WHO
There are two “who’s” to be addressed in this section. Who can do this thing called canning? And who is this author and what qualifications does he have?
The art of “putting up,” as it is still called in the South, doesn’t take a chef. It doesn’t take a cook, it doesn’t take any schooling, and there are as many guys as there are gals knocking out the jars. I often hear from curious customers when I offer them one of my recipes, “Are you kidding me? I’d burn water if I tried to boil it. I could never make that.”
In fact, nothing more than the ability to read and follow a few simple steps are required to successfully produce the most wonderful preserves, condiments, soups and sauces you’ll ever put in your mouth. Because of the added personal effort, many family dinners will become as exciting as dining in a fabulous restaurant. As an added bonus, you will feel that warm glow of satisfaction because of your “put up” additions—those little extras that made your dinner a unique, world-class event.
THE SECOND “WHO”
My careers have been diversified, to say the least. As was the law of the land at the time, after I graduated from college I became a soldier. Eventually, I found myself fighting, first in Africa and later in Vietnam. When peace came, I entered the world of real estate. Later, and still searching, I messed with boats on a professional level. Finally, I entered the heady arena of stocks and bonds. I became a vice president at a national investment house. My family lacked little, but still, nothing bought my fancy.
It took me fifty years before I found the meaningful satisfaction of canning. I was obviously a slow learner, since I was first exposed to the art when very young while living with my grandparents at Rock-land Plantation in South Carolina. A war was raging, my father was overseas, and my mother worked for naval intelligence in a far away city. I was passed off to the loving care of my grandparents. What a pass-off—unconditional love on a southern plantation. Well, really it was only the remnants of a once great land grant, but still, by definition, it was a real plantation, a totally self-sufficient farm. We had cattle, pigs, chickens and fields of crops for both family and livestock. The farm was on an island and fronted on a river, so the bounty of the sea also graced the family table; crab, shrimp, mullet, flounder, bass, sea trout and a variety of small edible fish like croaker.
My grandfather fashioned a three-legged stool for me and, by age four, I could milk the cow. I watched him and learned to make butter, cottage cheese and ice cream. I knew how to pluck chickens, work fields and cut greens. While most kids are finicky about what goes into their mouths, I could spit out birdshot and keep right on eating quail without a second thought.
It was during this formative period that I also got my canning indoctrination. My grandmother not only put up for the Rockland pantry, she commercially produced a host of shelf-stable products, from pickled shrimp to Jerusalem artichokes, for many east coast stores. Her products became legendary. Even Clementine Paddleford, the renowned New York Herald Tribune food editor, once dedicated her column to her. The article was headlined, “Rockland Plantation Pickled Shrimp Invade Post-War New York.” Little did I know then, those idyllic years, coupled with a wonderful grandmother and her commercial enterprise, would later meld into a most satisfying venture.
The restlessness and the searching that I presumed was part of life finally grabbed me by the throat. Events shook me to the core. It might have been that I was approaching fifty and somewhere deep inside a clock was telling me I didn’t have forever to discover satisfaction. Who knows, it might have been something far simpler; then again, it might have been something so complex it’s too spooky to contemplate. I often dwell on those times and events.
At any rate, to make a long story even longer, after steering so many clients into stocks, in the midst of the biggest bull market in history, I one day pushed back my chair and said, “That’s it!” I walked out the office never to return.
After a period of decompression, my son and I boarded a tiny sailboat. We set to sea. We coped with calms and battled Pacific storms. After one fierce blow where we had struggled, cold and wet, through two days and nights to hold a course and keep afloat, we hove-to, exhausted. The wind had subsided. We slept. I dreamed. Across the ages came a grandmother’s call. “Go to Charleston, pickle shrimp!” Ten thousand miles later our prow slid into the famous pluff mud of the Lowcountry. I was home.
Father and son were now ready to answer grandmother’s call. We set to work. By year ten we had become the talk of the town when it came to locally produced jams, condiments, soups and sauces. We were turning out over sixty products packaged under a variety of labels. Each day fifteen hundred jars, cans and bags would leave our facility. Some we sold at local farmers markets, some we shipped to distant admirers. Many were destined for the shelves of local purveyors. Numerous articles, local, regional and national appeared in newspapers and magazines. Similar stories were broadcast over radio and television. Friends from as far away as California and Hawaii would call to say they had seen us on television.
These cercis were never our intent. All we set out to do was to create a wonderful product for our local economy. We wanted the very best, a product just like my grandmother made, just like all grandmothers once made when life was simple.
Fourteen years have passed. Our involvement has changed. We no longer put in fifteen-hour days seven days a week. A younger crew bought those reins. Mine, now, is an advisory role, and yet, I remain
fully committed. I search out and create new and exciting recipes and I continue to enjoy selling our products at local markets. Through those tumultuous years, son Tom and I remained best friends. We can laugh now as we recall some crisis situation of the past. In a greater sense, it is as if that call to can from across the ages paved a highway on which we both now travel.
Why
“Canning,” the idiomatic gerund for preserving produce and prepared recipes in special vessels, is a misnomer. It is rare that a home kitchen will use an actual can. Metal closures are nearly impossible to come by in small quantities (that is to say, in lots of less than twenty-five thousand) and cans require expensive and complex sealing machinery. Consequently, special “canning” jars are used, and have been since 1810, long before metal cans were perfected. In the early days of the twentieth century, when our country still clung to its agrarian roots and later when the Depression tightened the nation’s purse strings, industrious family members processed and put up all they could of the fresh bounty locally available. The effort saved money and insured a well-stocked larder, regardless of a family’s economic plight.
Our world has changed. Commercially available produce is now gathered and shipped from many different countries. What is winter here is summer in Peru. Modern high-speed transportation, flash freezing, nitrogen gas protection, chilled shipping containers, and a host of other protective sciences ensure that perishable products are delivered to grocery stores with a degree of freshness year-round.
To preserve, most plain vegetables require the application of very high heat, temperatures in excess of the boiling point of water. This can only be achieved in a “retort,” the commercial term for a pressure canning vessel or pressure cooker. A home-canned vegetable is not fresher or better than a store bought fresh one, even one that has traveled thousand of miles over several weeks.
Pressure canning is complex. It is beyond the scope of this book and might best be left in the past, at least for the home processor. But if one concentrates his energy on special products like the ones in this book (preserves, relishes, chutneys, soups, sauces and pickles), the results, even for the amateur on his or her first attempt, will be better than anything one can purchase anywhere.
This book will guide you step-by-step through the preparation of products that will convert a boring family repast into an exciting dinner time adventure. You will put up goodies that you’ll use as hors d’oeuvres when entertaining. Friends will ask, “Where in the world did you find this?” Your proud response will be, “I made it!” You’ll put up preserves that, as gifts, will become the rage among friends. Some recipes you’ll make don’t exist on store shelves because of labor and produce requirements. Everything that you produce will be far better than what is available for purchase.
There is a reason for this. The quality of commercial products has continued to escalate. However, when using the word “quality,” I am referring to the fancy glass packaging, eye-catching labels, and those special additives put in to maintain color and “freshness.” All this might appear to be fine, but the actual taste of products we purchase has not improved. In fact, as the complexities of industrialization and competition have increased, the taste factor, in many cases, has eroded. The pretty jar and fancy label do not matter to our palate.
Why such craziness? A manufacturer receives only a small fraction of what one will pay for a jar. There are transportation costs and there are distributors and stores, all demanding their share of the profit. Worse, once on the store shelf, a jar must compete for a customer’s dollar and there are many brands vying for purchase.
There are four ways a manufacturer can compete: advertising, price, label and container. Notice, taste is not in the competitive mix. It is unfortunate, but economics sometimes brings out the worst in business. Items manufactured competitively by the lowest bidder might work in the airplane business, but they crash in the food producing business. Ingredient availability is a key culprit. Produce needs to be brought from fields, gathered and sorted at central distribution points, shipped to far away local distribution centers, allocated, delivered, cleaned and prepared. Before processing takes place, maybe a week has passed, maybe a month, maybe longer. From the beginning, the best of a lot, the most expensive, has gone to restaurants and retailers.
Consider for a moment the simple strawberry. When one ventures into a field to select a berry, so ready for picking that it falls off the plant, it is full of flavor and aroma. It’s a luscious, unbelievable creation. At those times, I wish that the spring of the year be eternal. For each dozen picked, at least one cannot help but fall into my mouth. This spectacular fruit has been created by good growing conditions: the right soil, hot sun and little rain as the berries ripen. Two days after picking, regardless of how the fruit is stored, spots will develop. By the next day the condition has worsened and by the fourth day one has no choice but to discard the remains.
How then do prominent national companies make strawberry preserves? Most have two choices, use frozen fruit or use berries picked green and artificially ripened while they journey toward jam. Neither berry will ever compete with ripe-picked fruit, nor will the preserves they make. When a family makes their own, it is much like original art as compared to a print. A similar story can be told with every commercial ingredient. This is why home canned is far superior!
Our lives have become filled. We find ourselves too busy. There is too much to squeeze into the hours. So slowly, over the past four decades, Americans have begun to purchase many once time-consuming homemade items, trading dollars for more time. Manufacturers know that today we are willing to consume food products that our forefathers would not consider edible. They know that we are willing to settle for less in the name of convenience.
Here’s a tale of what I mean. When I was a parent of pre-teenage boys, one Sunday morning I arose early to get a head start on breakfast for the gang. I squeezed many pounds of the sweetest, just-picked oranges a friend brought me from Florida. I placed the glasses of juice in the freezer to chill while I continued with the morning preparations. During the kids’ breakfast, I had a food epiphany. The children sat around the dining room table chatting with each other as I served them. The first to try the juice looked startled. I had anticipated surprise. I had waited in the dining room to catch the expressions. In the Northwest, ripe-picked Florida oranges are an unheard of anomaly.
“What is this?” The young taster asked.
I explained. The others tasted, getting puzzled looks on their faces. They looked at one another. My two boys looked at me, embarrassed, like I was the nut case they always knew I was. Finally, there was a consensus at the table; it didn’t taste like orange juice, no orange juice they’d ever tasted. Then one of the boys delivered the blow that got me thinking. “Did I have any regular orange juice, like the real stuff you mix with water?” he asked. That was how conditioned a rising generation was becoming to a sub-standard quality.
Here’s another example. Each June, the best of the best commercial gourmet kitchens gather at the Fancy Food Show at the Javits Center in New York City. They come together to present their goods to the great store buyers from all over the country. “Tasting is not what this is about,” a veteran Fancy Food Show colleague told me. “What’s important is how the product shows and its profit margin,” he added. How far we have distanced ourselves from grandmothers’ kitchens! This book was put together to take you back.
There is more than just taste when one puts up. One might continue for the sake of art. As humans we crave to create. It is one of those traits that separate us from other earthlings. A Doubting Thomas might say, “But you are not creating; you are using a recipe.” Yes, we are, but it is still art and canning is still art. It is no different from the artist with easel and palate sitting on the beach looking seaward. The artist didn’t create the sea or the scene, yet that’s his recipe. He paints it. Putting up will provide our table and our family and friends with a diverse array of products, not generally available on the markets, products that are made with just picked, wonderfully tasting ingredients. Finally, and important to our culture, we are keeping alive an art of our past while recreating a standard against which commercial producers can and will be judged.
Food is king. On a national level during the last score of years, food and cooking has grown from necessity into a kind of mainstream mania. There are television shows on cooking. Small towns now have gourmet restaurants. Supermarkets have special gourmet and organic produce sections. Culinary stores sell equipment and cookbooks, and cooking classes are being taught all across the country. A revolution has begun. And yet there are few books that specialize in putting up food as we once did in kitchens across America. Most of those in print are nondiscriminatory, featuring everything that is able to be put up. This book addresses only those products that can be made better by you in your home.
WHERE
Just about every kitchen has ample capacity to become a home canning center. Federal law requires that products produced for consumption by the public be made in an inspected and approved facility used only for the commercial enterprise. In other words, if you intend to sell what you make, plan on using something other than your home kitchen. But for home use and gift giving, your own kitchen will work just fine.
Regardless of its size, with planning and organization, your existing kitchen will do. The commercial kitchen where my son and I produced those thousands of jars each day exceeded 7,500 square feet, but the kitchen where I now put up my products for home use, where I create new recipes and make my hand-crafted gifts, is tiny, just 6 x 7 feet or 42-square feet. I have two small counters, neither one a yard long, a four-burner stove, a single sink, and a refrigerator. The kitchen is about as plain vanilla, a single scoop at that, as one can get and yet I have everything I need. There is some specialized equipment that I use and that you will need. Many of the items you might already have, but others you will have to purchase—which brings us to the next section.
WHAT
As with any new endeavor, one’s going to need some special items. Much of what is needed for canning might already be in your kitchen. Some is unique to canning and will need to be purchased. Don’t fret. The good news is that nothing required is expensive. In the following pages are two lists. The first is essential; the second makes the canning process quicker and easier.

ESSENTIAL EQUIPMENT AND SUPPLIES
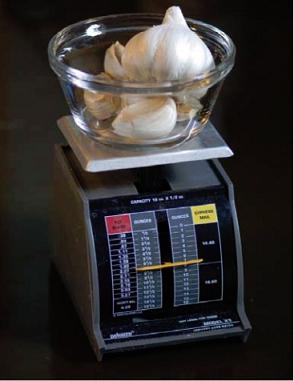
• Weighing scale 0 to 1 pound: I use a postal scale. These can be purchased at stores like Office Depot and Staples. Food scales are more expensive and are available in culinary stores, online and at restaurant supply stores. A postal scale will work just fine.
• Weighing scale 1 to 10 pounds: The same stores carry these scales. Just one word of caution: I have listed two separate scales because light weights on inexpensive scales made to measure heavier loads do not record accurately.
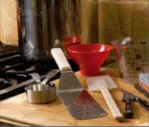
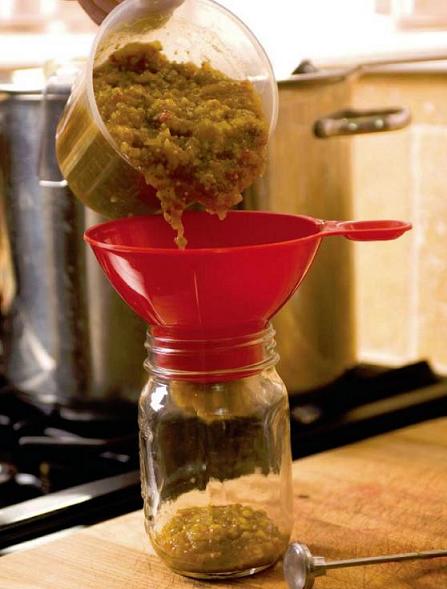
• Canning funnels: This funnel is canning specific. It is designed to fit firmly into the mouth of the specialized canning jar. The throat of the funnel extends down into the jar exactly to the canning line. When one fills to the bottom of the funnel they have fully filled a jar. These funnels can be purchased at stores like Wal-Mart, ordered from stores like Kitchen Craft or found at numerous websites online.
• Spatulas: The newer silicon spatulas are wonderful. Unlike their rubber ancestors, they do not deteriorate and leave behind bits of material in the chutney. I also use a large commercial metal
spatula, the kind a line cook would use to flip burgers on a grill. The blade is long and wide, 3 x 7 inches and has a blunt, squared end. This is one of my favorite tools. I find it an invaluable asset. When stirring a pot, I make circular sweeps, mixing all that is on or near the edges, and then zigzag across the pot bottom. The hard, straight edges move all that is in contact with the hot sides and bottom so nothing burns. Unlike a flexible spatula, the metal will not go over a lump stuck on the bottom. Proper use of this tool, along with diligent stirring, ensures nothing is in contact with the high heat long enough to affect the taste of the finished product. The spatula is commercial and carried by restaurant supply stores or can be found online.
• Measuring spoons and cups: These are probably already in your kitchen, but if not, they are readily available almost anywhere. One will need a measuring range from 1/4 teaspoon up to 4 cups. For the cups, don’t use glass. If glass breaks there is always a

chance an errant shard might find its way into your ingredients. Smaller measures come in plastic and stainless. Two- and four-cup measures are mostly in clear plastic. The problem with most plastic measures is they have the increments painted on the outside. The markings wear off quickly. Try to find measurers with raised markings. They’ll last many seasons.
• Sharp knives: Okay, I’m a guy and knives are a guy thing. Regardless, knives are an essential tool in the canning process. In case you haven’t already noticed, I’m an old-fashioned type, so I like carbon steel blades. I maintain them with steel and stone to shaving-edge specifications. Still, on occasion, I find myself reaching into the cutlery drawer to get a serrated blade. Of course, I’m embarrassed and immediately after use wash and return it lest I get confronted about my extravagant Sabatier knife expenditures.
All kitchens are stocked with knives, but sharp knives make processing work much easier and more professional. The blades one will use the most are a paring knife and a heavy-duty 8-inch chef’s knife. Get a quality knife sharpener, either stone or steel, and use it frequently.
• Cutting boards: One large one will work. Having two, one very small, will help with counter management if space is limited. I use bamboo. The soft wood protects the edges of my wonderful blades and the renewable, farmed resource, protects our remaining hardwood forests.
• Cooking pots: This is worth a winded discussion. Not any pot will do! When preparing recipes for canning, as you will learn in the How section, all mixtures are acid-based. Acids react with aluminum and uncoated iron and your finished product will be tainted. It’s also possible it will discolor and might possess a metallic flavor. Neither condition is acceptable. Further, the negative effects of ingesting aluminum are still being researched. This leaves copper, enameled steel or iron, and stainless steel.
Our foremothers knew what they were doing in the kitchen when they cooked with copper. Copper pots are wonderful cookers

because they are excellent conductors of heat. Kept polished, they are beautiful and add a nice touch to the look of any kitchen. The inside of a copper pot must be coated to prevent a lethal poison, cuprous oxide, from entering cooked food products.
In times past, copper pots were coated in tin. Some still are. When the tin wears off, the pot must be taken to a tinker, a person knowledgeable in the art of pot repair, for a new lining. I haven’t met any tinkers in recent years and I probably won’t any time soon. More recently, because of advances in metallurgy technology, some copper pots are coated with stainless steel. Now we are talking really big bucks. I suggest you read on without making a purchase quite yet.
Enameled pots, pressed from light-gauge steel, are a waste of money. They do not last and they do not conduct heat well. Enameled pots made from heavy cast iron conduct and distribute heat very well, but any pot that is enameled or ceramic coated, light or heavy, only lasts until it receives the first inside ding. Shortly thereafter, it begins to rust. My advice is, don’t bother.
Stainless steel, even heavy stainless, is not a good conductor of heat. The spots where the burner is concentrated will get very hot while the rest of the pot remains relatively cool. This means constant stirring. It is just a matter of time before something burns.
When a product becomes scorched, the burnt taste will get canned right along with the ingredients. Modern cookware features healthy, low-maintenance stainless inside and out with a sandwich of multiple, good heat-conducting metals like copper and aluminum. More expensive varieties have the multiple layers going all the way up or part way up the sides. On less expensive models, the sandwich is limited to the bottom. It’s your call. I use pots I found at Wal-Mart. In my opinion, they deliver by far the most bang for the buck. I have a 12-quart and a 22-quart pot.
• Water bath pot with rack: This is a totally specialized piece of equipment but is not one that is going to break a bank. Most of the systems available are comprised of a light, enameled steel pot with a galvanized rack that holds seven jars. This will do just fine. I
use two of these so I can prepare a baker’s dozen jars plus at once. Over time, the cheap enameled pots will be replaced with more substantial vessels that transfer heat faster, but there is no rush.
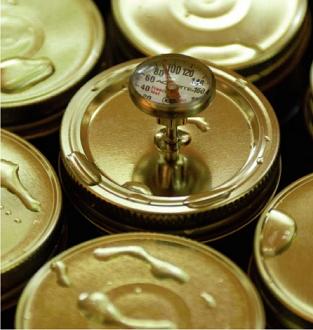
• Adjustable cook’s thermometer: These are available hanging on grocery shelves. It is the kind that looks like a ballpoint pen with a dial on top, the type one sticks in and removes. It is not the kind that is left stuck in meat in the oven. I have purchased thermometers in restaurant supply stores, grocery stores and at Wal-Mart, of course. I keep several on hand. One is as good as another as long as it can be adjusted. To tell if the meter can be calibrated, look on the back side of the face. If there is a hex headed protuberance, it is adjustable. Its plastic sheath is usually the adjusting tool. Test and adjust once a month.
• Colanders: These handy items are probably already in your kitchen inventory, but if not, purchase the biggest one you can comfortably store. Nothing fancy; plastic is fine.
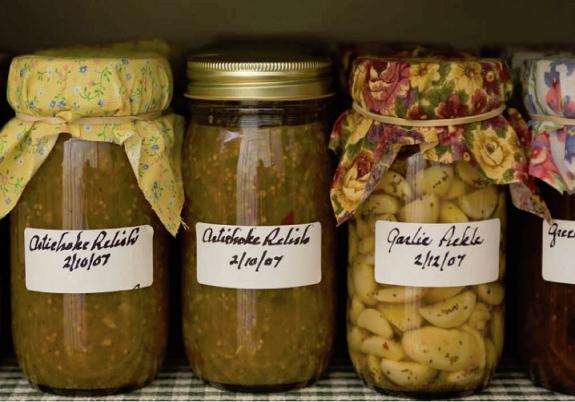
• Canning jars and lids: You will need 8-, 16- and 32-ounce regular, as opposed to wide mouth, jars. Like the funnel and water bath equipment, this product is canning specific. Canning jar glass is thicker and more durable than regular jar glass and can take rapid changes in temperature without shattering; the threaded top section is of special material and engineered so the lids, which have an applied ring of a rubber-like coating, will create an easy and excellent seal on the finished product. During the seasons of harvest, twelve-jar cases with lids are available in many stores including your favorite supermarket. If you have a Big Lots nearby, try them. They have better prices than what small companies pay for these jars wholesale, direct from the same manufacturer, and they inventory many pallets of all the common sizes during the harvest seasons. If you can store them, stock up! Your next best price might be Wal-Mart—where else!
• Chemicals needed for canning:
Sodium hypoclorite: A jug of regular grocery store bleach like Clorox meets this requirement. You will dilute this chemical and use it to sterilize jars and wipe down counters for bacteria-free canning.
Sodium chloride: This is the chemical name for salt. It is in this section because not just any salt will work. One cannot use salt with iodine or any additives including anti-caking agents. Sea salt is not an option either. At many grocery stores one can purchase 25-pound bags of pure evaporated sodium chloride produced by Morton. The cost is about four dollars. Canning salt, the same item but in the canning section of stores costs ten times this amount or more! The issue is that the salt must be pure.
Distilled water: Not a chemical. It is, in fact, the exact opposite; it’s chemical free. It can be purchased almost anywhere and is very different from regular water. For some testing one should use only distilled water. A gallon jug will last a long time.
Citric Acid: This is used to increase the acidity of certain canned products. It is found wherever canning supplies are sold.
Canning or slacked lime: This is a food-grade lime that, when mixed with water, will maintain crispness in certain vegetables.
Alum: This is another keep-it-crisp chemical. It can be purchased at most drug stores but might have to be ordered, so plan a few days ahead.
Short-range pH paper: Don’t let this intimidate you! It might sound impressive, but these rolls or test strips are simply acid-sensitive papers like the litmus paper one might have used in a high school or college chemistry or science class. You will need to get short-range paper. Rolls come with a range between 3.4 and 4.8, strips between 3.0 and 5.0. Rolls are better for our purpose. They are less expensive and have a more narrow range.
In my grandmother’s day, when she put up foods, she followed time honored recipes and hoped. Because the acid levels of various fruits and vegetables fluctuate with ripeness and variety, this testing will insure the complete safety of your finished product, something our forebearers didn’t do. Phew, we made it! To purchase pH paper, check the Resources section .
NICE EQUIPMENT TO HAVE
• Blender: For puréeing, nothing beats this piece of equipment. Although used infrequently, when needed, it will save in time its inconsequential cost. Also, for pH testing a finished product, it makes for quick sessions.
• Food processor: At one time this piece of equipment was for the rich and famous. A few makes still are. Some units last while others barely make it through a season. Two years ago I bought a bigger, just slightly more expensive unit with a direct drive. I have been thrilled with the performance and the bigger bowl is just an added benefit. The machine turns many laborious chores into the turn of the dial.
• Large measuring pitchers: These handy measurers can really speed up a process. One can always use four 4-cup measures to accomplish a gallon measurement, but with a single half-gallon or gallon pitcher it takes less time and there is less chance for error. I cannot tell you the number of times I have counted out three or four measures when the phone rang. Let’s see, now where was I?
• Heat proof gloves: I have never used a pair, but once or twice I wish I had. Jams, for example, must be brought to a strong boil while stirring. Unlike more watery products that boil at 212 degrees and have little density, which means they cool fast, even on skin, preserves are thick and are upwards of 220 degrees. This is closer to napalm. When a boil bubble splatters on your wrist or arm you know it. During fruit season my right hand and lower arm look like I have a case of “right-arm measles.”
• pH meter: This is getting high tech, but I added it for those who want extreme accuracy. You will learn more about acidity and canning shortly. The FDA requires a commercial packer to use a pH meter to measure acid levels on any product canned above pH 4.00. This is a bit extreme. Above 4.2 might be a more realistic limit, but it’s not their nickel so what do they care? The price range for meters is from fifty dollars upward. If you do get a meter, you will also need calibration buffer solutions. The maximum pH for any recipe in this book is 4.2 and pH paper will work fine. If you decide to create a recipe, then you are on your own.
HOW
Canning is not rocket science. Thus far you have encountered terms like acidity, pH, conductivity and density, but these are only the jargon of the trade. Canning is as easy as boiling water, but it’s more fun and far more rewarding.
I have read many books on the subject of canning. I have yet to read a book that sets forth the procedures as required by the Food and Drug Administration (FDA) for safely canning acid and acidified foods for commercial application. The FDA’s mission is to insure the safety of the people. President Reagan once jested that the most terrifying words one could hear in America are “I am from the government and I’m here to help.” Sadly, in most instances those words ring truer than truth itself. However, the FDA, in insuring safe canning practices, has in fact simplified a process that basically remained unchanged since before the turn of the twentieth century. A miracle by government is truly a miracle!
The canning steps outlined in this manual are the same as required by the FDA. They are exactly the same methods and procedures every commercial packer must follow. The steps provide the safest, most accurate method of canning, and will insure a good, sealed product that will be of the very highest quality.
HOT PACKING
When the product has cooked the suggested amount of time, check the pH with a tear of pH paper. If within the guidelines given for the recipe, continue; if not, follow the recipe instructions for increasing acidity. Next, check the temperature of the product. It must be, at least, at the minimum temperature stated in the recipe.
With the testing done, you are ready to proceed. I use two measuring cups for the filling process. I use one to scoop the product from the pot into a second, bigger measure. I then hang the first cup on the inside pot edge. This way I do not have a dripping cup making a mess of my canning area. With the canning funnel in the mouth of the sterilized jar, pour in the mixture until it, at least, touches the bottom of the funnel. It is important, also, not to fill a jar too full or in other ways contaminate the sealing edge—the very top edge of the jar—during this process. An edge can also get contaminated from product on the outside of the funnel’s throat. In time you’ll have several funnels, keeping the extras rinsing in a bowl of water.
In the meantime, wipe the lower exterior of the funnel clean periodically with the cloth treated with the sterile solution. If the sealing edge of a jar does get contaminated, carefully wipe it clean with the same sterile dishcloth. Clean edges insure good seals! Once the pitcher is empty, maybe after filling two or three jars, prepare to seal the full jars. Caution: they will be hot. Place lids on jars, making sure none are cross threaded, and tighten. Once sealed, turn each jar upside down for a minimum of 2 minutes. Longer is fine, but not long enough for products like preserves to jell. This inversion accomplishes several tasks. The hot solution softens the rubbery substance on the lids to guarantee a good seal, and the heat further sterilizes the lid and the neck of the jar. Continue these processes until the pot is empty. If a last jar only partially fills, cap it and place in the refrigerator for final testing and near term use. Turn the jars upright any time after the specified 2-minute period and wipe clean.
WATER BATHING
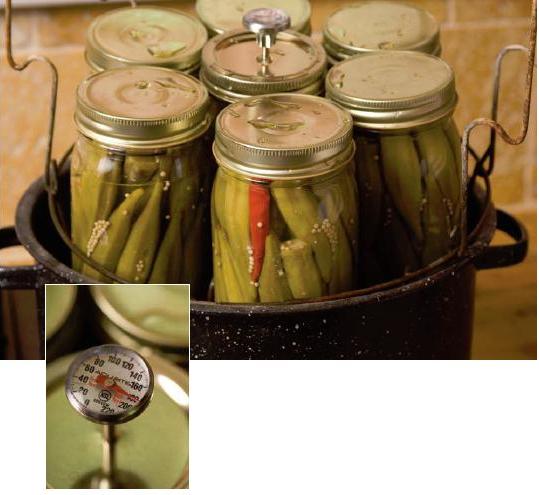
Follow the recipe instructions for packing the sterilized jars with ingredients. The rack that comes with a water bath pot holds seven
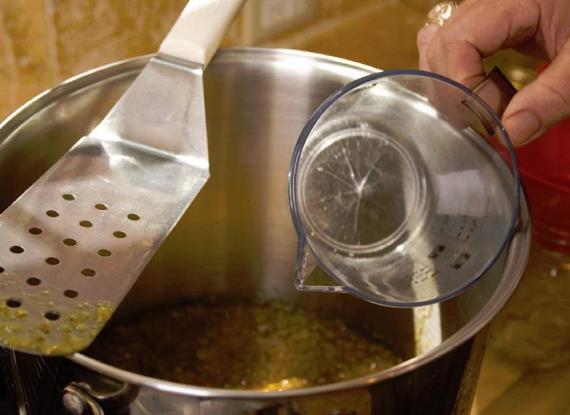
pint or half-pint jars. Place the seven or first seven in the rack. Prepare the liquid, as described in the recipe, on the stove and fill each jar to the canning line (the ring just below the threads), starting with the center jar. This center jar will be designated the cold jar because it was filled first and therefore will be the coolest.
Next, screw on the lids, just barely finger tight, on all but the center jar. On the center jar, screw on a lid with a small hole in the middle that you have made so you can insert a thermometer. Insert the thermometer, making sure the tip reaches to the bottom. Next, lower the jars into the boiling water that you have previously adjusted so the level reaches only to the canning line, the ring just below the threading. As the jars go in, the water will stop boiling. As soon as it begins to boil again, turn down the heat, a little at a time, so there is never a rapid boil. Rapid boiling could cause water to seep into the jars. When the specified temperature is attained, wait 2 minutes and remove the rack. Tighten the lids on each jar, being very careful; these jars are very hot! Lastly, replace the thermometer lid with a standard lid and tighten. After each lid is tightened, turn the jar upside down for a minimum of 2 minutes.
With both methods of canning, vacuum, sterilization, temperature and acidity combine to create a safe, shelf-stable product.
VACUUM
This is created by the hot material inside the jar shrinking as it cools and is why a positive seal between lid and jar is so important. It is also why you must fill each jar to the canning line just below the threaded section. Lesser amounts of product will create more space and reduce the amount of vacuum; a bad seal will also prevent a vacuum from being formed. Some canning lids have a “button” in the center of the lid; when sucked down, it indicates a good vacuum. Some lids don’t have buttons. I tap each lid with a teaspoon after the jar has cooled. The sound of an unsealed jar rings hollow and is very different from the sound of a sealed one. With both types of lids, as the jars cool you will hear them click as the vacuum increases. Jars that don’t seal are fine if kept in the refrigerator.

STERILIZATION
Clean jars and lids are important in preventing the growth of mold. This is why we first wash and then use chemicals to sterilize the jars and lids. To save time in future canning, a suggestion might be to measure the amount of water necessary to fill your sink to a workable level and then mark the level on the sink with an awl. If you don’t want to scratch the sink, or if it is porcelain, with a ruler measure the depth of the required amount of water, or make a gauge, like with a marked stick. Then, each time you are ready to sterilize jars, you need only to run warm water to the correct level before stirring in the appropriate measure of bleach (2 tablespoons per gallon of water).
TEMPERATURE
Pathogens, the bacteria and molds we don’t want to grow in our finished product, are destroyed at varying temperatures based upon the acidity level. Below is a chart of canning temperatures for various acid levels. The correct canning temperature for each recipe in this book is detailed in the recipe. However, if you begin creating recipes of your own, this chart will be necessary. It is
also important to remember that these temperatures are the initial temperature of the product after it has been introduced into the jar. As a rule of thumb, add 5 degrees to compensate for a room temperature jar.
| MAXIMUM PH | MINIMUM DEGREES F |
| 3.9 and lower | 182 degrees F |
| 4.1 | 185 degrees F |
| 4.2 | 190 degrees F |
| 4.3 | 195 degrees F |
| 4.4 | 205 degrees F |
| 4.5 | 210 degrees F |
To make sure your thermometer is correctly calibrated, fill a small saucepan three-fourths full of water (distilled water gives a more accurate reading, but is not necessary). When the water has reached a rolling boil, lower in the thermometer, tip first, until the probe is at least halfway submerged. Read the meter. It should read exactly 212 degrees F if you live at sea level. If you live at sea level and it does not, adjust to 212 degrees following the manufacturer’s instructions. For kitchens above sea level see chart below.
ALTITUDE TEMPERATURE AT WHICH WATER BOILS
| Sea level | 212 degrees F |
| 1000 feet | 210 degrees F |
| 2000 feet | 208 degrees F |
| 3000 feet | 206 degrees F |
| 4000 feet | 205 degrees F |
| 5000 feet | 203 degrees F |
| 6000 feet | 201 degrees F |
* This table is rounded down to the next whole number. For folks who live at high altitudes, some of the recipes call for canning temperatures that may exceed the boiling point of water at your altitude.Don’t despair. Sugar, salt and nearly everything in a recipe increases a liquid’s boiling point.
ACIDITY
I saved the best for last! During the first Gulf War, I remember seeing a political cartoon of an Iraqi scud missile with a jar of string beans lashed to the warhead. The cartoonist must have put up a jar or two in his day, for those of us involved in canning are most cognizant of clostridium botulinum, a bacteria found everywhere on earth. Actually it is in common, everyday dirt, but remains harmless until it is subjected to an anaerobic environment, a place without oxygen. It is then that the bacteria will grow, releasing spores of a deadly neurotoxin called botulism. In terrorist jargon, that’s a nerve agent and thus came the inspiration for the cartoon. When I was going through Green Beret training at the JFK Center for Special Warfare, during the demolition phase we learned how to mix fertilizer with diesel fuel to make an expedient explosive. After the Oklahoma bombing catastrophe, nitrogen fertilizer became a controlled substance. I often wonder if the string bean will be next?
When we create a vacuum in a jar to prevent yeasts and molds from growing, we also create that same potentially dangerous anaerobic environment; however, because the acidity of the product inhibits the spore forming clostridium botulinum, preventing harmful growth, this is not a problem, and there is never a concern as long as a product’s acidity is and remains below pH 4.6. For acidified recipes, both water bath and hot pack, one must maintain an acid level below 4.6. It is for this reason we always check the acidity of an acidified recipe both before and 24 hours after we can it.
To reduce any confusion about acid levels, the lower the pH number the more acidic is the product. The higher the number the more alkaline or base, the product. The pH scale goes from 0–14, with seven being neutral and the division between acidic and alkaline, and acid level pH 4.6 being the safety cut off for water bath and hot pack canning.

How one achieves the necessary acid environment when preparing recipes is by natural induction, artificial additives or a combination of both. Every living organism has a natural pH range. Actually, one of the distinguishing features between a fruit and a vegetable is its acidity. Above pH 4.7 a plant is no longer a fruit. The fruit with the highest pH is the tomato. Yes, a tomato is a fruit; it is a berry with a typical pH range between 4.1 and 4.6.
A complex acidified recipe might contain multiple ingredients with pH ranges from 2.5 all the way up to 11.0, like okra, for example. Initially, when a recipe is developed, the acid level is measured. If the mixture does not have a wide margin of safety, acids are introduced to make it a safe canning candidate. This is most often accomplished by the addition of citric acid, lemon juice, vinegar or a combination.
ACIDIFIED CANNING
Each recipe in this book has been pH tested. Each has a wide margin of safety, with no recipe exceeding a pH higher than 4.2 when properly prepared using the correct ingredients. Further, each recipe is designated either acid, sugar saturated, or acidified; and, if acidified, what pH range to expect. Just the same, if the person in the kitchen happens to forget an ingredient, the acidity of the final product could be dangerously altered. This is why we do an initial test before canning. It would be a shame to have to redo or throw out one’s work for the sake of a 5-second test. As a finished product cools, sometimes the pH rises ever so slightly because there is a temperature to pH relationship. More pronounced could be the balance that continues for several hours while penetrating acids mix with alkaline solids. In theory, these might make a difference. In reality, they do not seem to, but it is good, safe canning practice to test again after 24 hours to make sure the pH is below the 4.6 level.
The acidification method most often used is the addition of vinegar. There are many types and several common percentages of this acid. When canning we use only 5 percent. A lower percentage might cause a dangerously high pH. See “Types of Canning” for more information on the different types of canning.
PH TESTING
The initial test for hot pack recipes is simple. Stir the product in the pot and dip in a small tear of pH paper. Compare the color on the strip to the code on the pH paper pack. My workers had a saying, “Green is clean,” meaning acid level is sufficient. You’ll understand better after you make your first test. With a water bath recipe, before the jar lid holding the thermometer is applied, scoop 1/2 teaspoon of liquid from the jar and test with pH paper. This test is accomplished to make sure the liquid used for acidification is in fact strong enough to do the job. If not, it is because the mixture has been prepared incorrectly or the acidity of the vinegar is less than 5 percent. Final testing of water bath recipes are the important tests.
Testing after twenty-four hours takes a little more time. For well-blended, hot pack recipes, like chutneys and relishes, place a small amount—about a tablespoonful—into a clean bowl or a blender. Add about a cup of distilled water and mix well, cutting up, crushing or blending the solids. Test with the pH paper to insure the completed product remains safe. Canning jars come in several sizes, the smallest being 4 ounces. I have a case of these I use just for testing. When hot packing, I fill a 4-ounce test jar and turn it upside down just like any other jar. When water bathing, I put in all the required ingredients of the regular canning jar but in a quantity commensurate with the size of the regular canning jar. For example, if canning pints, I put in one-fourth of the amount. I fill the little jar with the hot liquid and put on the lid. I do not water bath this jar. I put it in the refrigerator and test it the following day and then discard. To test a water bath or hot pack product with quantities of big, solid pieces, remove a piece of each primary ingredient, rinse with distilled water, place in a blender or bowl with about a cup of distilled water. Blend or crush well and then test pH. Any number below 4.6 means the product is safe.
VACUUM TESTING
One test is performed on all jars: a vacuum test. This checks the jar lids for a proper seal. The test can be performed any time after the jar has cooled. Use a teaspoon and tap the lid right on its center. An unsealed jar will sound different. Take an empty jar, fill it with water, put a lid on it and tap. This is the sound you don’t want to hear.
CANNING ACID PRODUCTS
Some putting up can be done without pH testing because of the natural acid levels present in the ingredients or because with the amount of sugar used there is no water content. Preserves, jams and jellies are three of these. All the other safe measures—temperature, sterilization and vacuum—must be taken to insure top-quality canning and award-winning products.
TRICKS OF THE TRADE
Like in any new adventure there are some things that pros know and do that make the job easier. Here are a few we learned, most of them the hard way.
Liquids: Liquids tend to make a recipe runny. Often cooking times include the time necessary to eliminate excess liquid. Unfortunately, long cook times often cook the fresh-just-preserved-taste right out of the product. This is why on some recipes it says to squeeze the tomatoes. Also, when a recipe says to drain, drain well, very well— the less liquid the better.
Dicing/chopping: This is often simply a matter of presentation in many cases. For example, a tiny bell pepper square looks much better in pepper jelly than does a ragged chunk, but there is more. When using a food processor, the blade will often beat the ingredient into a runny mush. If it is only flavor that we seek, this is okay, but if it is the individual taste of the single ingredient, it becomes a problem. Add a little water to the food processor before pulsing and drain well after completion. This will help.
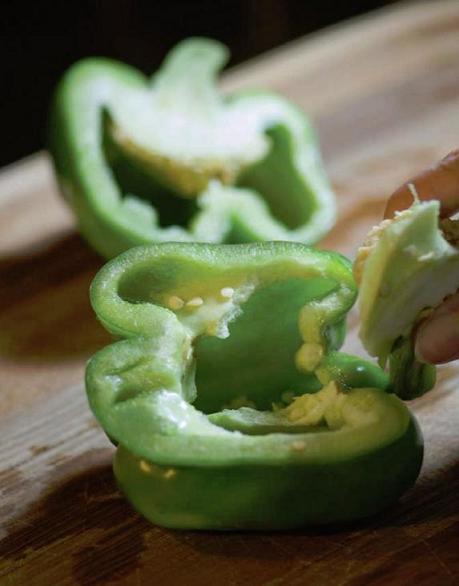
Preparing bell peppers: Chefs make an elaborate ritual over peppers, cutting them into strips, then slicing the veins off, dusting off the seeds and then dicing the strips. Our way is faster and, for your purposes, equally effective. Cut the pepper in half lengthwise. Rip out, by hand, the seed-stem clusters in both halves. Shake any additional seeds away. It doesn’t hurt to leave a few. Slice each half in half again, lengthwise. The pepper is now ready to be worked and you have spent fifteen seconds.
Hot peppers: Wear gloves! Not only can peppers burn your hands and keep burning for many hours, your hands will continue to transfer the heat to everything you touch. Rub your eye, go to the bathroom—get the picture? The flavor in a pepper is in the skin, while most of the heat is in the veins and the seeds. One can tweak heat by removing some or all of the latter two. The fastest method
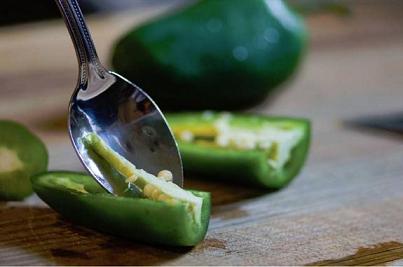
of seeding and veining is to cut the stem end off the pepper, slice the pepper lengthwise and run a gloved thumbnail or a teaspoon to scrape out the seeds and veins. If by chance one’s hands do begin to burn, washing them in whole milk will help.
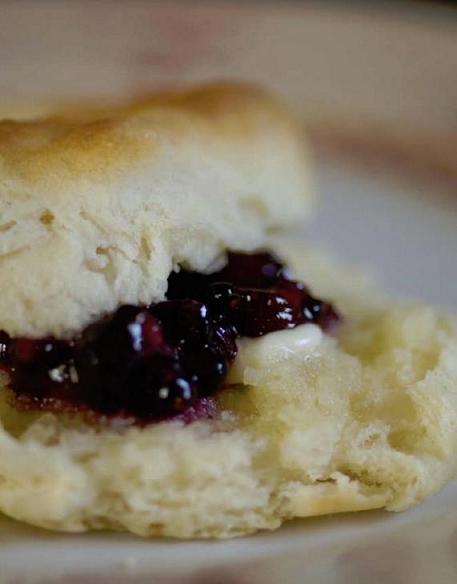
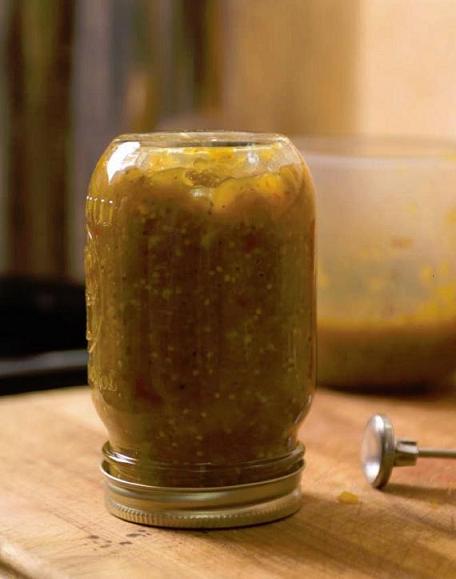
Making preserves: An old lady came up to my farmers market booth, picked up a jar of strawberry preserves, turned it on its side and rolled the jar in her hand. She looked at me, amazed. “This could win a blue ribbon at the Oklahoma State Fair,” she exclaimed. I didn’t know what she was talking about, but I learned. Once pectin begins forming the jelling chains, its getting time to can. This does not take a specified amount of time, like the books say, because fruit has differing amounts of liquids, depending on growing conditions. The rolling boil cooks off the excess water, but if there is little to begin with, it takes less time and if there is more it takes more time. This is why it is prudent to test for jelling with the stirrer. I allow the preserves to run off the tip of my metal spatula. If it runs like water, more boiling is needed. But when it makes long teardrop drips, it is getting ready. Go 30 seconds to 1 minute more. Why all
the fuss? Preserves and jams can get tough and rubbery if cooked too long. This woman was actually checking to see if my preserves fell away from the edge of the jar; as she rolled the jar, the break followed all around. She tasted and was impressed a second time. Still, she didn’t buy the jar.
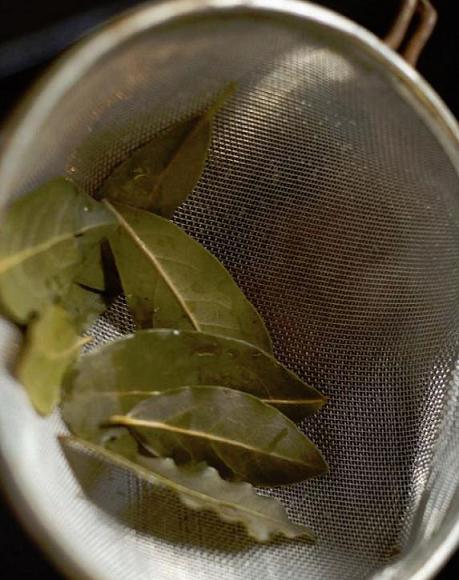
Bay leaves: These and other herbs and spices that will later be removed are usually tied in a cheesecloth bag for the cooking period. You will be doing a lot of stirring, and once a bag breaks open and you have to fish out each leaf and clove, you will seek a better solution. My son did just that. We began putting the to-be-removed-ingredients in a saucepan with a little boiling water. After boiling for 15 minutes, adding water if necessary, with strainer in one hand, we’d pour the flavored liquid into the recipe and discard the depleted herbs.
Getting smells off one’s hands: If a good washing doesn’t do the trick—and most of the time it won’t—try rubbing your hands on anything stainless steel: a spoon, pot, whatever; this really helps.
Glossary of Preparation terms, Measurements & Abreviations There are some technical words used to describe the way ingredients should be prepared and processed. These definitions will help by providing a standard in preparation.
Blanch: To pour boiling water over or submerge into boiling water for a time specified.
Boil: A boil where bubbles continuously form.
Chop: Cut larger than minced, like diced, but with no specific shape.
Cook: To hold at a specified temperature or just below boil for a specified period.
Dice: Cut into small squares (about 1/4 inch).
Dice large: Cut into bigger squares (3/8 to 1/2 inch).
Heat: To bring to specified temperature.
Low boil: A boil where periodic bubbles form.
Mince: Cut or chopped into tiny little pieces.
Purée: To blend in a blender until smooth and without lumps.
Rolling boil: A boil where the surface is fully involved.
Simmer: To heat for a period of time at a low temperature.
SMALL MEASUREMENTS USED IN A KITCHEN
This section is included because you might want to make more or less of a specific recipe. Recipes that can be doubled or halved are indicated with each recipe.
Dry Measure
1 teaspoon = a basic measure
1 tablespoon = 3 teaspoons
16 tablespoons = 1 cup
Liquid Measure
1 fluid ounce = a basic measure
8 fluid ounces = 1 cup
2 cups = 1 pint
2 pints = 1 quart
4 quarts = 1 gallon
Avoirdupois Measure
1 ounce = a basic measure
16 ounces = 1 pound
There is the old saying, “A pint’s a pound the world around.” This is true only for pure water, yet the weight relationship between the pound scale and liquid measure is often close. Take a second and compare dry, liquid and avoirdupois weights and measures. For example, there are 16 fluid ounces in a pint and there are 16 ounces in a pound. There are 16 tablespoons to 1 cup and 16 cups to 1 gallon. The similarity is not, however, a true relationship. Two cups of flour weighs nearly nothing, while 2 cups of sugar weighs almost a pound and a pint jar of mercury weighs 17 pounds. It takes a little common sense. Most liquids are pretty close. Often, a recipe that calls for 1 fluid ounce can be measured quickly by filling 2 tablespoons.
FINAL CANNING NOTES
This information applies to all recipes in this book. There is a sidebar in each recipe that contains Canning Notes. These tell what type of canning—hot pack or water bath—will be needed and whether the recipe is acid, sugar saturated or acidified. Line two gives the pH that can be anticipated; and, if it is not where it should be, what to do about it. Number three tells how many jars the recipe will make. If there is a fluid ounce measurement stated first and then the number of jars, this means the size of jar is totally optional. Some folks want quarts of soup while others are content with pints. If a recipe states a single size jar, that is usually the one best suited for the task. Note number four tells the preparer whether the recipe can be cut in half or doubled. When reducing a recipe by half, it is often most wise to state each measurement in the smallest measure and then divide. For example, reduce pounds to ounces, tablespoons to teaspoons, etc. Sometimes there is a fifth note. This one is specifically for water bath products and states the weight of the principal ingredient in each jar. Knowing that each jar contains a specific weight of product, one can then shop or pick accordingly.
Under the ingredients section, measurements that are stated in dry or fluid quantities are the amounts that go into the pot. When an ingredient is stated in pounds, it is an unprepared weight, the weight before peeling, cutting, coring, etc. This is done to make planning and purchasing easier. To calculate buying four cups of chopped tomato is difficult at best and often leads to waste.
The second to last sentence in each recipe states “hot pack (or water bath) according to safe canning practices outlined !” Safe canning practices means:
1. Jars and lids have been sterilized.
2. The jars have been filled to the canning line.
3. Initial pH has been taken and the product is safe.
4. The temperature has been taken and it is at or above recommendation. Or, for water bathing, the stated temperature has been obtained and a 2-minute hold period has been timed.
5. The finished jars will be inverted for a minimum of 2 minutes.
6. After 24 hours, a test jar will be pH tested if the product is acidified.
These six steps are important and insure a degree of safety never before available to the home canner.