AROUND THE HOME
In the book’s first section, let’s explore the items found around your home that you encounter every day. Your home is your personal space, full of treasures that you love and cherish. Open your cupboards and closets, admire your houseplants, and get ready to take a closer look at your favorite objects!

Creative Prompt
VASES
You likely own at least a few vases of different styles and shapes. You may even collect them, like I do! Let’s explore drawing various vases using only black gouache, which will allow you to focus on the forms and details.

Draw the wavy opening of the vase; then add the fan-shaped outline and the base before adding the interior details.

Start with a small oval for the opening and move downward to draw the rest of the vase. Zigzag and vertical lines complete the vase.

Draw the oval-shaped opening, followed by a teardrop with feet at the bottom. Add the hair and facial features, with circles for the cheeks.

Start with the swan’s beak and then draw the head, neck, and feathers. Complete the swan’s shape and add details, like small U-shaped feathers on the chest.
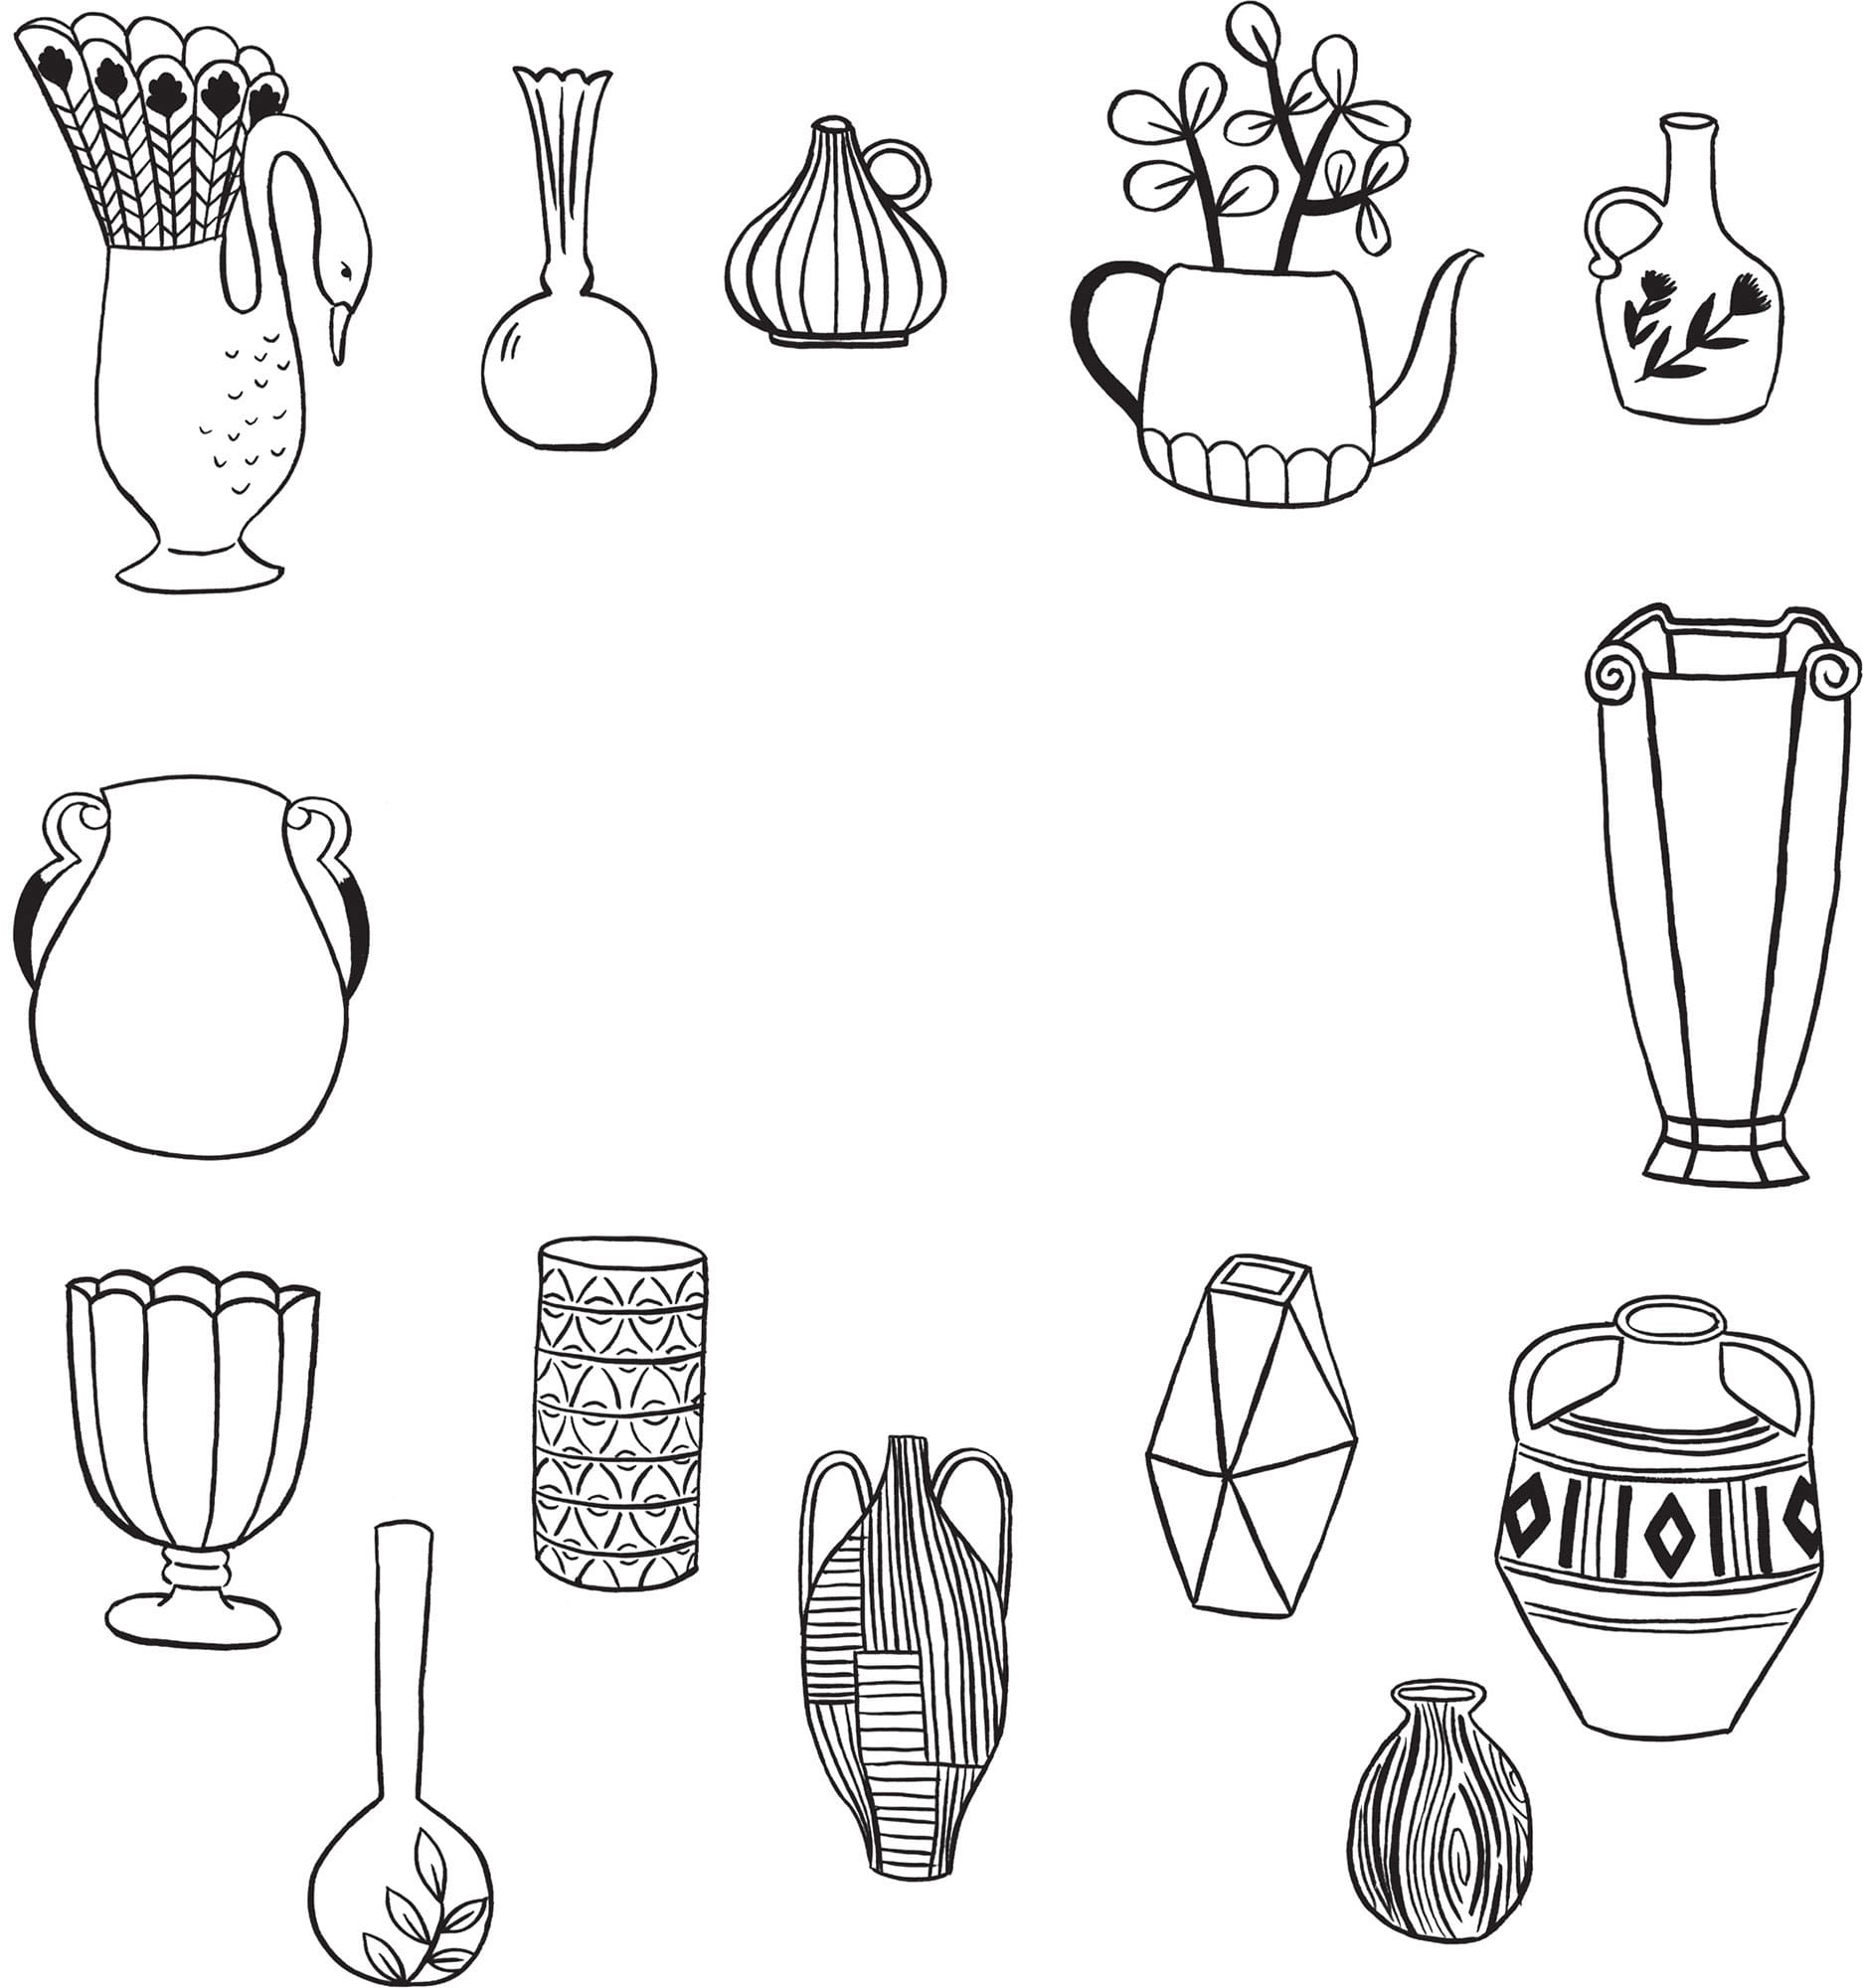
Here are additional vases to use as drawing inspiration. These can be photocopied and traced using a light box or tracing paper. Take a look at your own vase collection for even more ideas!
Creative Prompt
TODAY’S OUTFIT
Let’s have some fun with your wardrobe! Documenting your outfit every day makes for great drawing practice, and you don’t even need to leave your home to carry out this daily challenge!
Over the next few pages, we’ll cover wardrobe essentials. Practice drawing these shapes and then, as your confidence grows, try adding patterns or varying the shapes to draw your own favorite clothing items.
Pleated Blouse
Create the neckline before moving to the sleeves and body of the blouse.
Add cuff and seam details, and then draw a bow and pleats for a dressy-looking blouse.

Fuzzy Sweater
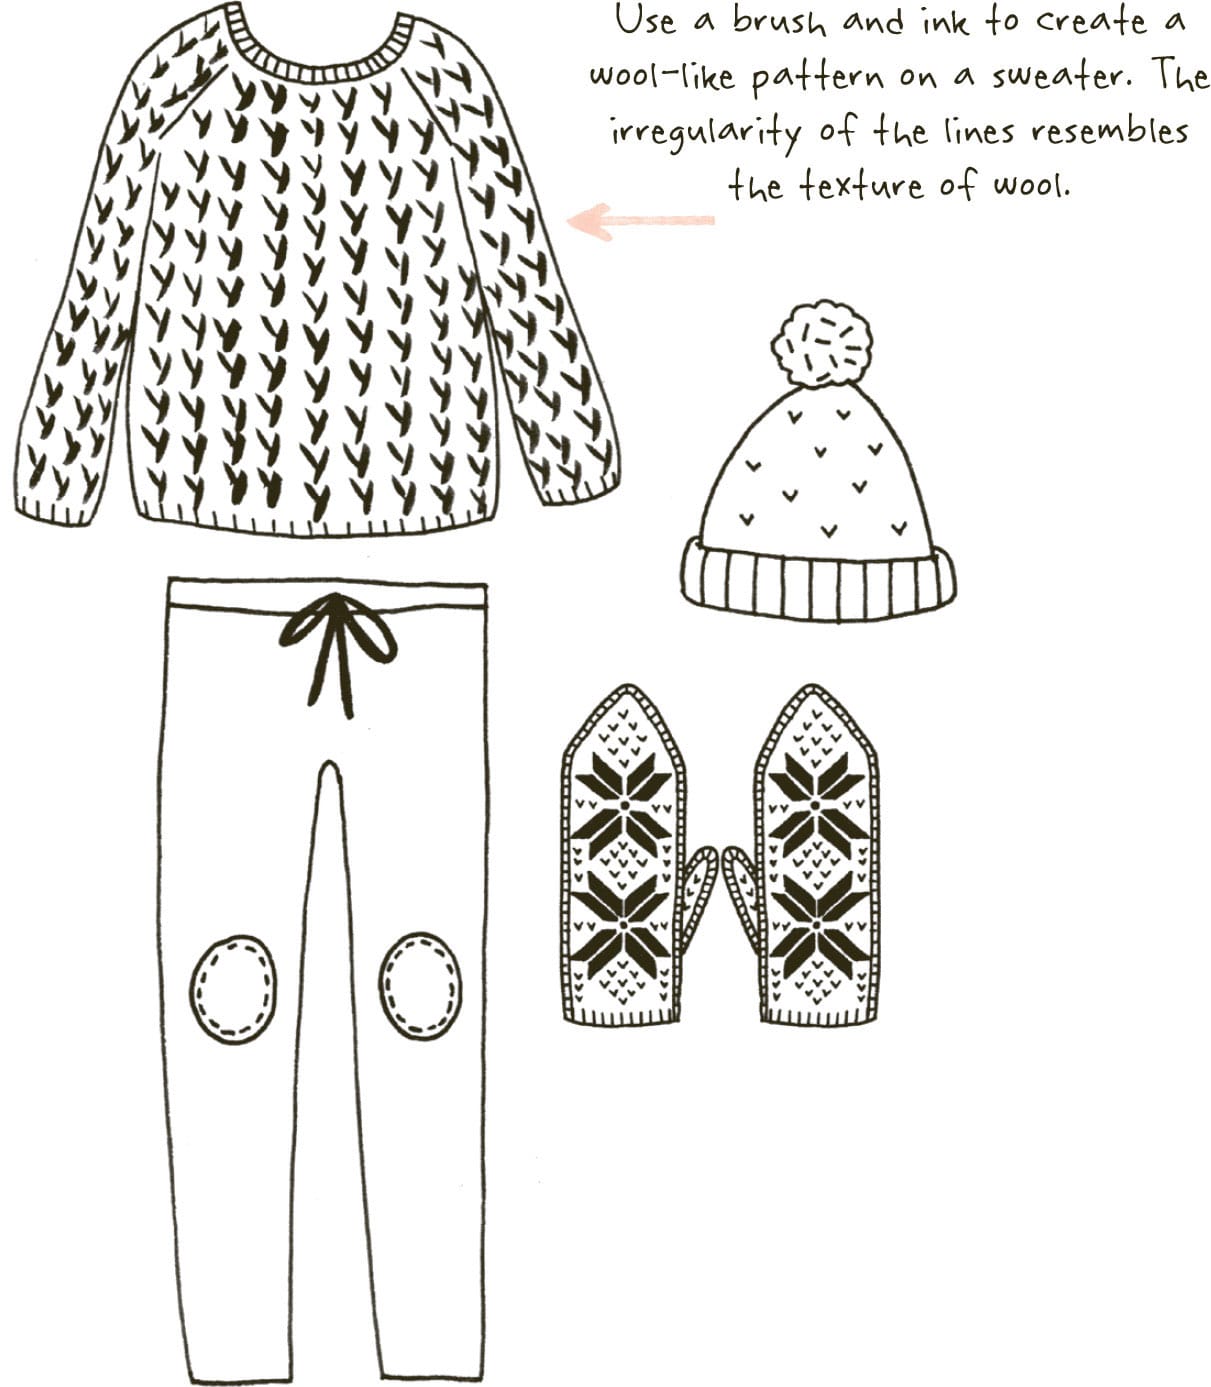
Begin with the neckline; then draw the main shape of the sweater before adding details to the cuffs and hem.
To create the look of wool, draw a random “V” pattern all over.

Jeans
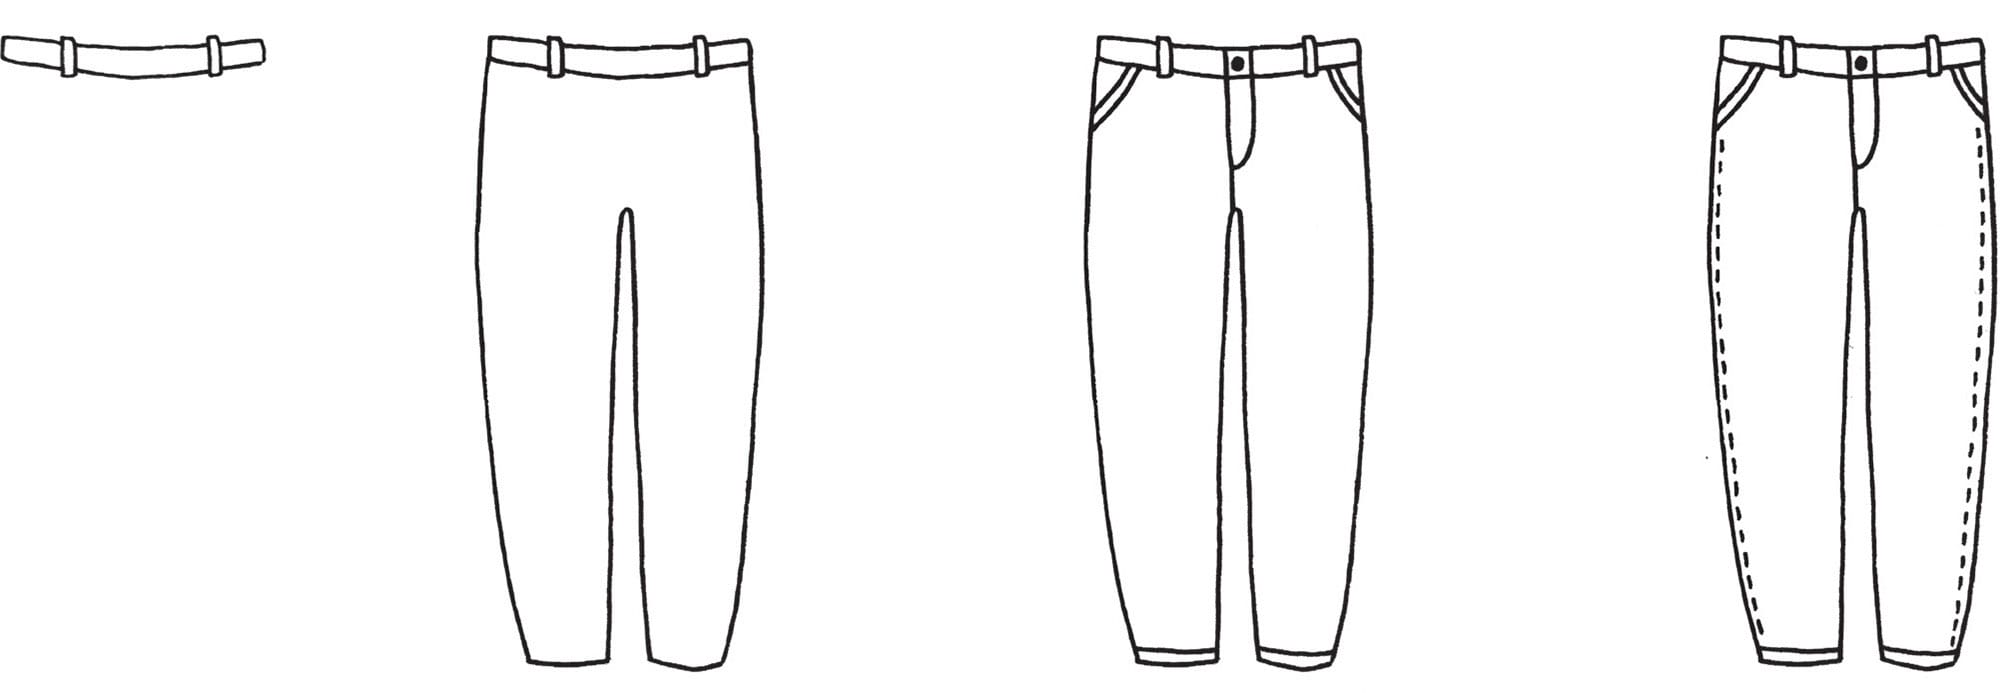
First, draw the waist and belt loops. Using the waistline as a guide, add the legs, zipper, pockets, and cuffs.
Then draw stitching down the outside of each leg.
Floral Skirt
Draw the shape of the skirt and add a belt.
Randomly draw flowers and fill any gaps with leaves to complete the pattern.

Patterned Shorts
Draw the basic shape of a pair of shorts, and add a waistband and cuffs.
Create pockets and a central seam, and finish with a simple pattern.

Lace-Up Shoes
Start with two ovals, and add a sliver of the sole at the top of each shoe. Draw the flap details before adding laces.

Pom-Pom Scarf
Draw a snake-like shape with tapered ends and pom-poms. Add stripes; then make dashed lines going in different directions to convey the fluffiness of the pom-poms.

Checkered Drawstring Bag
Outline the bag and add vertical stripes, ensuring that they taper in at the top.
Then make horizontal stripes and a thicker line at the top of the bag, and add a strap.

Polka Dot Socks
Draw two socks and add toe and heel details. The dots complete the look!

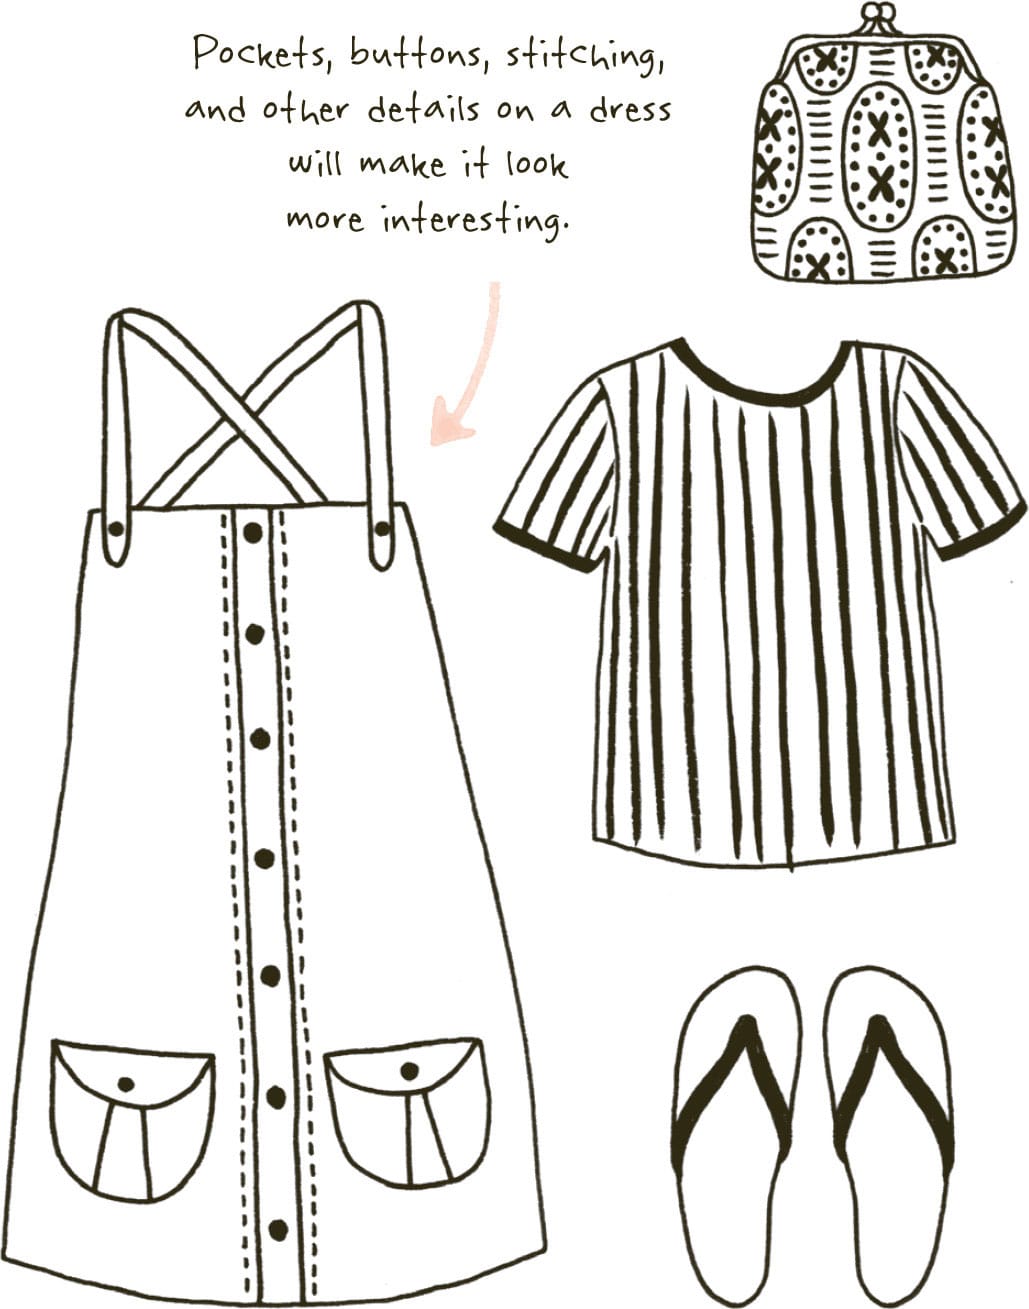
Once you’ve practiced drawing a few items of clothing, try grouping them to create outfits. Start by drawing what you’re wearing today. Draw three or four items, and then combine them like in the examples below. Don’t forget to add details!
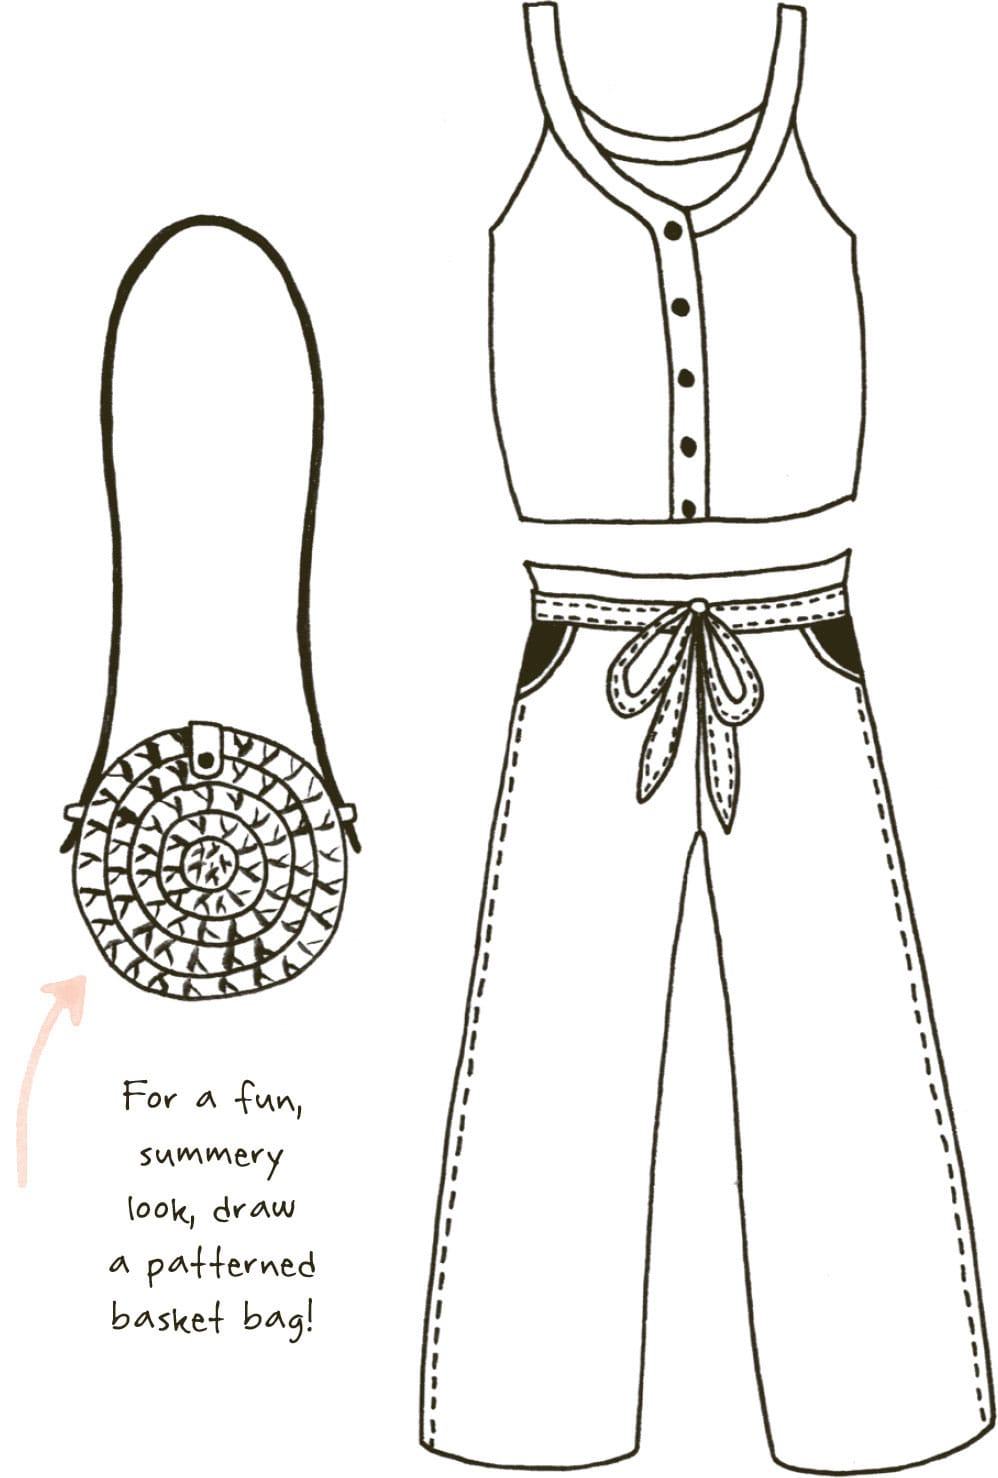
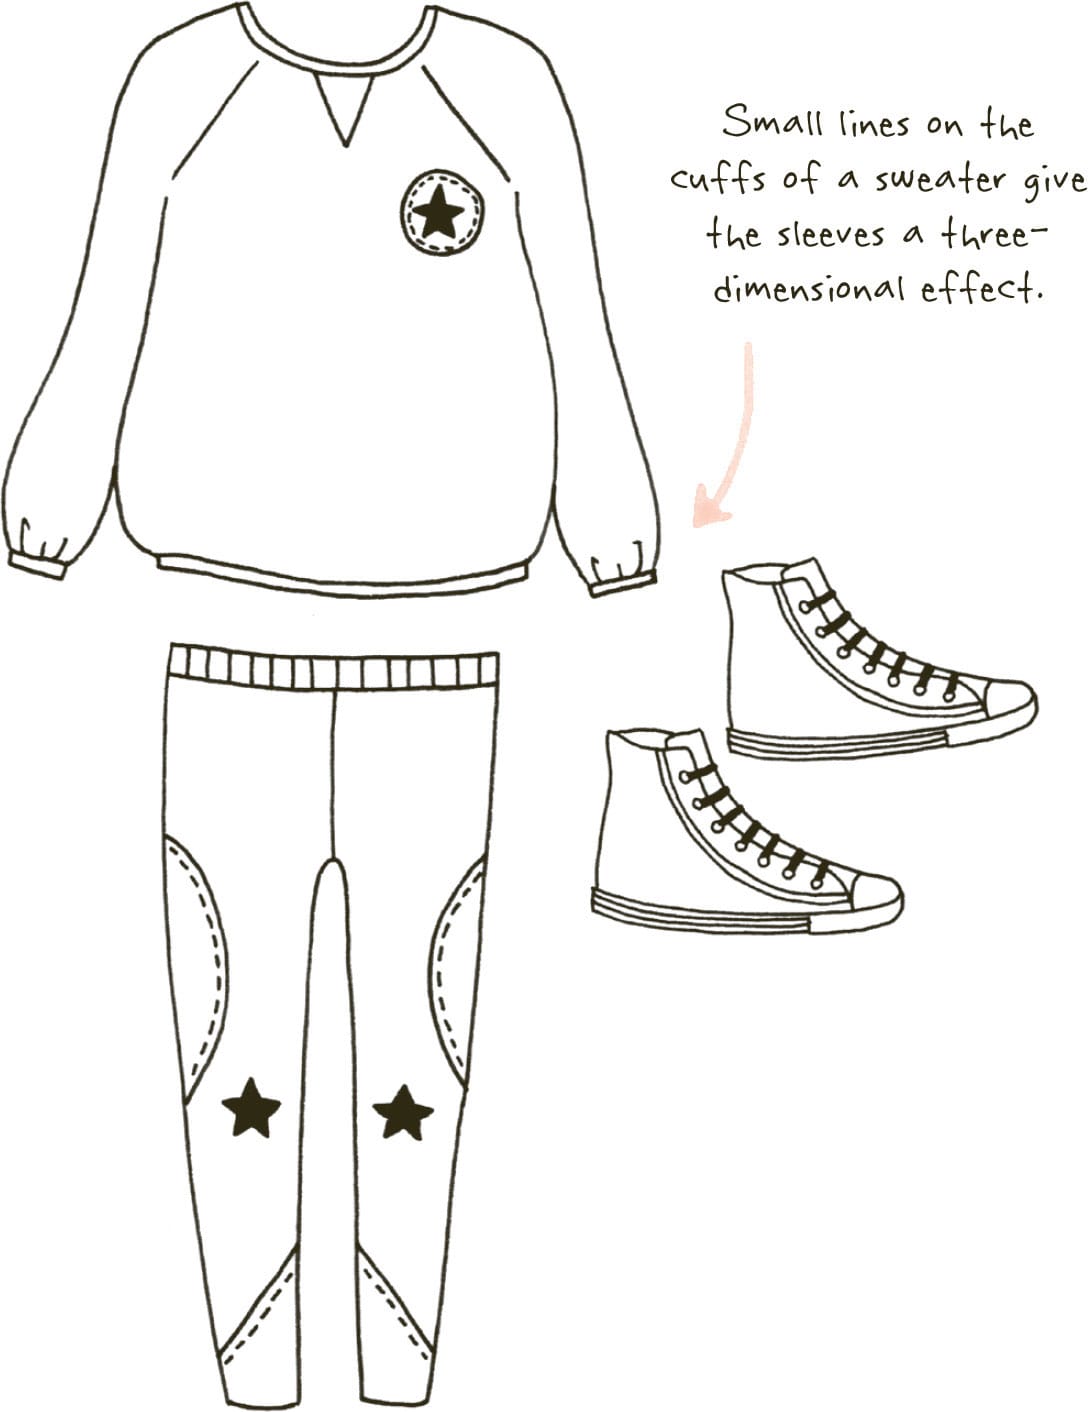
Creative Prompt
PETS
I have a gray cat named Shima whom I often feature in my artwork. I like to observe her in different poses and get lots of drawing inspiration from watching her.
This creative prompt will give you tips on how to approach drawing animals, whether they’re your own pets or someone else’s!
Cats
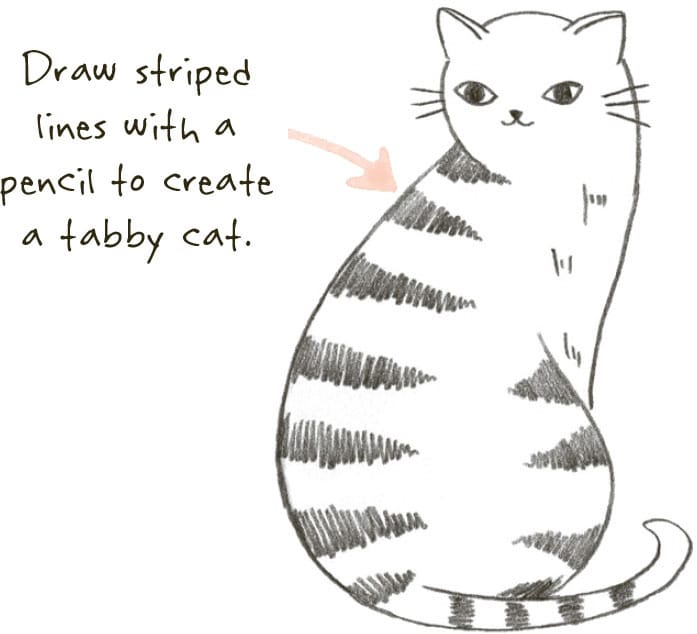
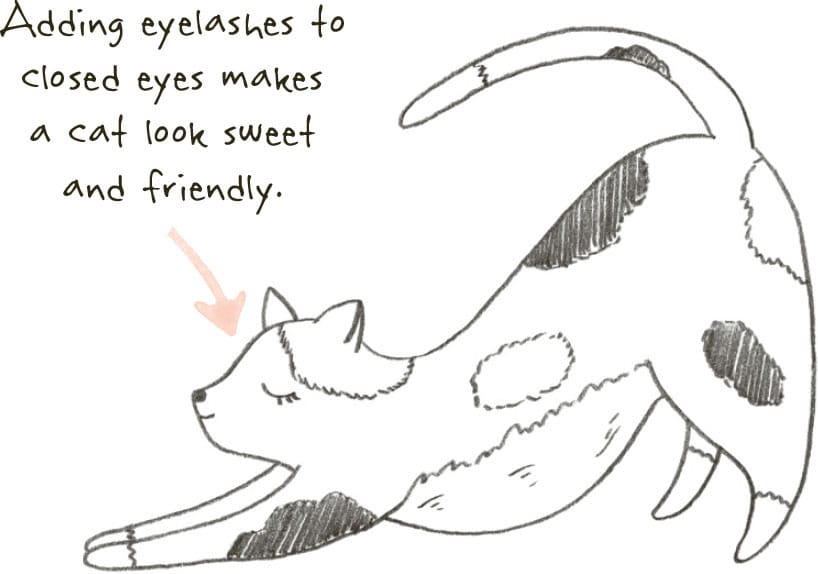
Start with the pointy ears and round face. Create a fluid line for the cat’s back and tail; then add the legs and a round belly connecting the two. Lastly, fill in the details.

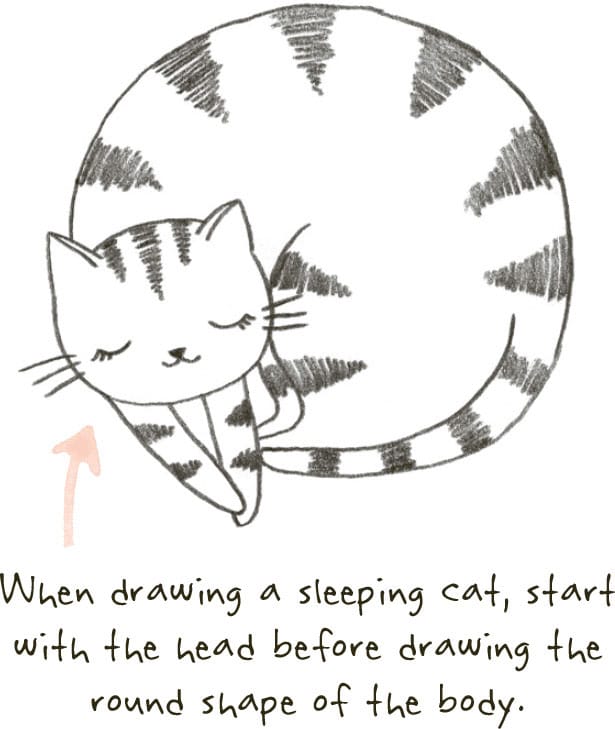
Now draw cats in different poses!
Dogs
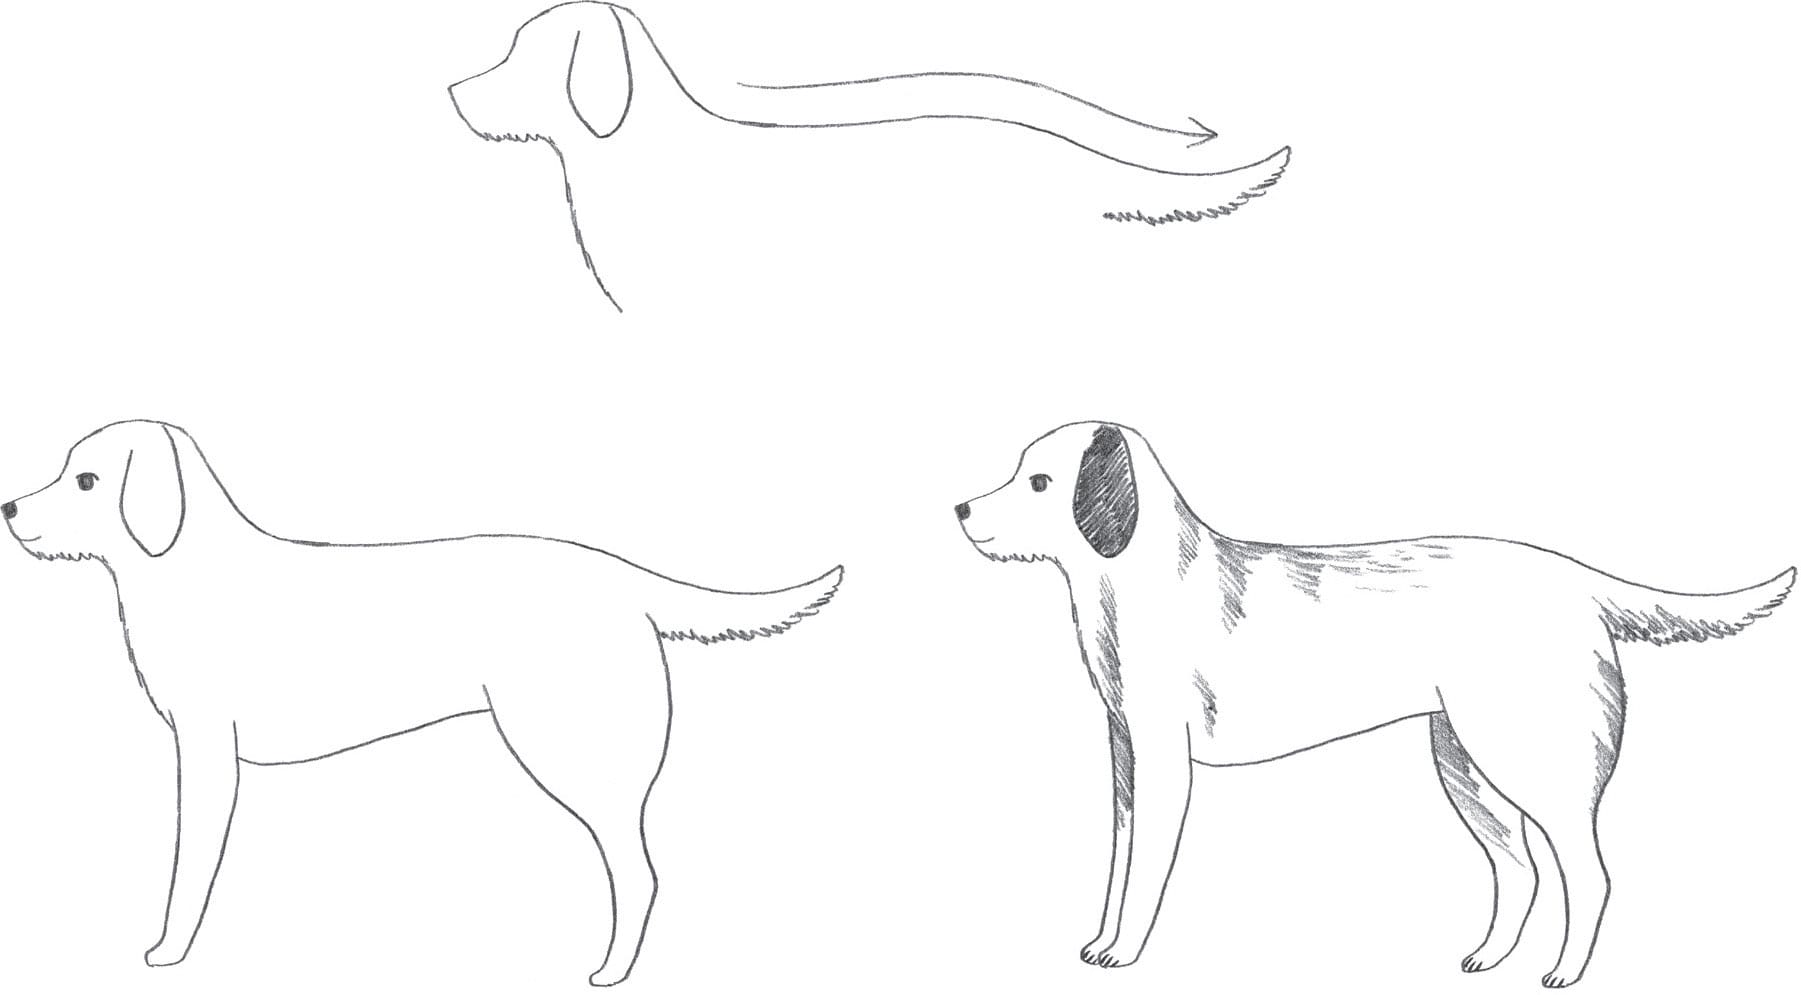
Draw the dog’s face in profile. In this example, the dog has a square muzzle and a pointy nose. Then add the body, using a fluid line for the back and tail. The jagged line on the underside of the tail implies fur. Draw legs and facial details, shade the ear, and add wispy lines to create dimension.
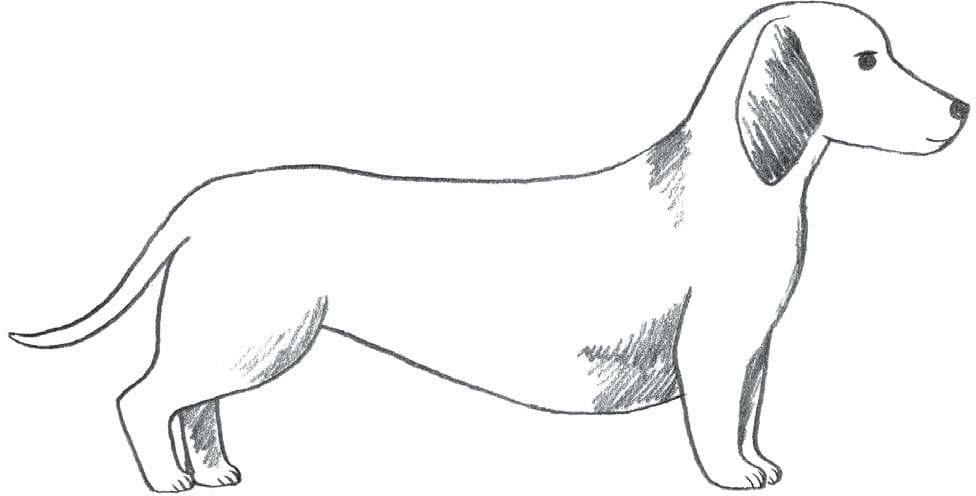
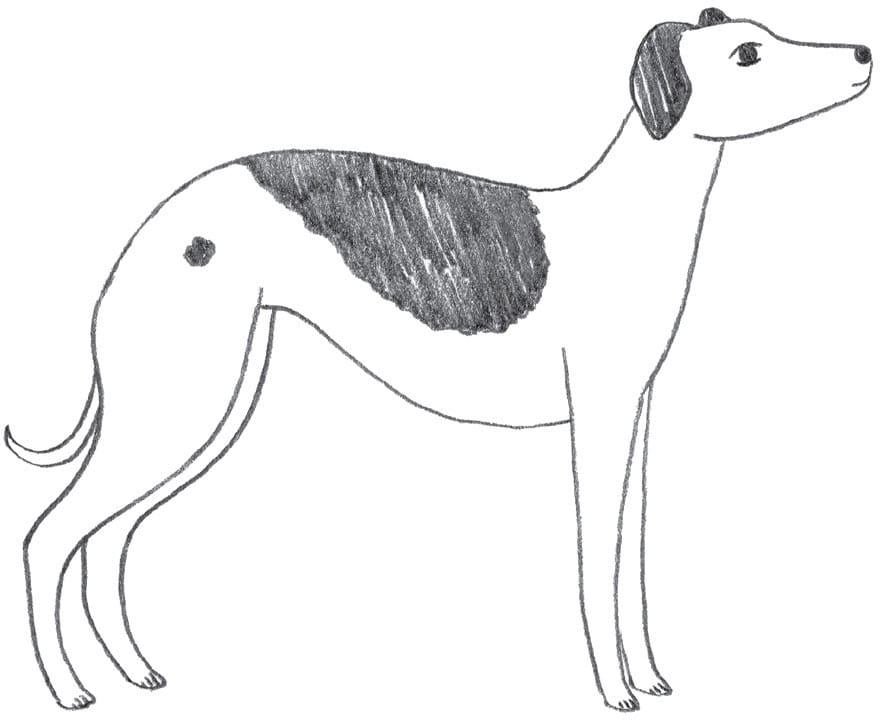
Here are a few dog breeds to practice drawing.
Dachshund
Whippet
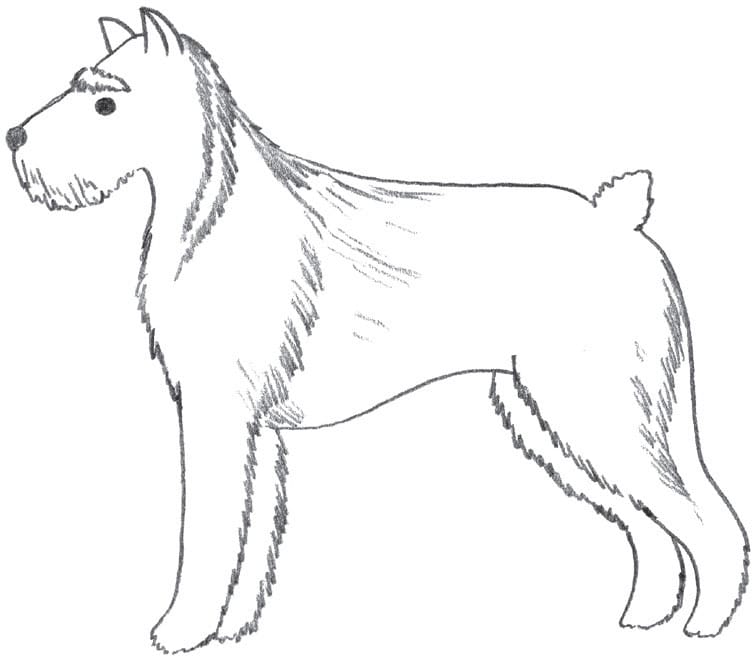
Schnauzer
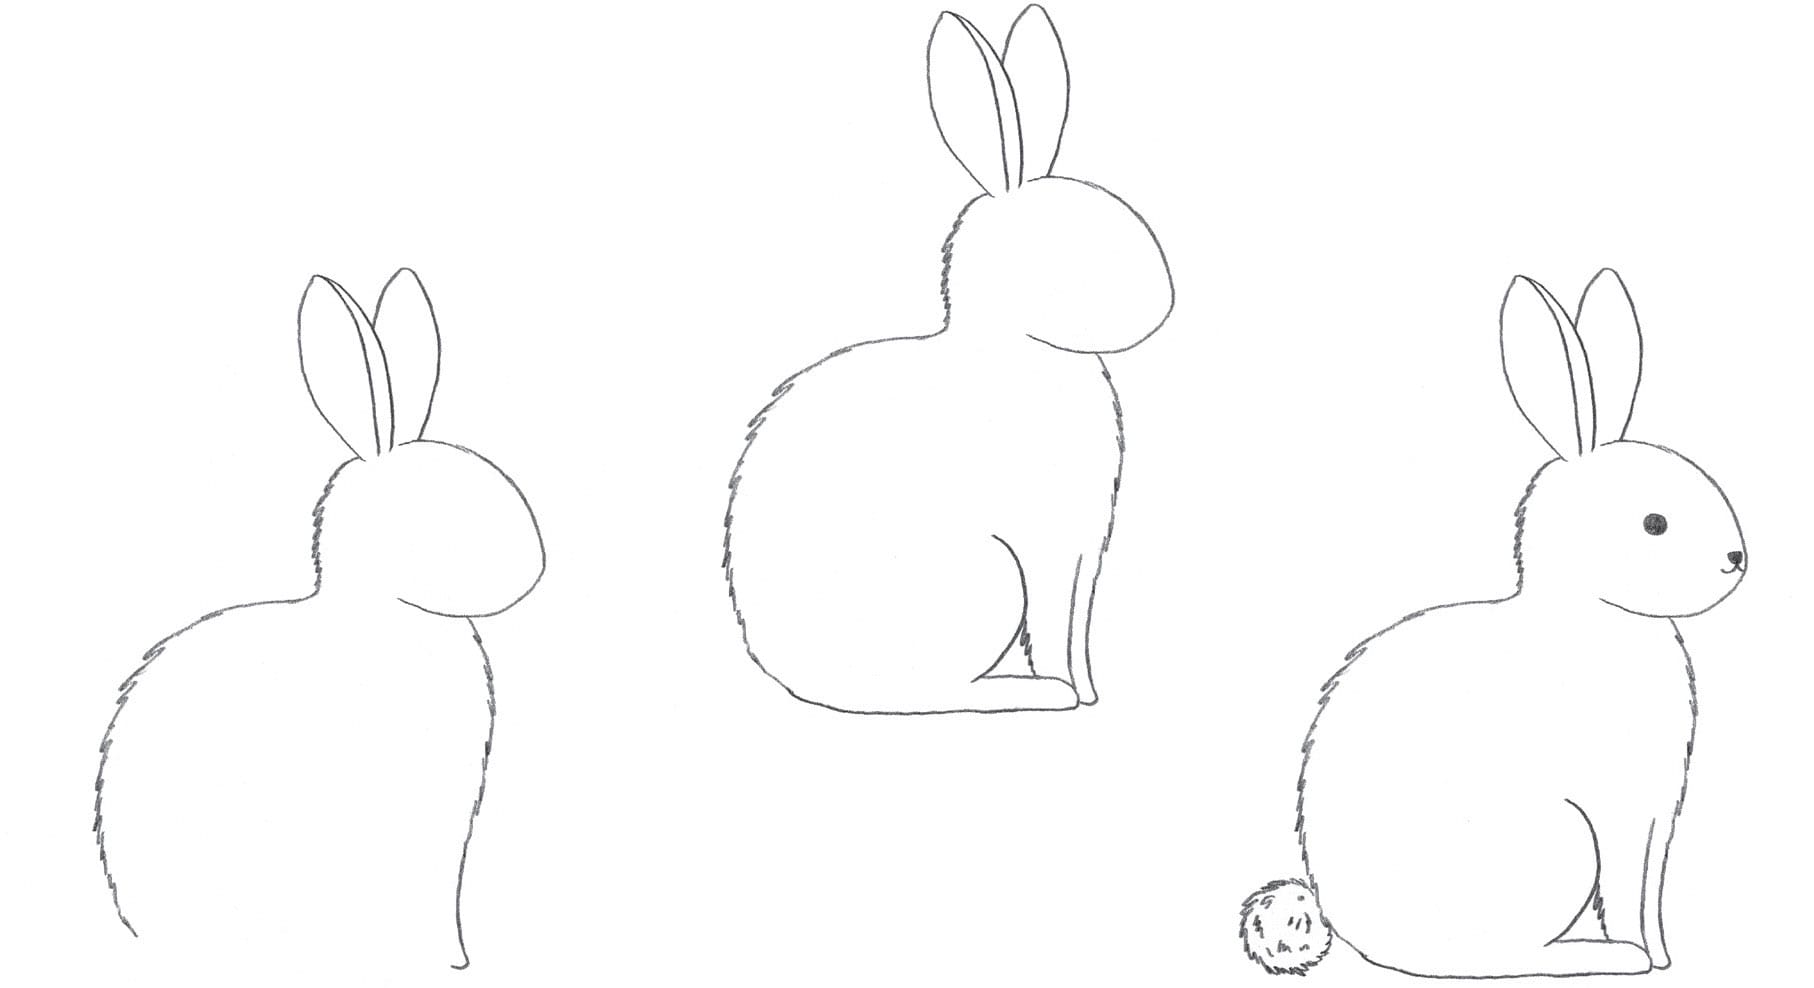
Rabbit
Draw the ears and an egg-shaped face, with a slight point for the nose. From the head, draw an arched back and a protruding chest. Keep the lines jagged to resemble fur. Draw the two front paws and the back leg; then add a round, fluffy tail and facial features. Small lines inside the tail create a soft, fluffy effect.
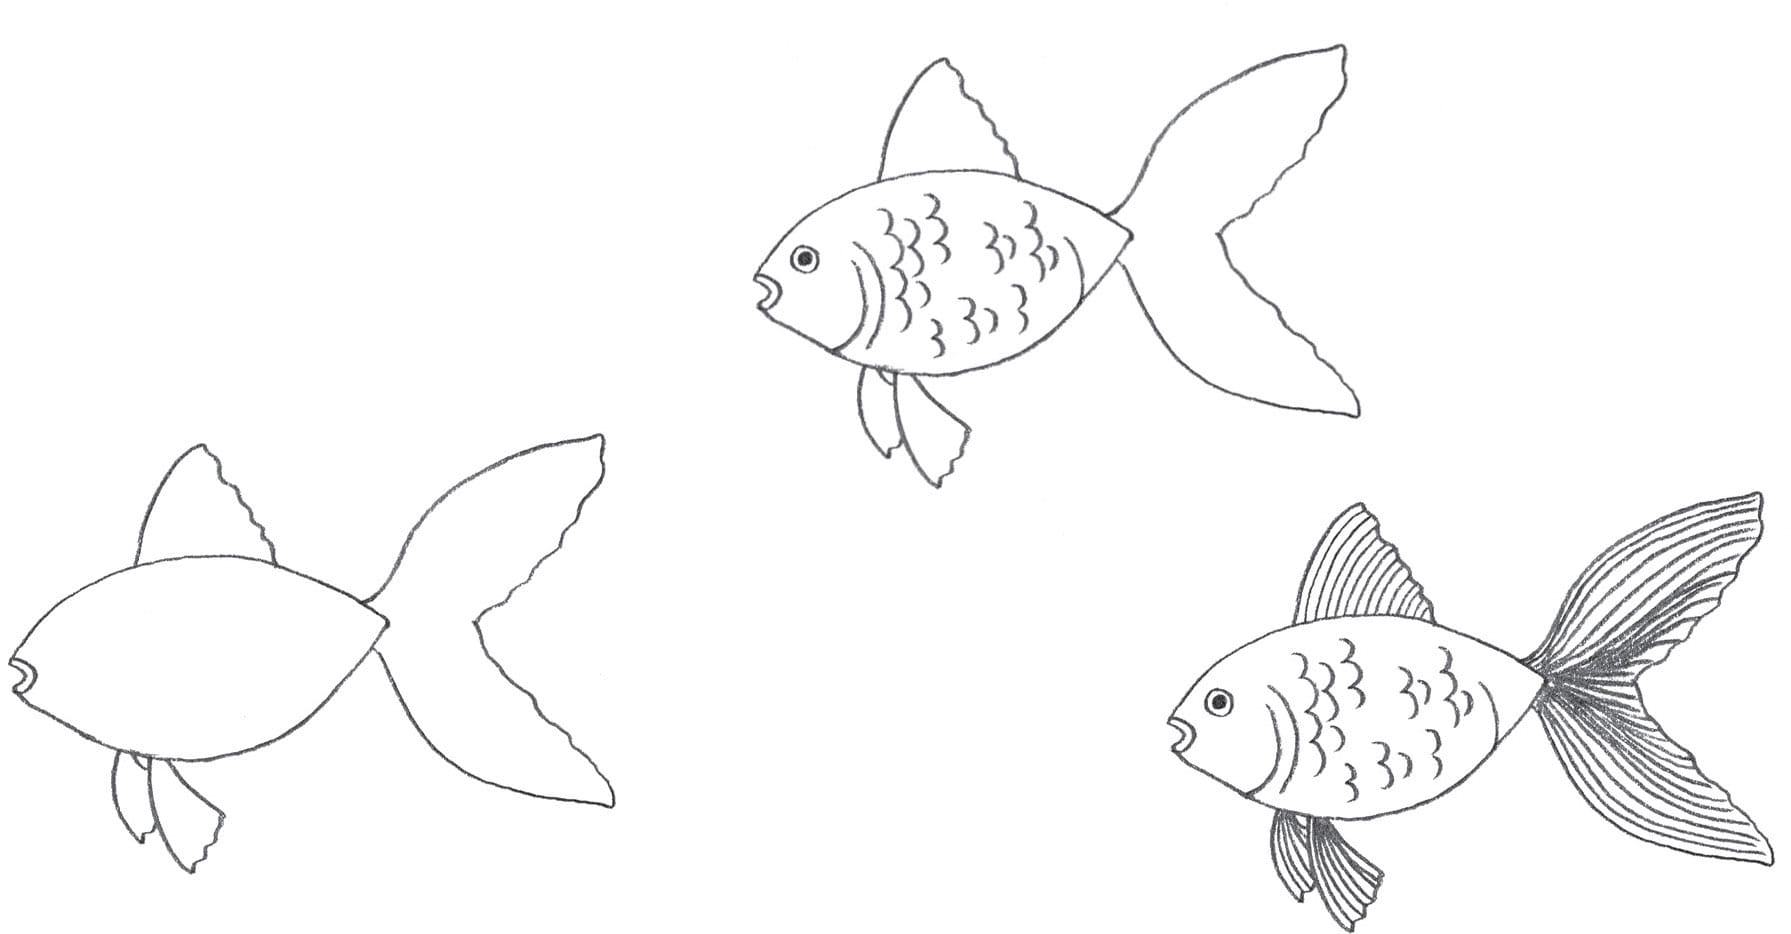
Goldfish
Draw the fish’s mouth and oval body, with a point at the end. Then add fins and a tail. Next, draw an eye, gills, and scalloped lines to resemble scales. Finish with details!
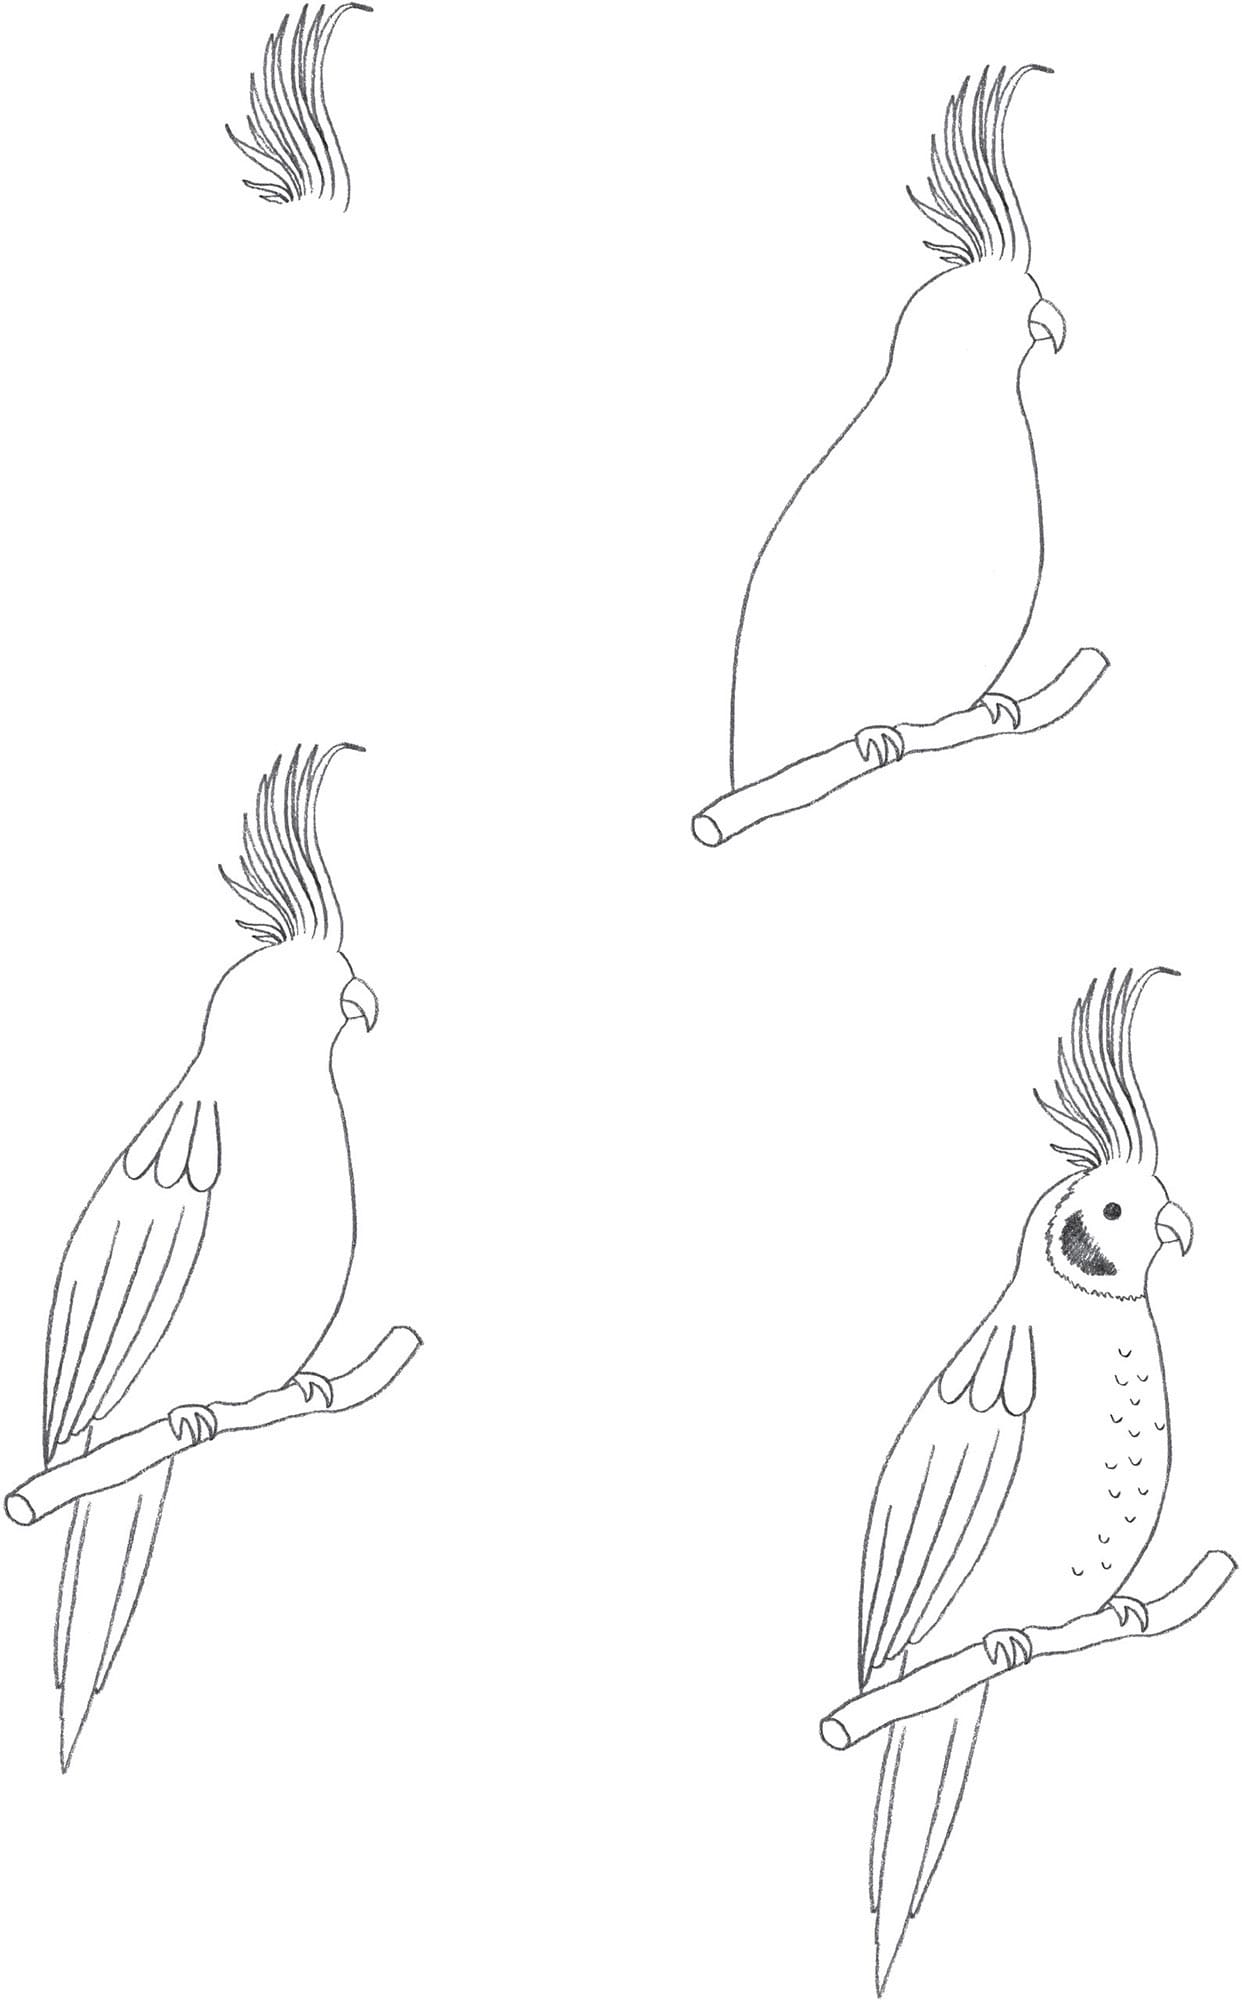
Cockatiel
Start by drawing the long, thin feathers on the bird’s head. Then draw the head, beak, body, feet, and perch. Add tail and wing details using neat, vertical lines to indicate feathers. Finish with a round dot for the eye, details on the face, and U-shaped feathers on the chest.
Exercise
TEA TIN
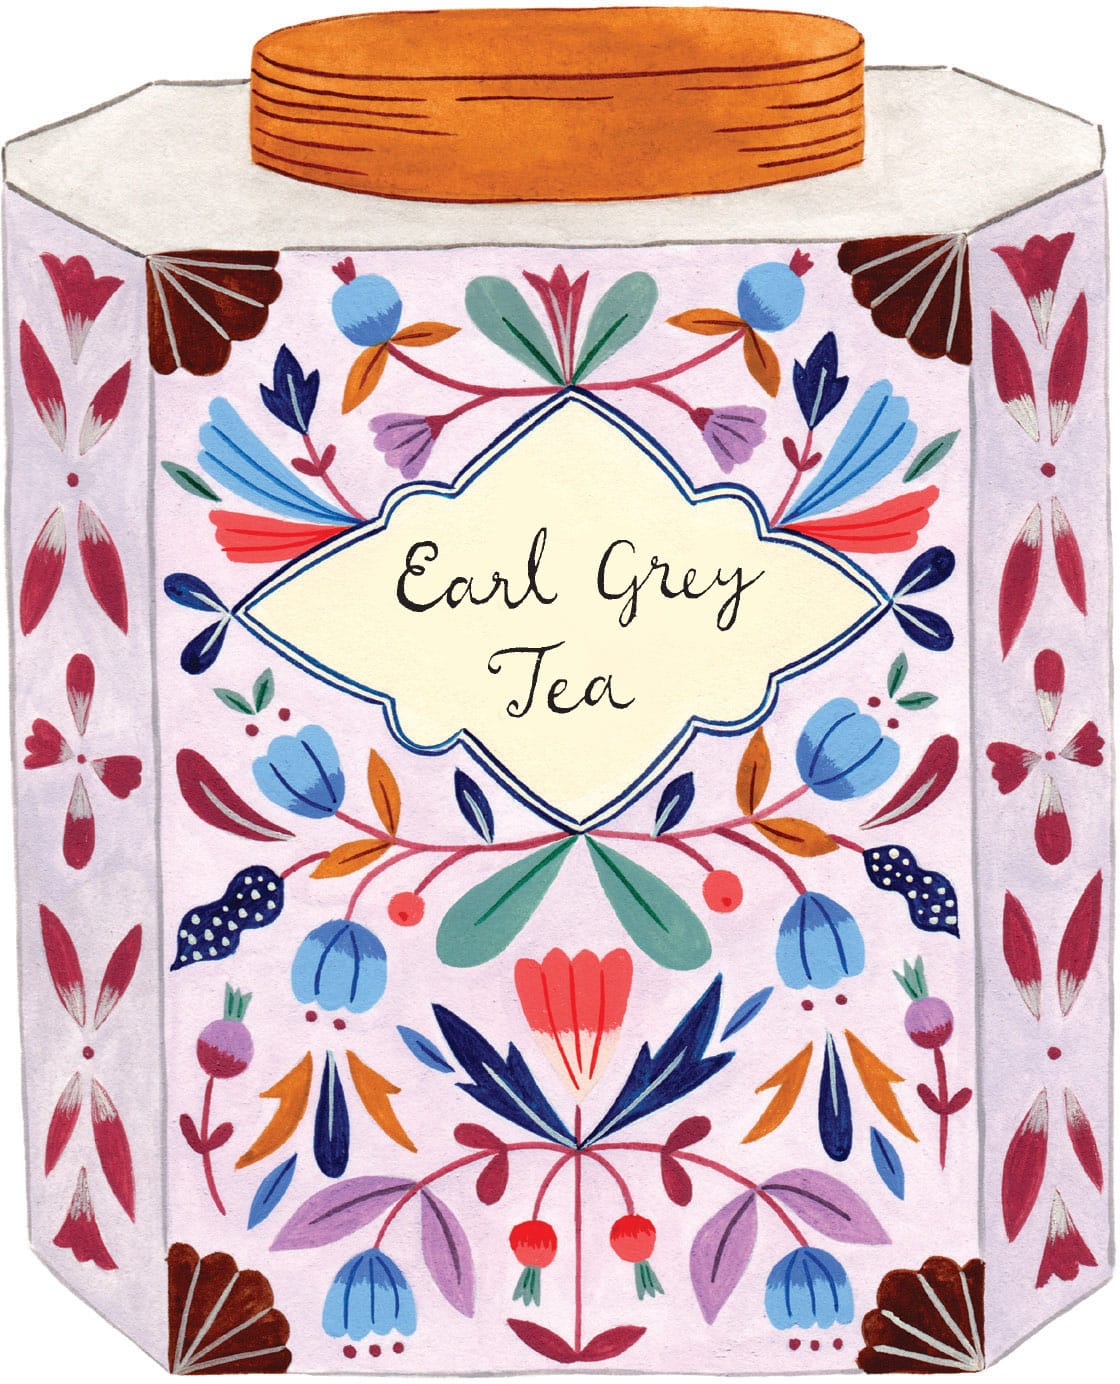
Growing up in England and Japan, tea has always been a part of my life. I love everything about it, from opening the beautifully patterned tin to brewing and pouring my tea before sitting down to enjoy a cup.
To create a tea tin with a playful folk pattern, start with a sketch. The design is detailed, and you want to ensure that it will look balanced. Use cartridge or printer paper, as you will transfer your design onto watercolor paper.
1
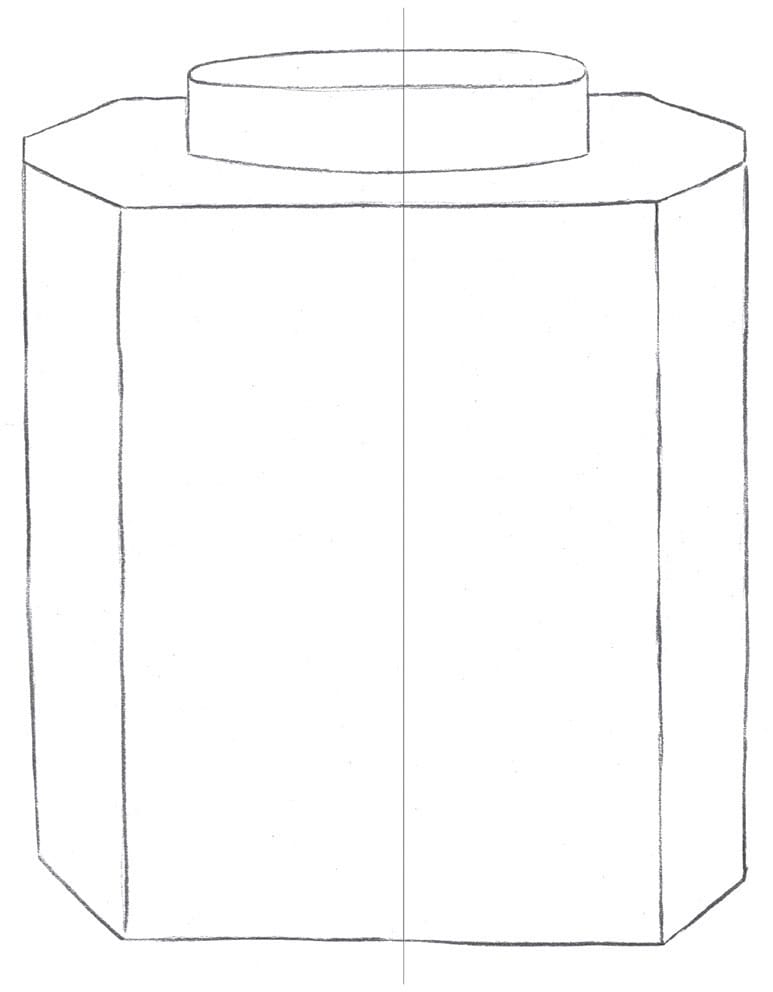
Make a vertical line down the center of your paper. Using this as a guideline, draw a tea tin and its lid.
2
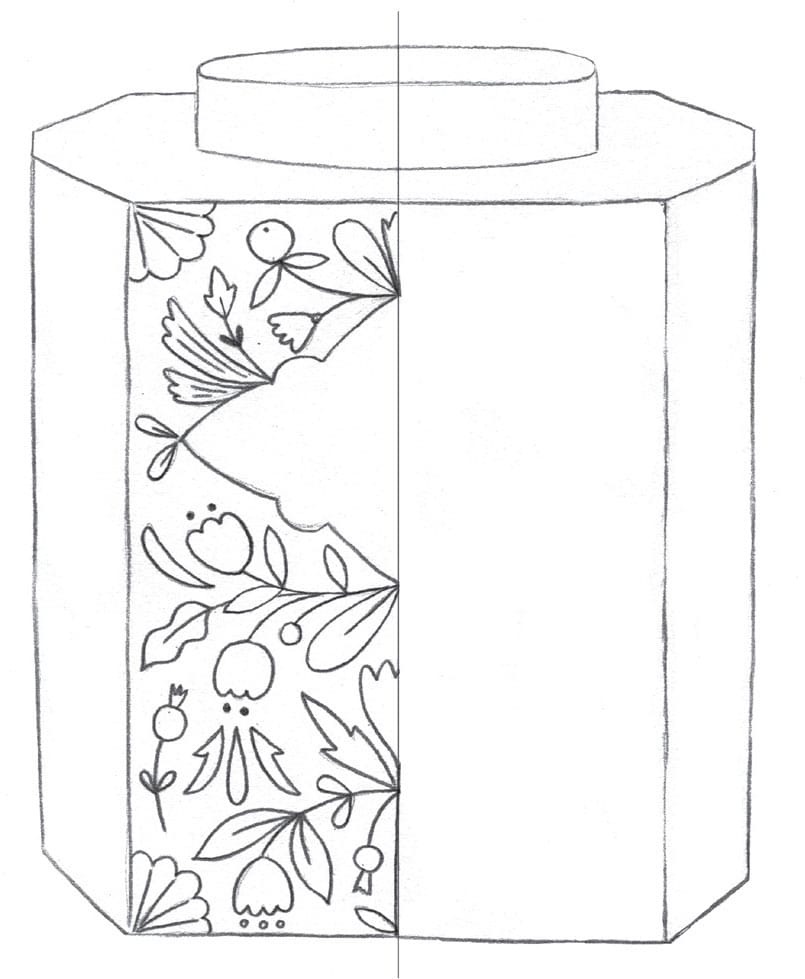
Working on the left side, draw half of the tea label and scalloped details in the corners. Then add a floral pattern around the label.
3
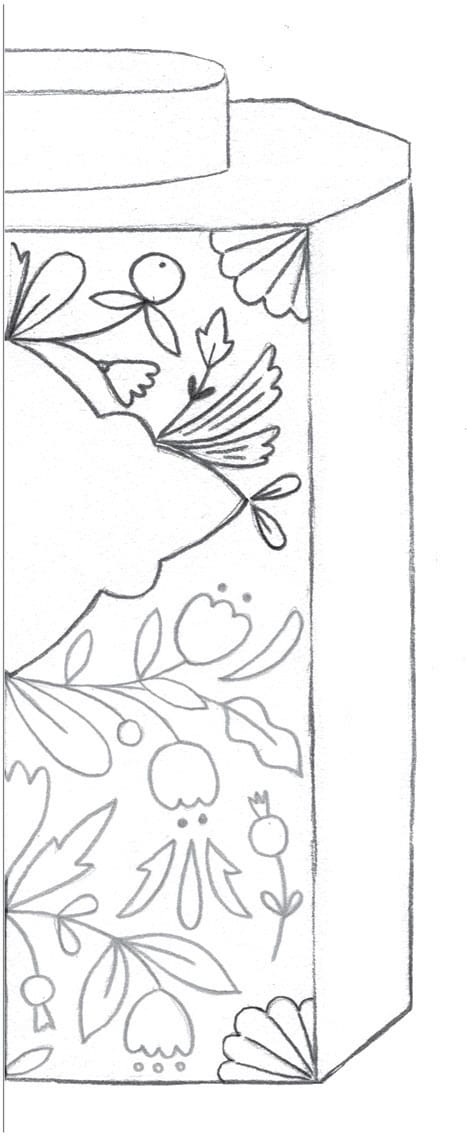
Fill in the pattern on the right side. You can do this by folding your design in half along the vertical line and using a light box or window to trace your drawing, or just draw it without any help. I enjoy slight imperfections in my art, so this is how I usually work. (See here for tips on creating a symmetrical image.)
4
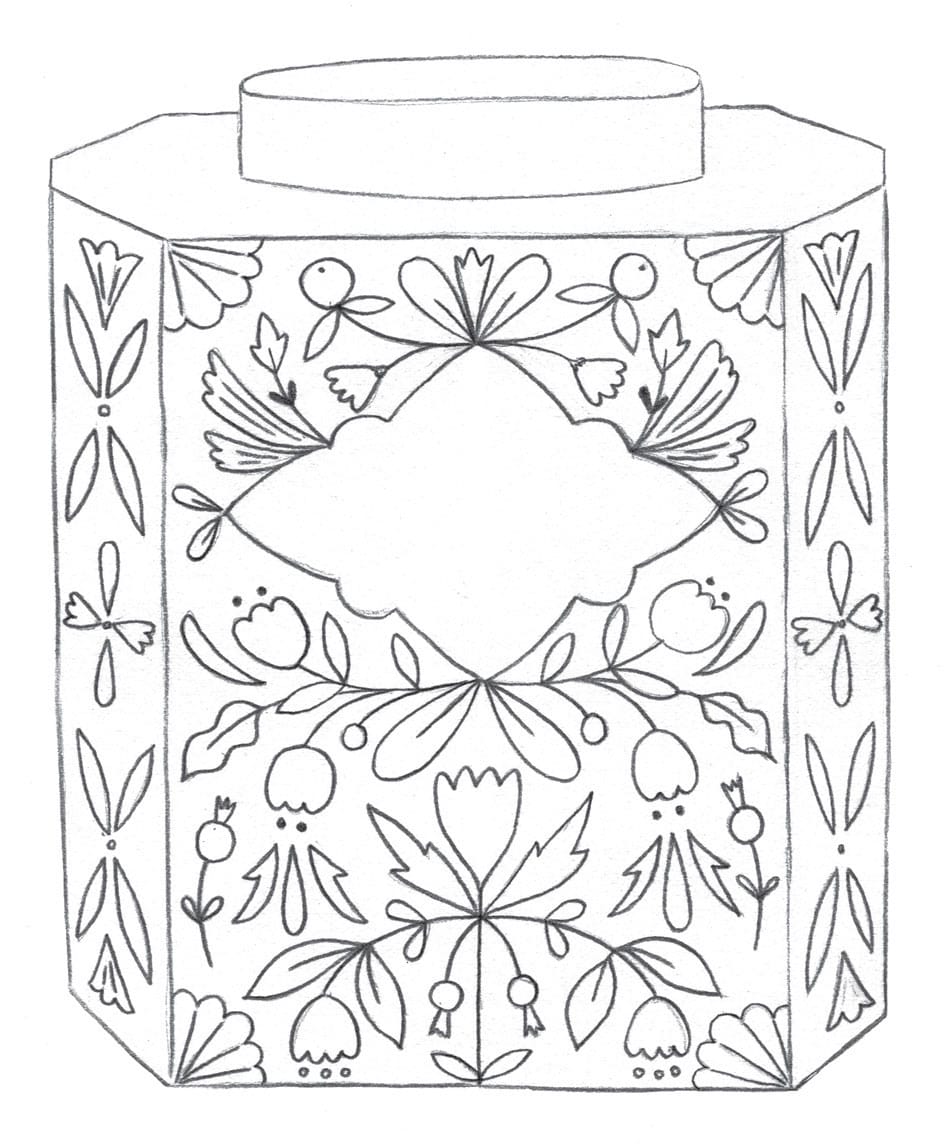
Add a pattern to the side panels of the tea tin. Keep the pattern simple so that it complements the main design without overwhelming it.
With a light box or a window, trace your design lightly onto watercolor paper. (See here for instructions.)
5
Use gouache paint for the background, leaving the pattern blank. Mix a tiny bit of black into the background color, and paint the side panels. Using a darker color here will create dimension. Also paint the tea tin’s lid.
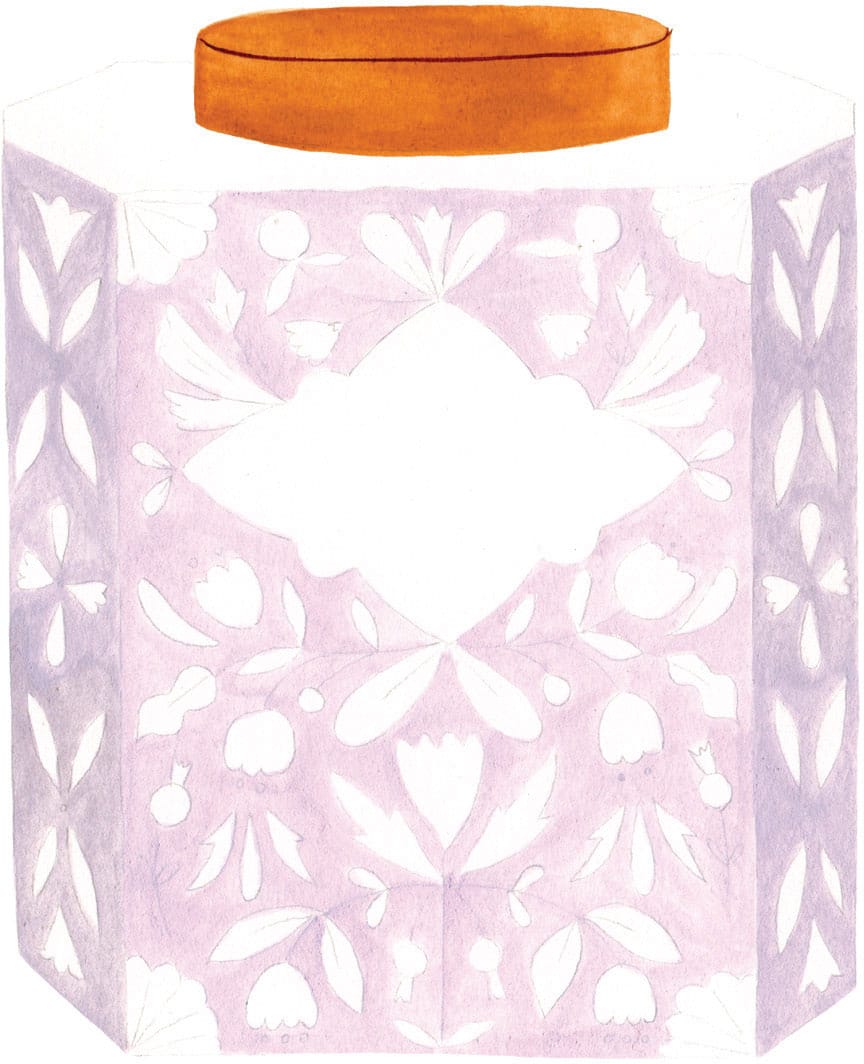
6
Paint the plant stems using a darker color that stands out against the background.
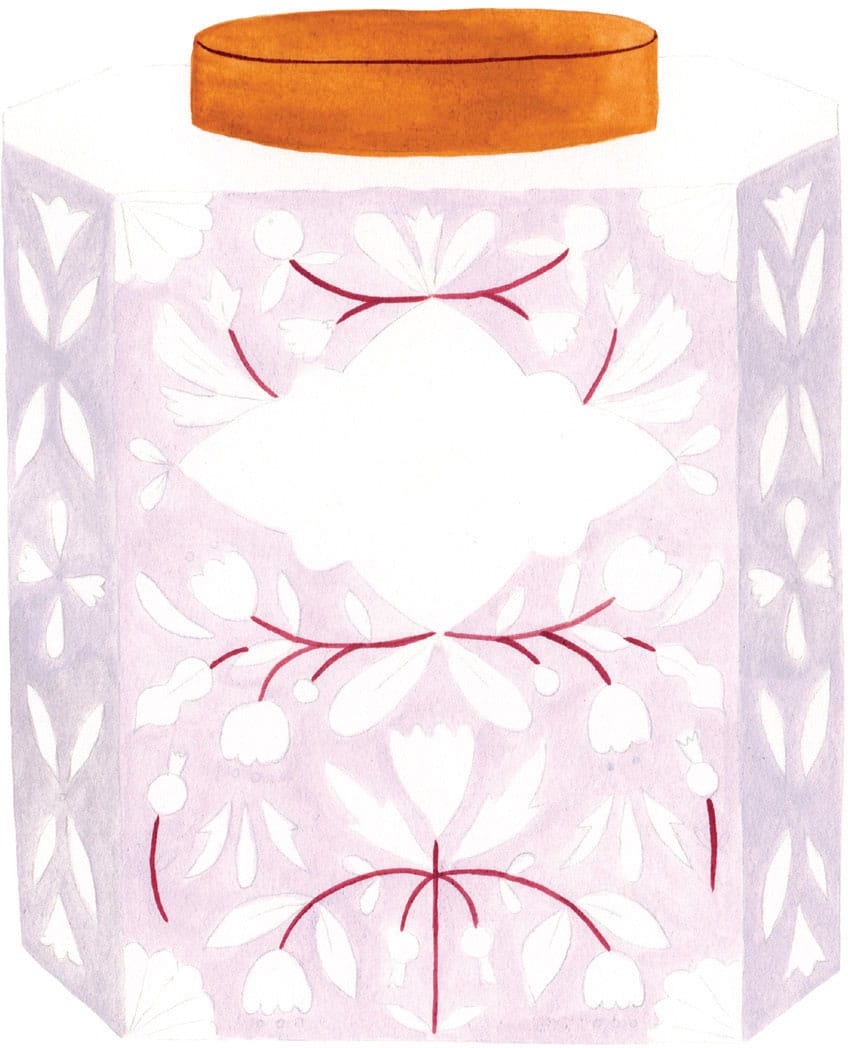
7
Fill in the main elements of the pattern using various colors.
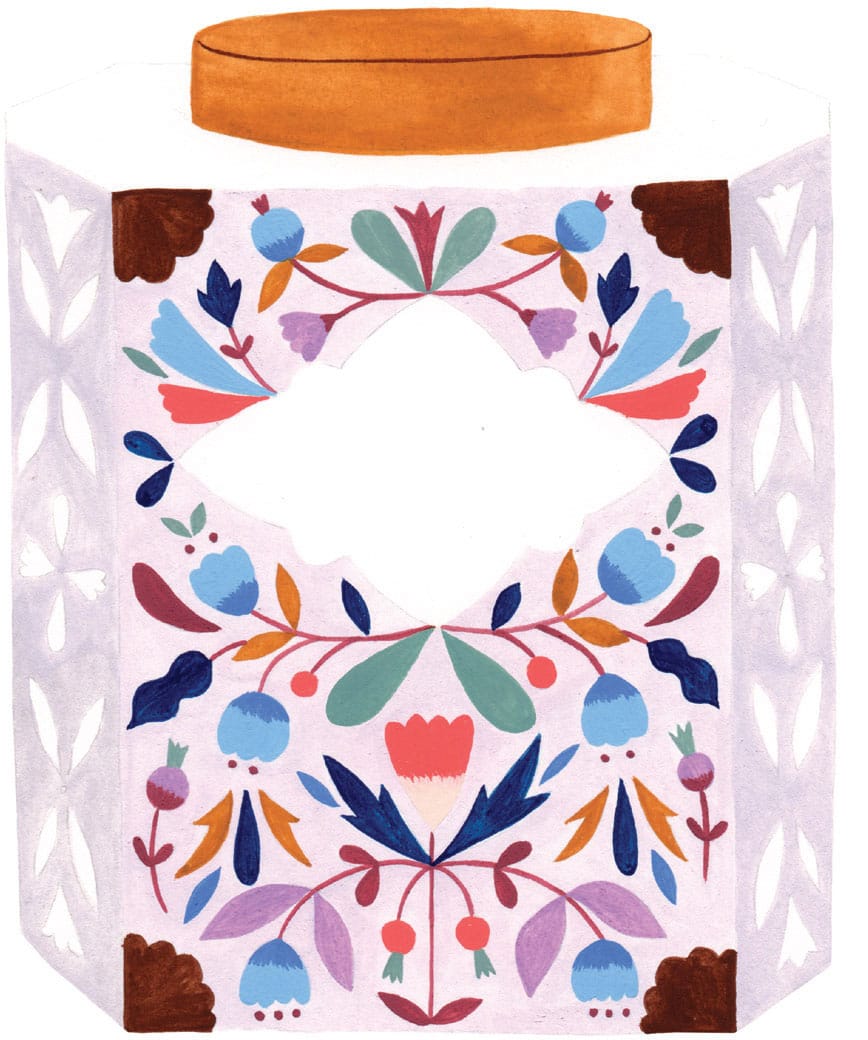
8
Now for my favorite part: adding little details! Using a size 00 brush and a steady hand, paint lines on the flowers and dots on the leaves. This step will make your design come to life!
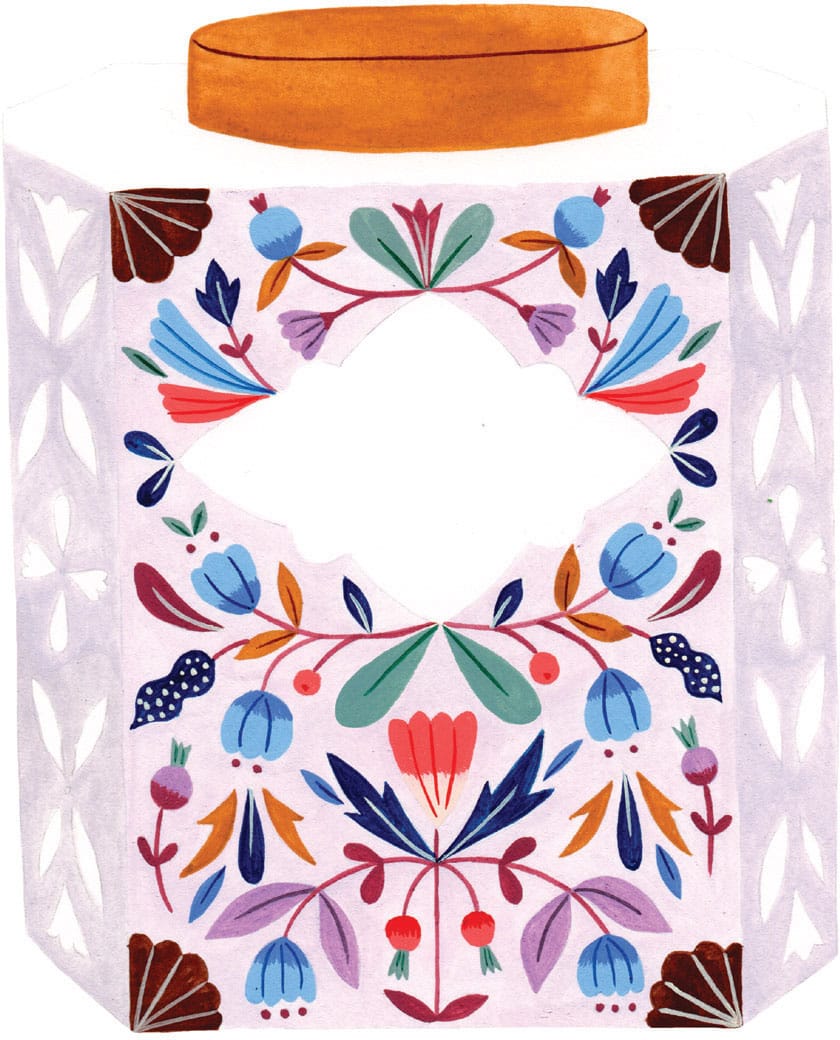
9
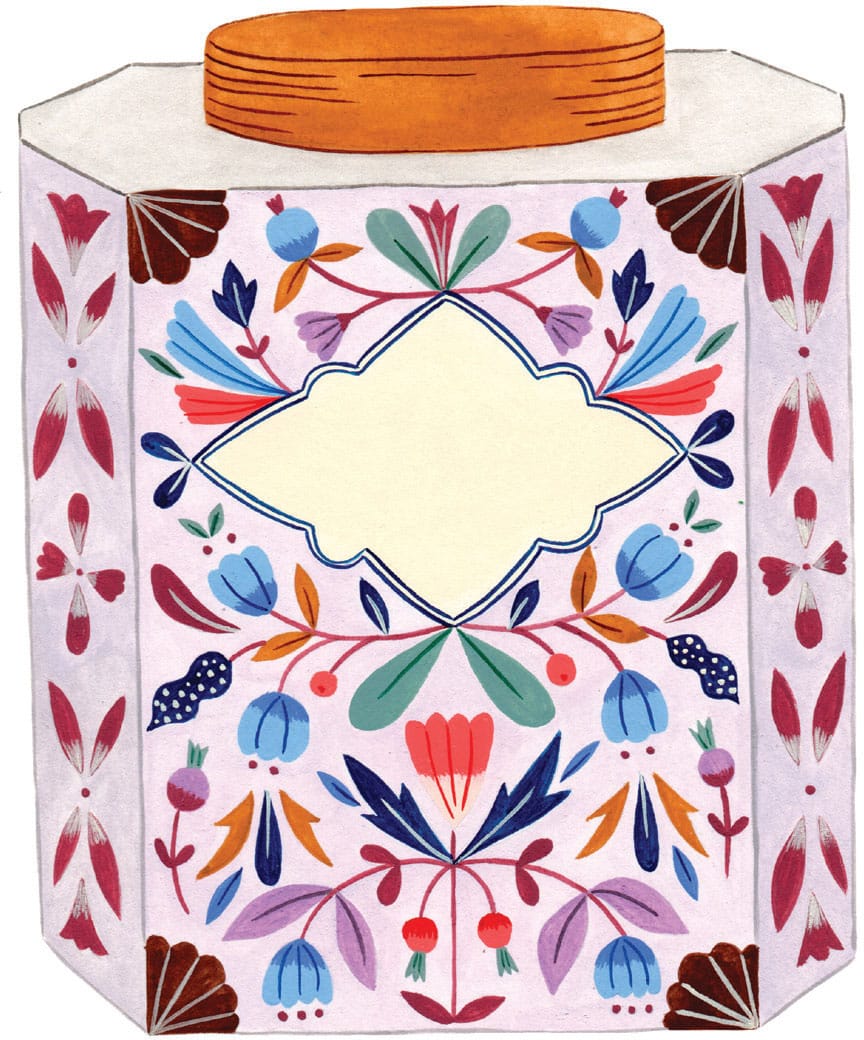
Fill in the pattern on the side panels and add lines that resemble ridges to the lid. Use a watery wash of light gray paint to fill in the area of the tin just below the lid. Also paint the tea label and outline the tea tin.
10
With a nib pen and black ink, hand letter the name of your favorite tea variety on the label.
Exercise
KITCHEN SHELVES
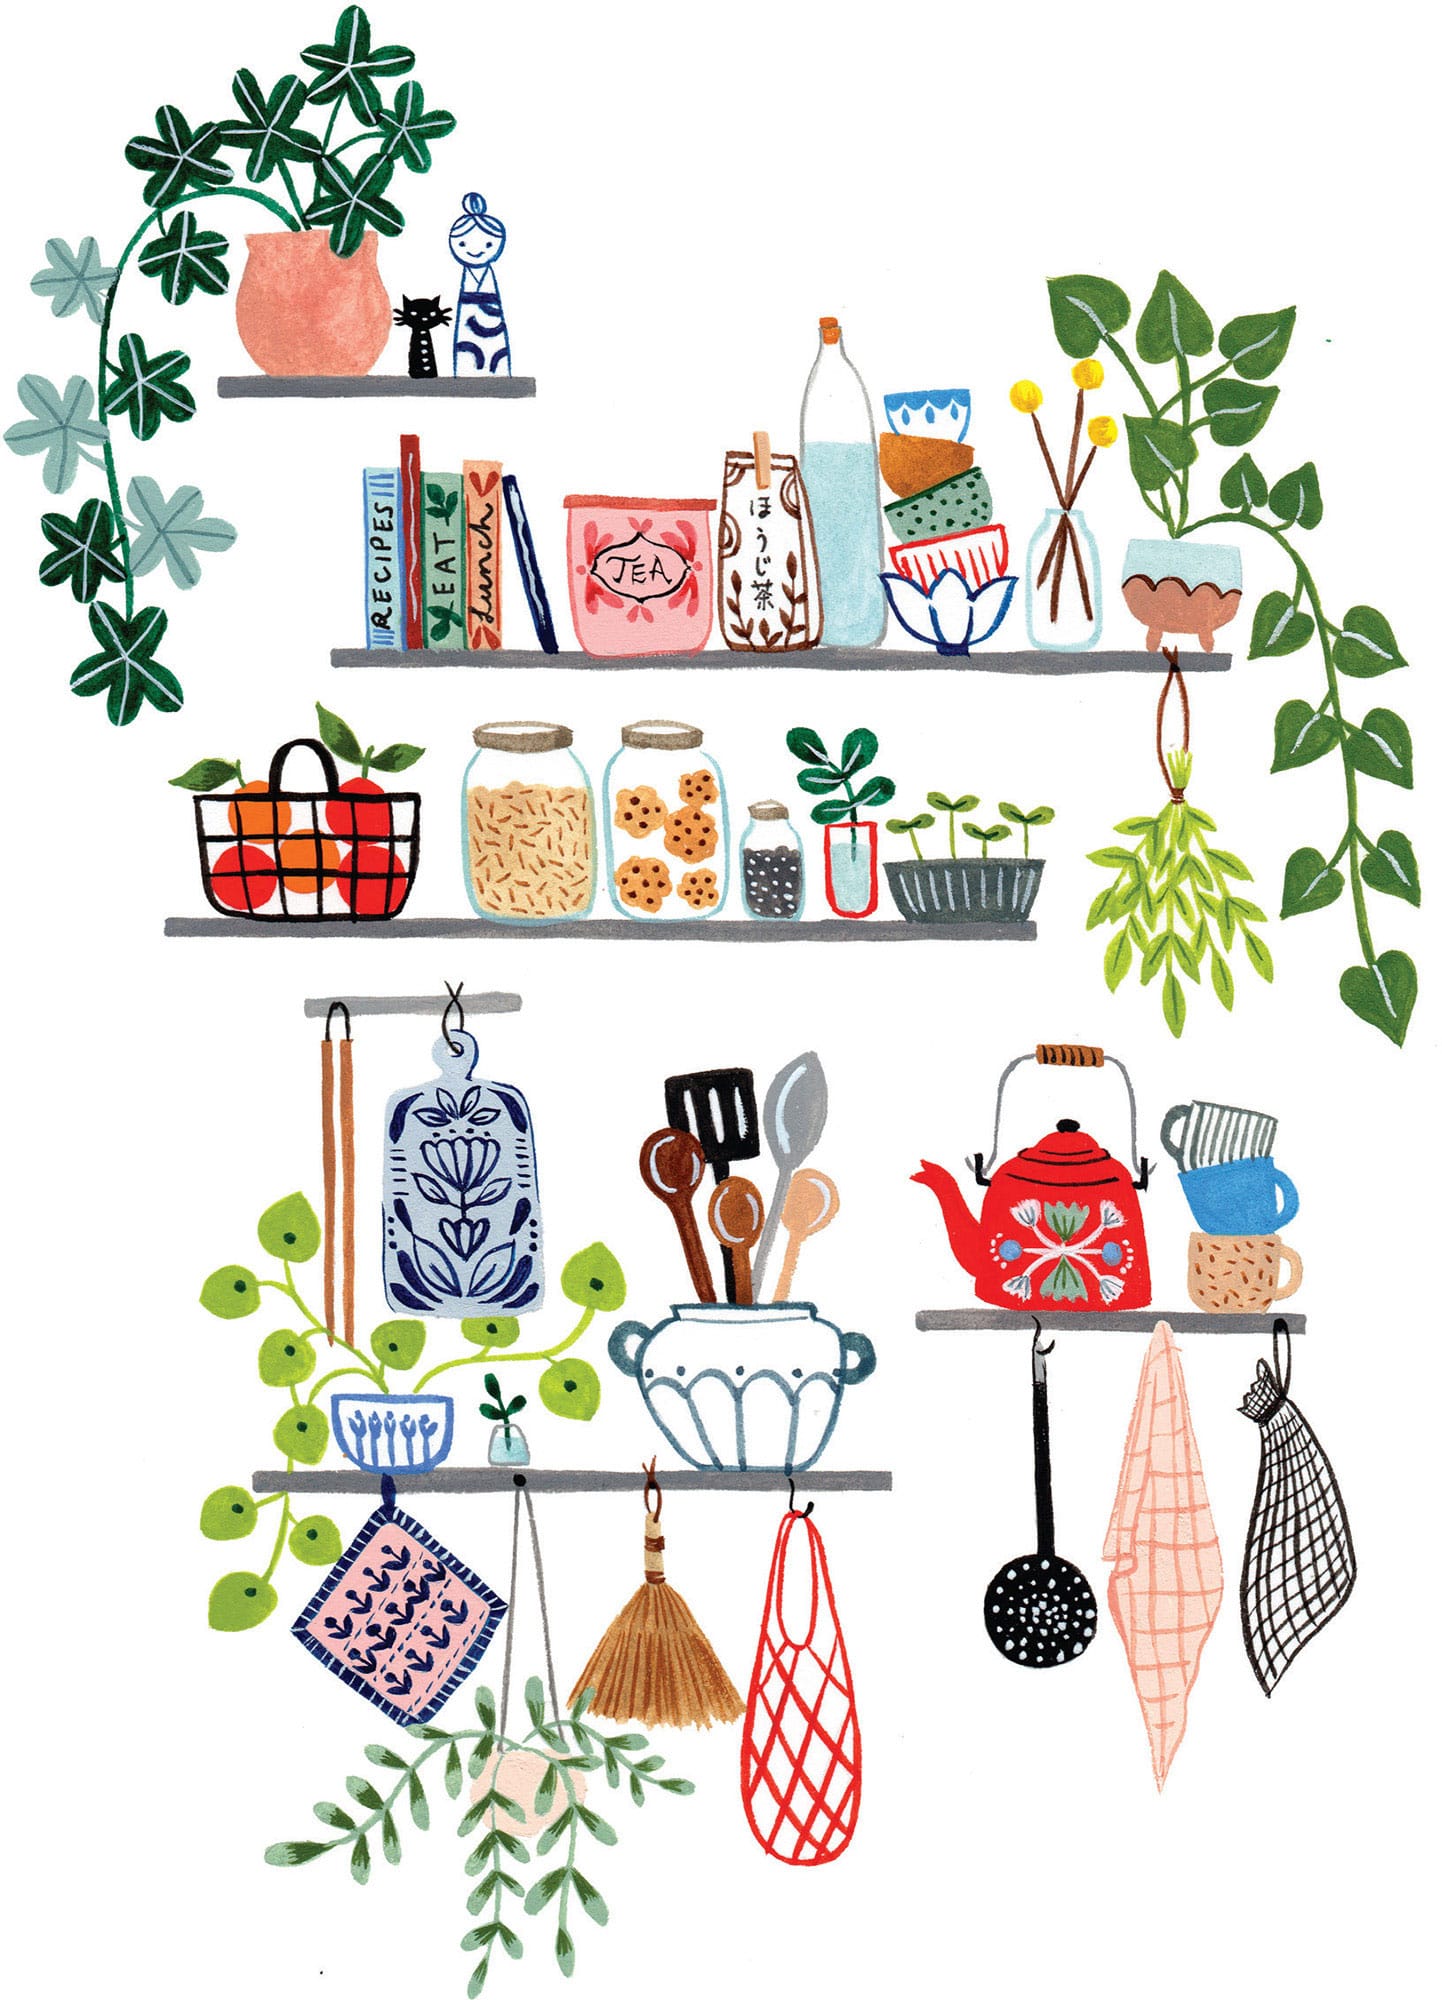
The kitchen is one of my favorite rooms in my home and where I spend a lot of time cooking, drinking tea, and flipping through cookbooks.
The kitchen also features many interesting shapes excellent for drawing practice. A couple of years ago, I started a personal project to paint the objects on the shelves in my friends’ homes and my own. I love to draw small, so this exercise always excites me, and I enjoy adding a unique pattern to a bowl and exaggerating the leaves of a plant.
1
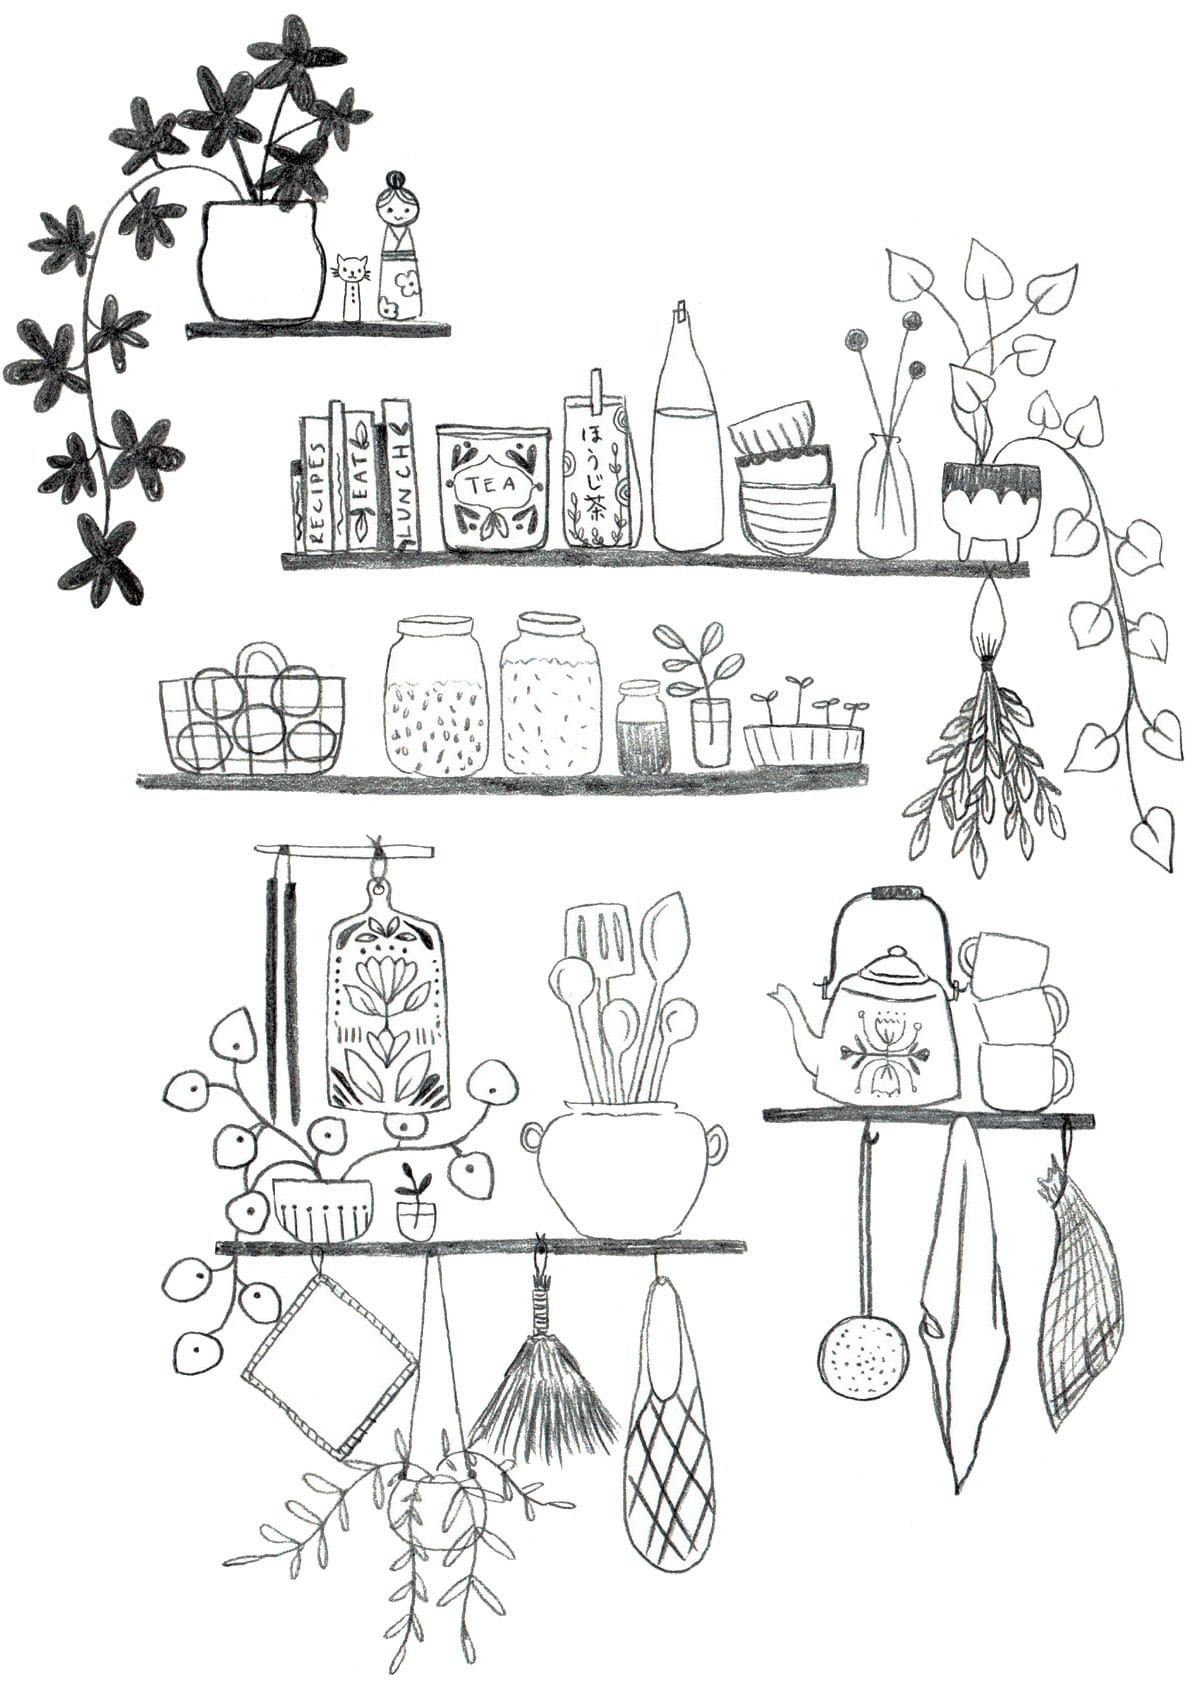
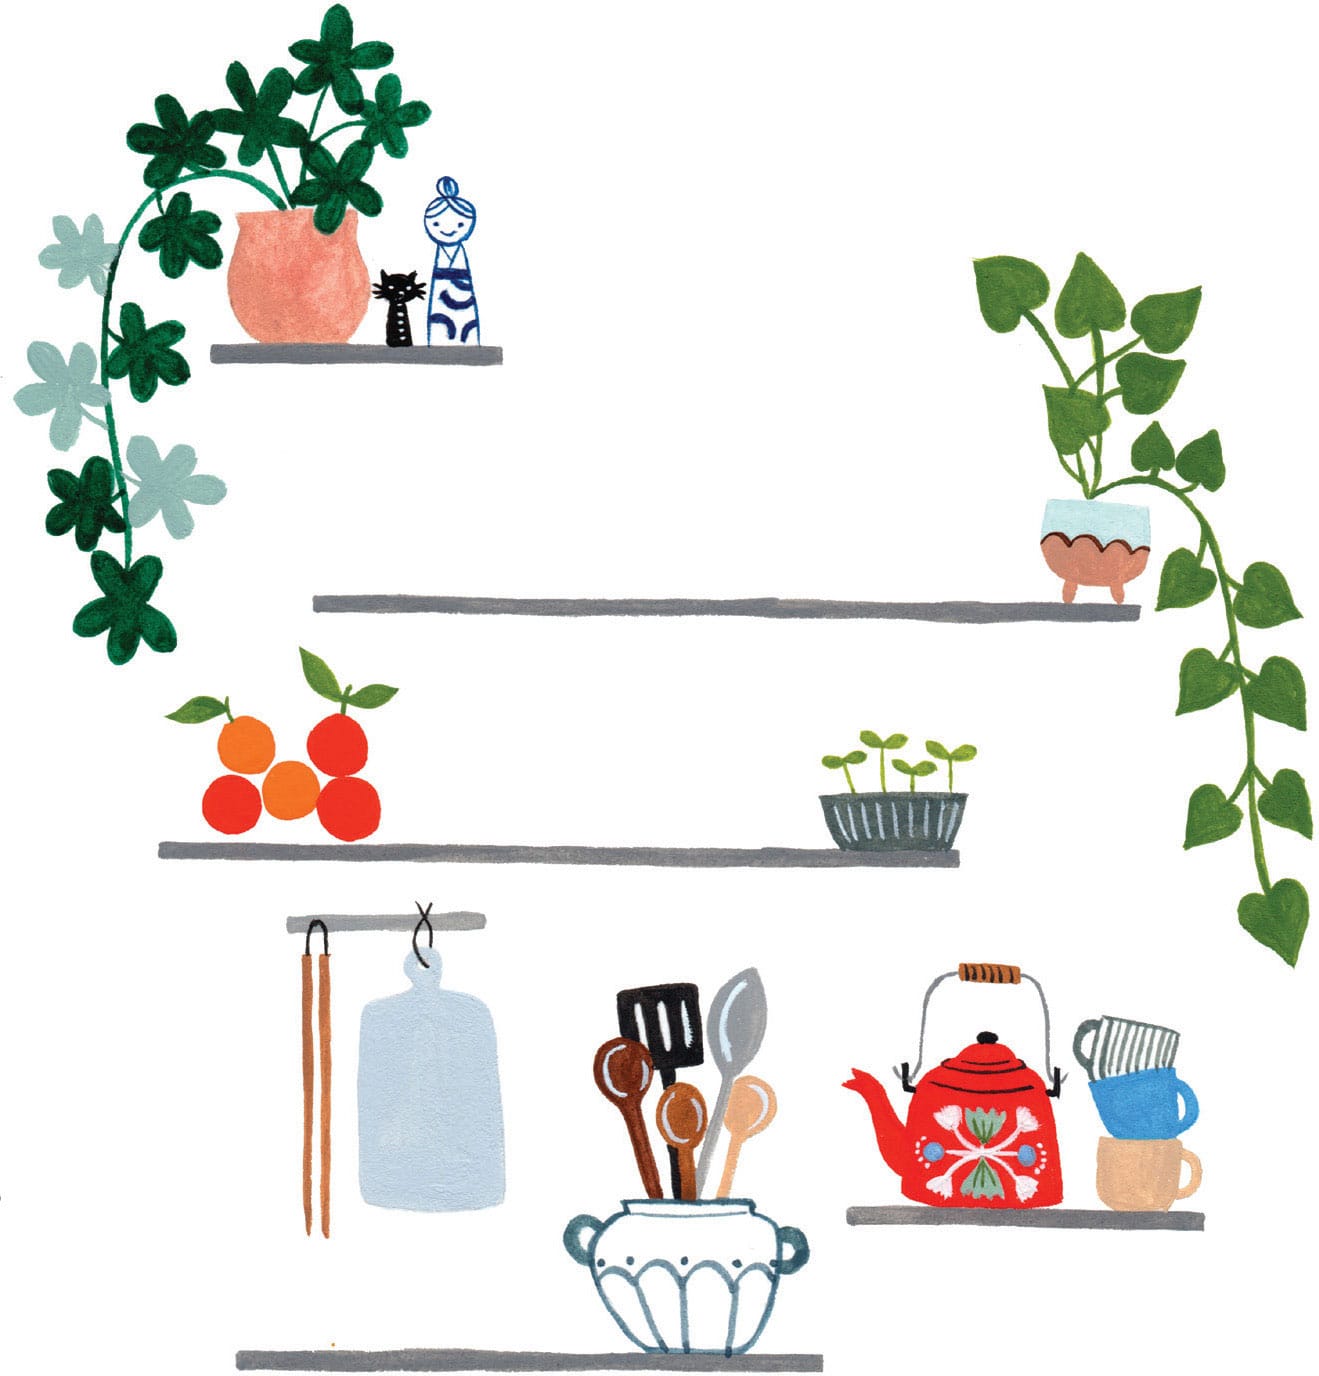
Start by looking through your cupboards and shelves for inspiration. Then make a rough pencil sketch, scattering items across several shelves. Add details like hanging bunches of herbs, a pot holder, and a tea towel.
2
Use a light box and a pencil to lightly transfer your sketch onto a sheet of watercolor paper. If you don’t have a light box, tape your sketch to a window, and lay watercolor paper over it to trace.
With paint, begin to fill in the lines of the shelves. Use neutral colors, like gray or taupe, so that the objects on the shelves will stand out.
3
Add some of the main elements in your design, starting with the larger items. Once these objects are in place, it’s easier to fill in the gaps with smaller items.
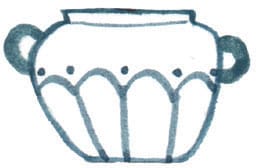
NOT ALL OF THE OBJECTS NEED TO BE FILLED IN WITH A SOLID COLOR. FOR EXAMPLE, I USED ONLY A THIN BRUSH TO ADD DETAIL TO THIS LINE-ART POT. IT LOOKS PRETTY AND DELICATE NEXT TO THE OTHER ITEMS.
4
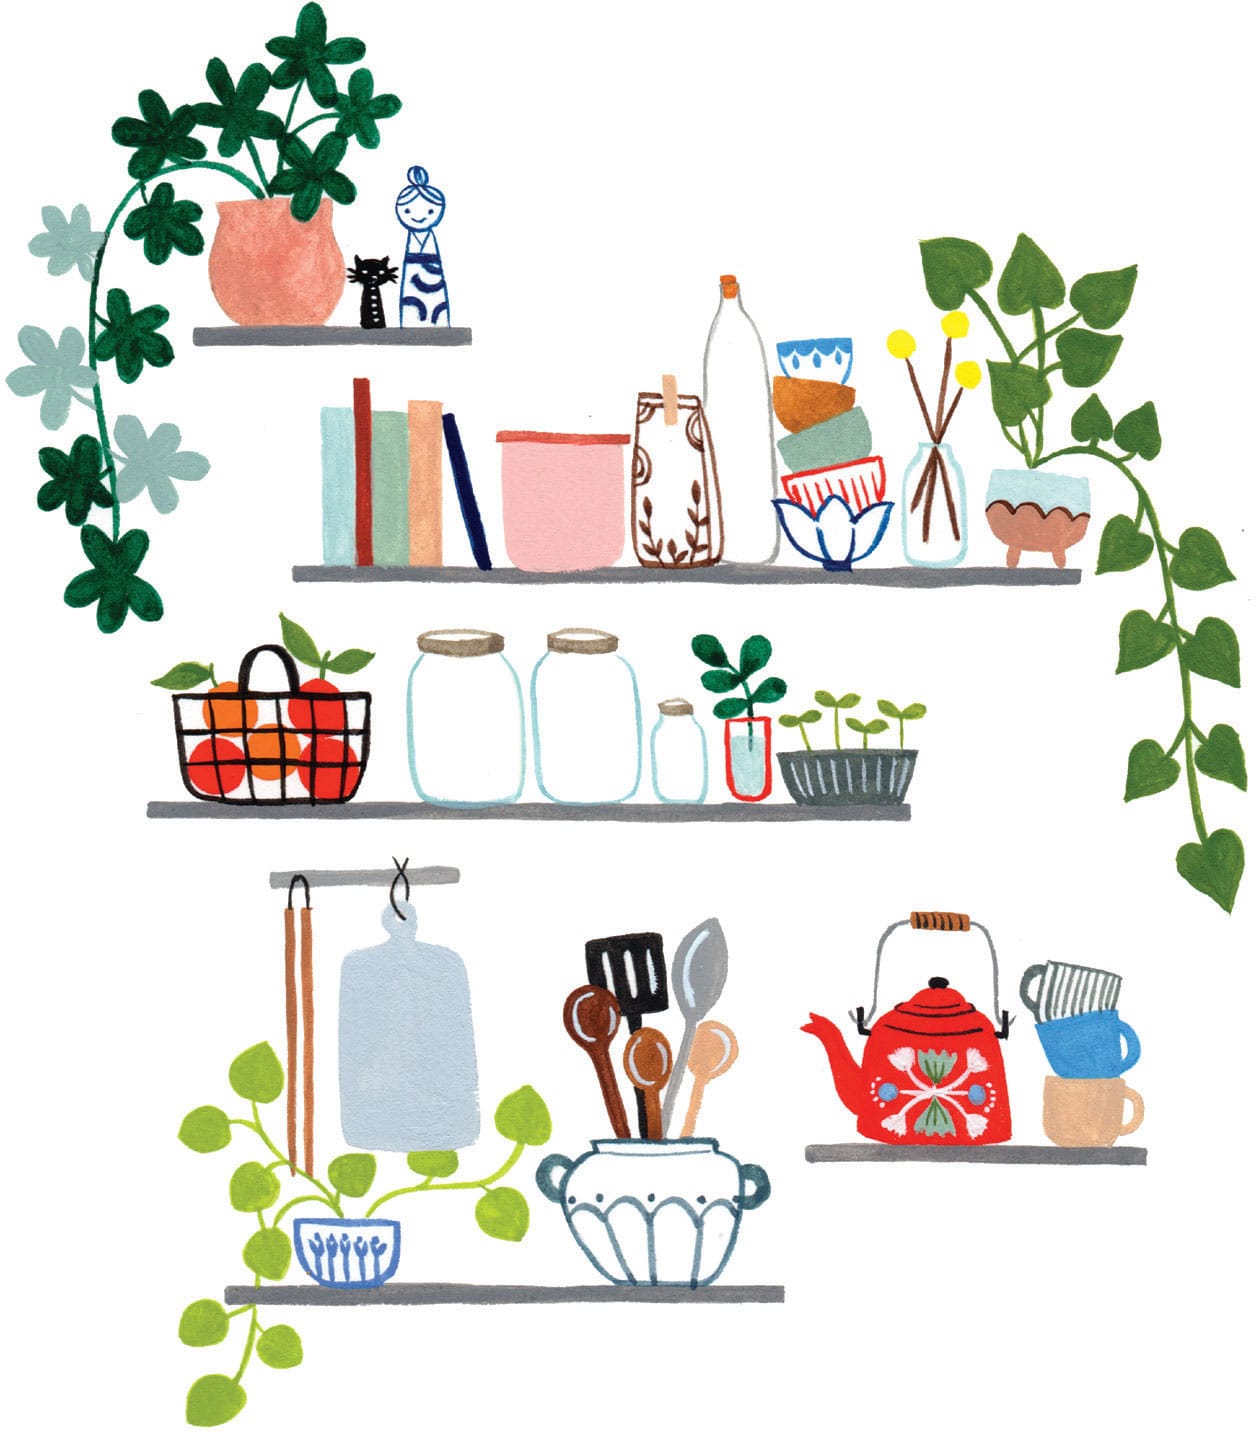
Paint the rest of the objects, nestling them in amongst the larger items. Consider the spacing between your objects, and if you add plants, play with drawing them surrounding the objects. This adds harmony to your final piece.
5
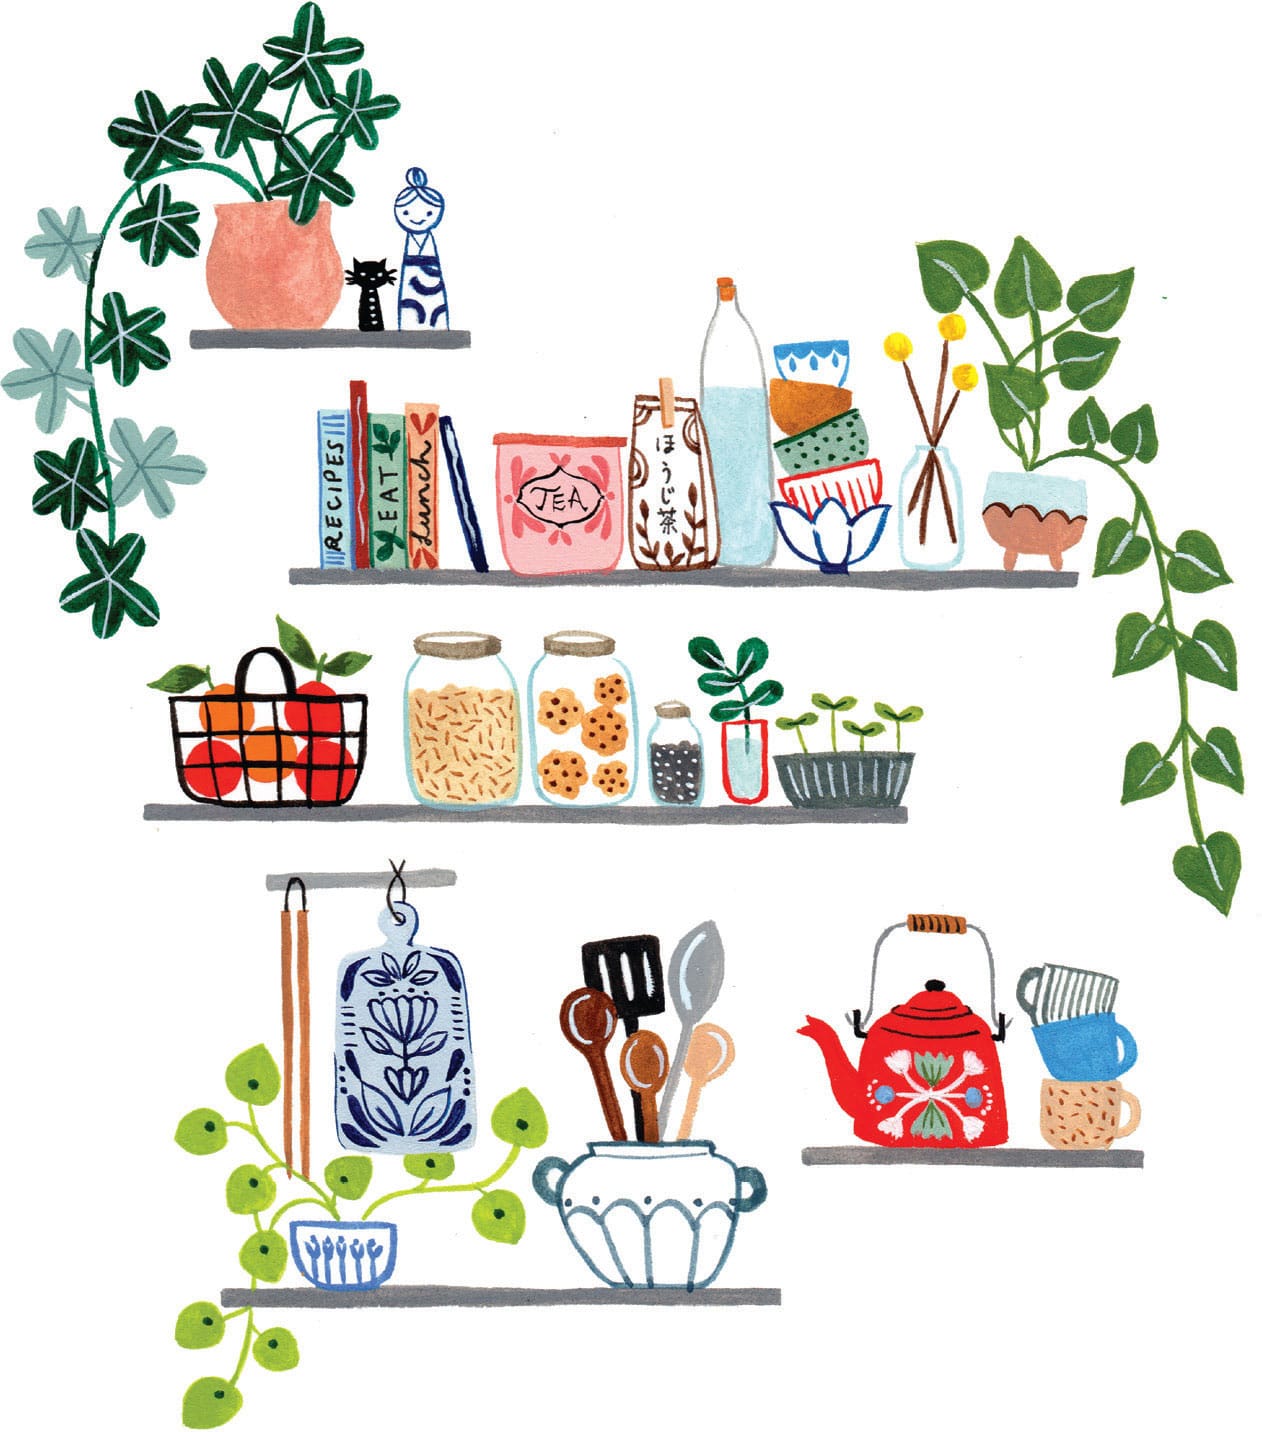
Add your final details, like the book titles, patterns on the tea canisters, and dish towels. Isn’t it lovely seeing your favorite kitchen objects come together in one place?
6
Finally, add hanging objects to the bottom shelves, and check to see if details need to be added anywhere else. If so, fill them in now.
Then frame your finished artwork and use it to decorate your own kitchen!
Exercise
HOUSEPLANTS & PETS
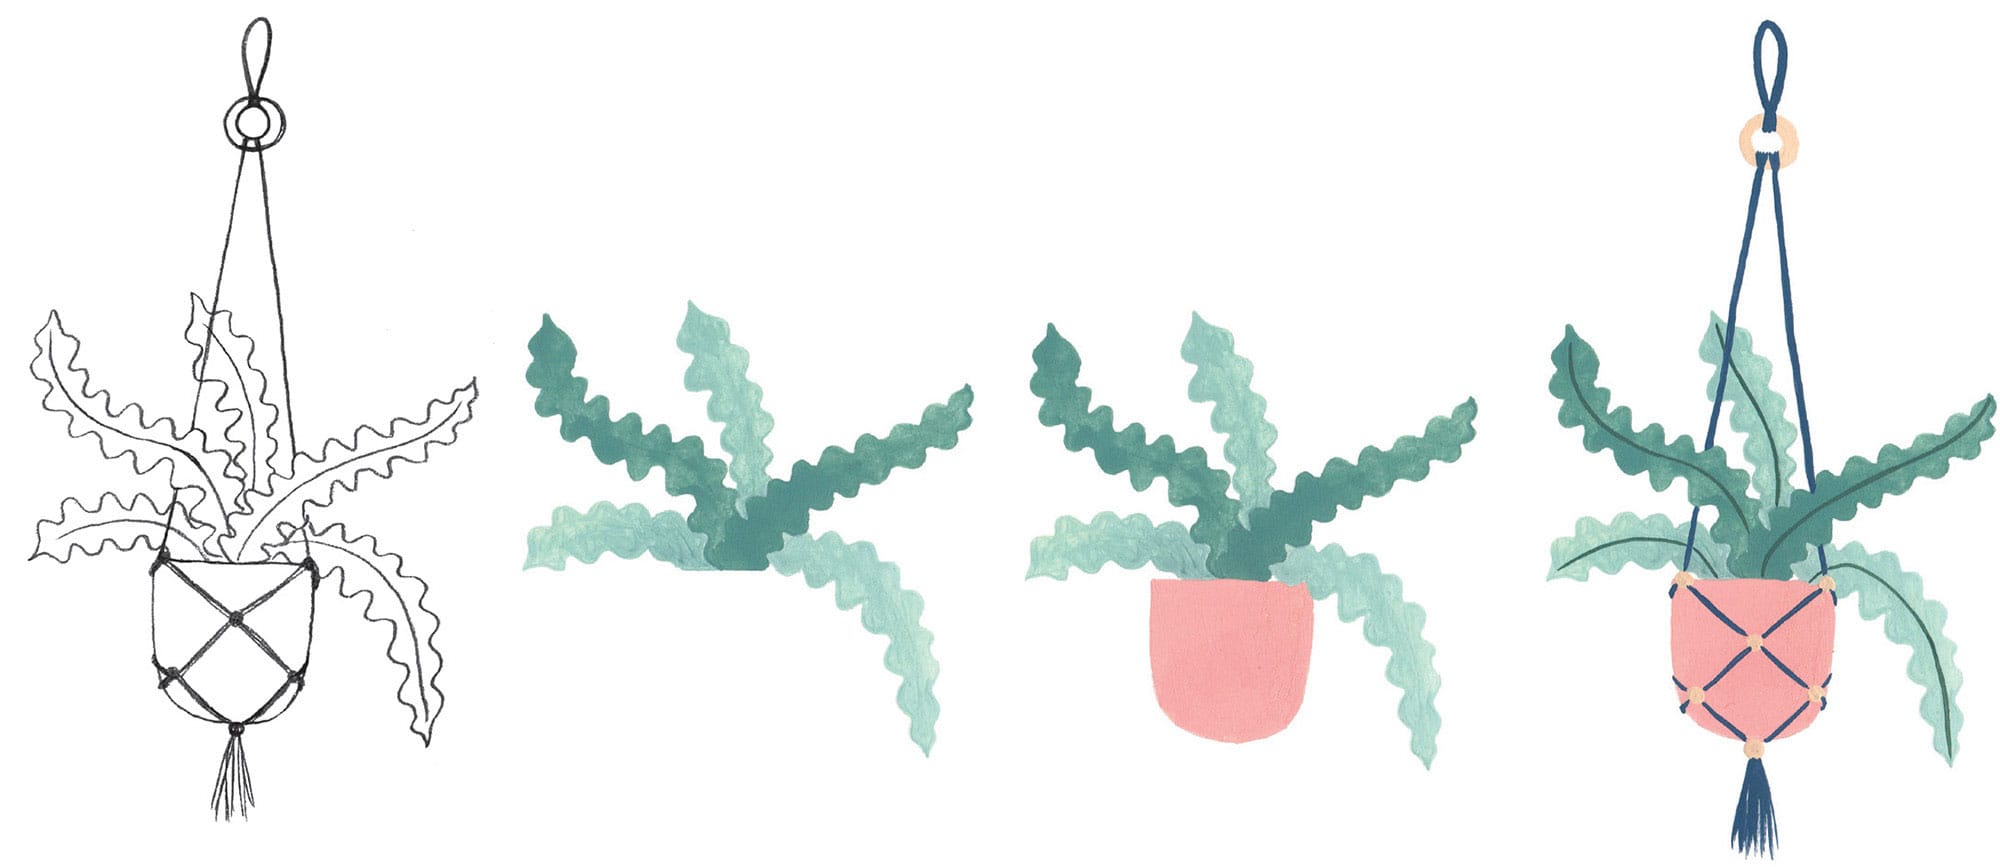
Anytime I move into a new place, I make sure to start a houseplant collection. Surrounding myself with plants calms me, and the many varieties are a wonderful source of inspiration for my art. If you’re anything like me, you probably have a collection of plants too; look around your home and see how many different leaf shapes you notice!
Alocasia

Pilea

Peace Lily

Fern
Monstera

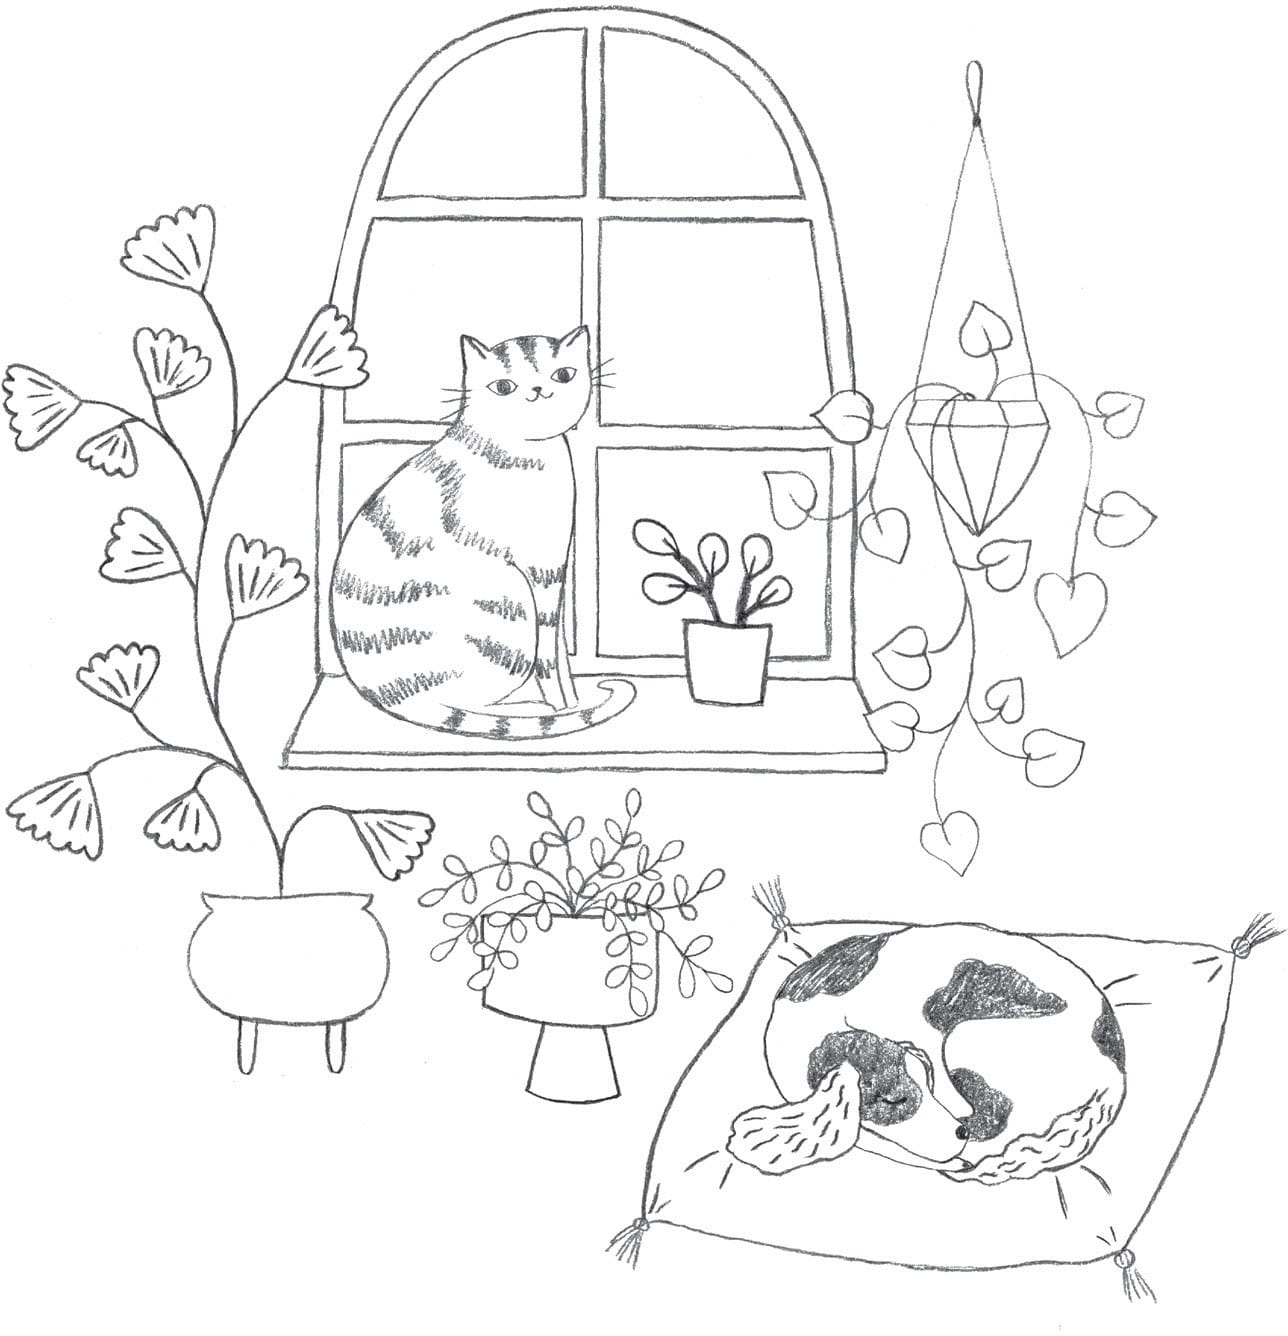
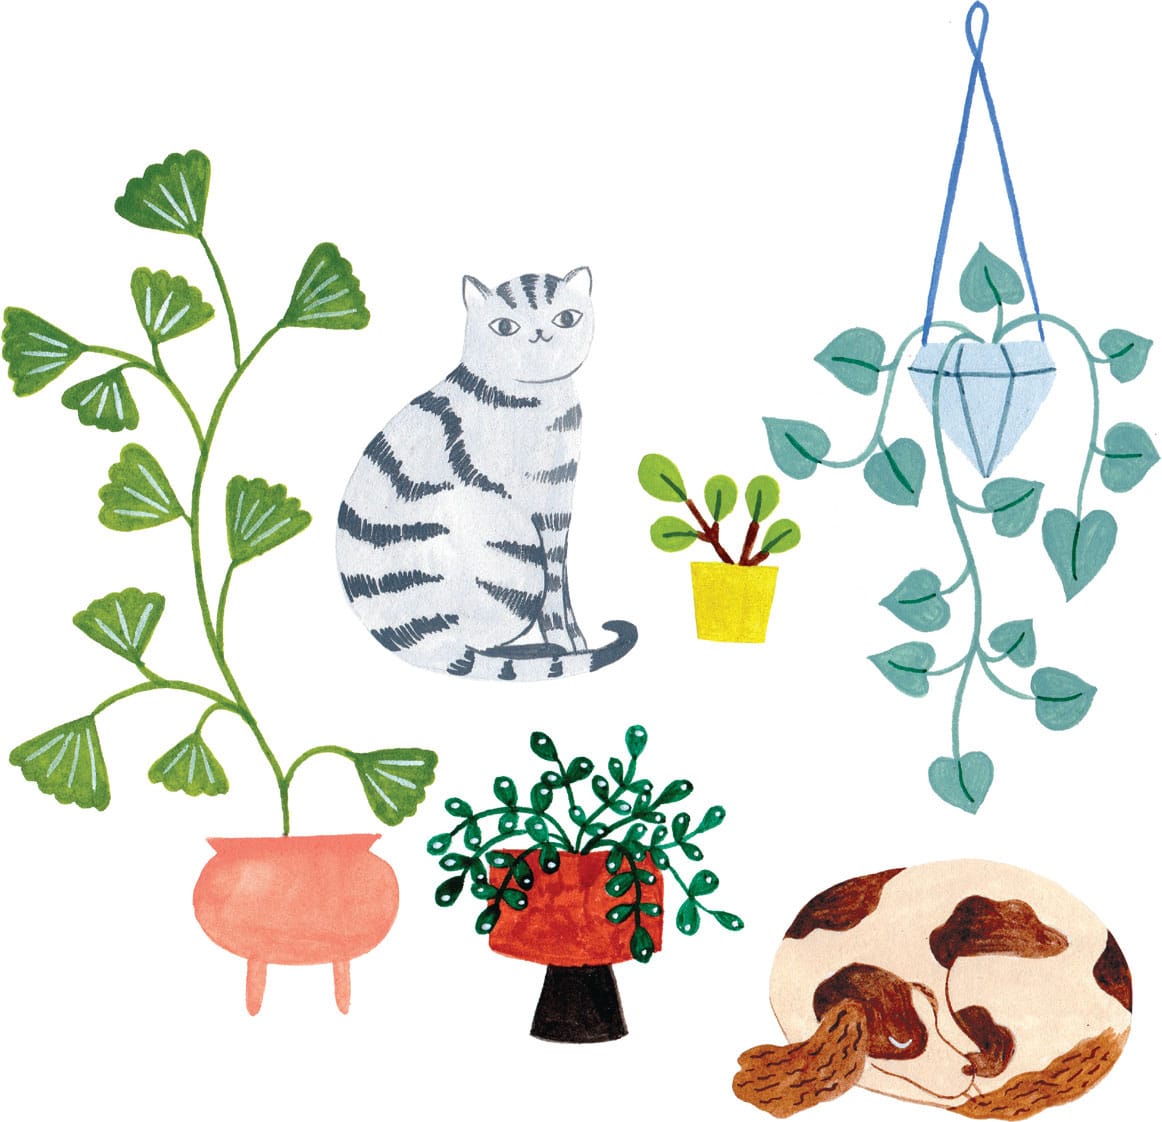
Now let’s create a drawing featuring houseplants as well as pets! My scene includes two furry friends relaxing among plants during a cozy evening at home. You can trace the sketch, or perhaps you’d prefer to draw a scene from your own home featuring your favorite furry companion(s)!
1
Sketch your scene using an HB pencil; then lightly transfer it onto watercolor paper.
2
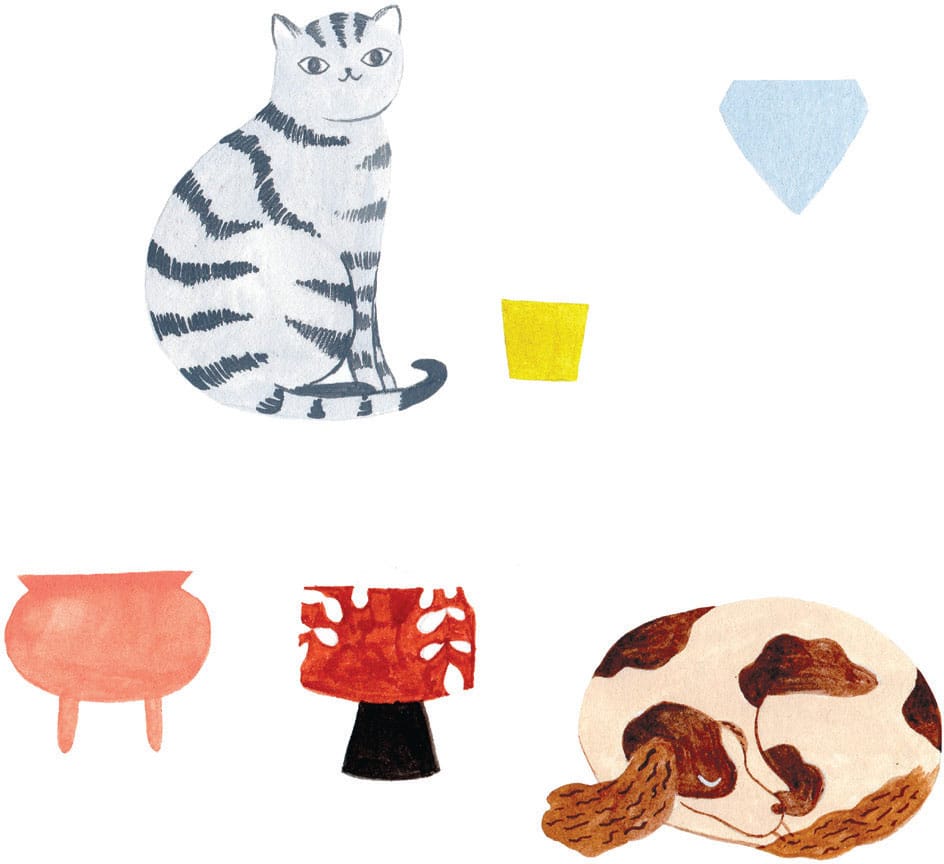
Paint the cat and dog with gouache, starting with their base colors and then adding their markings on top with a darker tone. Also paint the pots.
3
Paint the plants, including line and dot details within the leaves.
4
Lastly, add a cushion under the dog using colored pencil, and paint the window and dark blue sky behind the cat. Add falling snow to emphasize the cozy atmosphere!

Exercise
JAPANESE MEAL
Japanese meals are a feast for the eyes. Consisting of several small, seasonal dishes, they are beautifully presented with great attention to detail. They often include small bowls of rice and miso soup; a main course of fish, meat, or vegetables; and small dishes featuring tofu, salad, pickles, and sautéed vegetables. Everything is served in delightful ceramic bowls and dishes. Growing up in Japan, I loved eating this way, and I take special care to sketch or photograph my meals whenever I return. Drawing and painting these dishes preserves my memories forever.
Rice with Umeboshi (Fermented Plums)

Miso Soup

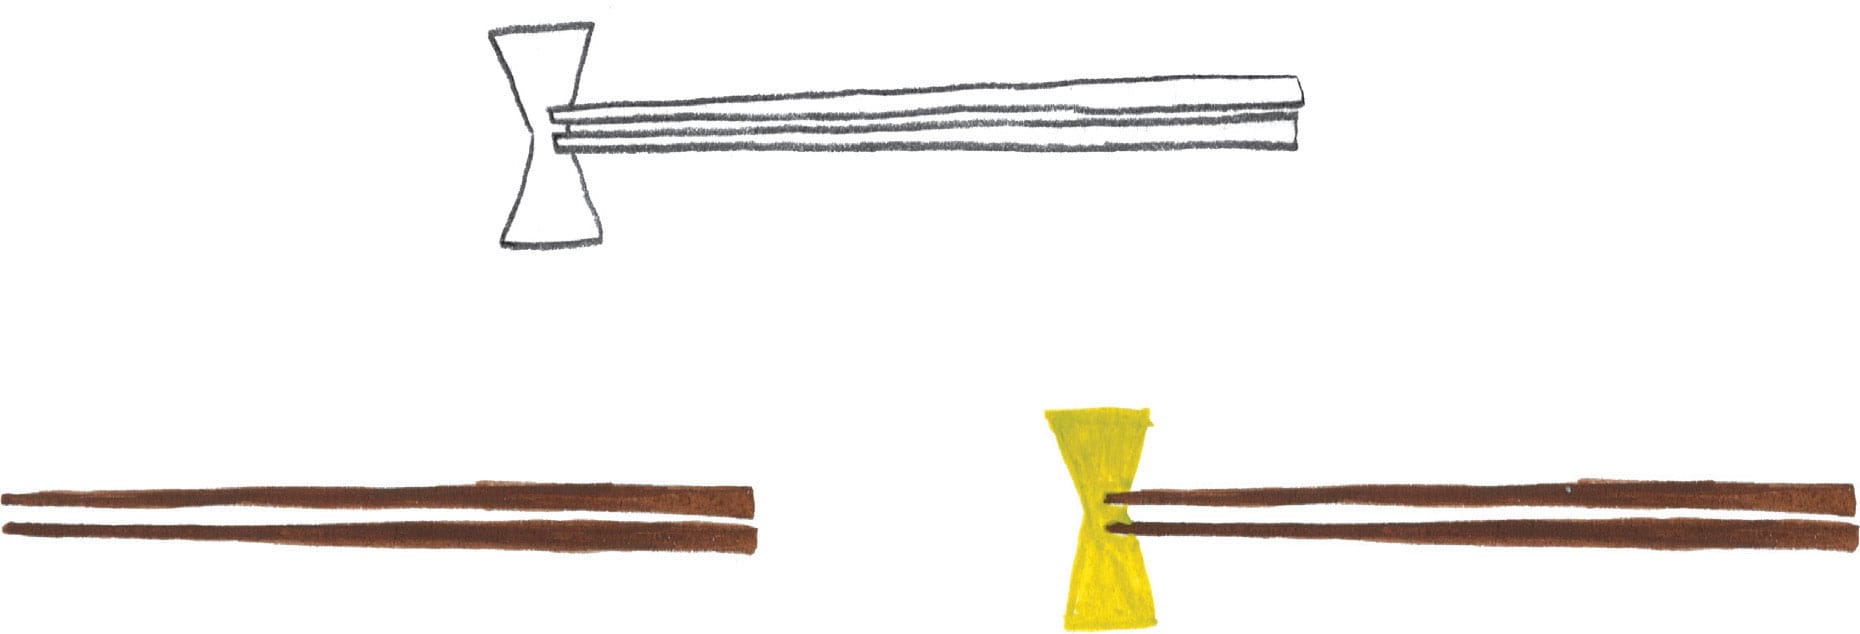
Chopsticks & Chopstick Rest
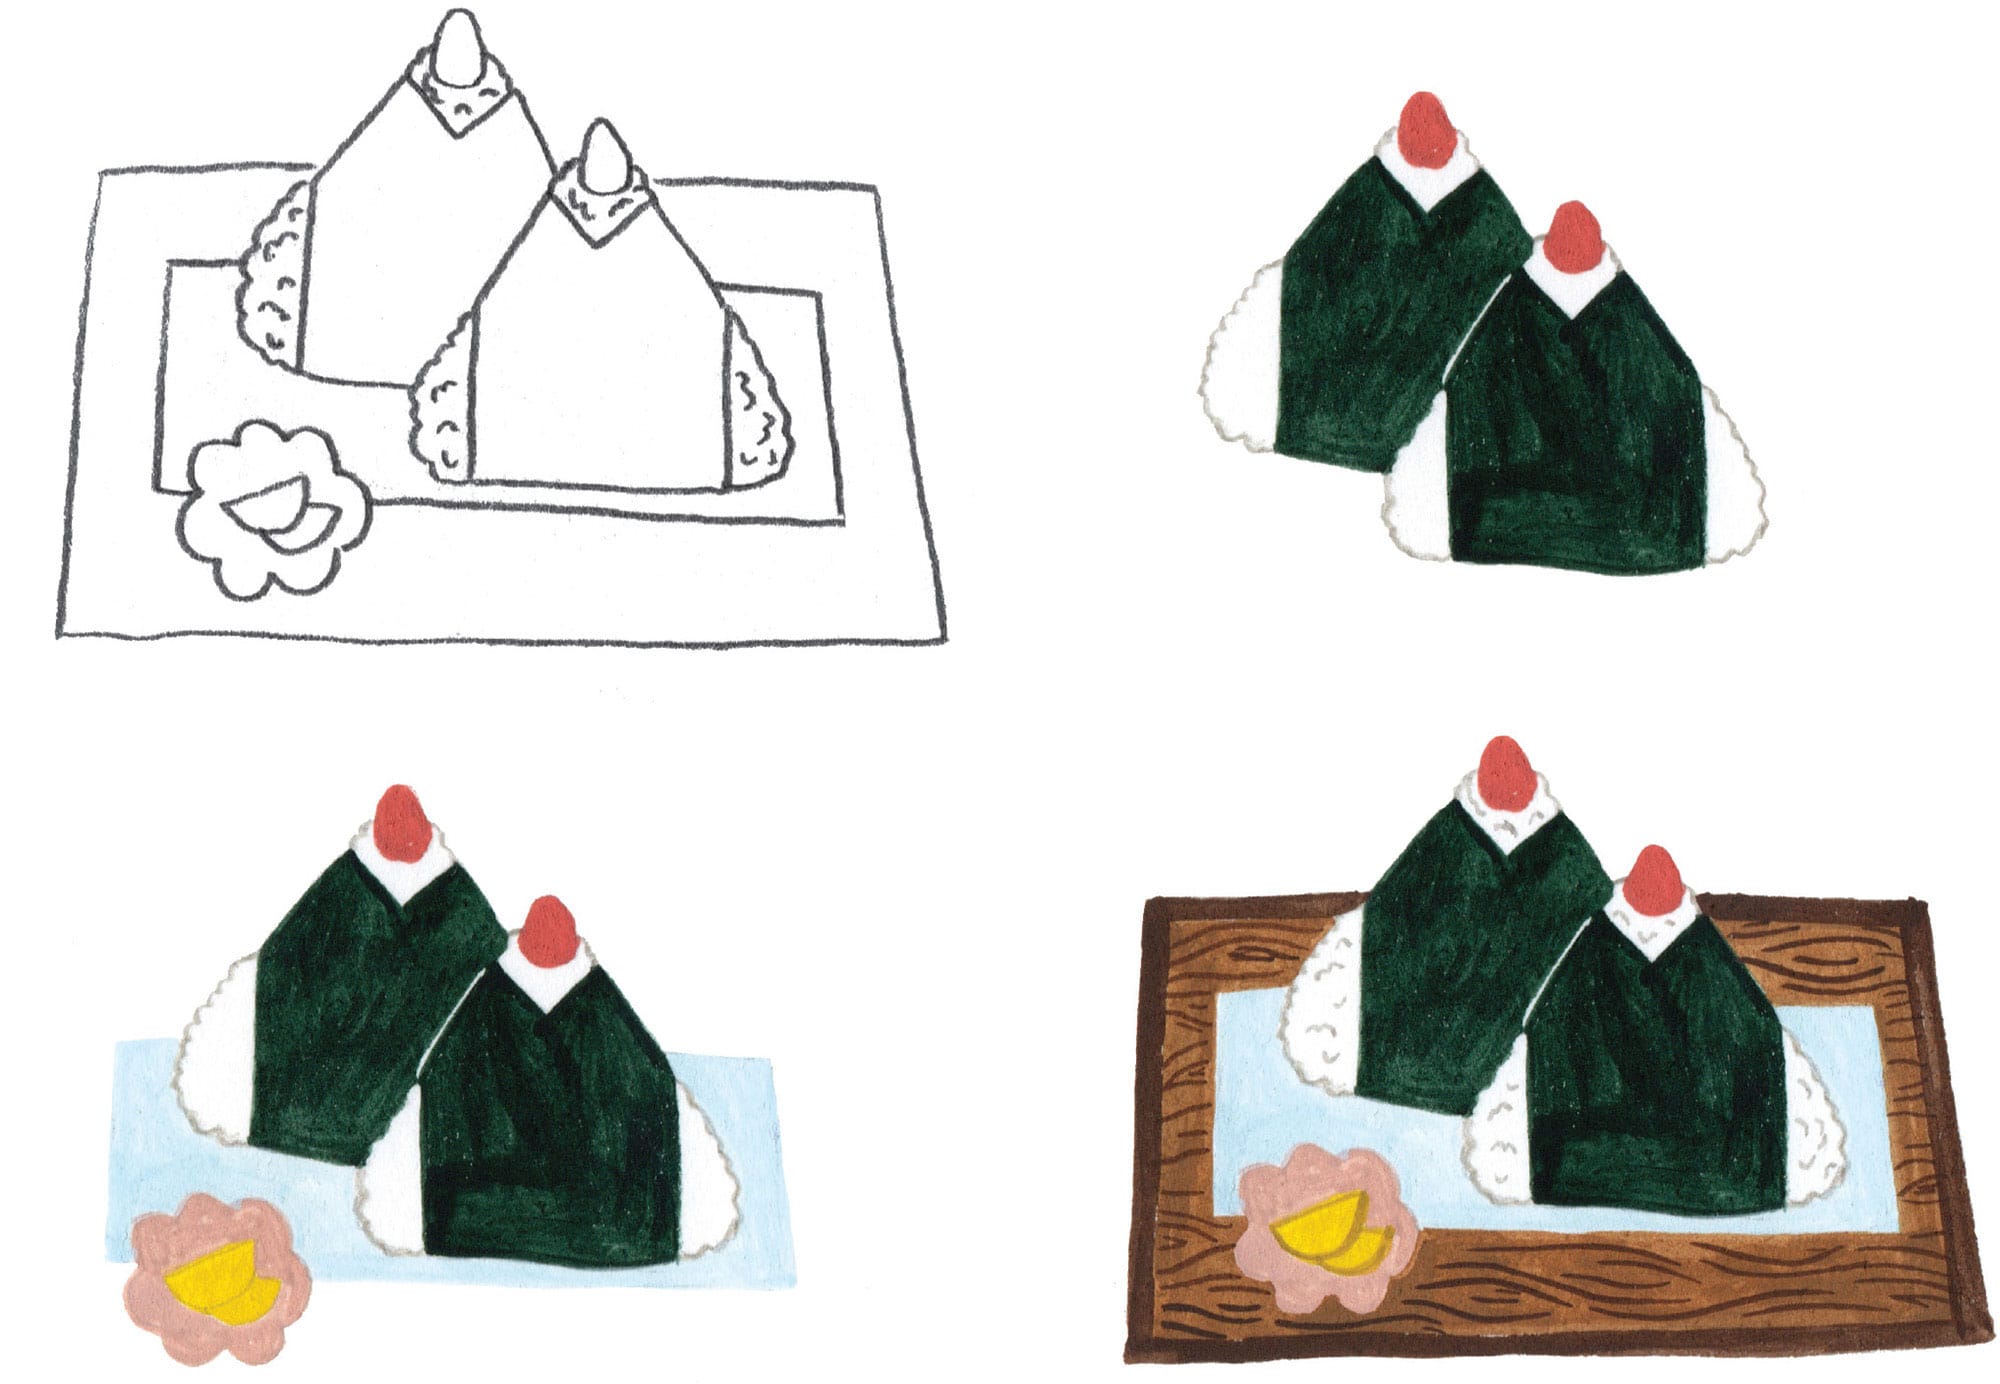
Onigiri (Rice Balls)
Tofu with Green Onions

Grilled Fish

Now that you’ve learned how to draw the elements of a Japanese meal, let’s combine them to draw a complete meal presented on a wooden tray.
1
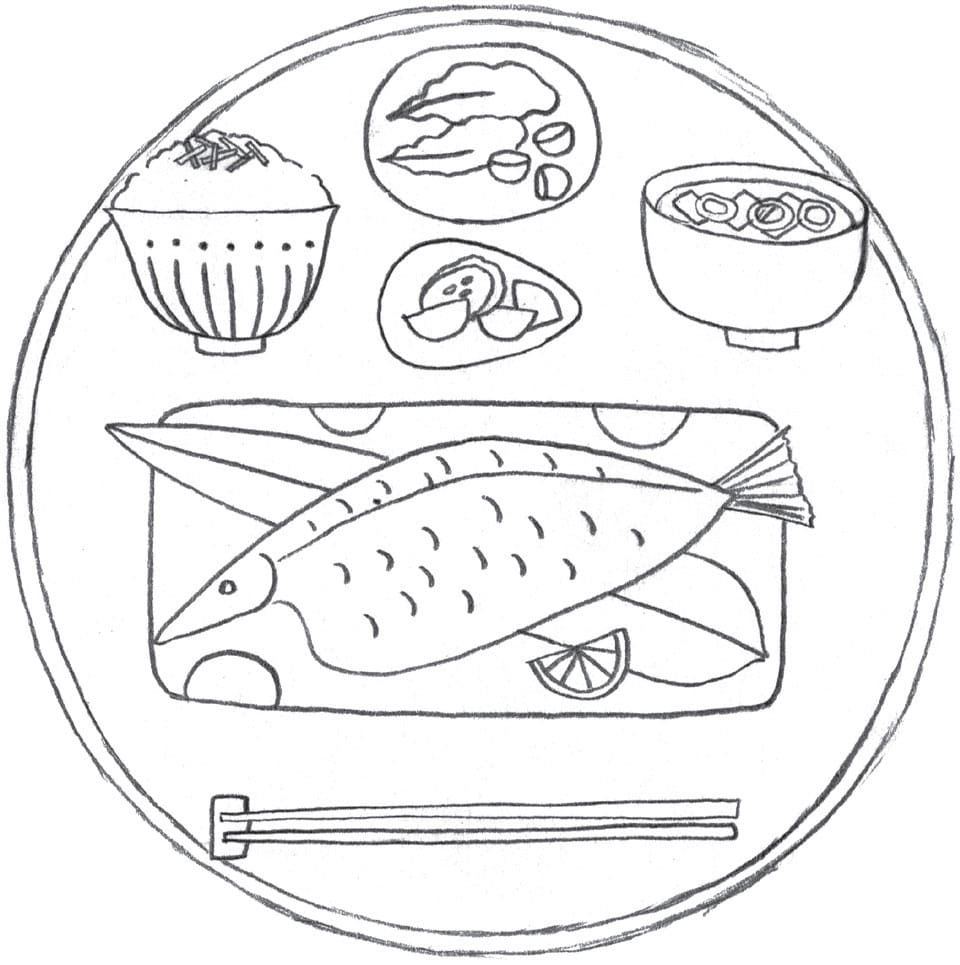
Use an HB pencil to create a sketch. I’ve drawn rice with nori (seaweed), miso soup, grilled fish with lemon on a bamboo leaf, pickles, and a salad, plus chopsticks in the front.
With a light box or window and a mechanical pencil, lightly transfer the sketch to watercolor paper.
2
With a round brush and brown gouache, fill in the tray. Carefully paint around the dishes, and don’t worry if the paint doesn’t look completely even—this will give your piece charm and personality!

3
Begin adding color to the food.
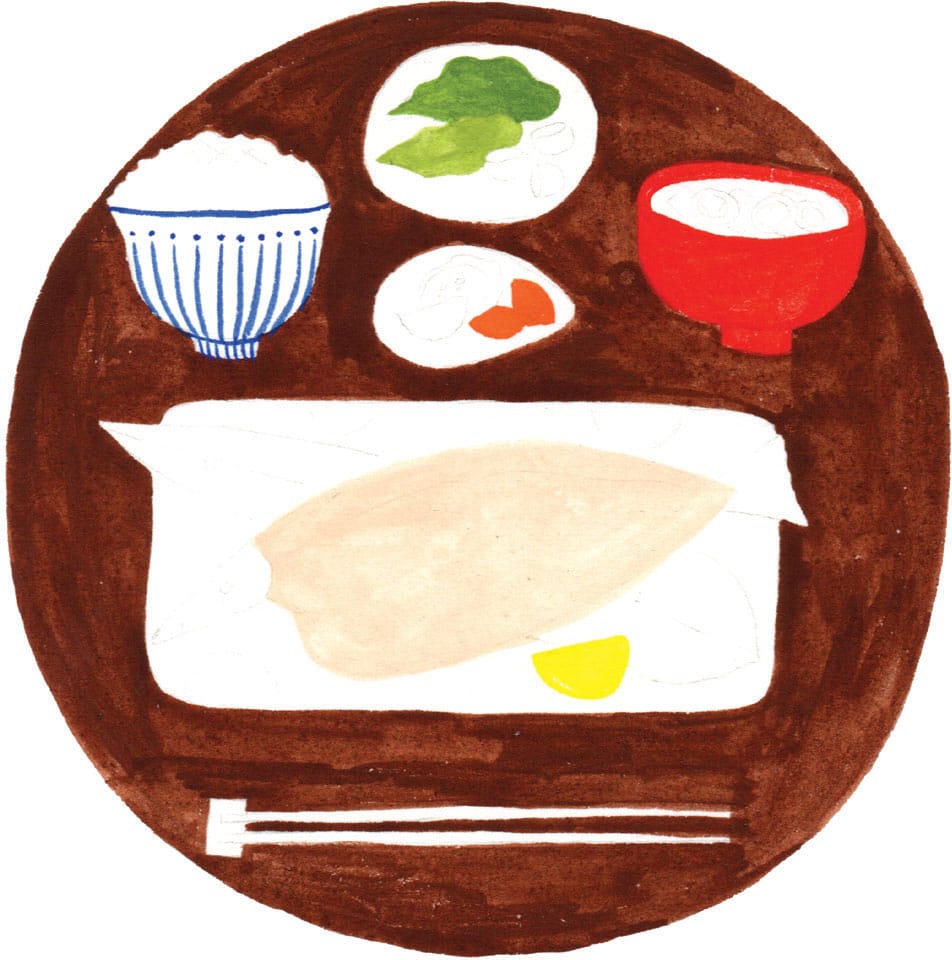
4
Fill in some of the smaller elements in the piece, such as the grains of rice, nori, and bamboo leaf.

5
Add detail to each dish: Define the shape of the fish, paint the chopsticks, and add fine details to the vegetables, soup, and ceramic dishes.
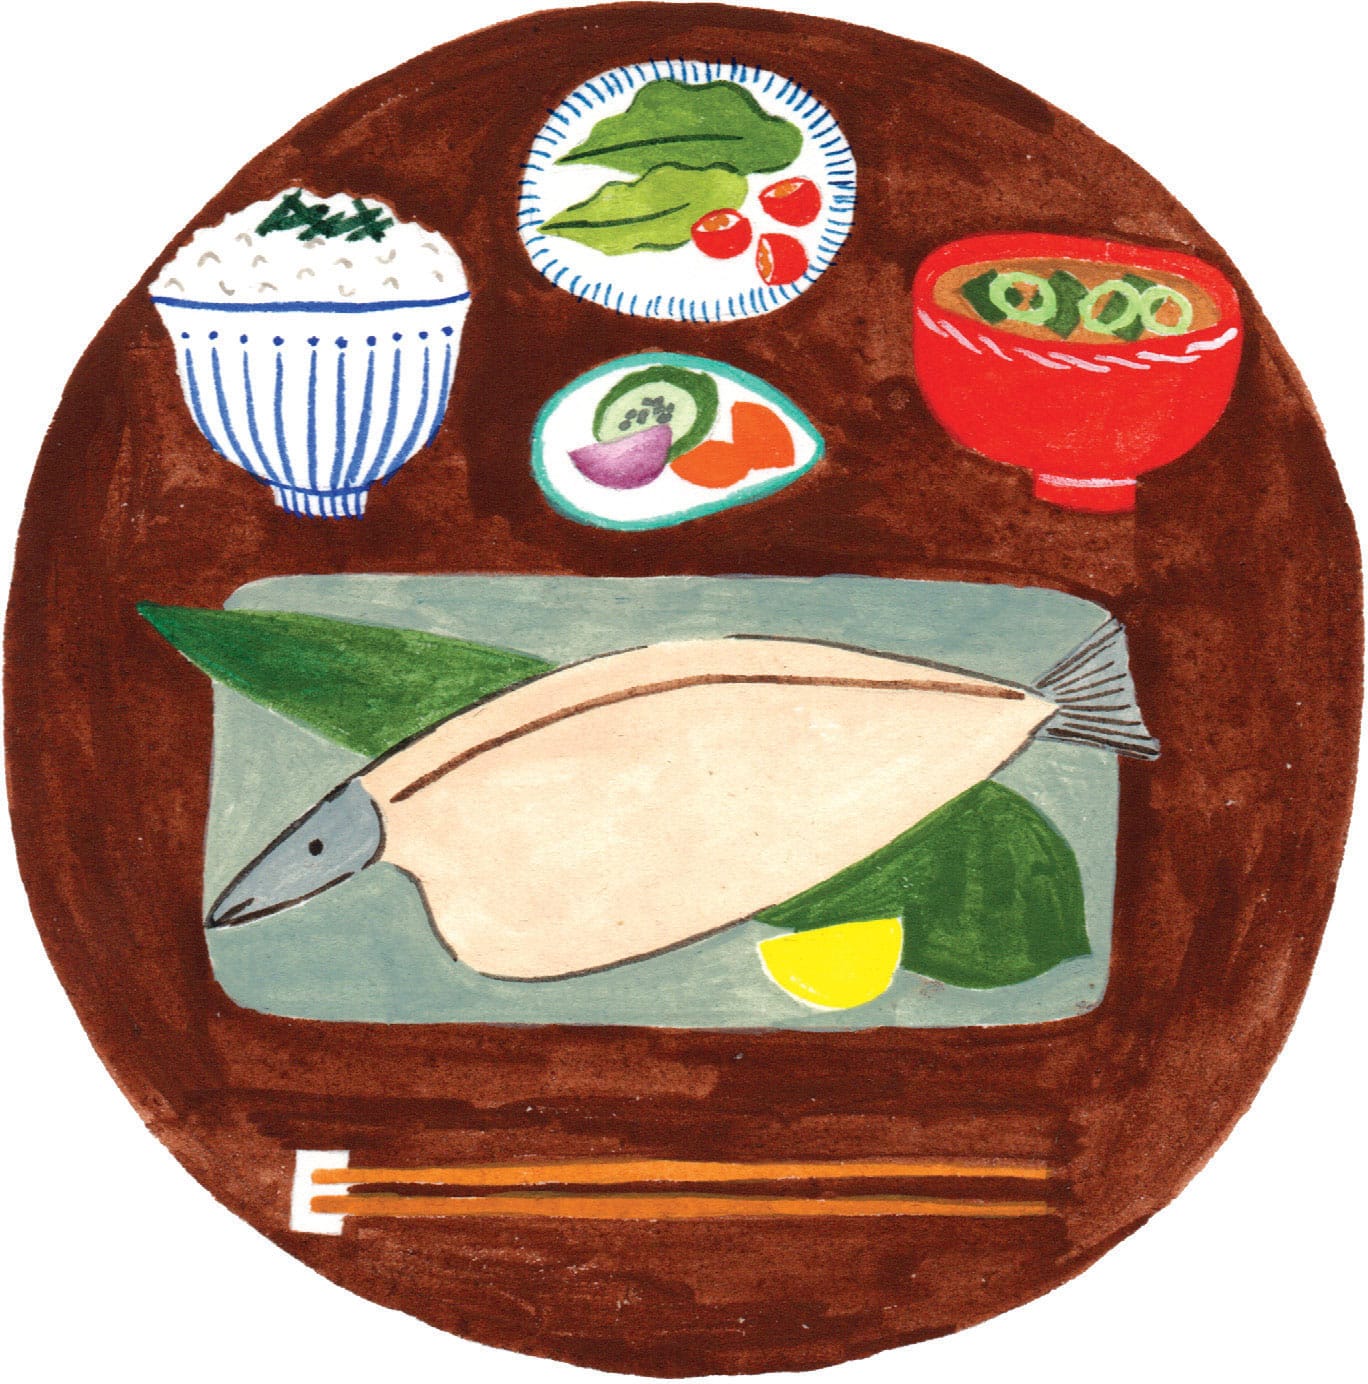
6
With thin strokes and shades of brown, paint grill marks on the fish. Add details to the bamboo leaf, lemon slice, and chopsticks.

7
Lastly, add texture to the wooden tray using a mixture of white and brown gouache and a round brush.
Now you can draw or paint a meal you shared with a loved one and give them the piece of art! This makes a beautiful, personalized way to remember your time together.
