As the requirements for our UI grow, we need to have more granular control of our views. We need to be able to tell what state our view is currently in inside our code. Is it, for example, shown or did the user just close the app? Is the app currently navigating from one view to another or is it just about to be shown, but still loading. All of these states refer to the life cycle of the UIViewController, which is very important when we want to build a great UI. The life cycle of a view can be overwhelming to dive into, but often we only need a couple of these states in order to make our UIs as we want them to be. The way we handle these states is by implementing certain methods defined by Apple. Then, Apple guarantees to call these methods at the right moment according to the view life cycle. Let's take a look at some of the important states related to the UIViewController:
viewDidLoad(): This method will be called after a view has been loaded and is about to be shown. This state is useful for setting up any initialization or configuration that needs to be set in code opposed to the storyboard.viewWillAppear(_:): This method will be called afterviewDidLoad(), right before the view is shown to the user. This state is useful for reloading data or doing last-minute view setup. It is important to know that this state can be triggered multiple times if the user takes an application back and forth from the background (without leaving this view). This is different fromviewDidLoad(), which in this case will be called only once (the first time the view gets loaded).viewDidAppear(_:): This method will be called afterviewWillAppear(_:), right after the view has become visible to the user. This state is useful for firing off animations as soon as the user is able to see the view.viewWillDisappear(_:): This method will be called sometime afterviewDidAppear(_:), right before the view is hidden from the user. This can be due to the user navigating further in the application flow or putting the app in the background.
We have covered a lot of fundamental concepts related to UIs in iOS in this chapter, and it is now time to use that knowledge to create a small application. We will create an application named Starry Night, which is a simple application that will animate the background of the application based on input from the user. Specifically, the user will be able to press two buttons: Day and Night; we will animate the background based on that.
Using the same approach as explained in Chapter 11 , Simon Says, we will create a new (Single View Application) project that we name Starry Night. Remember to save the project on a place on your hard drive where you will be able to locate it again.
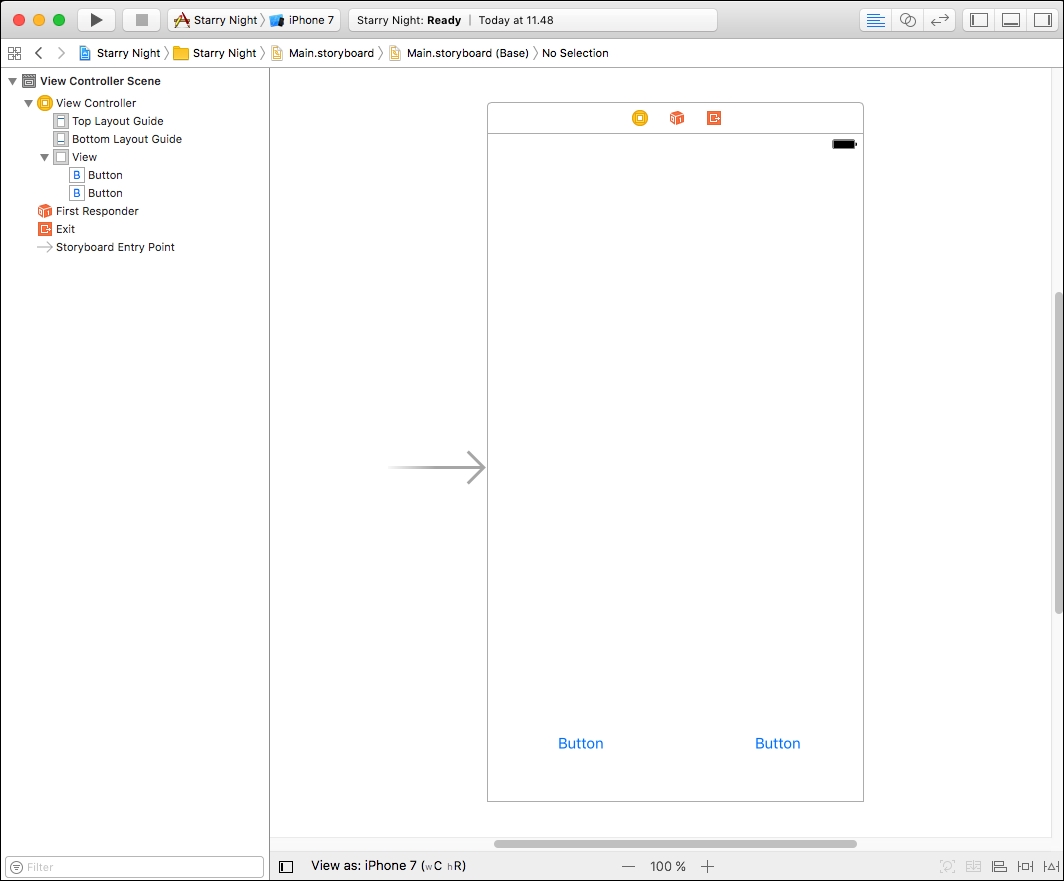
Next, we will open up Main.storyboard and drag two buttons onto our canvas toward the bottom.
Tip
All related source code for this chapter can be found here: https://github.com/swift-book-projects/swift-3-programming-for-kids/tree/master/Chapter-12
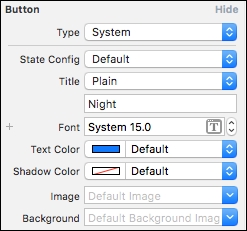
Then, we will name the button on the left Day and the button on the right Night. You can rename the button by double-clicking on the button on the canvas or using the inspector on the right side of Xcode, as can be seen in the following screenshot, where we just named our button Night:
With that in place, we need to set up the Auto Layout constraints to ensure that our interface scales correctly when being run on devices with different screen sizes. Start by selecting the button with the name Day in the lower-left corner. Then, after it has been selected, click on the small square icon at the bottom:
Clicking on that icon will bring up a small window that will assist us in adding some constraints.
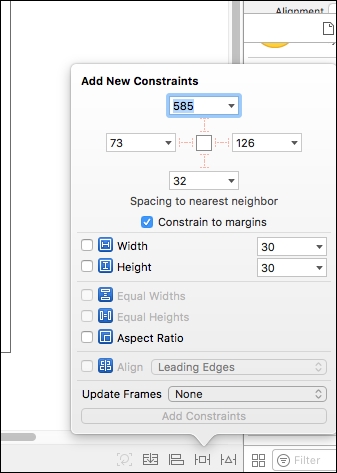
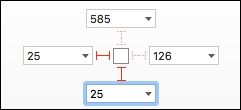
The first part of the window that has a small square symbol with values on each side makes it easy for us to add constraints for our button, which will tell it how to be positioned in relation to its nearest neighbors in the view hierarchy. In this case, we are interested in ensuring that it will pin to the bottom and to the left, offset by 25 points. To do this, we enter 25 in the field to the left and to the bottom of the square. Note how the red lines become solid as we enter values, indicating that our constraint is now active on those sides of our view:
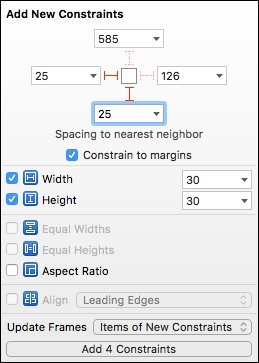
Having pinned the button to the lower-left corner, we need to specify the size of our button. Luckily for us, Interface Builder (IB) has already filled in its current size, which should match the size of the name we added for our button. All we need to do is activate these constraints. To do this, we just check the two checkboxes for Width and Height. Lastly, we select the Items of New Constraints option for Update Frames to ensure that the position of our button will be updated on the canvas. This will make it a little easier for us to validate that the constraints we just added correspond to how we imagined the position of our button. All the constraints for the Day button should look like this:
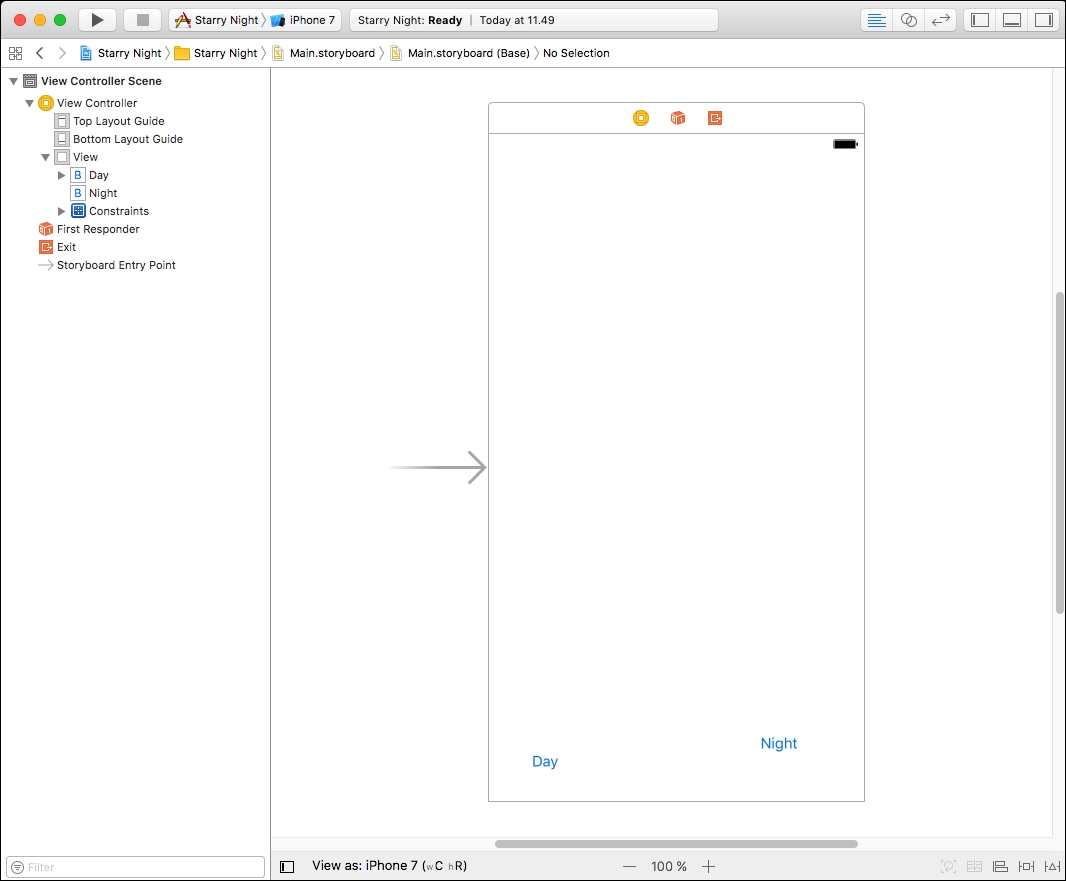
After clicking on Add Constraints, your canvas should look something like this:
Now we will do the same thing for the button on the right named Night but, in this case, we will make it pin the right-hand side and the bottom of the square. This means that the constraints to add should look as follows:
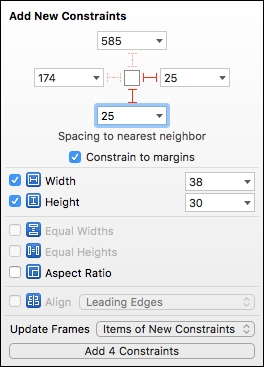
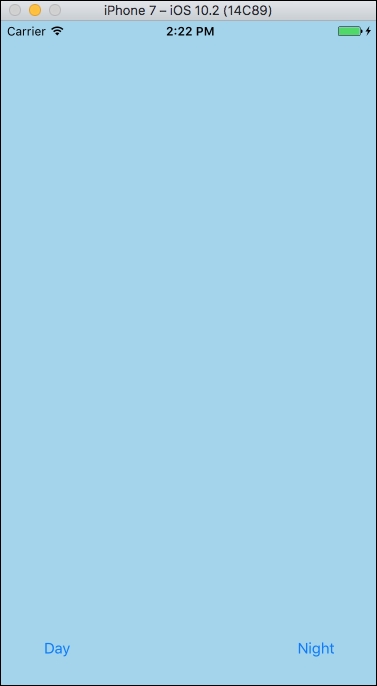
Note how the values for Width and Height in this case are not equal as the name of this button is longer. Then, try to run the application on an iPhone 7 and ensure that our buttons are positioned correctly toward the corners at the bottom:

In order to validate that our UI scales correctly across devices with different screen sizes, let's try to run it on an iPhone 7 Plus as well. If the constraints have been set up correctly, it should look great. Our interface now scales with the size of the screen. Instead of adding extra white space on the right-hand side and at the bottom, our interface now looks similar to how we designed it for iPhone 7.
In the earlier chapters, we programmed console applications using playgrounds and in the previous chapter, we started looking at how we can use IB in Xcode to lay out views. The last but most important part is how we tie the two worlds together, that is, how do we write code that can be triggered by the click of a button? How do we update the background color of our view when something happens in our code? The glue between these two worlds is something called a View Controller, which has the UIViewController type.
Note
When writing iOS applications, and software in general, we often use patterns that tells us how to organize our code as well as how the different parts should communicate. When writing iOS application, a pattern called Model-View-Controller (often referred to as MVC) is very popular. The details of this pattern is outside the scope of this book, but we encourage any interested reader to read up on this.
The UIViewController is a special type that can be tied together with a view (the canvas we looked at) in a storyboard. This enables our app to communicate back and forth between the view and our code. Before looking into how to do this, open up the ViewController.swift and simplify its content by removing some methods so that you end up with the following code:
import UIKit
class ViewController: UIViewController {
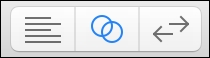
}Next, we will open Main.storyboard again and then make Xcode show the Assistant editor by clicking on the icon with two circles in the top-right corner of Xcode:
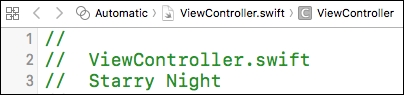
This should give you two vertically divided source editors. The one on the left should be the storyboard we already selected and the one on the right should automatically be the ViewController.swift file. If not, ensure that you set it to automatic at the top of the right source editor so that it selects this file automatically:
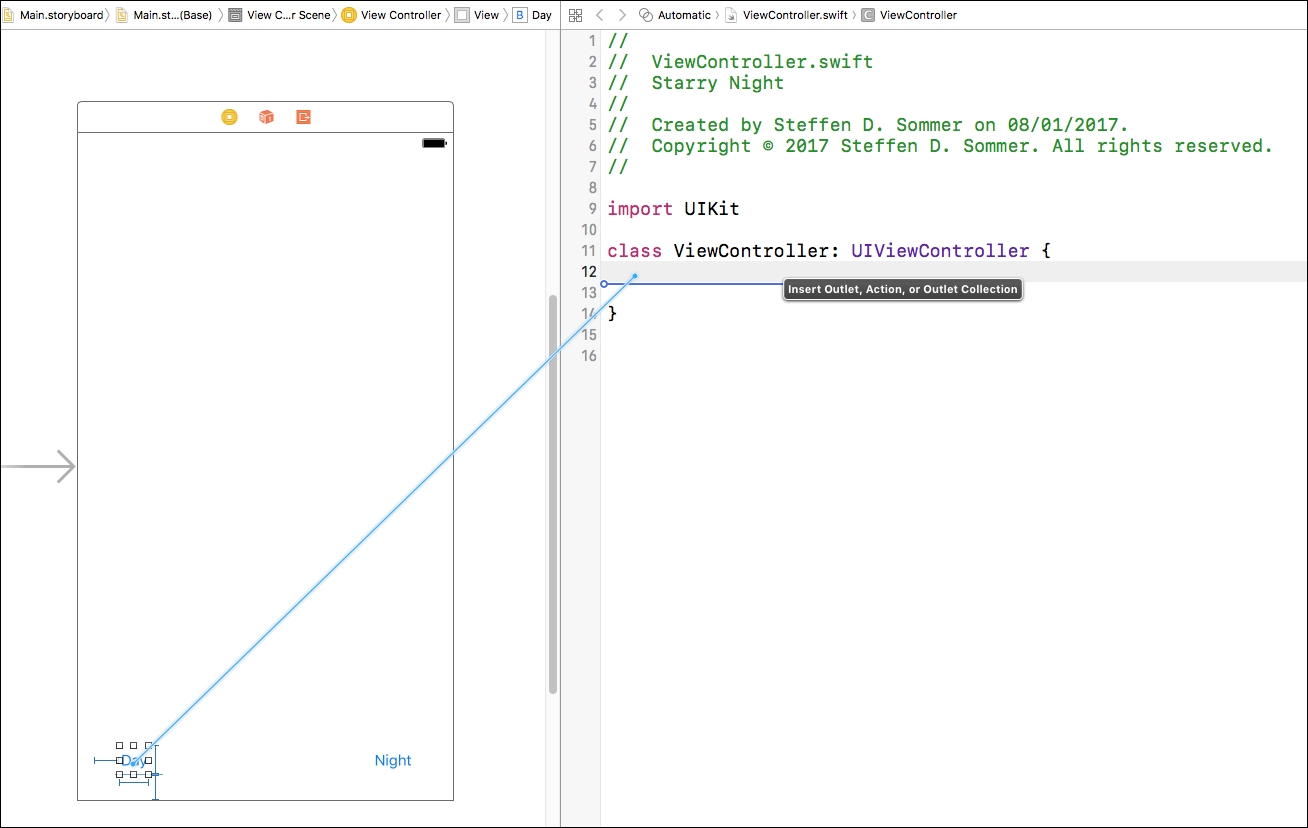
Having these two views side by side, we are now able to connect the two. Press and hold Ctrl while holding the left-click on the button named Day in the canvas. Then, while holding the left-click and beginning from the button, dragging into the editor on the right-hand side in the view controller and let go when inside the class body:
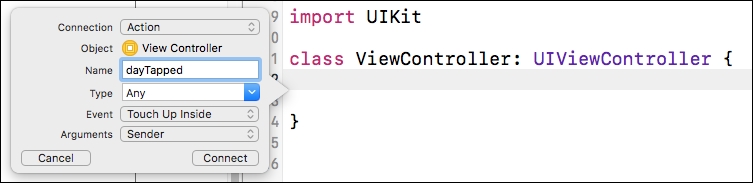
If done right, this should give you a small popup, which lets you define the connection we are about to make. In that popup, we will set the Connection to Action and type in dayTapped as the name of our action:
After pressing Connect, Xcode should generate some code for the view controller class so that you will end up with the following:
import UIKit

class ViewController: UIViewController {

    @IBAction func dayTapped(_ sender: Any) {
    }

}
This means that when we tap on our Day button, this function, named dayTapped, will be called. We will now do the same thing for the Night button so that we end up with two functions inside our class body. Let's call the second function nightTapped and remember to set the Connection to Action. Your ViewController.swift should now look like this:
import UIKit

class ViewController: UIViewController {

    @IBAction func dayTapped(_ sender: Any) {
    }

    @IBAction func nightTapped(_ sender: Any) {
    }
}
Now that we have a place to put code that will be called, we can add our animation code, which will take care of animating the background when pressing the buttons. To do this, we will make a small UIView animation where we will specify the duration of the animation and the actual work involved in the animation. For our dayTapped function, we can add the following:
UIView.animate(withDuration: 1, animations: {
    self.view.backgroundColor = UIColor(red: 0.64, green: 0.83, blue: 0.93, alpha: 1)
})
In the preceding code, we say that the animation should take exactly one second to perform, and the animation itself involves changing the background color to a light blue color. We can do the same for the nightTapped button, but in this animation we will use the another UIColor: UIColor(red: 0, green: 0, blue: 0.20, alpha: 1), which will give us a nice dark blue color.
ViewController.swift should now contain the following code:
import UIKit

class ViewController: UIViewController {

    @IBAction func dayTapped(_ sender: Any) {
        UIView.animate(withDuration: 1, animations: {
            self.view.backgroundColor = UIColor(red: 0.64, green: 0.83, blue: 0.93, alpha: 1)
        })
    }

    @IBAction func nightTapped(_ sender: Any) {
        UIView.animate(withDuration: 1, animations: {
            self.view.backgroundColor = UIColor(red: 0, green: 0, blue: 0.20, alpha: 1)
        })
    }
}
If you run the application and try to press the buttons with the labels Day and Night, you will see that it will animate between the colors we specified in our code: