
These infused ingredients are meant to add extra flavor to your everyday cooking adventures and help you jazz up the recipes that you’re already comfortable making. They consist of pantry staples like salt, sugar, and butter, as well as some not-so-typical condiments that are staples in my kitchen and that I recommend making a part of your pantry, too! Some of the recipes in this book specifically call for these items, and with those that don’t, you can feel free to sub in a flavored ingredient for a little extra kick—for example, using the Garlic and Bay Leaf Salt in a savory recipe that just calls for plain ol’ flake kosher sea salt. The following are flavor-building tools that can help you experiment with the way different tastes play off each other, and to generally heighten the flavor of your everyday dishes. Now, go and experiment!
The icons below indicate the season when you should consider making the recipes in this chapter, highlighting when the ingredients are at their peak or when the recipes might be best enjoyed. But feel free to make these items any time of year if the mood strikes.
 Spring
 Summer
 Autumn
 Winter
I love salt. It gives food depth and that extra-tasty oomph. I like using homemade flavored salts because 1) they are a fun way to add some new tastes into the mix, 2) they’re an awesome way to preserve seasonal flavors, and 3) they can stretch out the flavors of expensive ingredients and make them go further.
This salt preserves the wonderfully mild green onion flavor that chive blossoms have while creating a gorgeous salt with little purple flowers mixed in that’s awesome for adorning dishes like salads or steaks.
Makes about 1 cup (268 g)
10 chive blossoms
1 cup (268 g) flake kosher sea salt
—Separate the individual chive blossoms and place them in a bowl with the sea salt. Stir to evenly distribute the blossoms throughout the salt and pour into an 8-ounce (240-ml) jar. Seal and store in a dark place for 2 weeks before using. The salt will keep in the jar in a cool, dark place for up to 2 years.
This is the most versatile of my homemade salts. I put it on roasted vegetables, hamburger patties, salads, soups, and so on. It just takes anything savory up a notch.
Makes about ½ cup (134 g)
½ cup (134 g) flake kosher sea salt
3 dried bay leaves, pulsed in a blender until finely crumbled
—Preheat the oven to 200°F (90°C). Line a baking sheet with parchment paper. Using a mortar and pestle, blend the garlic, salt, and bay leaves together until the garlic is crushed and evenly distributed throughout the salt mixture. Spread on the prepared baking sheet and bake for 50 minutes.
—Allow to cool before breaking the salt blocks off the baking sheet. You can crumble them by hand for a coarse-textured salt, or pulse them in a blender or food processor for a fine-textured salt. Store in an airtight container. Best if used within 1 year.

I love using this salt to impart the exotic, warm, and slightly floral flavor that is entirely unique to saffron. The saffron also turns the salt an amazing shade of yellow when it’s fresh, and since saffron is expensive, it helps make a little of this pricey ingredient go much further.
Makes about ½ cup (134 g)
½ cup (134 g) flake kosher sea salt
½ teaspoon loose saffron threads
¾ teaspoon filtered water
—Using a mortar and pestle, blend together the salt, saffron, and water until the saffron threads are broken into small pieces and the entire mixture is yellow, 2 to 3 minutes. Spread the mixture out onto a large, flat plate and allow to dry at room temperature for 6 hours before storing in an airtight container. Best if used within 1 year.
There’s so much more to the world of sweeteners than just sugar (although straight-up sugar is admittedly tasty stuff), and I love experimenting with infusing my favorite flavors into the wide variety of sweet-tooth fuels out there. I have recipes for infused granulated sugar, honey, and maple syrup below, but other sweeteners I’d recommend experimenting with are agave, coconut/palm sugar, blackstrap molasses, date sugar, maguey sweet sap, and brown rice syrup. If you want to dive into experimenting with infusions, I recommend using dried ingredients rather than fresh ones so you don’t have to worry about the moisture in fresh ingredients causing food spoilage.
This is based on my favorite condiment from my go-to taco stand in Los Angeles, Hugo’s Tacos. This stuff drizzled on carnitas is like riding a rocket to heaven.
Makes about 2¼ cups (540 ml)
5 whole dried chipotle peppers, halved lengthwise, stemmed, and seeded
2 cups (480 ml) honey
—Put the peppers in a 16-ounce (480-ml) mason jar. Pour the honey into the jar until the peppers are completely submerged. Seal the jar and store at room temperature out of direct sunlight for 3 weeks, shaking the jar once every week.
—Pour the mixture into a blender or food processor and pulse until the peppers are broken into small pieces but not completely pureed. Pour the mixture back into the jar and seal. Store at room temperature out of direct sunlight. Best if used within 1 year.
This is what to use if you want your pancakes to be as addicting as heck. The combination of warm maple, herbal rosemary, and floral vanilla creates the ultimate complement to any pastry, breakfast-related or otherwise.
Makes about 3 cups (720 ml)
1 vanilla bean pod, split lengthwise
2 tablespoons dried rosemary
3 cups (720 ml) grade-A dark or amber pure maple syrup
—Use a blunt butter knife to scrape the vanilla bean seeds into a 24-ounce (540-ml) jar; toss the scraped vanilla bean pod in there as well. Add the rosemary and maple syrup and seal the jar. Refrigerate for 3 weeks, shaking the jar twice a week. After 3 weeks, you can strain out the vanilla and rosemary and reserve the maple syrup, or just leave them in the syrup to allow the flavors to intensify over time, straining it as you use it. Keep refrigerated. Best if used within 1 year.
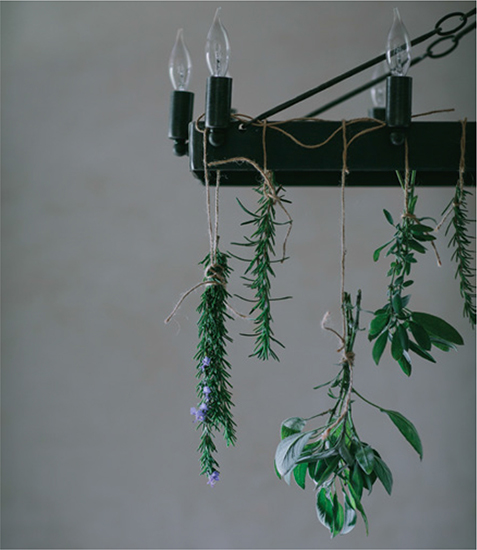
Drying your own herbs is one of the easiest ways to enjoy the herbs from your garden all year long, regardless of the weather. It will also save you a ton of money over time, too, since one flourishing rosemary shrub can make buckets of dried rosemary in a season, if properly maintained. You can dry them three different ways: air-drying (this takes the longest but keeps the freshest flavor), dehydrating them in a dehydrator (this takes a shorter amount of time and preserves the flavor fairly well), or drying them in the oven at a low temperature (this is the shortest method but reduces the flavor intensity, and there is a greater risk of accidentally burning the edges of the herbs). Each method has its own advantages and drawbacks—my personal favorite is air-drying, but feel free to try what works best for you.
This method works for other herbs, but the cooking time will vary. The thinner the herb leaf, the shorter the cooking time.
Makes about ¼ cup (9 g)
6 (6-inch/15-cm) sprigs fresh rosemary
—Rinse the rosemary, then shake it gently to rid it of excess water, and pat it completely dry with a clean, absorbent dish towel or paper towels.
—To air-dry, bundle the rosemary in groups of three sprigs and use twine to hang the bundles upside down by their base in an area of your home without direct sunlight and with good air circulation until they are completely dry and some of the needles have begun falling off. The number of days will depend on the temperature and humidity of your home, but give them at least a week of drying before checking them.
—To dry them in the oven, preheat the oven to 175°F (80°C). Line a baking sheet with parchment paper. Remove the rosemary leaves from the sprigs and spread them in an even layer on the baking sheet. Bake until dry but still somewhat green, about 1 hour 30 minutes, stirring every 30 minutes to ensure even drying.
—To dry them in a dehydrator, preheat the dehydrator to 95°F (35°C). Place the rosemary sprigs on the dehydrator tray in an even layer with each sprig barely touching the one next to it. Dehydrate until dried but still somewhat green, 6 to 8 hours.
—Once the sprigs are dried, hold each sprig over a bowl and clamp the sprig at the top between your thumb and forefingers and pull down to the bottom of the sprig, knocking off all the rosemary needles as you do so. Repeat with all the sprigs, discarding the stripped sprigs.
—You can either leave the rosemary needles whole, or pulse them in a food processor or blender to your desired fineness. Store the dried rosemary in an airtight jar out of direct sunlight. Best if used within 1 year.
Garlic powder is my secret weapon when it comes to savory foods. It boosts the overall umami-ness of the meal without giving it a spicy garlicky flavor the way raw garlic does. It’s also great as a salt substitute for those on low-sodium diets since it gives that savory element to dishes without the negative health effects.
Makes about 3 tablespoons
1 garlic bulb, cloves separated and peeled
—Preheat the oven to 175°F (80°C). Line a baking sheet with parchment paper.
—Very thinly slice the garlic and place the slices on the baking sheet, making sure the slices don’t touch one another. Bake until the garlic slices are completely dry and snap in half rather than bend when you fold them, 2½ to 3½ hours, depending on the thickness of the slices.
—Remove from the oven, allow to cool to room temperature, and transfer to a blender or food processor; pulse until finely ground. Store in an airtight container out of direct sunlight. Best if used within 1 year.
I like to roast tomatoes for a few reasons. First, evaporating the water inside them reduces their size and makes it easier to fit more of them in a container before I freeze them for later use. Second, roasting caramelizes the sugars within ripe tomatoes, creating a delicious sweet and tangy flavor. And third, it helps break down the structure of the tomatoes, which helps them disintegrate faster when tossed into soups, sauces, or stews, reducing the overall cooking time of whatever I happen to be making with them. This and the Tomato Sauce below are how I process the vast majority of the tomatoes from my garden that aren’t eaten fresh.
Makes about 1¼ cups (240 ml)
1 pound (455 g) Roma (plum) tomatoes, halved lengthwise
2 teaspoons extra-virgin olive oil
½ teaspoon flake kosher sea salt
¼ teaspoon freshly cracked black pepper
—Preheat the oven to 375°F (190°C).
—Set the tomatoes on a baking sheet, cut side up. Rub the cut sides with the oil and sprinkle with the salt and pepper. Roast until the tomatoes have reduced in size by half, are a bit wrinkly, and have turned a deep, dark red, 40 minutes to 1 hour, depending on the size of the tomatoes—smaller tomatoes will have a shorter cooking time.
—Remove and allow to cool to room temperature. Leave the tomatoes whole to add to soups and stews for a bit of tomato flavor, as needed, or transfer them to a food processor or blender and puree to make a roasted tomato concentrate that is excellent when added to soups, stews, and spreads and can be subbed in for tomato paste.
—The puree can be frozen in an airtight freezer-safe container to use later on. I recommend lining a baking sheet with parchment paper and using a ¼-cup (60-ml) scoop to measure out the pureed mixture onto the baking sheet, leaving about 1 inch (2.5 cm) between each mound. Freeze for at least 4 hours or overnight. Once the puree portions are frozen solid, transfer them to an airtight freezer-safe container and store in the freezer for up to 1 year.
—The whole roasted tomato halves can also be frozen for later use. Transfer them to a baking sheet lined with parchment paper and freeze. Once the individual roasted tomatoes are frozen, transfer them to an airtight freezer-safe container and store in the freezer for up to 1 year. This will make it easier to grab just a couple of them rather than needing to thaw out dozens at once if you only want to add a couple.
I keep my tomato sauce pretty simple, because the flavors of the ripe tomatoes are all that really matter here. There’s a bit of garlic, basil, and oregano for some herbal and umami elements, but they’re just a complement to the sweet, tangy, and robust garden-fresh tomatoes. I highly recommend getting yours from a farmers’ market if you don’t grow your own. If you get them from the supermarket, try to get the heirloom ones, since they’re usually riper and softer than the plain red hothouse ones. If you have ripe seasonal tomatoes, you won’t need to add sugar to this sauce, but if they aren’t super-juicy or saturated inside when you cut them open and the sauce tastes slightly too acidic, you’ll need to add a teaspoon or two of sugar to balance it out.
Makes about 1 quart (960 ml)
¼ cup (60 ml) extra-virgin olive oil
4 garlic cloves, minced
3¼ pounds (1.5 kg) fresh slicing or Roma (plum) tomatoes, cored and halved or quartered
3 tablespoons chopped fresh basil leaves
¾ teaspoon dried oregano
¼ teaspoon freshly cracked black pepper
Flake kosher sea salt
2 teaspoons sugar (optional)
—Heat the oil in a medium Dutch oven over medium-low heat. Add the garlic and cook, stirring, until the garlic is very fragrant and lightly browned around the edges, 4 to 5 minutes, stirring every minute.
—Add the tomatoes and ¼ cup (60 ml) water and raise the heat to medium. Once it reaches a boil, reduce the heat to low and cook, uncovered, until the sauce has reduced by half and the tomatoes have completely disintegrated, 50 to 60 minutes, stirring every 5 minutes at first to help the tomatoes disintegrate and every 10 to 15 minutes after that, breaking the tomatoes apart with the end of the spoon as they cook.
—Remove from the heat and stir in the basil, oregano, and pepper. Season with salt and add the sugar, if needed.
—Store in an airtight container in the refrigerator for up to 10 days. You can also transfer the sauce to an airtight freezer-safe container and freeze it for later use. Will keep in the freezer for up to 1 year.
These recipes aren’t meant for long-term storage of produce, but rather for easy and low-stress homemade pickled veggies. They give you the awesome tangy flavor and crunch of freshly pickled foods without the anxiety of properly pickling something in a sterile-enough environment to last several years in the basement. Each of these recipes takes less than fifteen minutes to make, keeps for about two months in the refrigerator, and packs a delicious and tart flavor that adds a wonderful tanginess to a wide variety of dishes. If you like, you can substitute other vegetables for those listed in the recipes below to try out various types of quick pickles; just make sure to stick to the same weight as the recommended vegetable so the proportion of brine to veggies stays consistent.
These are a must-have for summer grilling season. I love putting them on hamburgers, tacos, and grilled corn salads for a little extra tang and color. The texture of the onions softens considerably when they’re pickled, though, so just be aware that the texture won’t be as firm and crunchy as a raw onion, but rather flexible and floppy like a cooked onion would be.
Makes about 1½ pints (720 ml)
1½ cups (360 ml) red wine vinegar
1¼ teaspoons sugar
1¼ teaspoons flake kosher sea salt
½ teaspoon caraway seeds
½ teaspoon whole black peppercorns
1 large red onion (about 11 ounces/310 g), thinly sliced
—In a medium saucepan, combine the vinegar, sugar, salt, caraway seeds, and peppercorns and bring to a boil over medium heat. Add the onion and simmer until the onion softens slightly, about 5 minutes. Pour the mixture into a quart-size (945-ml) glass container and allow to cool to room temperature before covering and refrigerating. Will keep in the refrigerator for up to 2 months.
I have a recipe on my blog for barbecue pulled pork buns with pickled beets, and that’s still my number-one favorite way to enjoy these guys. But they’re also great in salads, deli sandwiches, and ceviche.
Makes about 1½ cups (360 ml)
1 cup (240 ml) white vinegar
1 medium shallot, thinly sliced
1 teaspoon flake kosher sea salt
1 teaspoon whole black peppercorns
½ teaspoon sugar
¼ teaspoon red pepper flakes
1 small beet (about 4 ounces/115 g), peeled and thinly sliced
—In a medium saucepan, combine the vinegar, shallot, salt, peppercorns, sugar, and red pepper flakes and bring to a boil over medium heat. Add the beet and cook for 4 minutes. Pour the mixture into a pint-size (480-ml) glass container and allow to cool to room temperature before covering and refrigerating. Will keep in the refrigerator for up to 2 months.
Pickled carrots are awesome condiments for any sort of Southeast Asian recipe like bánh mì sandwiches, pho, or pad thai. You can leave them in long shavings or dice them into smaller bite-size pieces prior to serving.
Makes about 1½ cups (360 ml)
1 cup (240 ml) distilled white vinegar
1 teaspoon sugar
1 teaspoon flake kosher sea salt
1 teaspoon coriander seeds
½ teaspoon whole black peppercorns
1 garlic clove, thinly sliced
5 ounces (140 g) carrots, julienned
—In a medium saucepan, combine the vinegar, sugar, salt, coriander seeds, peppercorns, and garlic and bring to a boil over medium heat. Add the carrots and cook for 5 minutes. Pour the mixture into a pint-size (480-ml) glass container and allow to cool to room temperature before covering and refrigerating. Will keep in the refrigerator for up to 2 months.
Preserved lemons are a staple in many Middle Eastern countries, and for good reason. They add a tangy, complex quality to dishes that plain old lemons just can’t compete with, and the flavor in the rinds of the lemons becomes so concentrated that you only need a little bit of the minced rind to impart the same flavor that an entire fresh lemon’s worth of zest would. I’ve always had a mild obsession with the flavor combination of lemon and vanilla. It creates a slightly sweet and still very salty concentrate of lemon and warm, floral vanilla. Another favorite is preserved lemons that have a little bit of a kick to them in the form of a hefty dose of black pepper. These are great in Mediterranean recipes, especially ones where lamb is involved. Finally, I love using the fennel and coriander version in salads and dressings, in particular. Something about the bright fennel flavor and the herbal coriander really harmonizes well with the lemon and gives even the simplest salad a huge boost of flavor.
Preserved lemons are a great addition to any dish in which you would normally use lemons, so things like salad dressings, marinades, cakes, seafood, and roasts are your best bets for these guys. I reference them in recipes throughout the book, usually calling for the rind, but sometimes for the juice. To chop the rind, remove the lemon from the jar and peel the fruit off of it (it will just slip right off), then chop the desired amount of rind. To get the juice, just stick a little spoon into the jar and snag some of that salty, tangy liquid. As the preserved lemons rest, the juice will become thick in texture, like a syrup.

Makes 3 or 4
3 or 4 organic lemons (enough to fit snugly into a pint-size/480-ml mason jar)
Flake kosher sea salt
VANILLA BEAN
1 vanilla bean, split lengthwise and seeds scraped out
4 tablespoons sugar, plus a few pinches
PEPPERCORN
1 tablespoon crushed black peppercorns
FENNEL AND CORIANDER
2 teaspoons coriander seeds
1 teaspoon finely chopped fennel fronds
—Wash the lemons well. Cut them as if you’re cutting them into quarters, but stop ½ inch (12 mm) before you reach the bottom on one end so that all the quarters are still attached at the base of the lemon.
—For the vanilla bean preserved lemons: Rub the vanilla bean seeds inside the lemons. Then rub the interior generously with salt and a pinch of the sugar and reshape them into whole lemons. Pack 1 inch (2.5 cm) of salt plus 1 tablespoon of the sugar into the bottom of a pint-size (480-ml) mason jar, place one of the lemons in it, and pack salt around the lemon, filling in any gaps between the lemon and the wall of the jar with salt. Cut the vanilla bean pod in half. Place one of the pieces in the salt next to the lemon. Once the salt has nearly covered the lemon, add another tablespoon of the sugar and another lemon, pack it with salt and a piece of vanilla bean pod, and repeat until the jar is completely packed with lemons, salt, vanilla bean pods, and the remaining sugar.
—For the peppercorn preserved lemons: Rub the interior of the lemons generously with the salt and ½ teaspoon of the peppercorns and then reshape them into whole lemons. Pack 1 inch (2.5 cm) of salt and a few peppercorns into the bottom of a pint-size (480-ml) mason jar, place one of the lemons in it, and pack in salt and more peppercorns around the lemon, filling in any gaps between the lemon and the wall of the jar with salt. Once the salt has nearly covered the lemon, add another lemon, pack it with salt and peppercorns, and repeat until the jar is completely packed with lemons, salt, and peppercorns.
—For the fennel and coriander preserved lemons: Rub the interior of the lemons generously with the salt, ¼ teaspoon of the coriander, and a pinch of the fennel fronds and then reshape them into whole lemons. Pack 1 inch (2.5 cm) of salt, a few coriander seeds, and a pinch of fennel fronds into the bottom of a pint-size (480-ml) mason jar, place one of the lemons on it, and pack in salt and more coriander seeds and fennel fronds around the lemon, filling in any gaps between the lemon and the wall of the jar with salt. Once the salt has nearly covered the lemon, add another lemon, pack it with salt, coriander, and fennel fronds, and repeat until the jar is completely packed with lemons, salt, coriander, and fennel fronds.
—You really want to pack the lemons in there so that they’re crushing each other and releasing their juices. Seal the jar tightly and shake it for 10 seconds. Set it aside at room temperature out of direct sunlight for 3 to 4 weeks, shaking it for a few seconds once per day.
—To use, cut off the desired amount of preserved lemon and rinse it thoroughly. The rinds are wonderful finely chopped in dishes for a burst of lemon flavor and are also delicious in stews and sauces. The pulp is a great concentrated source of lemon flavor for sauces, stews, and soups as well, but make sure to take into account the saltiness of the pulp and adjust the salt content of the recipe accordingly.
Compound butters are basically butter with other flavorful ingredients mixed in. As you can imagine, they’re great for a wide variety of uses, but some of my favorites are simply spreading them on toast and pancakes, rubbing down a roasted whole chicken with them, and using them in buttercream icing.
This is a great topping for any breakfast toasts or pastries in the fall and winter months. It has a very cozy vibe to it, and the salty-sweet combo that you get from the maple and sea salt is pretty amazing.
Makes about 7 ounces (200 g)
6 ounces (1½ sticks/170 g) unsalted butter, at room temperature
1 tablespoon grade-A dark or amber pure maple syrup
1 tablespoon fresh rosemary leaves, finely chopped
2 teaspoons flake kosher sea salt
—Use a mortar and pestle to combine the butter, maple syrup, rosemary, and salt until thoroughly and evenly mixed, about 2 minutes. Use the compound butter immediately or transfer it to an airtight container, seal, and refrigerate. Will keep for up to 2 weeks.
This is a great way to put those delicious mushrooms to use year-round—I just change up the variety of the mushroom depending on the season. I like spreading it on toast and topping it with a poached egg for breakfast, incorporating it into a creamy pasta sauce, or melting it and drizzling it over roasted veggies.
Makes about 14 ounces (400 g)
10 ounces (280 g) mushrooms, cut in half or quartered, if large
2 tablespoons olive oil
8 ounces (2 sticks/225 g) unsalted butter, at room temperature
1½ teaspoons flake kosher sea salt
—Preheat the oven to 375°F (190°C). Toss the mushrooms with the oil to coat and place on a baking sheet. Roast until the mushrooms deepen in color and are slightly wrinkled, about 25 minutes, depending on the size of the mushrooms.
—Combine the mushrooms, butter, and salt in a blender or food processor and blend until smooth, stopping to scrape down the sides of the container, as needed, to ensure that everything combines thoroughly.
—Use the compound butter immediately, or transfer it to an airtight container, seal, and refrigerate. Will keep for up to 2 weeks.
I love using this butter as a coating on chicken thighs before roasting them. It’s also great melted and brushed onto pita bread to serve alongside hummus, or spread on little baguette slices and topped with crumbled feta as a quick and easy appetizer. Or, you know, just eating it with a spoon . . .
Makes about 7 ounces (200 g)
6 ounces (1½ sticks/170 g) unsalted butter, at room temperature
2 tablespoons finely grated lemon zest
1 tablespoon dried oregano
1 teaspoon freshly cracked black pepper
1 teaspoon flake kosher sea salt
—Use a mortar and pestle to combine the butter, lemon zest, oregano, pepper, and salt until the ingredients are thoroughly and evenly mixed, about 2 minutes. Use the compound butter immediately, or transfer it to an airtight container, seal, and refrigerate. Will keep for up to 2 weeks.
One of my favorite childhood Christmas memories was the chocolate orange that would inevitably find its way into my stocking on Christmas morning. You know the ones I’m talking about—with all the cute little chocolates inside shaped like orange wedges and filled with the most refreshingly decadent flavor combination ever. I decided to attempt to re-create this treat in butter form, and I definitely succeeded. I recommend using this on French toast, toasted sweet breads, pancakes, and waffles. You can serve it alongside orange marmalade for a little extra citrus kick, too!
Makes about 8 ounces (225 g)
6 ounces (1½ sticks/170 g) unsalted butter, at room temperature
2 tablespoons unsweetened cocoa powder
2 tablespoons honey
1 tablespoon finely grated orange zest
—Use a mortar and pestle to combine the butter, cocoa powder, honey, and orange zest until the ingredients are thoroughly and evenly mixed, about 2 minutes. Use the compound butter immediately, or transfer it to an airtight container, seal, and refrigerate. Will keep for up to 2 weeks.
This recipe is for a very dense and rich pork stock, following the style of Japanese tonkotsu broth, commonly used as a base for ramen. As you cook the stock, you will need to add a bit more water to ensure that it doesn’t all evaporate during the long cooking time. If you want a slightly lighter stock, you can cut the overall cooking time in half. I recommend trying to make a go of the full cooking time, though, as the flavor of the stock gets deeper the longer it cooks.
Makes 6 to 8 cups (1.4 to 2 L)
3 pounds (1.4 kg) pork neck bones, hocks (unsmoked), and/or feet
Flake kosher sea salt
—Put the pork in a large stockpot and add 16 cups (3.8 L) water. Bring to a boil over medium-high heat. Reduce the heat to low and simmer, covered with the lid slightly ajar, for 12 hours, stirring every couple of hours. Add water, as needed, to keep the bones submerged in liquid. Alternatively, you can place all the ingredients in a large slow cooker and cook, covered, on low for 12 hours, adding water as needed to keep the bones submerged in liquid. Strain and discard the solids. Season the stock with salt and allow to cool to room temperature. The stock can be stored in airtight containers in the refrigerator for up to 2 weeks or in the freezer for up to 1 year.
This is a really simple stock that you can make with whatever poultry odds and ends you have around. If you have a turkey carcass left over from Thanksgiving, great! Toss it in there. If you’ve saved all the necks from your roast chickens in a freezer bag, awesome! Put ’em in the pot. You can used mixed poultry for a general poultry stock, or stick to one kind for a more distinctly turkey, chicken, or duck-flavored one. From what I’ve found, poultry wings, heads, and feet make the most intensely flavorful stock because of the high concentration of skin, bone, and cartilage in them, but any part of the bird will impart that delicious buttery poultry flavor to the stock; it’ll just be in varying concentrations.
Makes 8 to 10 cups (2 to 2.3 L)
4 pounds (1.8 kg) poultry parts, ideally bone in and skin on (for flavor)
2 large carrots (about 10 ounces/280 g), cut into 1-inch (2.5-cm) slices
2 celery stalks (about 4 ounces/115 g), cut into 1-inch (2.5-cm) slices
1 large yellow onion (about 10 ounces/280 g), chopped
3 (6-inch/15-cm) sprigs fresh thyme
1 sprig fresh rosemary
2 bay leaves
1 teaspoon whole black peppercorns
Flake kosher sea salt
—In a large stockpot, combine the poultry, carrots, celery, onion, thyme, rosemary, bay leaves, peppercorns, and 12 cups (2.8 L) water. Bring to a boil over medium-high heat. Reduce the heat to low and simmer, covered with the lid slightly ajar, for 6 hours, stirring every hour. Alternatively, you can place all the ingredients in a large slow cooker and cook, covered, on low for 10 hours. Strain and discard the solids. Season the stock with salt and allow to cool to room temperature. The stock can be stored in airtight containers in the refrigerator for up to 2 weeks or in the freezer for up to 1 year.
I like vegetable stocks with some umami flavor to them, so I always include a generous dose of mushrooms. For a richer-flavored stock, I roast the vegetables beforehand to caramelize the natural sugars within them, but you can feel free to skip that step and just use raw vegetables for a brighter, lighter-tasting stock.
Makes 8 to 10 cups (2 to 2.3 L)
7 ounces (200 g) shiitake mushrooms, halved
4 large carrots, cut into 1-inch (2.5-cm) slices
3 celery stalks, cut into 1-inch (2.5-cm) slices
1 leek, washed well and cut into 1-inch (2.5-cm) slices
1 large yellow onion, quartered
3 tablespoons extra-virgin olive oil
1 ounce dried porcini mushrooms (optional)
4 garlic cloves, crushed
4 sprigs fresh thyme
¼ cup (60 ml) fresh parsley leaves
2 bay leaves
1 teaspoon whole black peppercorns
Flake kosher sea salt
—Preheat the oven to 400°F (205°C).
—In a large bowl, toss together the shiitake mushrooms, carrots, celery, leek, onion, and oil until the vegetables are evenly coated with the oil. Spread the vegetables out in an even layer on a baking sheet. Roast until the vegetables have wrinkled slightly and are lightly golden around the edges, 45 to 60 minutes, stirring the vegetables every 15 minutes.
—Transfer the roasted vegetables to a large stockpot and add the porcini mushrooms (if using), garlic, thyme, parsley, bay leaves, peppercorns, and 12 cups (2.8 L) water. Bring to a boil over medium-high heat. Reduce the heat to low and simmer, covered with the lid very slightly ajar, for 6 hours, stirring every hour. Alternatively, you can place all the ingredients in a large slow cooker and cook, covered, on low for 10 hours. Strain and discard the solids. Season the stock with salt. The stock can be stored in an airtight container in the refrigerator for up to 2 weeks or in the freezer for up to 1 year.


