As you’ve discovered, blur provides photographers with a wide array of artistic options. The pan, spin, and zoom described earlier were all excellent examples of what can happen when you include time and movement in your message-creation process. They are pretty classic photography techniques, but these slow-shutter options are just the beginning. We can (and should) push things even farther.
If you’ll recall from chapter 2, our cameras have a bulb setting. When we set our shutter speed dial to bulb, we can keep the shutter open for as long as we wish. If you thought the pan and zoom were awesome slow-shutter techniques, just wait until you see what happens when we take the brakes off.
When shooting in the bulb mode, you’ll need to learn to feel the light. You’ll have to learn to “just know” when to let up on the shutter, based on how the light feels on the back of your neck. Obviously, if you’ve never tried this, it’s going to be difficult. Keep in mind, though, that just because you have never done something before, doesn’t mean it’s impossible. You just need to have a little confidence, and practice, and get your feet wet.
It’s all about the blur when painting on bulb. Since the exposure time can be as long as you like, you have plenty of time to add rhythm, color, and texture to your image.
Grab a wide-angle lens and head outside in the middle of the day. Change the ISO to the lowest-possible setting. Choose the largest aperture your lens affords, focus on the world in front of you, and pick a shutter speed that gives you perfect lighting. (Your shutter speed will probably be quite fast.) Remember to make any needed adjustments to your white balance, contrast, and saturation. Now shoot.
Once you have a great image, start playing with reciprocity. Make the aperture one click smaller and the shutter speed one click slower. The amount of light used to expose the image will remain the same. Repeat the process, this time paying attention to what that shutter speed feels like in your hand. (Note: The small vibration in the camera and the sound you hear isn’t the shutter; it’s the SLR’s mirror moving up and down at the beginning and end of your exposure. At high shutter speeds, the mirror slap will feel the same every time, as it can only fall so fast. When shooting at very slow shutter speeds, the mirror slap will feel more pronounced. It almost becomes a “clunk.”) The shutter actually opens and closes before you feel the mirror slap, but feeling the vibration of the moving mirror will help you get an approximate feel for the length of time the shutter is open.
 Some people take to shooting on bulb very quickly, while others have an incredibly hard time. Free your mind and your vision. When you’re practicing with this technique, expect to fail for a while. You’re doing something few artists-with-cameras have mastered. Be proud of your intentions and strive for perfection. It’s what makes us strong.
Keep playing with reciprocity, choosing smaller and smaller apertures and slower and slower shutter speeds. Concentrate on what those shutter speeds feel like in your hand. Concentrate on the “clunk” you hear. You will probably also notice that the slower the shutter speed you shoot at, the more motion blur occurs in your image. This is to be expected, but don’t get hung up on it. The goal of this exercise is to learn to understand what certain shutter speeds “feel” like. This is not about pretty pictures—yet.
Once you’ve dialed-in the smallest available aperture and the slowest-possible shutter speed, take a few more images—with your eyes closed. Concentrate on the sound and feeling of the mirror moving up and down in your camera. Now, set the shutter speed to bulb and, with your eyes closed, press the shutter button, leaving it down for the exact same amount of time you just felt. Check your image. Amazingly your image will be lit very similarly. Now, for at least fifteen minutes (yes, fifteen whole minutes) walk around with this same setting, taking the exact same type of image on bulb, trying very hard to maintain the same lighting. It’s important to quickly garner as much experience as possible, as doing so will inspire your confidence. If you cannot build your confidence, there is no doubt that you will fail at this.
Stepping It Up a Notch. Once you’ve learned how to feel the light, push yourself to look for different lighting scenarios. Move to a darker shadowed area and repeat the process. Your first image will probably be a bit darker than you would like (since there was less ambient light to begin with). Now, try to let the image “cook” a bit longer. Feel for a longer shutter speed. Slowly fine-tune your new technique. Challenge yourself with various lighting situations while shooting on bulb. For these images, it’s only the exposure you should be interested in, not the focus (yet).
Repeat the process indoors as well. Get to a point where you can determine the exposure time required at this smaller aperture setting in any given situation. If you’re sincere in practicing this technique, you’ll be surprised at just how quickly you can pick it up.
Going Even Slower. When shooting on bulb, there will come a time when the ambient light around you will be so bright that you’ll find it impossible to shoot slow enough to paint. At this point, it’s time to pull out the neutral density filters or to attach two linear polarizers to your lens to cut the light (see chapter 4). Do whatever it takes to keep shooting using the bulb setting.
The most basic bulb painting technique is called a swipe. You literally swipe (or move) your camera from one point to another. Your first few images will look pretty bad, but remember, it’s the technique we’re after right now, not the images. Start small, if you like, by swiping while photographing flowers, bushes, or twigs. If you’re more adventurous, try a landscape. No matter the subject, the technique is the same.
How to Do It. Start with your camera on the bulb setting. Feel the exposure time. Make sure you’ve got it down pat. Begin as usual, holding the camera very steady and allowing the exposure to cook through. This time, however, just an instant before you let up on the shutter, drag the camera to the right, left, up, or down. Then release the shutter. The idea is to simply “cook in” a certain amount of quasi, in-focus information and then add a bit of movement to the picture. This will be tough; so many things have to go right for this to work. Again, the more you practice, the more you fail, the better your odds will be.
The swiping concept is simple. Just drag the colors and shapes through your image. Pull light across the frame. Look closely at your image and decide if you should swipe faster or slower. Should you adjust your timing or employ a longer exposure time? There are a thousand things that could go wrong, but that’s why it’s so much fun. Don’t give up if it doesn’t work at first (it probably won’t!). It’s in there. It’s in you.
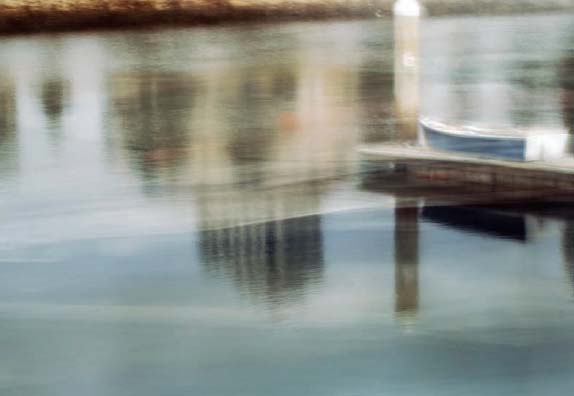
There is nothing like the freedom offered when painting on bulb. You are literally painting with your lens, sending color and shapes sliding across your viewfinder and creating a tapestry of emotion and feeling. The original scene lacked flavor. It was just a boat on a dock.
If it doesn’t work right away, don’t give up. Try a different approach. Vary the length of time you swipe and the length of the exposure. Think of it as if you were making two exposures happen—one in which the image is in focus and one in which you are panning.
Swiping is a great technique for making floral paintings, and it’s a great tool for creative expression.
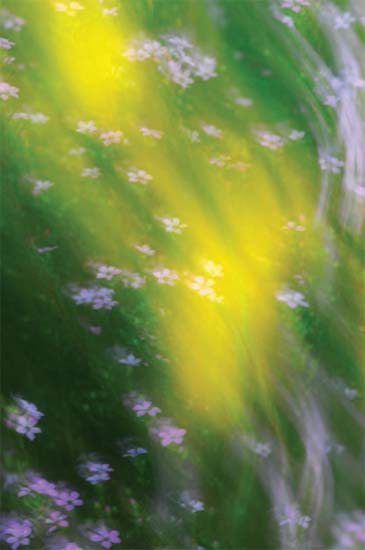
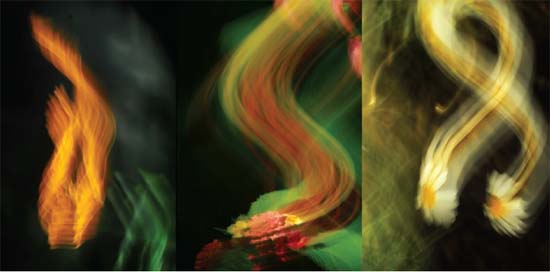
Time is an amazing thing for a painter of light. With enough of it, he can literally pull color and shapes from one part of the world to another. To create this image, I used a long exposure (1/2 second) to “cook in” the details of the flowers and allow for a quick camera movement to the left so I could include the color and the light that was there. While I moved the camera, I adjusted the focus to blur the scene, allowing only the colors and shapes to come through.
Slow, methodical movement with your camera will produce more than just an average blur. As you pull and push the colors about, you’ll create virtual paintbrush strokes. It’s an awesome feeling.
You’ll run into problems if you are swiping too hard, too far, or not enough. Keep changing things until you can get the image you’re after. If you still can’t get the technique to work, try this simple (yet amazing) swiping exercise: Find a good, moody punch. Locate a flower, twig, or branch lit with really bright light surrounded by very harsh shadows. Try to swipe the flower from one end of the image frame to the other, and look closely at the scene in your viewfinder. Practice moving the camera so that your subject moves from one end of the frame to the other.
Painting on bulb is the hardest technique described in this book. It will take an extraordinary amount of time and effort to master. Painting on bulb requires that you develop a feel for the light that surrounds you. Don’t expect serious results until you have shot hundreds upon hundreds of bad photos. Take your time, and learn as you progress. Don’t give up on the process, the artist in you needs this technique.
Some students find it easier to simply close their eyes throughout the process and visualize the flower moving. In their mind’s eye, they see it crossing the screen, and they simply stop moving when it reaches its mark. With enough practice, this is easily accomplished. Once you’ve got the technique down, vary your approach. Let the camera “stall out” at the beginning or end of the exposure. Hold it for a bit, and then start the swipe. You’ll notice that the stalled-out area will be a bit more in focus than the rest of the image. With enough practice, you should be able to stall out several times during a long exposure, giving your image several points of beautiful focus.
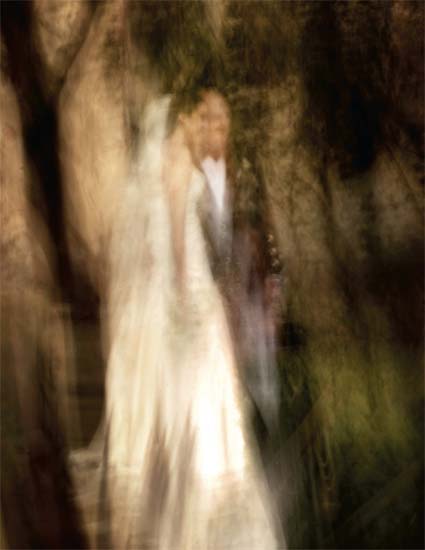
The flutter technique is one of our personal favorites. It brings the whole painting with a lens idea into crisp focus, while at the same time exploiting the use of extreme blur.
If you look closely at this image, you can see how the flutter created multiple versions of the same image and layered them atop one another. The eye, though, sees these colors and shapes and puts them together in its own way, which means that your viewers’ reactions will vary. Some will like it, some won’t. And that’s the true test of the artist. Can you create something that you know others may not like? A photographer strives for acceptance, an artist wants to be heard.
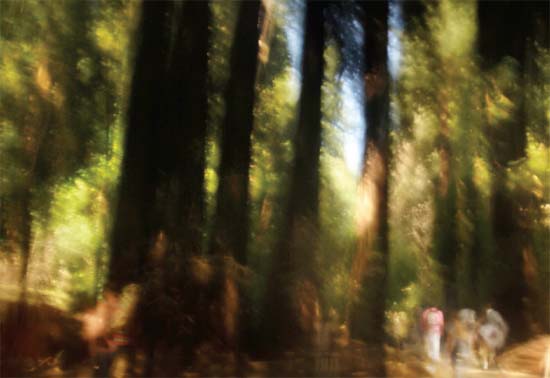
Painters often use two classic techniques, pointillism and divisionism, when creating expressionistic forms of art (abstracts). Pointillism and divisionism are similar in style in that both require many graphic elements to make one whole message. Pointillism uses thousands of points of color, placed into specific patterns, to make an image. When an individual looks at the image from a distance, the individual image elements merge to create one flowing message. Only the most skilled artisans use this technique today. Divisionism is similar to pointillism, but it mainly uses larger (more blocked) areas of color to accomplish the same thing. Photographers can create a similar effect, in-camera, by using the flutter technique.
Your success with this technique will lie in your ability to visualize the options that using the approach offers. Start simple. Visualize the possibilities that are available to you, and “flutter” away.
This is truly painting with a lens. Imagine moving your camera when you shoot, creating paint strokes of color and tone. You can’t get any more expressive than this!
Begin with your camera set on bulb. Adjust the white balance, contrast, and saturation in camera to establish mood in your image. You must use a tiny aperture, neutral density filters, cross polarize, or use some combination of the above to ensure a very long exposure. There is no exact exposure time that works best. Each artist is unique in how he accomplishes this technique. We have found, however, that a good flutter usually lasts a minimum of one to two minutes.
The flutter technique is a bit “out there,” so be ready for heads to turn when you begin practicing this technique. As always, your eventual success lies in your willingness to learn from your mistakes, so go ahead and make lots.
Since our exposure is very long, it will take an enormous amount of light to work-in the details of the scene. If we can move the camera back and forth from one position to another—quickly and hundreds of times—the “flutter” will allow us to re-create the pointillism/divisionism painting techniques.
How to Do It. As we’ve mentioned, the flutter requires at least a minute-long exposure. It also requires a controlled movement to occur during the exposure—a shake of sorts. This shake needs to be repeated, over and over again, so that you move groups of color and focus over one another in a highly controlled manner. One way to accomplish this movement is to create a muscle spasm in your right or left arm. The only problem is that this spasm has to last throughout the entire exposure. If you haven’t guessed by now, this can be uncomfortable.
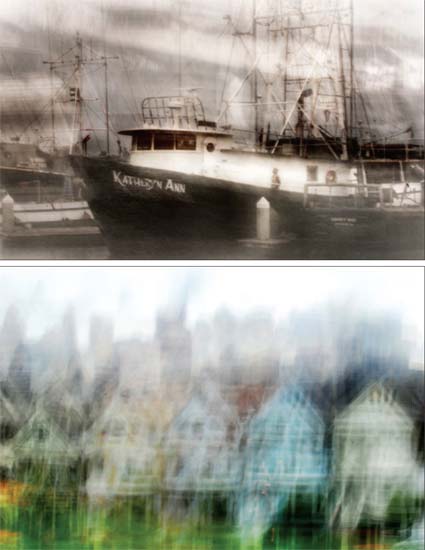
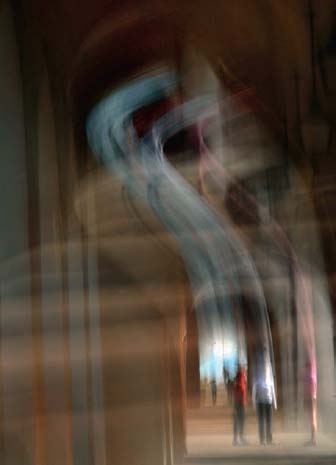
Hand-holding the camera and shaking it for several seconds would seem a silly thing to do, but when you consider what you can create, it’s not so silly anymore. An in-camera flutter was combined with a simple multiple exposure was used to create the image at the top of the page. This combination of painting techniques allows the most amazing image to happen, right in your camera. We also used the flutter technique to give the “Painted Ladies” of San Francisco a new paint job.
Of course, you can forego the muscle spasm and choose, instead, to simply shake the camera forward and back. Sadly though, from our experience, this doesn’t work as well. The technique truly does require precise movements, back and forth over the same areas. Simply moving or shaking the camera doesn’t offer that. The muscle spasm approach (yeah, it’s weird) works great. By straining your muscle to its extreme, the resulting involuntary spasm offers nearly the same movement throughout the length of the spasm. It works simply because it has no choice. You don’t have to think about it, you just need to do it.
By placing the colors/contrasts on top of each other in this aggressive yet highly artistic way, we can create wildly fantastic, artful images in less than three minutes flat and all in-camera. Of course, getting the best-possible results will require a lot of practice.
Be forewarned: creating a muscle spasm can wear your shooting arm out. Also, we promise that you will get some very odd looks from passersby or friends when you start painting like this, but over time you’ll get used to the attention and simply brush it aside. You are, after all, not taking pictures with your camera—you’re painting with your lens. And the last time we checked, when painting, you have to move your brush.

We all know what the typical Hawaiian beach scene looks like, but what about a painted one? Here, the flutter technique was used once again to create a more artistic interpretation.
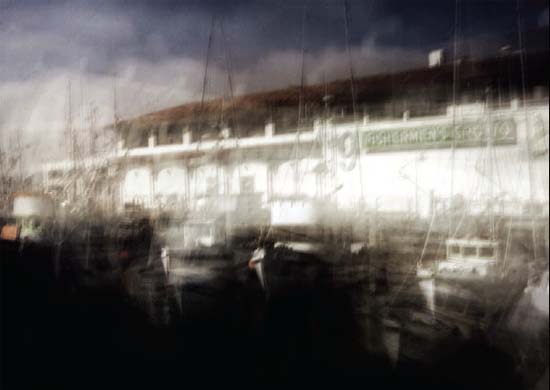
A minute-long flutter created a very dramatic representation of a San Francisco wharf. Note that even though the exposure time was a full minute, the words on the building can still be read. This is probably the most amazing thing about the flutter. If you can control it well enough, the detail you can capture while hand-holding the camera and shaking it for a full minute will amaze you.
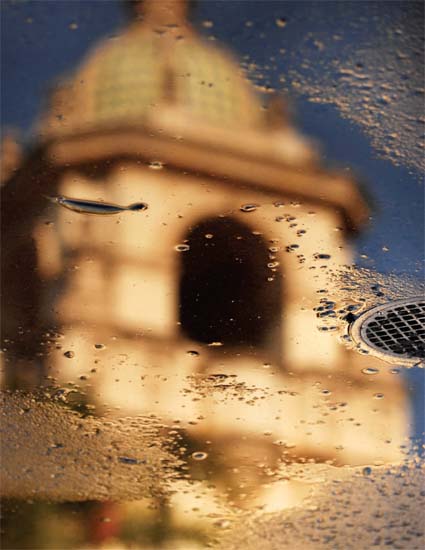
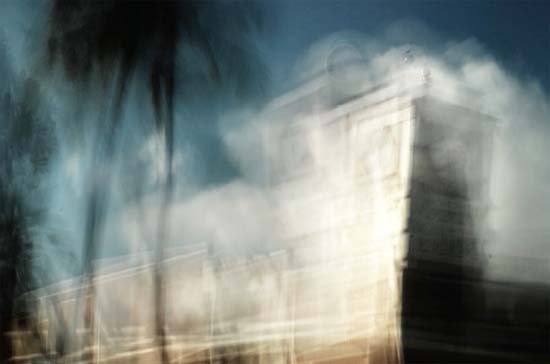
It’s all in the approach. Even though the tower would have made for an interesting subject, it wasn’t enough just to shoot a picture of it. In this image I looked for something different and found it in the reflection on the ground. Give up the simple pursuit of pretty pictures and focus instead on who you are as a person. Give the artist in you a chance. Push your vision and your camera.