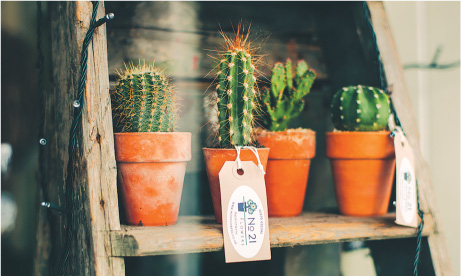
For many of us, there simply isn’t enough room to create the flower beds we would like. Growing in containers offers a simple way to satisfy our green-fingered fancies. But why stick to the conventional plant pots? As long as the basic requirements are provided, you’ll find that plants are not fussy about the spaces they’re grown in, and there’s an opportunity to get crafty with some of the least likely items. With a range of alternative planters and tips for maximizing their floral capacity, the gardeners in this chapter present a new take on an old convention.
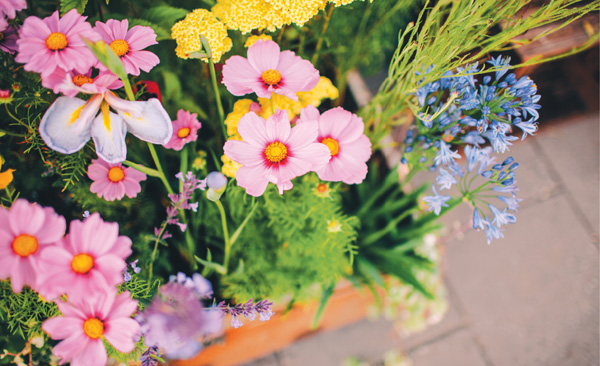
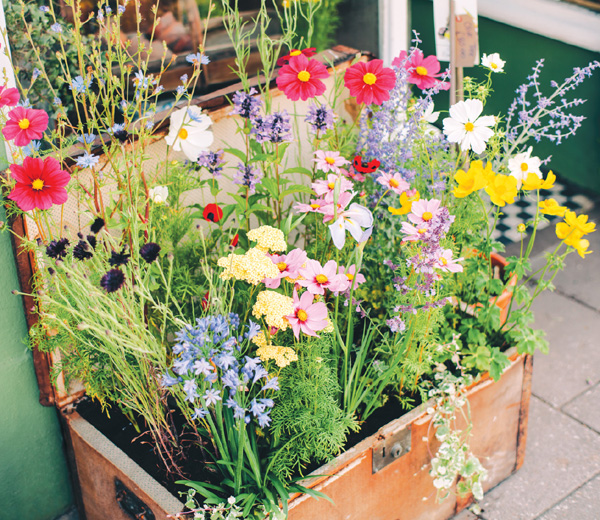
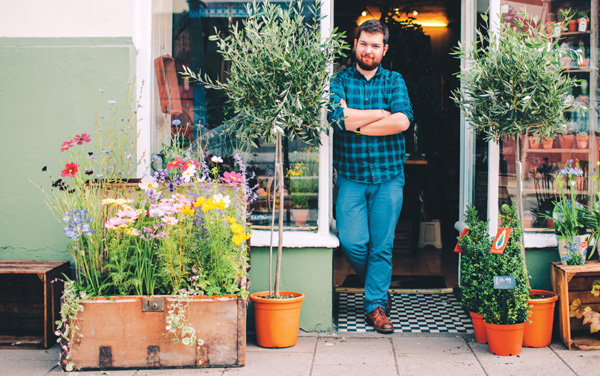
Mixing a bright array of flowers, Alex’s reclaimed trunk is an eye-catching feature outside his shop.
Alex Hales certainly knows a thing or two when it comes to floral displays; from assisting with award-winning exhibitions at the RHS Chelsea Flower Show to making his own bespoke arrangements for weddings and public events, he has created many an eye-catching design.
Well-known to residents of the Welsh coastal town of Aberystwyth, his boutique little flower shop, No. 21, is the workshop for Alex’s imaginative schemes. ‘I love coming up with new combinations,’ he says. ‘There’s something addictive about working with flowers, something endlessly pleasing. With so many forms and colours to play with, there’s always a great pairing just waiting to be discovered.’
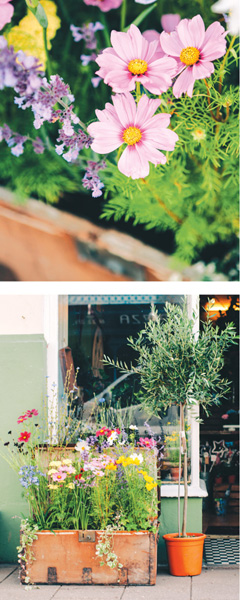
Alex nursed a passion for plants from a young age and later studied horticulture at the National Botanic Garden of Wales; opening a florist was something he had always wanted to do. With its stylishly decorated interior and elegant selection of cut flower stems, Alex’s shop is a botanical treasure trove, offering a wealth of ornamental inspiration. However, it is the recent addition at No. 21 that has been catching the attention of passers-by. ‘The success of the flower trunk has been a total surprise,’ Alex tells me. ‘I had no idea it would attract so much interest!’ When he stumbled upon the old trunk for sale, Alex set his plant-matching mind to creating a miniature flower bed within its four wooden walls. ‘I’d been looking for a way to devise a planted scheme at the front of the shop. Cut flower displays are one thing, but I wanted something more permanent, something with vitality.’ The vintage trunk offered Alex a chance to put his practical gardening experience to task.
Alex gets crafty with a smaller incarnation of his planted vintage container.
Very much in keeping with the vintage-chic character of the shop, Alex’s planted trunk sits comfortably among No. 21‘s floral displays. Bringing together a planting scheme that could be applied to one’s own sunny border, the trunk garden offers customers more than a simple bouquet. ‘People seem to love it,’ he says. ‘I had never thought of displaying plants like this before. I think it demonstrates what can be achieved with a small space and encourages people to try new things in their flower beds.’
In order for Alex’s trunk to be plant-ready a few alterations had to be made, especially to the base. ‘We’re in West Wales, so rainwater is not in short supply,’ he says. ‘With any compact planter, drainage is essential.’ Having drilled 1.25cm (½in) holes in the wooden floor and the base of the plastic sheet lining the trunk to protect the wood from saturation and subsequent rotting, Alex filled the bottom section with lightweight clay pellets. Allowing water to drain freely, this kind of aggregate makes for an airy, lighter alternative to bulky material, such as grit or broken crockery. ‘As the trunk would be standing out on the pavement, I wanted to avoid any unnecessary weight,’ he explains. ‘I knew I’d need to move it from time to time.’ For the same reason, Alex avoided using too deep a layer of compost when it came to filling the trunk. He opted for a rich, moisture-retentive soil medium so that the plants would be able to establish without the need for excess earth. ‘You can use any old plastic liner. Without one at all you’ll vastly reduce the life of a wooden plant container,’ he says.
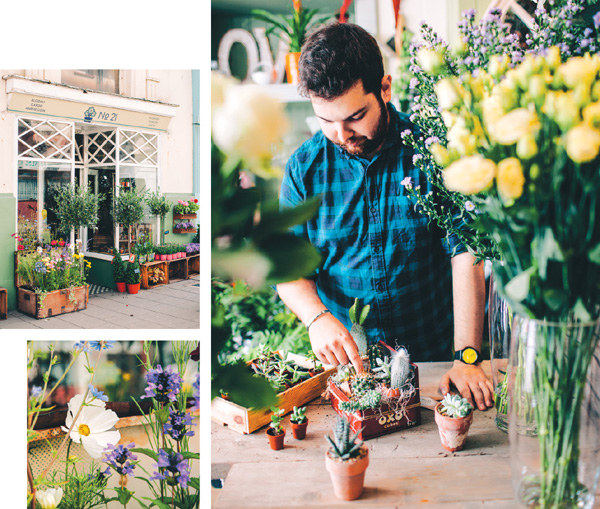
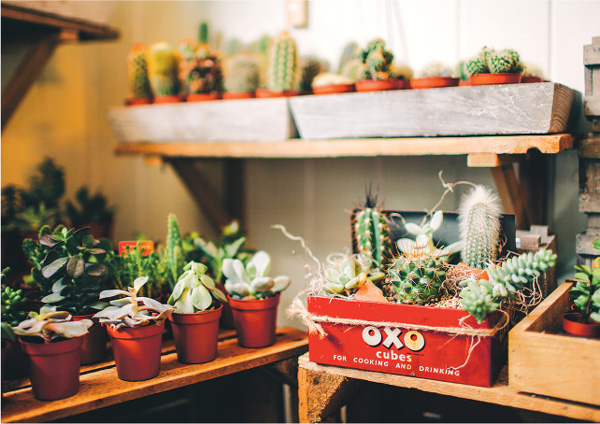
Extending beyond cut flowers for the vase, No.21 is a treasure trove of horticultural inspiration.
Once Alex had prepared the planter, next came the fun stage. ‘There’s a nursery nearby with a great selection of perennials,’ says Alex. ‘I went looking for contrasting plant forms, as opposed to focusing on any particular colour scheme.’ With this in mind, Alex’s plant list includes the large, round heads of Achillea millefolium ‘Summer Fruits Lemon’, with their striking mass of yellow florets. Offsetting these tall, flat-headed blooms are the wilder forms of flower, such as cornflower and chicory. ‘Chicory has always been a favourite of mine,’ Alex says. ‘It’s often forgotten in residential garden planting. When you see it growing in the wild the blue is so captivating.’ The trunk was therefore an opportunity for Alex to profile specific flowers, showcasing them alongside the more typical garden classics such as agapanthus and cosmos. ‘It’s like a Chelsea Flower Show garden in miniature,’ says Alex, ‘although I’ve managed to resist the urge to get at it with the manicure scissors!’
Having trained as a gardener, Alex enjoys any opportunity to experiment with planting combinations. Cosmos bipinnatus is a particular annual favourite, ranging from white to magenta.
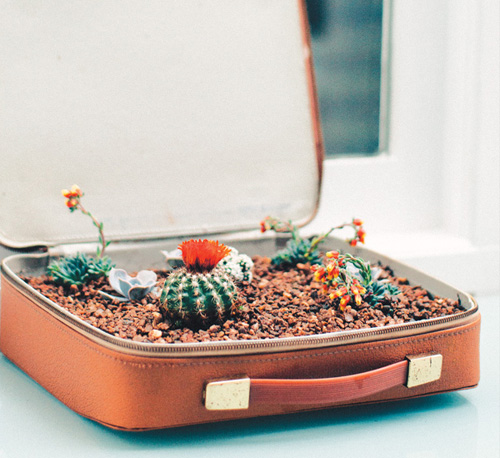
Here’s a great way to transform an old utility case into a windowsill wonderland. Succulents and cacti are not immediately associated with floral exuberance, but these curious and often other-worldly plants pack some surprisingly beautiful and exotic flowers. Finding the perfect way to show them off can often be a challenge, so try giving an old appliance a makeover by following these simple steps to turn a vintage container into an indoor garden.
Predominantly plants from desert and rock habitats, succulents and cacti dislike damp conditions so it’s important that watering is done sparingly; check the saturation levels each time before topping up.
These plants also require plenty of sunlight in order to produce strong, healthy flowers, so be sure to position them in a bright spot by a sunny window.
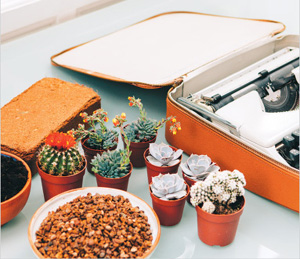
1. Choose an unwanted utility case – a briefcase, vanity case or, as in this example, a well-worn typewriter satchel all make for suitable containers. You will also require a coir brick, cactus compost, horticultural grit, a jug of water and a range of flowering cacti and succulent plants.

2. Fill the bottom third of the case with horticultural grit, putting half of the grit aside for later.

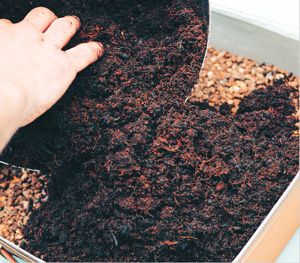
3. Place the coir brick in a bowl and pour water over it. As the brick soaks up water, it will begin to disintegrate. Loosen it further by hand.

4. Once the brick has been crumbled, add two generous handfuls of cactus compost.
5. Mix the coir and cactus compost together so that they are well integrated. Fill the middle third of the case with the compost mixture.
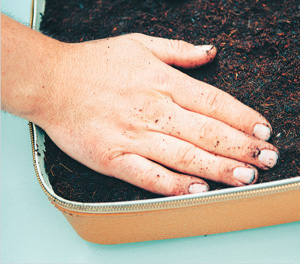
6. Using your hands, press down on the compost mixture to firm the surface.
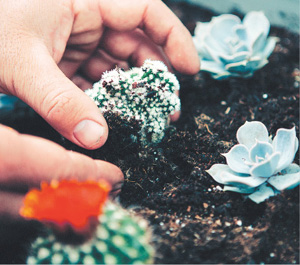
7. Arrange your succulents and cacti on the surface before proceeding to plant them. Ensure that each plant is well bedded in.
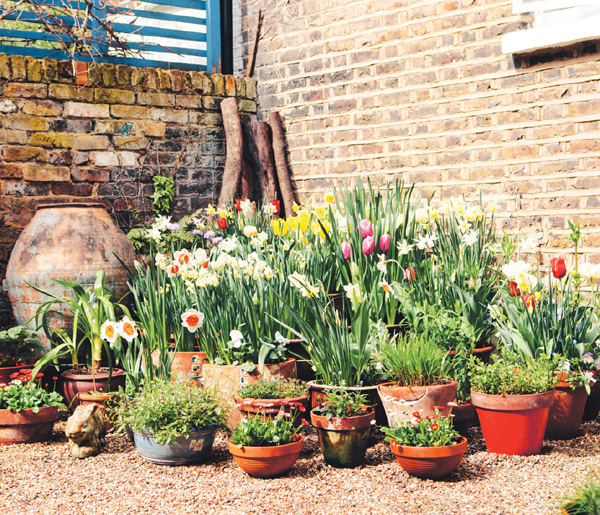
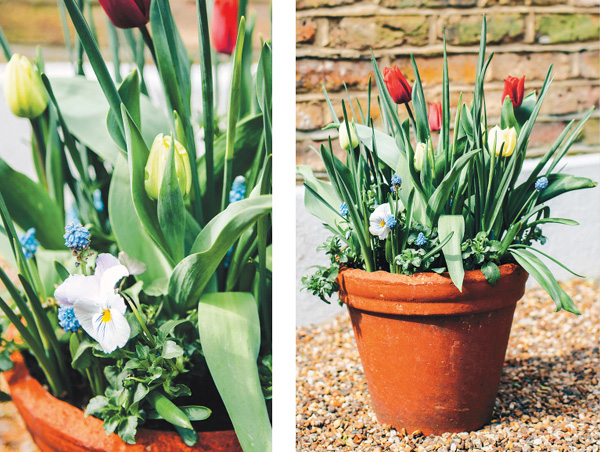
Planting bulbs in containers is a great way to brighten up a dull corner.
The wonderful thing about growing flowers in pots is that you can keep trying out new ideas. Like most gardeners, I have certain favourites – flowers I’ve been continuing with year upon year for their structure, colour and scent. But it’s the act of experimenting in a garden that I find the most exciting, and getting a plant combination right can be enormously satisfying. Writing this book offered the perfect opportunity to share what I have discovered.
As a gardener, one of my favourite exercises in the flower garden has always been playing around with the herbaceous border. It’s a process that requires planning, an understanding of individual plant characteristics and a level of patience, since plants need time to develop and spread in order to achieve their full potential in any given space. Growing in pots speeds up this process, and being able to dismantle a display and then reorganize it while the plants are in flower can be a lot of fun.
My London garden is only a few square metres of gravel. When I moved in I brought all of my pots with me, knowing I would want to grow whatever I could in the limited space available. Over the years I’ve amassed quite a few in all shapes and sizes, finding them at furniture markets or being given them by friends and family. There is usually a handful of empties stashed to one side so that I can add in new plants to replace those which have begun to die back.
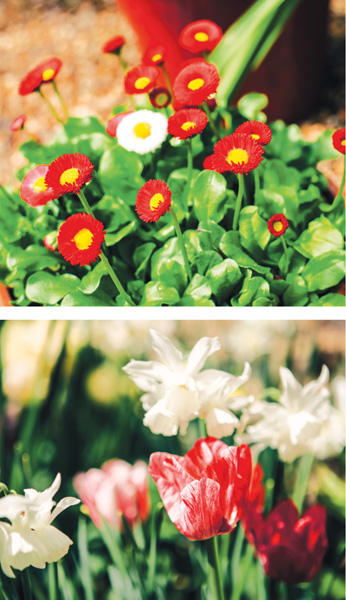
Perennial daisies (Bellis perennis) complement the spring bulb display with dazzling flowers and deep green foliage.
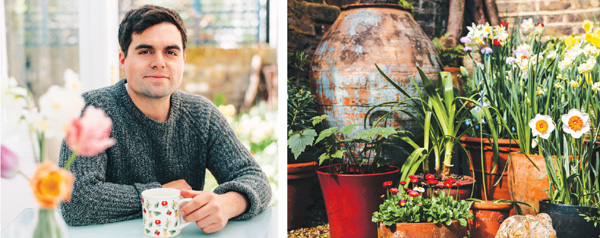
Writing this book has given author Matt Collins the opportunity to share what he has learned about growing flowers in pots.
Early on in my horticultural career I went to visit the Great Dixter garden in the south-east of England. It is renowned for its impressive and eclectic plant list and flower displays, and I remember being completely stunned by the pot arrangements on exhibition. Their use of contrasting colour and form exuded a sense of playfulness and enjoyment, demonstrating what can be achieved beyond simple bedding planting. Being creative in this way has remained one of the elements I enjoy most as a gardener, and there’s no space too small in which to try out ideas.
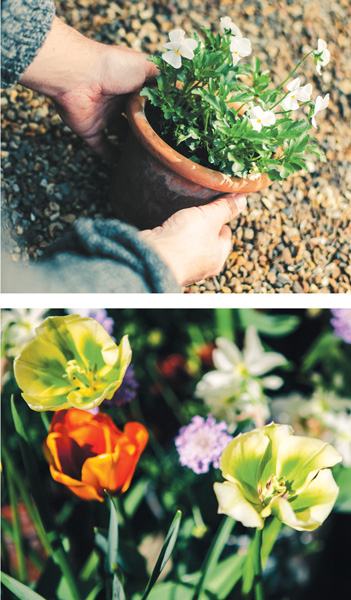
Spring is a great season for potted plants. Bulbs in particular grow very well in containers and with so many to choose from, there’s no limit to the combinations you can create. I really enjoy mixing bulbs together, coming up with simple pairings of particular varieties. Richly coloured tulips such as Tulipa ‘Cairo’ and T. ‘Hemisphere’ make striking backdrops for the softer, more delicate and scented daffodils such as Narcissus ‘Cheerfulness’ and N. ‘Avalanche’. It’s great also to mix bulb-heavy pots alongside those planted up with reliable biennials such as forget-me-not and purple scabious. Spring flowers often come in such bright and lively tones that it’s quite easy to cultivate a varied array of interesting forms.
A problem with autumn-planted bulbs, particularly those in shallow containers, is that they are often at the mercy of autumn-foraging rodents, such as squirrels and mice. There are many prevention methods for tackling this, ranging from a top-scattering of prickly holly leaves to rolling the bulbs in chilli powder. I have even encountered a method that involved grating a paraffin-soaked firelighter onto the surface of the compost! For me, however, the best approach has been to simply cover each pot with a sheet of 13mm (½in) chicken wire and weigh it down with a heavy stone or brick. By the time the leaves have grown through it and reached about 30cm (12in) in height the danger period has usually passed, leaving the bulbs to grow on undisturbed.
It’s often difficult to choose between the many varieties of bulb on sale at garden centres and nurseries or in the autumn catalogues. But why limit your garden containers to just one display? By following this simple layering technique, you can ensure a bountiful colour array that will continue to impress throughout the spring months. Whether your favourites are modest daffodils, lavish tulips or delicate grape hyacinths, here’s a great way to combine the lot!
Different types of bulb have different flowering times, so a careful selection will offer a sequential display that’s easy to achieve. It’s always best to check with the supplier if you’re unsure of a particular bulb’s flowering period. For my pot I’ve used nine Narcissus ‘Pueblo’, five Tulipa ‘Montreux’, four T. ‘Ruby Prince’ and 20–25 Muscari azureum.
Keep an eye on the weather. Once the sun is shining and the bulbs are in leaf, they’ll need a little help to continue healthy growth. As there are many plants crammed into a small area it is important to give them enough water to avoid them drying out. Topping up the nutrient levels is also recommended; a single dose of liquid feed mixed into a watering can will be well received.
As the flowers begin to fade and drop their petals, deadhead them from the base of the stalk. This will keep the display looking its best while making room for the next layer of bulbs.
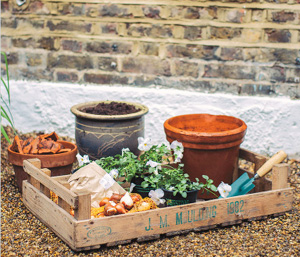
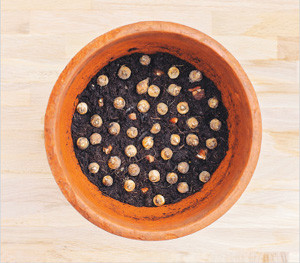
1. Choose a good-sized pot and a selection of your preferred bulbs. You’ll also need potting compost, drainage material, such as grit or broken crockery and a few bedding plants to top your display and give your pot a floral head start.

2. Fill the bottom of your pot with about 2.5cm (1in) of crockery. It is important that water can drain freely to prevent the bulbs from rotting.
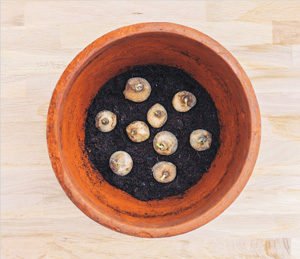
3. Add a thick layer of compost and place the narcissi on top. Space the bulbs far enough apart that they do not touch and check that the tips are pointing directly upwards.
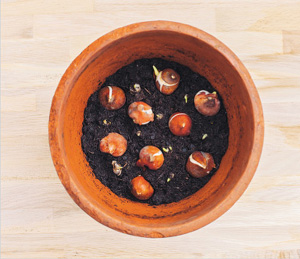
4. Now add another layer of compost, making sure that the narcissi tips protrude just above the surface. Avoiding the narcissi tips, place a layer of tulips in amongst them. Here I have mixed together both tulip varieties.
5. Leaving the tulip tips exposed, add another layer of compost and place the muscari bulbs around them. You can be liberal with the quantity – they’re only small!
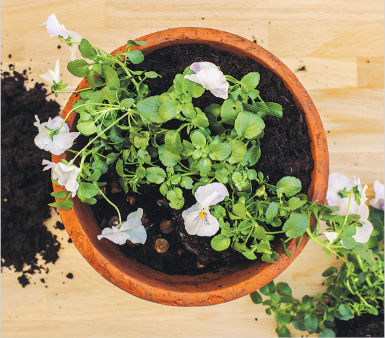
6. Add a final layer of compost and top-plant with bedding such as viola, forget-me-not and primrose, then water your pot.
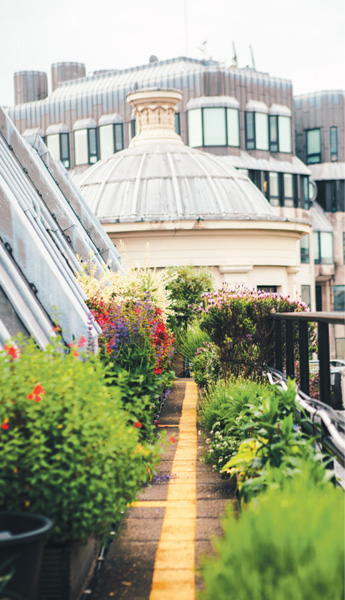
The fire escape of a central London bank is the last place you’d expect to find a garden, let alone one producing a high-quality crop of edibles and flowers. However, the headquarters of private bank Coutts has seen its four narrow rooftop avenues adorned with planting containers of all sizes, crammed full of cooking ingredients for their in-house restaurant.
Walking me through his bustling kitchen and out onto the roof, Coutts’ Head Chef Peter Fiori tells me where the story began. ‘Until recently this was a dead space,’ he says. ‘I’d always wanted to do something with it, and Richard had the know-how.’ He is referring to the expert micro-salad grower Richard Vine, to whom the bank’s Skyline Garden owes much. Prior to his death in 2015, Richard spent two years developing Peter’s dream of a kitchen-garden roof, resolving issues concerning space, irrigation, drainage and plant productivity. ‘We shared the vision,’ Peter says. ‘This particular avenue used to be known as the Meadow Garden, but we’ve renamed it Vine Lane so that Richard’s legacy lives on.’
As he grew up in a family of Italian farmers, a working kitchen garden close to hand is something Peter is very well acquainted with. ‘Plants lose around 90 per cent of nutrients after 24 hours,’ Peter tells me, ‘so for optimum culinary flavour, the aim is to harvest roughly two hours prior to service.’ This is something his kitchen team are now able to achieve, and the range of ingredients available to them really is impressive.
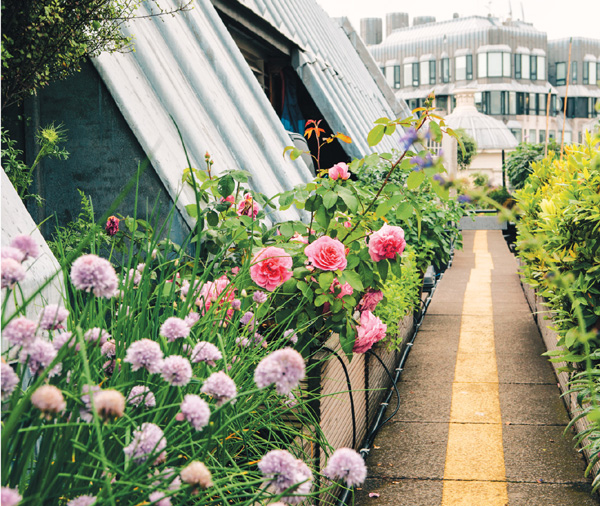
Chives and roses thrive in the warm, sun-soaked containers on the rooftop walkway.
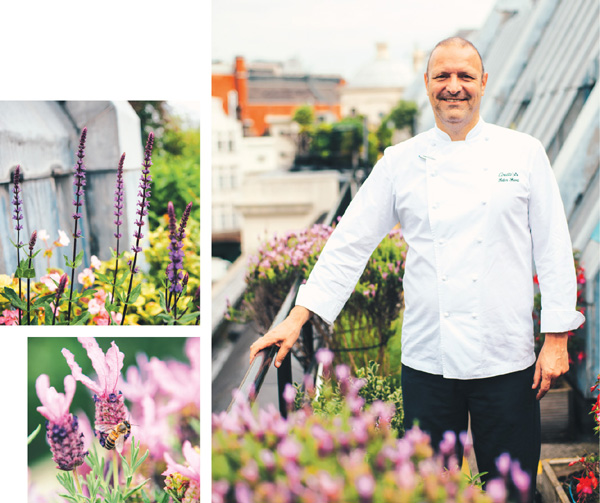
Head chef Peter Fiori stands among pots of French lavender, overlooking central London.
From herbs and salad leaves to plums and potatoes, the roof garden makes an enormous contribution to the kitchen’s requirements. Recent additions have even included peaches and wasabi. ‘We have everything we need without the air miles,’ Peter says. And he has taken the kitchen garden a step further; making use of every facet of the roof’s architecture, he and his team have managed to accommodate a staggering wealth of flowers, each one with either a culinary or decorative use. ‘Camomile and lavender!’ Peter exclaims, as we process along the walkway in single file. ‘Now that’s a combination. We blend them together as a syrup which goes perfectly with duck.’
The Skyline Garden is a great ambassador for the versatility of culinary flowers. Of course there are the usual species found in a kitchen garden; nasturtium and chive flowers, for example. However, Peter has found room for some of the less typical edible blooms that his intricate dishes depend upon. ‘Fresh watercress flowers are amazing to cook with,’ he says. ‘The moment they hit a warm plate their aroma fills the room.’
Facing out from each aspect of the building, the garden lanes are exposed to differing levels of sunlight. ‘The sun determines what we plant,’ Peter says. ‘We’ve recorded temperatures of up to 45°C (113°F) in one particular spot; with heat coming off the walls as well as from the ventilation ducts, it’s like a little microclimate. During the first two years we were doing all the watering by hand. The soil is organic and peat-free, which means it can dry out quite quickly. Thankfully we’ve now installed an irrigation system, which can supply water across the roof to all of the containers.’
With so many plants blooming during the peak growing season, cropping requires attention to detail. ‘All the chefs here are trained in harvesting our produce,’ Peter says. ‘They’re taught when and how to cut, how to preserve the plant and maintain its shape too. Just five years ago I myself wouldn’t even have known what half of these flowers were!’
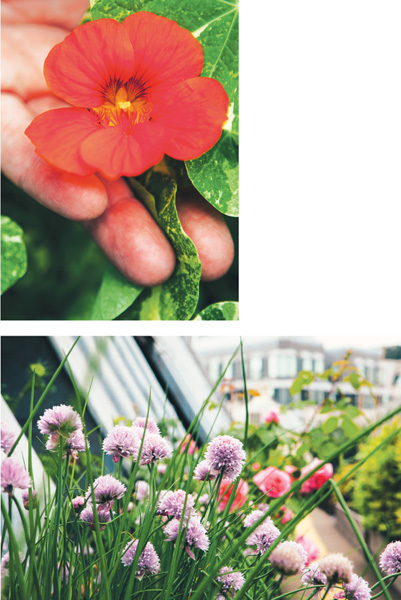
Peter’s staff have been trained in how best to harvest flowers from the kitchen planters. Nasturtium (top) is a particularly versatile culinary component.

An abundance of petunias cascade over Mauro Rettori’s container-clad bicycle.
Mauro Rettori’s modest rustic wine shop sits at the heart of one of Italy’s most celebrated wine regions. Deep-rooted residents of the sunny hillside town of Montefalco, Mauro’s family sell premier wine produced exclusively in the area, operating from their boutique outlet at the foot of the old town.
Although its interior may conform to the typical appearance of a traditional wine seller’s shop, the front of Mauro’s is anything but conventional. ‘The idea behind the crates came to me late one night while I was lying in bed,’ he says. ‘I’d been looking for a way to bring the shop to life and make it more colourful on the outside.’
With stock moving regularly through the shop, a wide range of transportation and packaging materials had begun to accumulate. Getting handy with a hammer and drill, Mauro saw a way to recycle some of these shabby wooden receptacles and create hard-wearing growing containers for a floral display. ‘Flowers are important to me, they’ve always made me smile,’ he tells me, standing amid a bright assembly of blooms. On his right is an old chestnut stock pallet, its mid-sections filled with compost, creating miniature flower beds that erupt with colour. Repurposing wine crates of differing sizes, Mauro has made room to house a profusion of showy plants. From the spires of heavily scented lavender to the blowsy, flamboyant petals of petunias and coreopsis, the eye-catching display spills out into the street.
Expanding on the theme, Mauro found yet another challenge for his up-cycling skills. ‘The bike is my invention, it’s a little more personal,’ he says. ‘I worked on it in my garage, fitting it with crates and hanging baskets. I wanted to create something loud and fun that would generate maximum impact. I’ve named the bike Calendula.’
Among the more intricate incarnations within the shop’s repurposed display are a set of individual wine boxes, fixed to the entrance wall. Having cut the lids in half with a hinge on each side, Mauro has filled the lower sections with compost, creating little windowed containers for single plants. This is a great way to produce ornamental flower boxes, bringing a bare wall to life with tiny splashes of vivid colour. By drilling a handful of little holes in the bottom of the boxes, water can drain freely, ensuring that the plants do not sit in damp conditions. The screw fixings themselves were easily drilled when the lid was wide open but are now hidden from view.
‘All the wine we sell is grown in the area,’ says Mauro, ‘so I wanted to use flowers from the area too. The majority of the display came from just outside Montefalco and a local plant seller supplied the lavender.’ By using plants well suited to the warm, humid climate, Mauro’s arrangements are quick to put on growth and produce a great wealth of blooms. Petunias make up the bulk of the display, tumbling over the crates in a range of radiant colours. With their lightweight stems and soft, tender flowers, they are the ideal choice when it comes to small containers such as window boxes and wall pots.
When selecting the plants for his vintage flower boxes, choosing brilliant, dazzling colours was very much an integral part of the decision for Mauro. ‘My life is very colourful,’ he says. ‘I love my job, and I’m proud of the work that I do. In a way the flowers complement my life; they’re an extension of my happiness.’

With simple alterations, the crates in Mauro’s display have all been equipped to accommodate a striking arrangement of bedding plants. Strips of wood are attached at the base of the pallet lengths, creating miniature shelves.
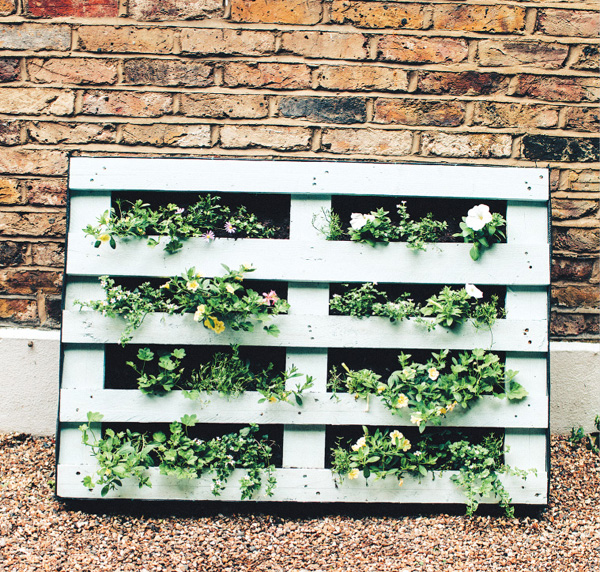
A great way to brighten up a wall or garden fence is to make creative use of a wooden pallet. With its horizontal slats acting as individual shelves, a converted pallet makes for a multi-storey planter that will cascade with flowers. Whether you choose to plug-plant with instant bedding or make an early start with seeds, a pallet garden can be a fantastic addition to any restricted outdoor space.
Keep an eye on the development of your pallet plants. Because the horticultural fabric will make it difficult for rainwater to soak down through the planted layers, it is important to water them regularly by hand. A good, careful soak once every few days will prevent roots from drying out.
Over time it is likely that the compost level will sink. Check to see that the plants are happily bedded in and top up the soil level if necessary.
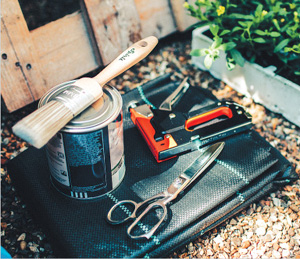
1. You’ll need ordinary potting compost, horticultural or ‘weed-suppressant’ fabric, scissors, a brush, paint, a staple gun (or hammer and small metal tacks) and, of course, a wooden pallet – ideally, one free of any rusty nails or sharp wooden splinters.

2. Paint the pallet a colour of your choice. Although it’s not an absolute necessity, painting will help to lengthen the lifespan of the wood and to give the framework a general sprucing-up, too.
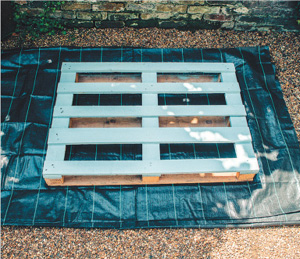
3. Fold your horticultural fabric to a size just wider than the pallet, so that the sides will wrap around the edges with ease.

4. Using a staple gun or small metal tacks, fasten the fabric to the back and sides of the pallet, leaving the front exposed. Cutting the fabric at the corners will help you to fold and fasten it neatly.
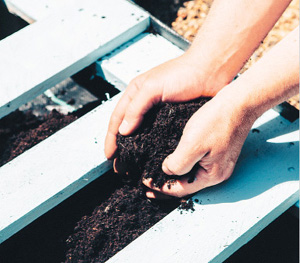
5. You’re now ready to fill the pallet with compost. It’s best to do this with the pallet upright, leaning on a wall. This way you can fill it from the bottom up, packing the compost in tightly as you go.
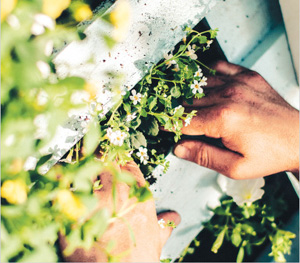
6. Plant up your pallet garden with plug plants. You can do this with the pallet either standing or flat on the ground. I find that summer annuals, such as petunia, calibrachoa and lobelia cope well with the growing conditions.
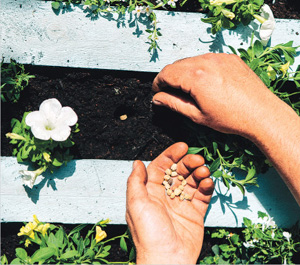
7. Topping up your plug planting with a handful of nasturtium or calendula seeds sown directly into the pallet compost will bring even more variety to your floral display.