Freezing Ice Cream in a Home Ice Cream Freezer
1. Make sure all parts of the freezer (dasher, freezing can and cover) are thoroughly clean. Bacteria thrive on the ingredients of ice cream.
2. Ice cream should be turned where the salt water draining from the bucket will not cause damage. A laundry tub or sink is ideal. When turning ice cream outdoors, the salt water should be drained away from cement, grass and flowers.
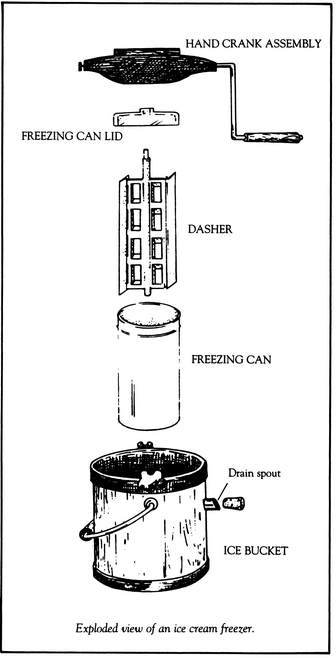
3. Adjust the dasher so it fits snugly against the sides of the freezing can. Put the dasher in the freezing can and fill with cool ice cream mixture to within no more than 3 or 4 inches from the top. Ice cream expands during the freezing process.

4. Put the lid on the freezing can. Make sure it is tight so salt will not leak into the can.
5. Place the freezing can inside the ice bucket and secure the hand crank or electric motor.
6. Pour about one quart of cold water into the bottom of the ice bucket. (For half-gallon freezers, use two cups of cold water.)
7. Fill the ice bucket one-third full with crushed or chipped ice.
8. Pour about ¾ cup of rock salt on top of the ice.
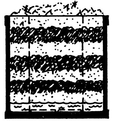
9. Continue adding layers of ice and salt until the ice is level with the top of the freezing can. Add about 3” of ice and ⅓ cup of salt for each layer.

Salt and ice should be added in alternate layers.
10. For Hand-Crank Freezer: Begin turning the crank so that the freezing can rotates about one revolution per second. When the crank starts to get hard to turn, speed up the revolutions to about two per second. This beats air into the ice cream, making it smooth and creamy. You will not be able to keep this speed up until the ice cream is completely hardened. It will get too difficult to turn.
For Electric Freezer: Plug the electric motor in to a grounded outlet.
11. Keep the bucket full by continually adding ice and salt. About 16 pounds of ice and 2½ cups of rock salt will be used to freeze one gallon of ice cream.
12. Check the drain hole occasionally to make sure it isn’t blocked. During the latter stages of the freezing process, salt water (brine) will flow from the drain hole.
13. For Hand-Crank Freezer: Continue turning the crank until it is very difficult to turn. One person will need to hold down the bucket while another turns the crank. The freezing process will take about 25 minutes.
For Electric Freezer: When the electric motor stalls or slows to almost a stop (follow manufacturer’s directions), unplug it. The freezing process will take about 25 minutes.
14. Pour off some of the water and remove the ice from around the top of the freezing can.
15. Remove the crank or electric motor. Wipe off and remove the freezing-can lid.
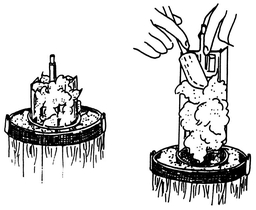
16. Slowly pull the dasher out of the freezing can. Use a rubber spatula to scrape the ice cream off the dasher. (This is a good time to taste what you have made!)
17. After removing the dasher, use the spatula to push the ice cream down in the freezer to remove air pockets.

Remove the dasher slowly and scrape it off with a spatula.
18. Replace the lid and plug the hole with a cork.
19. Repack the ice bucket with layers of ice and rock salt.
20. Cover the ice bucket with an old rug, a blanket or anything that will help hold the cold in.
21. Let the ice cream set and harden for 3 or 4 hours or as long as you can wait.
Serving Temperature
The serving temperature of ice cream affects the flavor intensity and sweetness. Most people prefer ice cream served at 8°F. The flavor becomes more intense and sweeter at warmer serving temperatures. Sweet ice creams and ice creams with strong flavors taste best when served at colder temperatures.
Storing Homemade Ice Cream
After making ice cream, you can pack it in airtight containers for later enjoyment. Most flavors of homemade ice cream will become quite hard when refrozen. Letting the ice cream sit at room temperature for a few minutes will soften it enough for easy dipping. Homemade ice cream can be stored in the freezing compartment of your refrigerator for up to two weeks. If it is kept longer, ice crystals begin to form, and the quality deteriorates rapidly.