WINDOWS & DOORS
It should be no great surprise that windows and doors require more maintenance than other buildings in your house. For one, they move and are subjected to the stresses of opening, closing, slamming, and more. And they are also exposed directly to the elements: not just on the exterior, but in the critical heating and cooling envelope that surrounds the walls of your home. There, drastic changes in temperature and humidity can cause a host of issues.
Maintaining windows and doors has changed as a pursuit in the past few decades. Not so long ago, if a window broke it was down to the basement to fetch the glazing compound and glazier’s compound to secure the replacement window glass in the opening. Today, most of the important windows in the modern home are not simple glass panes, but are sealed sandwiches of glass and gas called Insulated Glass Units (IGU). If one of those breaks, there is a little a homeowner can do to repair it other than buy a new IGU and try to install it, which can easily cost as much as replacing an entire window.
If your window was sticking or opening and closing roughly, the problem in the old days was likely to be the system of window sash counterweights, cords, and pulleys inside the wall next to the window. Today’s opening and closing mechanisms are integral to the window unit, usually involving springloaded mechanisms captured in the frame: easier to fix than IGUs, but often hard to get at and modern vinyl cladding does not always hold up to home repair.
Doors have not changed as much mechanically, but they have changed a lot materially. Few doors are wood any longer. Most exterior doors are made of steel filled with foam insulation or with fiberglass. Interior doors are just as likely to be made entirely of synthetic polymers as they are to be wood.
The upshot is, maintaining and repairing modern windows and doors is mostly a matter of understanding how they are built and which kinds of improvements are achievable.
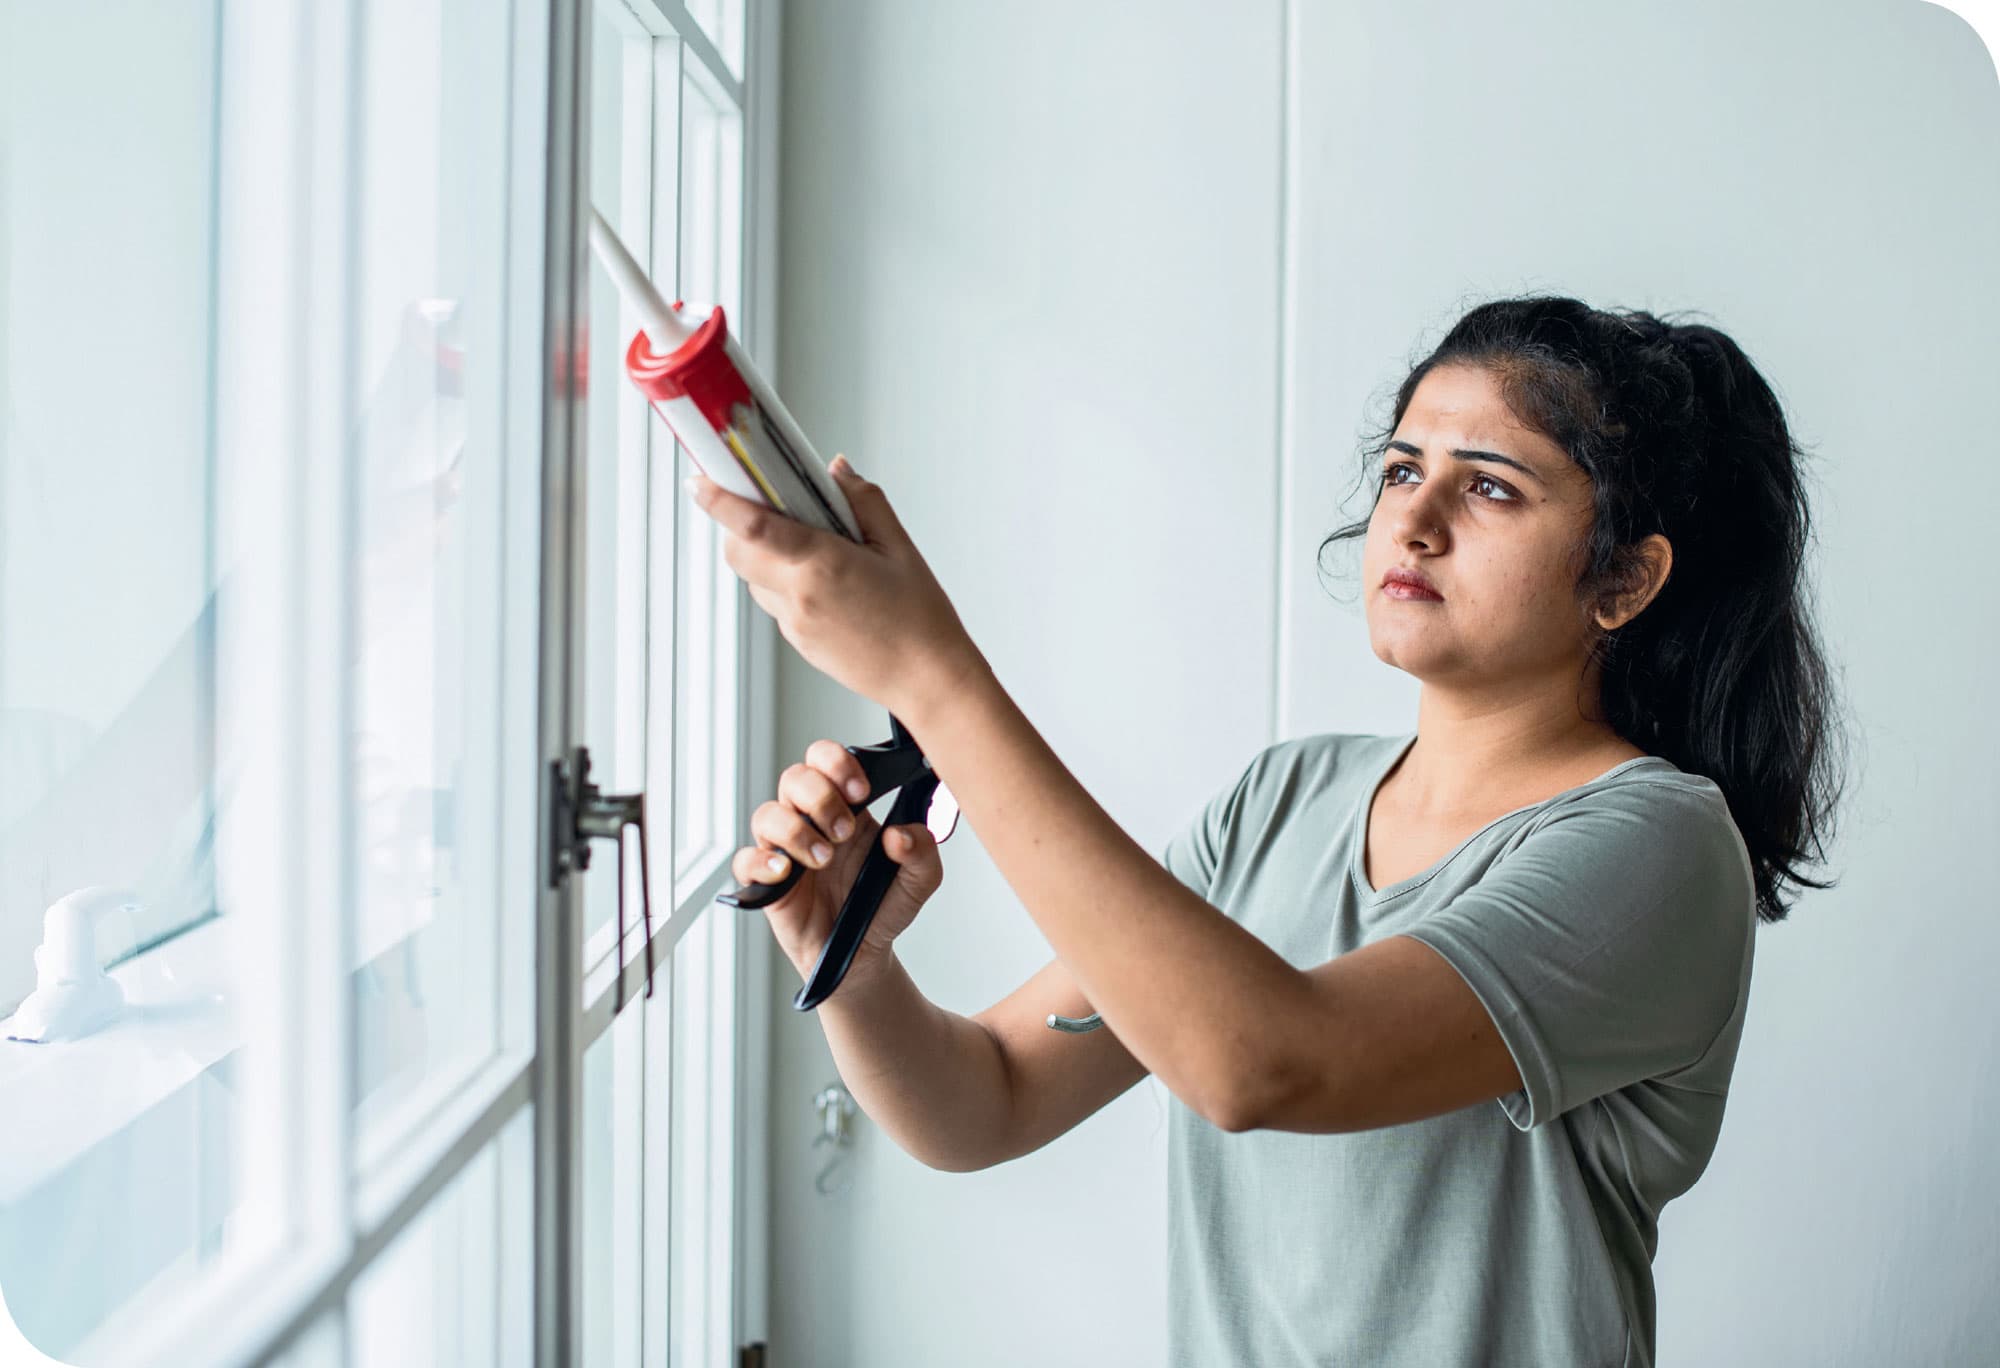
Window and door repairs fall into two basic categories: improving operation and upgrading weatherization.
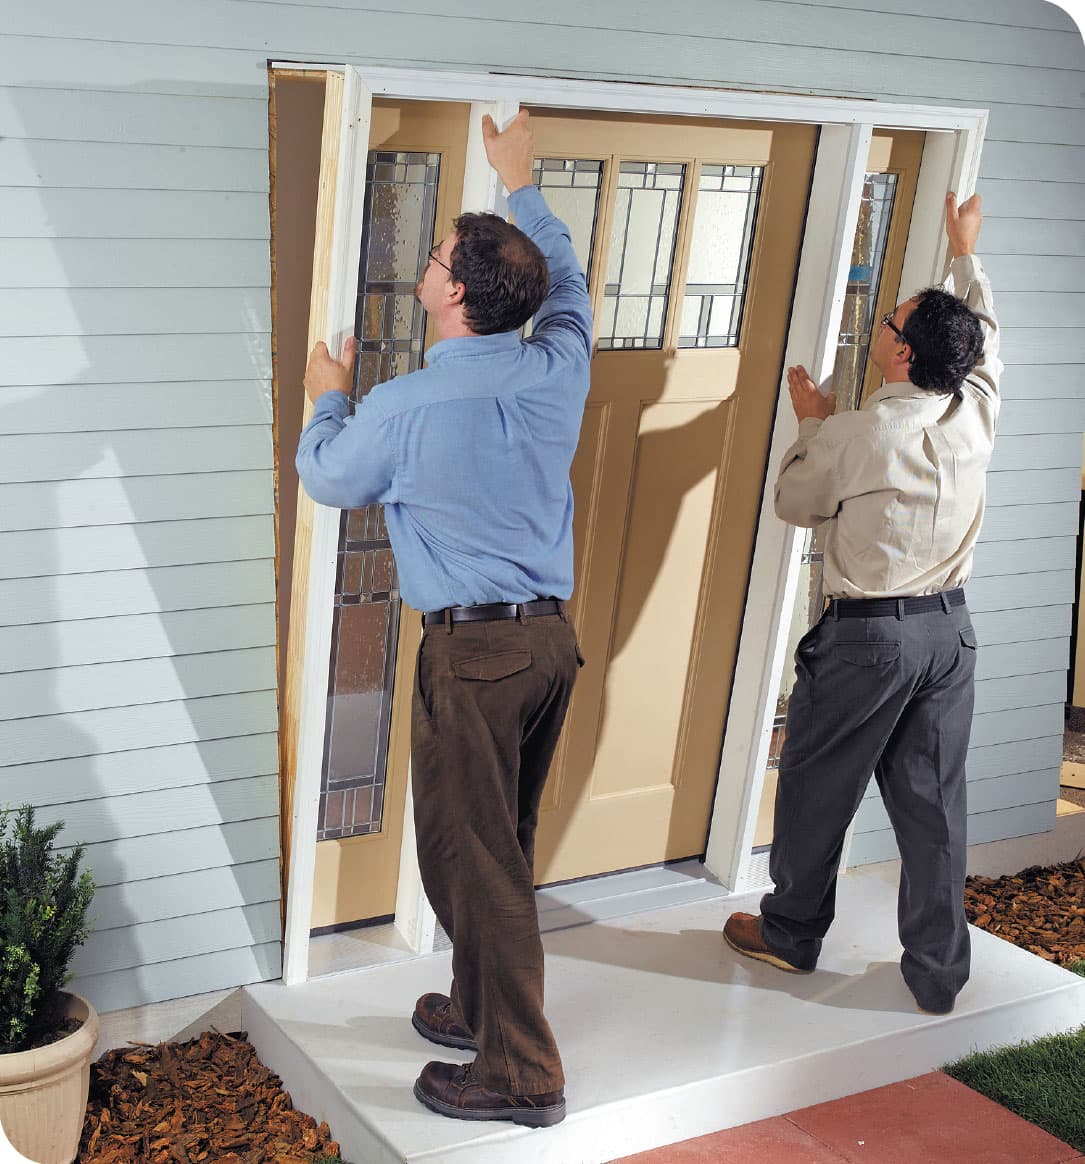
Modern entry doors are more accurately described as entry systems. Most are shipped prehung, often with transoms and sidelites preinstalled. This simplifies installation—you simply tip it up into the door opening and screw it in place. But it complicates getting at the parts and limits what you can do as far as repair and maintenance.
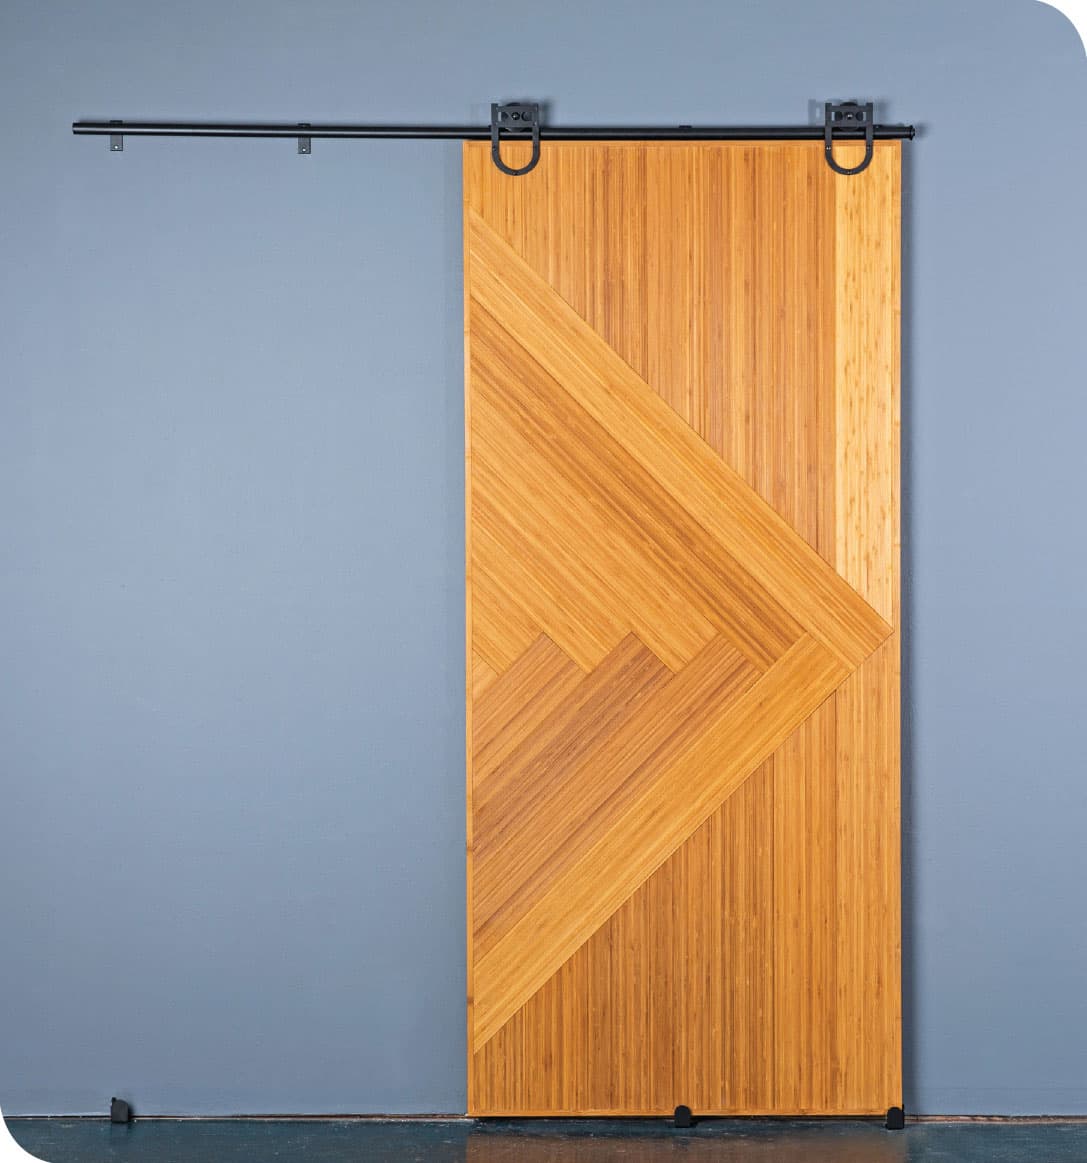
Door hardware, too, is changing constantly, often for stylistic reasons. The sliding barn-door hardware seen here is a good example. It is relatively simple, but keeping up with technological door and window hardware advances can require some attention.
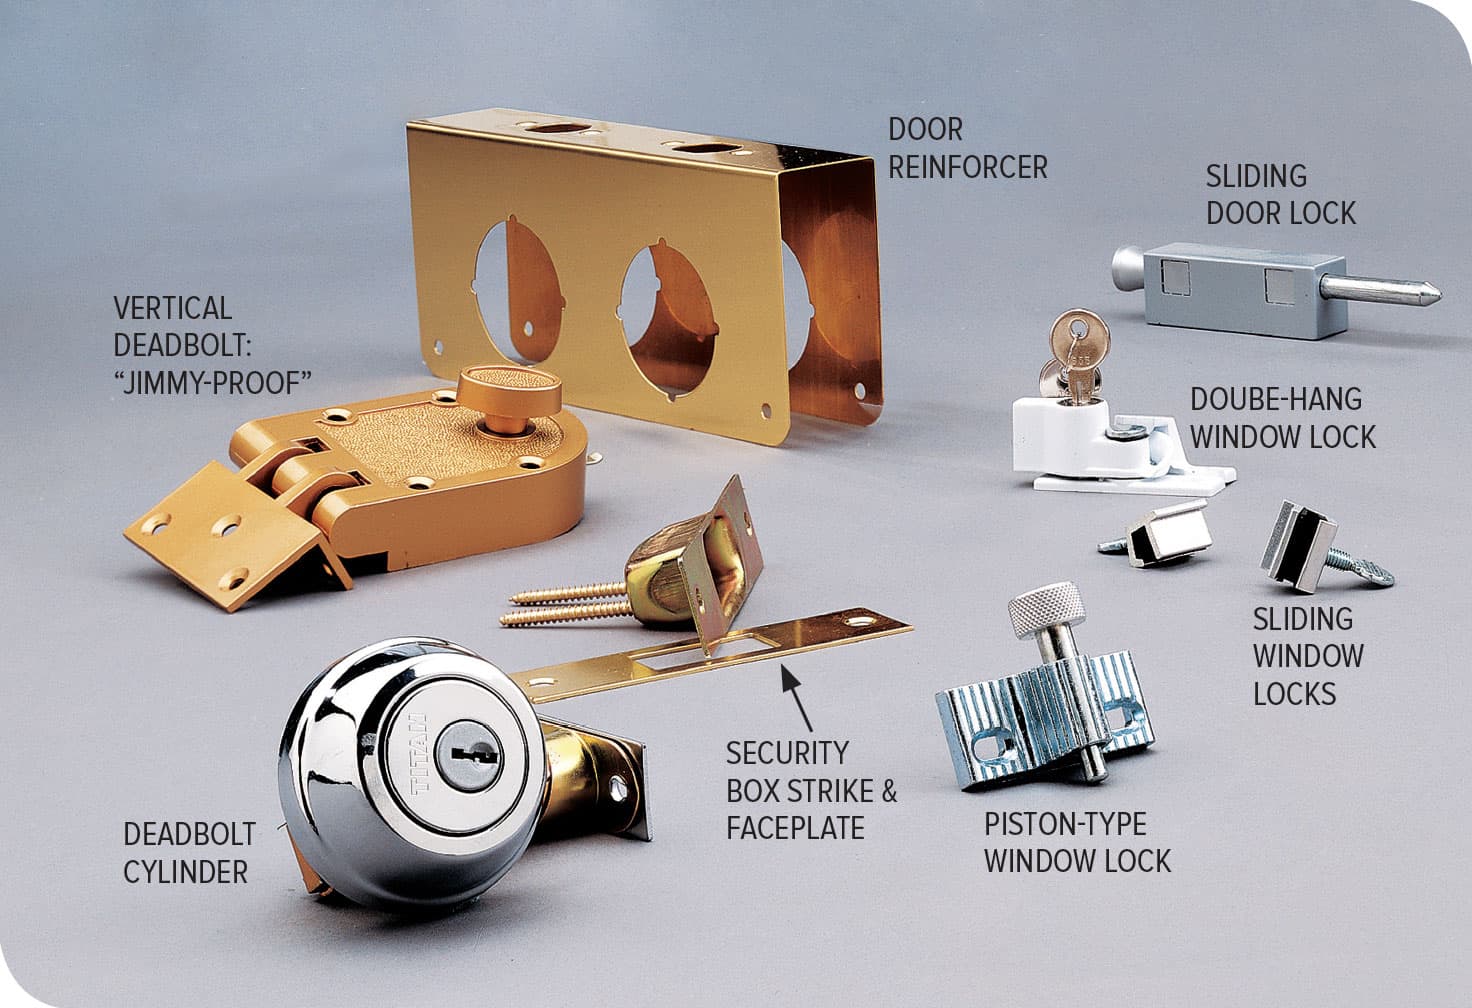
Window and door security remains an issue that most homeowners have the capacity to improve-not just with mechanical additions, but by instituting safer practices and my taking advantage of the growing list of app-based products that assist in home monitoring. The relatively simple products seen at left are all effective and easy to install.
FIXING COMMON DOOR PROBLEMS
Many door problems are caused by loose hinges. When hinges are loose, the door won’t hang right, causing it to rub and stick and throw off the latch mechanism. The first thing to do is check the hinge screws. If the holes for the hinge screws are worn and won’t hold the screws, try the repair on the next page. If the hinges are tight but the door still rubs against the frame, sand or plane down the door’s edge. Door latch problems can occur for a number of other reasons, including door warpage, swollen wood, sticking latchbolts, and paint buildup. If you’ve addressed those issues and the door still won’t stay shut, it’s probably because the door frame is out of square. This happens as a house settles with age; you can make minor adjustments by filing the strike plate on the door frame. If there’s some room between the frame and the door, you can align the latchbolt and strike plate by shimming the hinges. Or, drive a couple of extra-long screws to pull the frame into adjustment.
Common closet doors, such as sliding and bifold types, usually need only some minor adjustments and lubrication to stay in working order.
Door locksets tend to be very reliable, but they do need to be cleaned and lubricated occasionally. One simple way to keep an entry door lockset working smoothly is to spray a light lubricant into the keyhole, then move the key in and out a few times. Don’t use graphite in locksets, as it can abrade some metals with repeated use.
How to Remove a Door
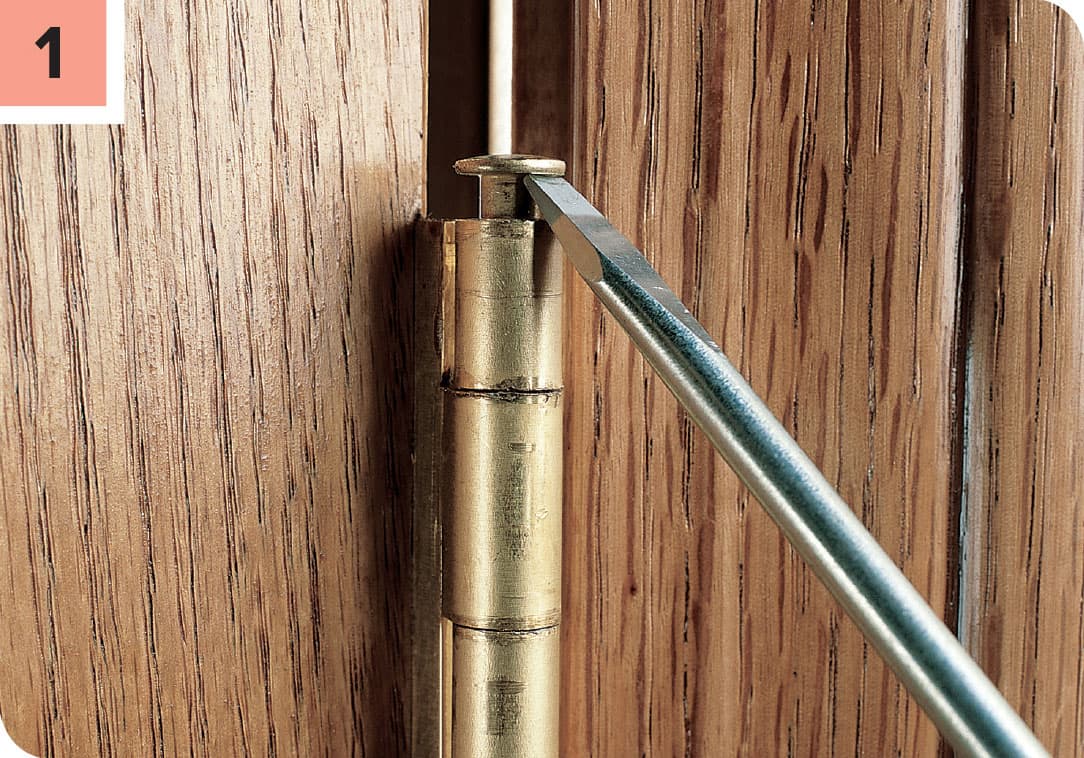
Drive the lower hinge pin out using a screwdriver and hammer. Have a helper hold the door in place, then drive out the upper (and center, if applicable) hinge pins. Once you have the hinge pin started, you may find it easier to extract it with pliers.
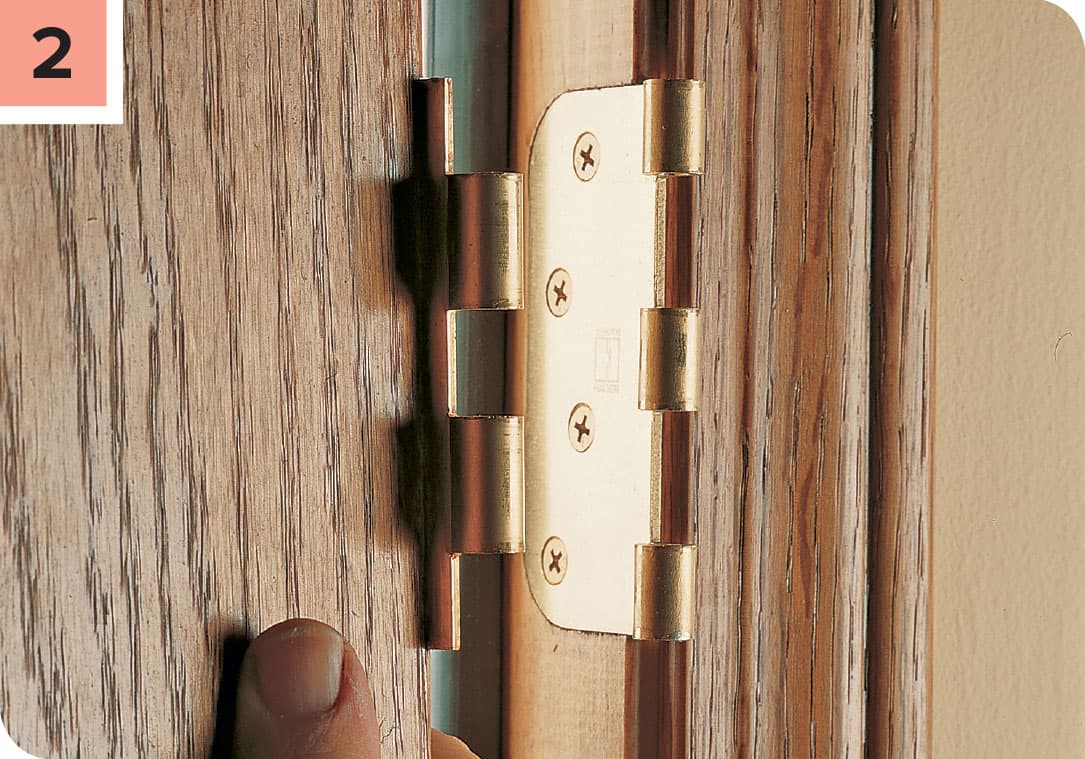
Remove the door and set it aside. Clean and lubricate the hinge pins before reinstalling the door.
How to Tighten a Loose Hinge Plate
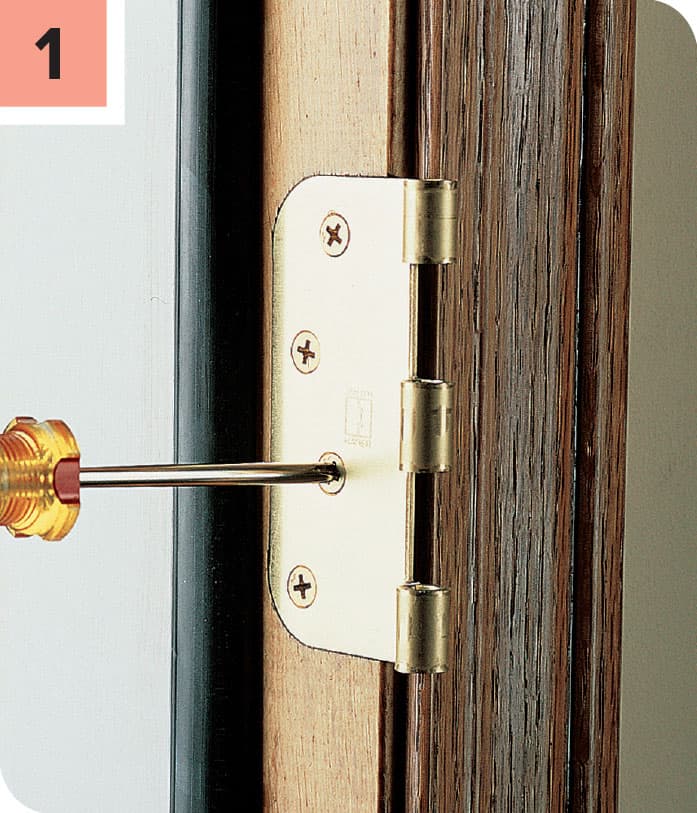
Remove the door from the hinges. Tighten any loose screws on the door jamb or the door itself. If the wood won’t hold the screws tightly, remove all the hinge plate screws to access the screw holes.
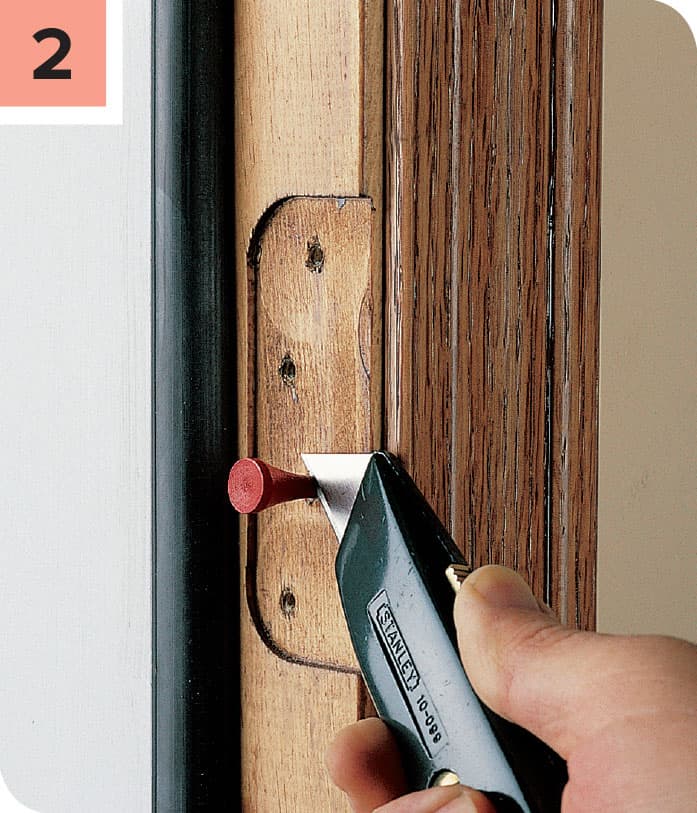
Coat wooden golf tees or wood dowels with wood glue, and drive them into the worn screw holes. If necessary, drill out the screw holes to accept dowels—it’s better than pounding too hard on the dee or dowels and splitting the jamb wood. Let the glue dry, then cut off excess wood with a sharp utility knife.
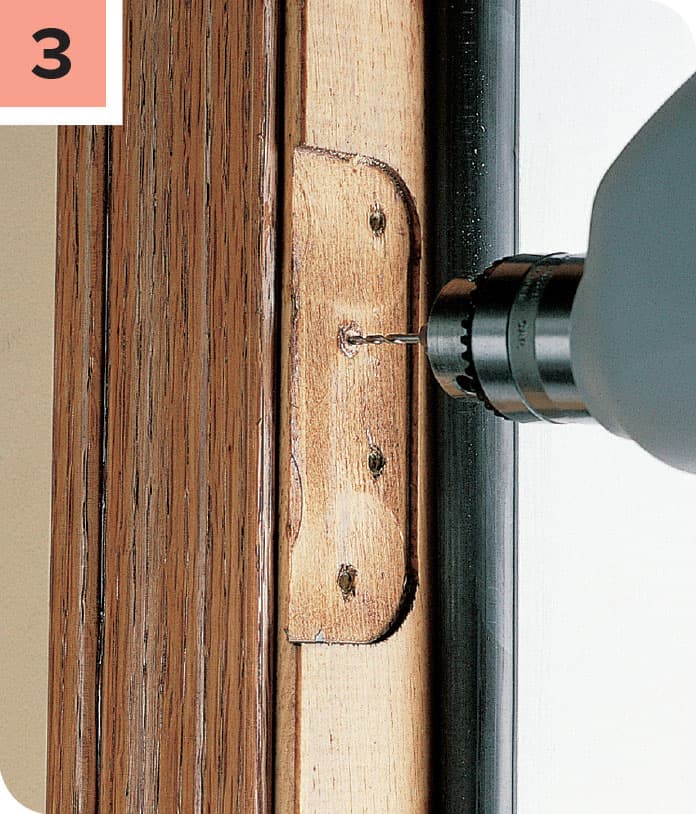
Drill small pilot holes in the new wood patch, and reinstall the hinge.
Tips for Aligning a Latchbolt & Strike Plate
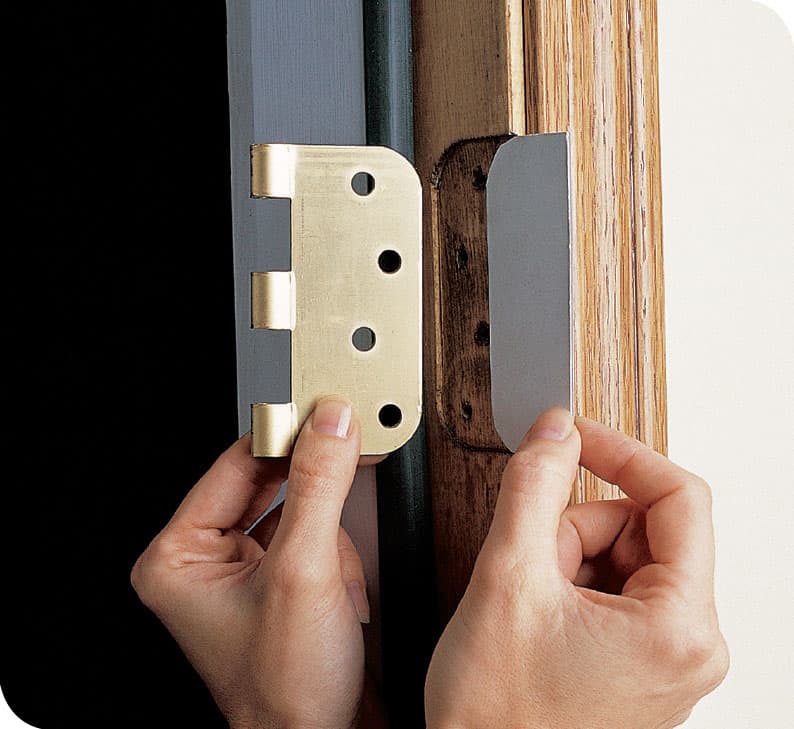
Install a thin cardboard shim behind the bottom hinge to raise the position of the latchbolt. To lower the latchbolt, shim behind the top hinge. Reinstall the hinge plate.
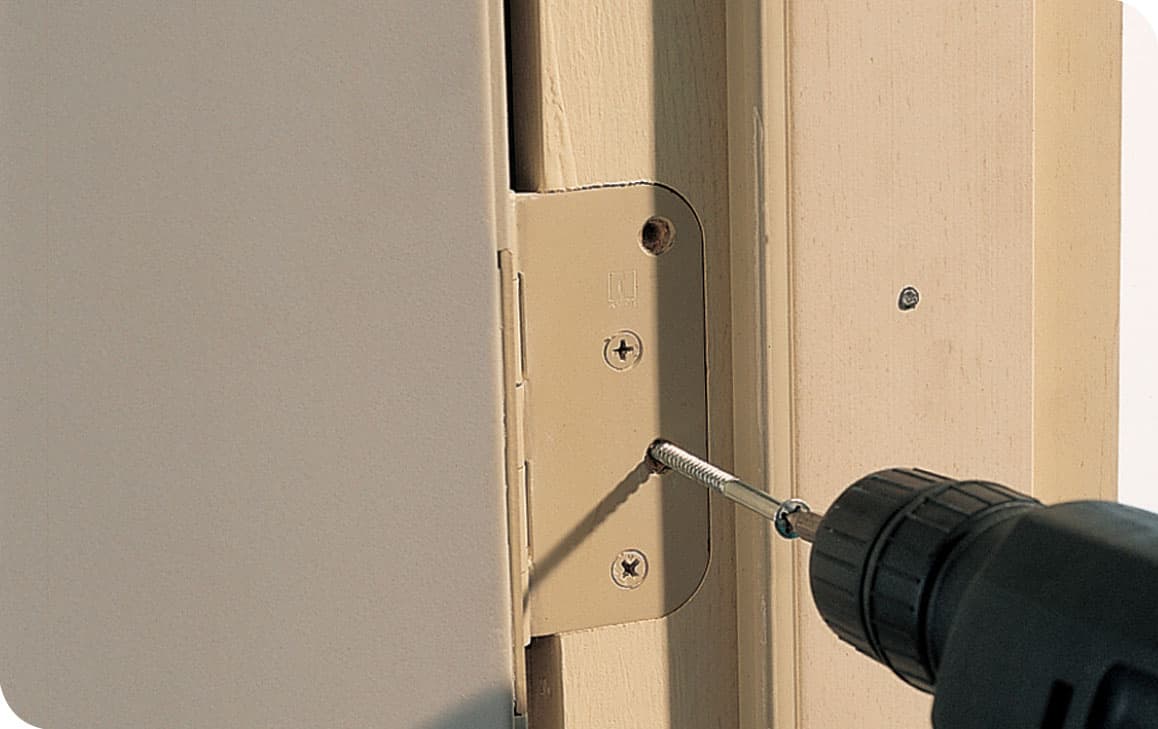
Remove two hinge screws from the top or bottom hinge, and drive a 3" wood screw into each hole. The screws will reach the framing studs in the wall and pull the door jamb, changing the angle of the door. Add long screws to the top hinge to raise the latchbolt or to the bottom hinge to lower it.
Tips for Straightening a Warped Door
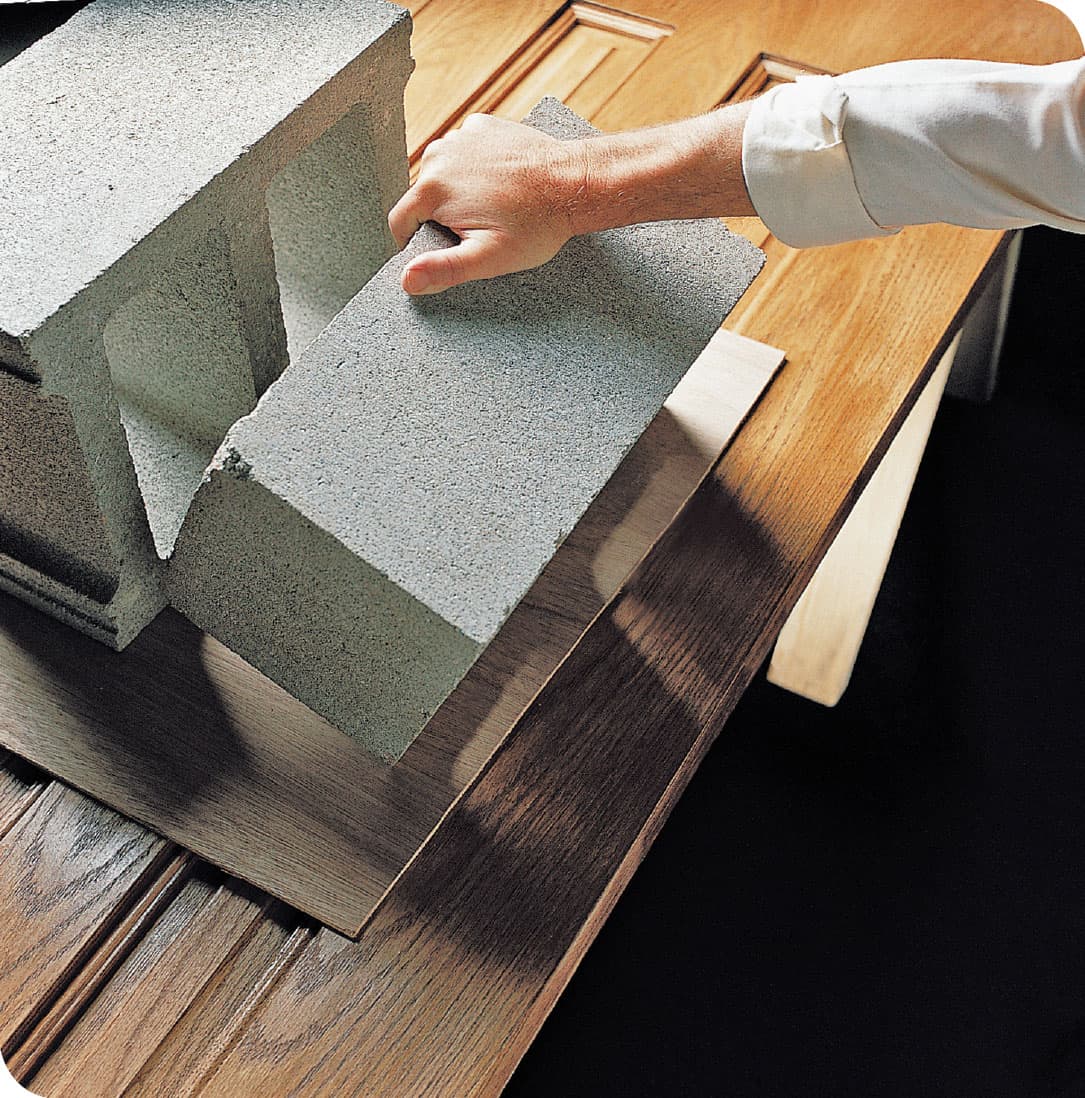
If the warpage is slight, you may be able to straighten it by removing it and placing heavy weights on the convex side of the warpage. Leave the weights on the door for several days, and check it periodically with a straightedge. This has a relatively low chance of success but may be worth a try.
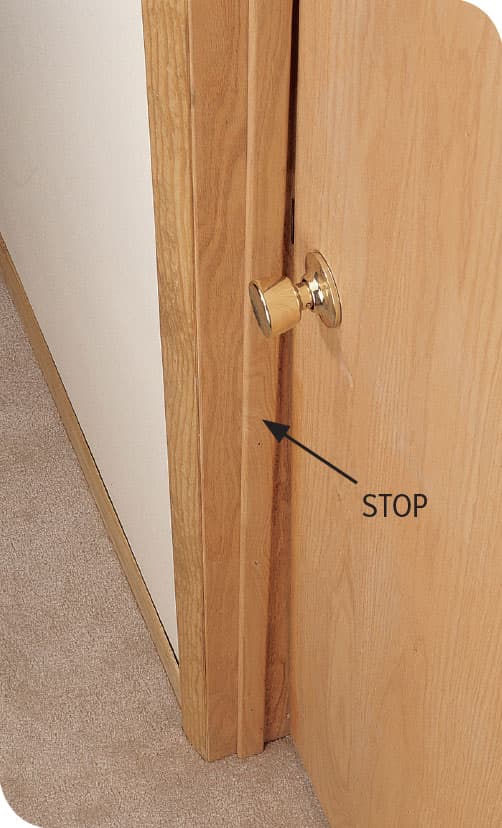
Adjust the door trim to follow the door. You can do this by removing or loosening the doorstop molding and reattaching it to conform to the door’s warped profile. You likely will have some touch-up work to do on the door jamb where the doorstop edge has moved.
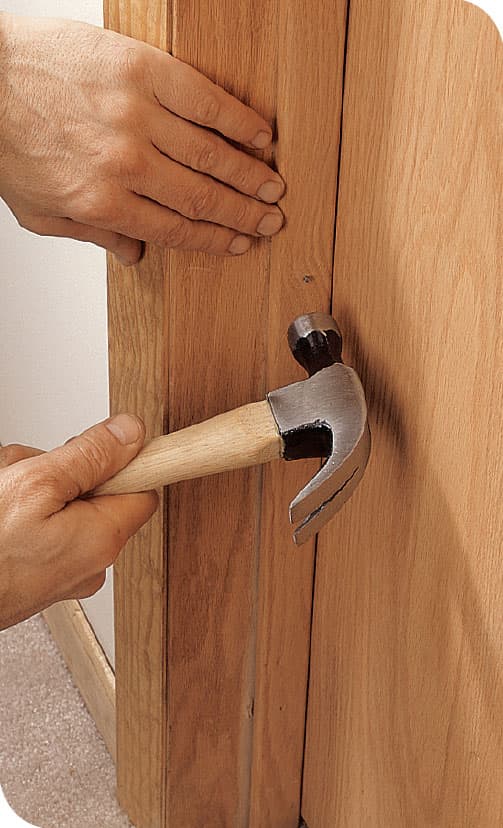
Tips for Freeing a Sticking Door
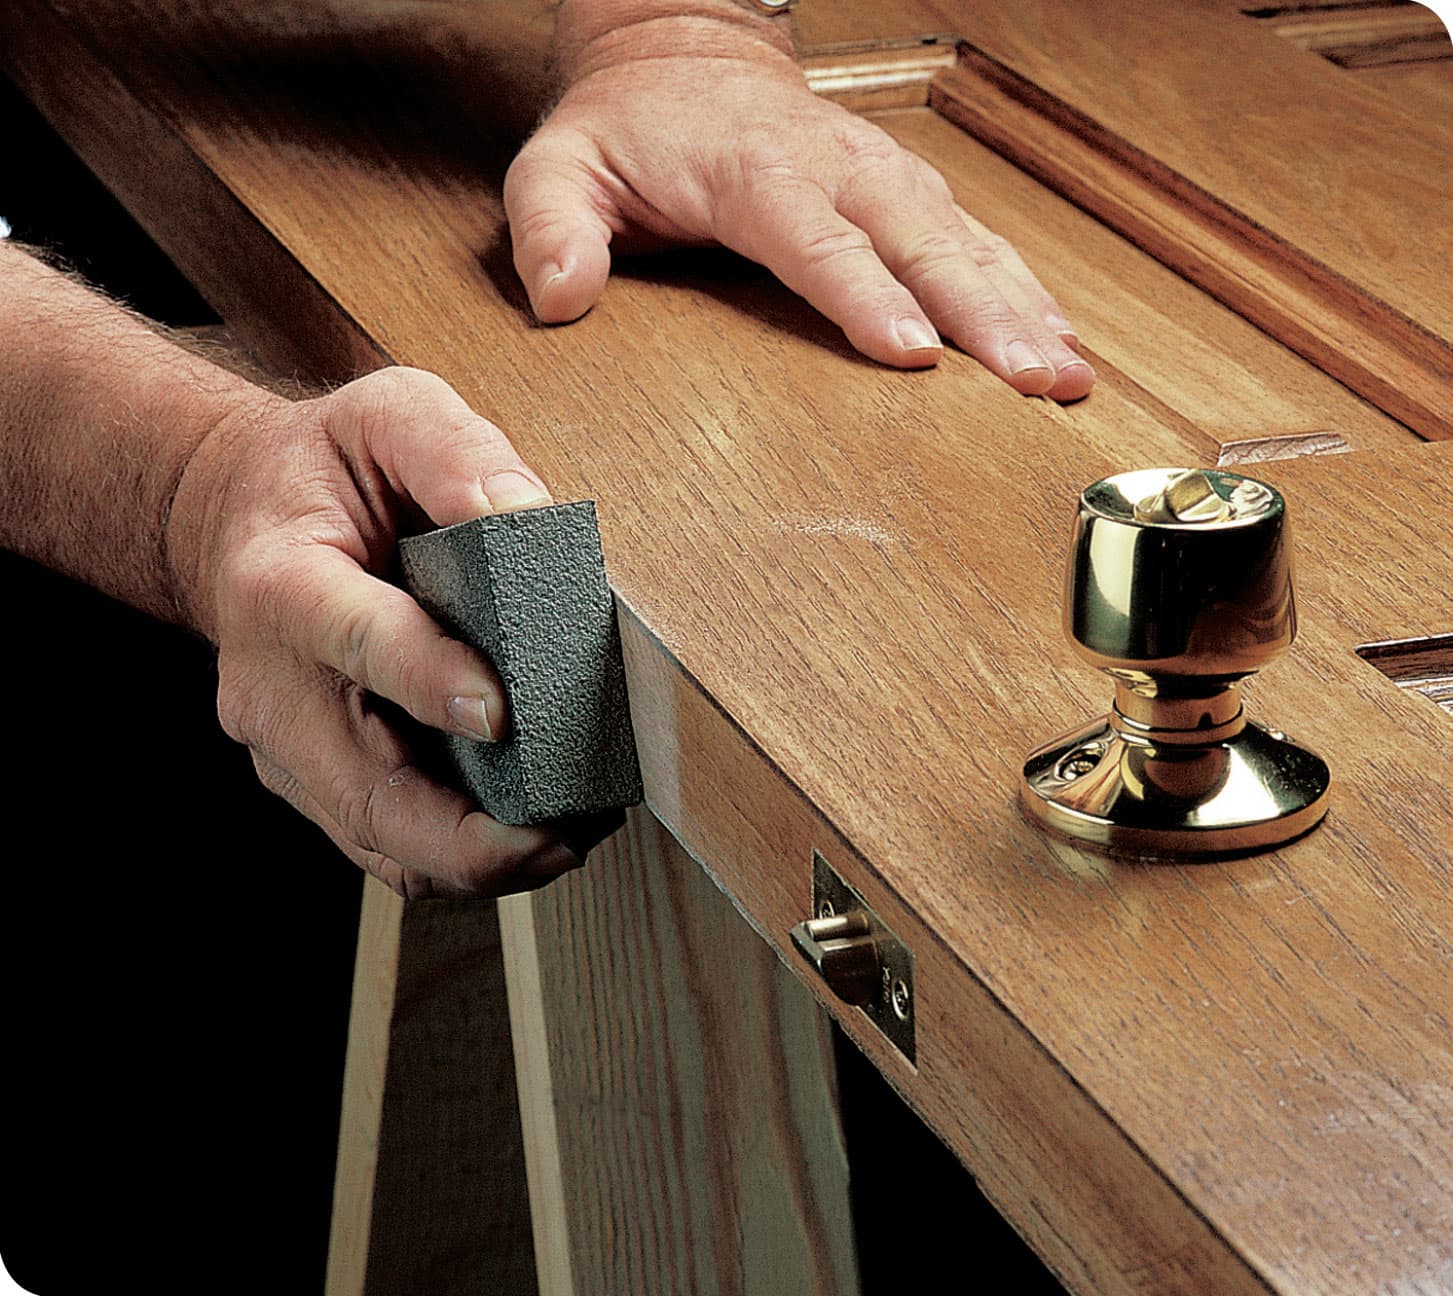
Tighten all of the hinge screws. If the door still sticks, use light pencil lines to mark the areas where the door rubs against the door jamb. Remove the door and sand the sticking points. You may be able to get away with sanding the door while it is still hanging. Replace the door and test the fit. If the sanding has not fixed the sticking, remove it again and go to the next step.
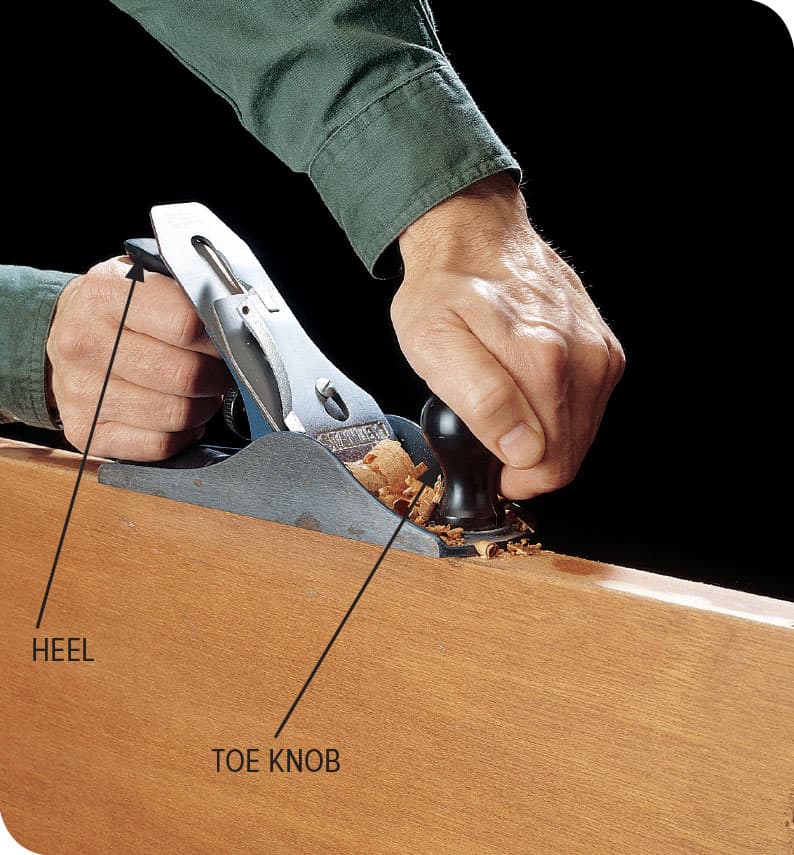
Secure the door on-edge. If the door has veneered surfaces, sand back the veneer edges slightly so they do not catch the plane blade and splinter. Grip the toe knob and handle firmly, and plane with long, smooth strokes. You could also use a belt sander or a power planer for this step if you are not good with a hand plane—it is an acquired skill. Check the door’s fit, then sand the planed area smooth.
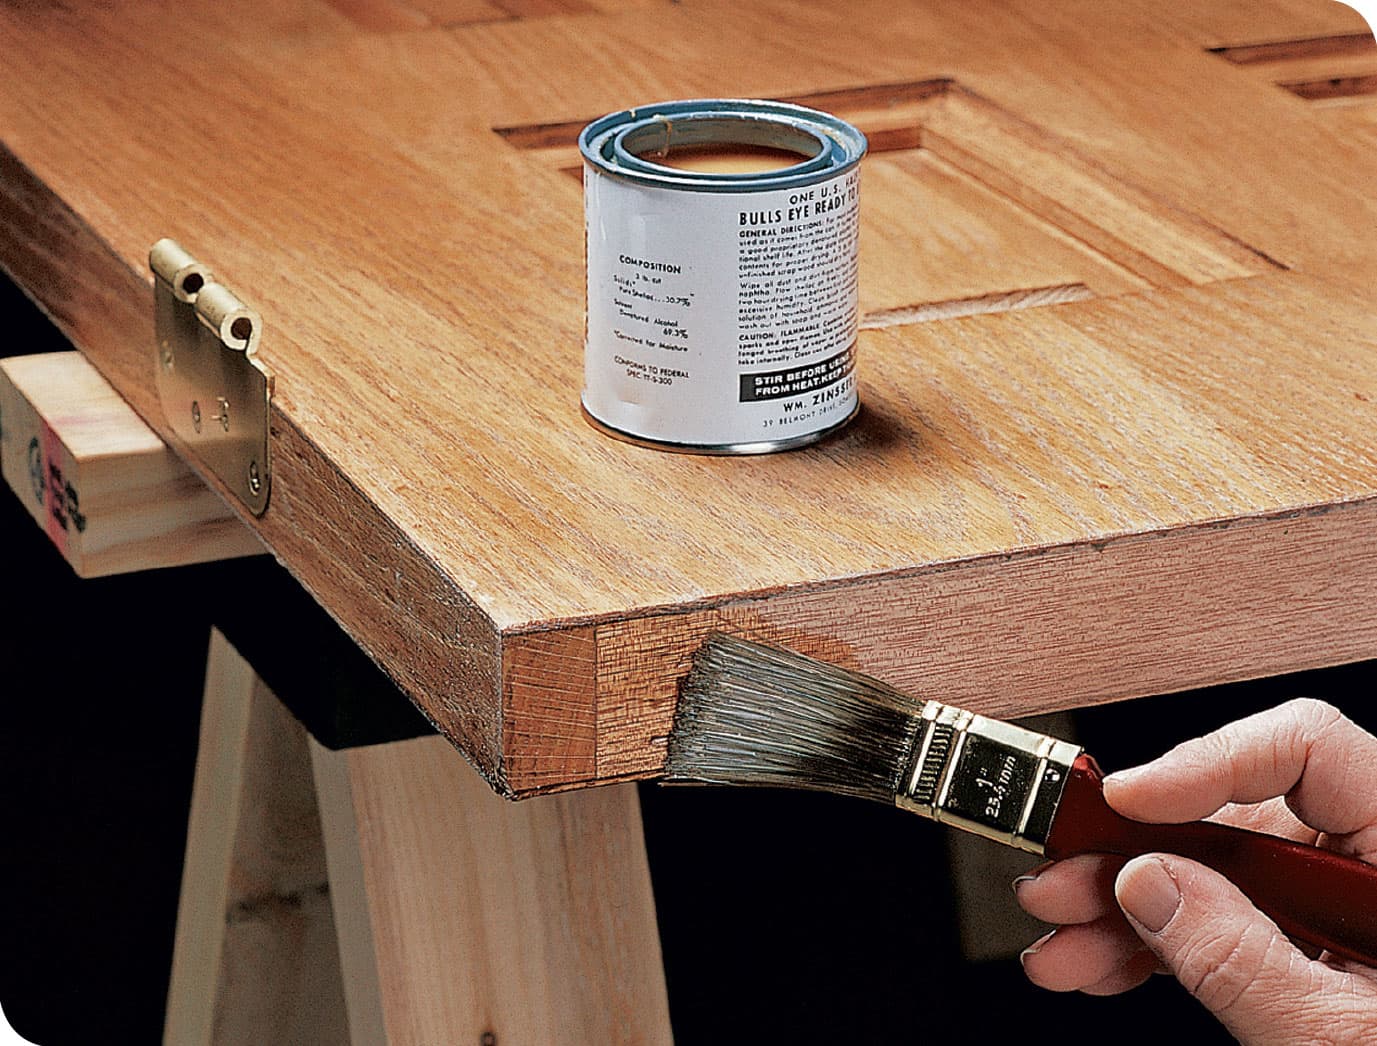
Apply clear sealer or paint to the sanded or planed area and any other exposed surfaces of the door. This will prevent moisture from entering the wood and is especially important for entry doors.
Tips for Sliding Doors
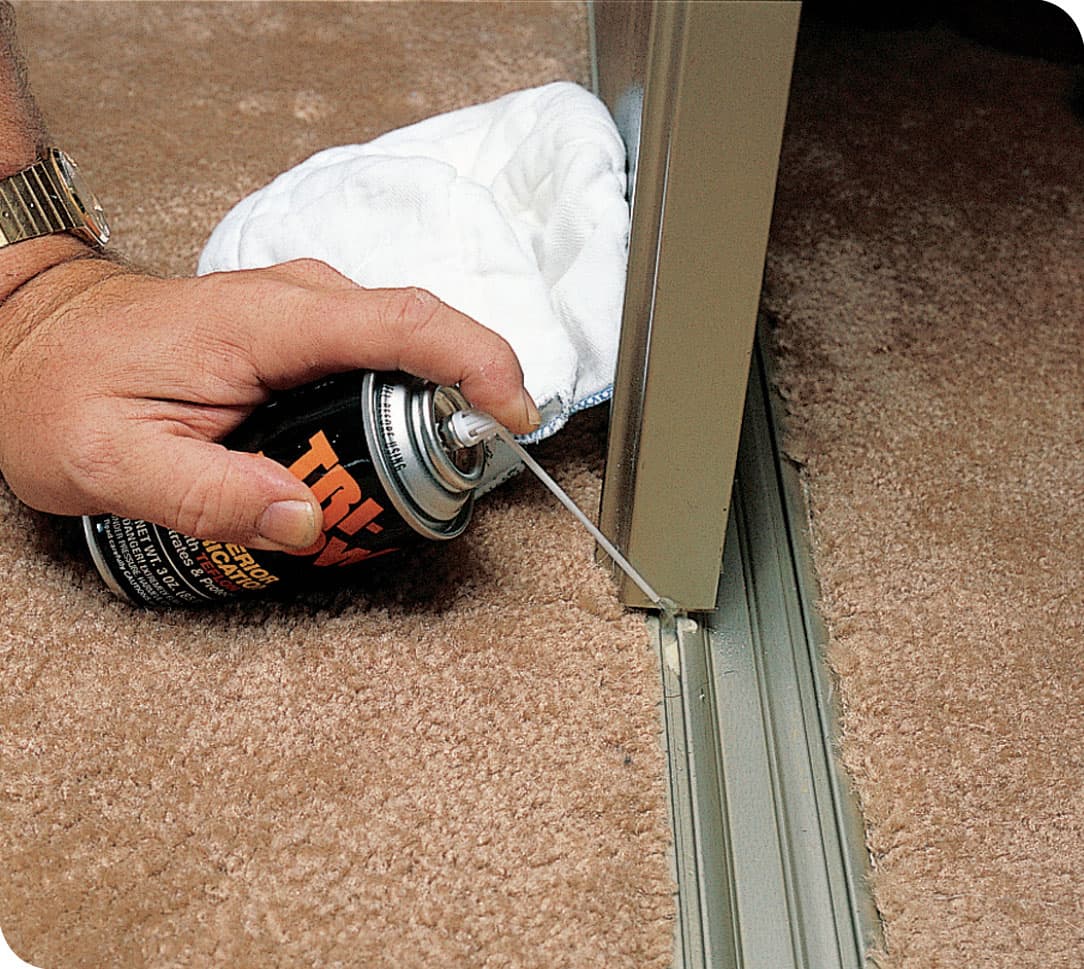
Clean the tracks above and below the doors with a toothbrush and a damp cloth or a hand vacuum. Spray a greaseless lubricant on all the rollers, but do not spray the tracks. Replace any bent or worn parts.
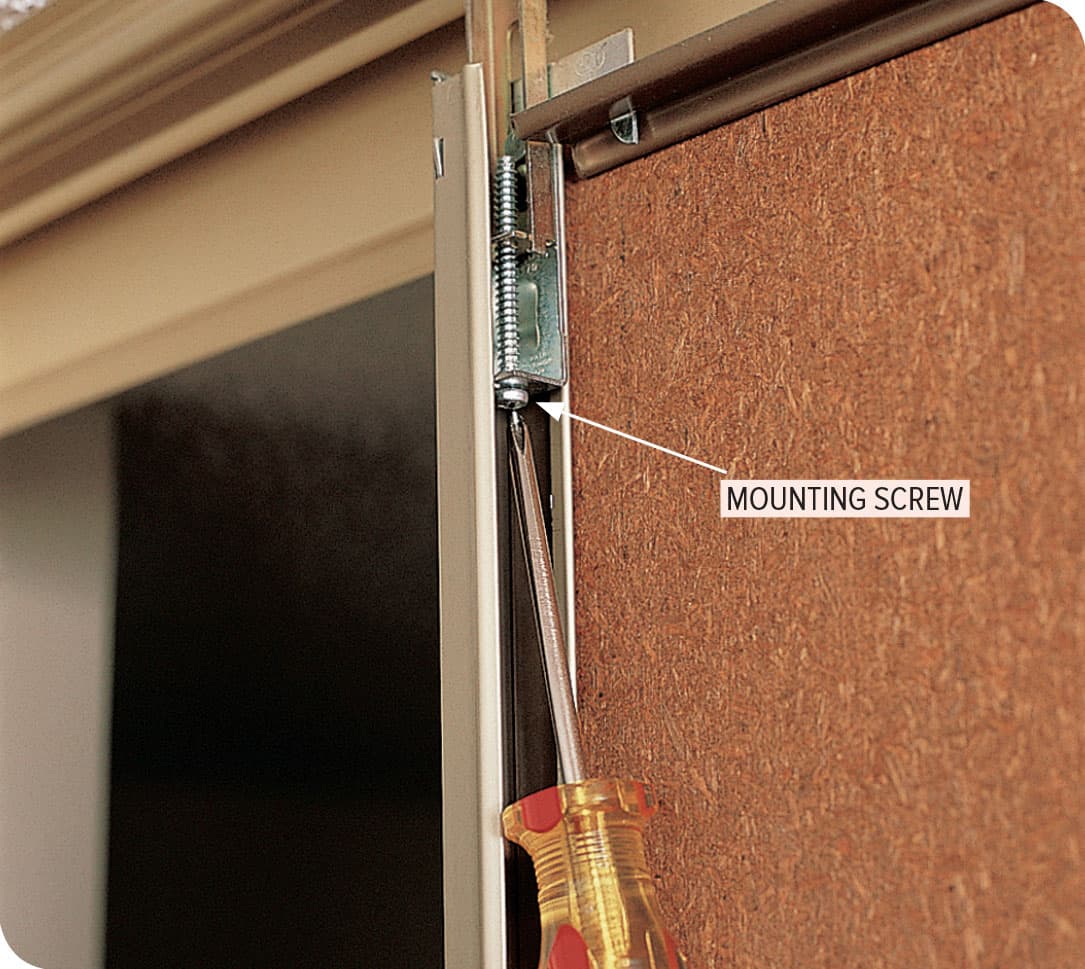
Check the gap along the bottom edge of the door to make sure it is even. To adjust the gap, rotate the mounting screw to raise or lower the door edge.
Tips for Bifold Doors
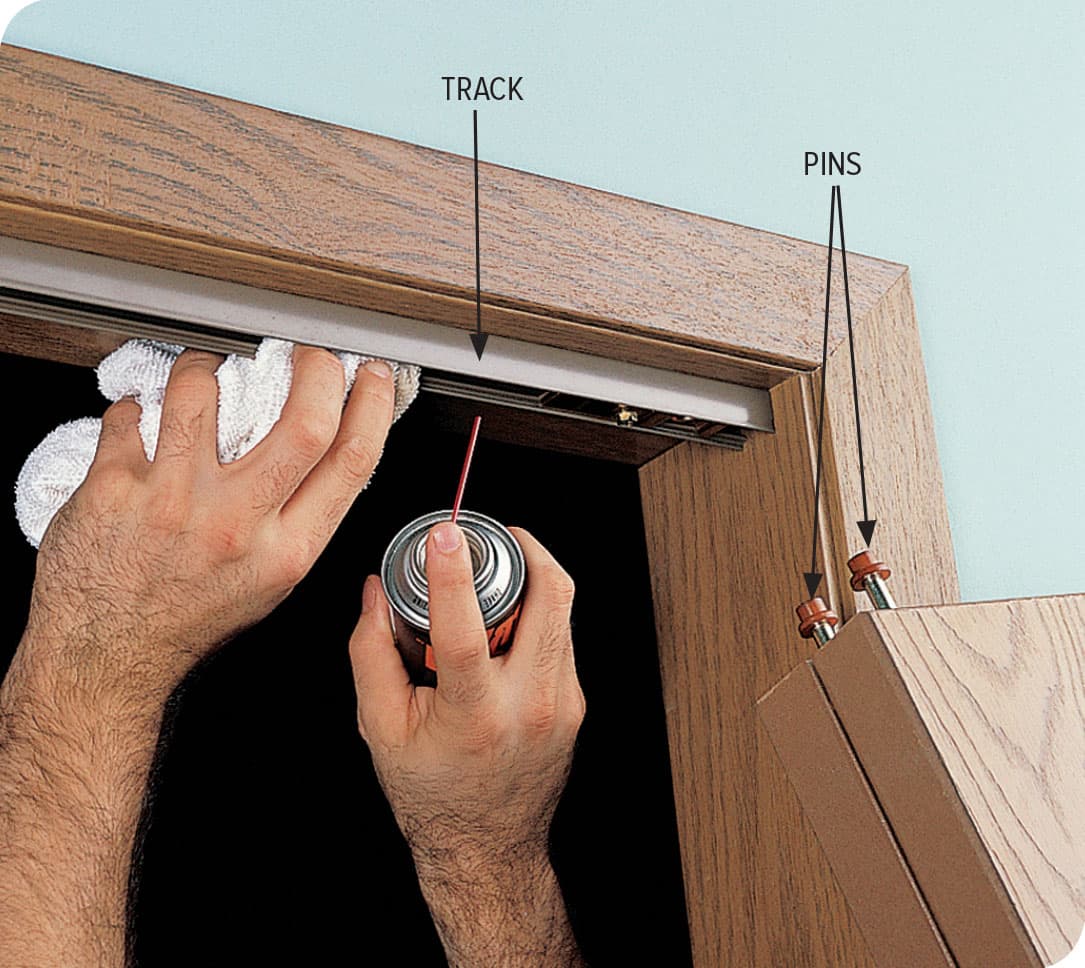
Open or remove the doors and wipe the tracks with a clean rag. Spray the tracks and rollers or pins with greaseless lubricant.
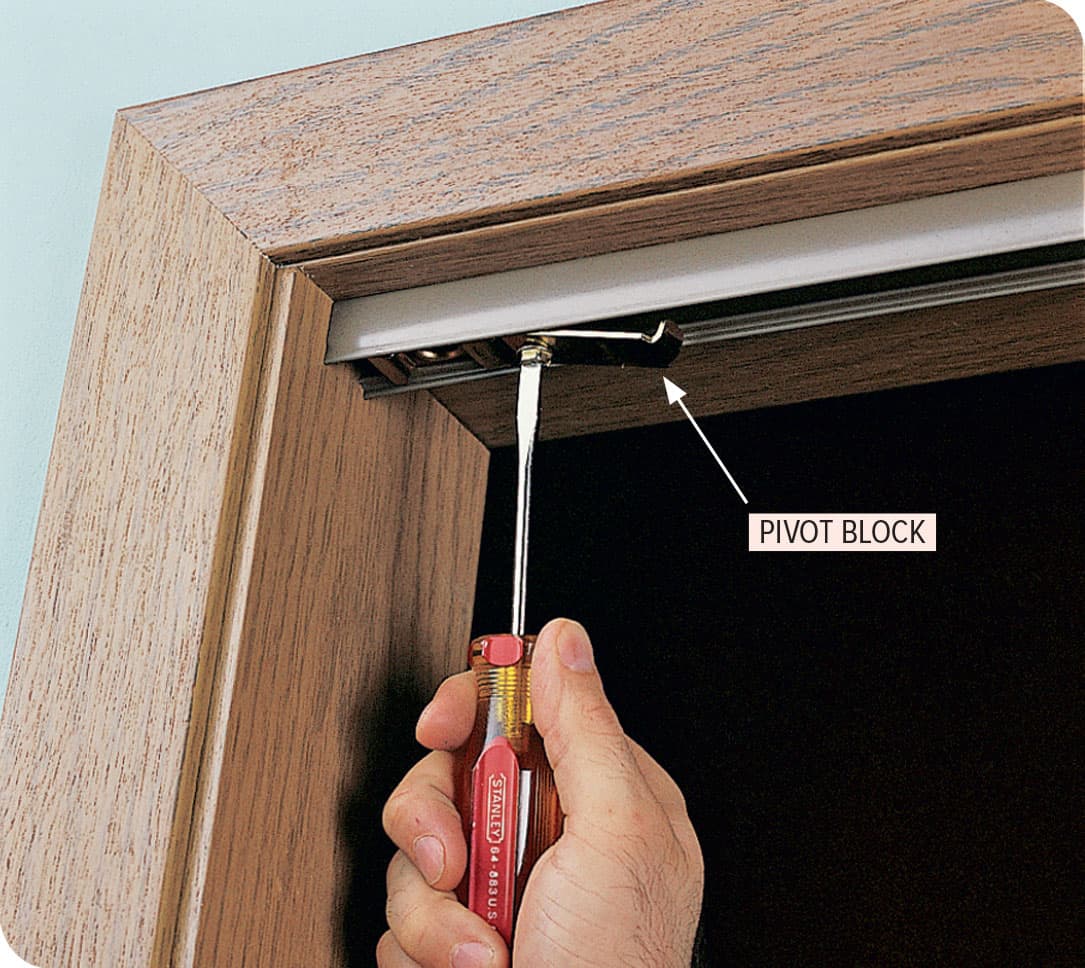
Check closed doors for alignment within the door frame. If the gap between the closed doors is uneven, adjust the top pivot blocks with a screwdriver or wrench.
How to Shorten a Hollow-core Door
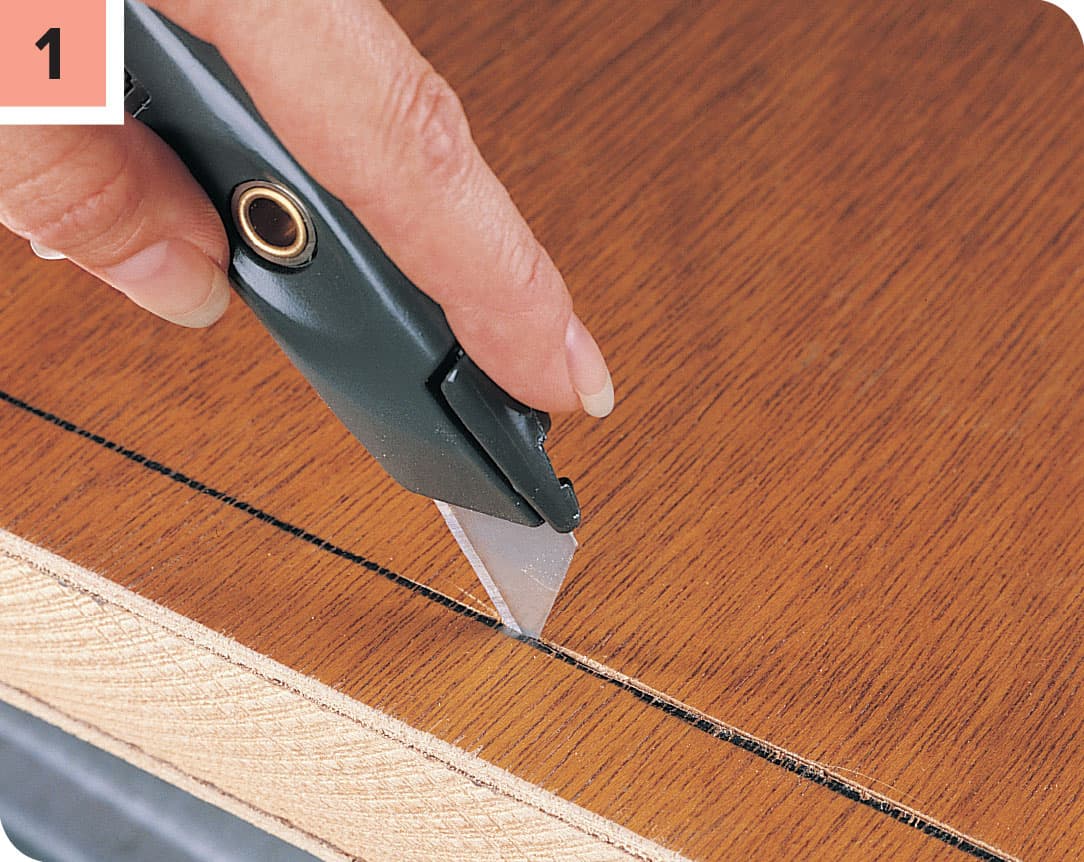
Mark the cutting line. Cut through the door veneer with a sharp utility knife to prevent it from chipping when the door is sawed.
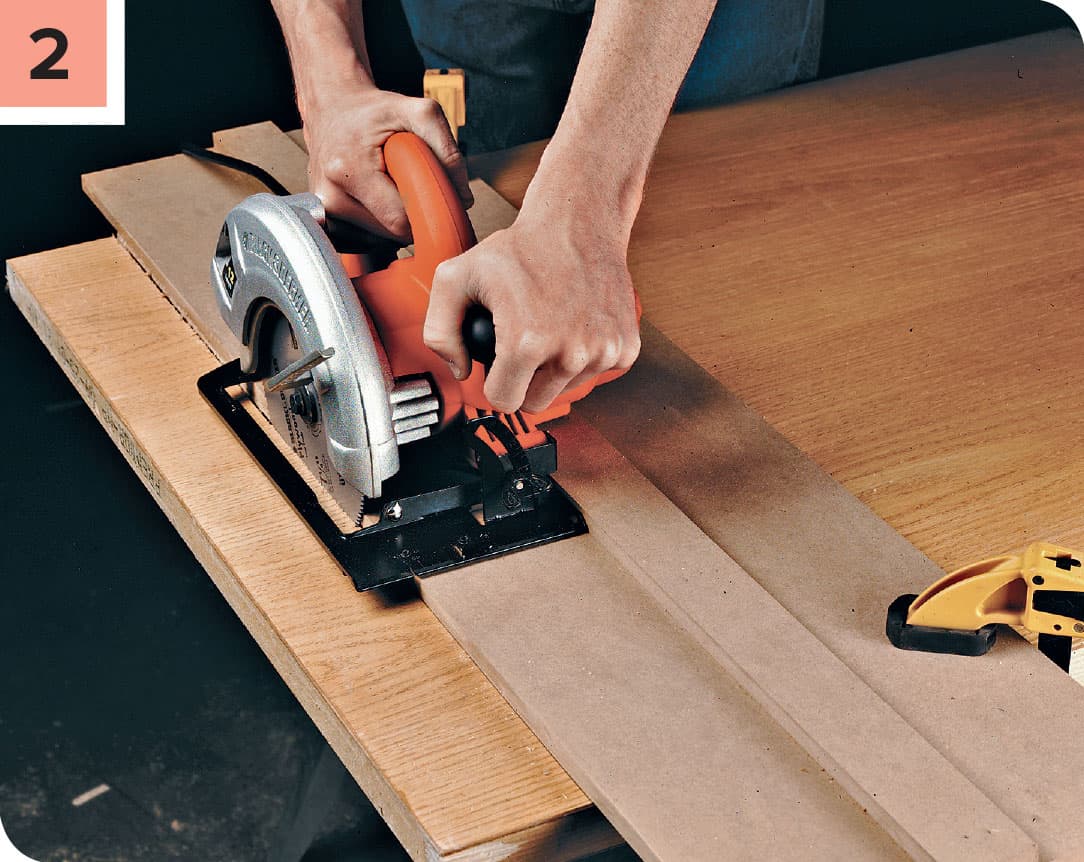
Lay the door on sawhorses and clamp a straightedge to the door as a cutting guide. Saw off the bottom of the door. The hollow core of the door may be exposed.
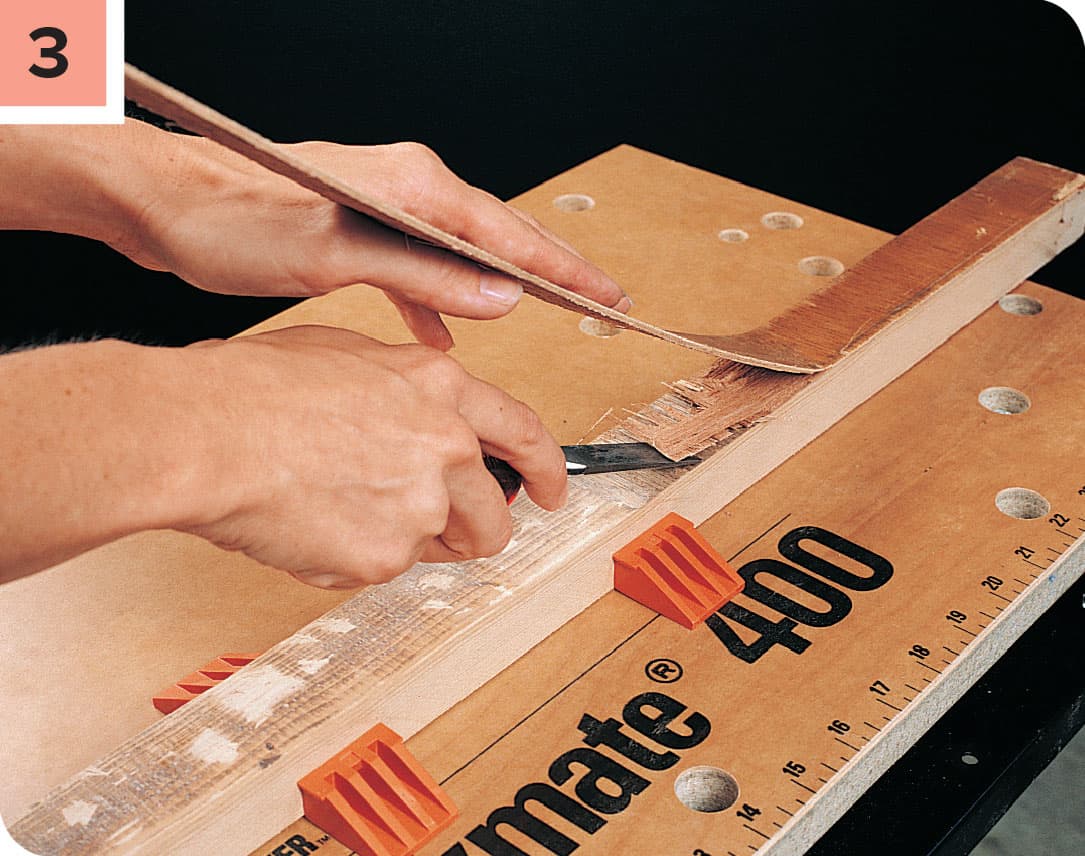
To reinstall a cutoff frame piece in the bottom of the door, remove the frame piece from the door and chisel the veneer from both sides of the frame.
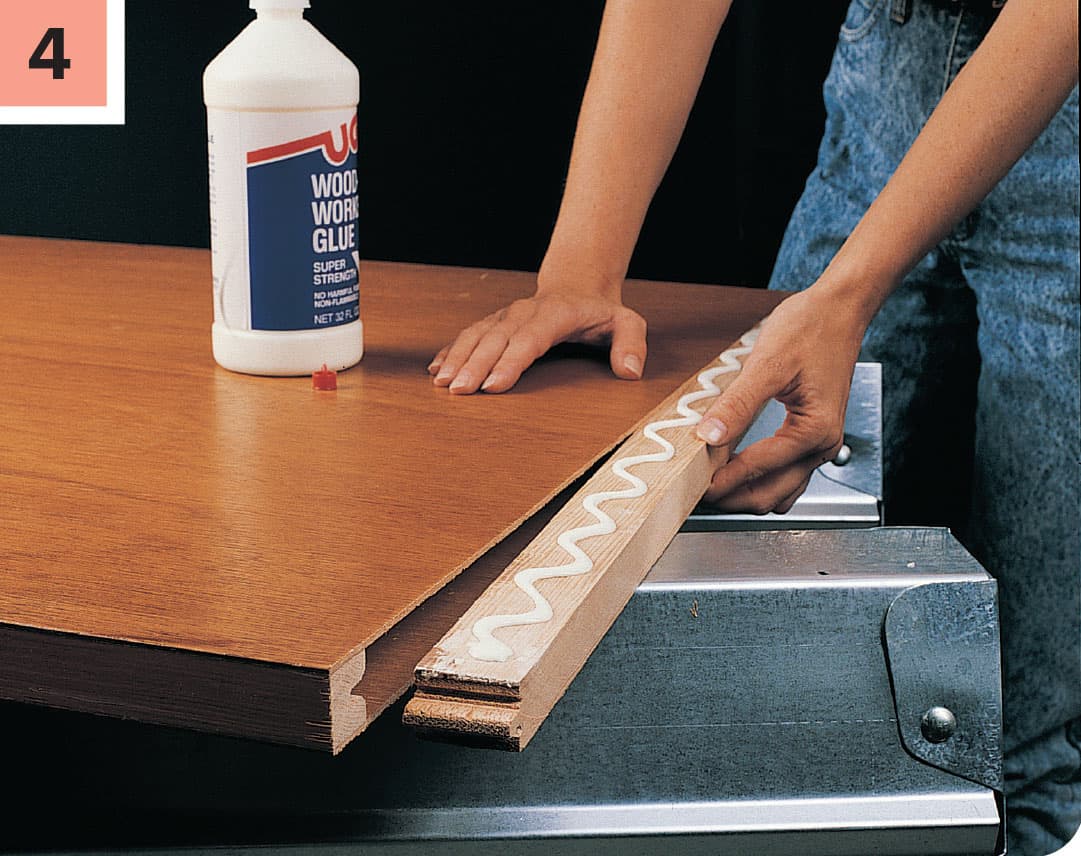
Apply wood glue to the cutoff piece. Insert the frame piece into the opening at the door bottom and clamp it. Wipe away any excess glue and let the glue dry overnight.
FIXING COMMON WINDOW PROBLEMS
Many of us have experienced difficulty with opening windows due to swollen wood or painted channels. Almost as frequent, windows won’t stay open because of a broken sash cord (on very old windows) or failed spring-load device. Double-hung windows with spring-loaded sash tracks require cleaning and an occasional adjustment of the springs in (or behind) the tracks. Casement windows are often faulty at the crank mechanisms. If cleaning doesn’t fix the problem, the crank mechanism must be replaced.
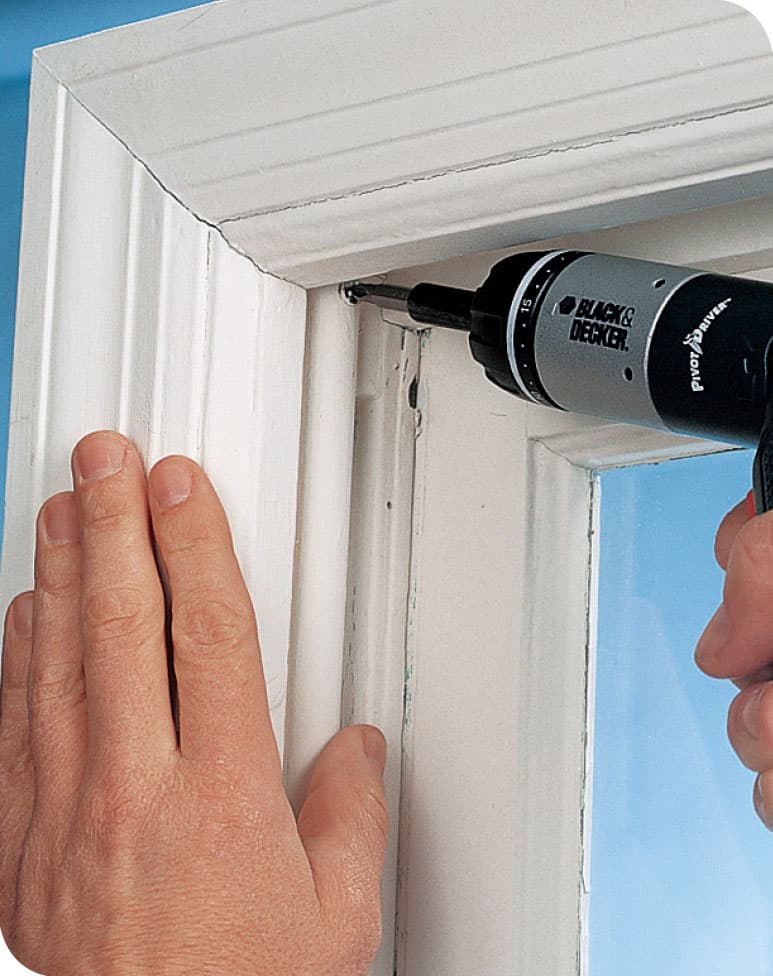
Spring-lift windows operate with the help of a spring-loaded lift rod inside a metal tube. Adjust them by unscrewing the top end of the tube from the jamb, then twisting the tube to change the spring tension: clockwise for more lifting power; counterclockwise for less. Maintain a tight grip on the tube at all times to keep it from unwinding.
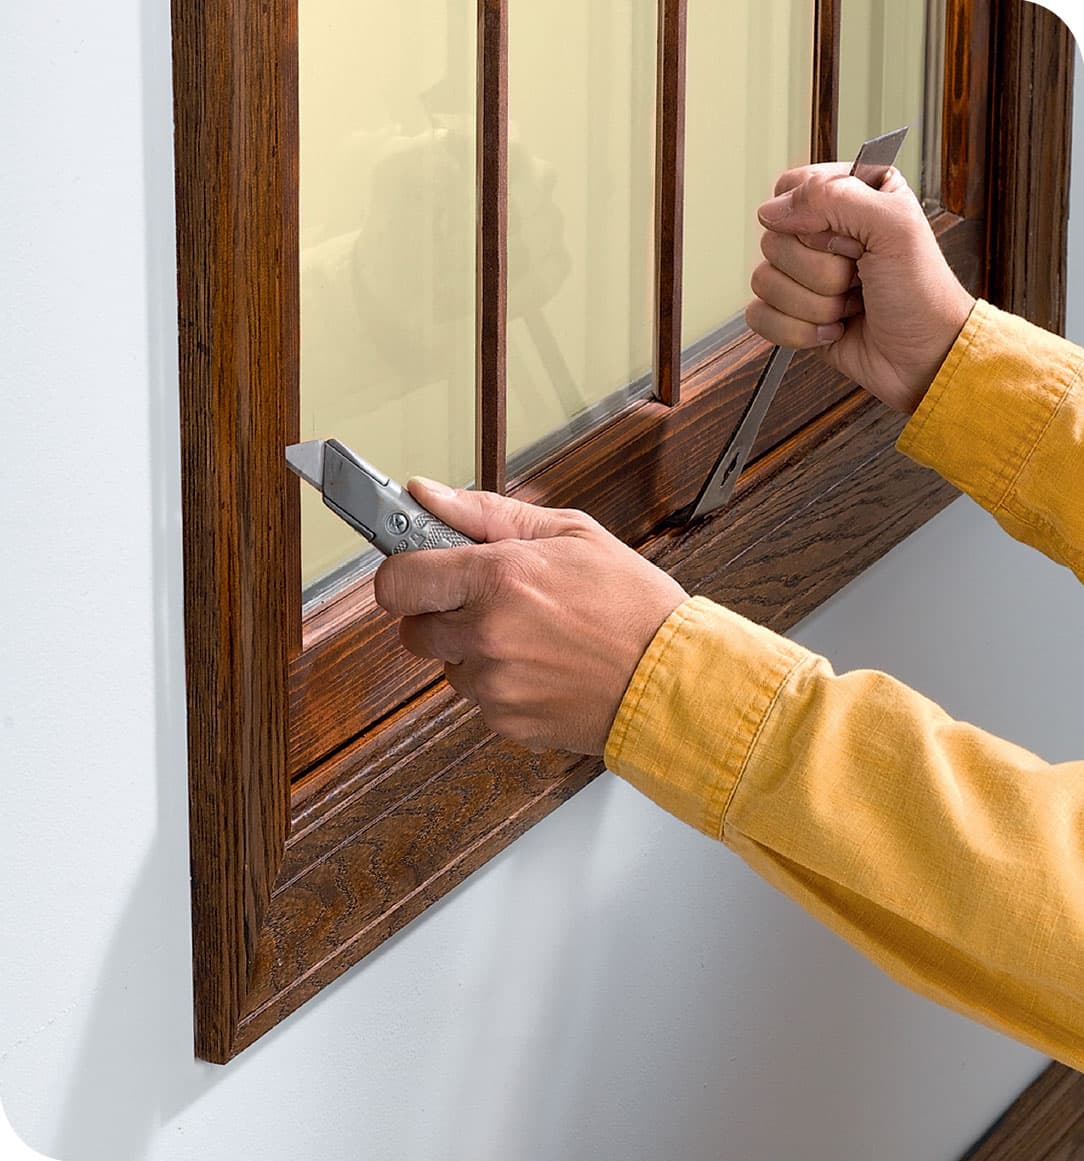
Windows endure temperature extremes, house settling, and all sorts of wear and tear. Sooner or later, you’ll need to perform a bit of maintenance to keep them working properly.
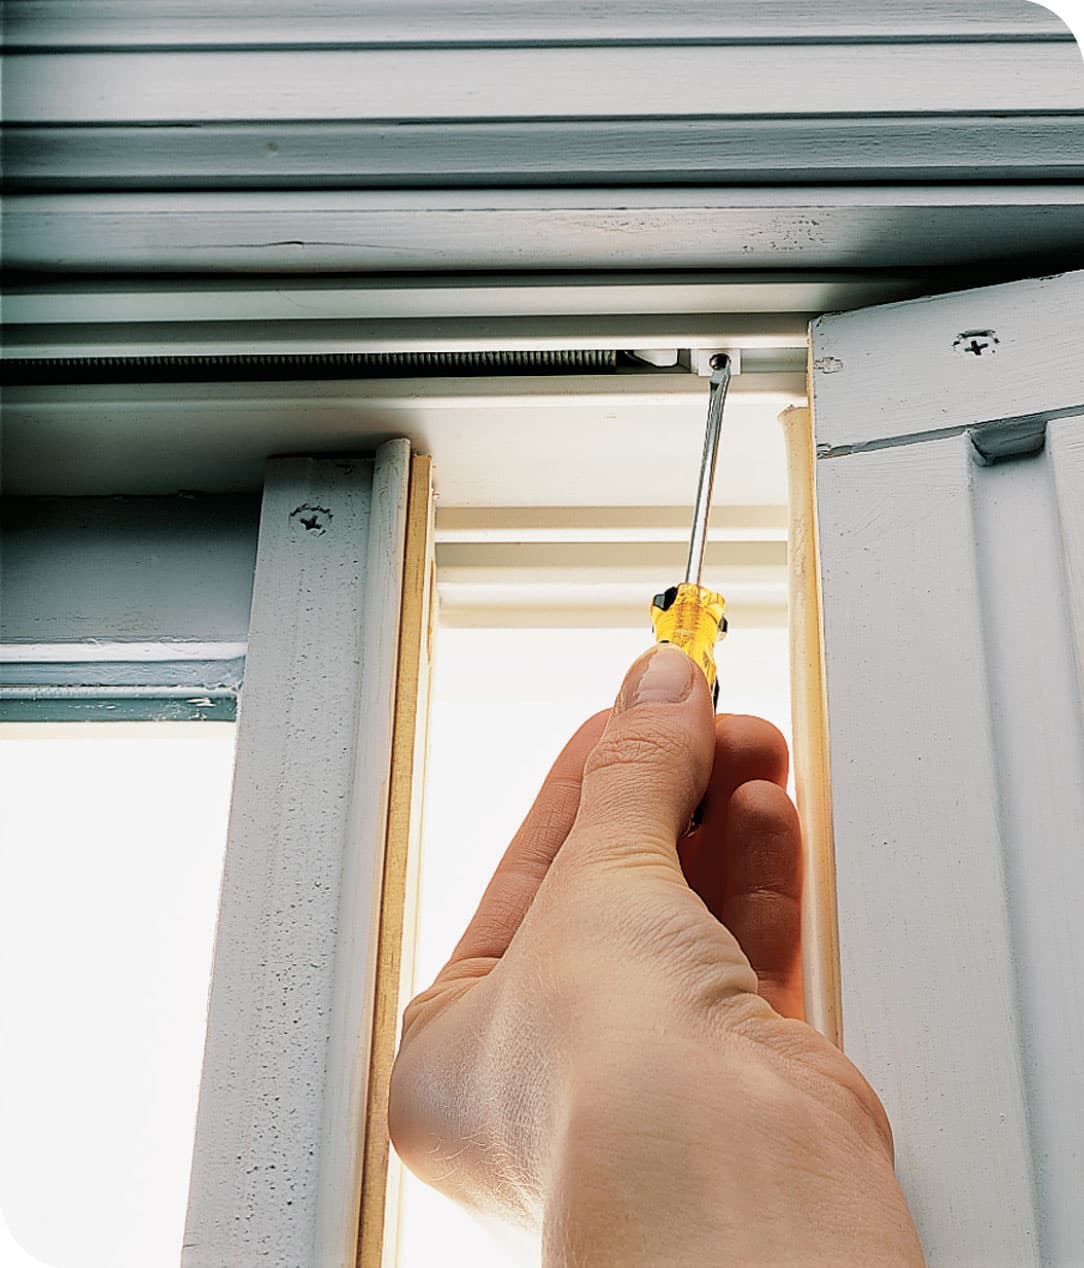
Spring-loaded windows have an adjustment screw on the track insert. Adjust both sides until the window is balanced and opens and closes smoothly.
Tips for Freeing Stuck Windows
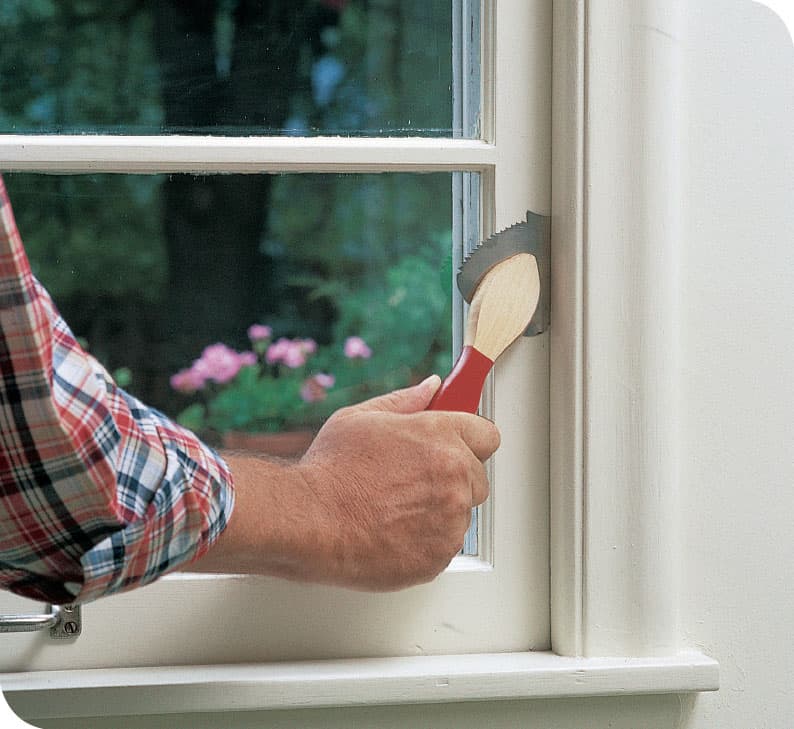
Cut the paint film if the window is painted shut. Insert a paint zipper (the tool seen above, sold at most hardware stores) or utility knife between the window stop and the sash, and slide it down to break the seal.
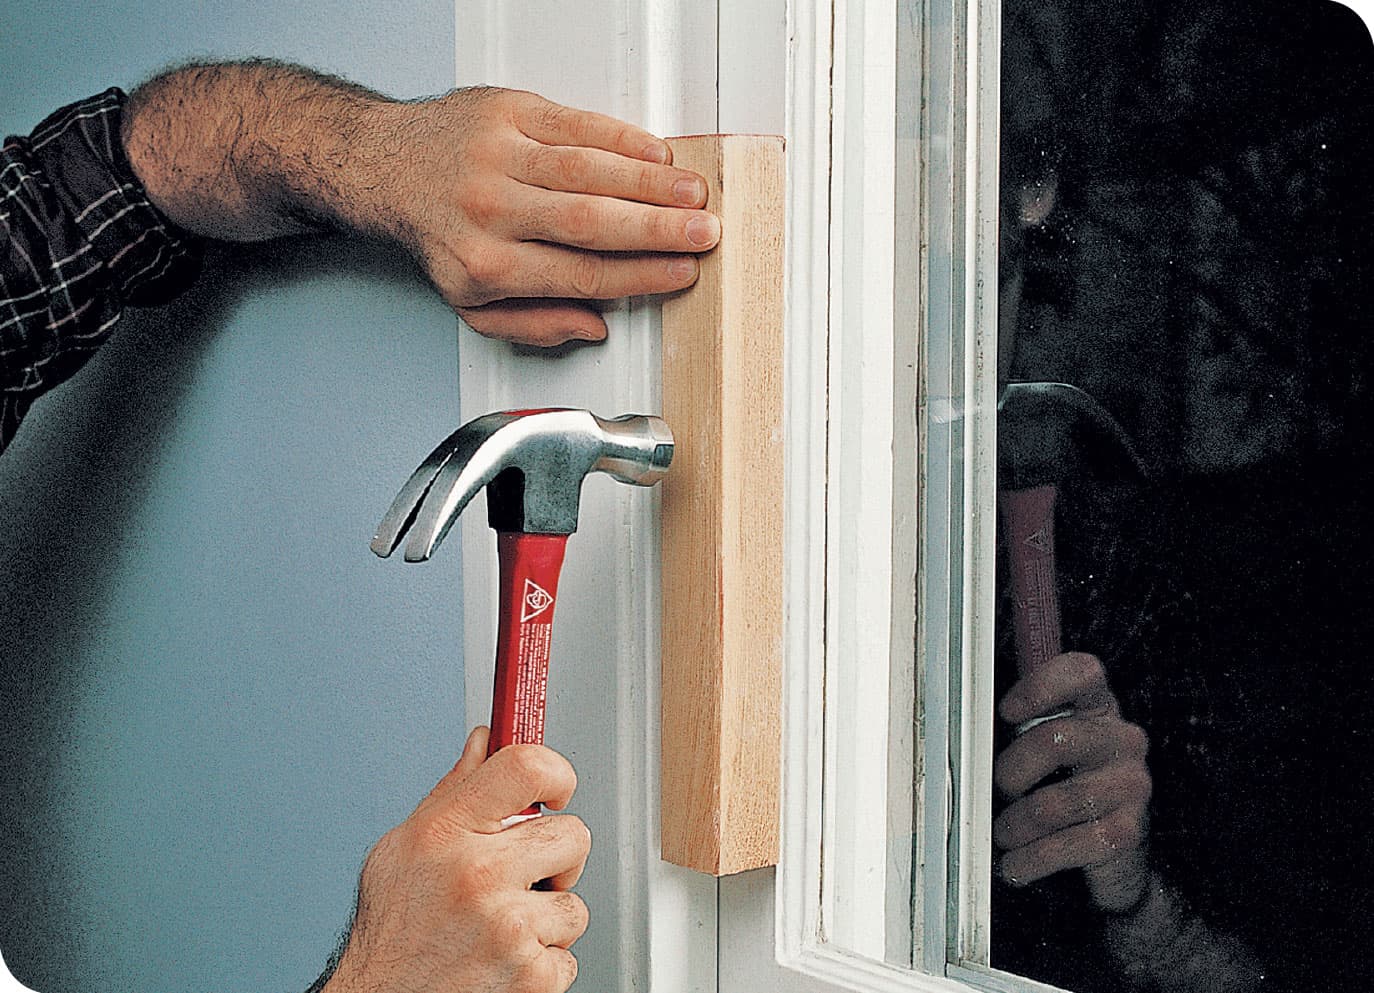
Place a block of scrap wood against the window sash. Tap very lightly with a hammer to free the window.
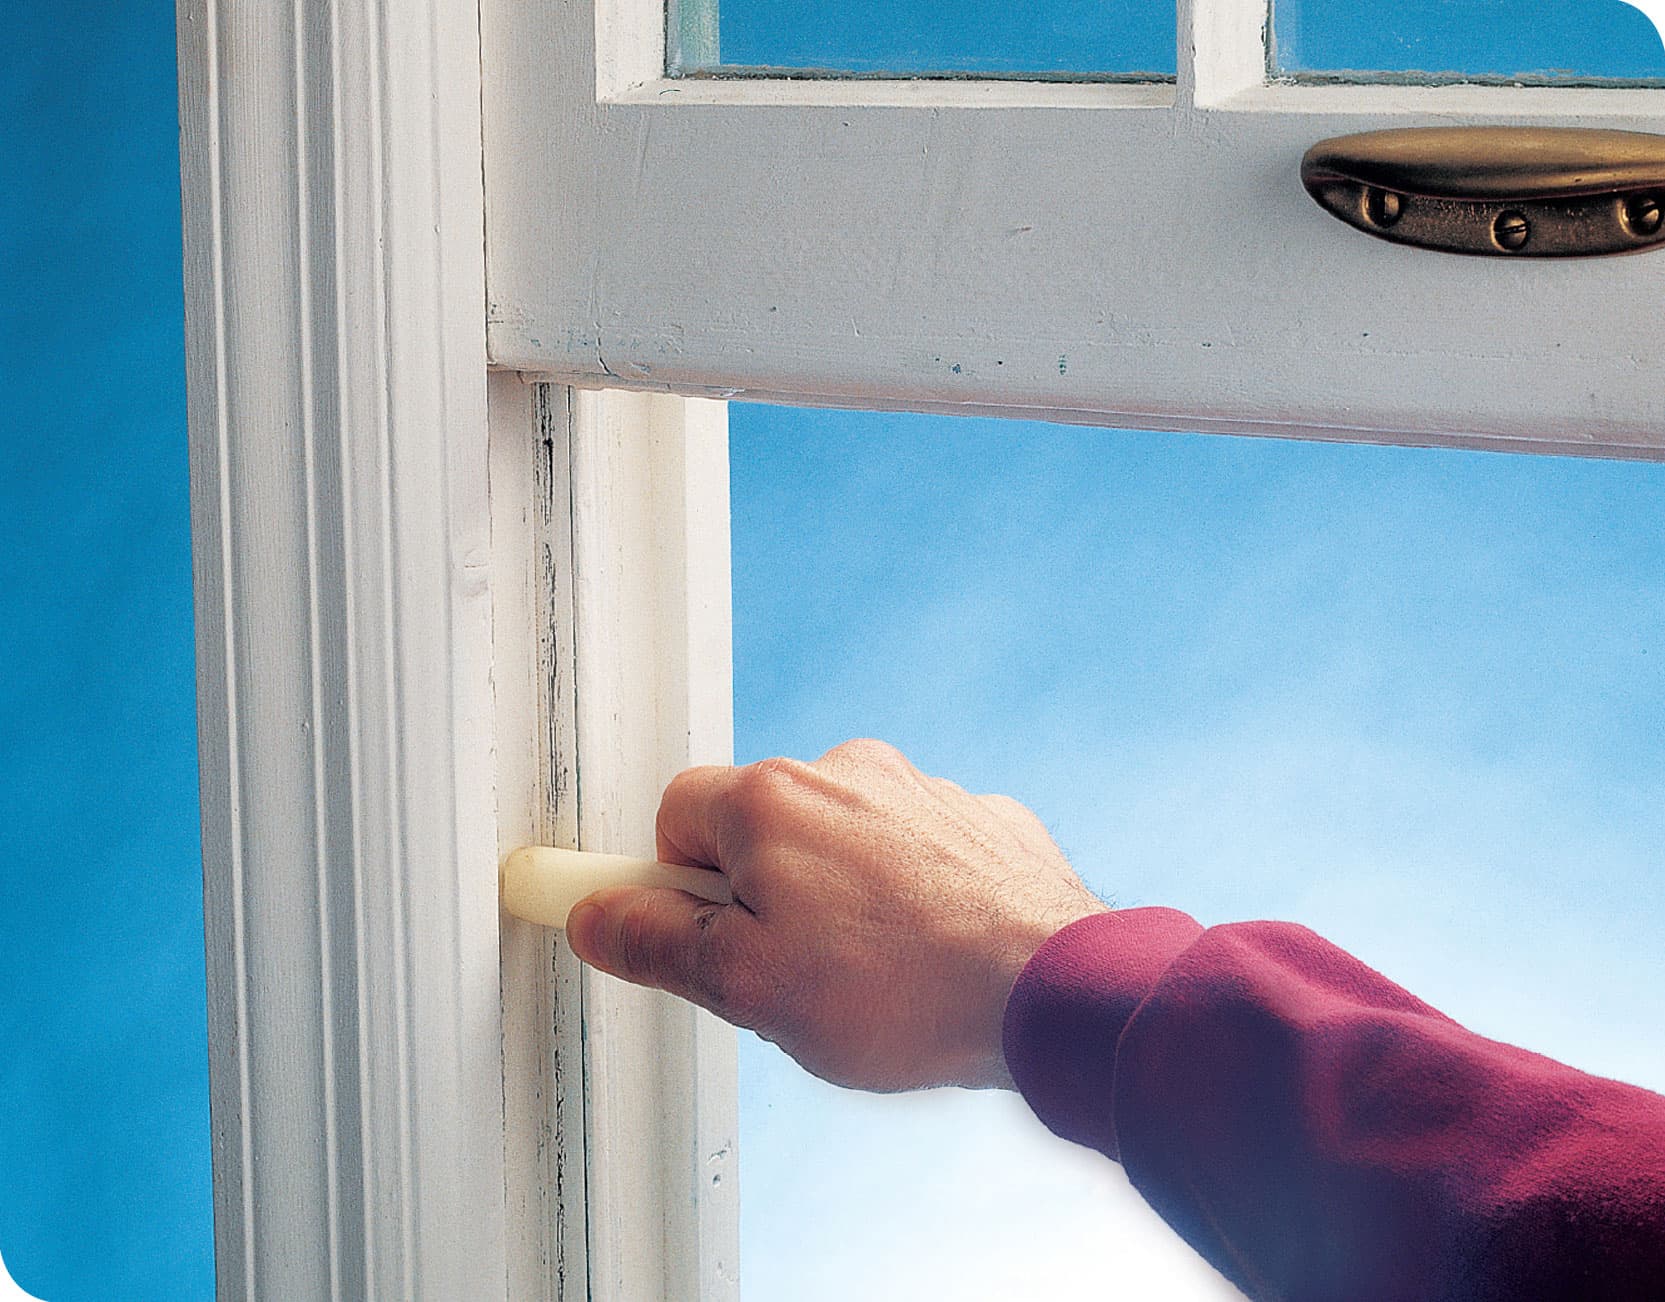
Lubricate window channels by rubbing them with a white candle, then opening and closing the window a few times. Do not use liquid lubricants on wood windows
How to Lubricate Casement Window Cranks
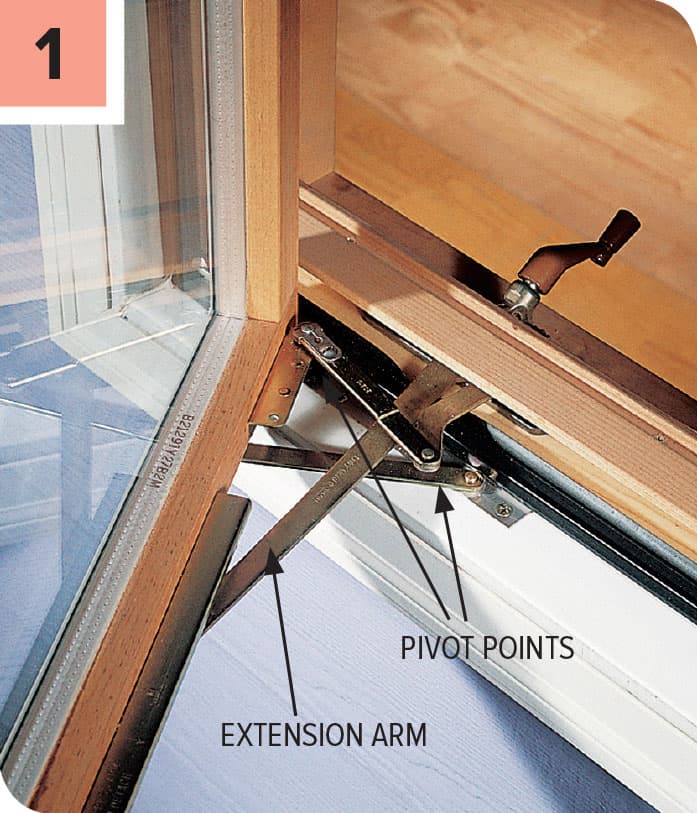
If a casement window is hard to crank, clean the accessible parts. Open the window until the roller at the end of the extension arm is aligned with the access slot in the window track.
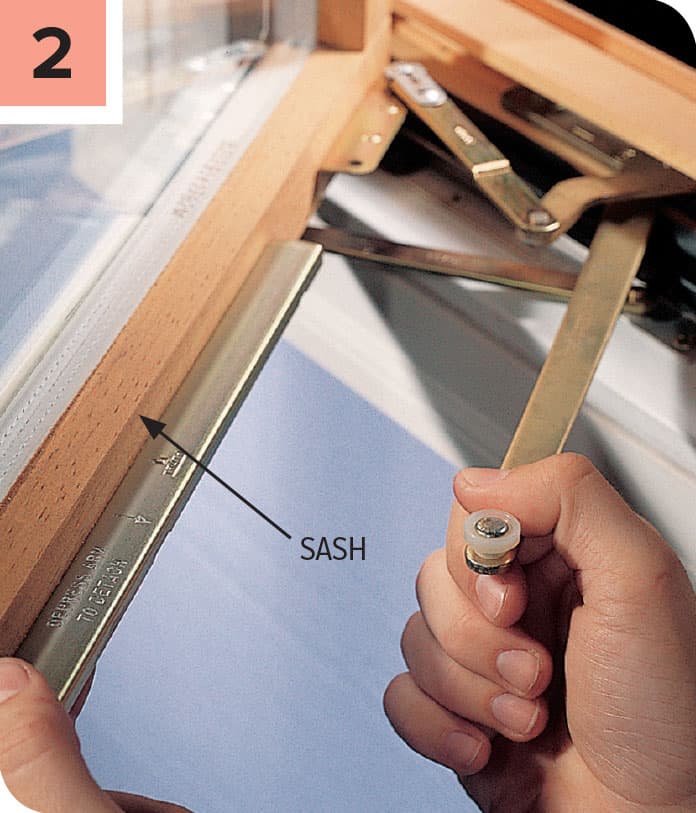
Disengage the extension arm by pulling it down and out of the track. Clean the track with a stiff brush, and wipe the pivoting arms and hinges with a rag.
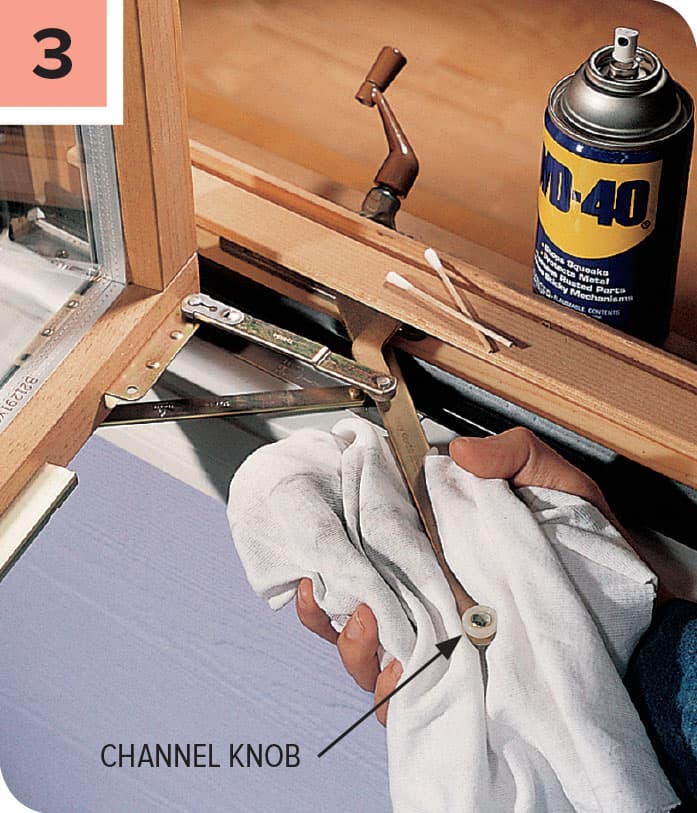
Lubricate the track and hinges with spray lubricant or household oil. Wipe off excess lubricant with a cloth, then reattach the extension arm. If that doesn’t solve the problem, repair or replace the crank assembly.
How to Repair a Casement Window Crank Assembly
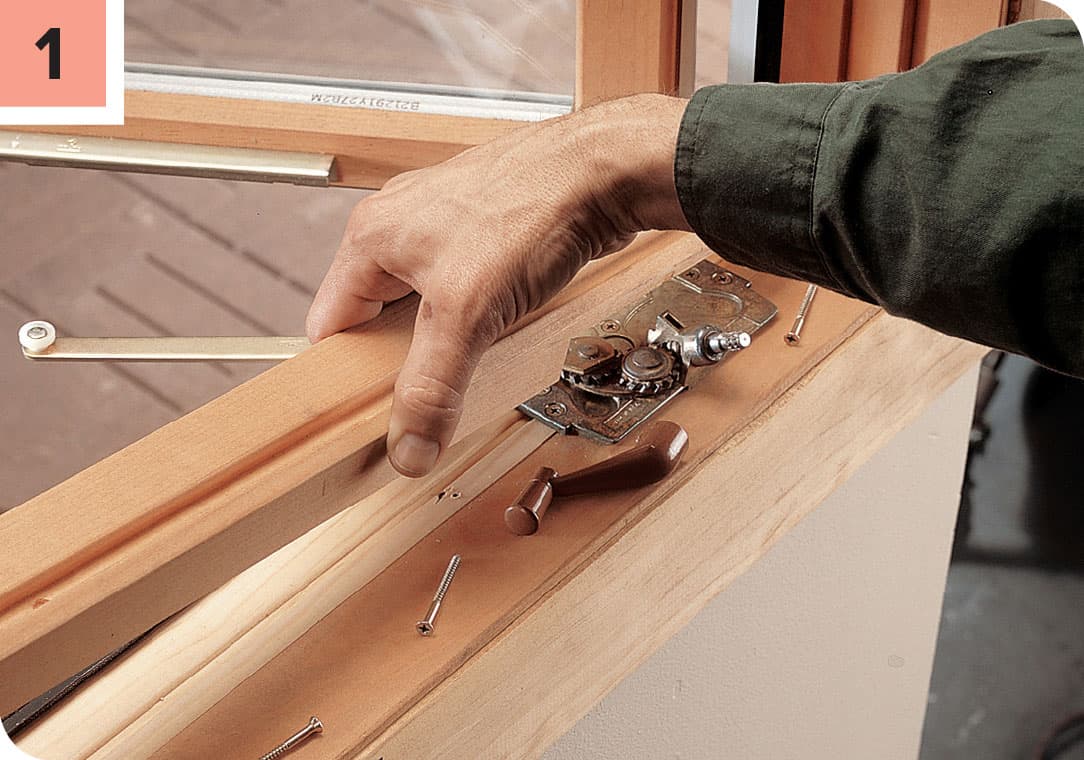
Disengage the extension arm from the window track, then remove the molding or cap concealing the crank mechanism. Unhinge any pivot arms connected to the window. Remove the screws securing the crank assembly, then remove the assembly and clean it thoroughly. If the gears are badly worn, replace the assembly. Check a home center or contact the manufacturer for new parts. Note which way the window opens—to the right or left—when ordering replacement parts.
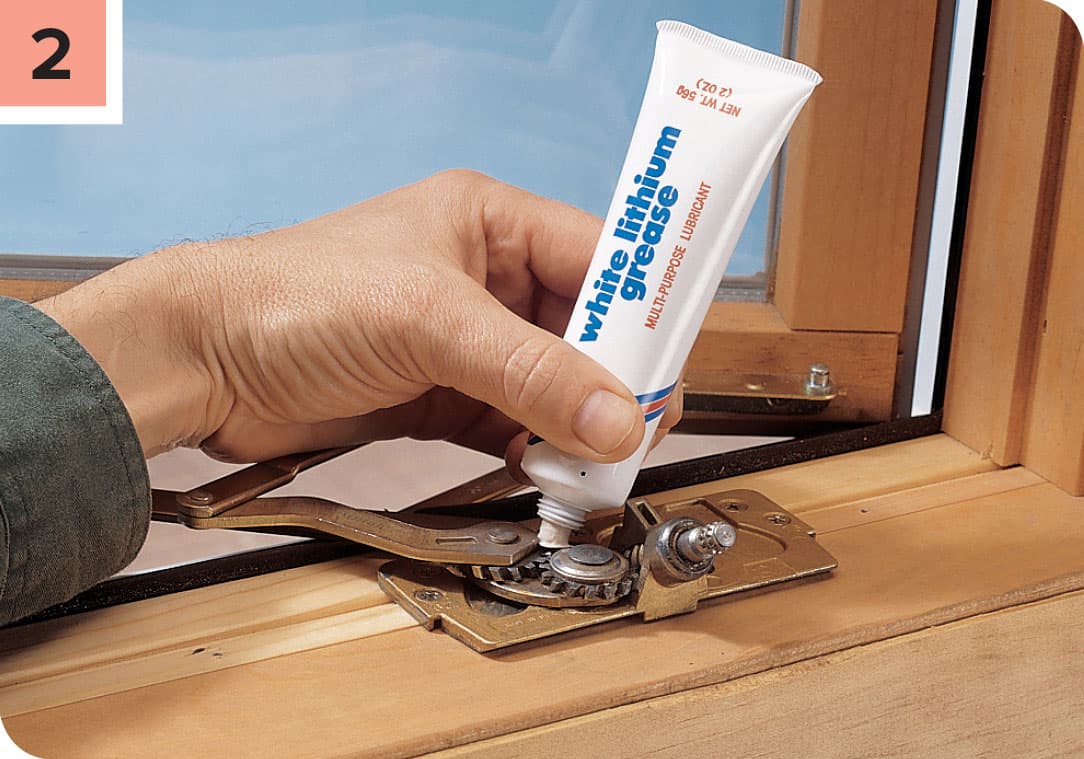
Apply an all-purpose grease to the gears, and reinstall the assembly. Connect the pivot arms, and attach the extension arm to the window. Test the window operation before installing the cap and molding.
How to Replace Window Glass
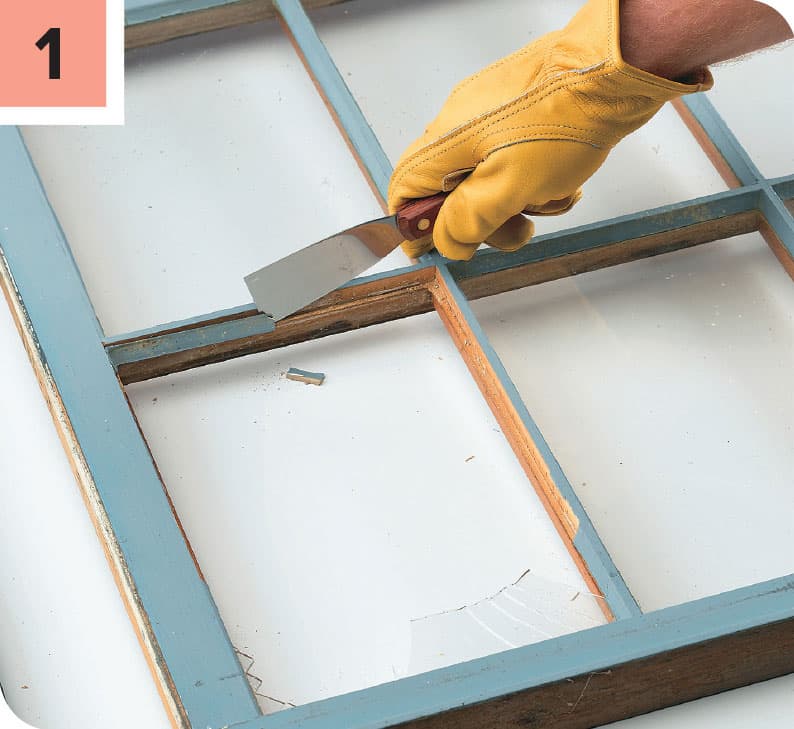
Wearing heavy leather gloves, remove the broken pieces of glass. Then, soften the old glazing compound using a heat gun or a hair dryer (carefully). Scrape out softened putty with a putty knife. If a section is difficult to scrape clean, reheat it.
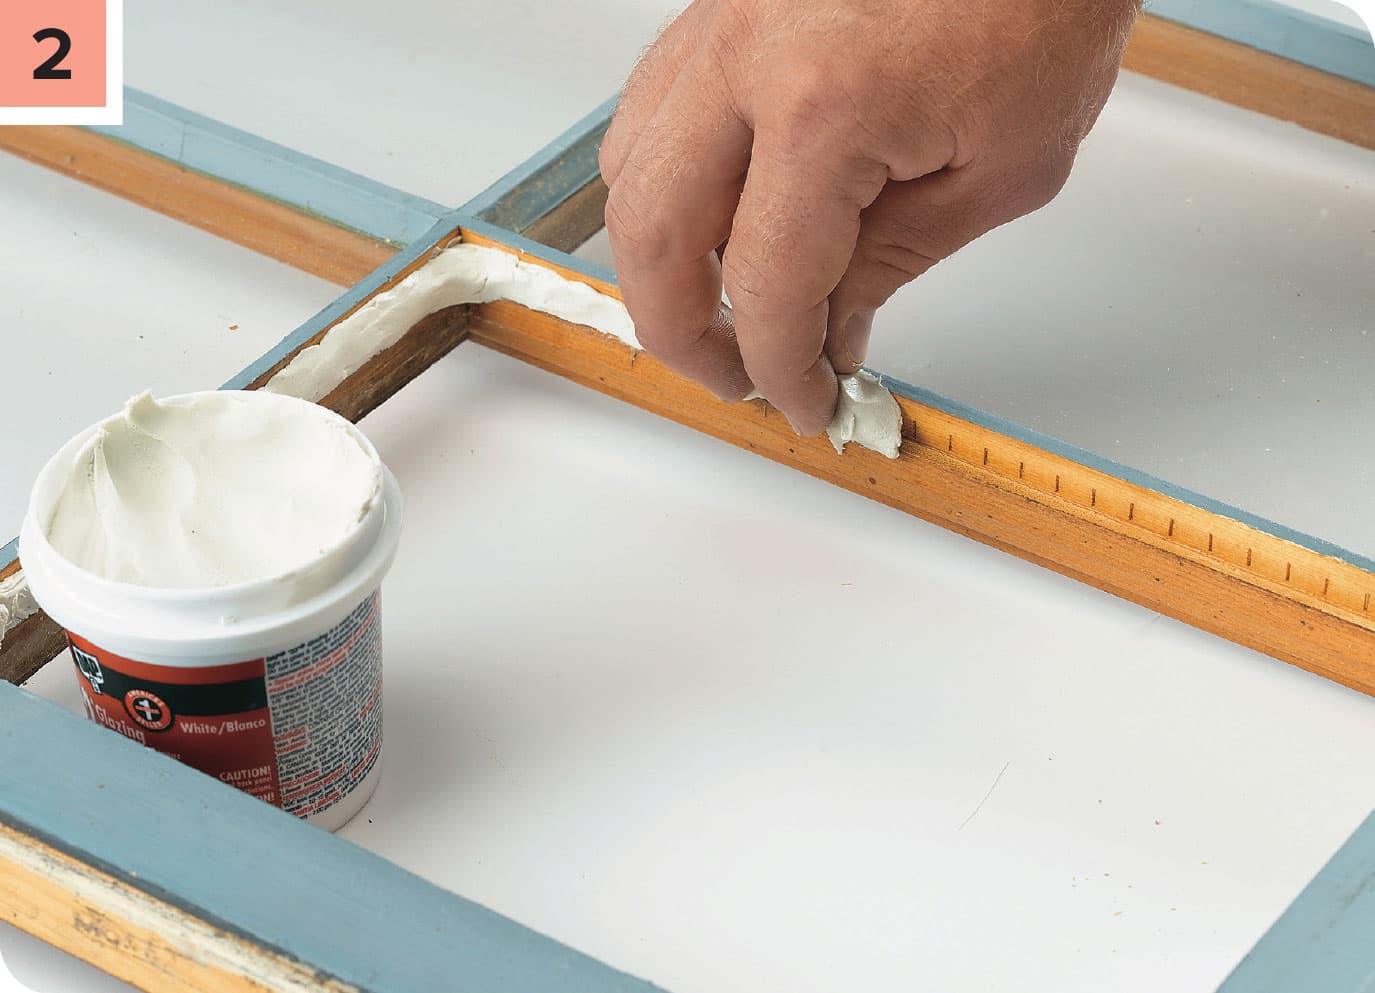
Apply a thin bed of glazing compound to the wood frame opening and smooth it in place with your thumb. If you are having trouble getting the glazing compound to stick, make sure the product is not too old and dried out—fresh compound always works better. You can also try applying a coat of shellac on the wood in the recess if the wood frame is very old.
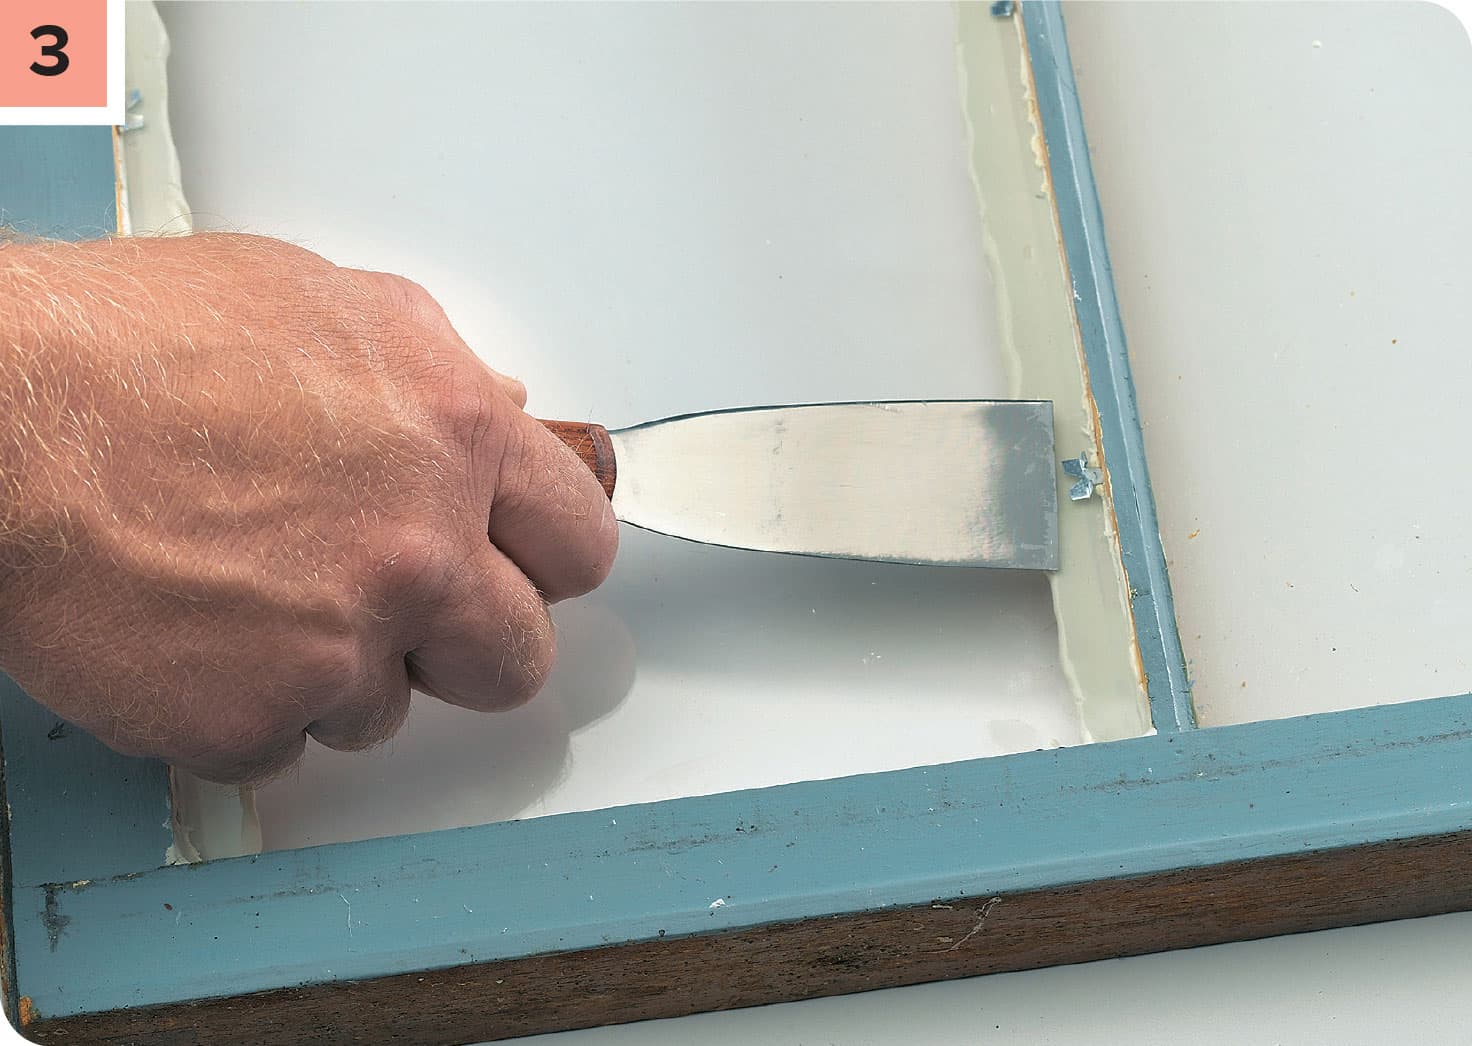
Press the new pane into the opening, making sure to achieve a tight seal with the compound on all sides. Do not press all the compound out. Drive glazier’s points into the wood frame to hold the pane in place. Use the tip of a putty knife to slide the point against the surface of the glass. Install at least two points on each side of the pane.
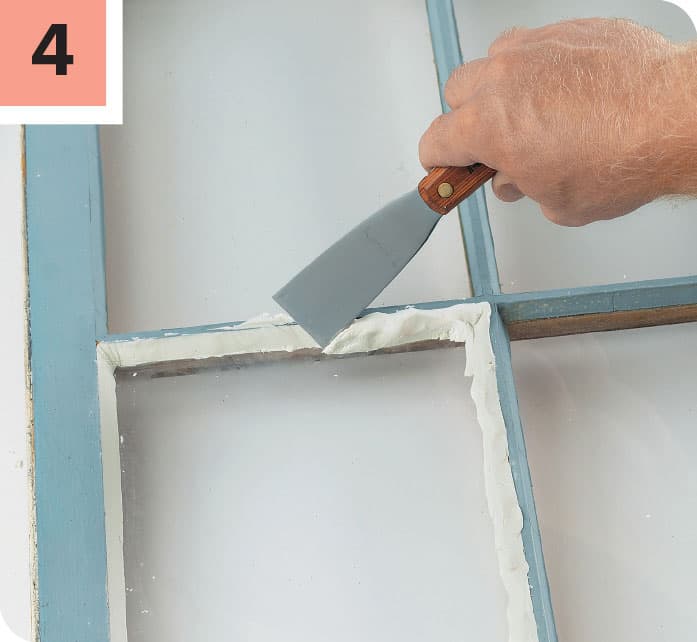
Make a rope of glazing compound (about 1/2" dia.) by rolling it between your hands. Then press it against the pane and the wood frame. Smooth it in place by drawing a putty knife, held at a 45° angle, across its surface. Scrape off excess. Let the glazing compound dry for at least one week, and then prime and paint it to match the rest of the sash. When the paint is dry, scrape off the extra with a razor blade paint scraper.
WEATHERIZING DOORS & WINDOWS
No matter whether you live in a hot or a cold climate, weatherizing your home’s windows and doors can pay off handsomely. Heating and cooling costs may account for over half of the total household energy bill. Since most weatherizing projects are relatively inexpensive, you can recover your investment quickly. In fact, in some climates, you can pay back the cost of a weatherproofing project in one season.
If you live in a cold climate, you probably already understand the importance of weatherizing. The value of keeping warm air inside the house during a cold winter is obvious. From the standpoint of energy efficiency, it’s equally important to prevent warm air from entering the house during summer.
Weatherizing your home is an ideal do-it-yourself project, because it can be done a little at a time, according to your schedule. In cold climates, the best time of the year to weatherize is the fall, before it turns too cold to work outdoors.
Generally, metal and metal-reinforced weather stripping is more durable than products made of plastic, rubber, or foam. However, even plastic, rubber, and foam weather stripping products have a wide range of quality. The best rubber products are those made from neoprene rubber—use this whenever it’s available.
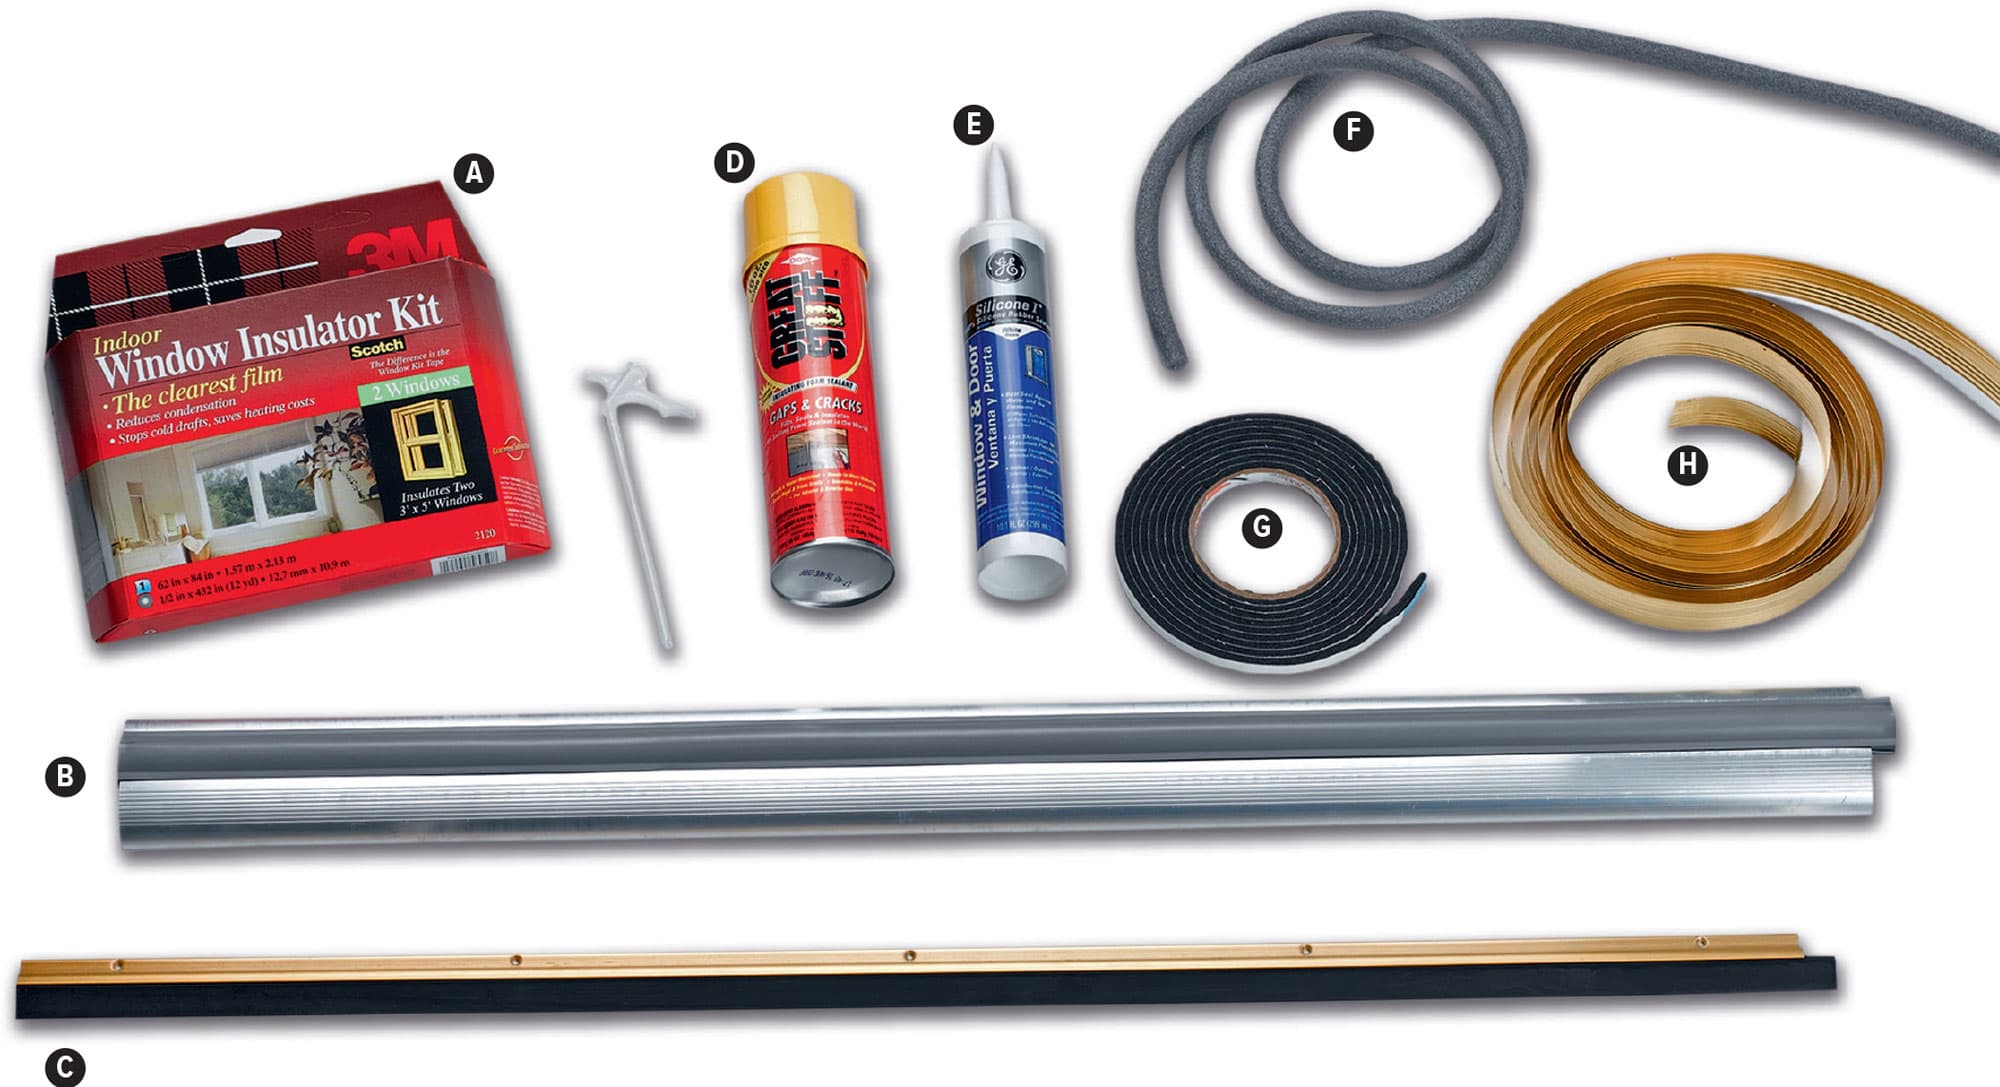
Weatherizing products commonly found in home centers include clear film, heat-shrink window insulator kit (A); an aluminum door threshold with vinyl weather stripping insert (B); a nail-on, rubber door sweep (C); minimal expanding spray foam (D); silicone window and door caulk (E); open-cell foam caulk-backer rod (F); self-adhesive, closed-cell foam weather stripping coil (G); flexible brass weather stripping coil, also called V-channel, (H).
Tips for Weatherizing Windows & Doors
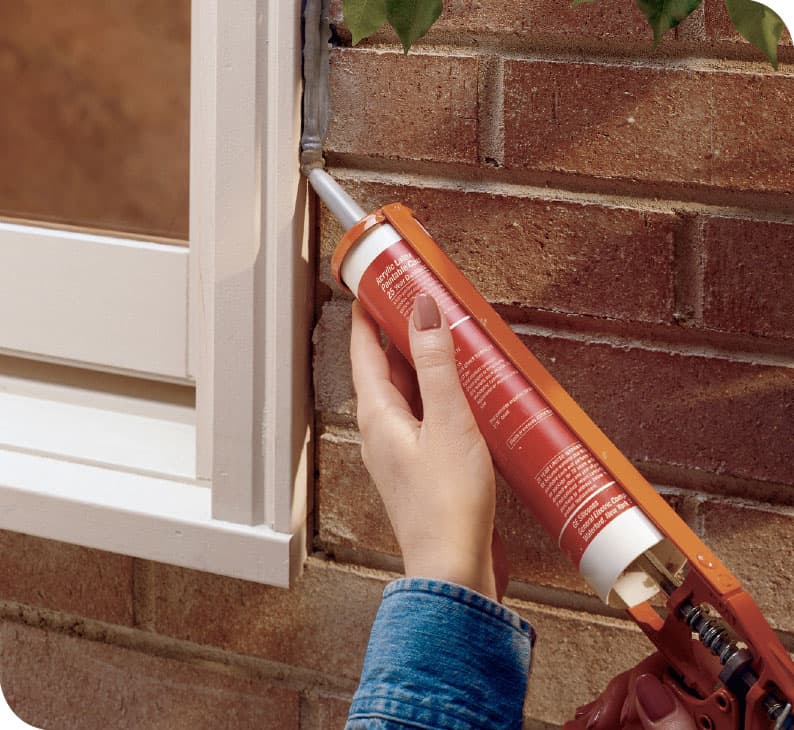
Caulking is a simple and inexpensive way to fill narrow gaps, indoors or out. One primary spot for heat loss is the gap between the window brickmold and the exterior wall.
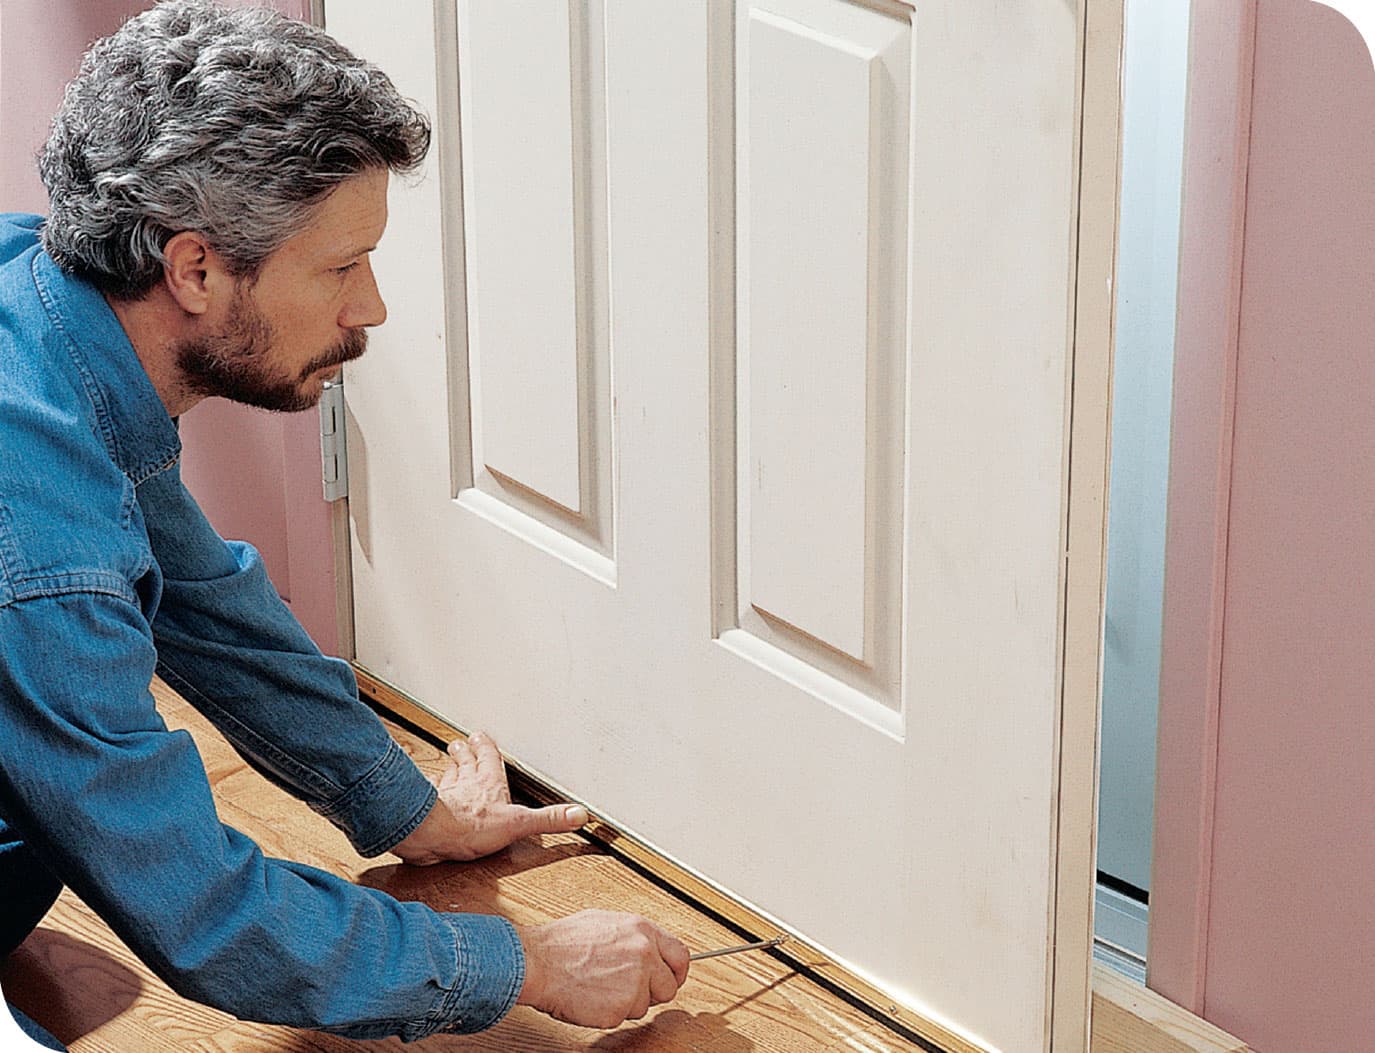
A felt, bristle, or rubber door sweep seals out drafts, even if you have an uneven floor or a low threshold.
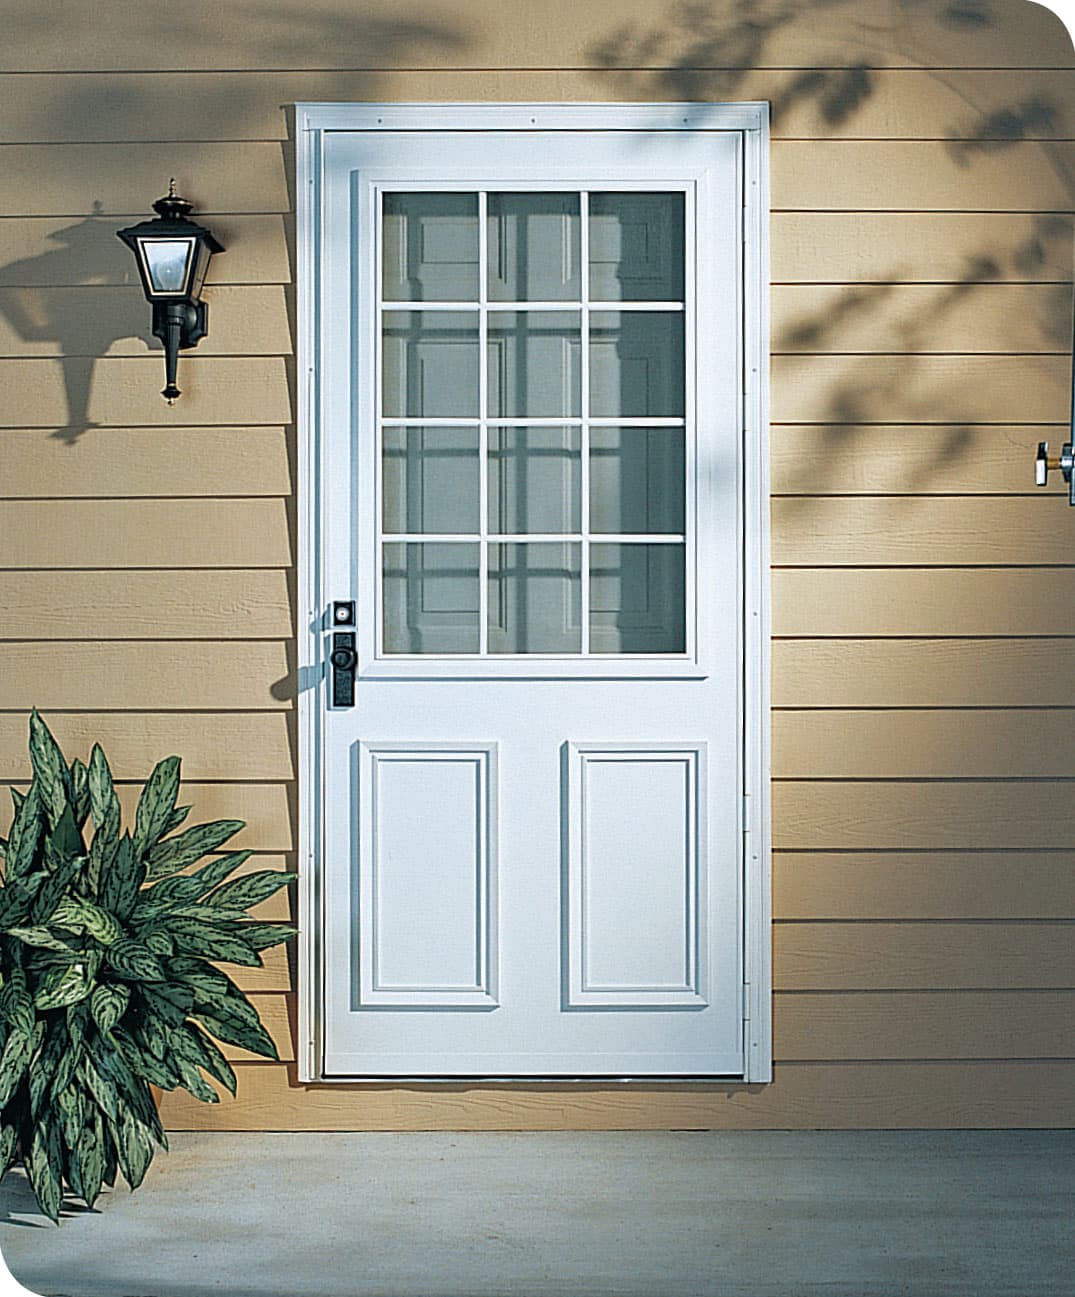
Install a storm door to decrease drafts and energy loss through entry doors. Look for an insulated storm door with a continuous hinge and seamless exterior surface.
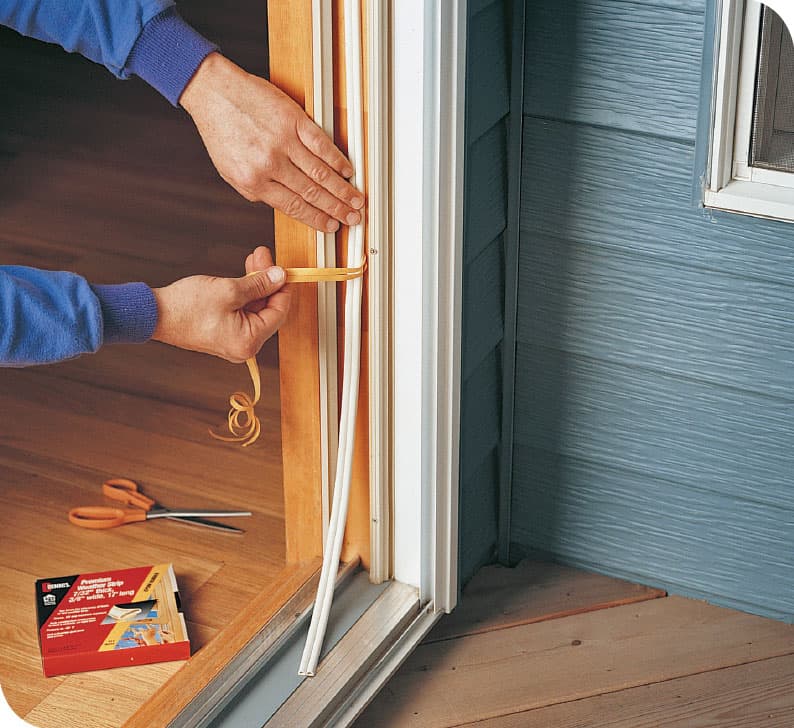
Patio door: Use rubber compression strips to seal the channels in patio door jambs, where movable panels fit when closed. Also install a patio door insulator kit (plastic sheeting installed similarly to plastic sheeting for windows) on the interior side of the door.
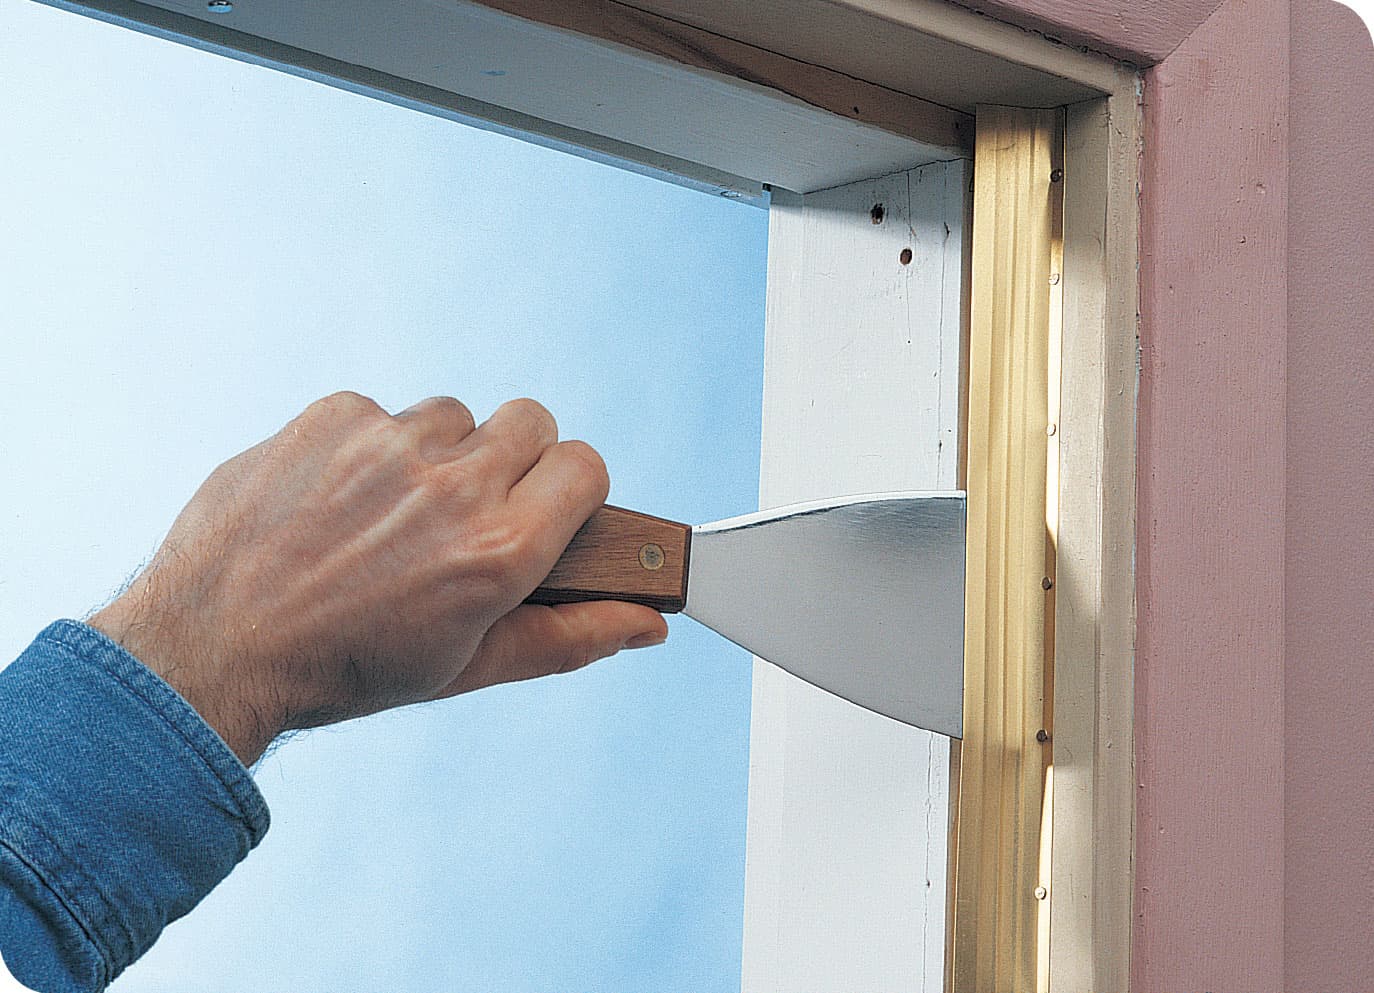
Cut two pieces of metal tension strip or V-channel the full height of the door opening, and cut another to full width. Use wire brads to tack the strips to the door jambs and door header on the interior side of the doorstops. Attach metal weather stripping from the top down to help prevent buckling. Flare out the tension strips with a putty knife to fill the gaps between the jambs and the door when the door is in the closed position (do not pry too far at a time).
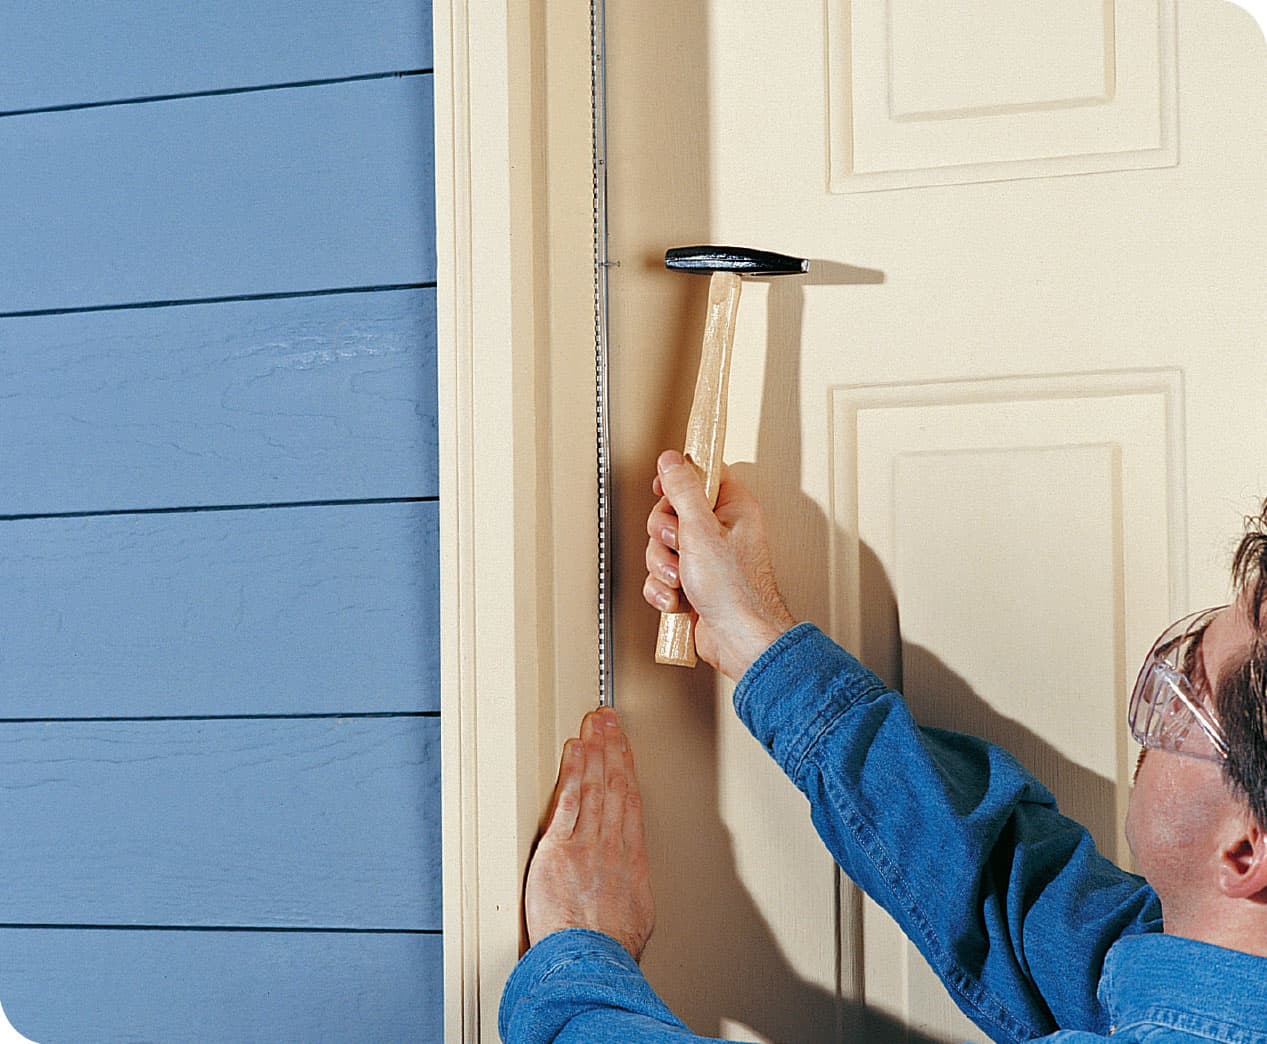
Add reinforced felt strips to the edge of the doorstop on the exterior side. The felt edge should form a close seal with the door when closed. Drive fasteners only until they are flush with the surface of the reinforcing spine—overdriving will cause damage and buckling.
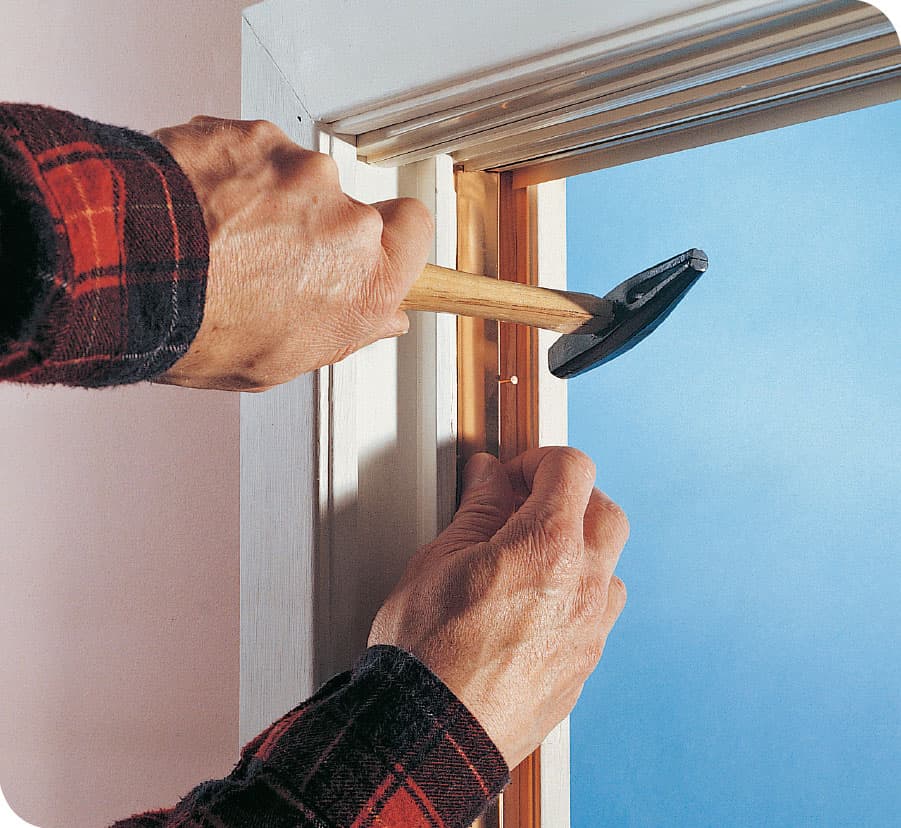
Sliding windows: Treat side-by-side sliding windows as if they were double-hung windows turned 90°. For greater durability, use metal tension strips, rather than self-adhesive compressible foam, in the sash track that fit against the edge of the sash when the window is closed.
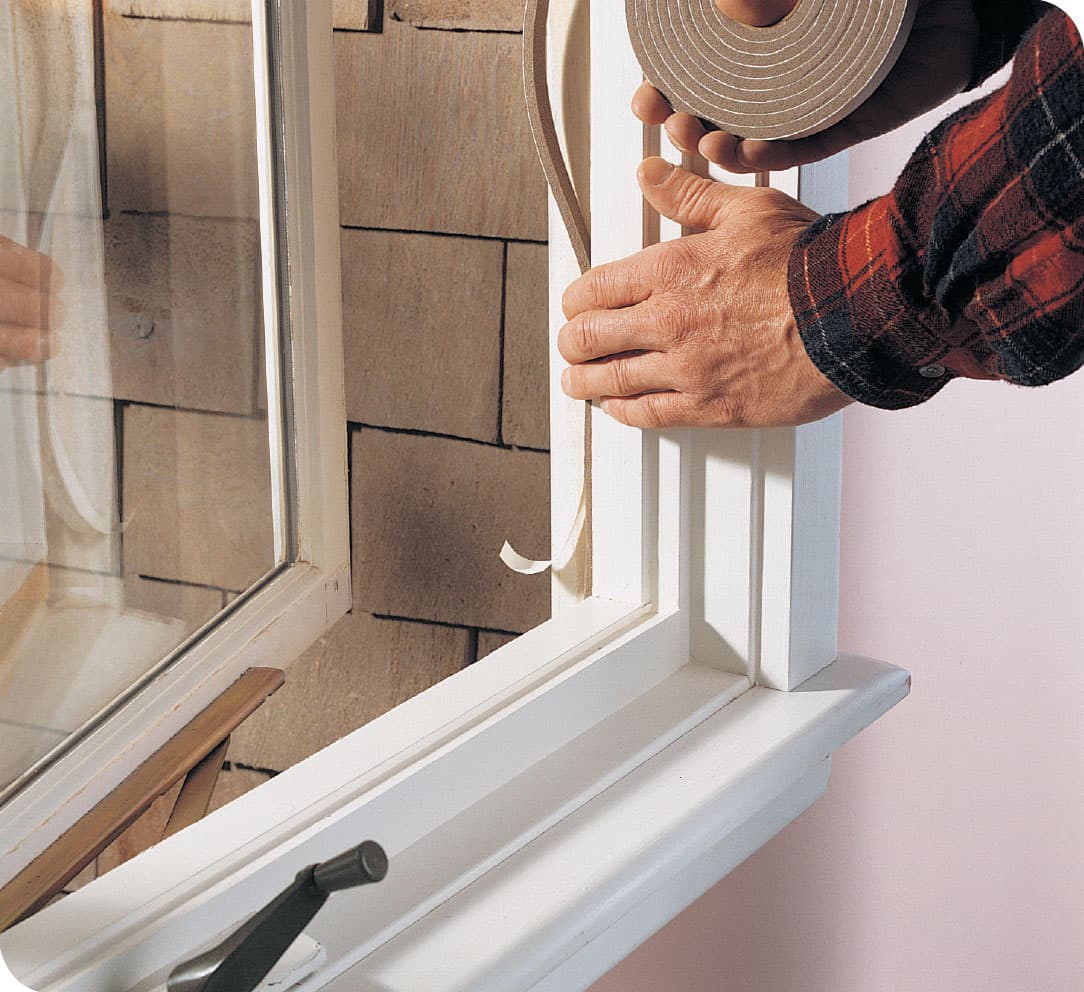
Casement windows: Attach self-adhesive foam or rubber compression strips on the outside edges of the window stops.
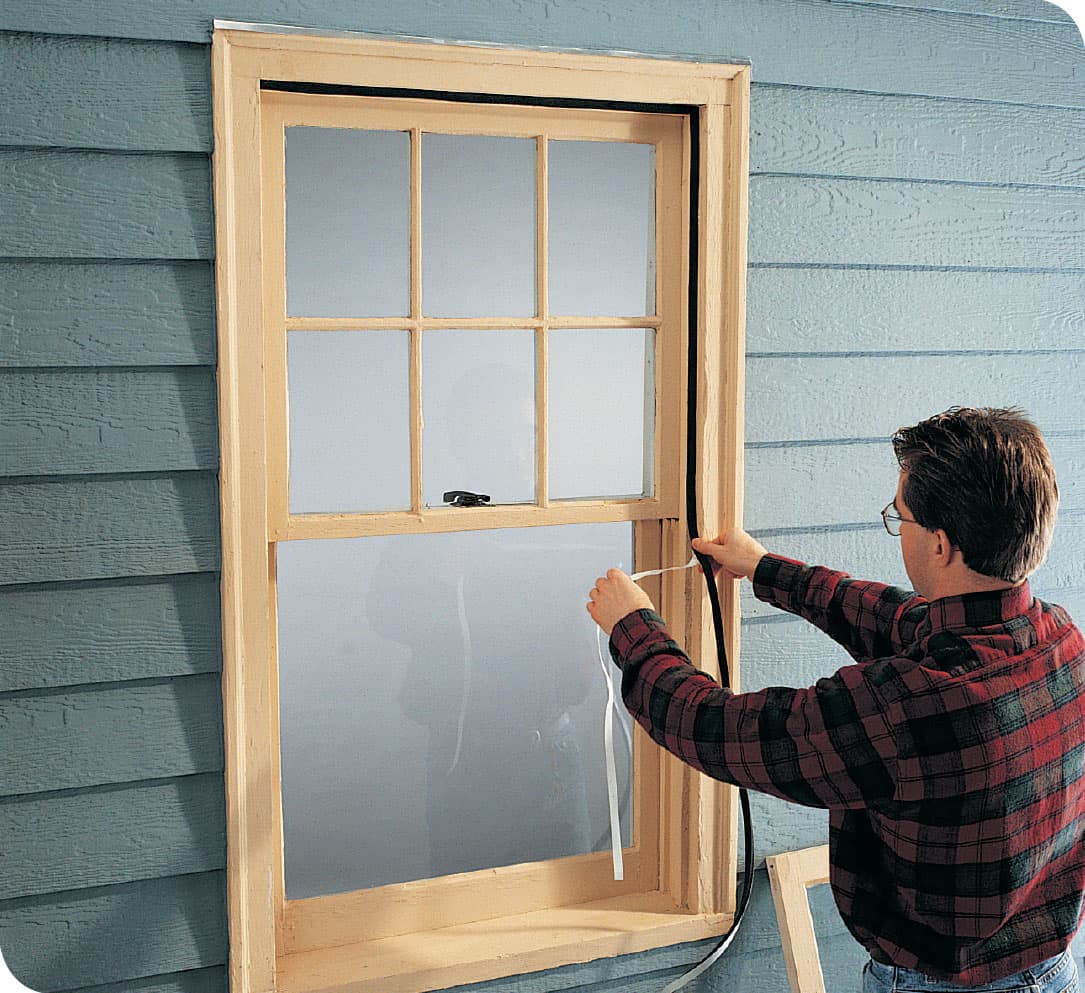
Storm windows: Create a tight seal by attaching foam compression strips to the outside of storm window stops. After installing the storm window, fill any gaps between the exterior window trim and the storm window with caulk backer rope.
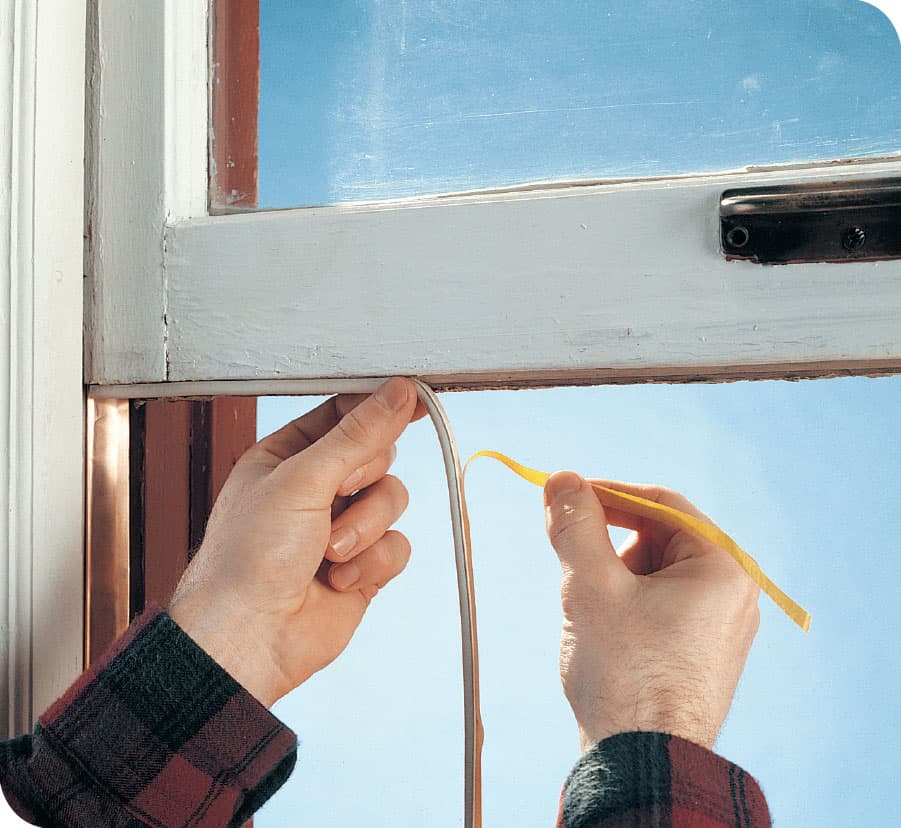
Lower sash of a double-hung window. Wipe down the underside of the bottom window sash with a damp rag, and let it dry; then attach self-adhesive compressible foam or rubber to the underside of the sash. Use high-quality hollow neoprene strips, if available. This will create an airtight seal when the window is locked in position.
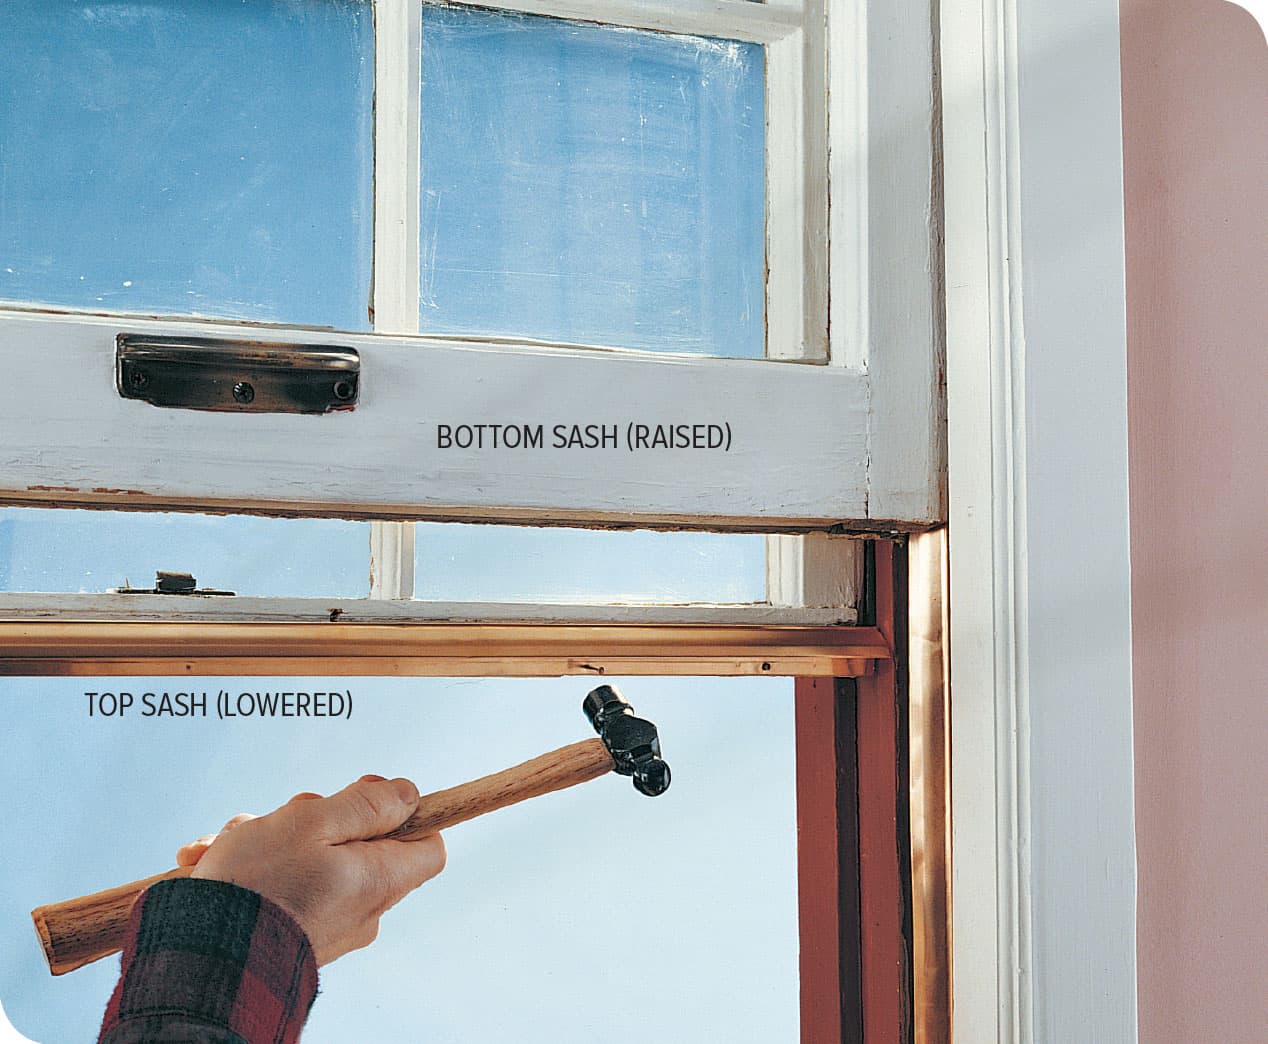
Upper sash of a double-hung window. Seal the gap between the top sash and the bottom sash on double-hung windows. Lift the bottom sash and lower the top sash to improve access, and tack metal V-channel to the bottom rail of the top sash using wire brads. The open end of the “V” should be pointed downward so moisture cannot collect in the channel. Flare out the V-channel with a putty knife to fit the gap between the sash.
STORM DOORS & WINDOWS
Compared to removable wood storm windows and screens, repairing combination storm windows is a little more complex. The metal-frame combination windows reside not just in window openings but in the glazing of full-height storm doors as well. But there are several repairs you can make without too much difficulty, as long as you find the right parts. Take the old corner keys, gaskets, or other original parts to a hardware store that repairs storm windows so the clerk can help you find the correct replacement parts. If you cannot find the right parts, have a new sash built.
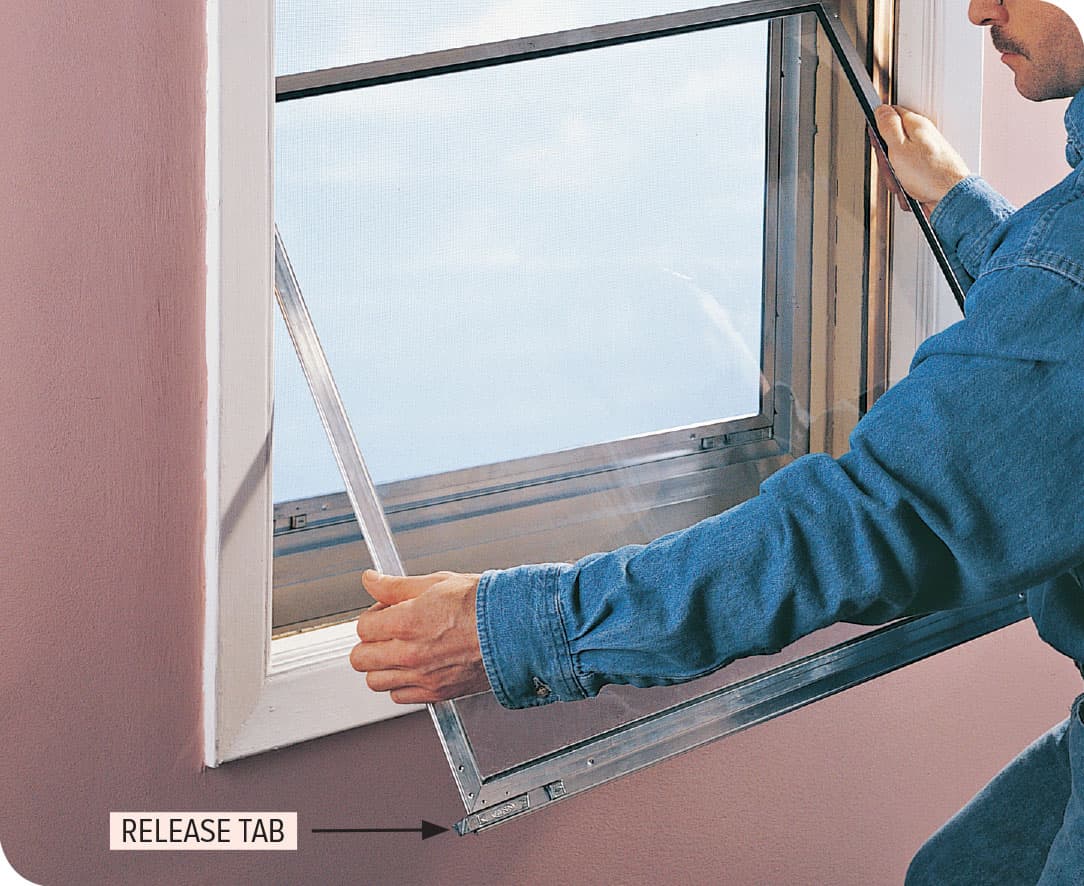
Remove the metal storm window sash by pressing in the release hardware in the lower rail then lifting the sash out. Sash hangers on the corners of the top rail should be aligned with the notches in the side channels before removal.
How to Replace Screening in a Metal Storm Window
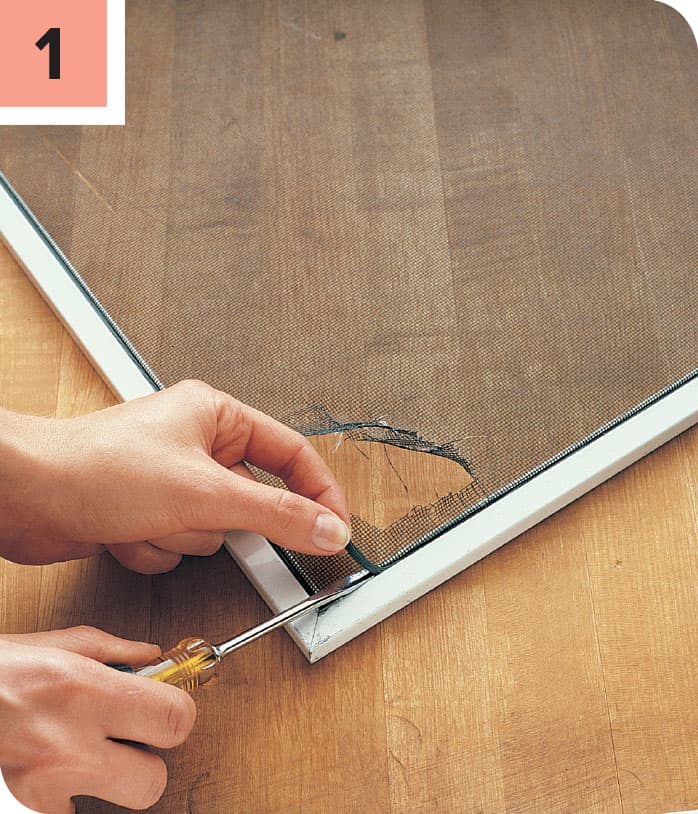
Pry the vinyl spline from the groove around the edge of the frame with a screwdriver. Retain the old spline if it is still flexible, otherwise replace it with a new spline.
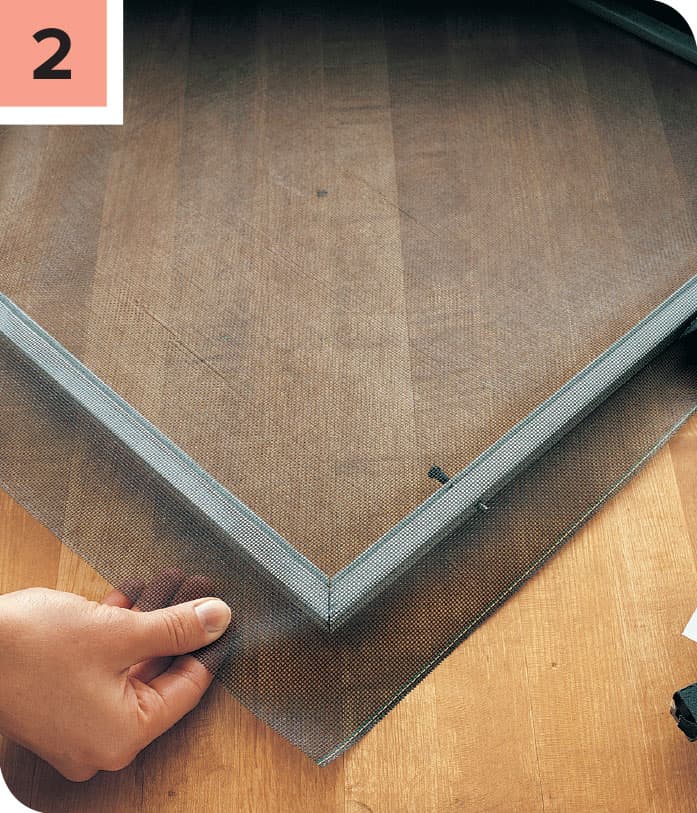
Stretch the new screening tightly over the frame so that it overlaps the edges of the frame. Keeping the screen taut, use the convex side of a spline roller to press the screen into the retaining grooves.
TIP: You can have insect screening, mostly fiber glass these days, cut to size at most hardware stores, or you may be able to purchase it from a roll by the lineal foot. Make sure your replacement screening is at least 6" larger than the window frame in both directions.
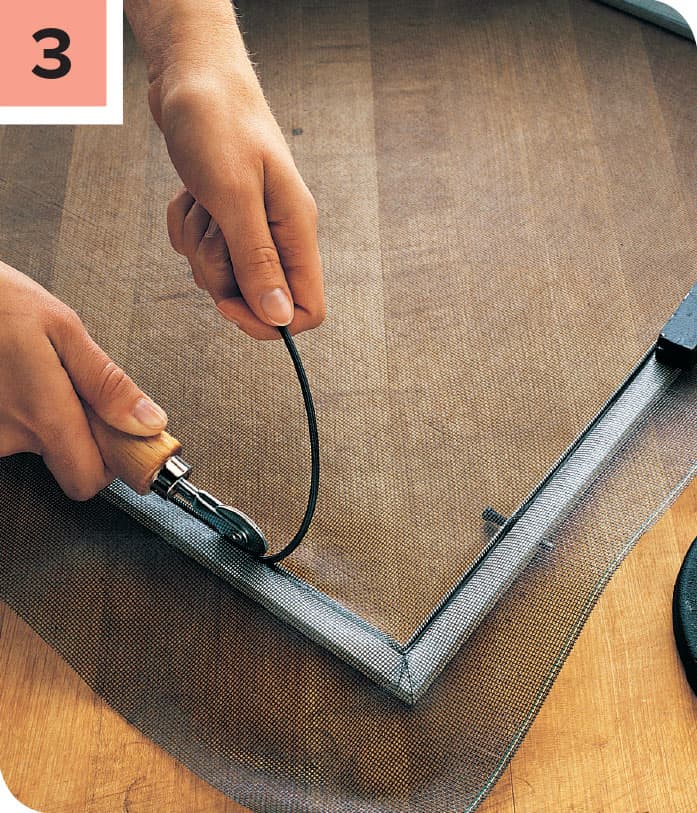
Use the concave side of the spline roller (a specialty item available at hardware stores specifically for this purpose) to press the spline into the groove—it helps to have a partner for this. Carefully cut away excess screening using a sharp utility knife and a straightedge to hold the screening tight against the frame.
CAUTION: The screening is prone to catching on the blade and being torn from the retaining grooves if it is not taut.
How to Replace Glass in a Metal Storm Window
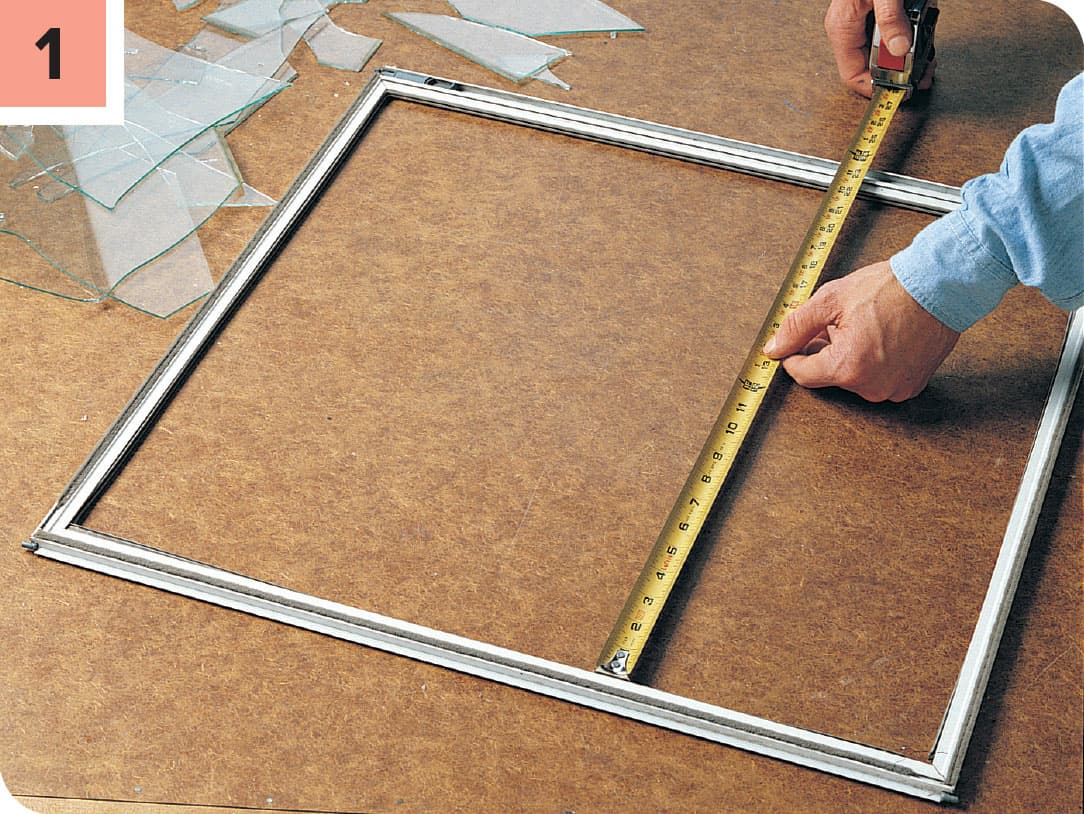
Remove the sash frame from the window, then completely remove the broken glass from the sash (wear heavy gloves). Remove the rubber gasket that framed the old glass pane and remove any glass remnants. Find the dimensions for the replacement glass by measuring between the inside edges of the frame opening, then adding twice the thickness of the rubber gasket to each measurement.
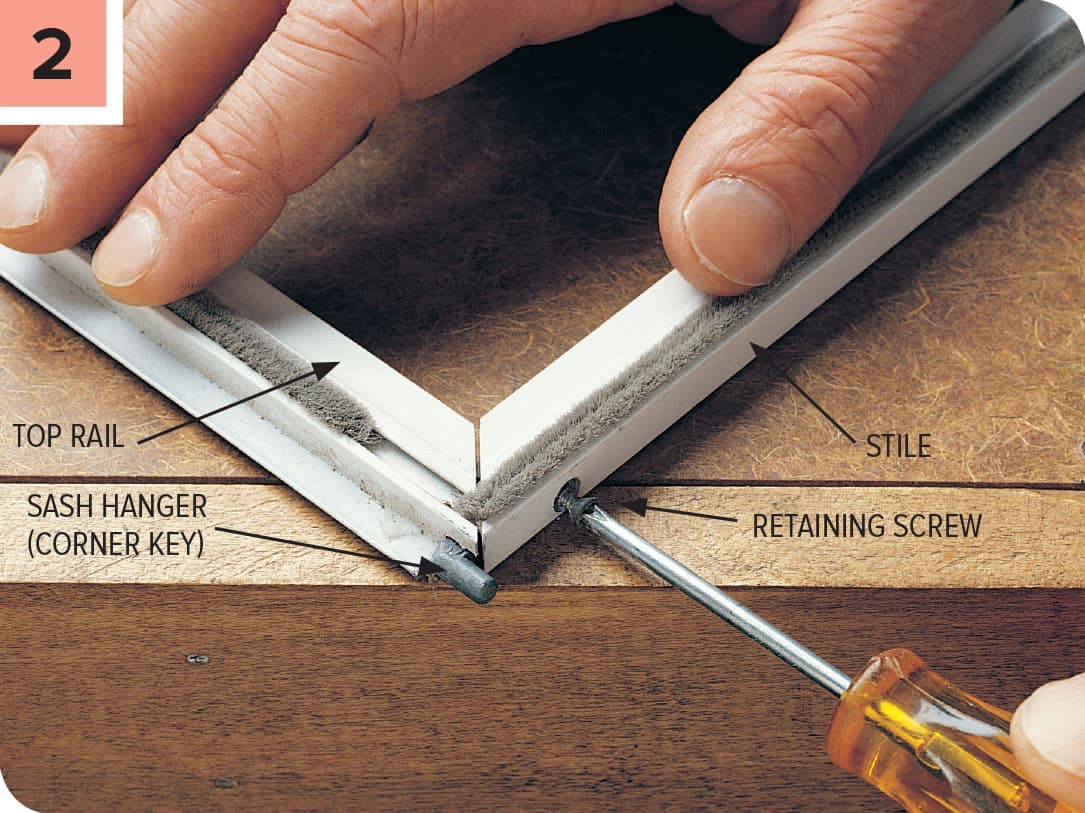
Set the frame on a flat surface, and disconnect the top rail. Remove the retaining screws in the sides of the frame stiles where they join the top rail. After unscrewing the retaining screws, pull the top rail loose, pulling gently in a downward motion to avoid damaging the L-shaped corner keys that join the rail and the stiles. For glass replacement, you need disconnect only the top rail.
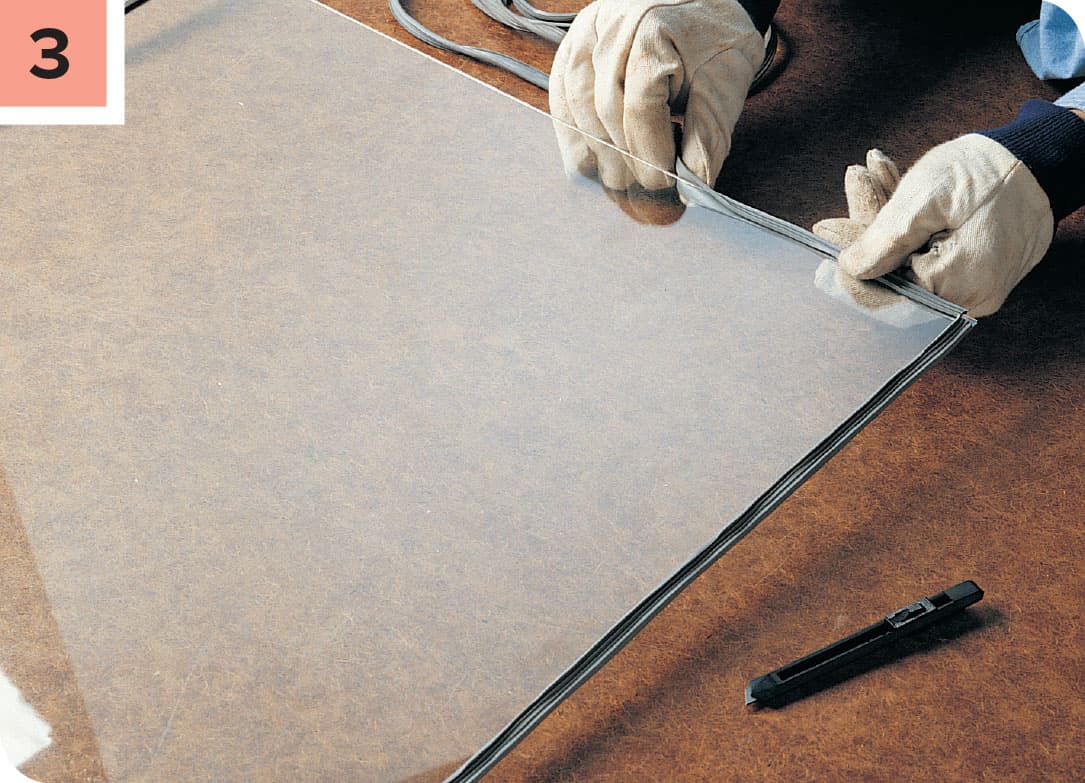
Fit the rubber gasket (buy a replacement if the original is in poor condition) around one edge of the replacement glass pane. At the corners, cut the spine of the gasket partway so it will bend around the corner. Continue fitting the gasket around the pane, cutting at the corners, until all four edges are covered. Trim off any excess gasket material.
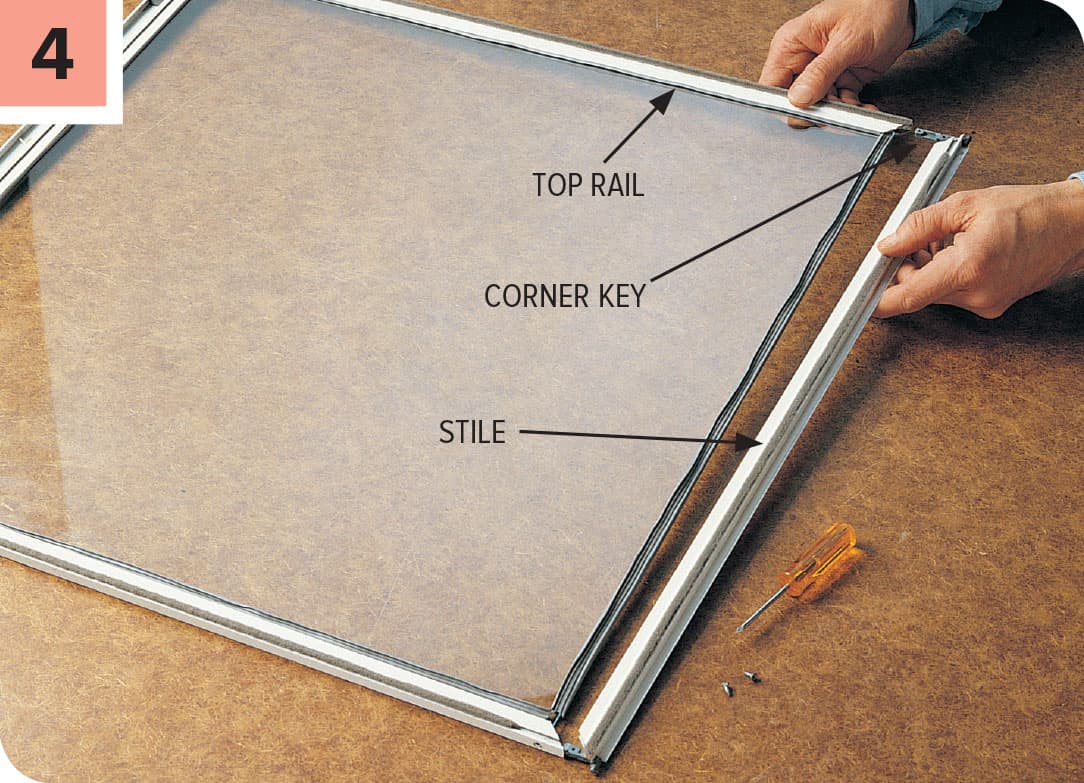
Slide the glass pane into the channels in the stiles and bottom rail of the sash frame. Insert corner keys into the top rail, then slip the other ends of the keys into the frame stiles. Press down on the top rail until the mitered corners are flush with the stiles. Drive the retaining screws back through the stiles and into the top rail to join the frame together. Reinsert the frame into the window.
How to Disassemble & Repair a Metal Sash Frame
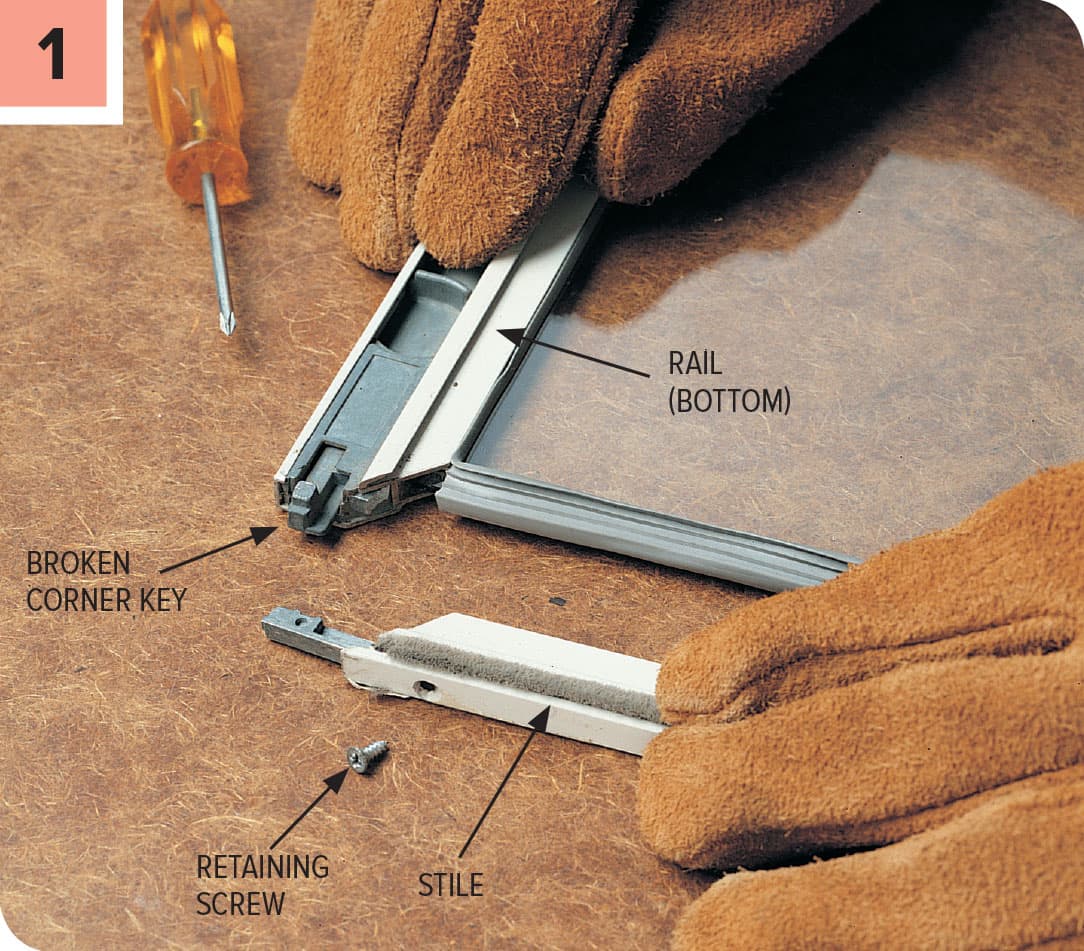
Metal window sashes are held together at the corner joints by L-shaped pieces of hardware that fit into grooves in the sash frame pieces. To disassemble a broken joint, start by disconnecting the stile and rail at the broken joint—there is usually a retaining screw driven through the stile that must be removed.
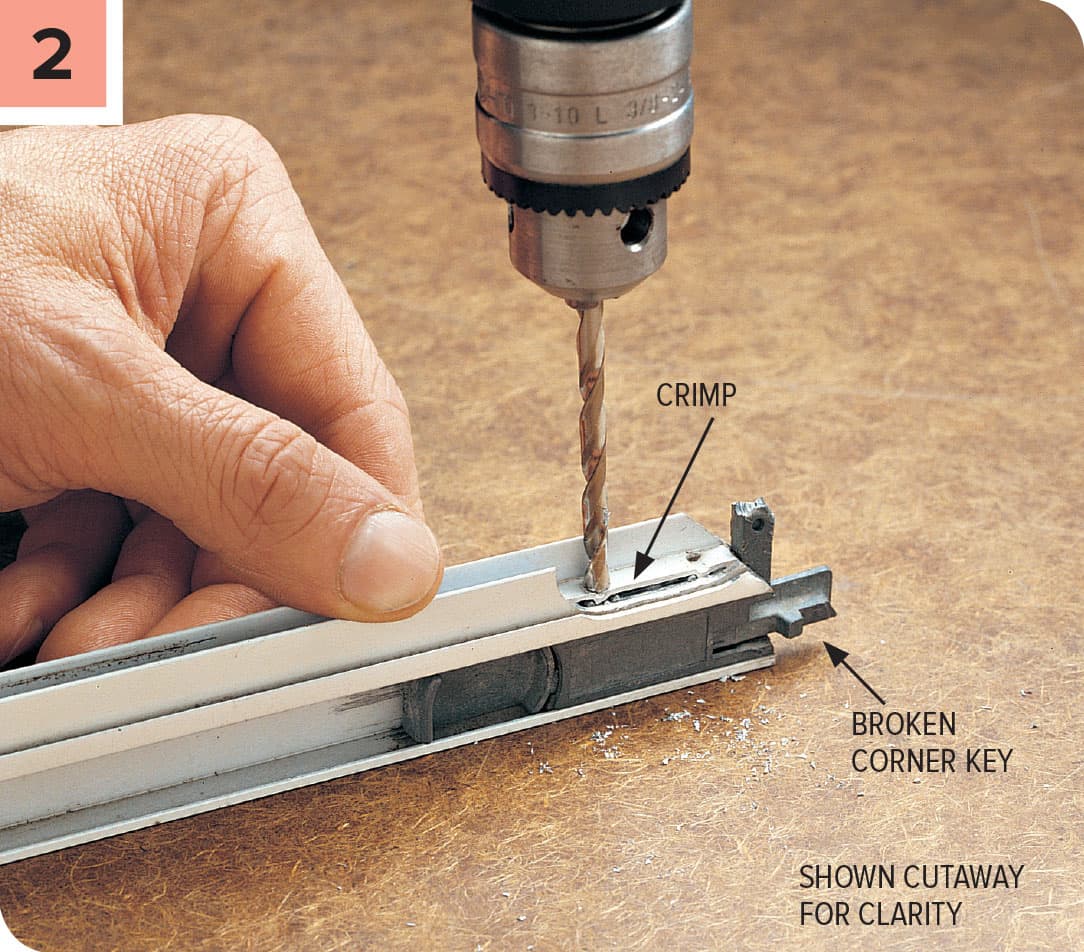
Corner keys are secured in the rail slots with crimps that are punched into the metal over the key. To remove keys, drill through the metal in the crimped area using a drill bit the same diameter as the crimp. Carefully knock the broken key pieces from the frame slots with a screwdriver and hammer.
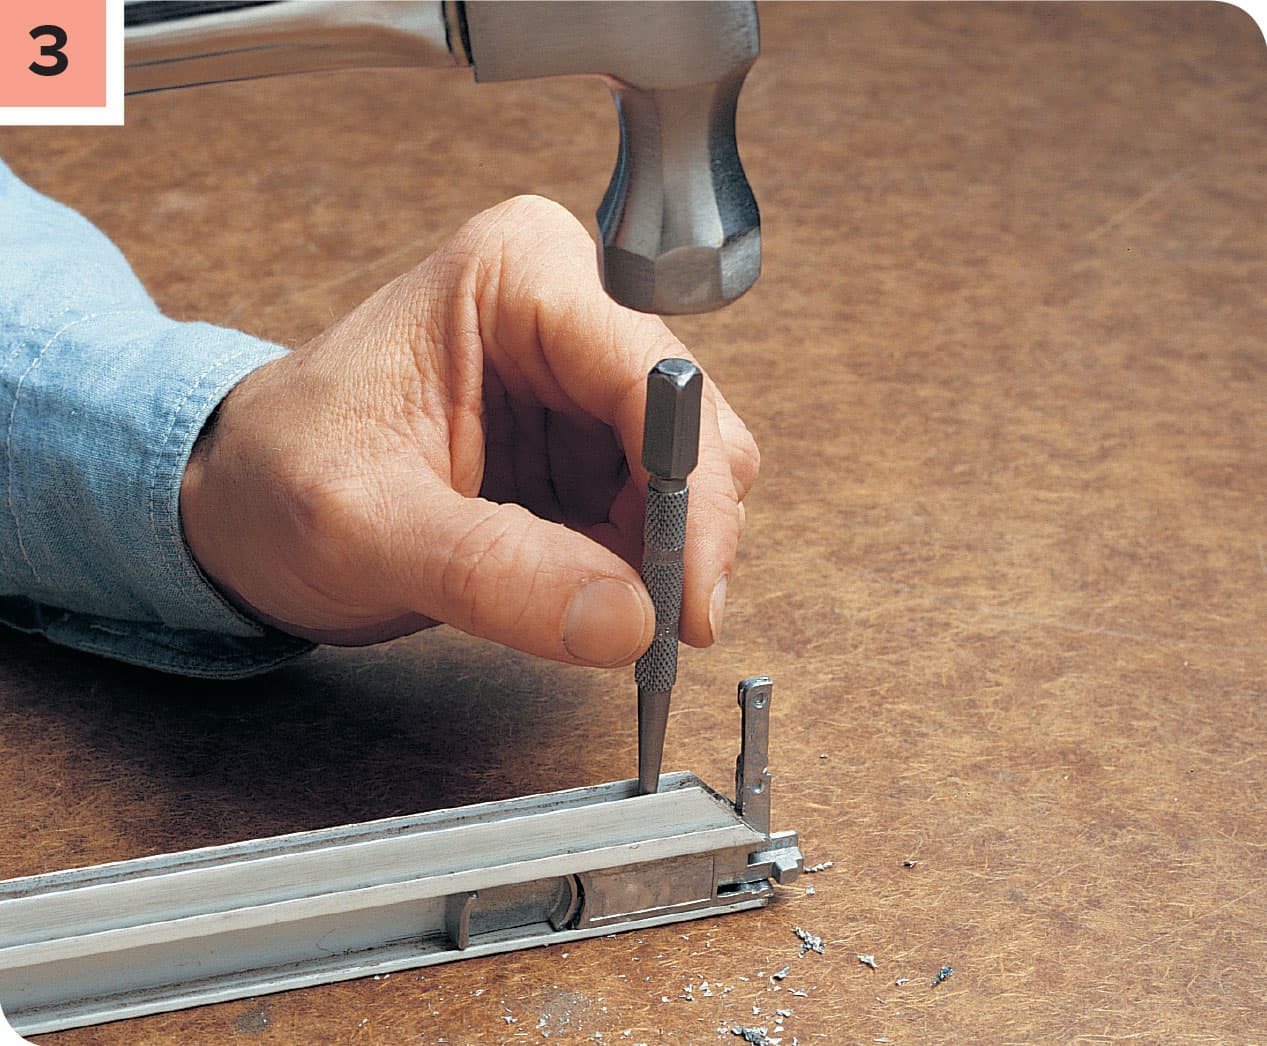
Locate matching replacement parts for the broken corner key, which is usually an assembly of two or three pieces. There are dozens of different types, so it is important that you save the old parts for reference. Most hardware stores carry a wide selection of common types. Insert the replacement corner key assembly into the slot in the rail. Use a nail set as a punch and rap it into the metal over the corner key, creating a new crimp to hold the key in place.
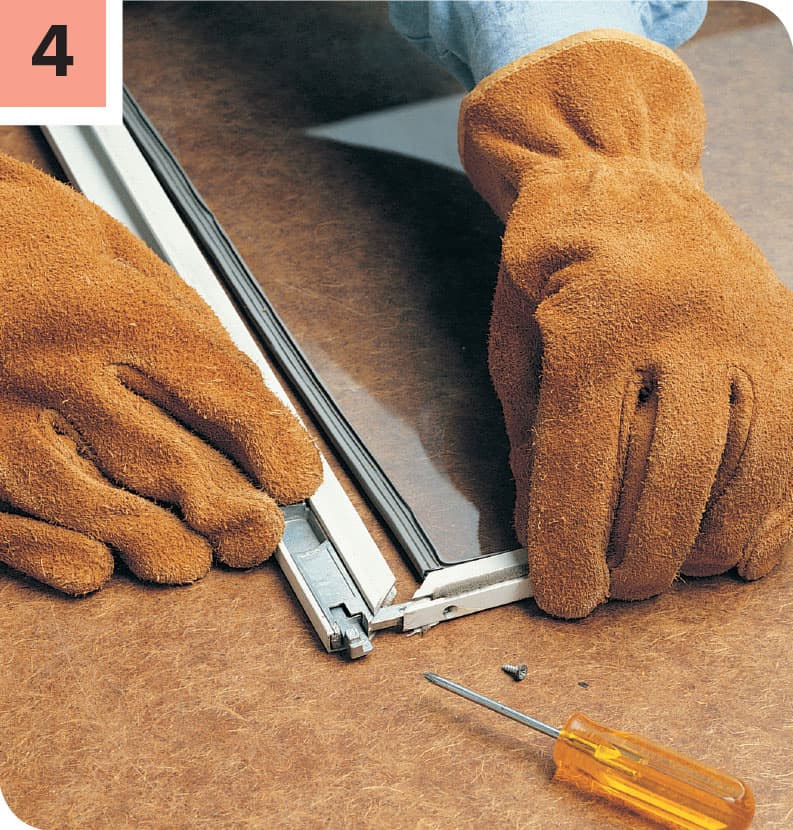
Insert the glass and gasket into the frame slots, then reassemble the frame and drive in retainer screws (for screen windows, replace the screening).
Tips for Maintaining Storm Windows & Doors
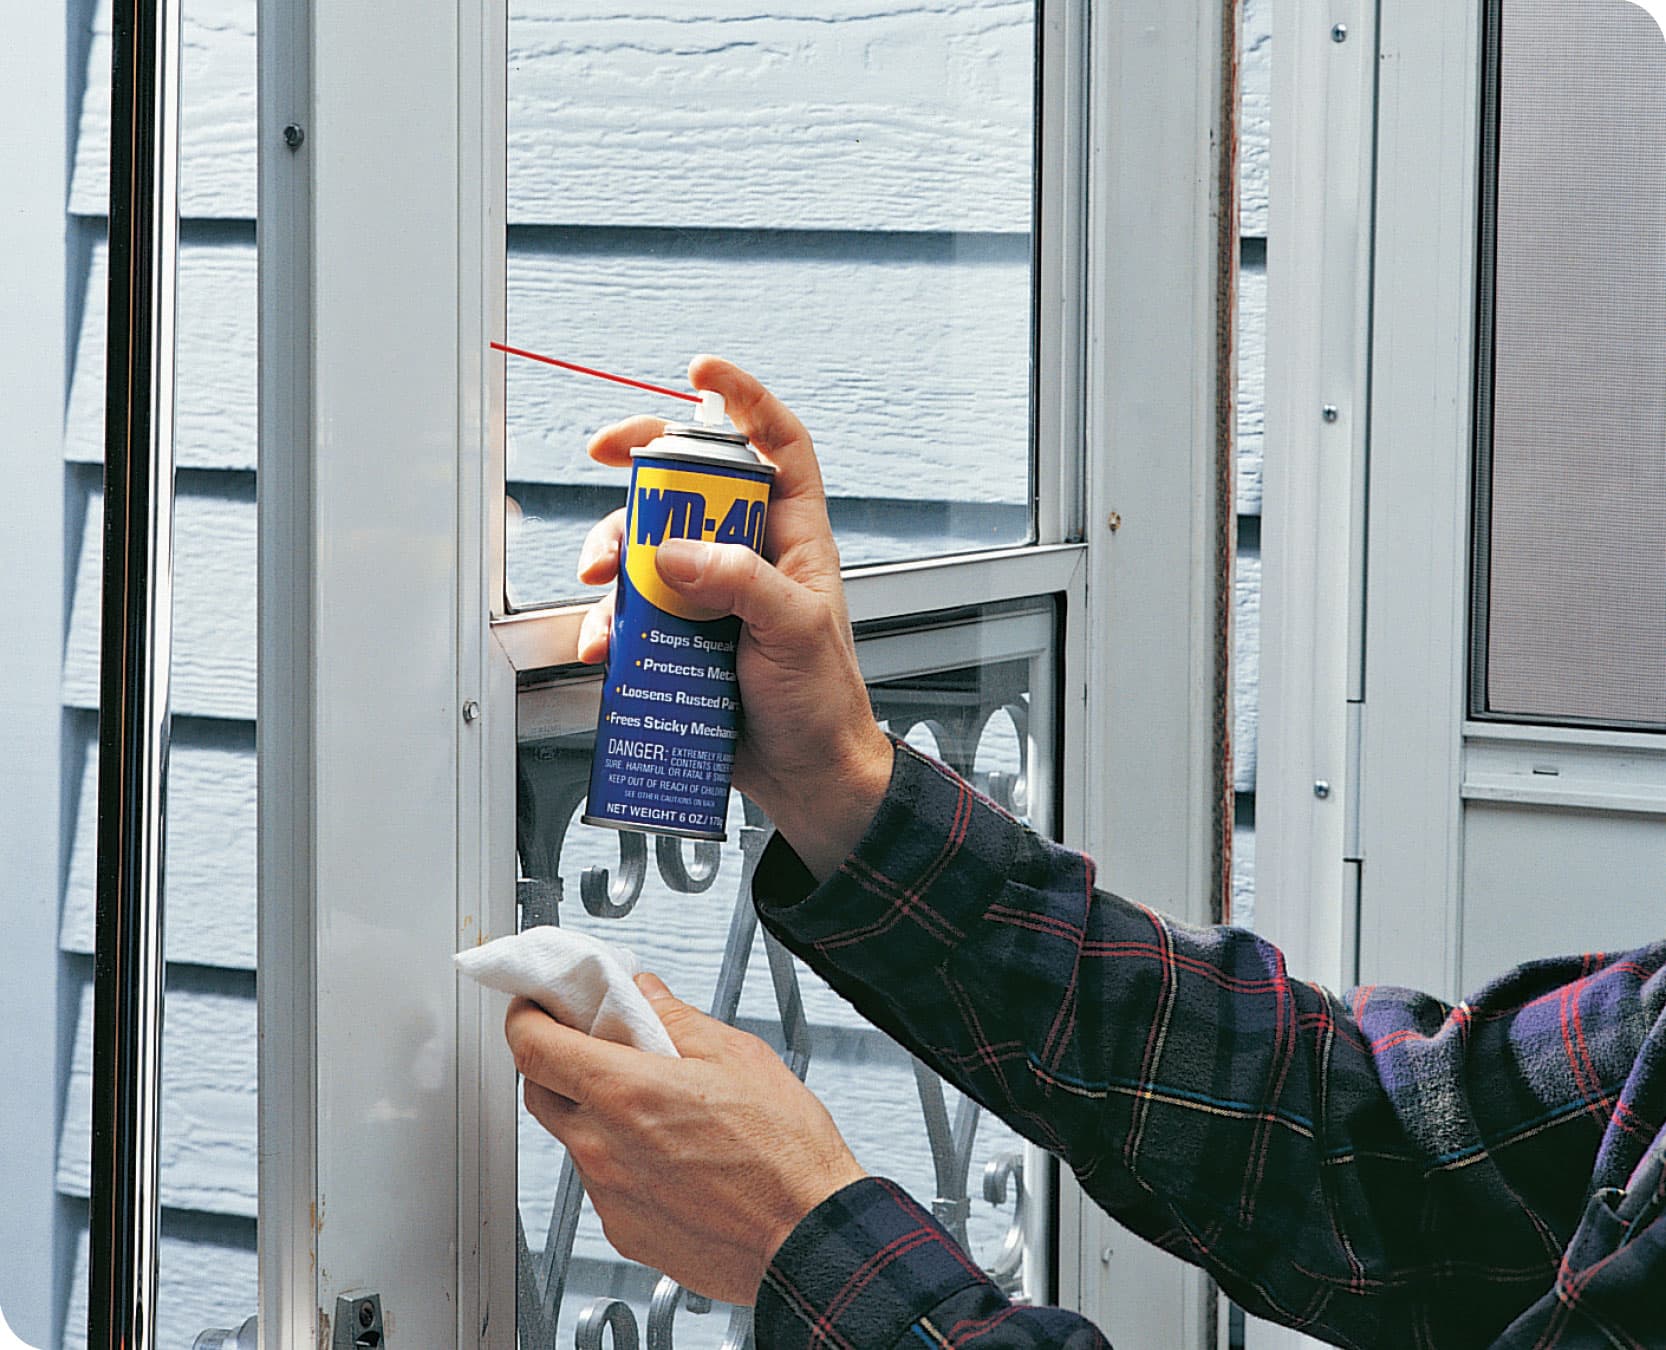
Lubricate the sliding assemblies on metal framed combination storm windows or doors once a year using penetrating lubricant.
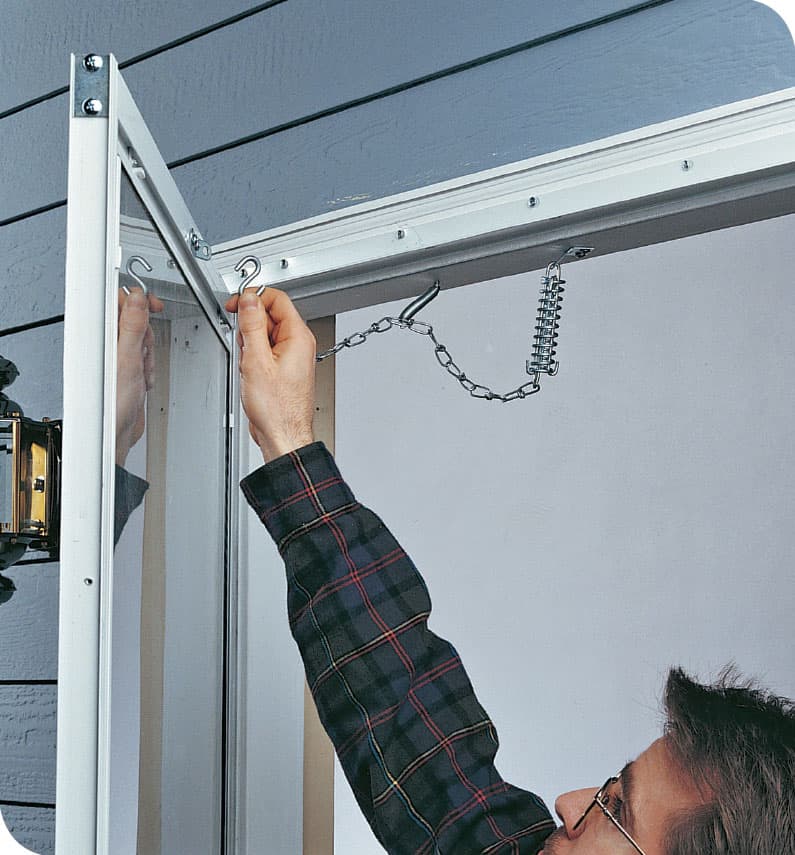
Add a wind chain if your storm door does not have one. Wind chains prevent doors from blowing open too far, causing damage to the door hinges or closer. Set the chain so the door will not open more than 90°.
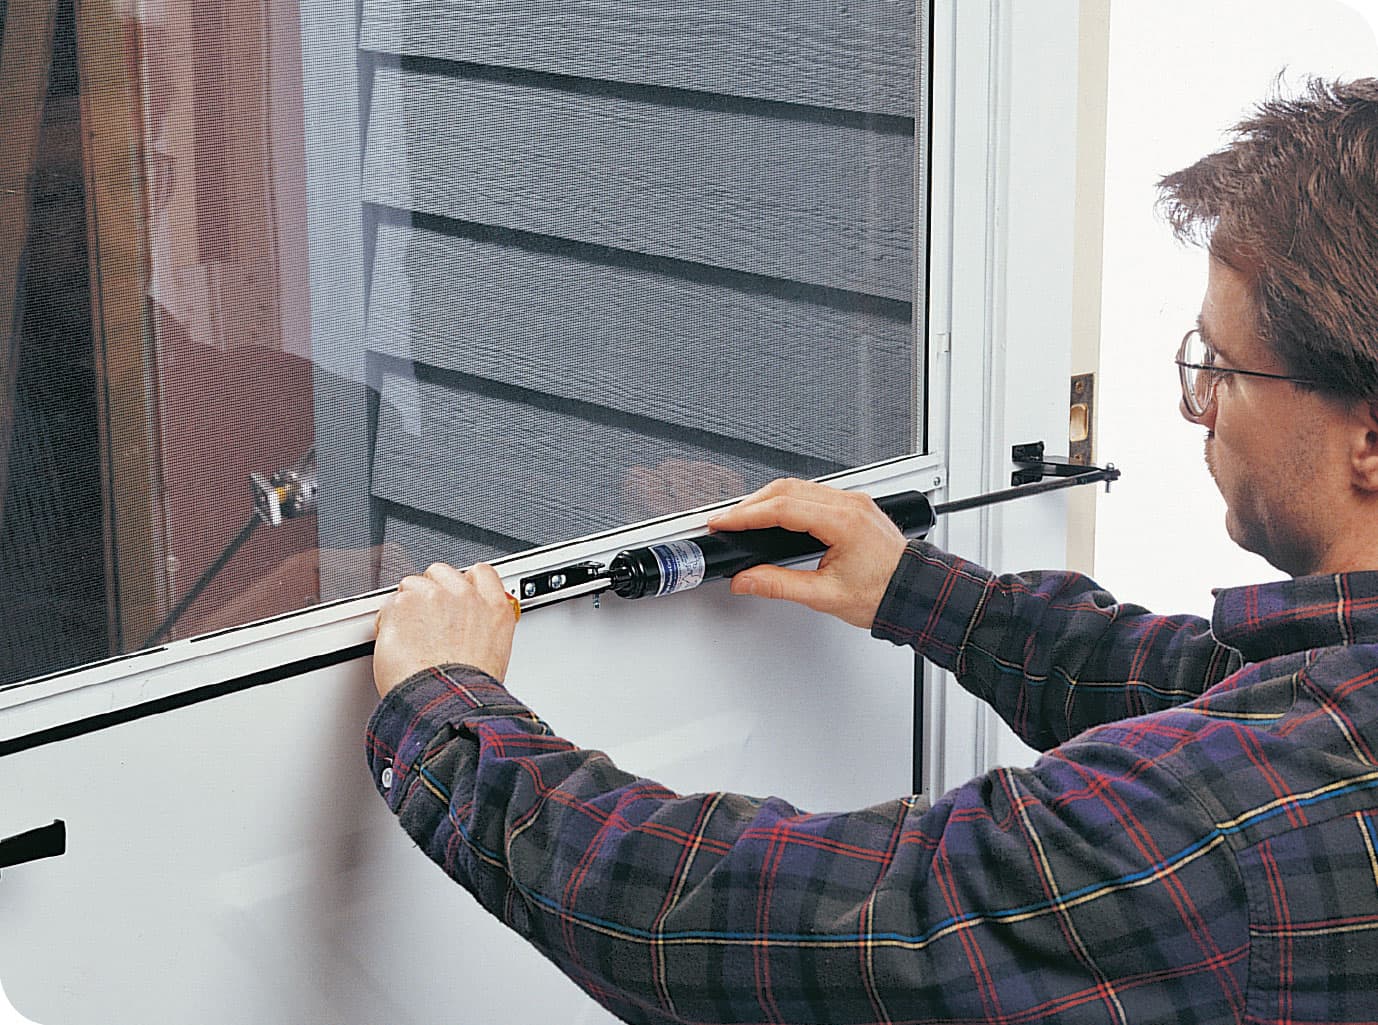
Adjust the door closer so it has the right amount of tension to close the door securely, without slamming. Most closers have tension-adjustment screws at the end of the cylinder farthest from the hinge side of the door.
TUNING UP GARAGE DOORS
Over time, many good things become bad things, especially if they aren’t well maintained. An overhead garage door is no exception. To keep everything running smoothly requires effort on three fronts: the door, the opener, and the opener’s electronic safety sensors. Here’s what you need to know to keep all three in tiptop shape.
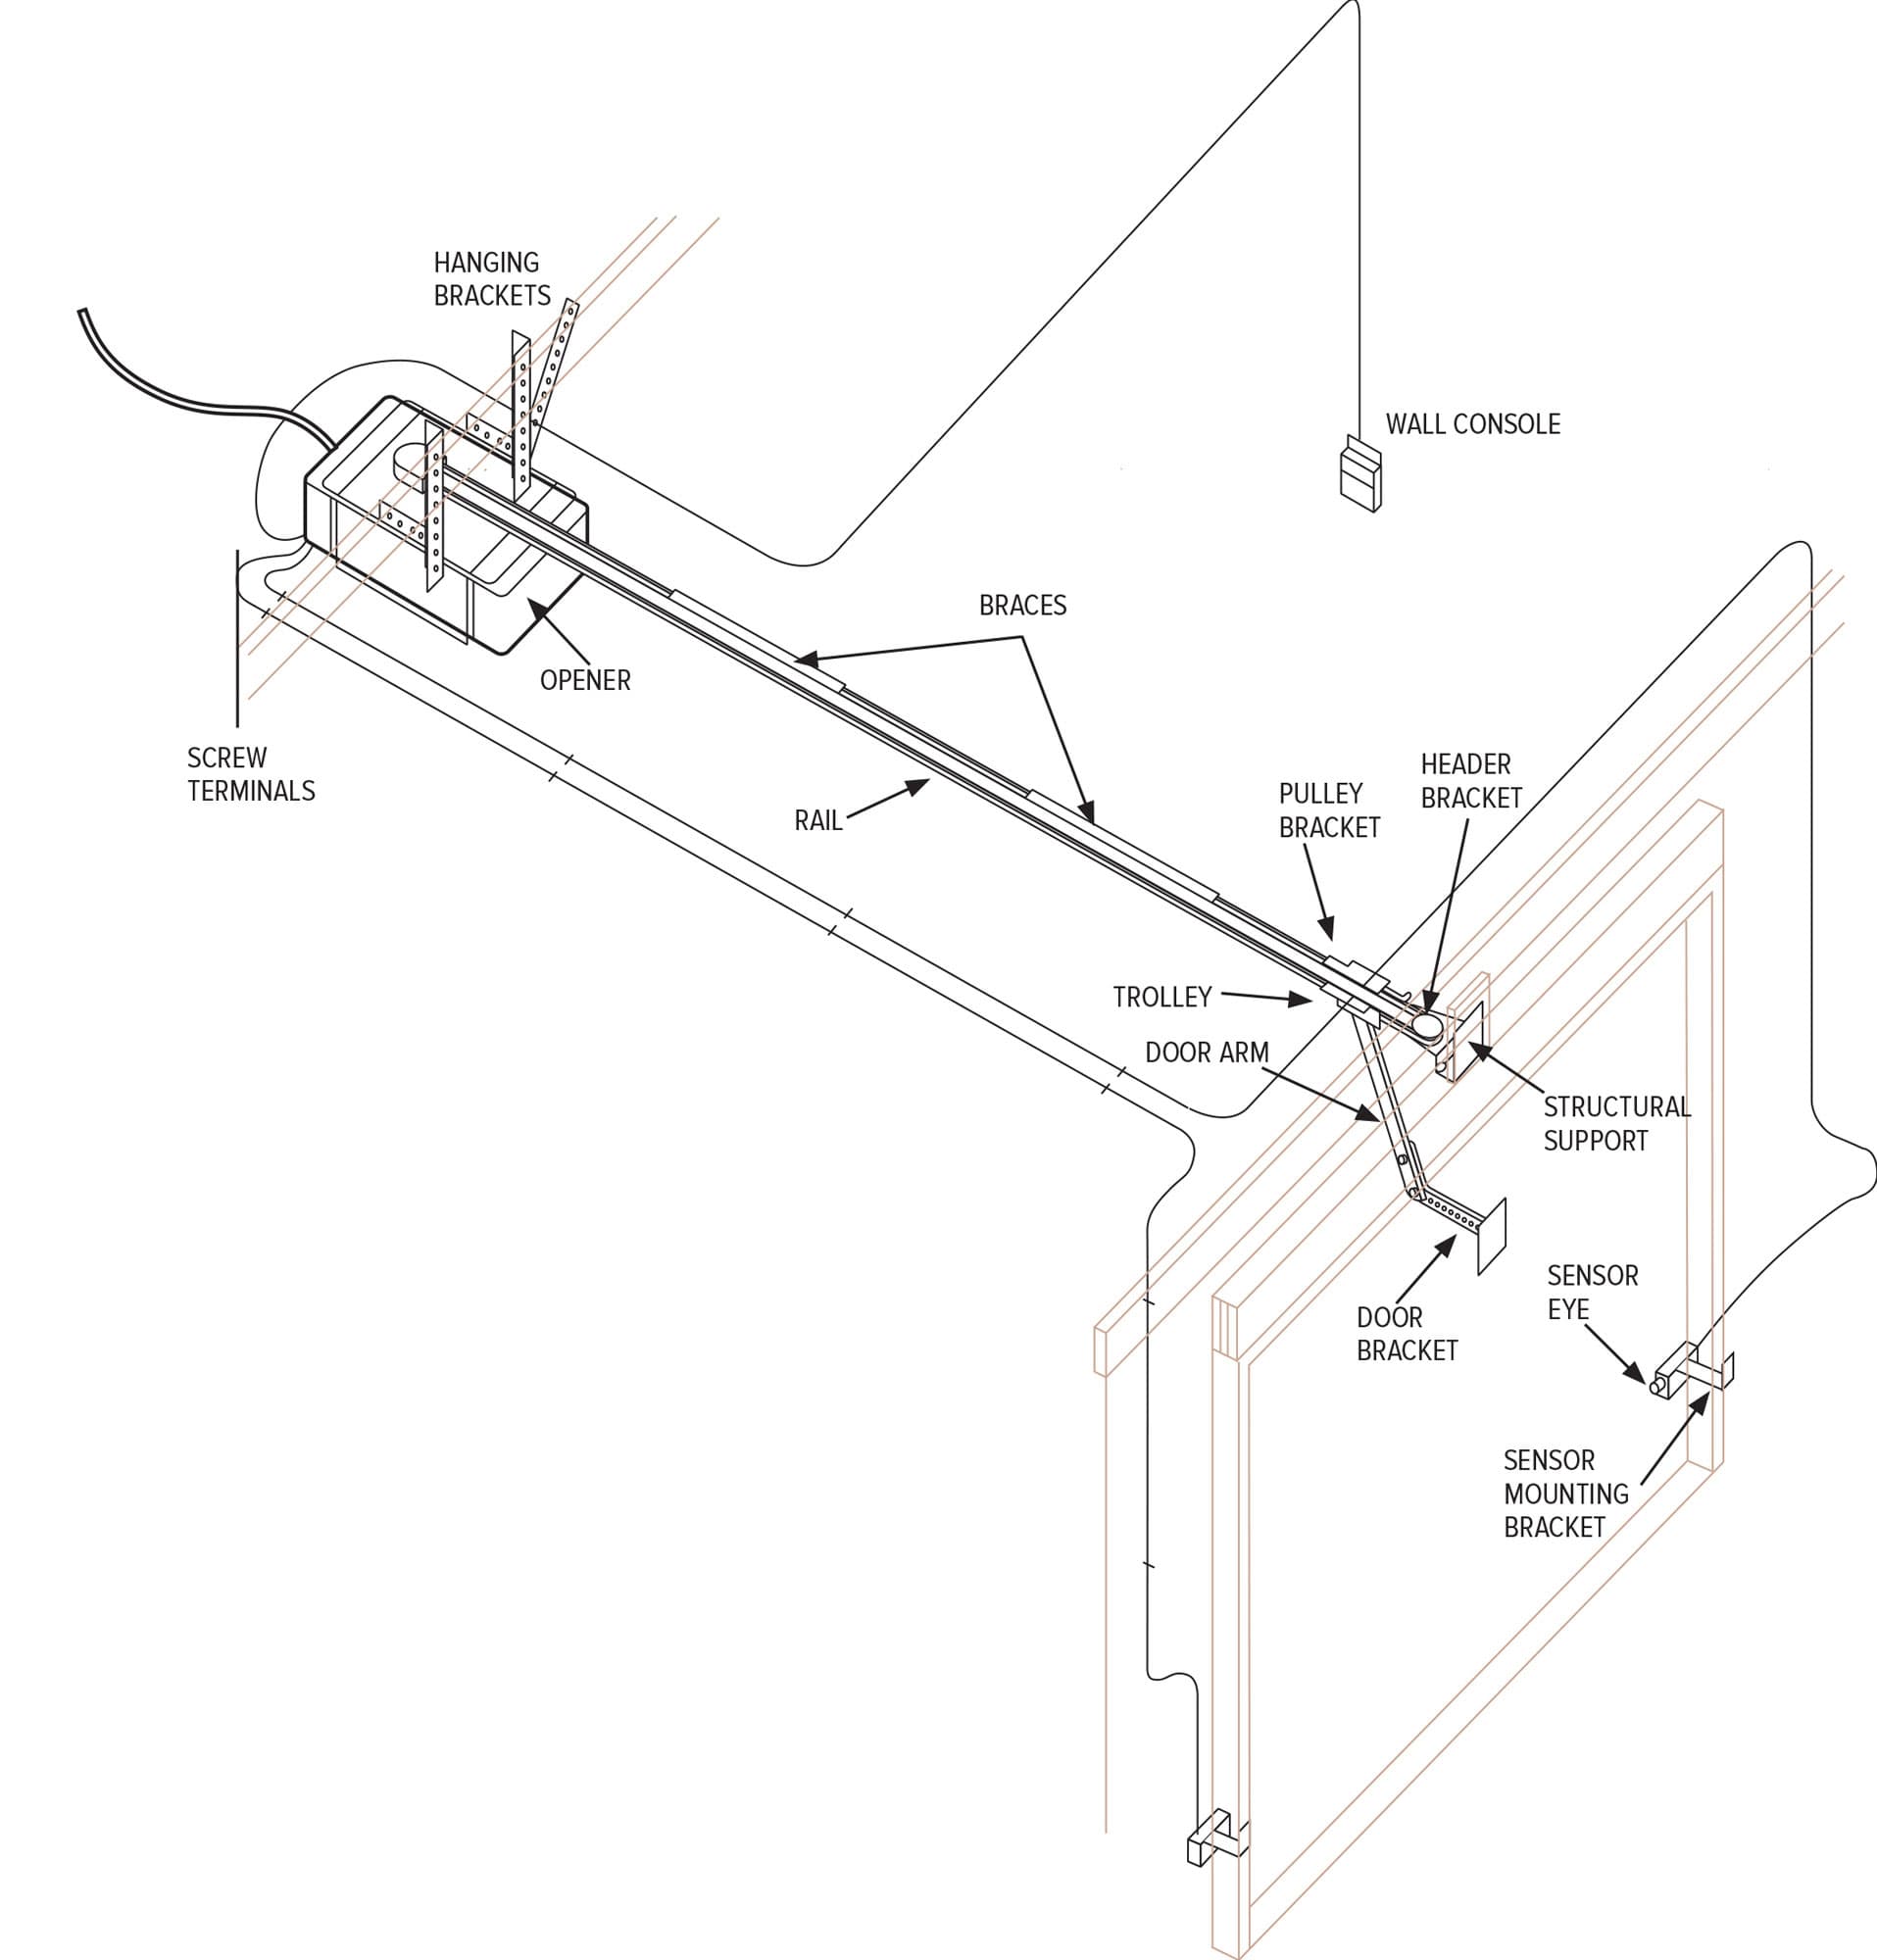
A schematic drawing of the basic parts of a classic garage door and opener system.
How to Tune Up a Garage Door
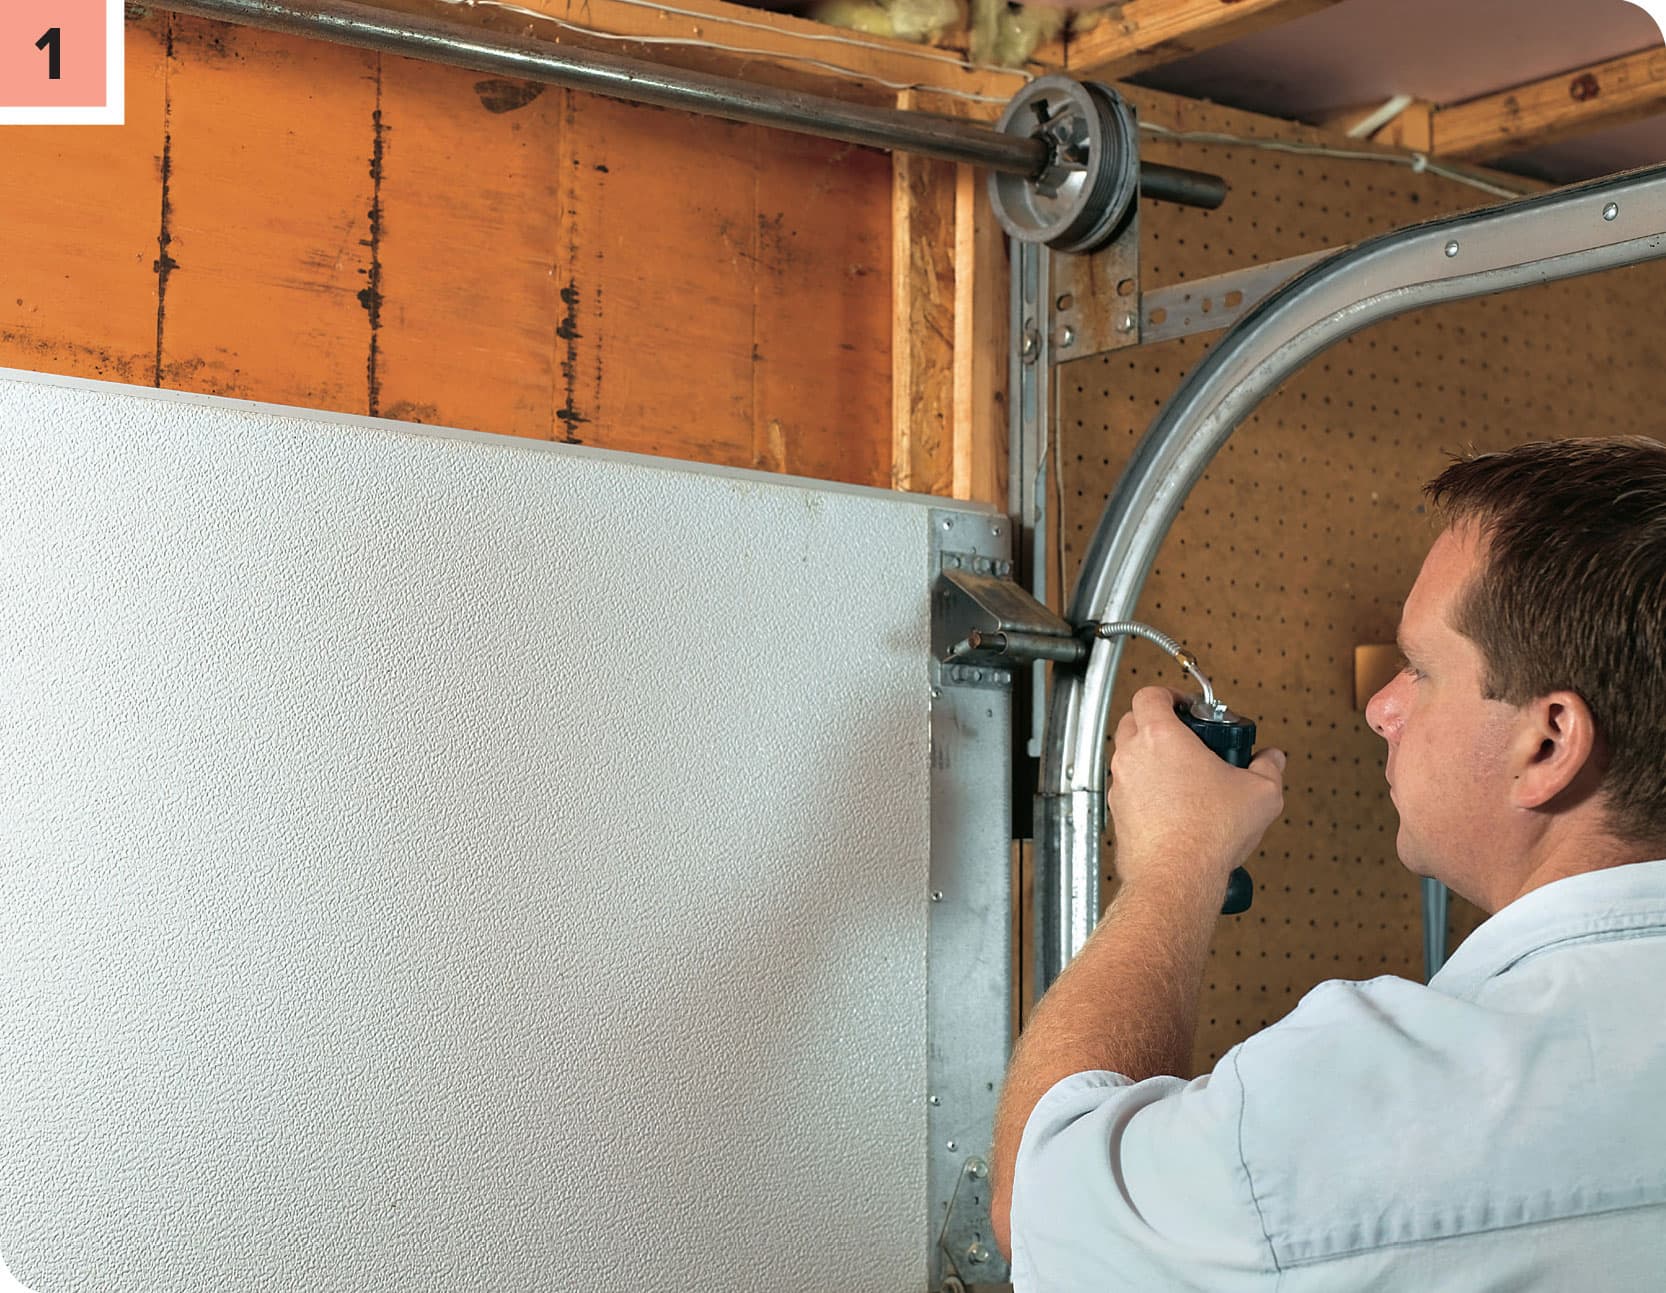
Begin the tune-up by lubricating the door tracks, pulleys, and rollers. Use a lightweight oil, not grease, for this job. The grease catches too much dust and dirt.
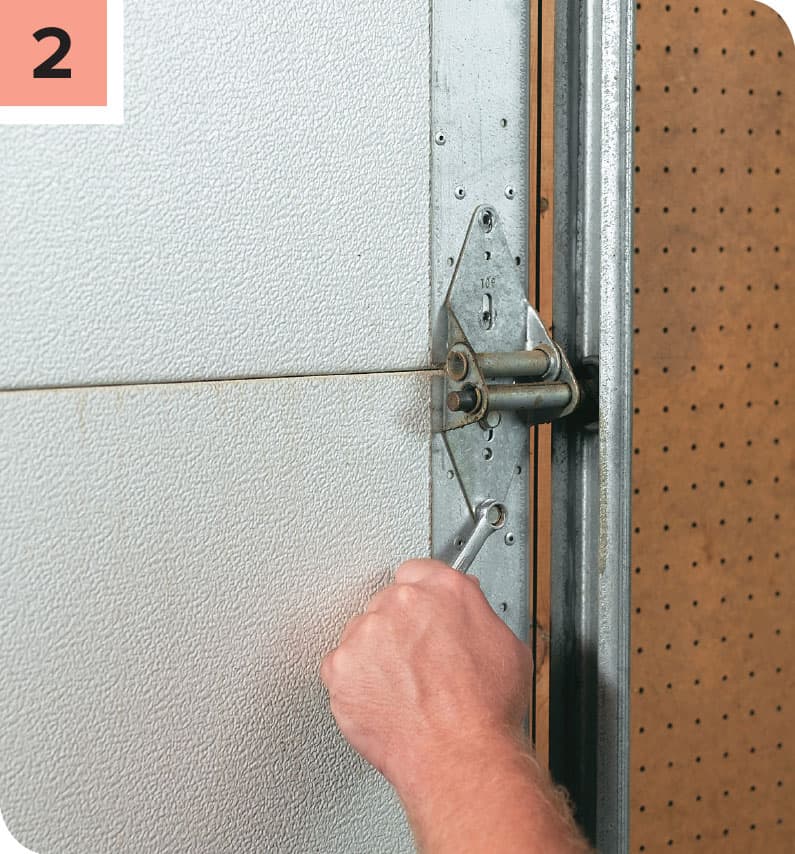
Remove clogged or damaged rollers from the door by loosening the nuts that hold the roller brackets. The roller will come with the bracket when the bracket is pulled free. Clean the rollers. Mineral spirits and kerosene are good solvents for cleaning roller bearings.
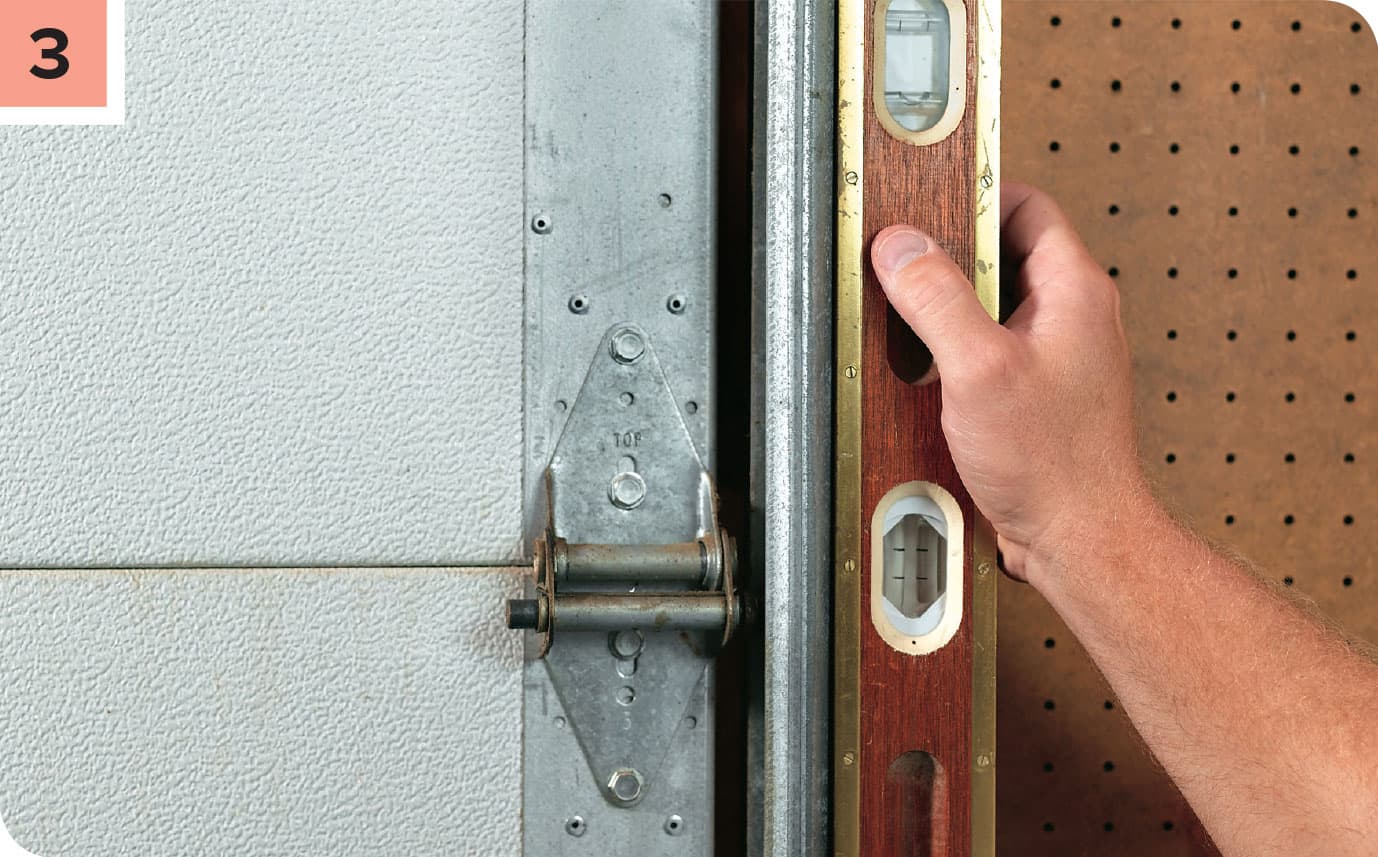
If the rollers are making a lot of noise as they move over the tracks, the tracks are probably out of alignment. To fix this, check the tracks for plumb. If they are out of plumb, the track mounting brackets must be adjusted.
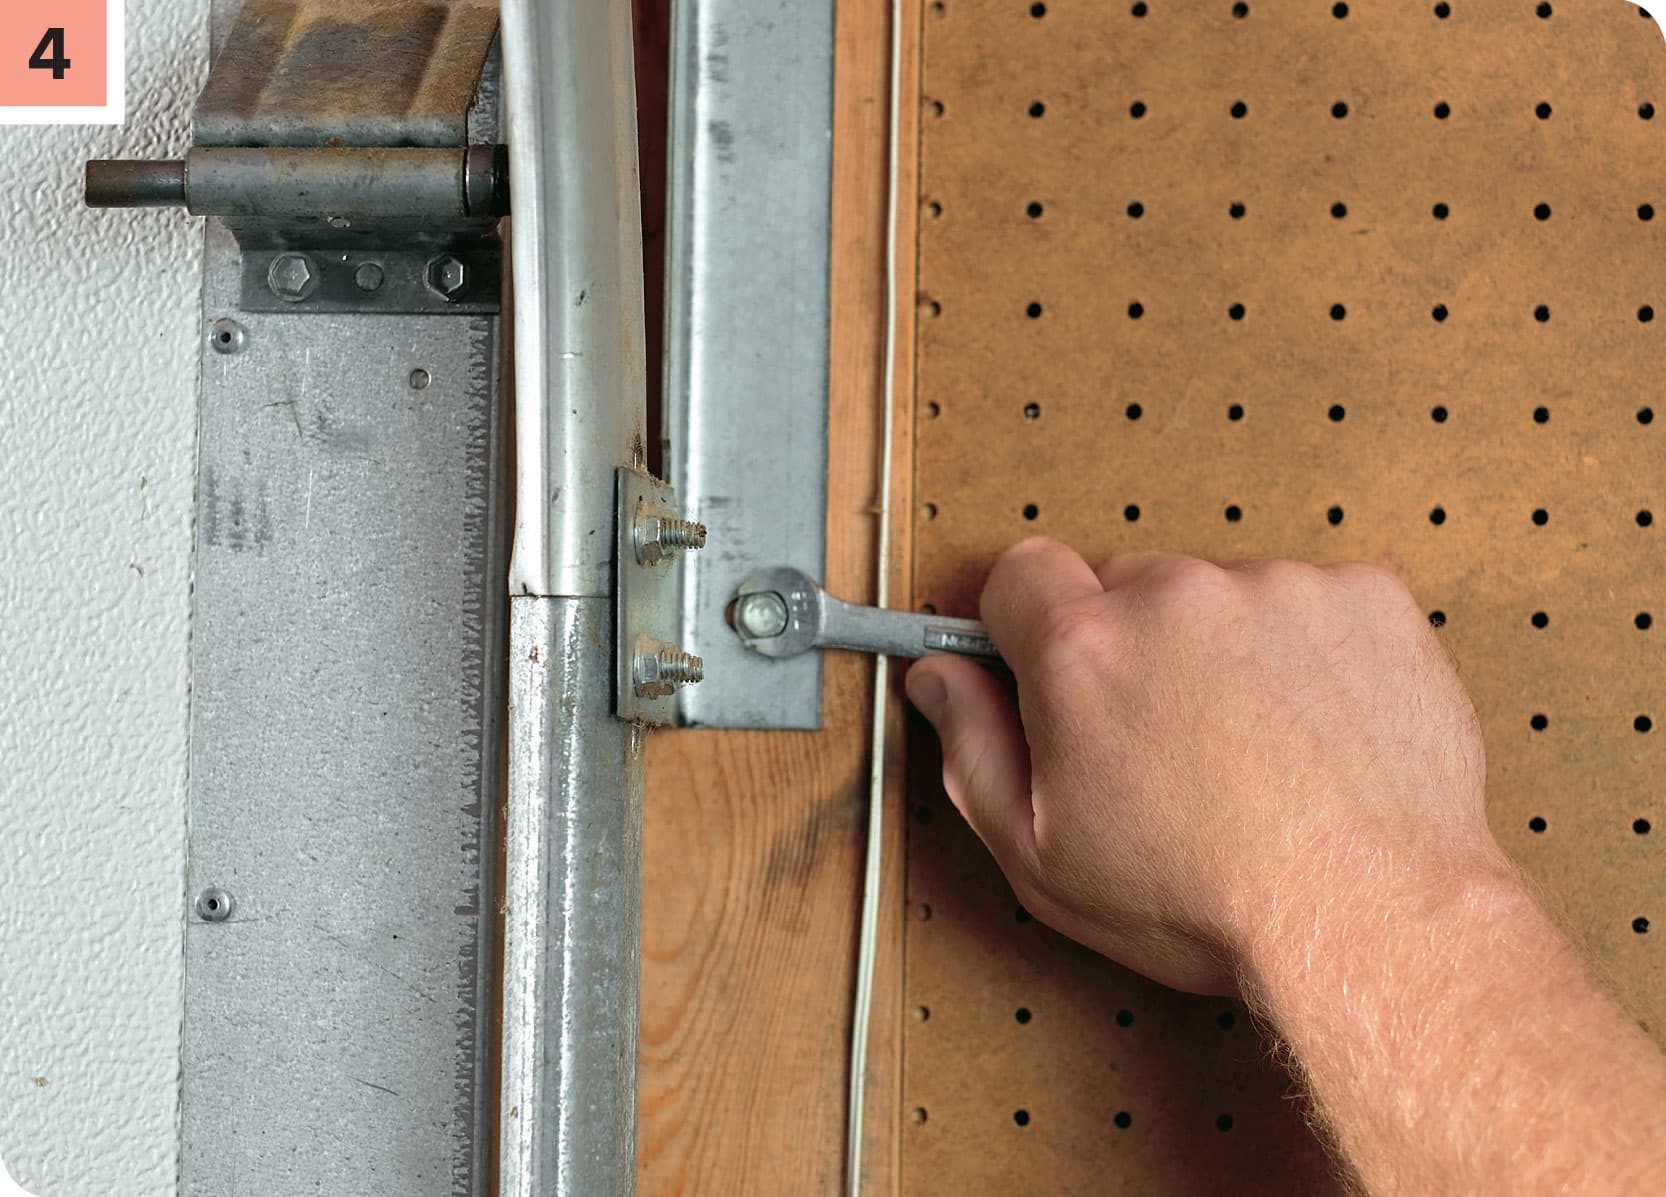
To adjust out-of-plumb tracks, loosen all the track mounting brackets (usually 3 or 4 per track) and push the brackets into alignment. Once the track is plumb, tighten all the bolts.
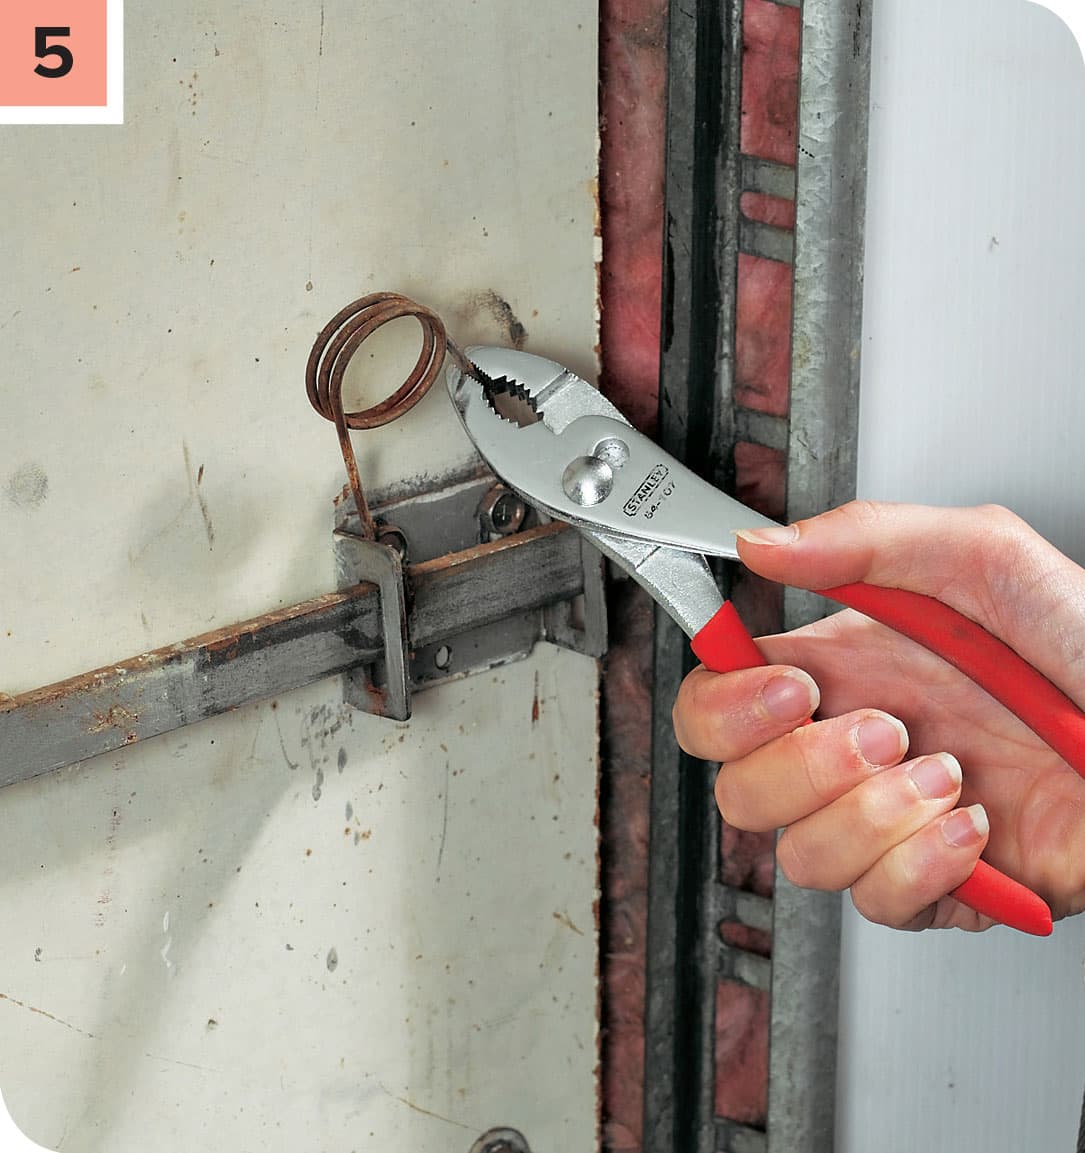
Sometimes the door lock bar opens sluggishly because the return spring has lost its tension. The only way to fix this is to replace the spring. One end is attached to the body of the lock; the other end hooks onto the lock bar.
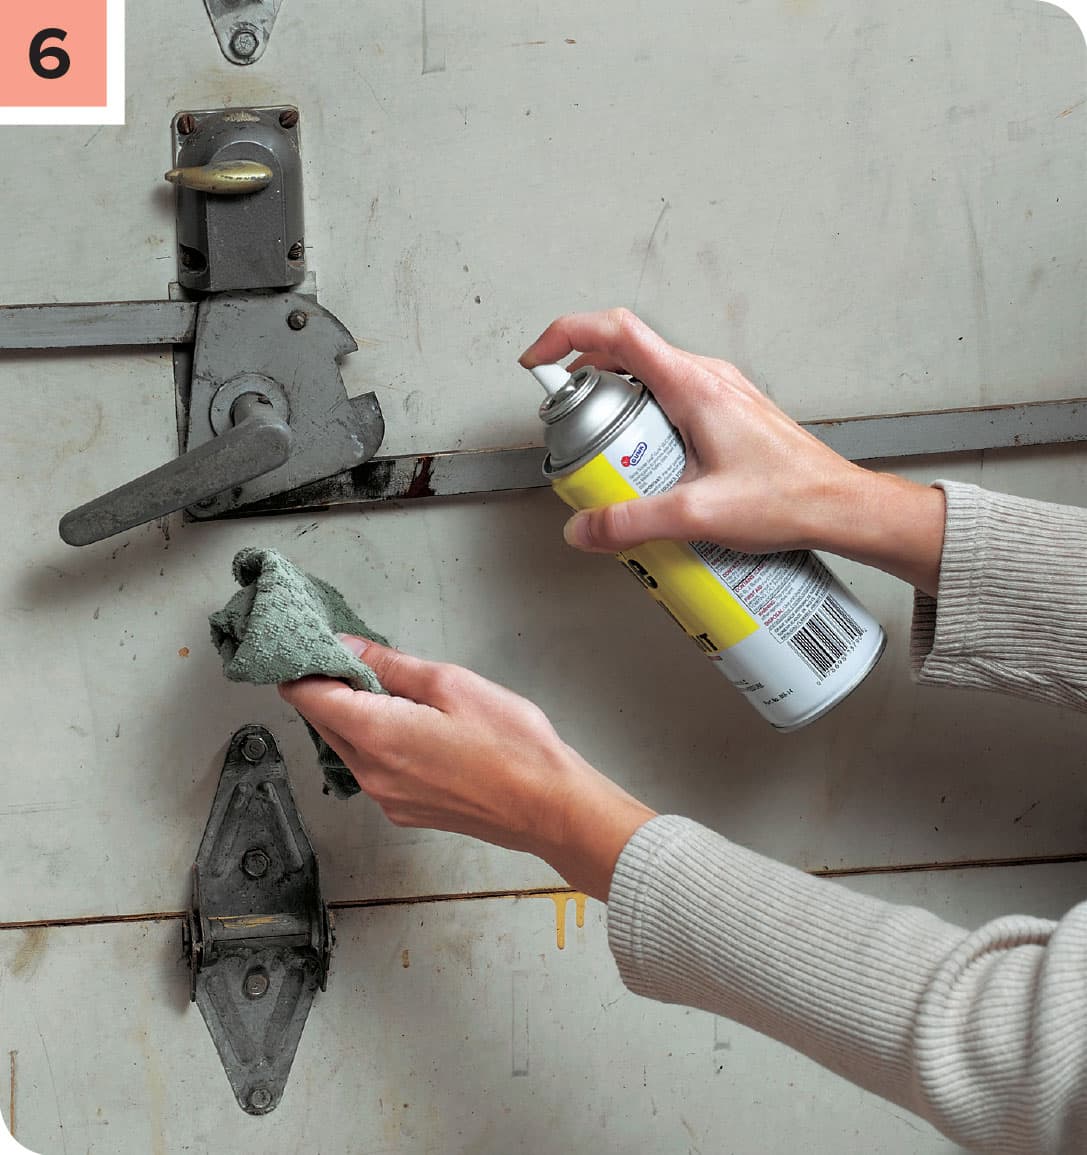
If a latch needs lubrication, use graphite in powder or liquid form. Don’t use oil because it attracts dust that will clog the lock even more.
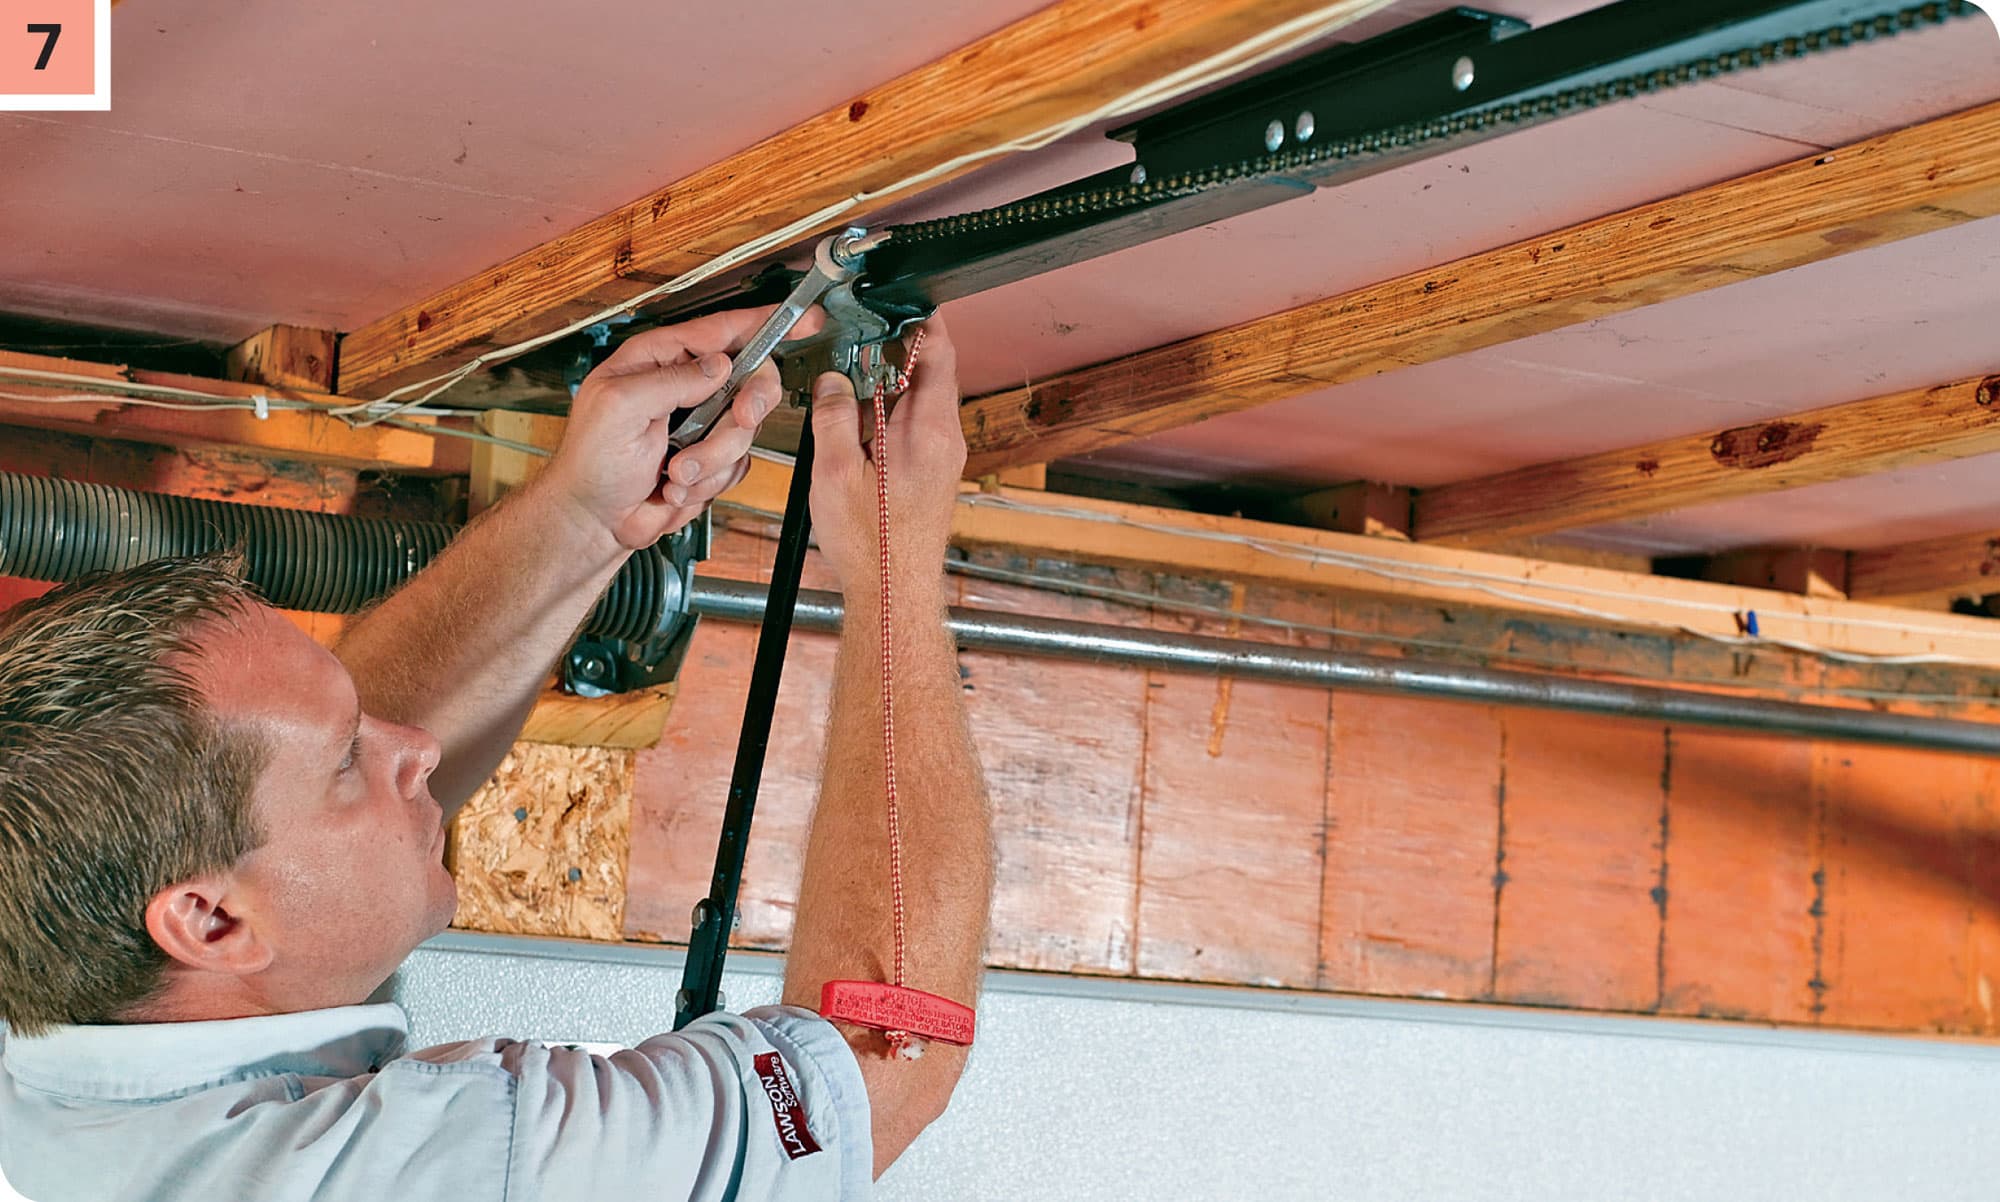
If the chain on your garage door opener is sagging more than 1/2" below the bottom rail, it can make a lot of noise and cause drive sprocket wear. Tighten the chain according to the directions in the owner’s manual.
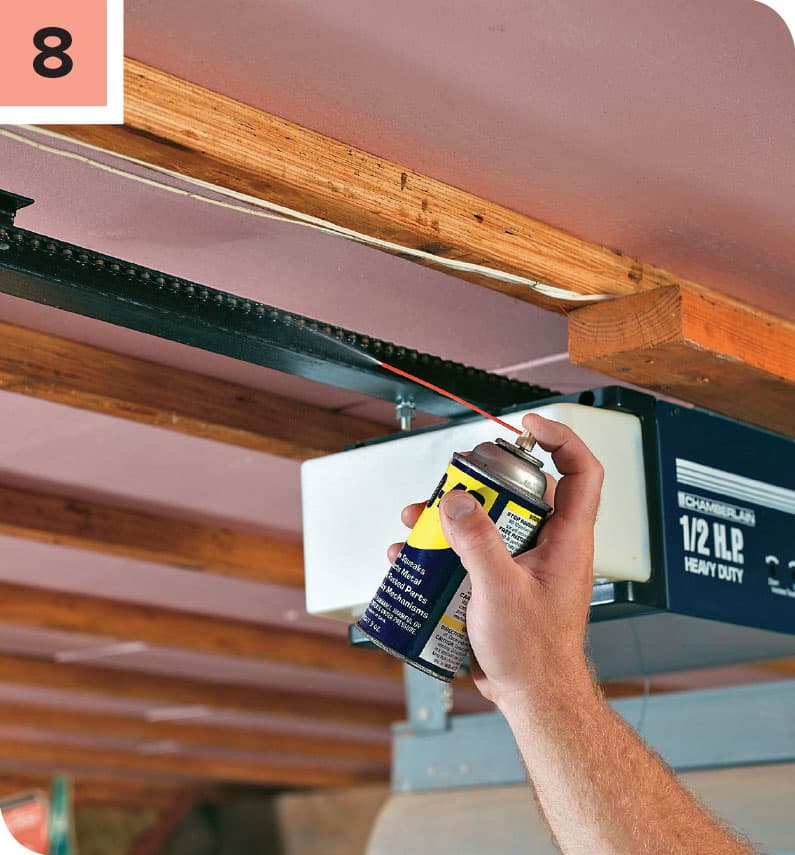
On openers with a chain, lubricate the entire length of the chain with penetrating oil. Do not use grease. Use the same lubricant if your opener has a drive screw instead.

Make sure that the sensors are “talking” to the opener properly. Start to close the door, then put your hand down between the two sensors. If the door stops immediately and reverses direction, it’s working properly. If it’s not, make the adjustment recommended in the owner’s manual. If that doesn’t do the trick, call a professional door installer and don’t use the door until it passes this test.