Whenever we add a layer to our Motion projects, it has to be contained in a group. But what exactly is the difference between layers and groups? Well, for one thing, a layer is an element—a picture, movie, text object you've brought in or created. A group is a container for those elements. It can be used to organize materials in your project or perform operations to several elements at once. For those of you who use Final Cut Pro X, you may be familiar with compound clips. Compound clips allow you to reverse render operations or make universal changes to several objects at once. Let's take a brief look at some of the fundamental differences between groups and layers in this following exercise.
- From this chapter's exercise files, open the
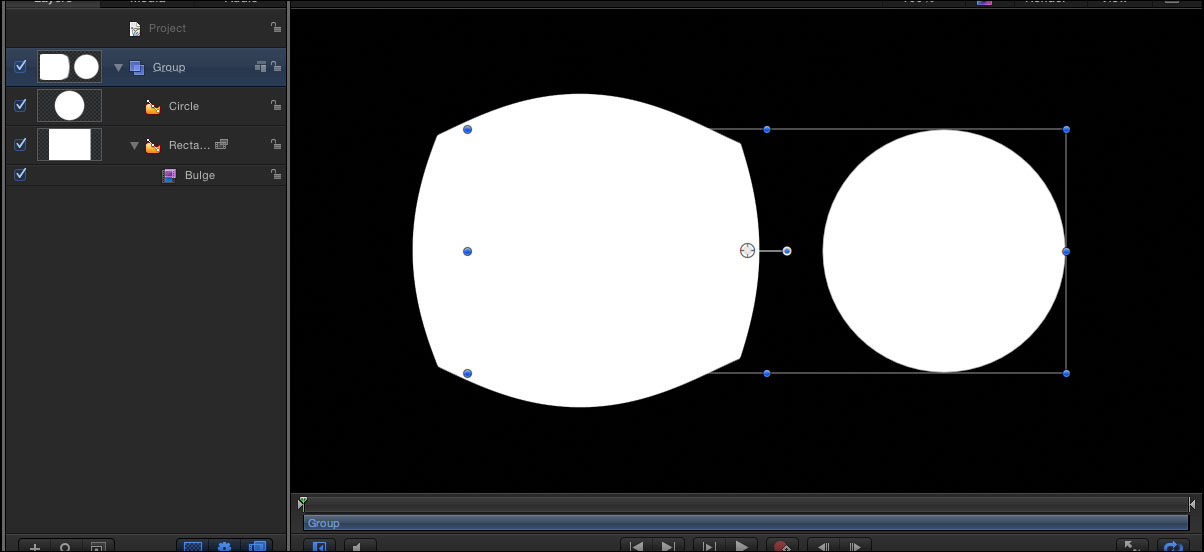
01_06project by double-clicking on it. - There is one group that contains a circle and a square. Click on the Library tab.
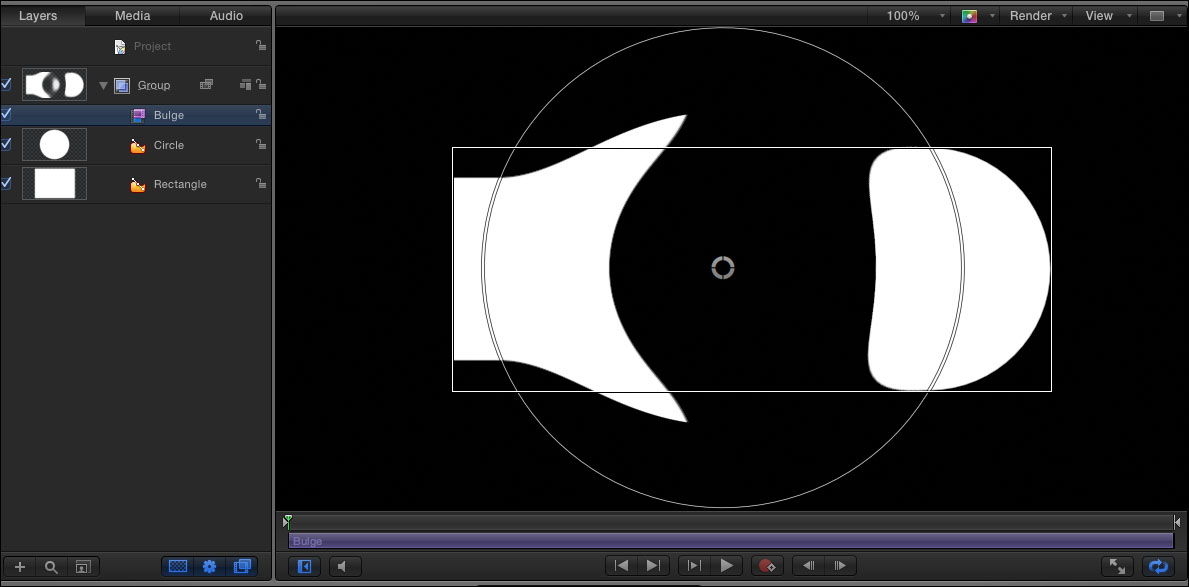
- Select Filters | Distortion | Bulge and compare your results to the following screenshot:
- Notice how the bulge only affects the rectangle. Press F3 to open up the Filters tab of the Inspector. Adjust some of the parameters to get a feel for what it does.
- Select the Bulge filter and drag it from Rectangle to Group. Notice how the bulge now affects both the circle and the rectangle, as shown in the following screenshot:
- Delete Bulge by selecting it and pressing Delete.
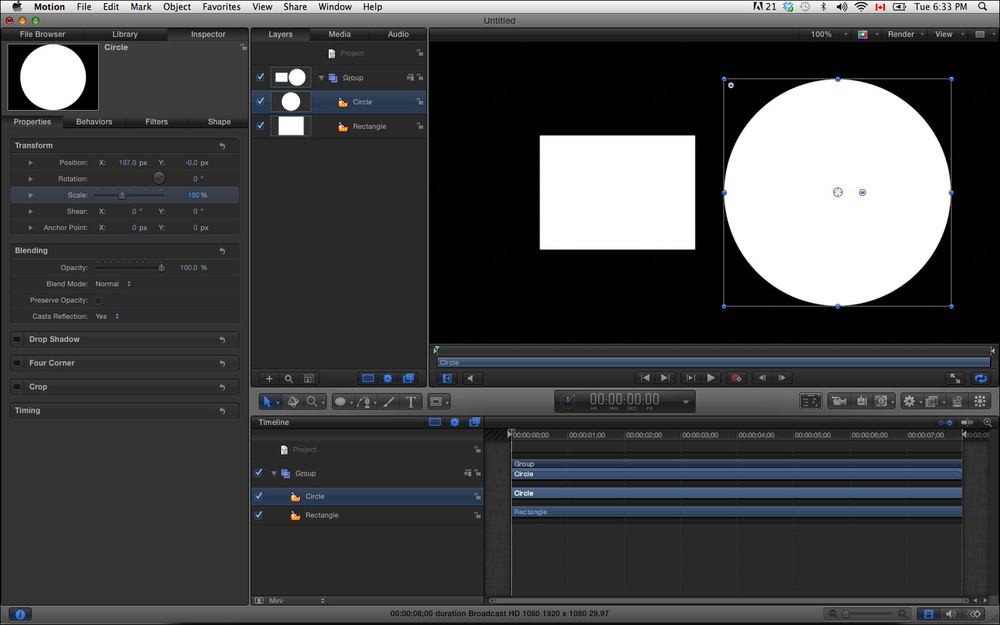
- Select the Circle layer and press F1 to go to the Properties tab of the Inspector.
- Drag the Scale slider to the right up to 150, or double-click on the scale number and manually type it in, as shown in the following screenshot:
- Go to the Edit menu and select Undo until you get back to 100.
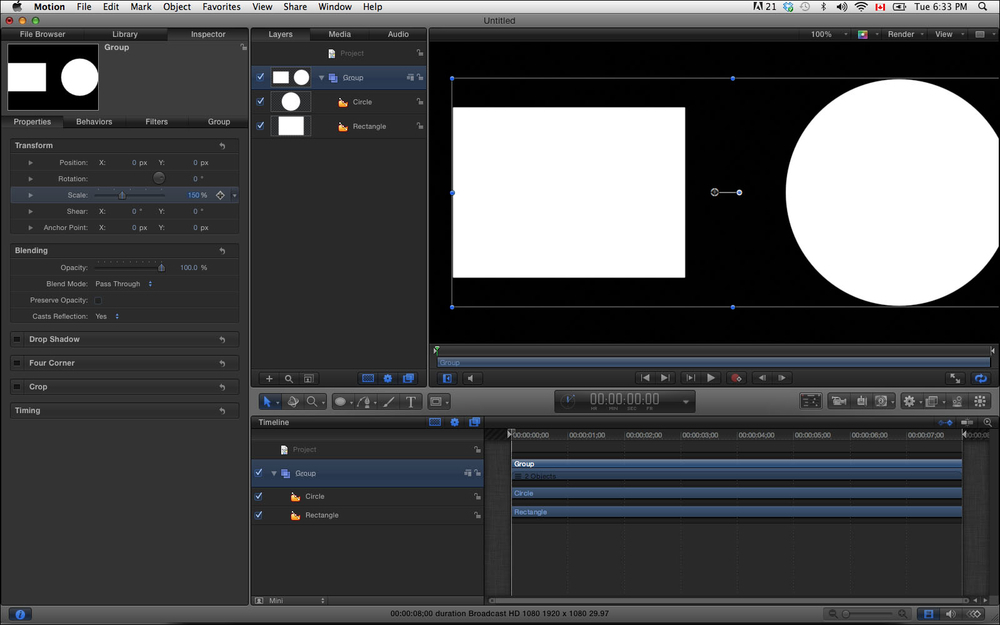
- Select the group and press F1 to go to the Properties tab if needed. Drag the Scale slider up and notice how both the circle and rectangle increase in size, as shown here:
A default group was created with the Motion project. If you want to create a group in Motion from multiple layers, you can select them; just go to the Object menu and select Group. There is also a plus icon at the bottom of the Layers tab, as shown in the next screenshot. This creates an empty group above the selected group. If nothing is selected, the group goes to the top of the Layers tab.

I cannot stress enough that it pays to learn your keyboard shortcuts. It will allow you to perform tasks more quickly and efficiently instead of going to menus.
In this recipe, you went to the Edit menu to undo your last action. If you look under that menu, you will see that the shortcut key is Command + Z. This is one of the shortcut keys that isn't only good in this application, but on the majority that run on your OS system.
Here is a brief list of some keyboard shortcuts that are great to start learning and are exactly the same in most Mac applications:
- Command + A: Select all
- Shift + Command + A: Deselect all
- Shift + Command + G: Create a new group
- Command + O: Open
- Command +S: Save
- Shift + Command + S: Save a copy
- Command + X: Cut
- Command + C: Copy
- Command + V: Paste