In the previous recipe, we saw how easy it was to copy and paste filters from one layer to another or to a group. Sometimes in a Motion graphics workflow, it's necessary to duplicate layers. A problem can occur when we want to change the filters on these layers. Both the duplicate and the original layers would each have to be changed manually. If you begin to change or manipulate filters several times, this can become a very tedious process. This is where cloning comes in handy. Any changes we make to filters on the original layer, the clone will follow along. As an added bonus, it also allows for better performance in Motion. Let's take a look at an example in action.
- Open the
02_06project from this chapter's project folder. This project consists of the Arrow 01 group from Motion's Content library. - Click on the disclosure triangle for the Arrow 01 group and reveal its content. Notice there are two filters on the group—a Colorize and Trail filter. Press F3 to go to the Filters tab of the Inspector.
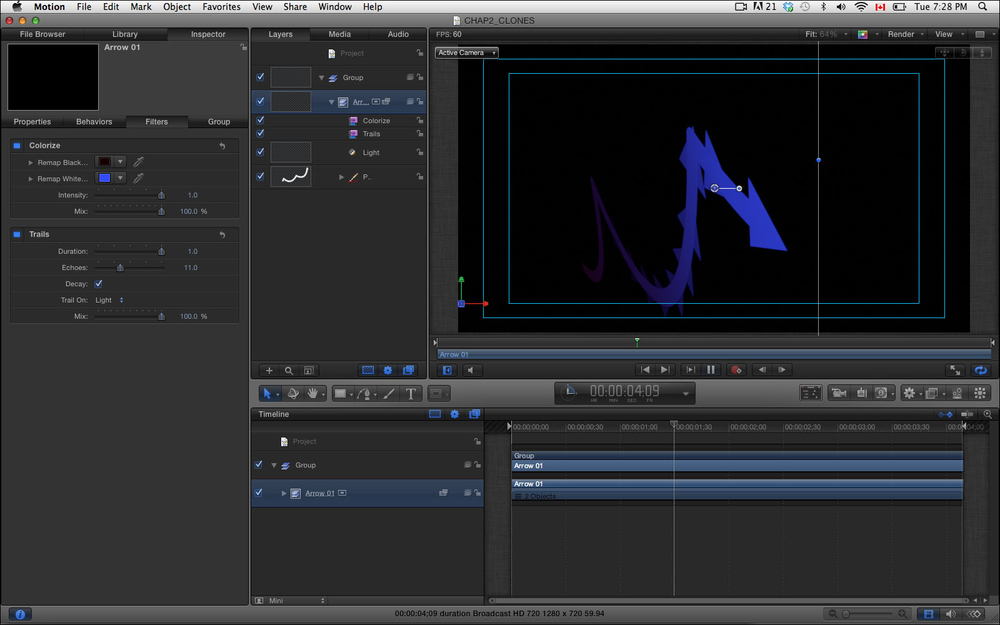
- Press the Space bar to play back the project. Notice how the Remap White value on the Colorize filter has been turned to blue, and also notice how in the Trail filter, eleven echoes have been created lasting for a duration of one second.
- Select the Arrow 01 group in the Layers tab and go to the Object menu and choose Make Clone Layer, as shown in the following screenshot:
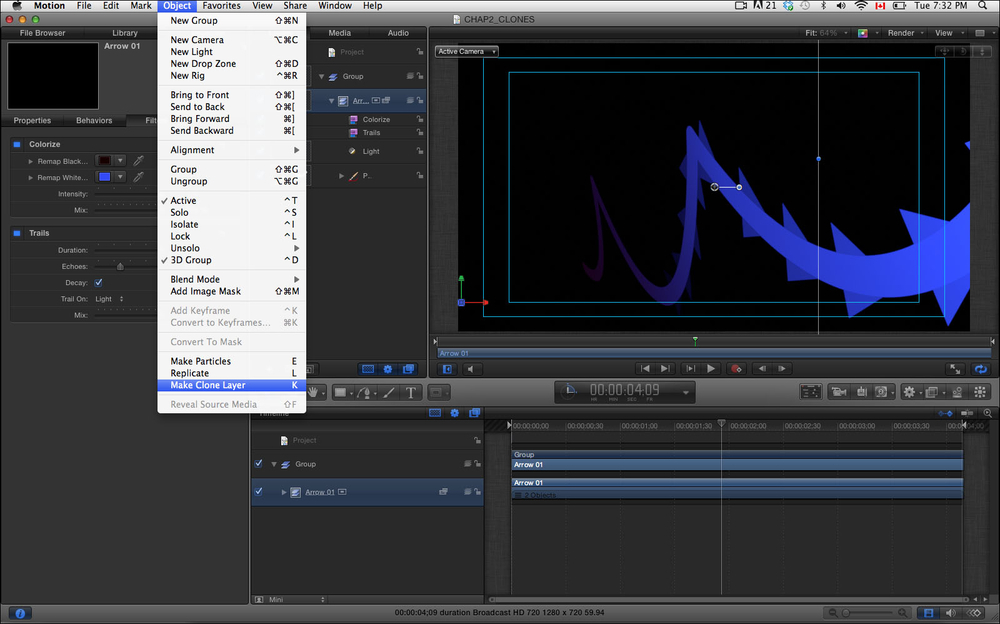
- Notice that a new layer has been created just above the Arrow group, as shown in the following screenshot. Select Clone and press F1 to go to the Properties tab of the Inspector. Change the Position X value to
–400. Clones have independent Scale, Position, and Rotation properties from the original. Press the Space bar to play back and see the two arrows animate.
- Stop the playback. Move to a frame where you can see both the arrows in the Canvas, or go to the one second and the thirty-fifth frame mark. Select the Arrows 01 group and press F3 to go the Filters tab of the Inspector.
- Right-click or Ctrl + click the Remap White value and change the color to a red of your liking, as shown in the following. Under the Trails filter, set Echoes to 4.

- Press the Space bar to play back the project. Notice how the clone adopts the original group's filter changes, and you only had to switch one set of values!
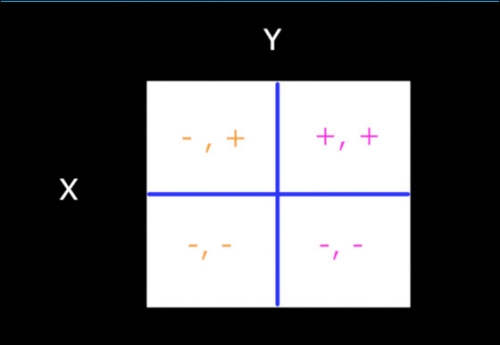
When we move our layer's Position co-ordinates, it's a good practice to know what the values mean.
Having a basic understanding of how Position co-ordinates work in Motion 5 can come in handy. When dealing with the x and y positions, we can easily break down our screen into four basic quadrants. The quadrants hold either positive or negative values. Here is a breakdown of the grid system in Motion 5; the same holds true in FCP X:
If we are working with one layer in a project that has clones and later decide there may be another element that works better in its place, we can actually swap out the source. See the following example. In Picture 1, there was a photo of chalk that was cloned and scaled lower in size. The still picture of the ruler replaced the chalk and its clone. To achieve this, the ruler was dragged on top of the original chalk layer. The clone simply follows suit!
