The Motion Path behavior is very versatile. It creates a path for an object to travel along and is customizable.
- Let's launch Motion and create a new Motion project with a Preset of Broadcast 1080p. Set Duration to
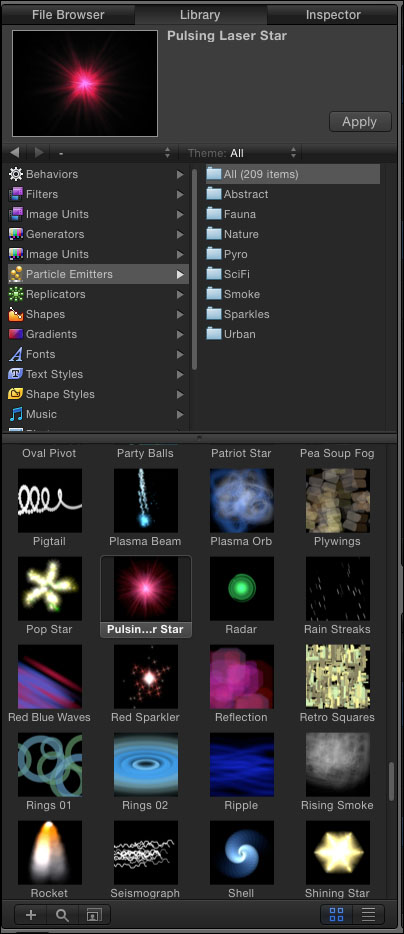
6seconds. - Press the Command + 2 shortcut to go to the Library. Go to Particle Emitters and select the Pulsing Laser Star as shown in the following screenshot. Click on Apply.
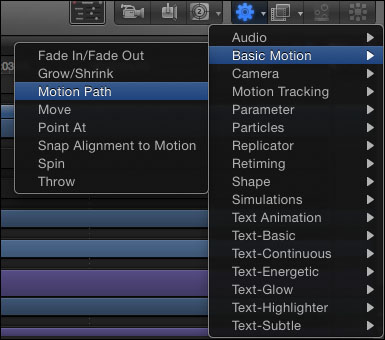
- Press the Space bar to play back your project. It's a simple star that twinkles in the middle of your Canvas. We're going to make it travel along a path. Click the gear icon on the bottom-right corner of the Canvas and choose Motion Path under Basic Motion as shown in the following screenshot. Press the F7 key to show the HUD if it's not already displayed.
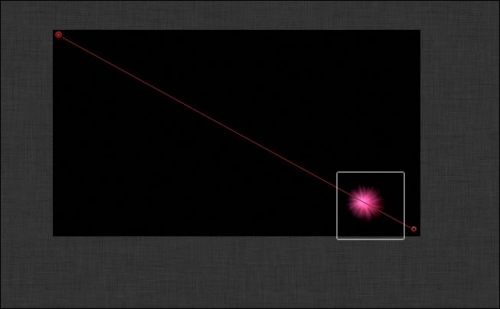
- Zoom out on your Canvas by pressing the Command + - shortcut. Notice that with the Motion Path behavior selected, you can see a line in the Canvas that has two points; one point is in the center and the other is off-screen to the right-hand side. Press the Space bar to play back the project. Notice that the star travels from left to right.
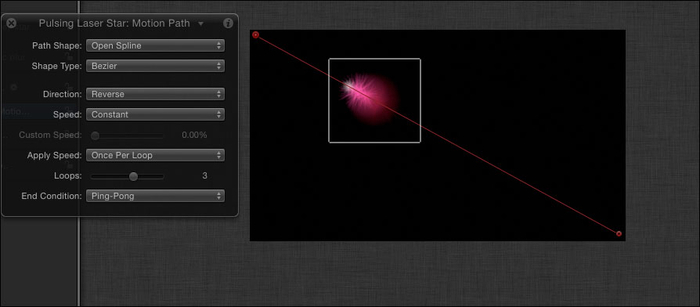
- In the HUD, change the value of Direction from Forward to Reverse. Make sure the project is still playing back. Drag the point offscreen to the lower-right corner of the Canvas and the middle point to the upper-left corner, as shown in the following screenshot:
- While still playing back, change the value of Speed from Constant to Ease Both. The star now slowly goes out of the first point and then slows down when entering the second point.
- Change the value of Loops to 3 and the End Condition to Ping-Pong. Press the Shift + z shortcut to make your Canvas fit in the window.
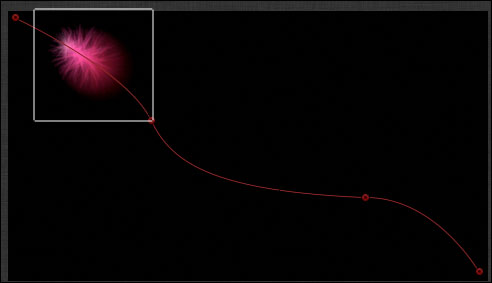
- Double-click on the line once you are close to the first point and the end point. Two more points are added. Click on one of the newly created points and notice handles appear that will allow you to make a curved shape path. Drag the handles on each of the new points to make your own curved path. Click on any point and drag it across the line to change its position. Option + click a handle on any point to break them apart and customize you shape even more. Use the following screenshot for reference:
- As a final step, change the value of Path Shape to Rectangle. Choose a few more path shapes to familiarize yourself with the options available to you. Customize the additional settings as you see fit.
There's a lot of flexibility in Motion's behaviors to use custom shapes to create animation.
If you choose Geometry under Path Shape in the Motion Path behavior, you are asked to give it a source to use for your object to travel along. In Library under Shapes, there are 16 shapes you can use as the source as indicated in the following screenshot. Simply apply them to your project and then drag the shape in the source well for the path shape.

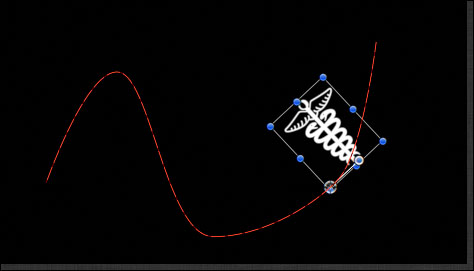
The Snap Alignment to Motion behavior is a great complement to Motion Path. Sometimes when you have objects following along a path, you want it to turn with the path. Take a look at the following screenshot. I added a text layer and used one of the characters from the Webdings font. I adjusted the path to make it curved and then applied the Snap Alignment to Motion behavior from Basic Motion.