We can keyframe groups the same way we keyframe layers. The advantage of keyframing groups is that if we have a bunch of layers or objects that are related, we can keyframe just the group the layers are in rather than keyframe each layer individually. Let's take a look!
- Open the
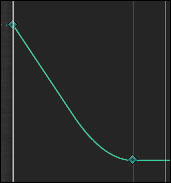
04_03project in this chapter's exercises folder. - Play back the project. This project consists of a radial gradient background, some smiley faces, text, and animated arrows. We want to animate all the elements in this project on and offscreen together. Select the group and press F1 to go to the Properties tab of the Inspector.
- Move to the one-second mark on your Timeline. Next to the word Scale, in Transform properties, click the diamond icon to add a keyframe, as shown in the following screenshot. Move to the end of the Timeline and change the Scale value to 120. A new keyframe is automatically added.

In the following screenshot, we see a view of our window's display after the preceding changes have been made:
- Let's have the full group rotate and scale down from offscreen. With the group still selected, move to the beginning of the project. Enter
2500for Scale. A keyframe is added automatically. Play back the animation. The group now scales from2500to100over one second and slams into place. We would like the group to gradually slow down before reaching100. - Press Command + 8 to bring up the Keyframe Editor. Drag up in between the Timeline and Keyframe Editor, so you have more space. Make sure the group is selected. Over to the left, we can see that we've added keyframes to all the scale values (x, y, and z.). With your mouse, draw a square around the second keyframe, as shown in the following screenshot:

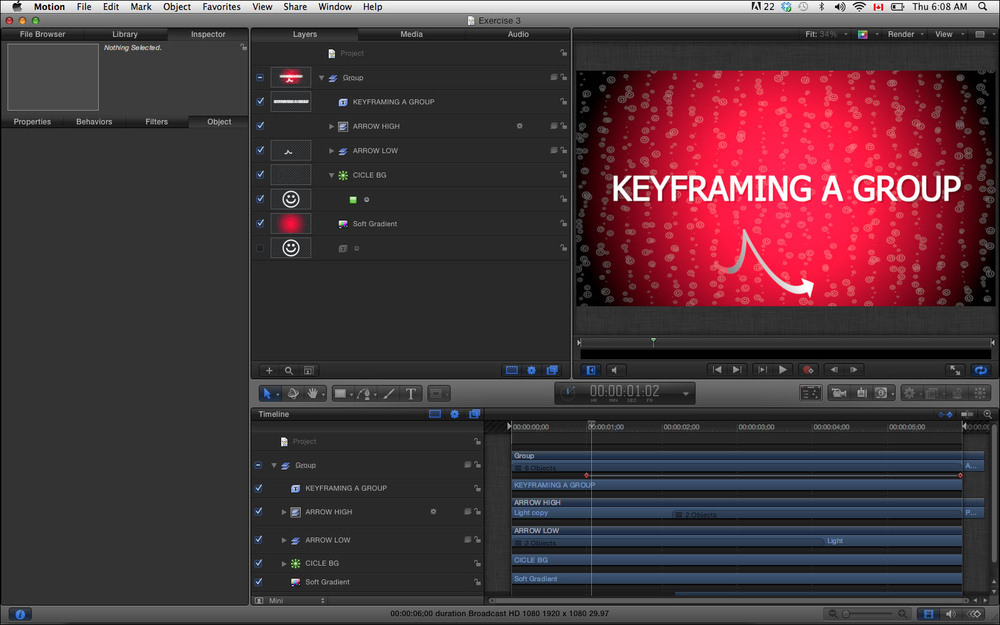
Right-click the keyframe and from the menu choose Ease In. Refer to the following image and notice the curve on the second keyframe. Play back the animation. You should see that the group scales and slows down when approaching the second keyframe.
- Move to the one-second mark in the Timeline. Click the disclosure triangle next to Rotation. Add a keyframe for the rotation Y parameter in the Properties tab by clicking on the diamond icon to the right of the Y parameter. We're not going to change the value here because this is where we want it to land.
- Move to the beginning of the project and type in
45for the Y rotation. A keyframe is automatically added. Draw a square around the second Y rotation keyframe in the editor. Right-click and choose Ease In. Play back the animation. - Let's have the group animate offscreen right. Move to the five-second mark in the Timeline. In the Properties tab, click on the diamond icon next to Position to add a keyframe.
- Move to six seconds and scrub the X position value until the group is offscreen right. A keyframe is automatically added. I entered a value of
2250. Play back the animation. The following screenshot shows a selected frame at the end of the animation: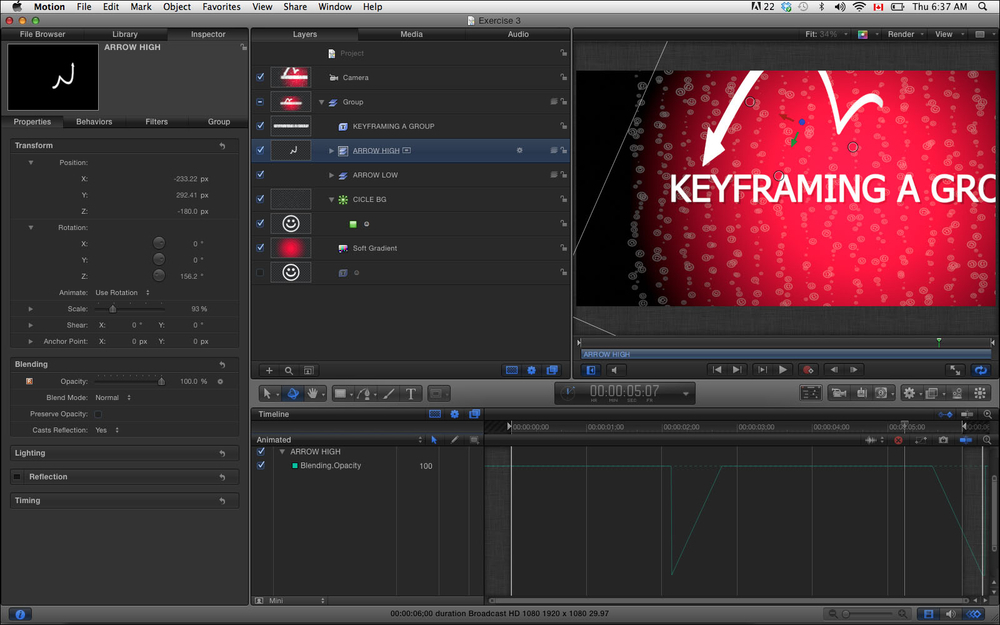
While we can move a keyframe's position by dragging in the Timeline or the Keyframe Editor, we can also move keyframes by selecting them and typing in a value to move them. For instance, to move the second Rotation Y keyframe in this recipe, select it in the Keyframe Editor and type in Shift + = + 1 + ., as indicated in the following screenshot. The keyframe moves one second forward. To move a keyframe back, select it and type – and the number you want and a period to force seconds. You can also move groups of keyframes in this way.

The Keyframe Editor can become a very busy place, very quickly. You can easily hide keyframes by clicking on the checkmark next to a parameter in the Keyframe Editor. If you Option + click the arrow, you will solo it, as shown here:
