Every once in a while, we may look at an animation and say: "That would look so much better if it was played in the opposite direction". That's where reversing keyframes comes in. We can select a series of keyframes and easily reverse them to flip the animation.
- Open
04_07from this chapter's exercises folder. - Press the Space bar to play back the animation. It's a book from Motion's Content library. The Opacity, Position, Scale, and Rotation parameters have been keyframed. We're going to reverse the Rotation and Scale keyframes, so that it animates in the opposite direction.
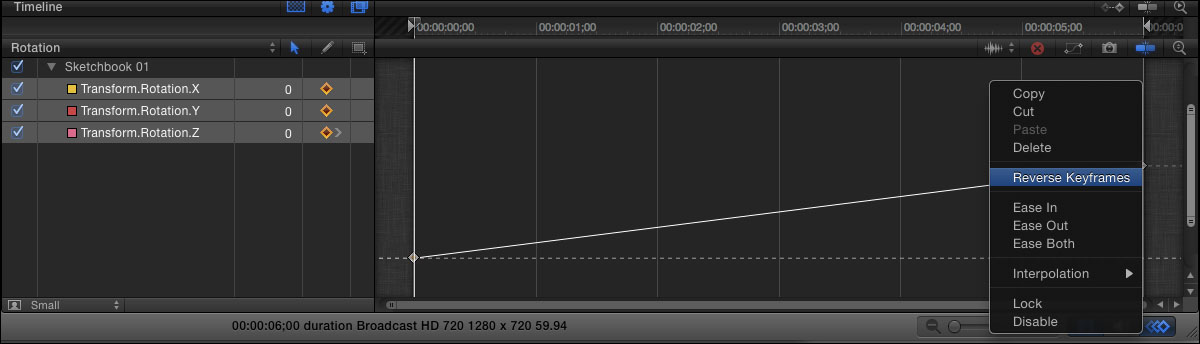
- Press Command + 8 to bring up the Keyframe Editor. On the left-hand side of this editor, click on the word Animated and choose Rotation from the drop-down menu. Now, only the Rotation keyframes show in the graph.
- Press Command + A to select both the Rotation keyframes in the editor. Ctrl + click on one of the keyframes and choose Reverse Keyframes, as shown in the following screenshot. Play back the animation and see that it now rotates in reverse. Let's repeat this for Scale.
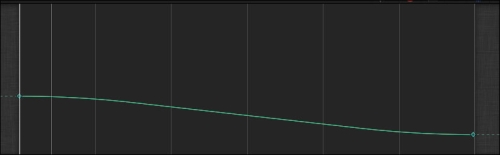
- Click on the word Rotation and select Choose from the resulting drop-down list. Press Command + A to select all the visible keyframes. Ctrl + click on any one keyframe and from the list choose Reverse Keyframes. Press Command + A to select the Scale keyframes again. Ctrl +click any one of the keyframe and choose Ease Both.
- Play back the animation and see how the graph has curves as we leave and come into each of the keyframes, as shown in the following screenshot. As a final step, we're going to copy and paste the two Opacity keyframes to the end of the animation, and then reverse them so they fade in instead of out.
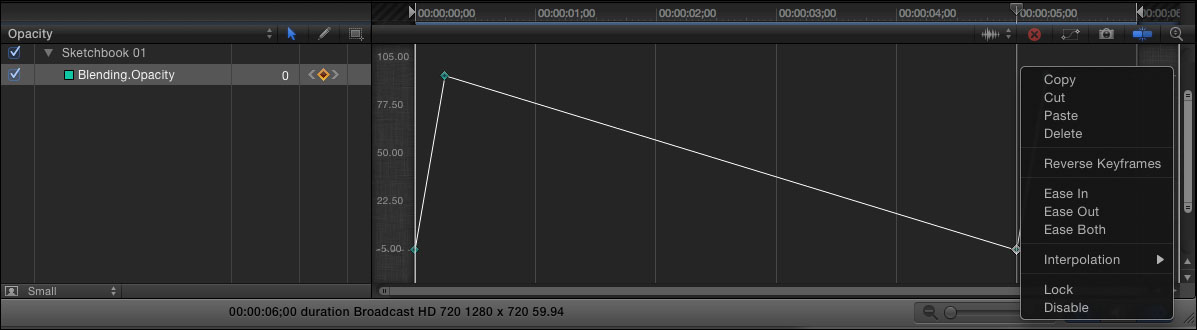
- Click on the word Scale in the Keyframe Editor and from the resulting drop-down list, choose Opacity. Drag a rectangular marquee around the Opacity keyframes and press Command + C to copy them to the pasteboard.
- Move to the five-second mark and press Command + V to paste them. Select the two keyframes you just pasted by dragging around them.
- Ctrl + click on any one of the keyframes and choose Reverse Keyframes. Use the following screenshot for reference:
- Play back the animation and see the book now fades in and out.
So far, the majority of keyframes we've changed or added have been in the Properties tab. We can also keyframe filters and use them to create transitional effects. We can achieve this by changing the Mix value from 100 to 0 or vice-versa. Try adding a Glow filter and play with the Mix value to add a transitional type effect. Reverse the keyframes using the steps just explained in this recipe.