Okay, we've gone through the recipes of keyframing and also behaviors in the last chapter, so now it's time to bring it all together. We're going to animate a Photoshop file using both keyframes and behaviors to create a simple animation on screen. Let's get started!
- From this chapter's exercise files, open the
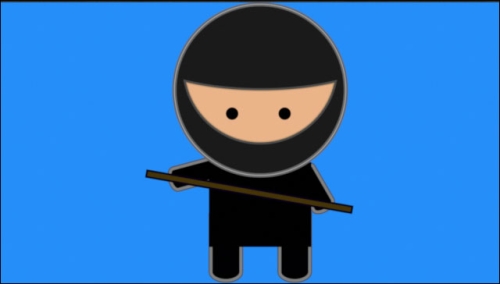
04_10project. - The project consists of a Photoshop file that was imported with multiple layers. Our goal is to animate the little ninja you see in the following image and have him jump onscreen while bobbling his head. We'll then have a spear fall into his hands as he adjusts them to fighting position. Eventually, we'll want both the spear and ninja to end up where the ninja currently is.
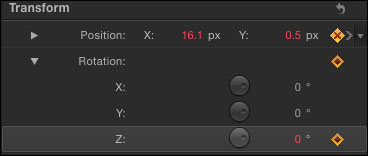
- Move to the one-second mark on the Timeline. Select the Ninja group. Press F1 to go to the Properties tab of the Inspector and add a keyframe by clicking on the diamond next to Position and Rotation, as shown here:
- Move back to the beginning of your Timeline by pressing the home key on the extended keyboard or drag your playhead. Change the Position value of X: to
440and of Y: to740and the Rotation value to720. Play back the animation. Our ninja rotates and jumps onscreen. Awesome! - Let's have him land a bit more softly on the ground. Press Command + 8 to open up the Keyframe Editor. Draw a square around the keyframes at one second to select them. Ctrl + click anyone of them and choose Ease In from the menu.
- With the Ninja group still selected, move to the end of the Timeline. Set the X position value to
-450. The ninja lands and then slowly moves to the left. Let's make his head move a bit with a Parameter behavior. - Select the Head group. Click the disclosure triangle next to Rotation in the Inspector. Ctrl + click Rotation Z and choose Add Parameter Behavior | Wriggle.
- In the Behaviors tab, set the number to
1, Apply Mode to Add, and Subtract and the Frequency to1. - Jump to the two-second mark in the Timeline. Select the Spear layer. Press F1 to jump to the Properties tab of the Inspector. Add a keyframe for Position and Rotation by clicking the diamonds next to the values.
- Move to the two-second and the thirty-frame mark. Twirl down the Rotation values and type
360in Z rotation. Change the Position values to of X: to16and of Y: to134. Play back the animation. - Move to the three-second mark. We're going to keyframe the movement of the left arm and attach the right arm to move with it using a Link behavior. Select Right Arm in the Layers tab. In the Properties tab, add a keyframe to Z Rotation. Move to four seconds and change Z Rotation to
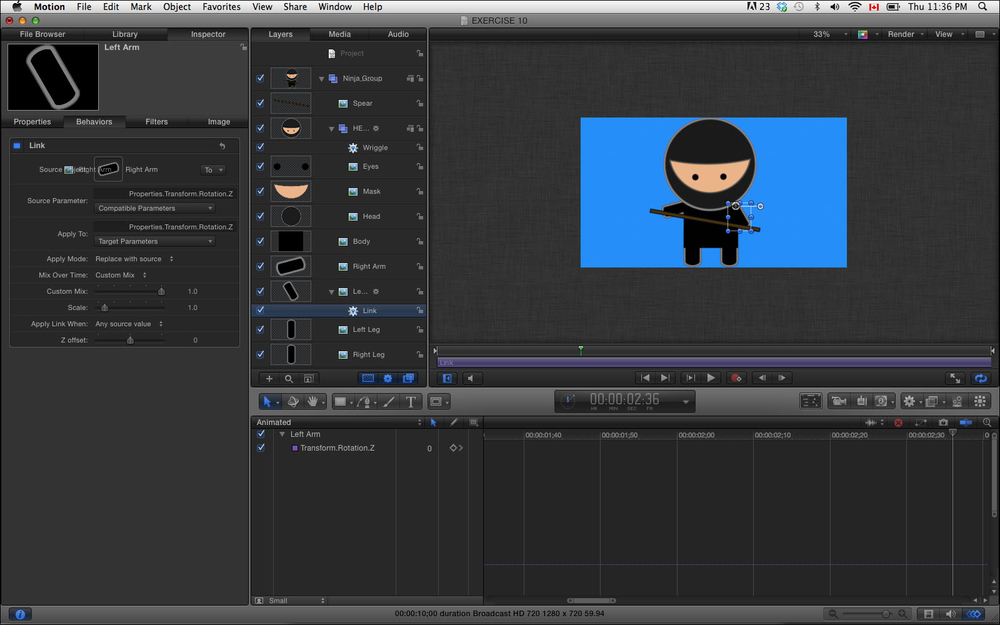
30. - Select Left Arm. Ctrl + click the letter Z under Rotation and choose Add Parameter Behavior | Link.
- In the Layers tab, select Right Arm and drag it to the source well on the Link behavior in the Behaviors tab. Refer to the Properties tab in the following image for reference. Play back the animation and notice how both arms move together:
- Select the Spear layer. Move to three seconds in the Timeline and add a keyframe for Z Rotation and X Position.
- Move to four seconds and change the X Position to
20and Z Rotation to372. Play back the animation. - As a final step, select the Eye layer. Ctrl + click the word Scale in the Inspector and choose Add Parameter Behavior | Wriggle. In the Behaviors tab, set the number to
5, Apply Mode to Add, and Subtract and the Frequency parameters to1.
In order for the arms to rotate around the Ninja's shoulders, the anchor points on the arms were moved. This was achieved using the same method we used to move in on the cat's eye in the first recipe of this chapter. We'll see more about this in the next recipe.
- The Moving a still's anchor point and keyframing its scale recipe.
- The Combining keyframes and behaviors – animating a clock recipe.
- Using the Link behavior in Chapter 3, Making It Move with Behaviors.