Let's take a look at another example of combining keyframes and behaviors by animating a clock's minute and hour hand while linking some text to rotate along with the clock.
- From this chapter's exercises folder, open the
04_11project. This project consists of a clock from Motion's library that contains separate layers for the hour and minute hand. There are also two text layers, as shown in the following image. We want the text to rotate along with the clock's hand. In order to achieve this, we're going to move both of the texts' anchor points to the center of the clock.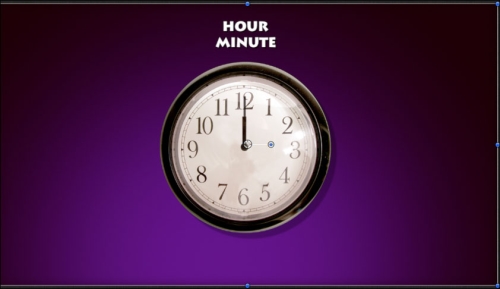
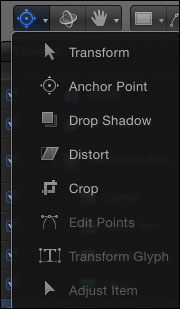
- On the toolbar, click and select the Anchor Point tool located underneath the selection tool, as shown in the following screenshot. Select the Hour Text layer and use the green and red arrows to move the anchor point to the center of the clock. Repeat this step for the other text layer.
- Press Shift + S to go back to the selection tool. Let's keyframe the minute hand so that it rotates twice around the clock. Select the Minute Hand layer and press F1 to go to the Properties tab of the Inspector. Make sure the playhead is at the beginning of the mini-Timeline. Click the disclosure triangle for Rotation and add a keyframe for Z Rotation.
- Move to three seconds and change the Z Rotation value to
-1080. Press Command + 8 to open the Keyframe Editor. Ctrl + click the last Z Rotation keyframe and choose Ease In. - Let's say we're not sure if we want the clock to rotate around three times. We want to keep options available in case we change our mind without having to go and redo every animation. Say hello to the Link behavior. The Link behavior will allow us to link the Z Rotation for all of our objects. If we change the keyframes on the hour hand, it will pass on to the linked layers. Let's link the hour hand first. Select the Hour Hand layer. In the Properties tab, Ctrl + click Z Rotation and choose Add Parameter | Link, as shown in the following screenshot:

- Press F7 to show the HUD. Drag the Minute Arm layer straight into the source well. Move the playhead to the beginning of the mini-Timeline and play back the animation. The hands are linked but they're moving at the same rate. In order to correct this, we're going to play with the Link behavior's Scale value.
- In the Behaviors tab, change the value of Scale to
0.083. To come up with this number, we divide 1 by 12 (representing the number of hours on the clock). Scrub the animation and see the clock hands move as they're supposed to. - Select the Hour Text layer. Press F1. In the Properties tab, Ctrl + click Z Rotation and choose Add Parameter | Link. In the HUD, drag the Hour Arm layer straight into the source well.
- Select the Minute Text layer. Press F1. In the Properties tab, Ctrl + click Z Rotation and choose Add Parameter | Link. In the HUD, drag the Minute Arm layer straight into the source well.
- Let's see it all come together. Select Minute Arm. In the Keyframe Editor, select the last Z Rotation keyframe and press Command + X to cut it. Move to six seconds and press Command + V to paste it. On the left-hand side of the Keyframe Editor, double-click the Z Rotation value and set it to
-2160, as shown in the following screenshot. Play back the animation.
- As a final step, select the Master group. Click on the gear icon to the right-hand side of the Timeline and choose Basic Motion | Grow/Shrink. Change the value in the Behaviors tab or HUD as you see fit.
- Using the Link behavior in Chapter 3, Making It Move with Behaviors.
- The Moving a still's anchor point and keyframing its scale recipe.
- The Combining keyframes and behaviors – animating a clock recipe.