After you initially format your text, it's time to look at the stylizing options available. Motion has a Style pane with four sections to help you get your desired color and look finalized.
Locate the exercise folder for this chapter and navigate to the 05_02 project. Double-click on it to open it.
Like text format, to change the text style, we head to the Inspector:
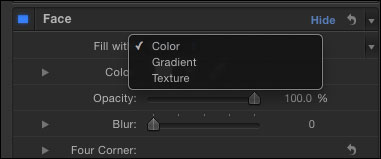
- Press F4 to go to the Text tab and click on the Style pane. While we have access to changing the face color in the HUD, we don't have options to change the fill type. Change the value of Fill from Color to Gradient as shown in the following screenshot:
- Click on the disclosure triangle next to Gradient. From the gradient preset styles choose Dawn. Click on the blue color stop to load it in the color well. Switch the color to a more vibrant blue. Drag the middle color stop over to the right to increase the blue influence over the letters. Use the following screenshot for reference:

- Now that we have made these adjustments, we could save it as a preset for later use. From the preset menu choose Save Preset and type in
Dawn(alternate). - The great thing about Motion's Style pane is its flexibility to mix several parts of our text together or work with them separately. For now, turn off the face of our text by clicking on the blue square. Click on the empty square next to the word Outline to activate it. Change the value of the Color from white to black and the Width to
2. - Turn back on the face of our text. Make sure the outline is set to be Under the face.
- Let's add a glow to all of our text, but rather than use the Style pane option we're going to use a filter. From the filter icon choose glow – glow.
- Press F3 to go to the Filters tab and increase the Glow to
50. - As a final step, activate Drop Shadow by clicking on the empty square. Change the value of Distance to
10and Blur to7as shown in the following screenshot. Deactivate Face and Outline to see how the drop shadow looks by itself.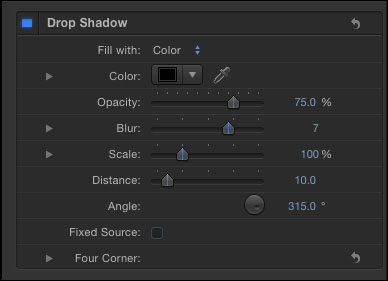
- Under Drop Shadow, click on the disclosure triangle next to Four Corner and change the bottom left X position to
15. See how you can change the other corners by playing with the values.
We can also achieve this effect by adding a texture to our text.
We can add any texture to the Face and Outline of our text. A texture can be a still image or even a movie file. All we need to do is make sure we have the texture we want to use in the Layers tab. With it, select the texture from the appropriate section and drop the texture into the source well. As a final step, turn off the texture in the Layers tab.

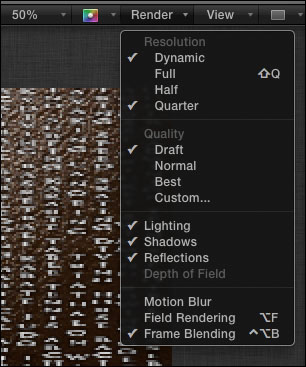
You may have noticed the quality of the video was not as sharp as the other projects. This is because the render quality has been turned down for better playback. At anytime, you can go to the render menu and choose a different resolution and quality to have a faster playback. Keep this in mind for render-intensive projects. Since you're reading this book, it's going to happen sooner rather than later.
Setting the play range to a smaller value than your project length can make all the difference.
Rather than playing your whole project, sometimes it's better to isolate a section we're working on so that Motion doesn't have to play back the entire animation. Simply drag the play range handles to your desired location. Use the following screenshot for reference. Press the Space bar and notice your project will only play between your two designated points.

Loading your project to RAM may be necessary in order to ensure you are seeing an accurate preview.
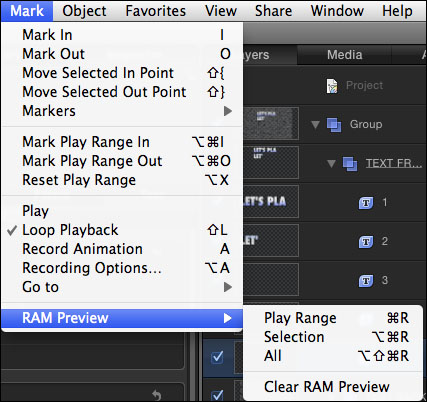
In the last exercise, our projects didn't play back in real time. In order to do that, we need to go to the Mark menu and choose an option under RAM Preview, as shown in the following screenshot. This will use our computer's memory to create temporary files in order to play back our full project or play our range in real time. Just note, as soon as you make a change, RAM Preview will be lost!