We're going to take a quick look at how we can fill our text with something other than a solid or gradient color by using video. In this exercise, we're going to apply a blend mode on our text to achieve the desired result.
Find a piece of video and create a project based on its dimensions, frame rate, and duration. Go to File Browser and navigate to the location where the file is. Make sure you're on the first frame of your project and select Import to bring it in.
Let's begin by creating some text.
- Select the text icon in the toolbar underneath the Canvas and type out
MOVING FORWARD. Press Esc and F7. Select a nice, thick font such as Aerial Black as shown in the following screenshot: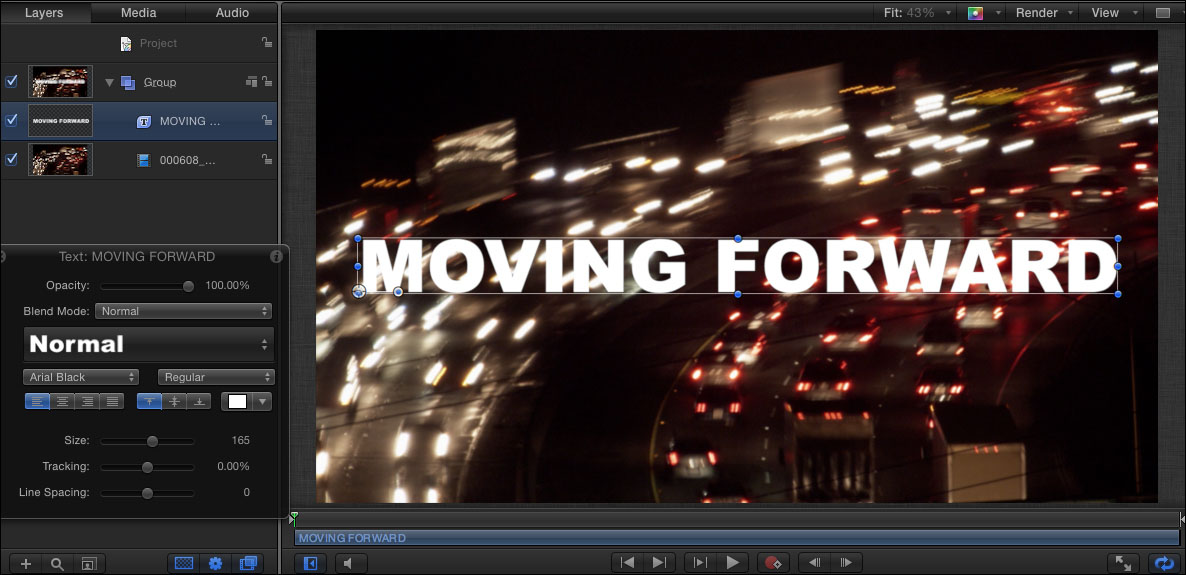
- Select the text and press F1 to go to the Properties tab. From the pop-up list under Blending Mode, select Stencil Luma. Your image is now contained in the text. If it seems to have got lost on the screen, try duplicating the text by pressing Command + D.
- On the duplicate, change the value of Blending Mode to Normal. Press F4 to go to the Text tab and click on the Style pane. Turn off the Face option and turn on Outline. Select a width and color of your liking. Use the following screenshot for reference:

- Making sure all layers are in the same group, select the Group layer, press Command + 2 to go to the Library, and under Behaviors select Basic Motion | Grow/Shrink. Click on Apply to add it to the Group layer and tweak it to your liking. Play back your animation.
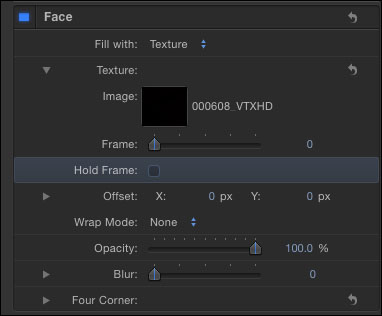
We can achieve a similar effect by filling the face of our text with a texture. Under the Style pane and under Face, Select Texture as the Fill With option. Drop the video into the source well that appears and then turn off your video clip in the Layers tab. Use the following screenshot for reference:
- The Using image masks recipe in Chapter 6, Paint and Masks