Sometimes you may want to use something from Motion in one of your FCP X projects. It's very common to have projects where we need to utilize the same text design across the project making slight tweaks to it along the way. This exercise is a preview to Chapter 11, Publishing your Work to FCP X, which goes into much greater detail about publishing and rigging your work for FCP X.
Under the exercise folder for this chapter, open the 05_12 project. Play back the project. A lower third moves from offscreen to onscreen while some placeholder text fades in. It then stays static and disappears offscreen again. What you may not see is that it's set up to be used in FCP X. If you take a look at the project extension right above the Canvas, you'll notice it's a .moti file. When creating this project, I chose to save it as Final Cut Title in order to have it available in FCP X'S media browser.
Let's get a closer look at this project.
- In the Layers tab, open up the Lower Third Contents group and then the Lower Third Bars group. There are four still layers in here that have all been masked in order to create a textured lower third bar. The ultimate goal here was to allow someone the option to choose which bar they would like to use in FCP X. A rig was set up in order to achieve this.
- To see the rig, select Bars Pop-Up in the Layers tab and look at the Widget tab of the Inspector. Press F4 if it's not visible. Under Bars Pop-Up, go through each of the four different types of background bars. Make sure your playhead is at a place where the text has animated on the screen. The Opacity parameter of each still layer was added to the rig. You can see that the Opacity value was set to
0or100depending on whether that layer was selected or not. Use the following screenshot for reference: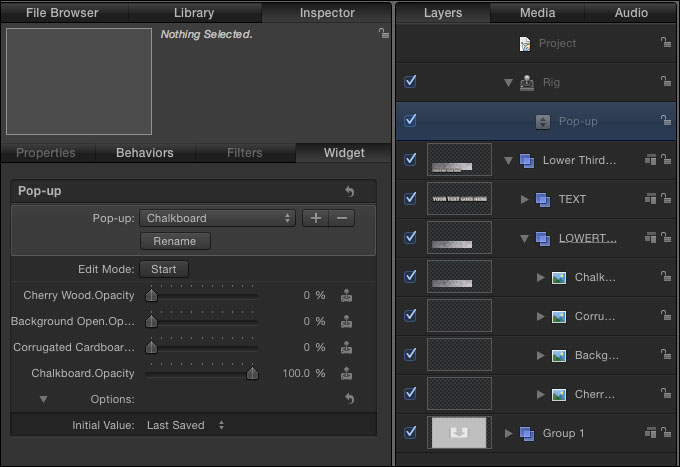
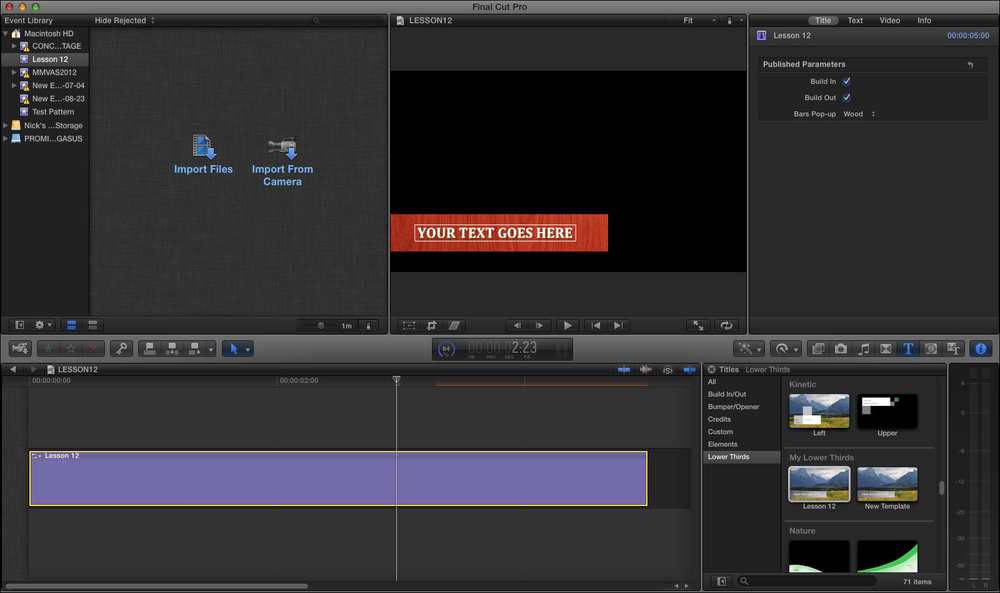
- Before we make this available in FCP X, there's one more thing to look at. At the top of the Timeline, you may have noticed these two green triangular marks and the section in between them identified by an orange highlight. These are known as Optional Build In and Optional Build Out markers. They were created to allow the user in FCP X to increase or decrease the length of the text animations. It also prevents the middle section from getting highlighted due to the unnecessary change in speed.
- Let's bring it into FCP X. From the File menu, select Save. Name the template as
My Lower Third. Save it to the Lower Thirds category and create a new theme called Custom Lower Thirds. Make sure Use Unused Media is unchecked and Save Preview Movie is checked. Click on Publish. - Open FCP X and create a new project. Navigate to your Title Browser. Go to the Lower Thirds category on your left and find your text. Drag it in to the Timeline. Select the text in the Timeline and click on the i icon to go to the Inspector. Click on the Title tab and change between the Bars-Pop Up states. Play back the animation. Uncheck Build In and play back the animation again. Congrats, you've just completed another chapter!
- The Opening and changing text from FCP X in Motion recipe in Chapter 11, Publishing Your Work to FCP X
- The Publishing parameters versus publishing rigs 101 – part 1 in Chapter 11, Publishing your Work to FCP X