Sometimes it's necessary to apply multiple masks to an image to get your desired selection. At other times, multiple masks can be used to animate and reveal only specific portions of your image, creating dynamic motion graphics. Let's see some of the options available to us when we start combining multiple masks on a clip.
From the exercise folder of this chapter, double-click on the 06_08 project file. Play back the project; it's a scenic shot of a beach. Our objective is to combine several masks across the image to make it appear as though we're looking at the image through the window of a jail cell. We'll achieve this by adding one mask and duplicating it several times. We'll use different mask modes to control the interaction between the masks.
- Select the clip Rectangle Mask tool from the toolbar. You'll find it to the right-hand side of the Text tool.
- Click-and-drag a narrow Rectangular Mask from the top-center of the screen to the bottom. Press the F7 key to bring up the HUD and click on the empty square next to Invert Mask, as shown in the following screenshot:

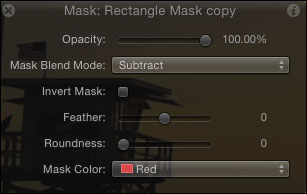
- Select the Rectangular Mask and press Command + D to duplicate it. Move the duplicate over to the right-hand side and don't be alarmed when you don't see anything. The reason we can't is because of the default mask blend mode and the fact that both masks are inverted. In the HUD, change the duplicate mask's blend mode to Subtract as shown in the following screenshot. Then, click the checkmark next to Invert Mask.
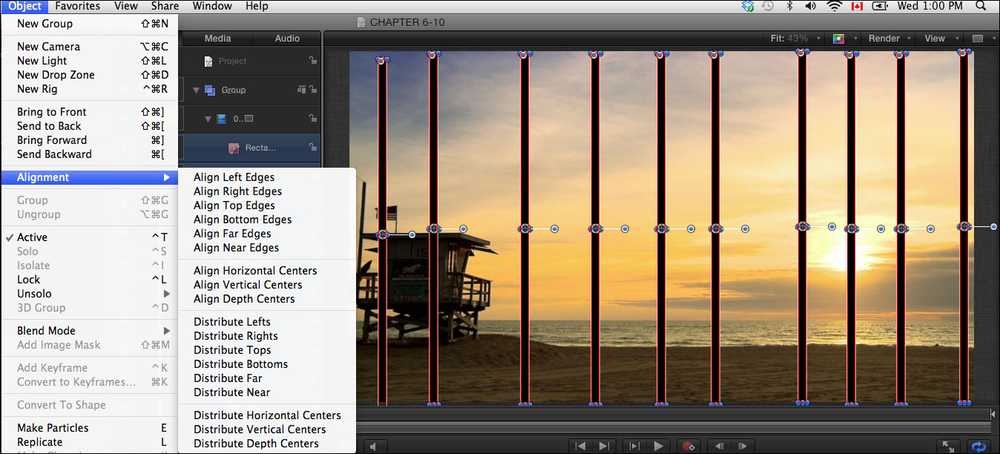
- Select Rectangle Mask Copy and press Command + D eight times. Select each copy and spread them out across the screen; the alignment doesn't have to be exact.
- In the Layers tab, click on the first mask and Shift + click on the last to have all ten selected. Go to the Object menu and choose Align Top Edges from under Alignment. Go to the Object menu again and choose Distribute Horizontal Centers from under Alignment.
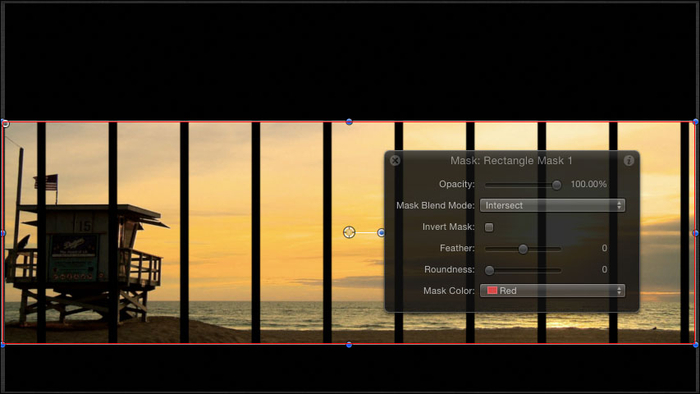
- As a final step, select the Movie layer and, from the toolbar, grab the Rectangle Mask tool. Draw a rectangle across the entire image encompassing the top and bottom of the lifeguard house. In the HUD, change the value of Mask Blend Mode to Intersect. Use the following screenshot for reference. We see our image only where each of our mask layers intersect.
A lot of commercials with motion graphics require adding and animating masks. Watch some commercials in the next few days and see if you can point out where masks were applied.
- Combining keyframes and behaviors – animating a Photoshop file in Chapter 4, Making It Move with Keyframes
- The Using shape masks recipe in this chapter