Motion 5 doesn't make 3D objects. For that, you would need to go to a dedicated 3D application such as Cinema 4D and Maya. What Motion does allow is for us to fake 3D. As we saw when working with particles and even replicators, a number of camera tricks can be employed so that our object never appears flat.
From the exercise folder of this chapter, double-click on the 08_09 project file. The project consists of a diamond. We're going to replicate it and spread it out in a line on the Z axis, making it seem that, when we rotate around it, the object has depth.
- Select the diamond and navigate to Object | Replicate.
- Press the F4 key to go to the Replicator tab of the Inspector. Change the value of Shape from Rectangle to Line.
- The diamonds overlap on a line spread out from left to right. We want it to spread out in Z space and for the diamonds to be close together. Click on the 3D checkbox.
- Click on the disclosure triangle for the start and end point of the line. Change the X values to
0. Under Start Point change the Z position to30. Under End Point alter the Z position to-30.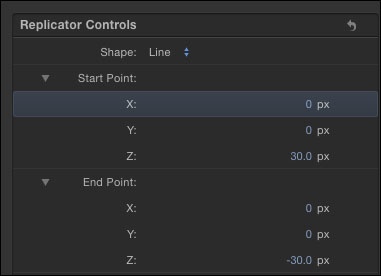
- Change the value of Points under Replicator Controls to 60.
- Under Color Mode change the value to Over Pattern.
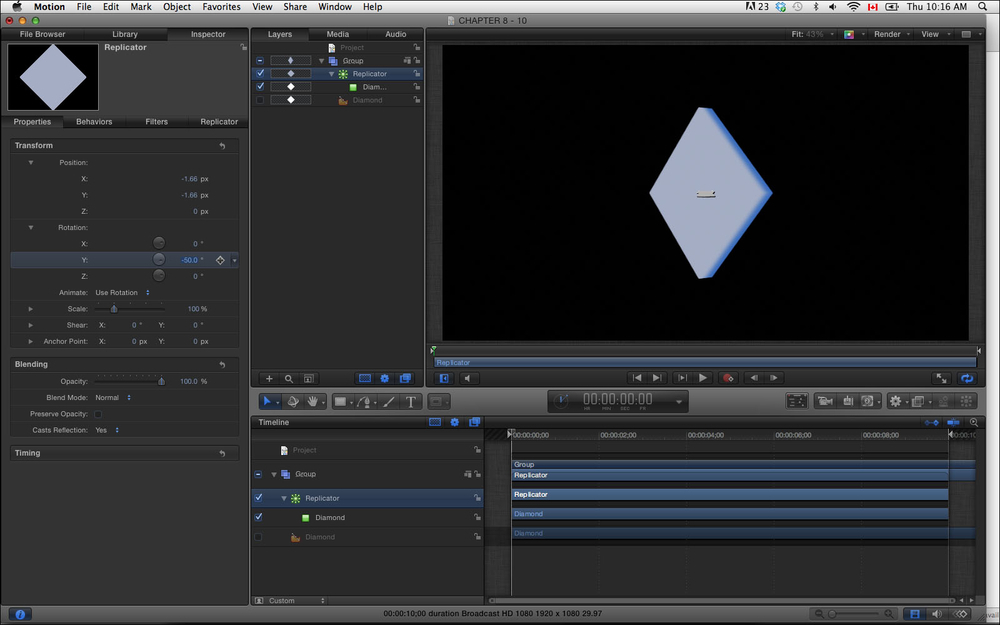
- Go to the Properties tab of the Inspector and click on the disclosure triangle next to Rotation. Change Y Rotation to -50.
- Go to the beginning of the Timeline and click on the diamond icon next to Y Rotation to add a keyframe. Change the value to
0. Jump to the end of the Timeline and change the Y Rotation value to360. Play back the project. The shape rotates over time and looks as if it's 3D!
- The Keyframing a group recipe in Chapter 4, Making It Move with Keyframes
- The Creating a replicator and changing parameters in the HUD recipe
- The Tweaking replicator parameters in the Inspector recipe