Making a layer or group 3D is literally done with the click of a button. Seeing all the options that become available once you click that button requires a bit of trial and error. Let's hop on the fast track to turn our layers into 3D with a camera.
From this chapter's exercise files, double-click the 10_01 project. The project consists of two groups and a light. One group contains a rectangle that has been rotated and acts as our floor. The other group contains four rounded rectangles that are positioned in x and z space, so that one appears closer than the other while slightly overlapping. Click the checkmark next to the light to see that it has no effect on our groups. In order for it to interact with our projects, the groups need to be 3D. Click on the Render menu above the Canvas to see that both Reflections and Shadows are currently turned on; once again, though, it doesn't appear as if there are any effects of it showing in the scene.
Let's add a camera to our project:
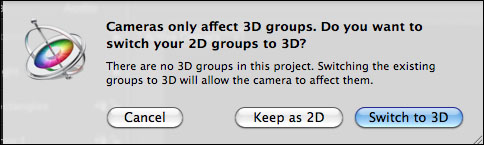
- Under the Object menu, choose New Camera. You'll be presented with a dialog box that asks you if you'd like to turn your 2D groups to 3D, as shown in the following screenshot. Choose Switch to 3D:
- Wow! A lot of stuff just happened. The minute you chose to switch your groups to 3D, your floor started to reflect the rounded rectangles and the overall luminance of the scene went down since a light (spotlight) is now controlling it. On top of this, an icon on the two groups in the Layers tab changed and a series of camera controls appeared in the Canvas. On the Floor_1 group in the Layers tab, click the icon that looks like a stack of three rectangles, as shown in the following screenshot. Notice how it flattens. Once it does, the reflections go away and the group doesn't interact with the spotlight. That's because you made it 2D. This brings us to one of the most important rules when we work in 3D. 2D groups do not interact with cameras and lights. Only 3D groups do. Click the icon again to change it to 3D.

- Select the Light layer in the Layers tab and press F4 or Fn + F4 to go to the Light properties in the Inspector. Increase the Intensity property of Light to
600. Currently, the light is set to spotlight, much as you'd see in a theatrical show. That spotlight has been placed above our layers. We'll see in some of the later recipes how we'll be able to see the light from a different type of view. - To the upper-right of the Canvas, click and select the first camera control called Pan Camera. Notice how, when you hold down your mouse and scroll, you pan across your scene left, right, up, and down. Once you're done panning, double-click the control to reset it.

- Click and select the second control. Notice that, when you scroll, it allows you to rotate around the scene. Once you're done, double-click the control to reset it.
- Click, select, and scroll the third control called Dolly Camera and notice how it allows you to move in and out on the scene. Once again, double-click the control to reset your camera.
- Select the Camera layer in the Layers tab and press F1 to go to the Properties tab of the Inspector. Click the disclosure triangle next to Position and Rotation to see the individual x, y, and z coordinates. Select each of the camera controls again and notice how the values of our camera change in the Inspector. You should see the following:
- Pan Camera affects the X and Y position.
- Orbit Camera affects the X, Y, and Z rotation
- Dolly Camera affects the Z position
We explored rotation in earlier chapters but it's worth explaining further how rotation works because it's the foundation of how we'll orbit in 3D space.
First of all, what is the X Position in Motion? X Position is left and right. Now how would you you rotate around this? Picture a pizza roller that's used to flatten dough. The pizza roller rotates along the x axis.
The Y Position in Motion is up and down. Now picture a cowboy with his rope as he twirls it in the air. Much as with a flag on a pole, the rope rotates on the y axis.

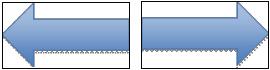
You may be unfamiliar with the Z Position if you come from a background having experience in an editing application such as FCP X. The Z Position refers to depth in your project. If I were to show you arrows, they would appear as a dot because it would be pointing away from us. Now picture holding a TV converter straight out in front of you with your arm fully extended. If you were to rotate it along the z axis, you may be surprised to find it's very familiar to how the hands of a clock rotate; in a circular type fashion. This is the one and only rotation available to us in FCP X.