Lighting in Motion in any project can make all the difference. Use and animate lights to create complex animations for all your clients. Let's see a few of the light types available to use once we've made our groups 3D.
From this chapter's exercise folder, double-click the 10_07 project. Press the Space bar to play back the project. It's the same project from the last recipe including the Framing behavior moves we made. Make sure you have two horizontal viewports displayed. Set the upper view to Active Camera and the bottom view to Front. Reposition the scene as necessary in the Front view using the camera controls. We're going to change the lighting in our scene a bit. We're going to add three lights: an ambient light to illuminate the overall scene and two spotlights that we'll animate to turn on when we move in on the clock. Select the camera and each of its behaviors to familiarize yourself with the timing.
- From the Object menu, choose New Light. A light is added to the scene that interacts with all the 3D groups and layers in your group. When you added the light, all the ambient light in the scene was turned off. We want to replace that with our own ambient light that is positioned back in Z Space so that we create a silhouette-type effect.
- Select the light and press F7 to show the HUD. The default light type is Point. We can place it anywhere we want by changing its Position value and we control its brightness by adjusting the Intensity value. In the HUD, set Intensity to
45and Falloff to9. Press F1 to go to the Properties tab of the Inspector and set the light's Z Position to-500. Use the following screenshot as a reference. The silhouette effect was made possible by separating the characters in Z Space from the back of the clock.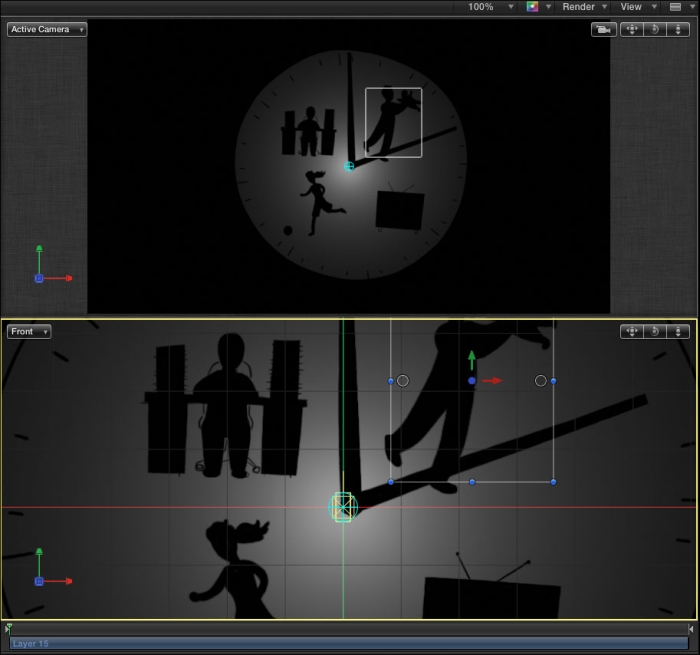
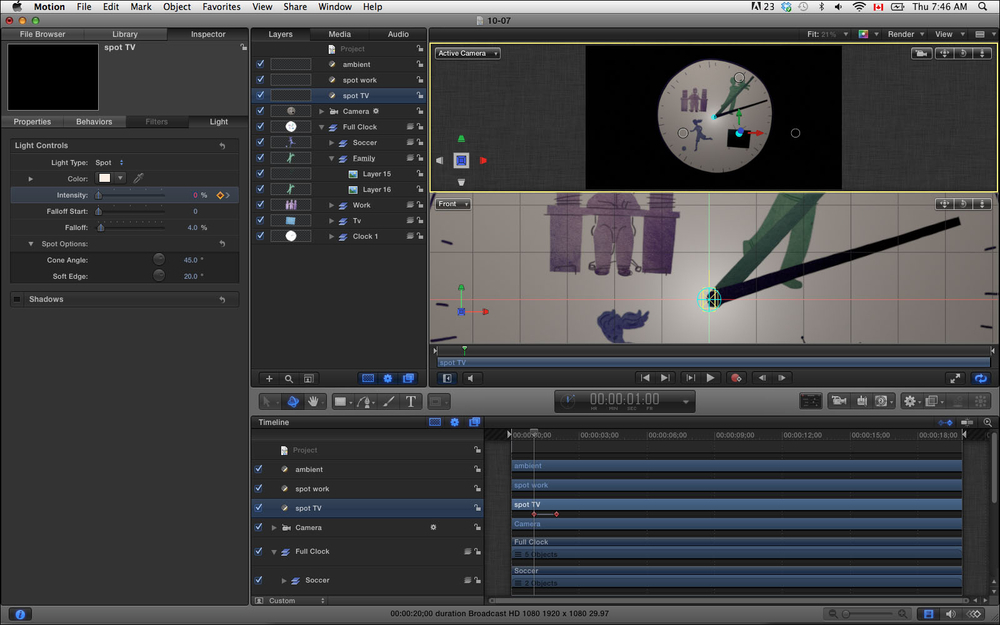
- Let's add two additional lights to our scene. From the Object menu, select New Light. In the HUD, set Light Type to Spotlight. Rename the light as
Spot TV. With the light selected, press Command + D to duplicate it. Name the duplicateSpot Work. - Select Spot TV and press F1 to go to the Properties tab of the Inspector. Enter
200,-125,-125for its X, Y, and Z position respectively. For Rotation X, enter-10. Go to the Light tab in the Inspector and set Intensity to 80, Falloff to 2.5, and Soft Edge to 11, as shown in the following screenshot. For the time being, turn off the Spot Work light by clicking the checkmark next to it in the Layers tab.
- We're going to keyframe the Intensity value of the TV light so that it turns on as we zoom into the TV. Press F6 to show the Timeline. Move to the two-second mark. In the Light tab of the Inspector, click the diamond shape next to Intensity. Move to one second and change the Intensity value to
0. A keyframe is added automatically. Move to five seconds and click the diamond shape next to Intensity to lock the value at80. Move to six seconds and change the Intensity value back to0. Play back the animation. The light now fades in as the camera zooms on the TV and fades out when it leaves.Use the following screenshot for reference:
- Turn back on the TV Work light and see if you can reposition the light where the camera zooms in the second time. Repeat the steps from the last number to try to animate the light to turn on and off as the camera zooms in and out.
When you make your objects 3D, your objects have full interactivity with lights, including the option to cast and receive shadows. As long as you have Shadows enabled under the Render menu from the Properties tab, you can choose how shadows for the selected layer interact in your 3D project.
- Autokeyframing multiple parameters on a shape in Chapter 4, Making It Move with Keyframes.
- The Making it 3D recipe.
- The Moving a camera versus moving a layer recipe.
- The Where am I? Controlling the view of your world using viewports recipe.
- The Adjust Around recipe.
- The Integrating 2D and 3D recipe.
- The Using the camera Framing behavior recipe.