If you have FCP X and Motion running on your MAC, you may have noticed certain similarities between the two applications and their interfaces. When exploring FCP X, you might have right-clicked on a text file from the Media Browser and noticed an option to open it in Motion. Let's now walk through what happens when we do.
Go into your application folder and double-click on the Final Cut Pro icon to launch it. Press Command + 0 to go to the Project Library and from the File menu choose New Project. Name the project Text to Motion, associate it with any event you'd like, and click on OK.
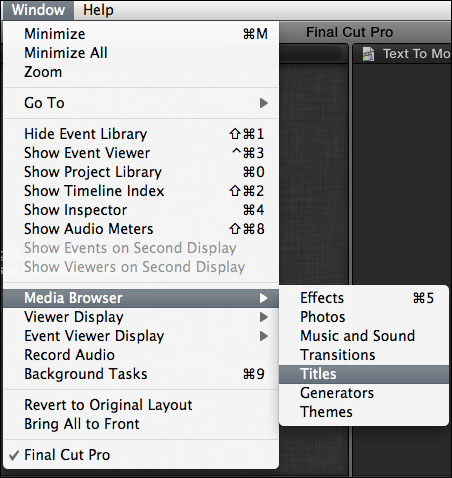
- From the Window menu, navigate to Media Browser | Titles as shown in the following screenshot. The Media Browser opens to the right-hand side of the Timeline showing all of the available text presets. We're going to find one and send a copy of it over to Motion.
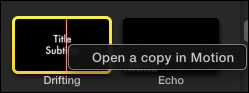
- Under All Category, scrub over the Drifting text by hovering over it with your mouse. A preview of the text animation is displayed. Let's say you pretty much like the animation but would prefer to animate the text in the opposite direction. Ctrl + click the text and choose Open a copy in Motion. Motion launches and opens up a project entitled Drift Copy.
- Press Command+ - to zoom out on your Canvas window a few times until it reads 25%. Open up the group in the Layers tab by clicking on the disclosure triangle and select each of the text layers, paying attention to where keyframes lie along their Motion paths. Make sure your playhead is at the beginning of the project.
- With the Title layer selected, press the F1 key to go to the Properties tab of the Inspector and change the Position X value to 1482.
- Press Shift + K to move to the next keyframe and set the Position X value to 74. Press Shift + K again and change the Position X value to -74. Press Shift + K again and change the Position X value to -1482. You should have now made changes to the four existing keyframes. Play back the animation. Notice how both text layers move in the same direction. Use the following screenshot for reference.

- Select the Subtitle layer and move to the beginning of the project. In the Properties tab of the Inspector, enter -1586 for Position X.
- Press Shift + K to move to the next keyframe. Set the Position X value to -74. Press Shift + K again and change the Position X value to 74. Press Shift + K again and change the Position X value to 1586. Play back the animation.
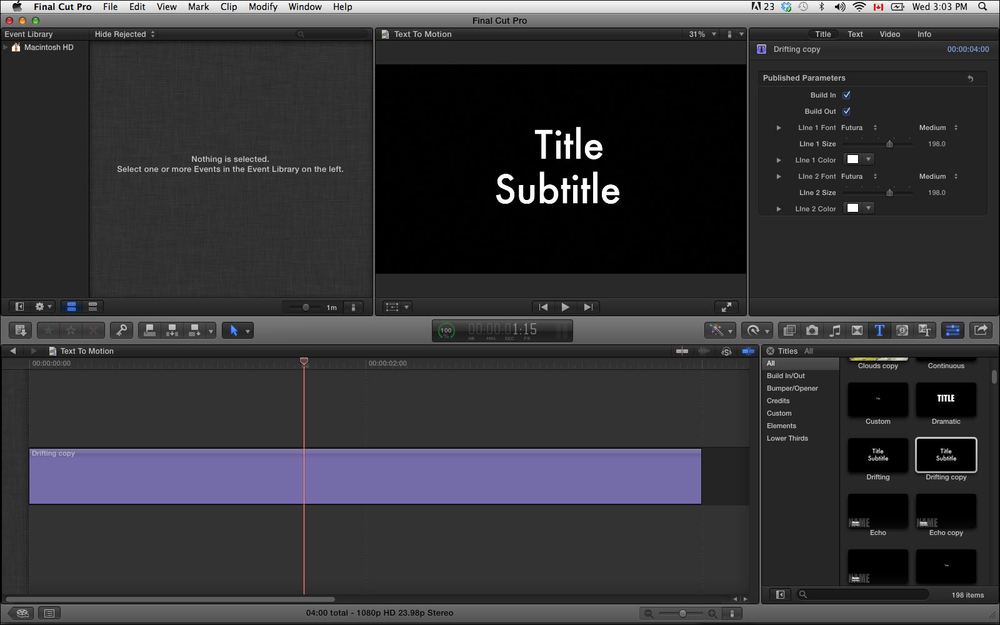
- We're now ready to send the text back over to Motion. Press Command + S to save the file. Press Command + Tab to go back over to FCP X on the dock. In the Media Browser, you should notice a new text template in the Media Browser called Drift Copy. Drag it into the Timeline, as shown in the following screenshot. Press Shift + Z to fit the text to your Timeline window and the Space bar to play back the animation. Notice how your changes have been carried over!
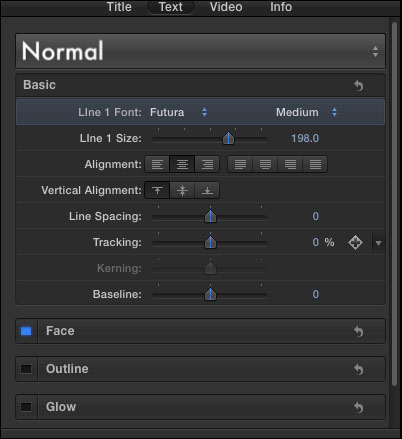
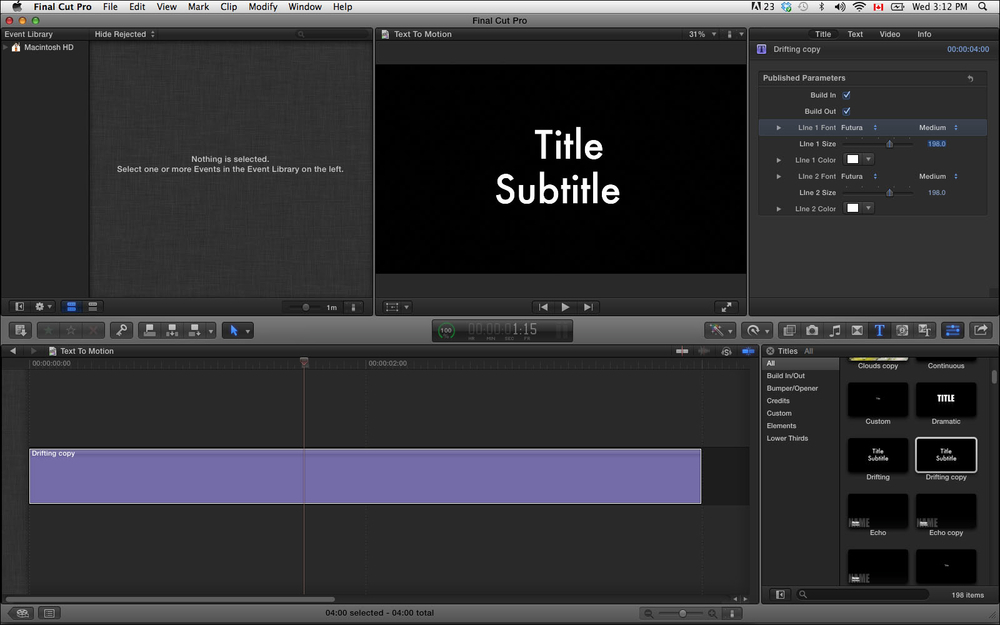
You can choose to allow the user control over certain parameters from Motion in Final Cut. In FCP X, select the Drift Copy in your Timeline and press Command + 4 to go to the Inspector. Every parameter you see in the Title tab, someone chose to publish it over from Motion giving the FCP X user control of it. For instance, the Build In, Build Out checkboxes control the animation of your text at the beginning and the end. They were set up using a special type of marker in Motion, allowing the user an option to turn the animation on or off.
You should note that, when you create a title project in Motion, it gets added to FCP X's Media Browser automatically once you save.
When you create an FCP title project in Motion and save it, it gets added to the Media Browser in FCP X under the Titles section. On top of this, you get a Text tab containing a majority of the options you have for working with text in Motion. See the following screenshot for reference: