If you've worked with some of the earlier chapters, you'll know that there are several generators available to you in Motion's Library. Some of them aren't available in FCP X. Let's add a generator and its parameters to FCP X by saving our project as a Final Cut Pro generator.
Launch Motion. From the welcome screen, select a Final Cut generator project. Choose a project with a Preset of Broadcast HD 1080, a Frame Rate of 29.97, and a Duration of 10 seconds. Click on Open. Motion's interface launches.
From here we'll add a generator to our Timeline and use the Inspector to choose the parameters we wish to publish.
- Press Command + 2 to go to the Library. Navigate to Generators | Spirals. With Spirals selected and your playhead at the beginning of the project, click on Apply.
- With the Canvas selected, press Shift + Z to fit it to the window. Select Spirals from the Layers tab and press the F4 key to go to the Generators tab of the Inspector.
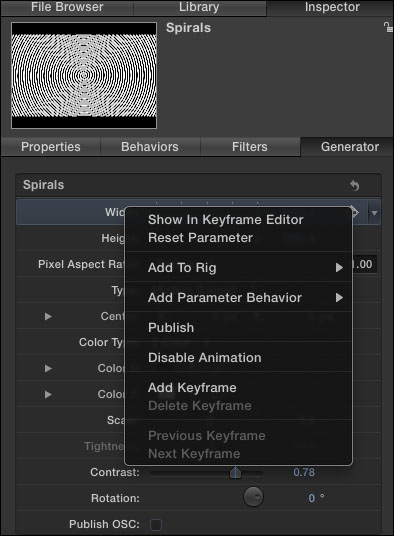
- The trick to publishing parameters to FCP X is to find them in the Inspector. Once you do, it's a matter of Ctrl + clicking on the appropriate word to publish. Ctrl + click on the word Width in the Generator tab and choose Publish as shown in the following screenshot:
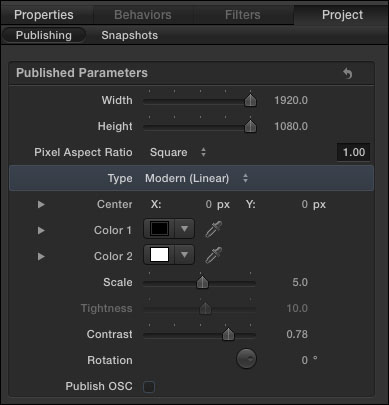
- Click on the Project layer in the Layers tab. In the Project tab of the Inspector, you should see that Width appears under Published Parameters as shown in the following screenshot. Select the Spirals layer again in the Layers tab. In the Generator tab of the Inspector, Ctrl + click on the word Height and choose Publish.

- Repeat the last step for every remaining parameter. When you get to Scale, you'll notice that the parameter is grayed out. Scale is associated with the Modern (linear) type of spiral. To publish it, select Modern (linear) from the Type menu and then publish it as with the other parameters.
- Select the Project layer again and double-check that all the parameters are published in the Project tab of the Inspector. The Published Parameters section also represents the order in which the FCP X user will see each parameter, as shown in the following screenshot:
- To get this over into Final Cut, navigate to the File menu and choose Save. We'll call the template
Spirals. - You need to create a new category and theme in order to see this in FCP X. Under the Category menu choose New Category. Name it
Generators. - Under Theme, choose New Theme and call it
Motion 5 Generators. Make sure Make Preview Movie is selected and press Publish. Motion begins to save the file to FCP X as shown in the following screenshot: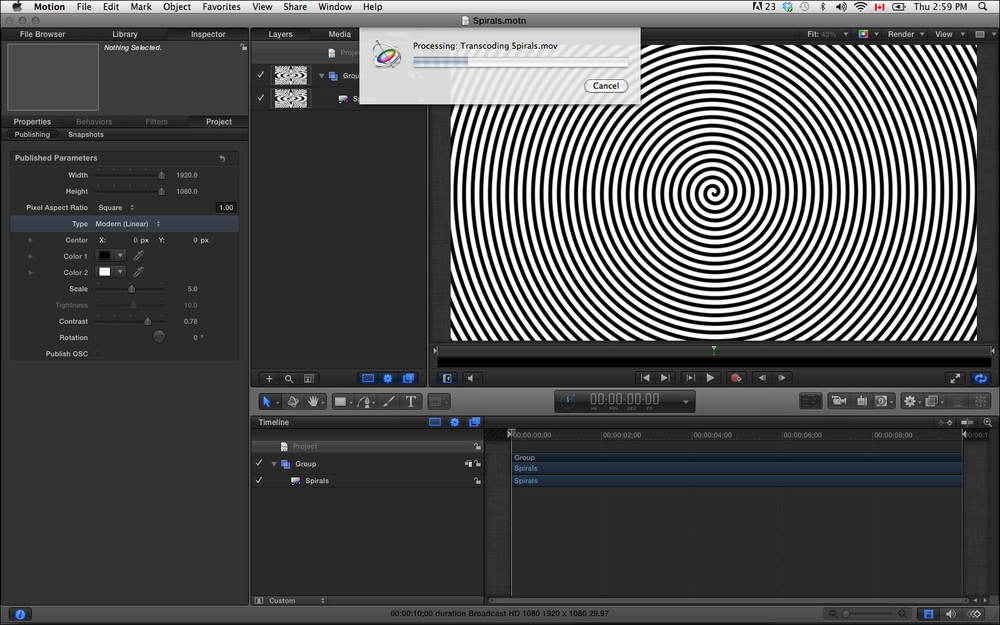
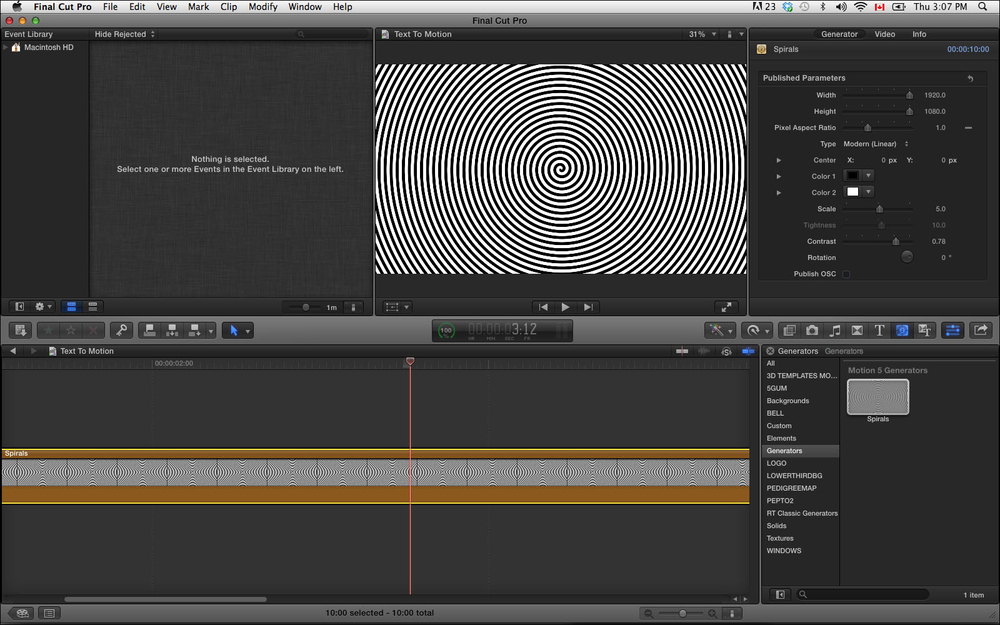
- When the process is complete, launch Final Cut. Create a new project and event if necessary. Navigate to Window | Media Browser | Generators. Find the Generators category on your left-hand side and notice the theme the Spirals generator is in. Drag Spirals to bring it into the project. Select it and press Command + 4 to bring up the Inspector. Verify that all the parameters you published are present. Use the following screenshot for reference:
It's easy to change the order of the published parameters.
In Motion, if you click on the word of any published parameter and hold your mouse, you can drag that parameter up or down to change its order and verify how it will be seen in FCP X.
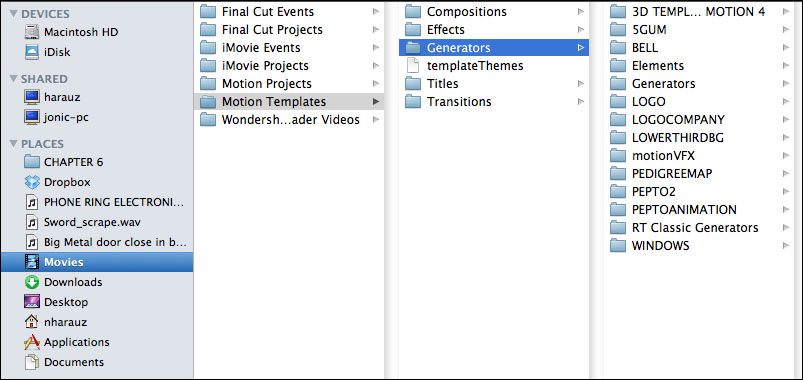
If you ever need to transfer Motion files for FCP X to another computer, everything is contained in the Movies folder.
Under your user Movies folder, there is a folder called Motion Templates that contains all the Effects, Generators, Titles, and Transitions that you publish over to Final Cut. If you want to install them on another system, find the category your items are in and copy that folder over to another system. Use the following screenshot for reference:
- The Creating a lower third for FCP X in Chapter 5, Let's Make Text