Just as we can create effects to use in Final Cut Pro X, we can also create custom transitions. Transitions can be created using overlaying graphics and also by animating placeholders that will appear as soon as you launch a Motion transition project.
Locate two still images on your computer that you'd like to a transition between. Launch Motion. From the welcome screen, select a Final Cut transition project.
- From the Preset, choose a Broadcast HD 1080 project with a Frame Rate of 29.97, and a Duration of 1 second. This represents how long we want the transition to be.
- Click on Open. Motion's interface launches. Make sure you are at the beginning of your project. There are two transition sources in the project; Transition A and Transition B.
- Drag your first still image to Transition A. When you see a hooked arrow, release the mouse. The Transition A placeholder now gets updated with your footage.
- Repeat this for the second video clip and Transition B. Select the Canvas and press Shift + Z to fit the video to the window. Before we create our transition, there are two essential rules we need to know. First, Transition A should always be full-frame on the first frame of our project. Second, on the last frame, Transition B should be full-frame. Your animation will begin and end between these two points that we'll identify so that we can stretch out the duration of the transition in FCP X later on.
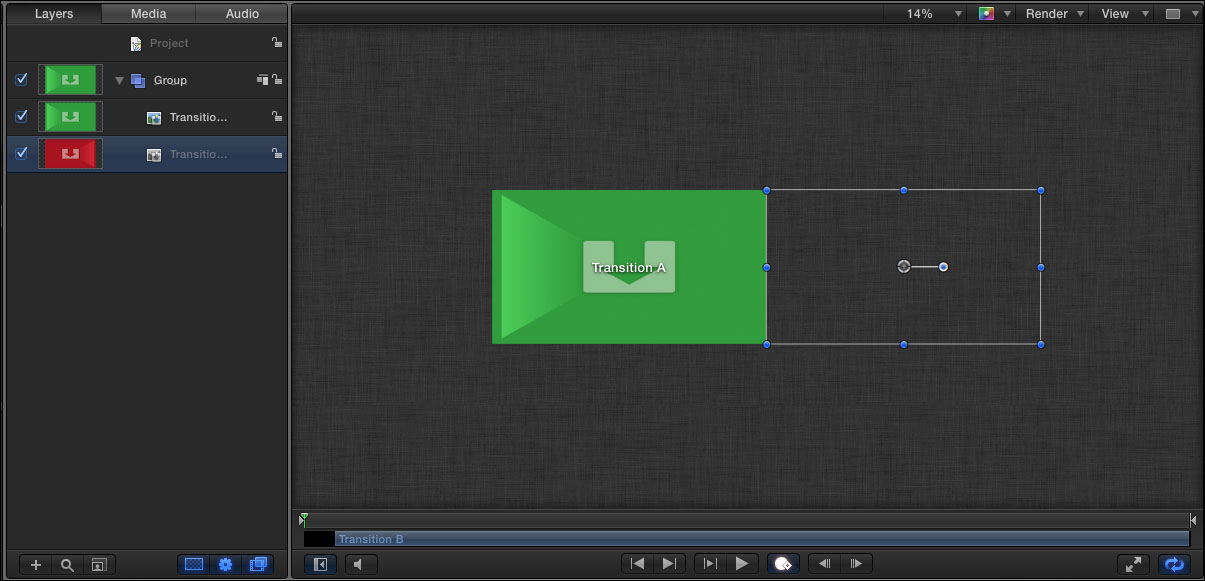
What we'd like to do is start with Transition A and move to Transition B, which is going to come onscreen from the right-hand side. To do this, we'll reposition the Transition B layer offscreen on the right-hand side and then we'll keyframe the group to move between the transitions.
- Press Command + - to zoom out on the Canvas and select Transition B. Shift + drag the layer in the Canvas until it is offscreen to the right-hand side, as shown in the following screenshot:
- Move to first frame 1 of the project. With Transition B still selected, press the I key to extend its in-point to frame 1. Select Transition B and move to frame 28. Press the O key to trim its out-point.
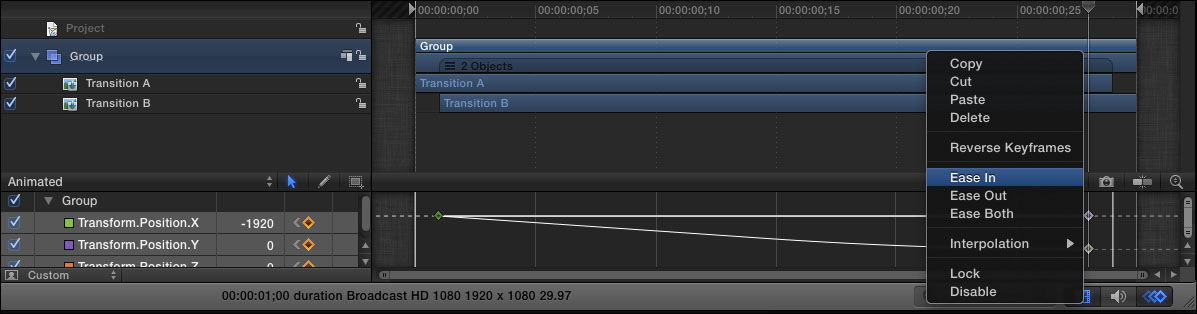
- Move back to frame 1. Select the Group and press the F1 key to go to the Properties tab of the Inspector. Click on the diamond shape next to Position to add a keyframe. Move to the frame 28 and enter
-1920for the X value. A keyframe is added automatically. Use the following screenshot for reference:
- Press Command + 8 to bring up the Keyframe Editor. Select the last two keyframes in the graph and Ctrl + click either one. From the menu, choose Ease In. Play back the animation.
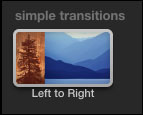
- Press Command + S to save the transition to Final Cut. Call the transition
Left to Right. Create a new category calledMy Transitionsand choose a new theme of your liking as shown in the following screenshot. Make sure Save Preview Movie is selected and choose Publish.
- Launch Final Cut and, from the Window menu, go to Media Browser | Transitions. Verify that the transition is there and apply it to the edit point over any two clips or stills in your Timeline by clicking and dragging from the Media Browser to the edit point. Play around the transition point.
In FCP X's preferences, all transitions have a default length of 1 second. If you create a transition longer than the FCP X default length in Motion, you need to go into your Project Properties and click on the Override FCP option. With this option, if you had a 3-second transition, it would appear as 3 seconds in Final Cut and cannot be sped up to 1 second.