There are several instances where you may be presenting your final video on an LCD screen with unusual dimensions. If this is a common workflow for you, you can create your own project presets made available to you right from Motion's welcoming screen.
Launch Motion. Choose any project, frame rate, and duration you like. We won't be saving this project. Click on Open. Motion's interface launches. We'll go to Motion's preferences and set up our own project preset that will become available for us the next time we launch the application.
- Go to the Motion menu and choose Preferences. Click on the Presets tab. You may recognize these presets. This is what's available to us whenever we set up a Motion project. Let's say all the projects we export for our main client need to be 900 by 700. These current presets are locked by default. To get around this, the Medium preset under Presentation is close to this, so we'll duplicate the setting to customize it.
- Click on the Duplicate button at the bottom of the window. With the duplicate Medium selected under Presentation, click on Edit.
- Name the preset anything you want. Make the Width and Height 900 by 700 as shown in the following screenshot. Depending on where you're exporting to, you may need to alter the Pixel Aspect, Ratio, Field Order, and Frame Rate values too.
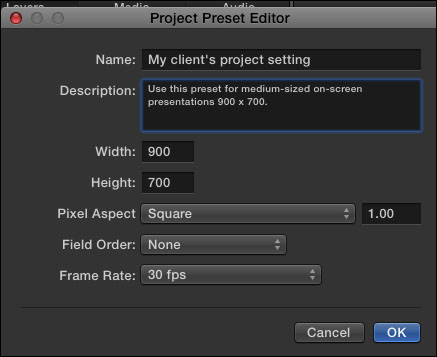
- Enter a description for the preset and click on OK. Close out the Preferences window.
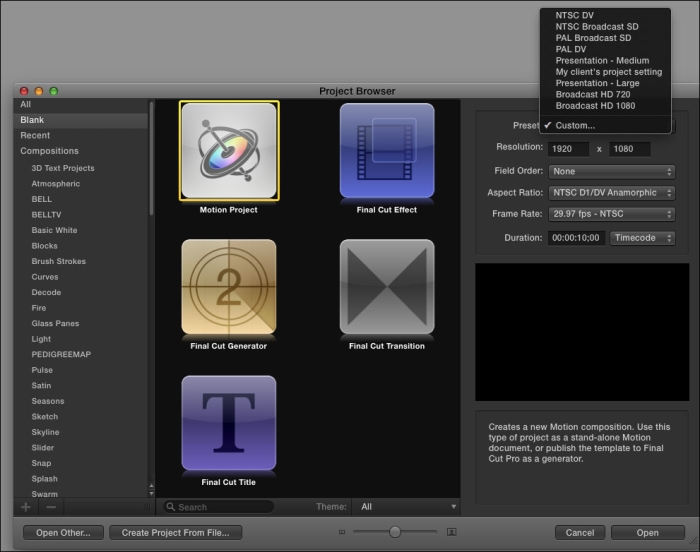
- Motion needs to be closed in order for the preset to become available from the menu. Press Command + Q to close Motion. Launch Motion and choose Motion project. Look under Presets to see the setting you've just made available, as shown in the following screenshot: