Compressor is a standalone application that is sold on the App Store. If you have Motion or FCP X, you should know that it opens up a ton of export options. Compressor allows you to export out several versions of your project at once while allowing you to continue working in Motion as it runs in the background.
Locate a Motion Project you've worked with in one of the previous exercises that's 1920 by 1080. Double-click to open it. Go through the project and make sure the play range is set to the beginning and end of your Timeline. If it's not, press Option + X to reset the play range to the length of your project.
- From the Share menu, choose Send To Compressor.
- Compressor launches. In order to send something out, you need at least one setting (which format?) and one destination (where will it go?). If you can't see the Settings and Destination tabs, navigate to Window | Settings and Window | Destinations to bring them up. The window is displayed in the following screenshot:
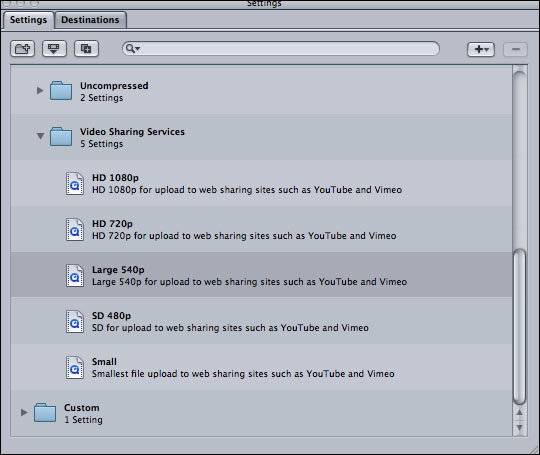
- Under the Settings tab, click on the disclosure triangle next to Video Sharing Services to reveal the presets available. Drag the Large 540p setting to where it says Drag Settings and Destinations Here on the Motion project file as shown in the following screenshot:
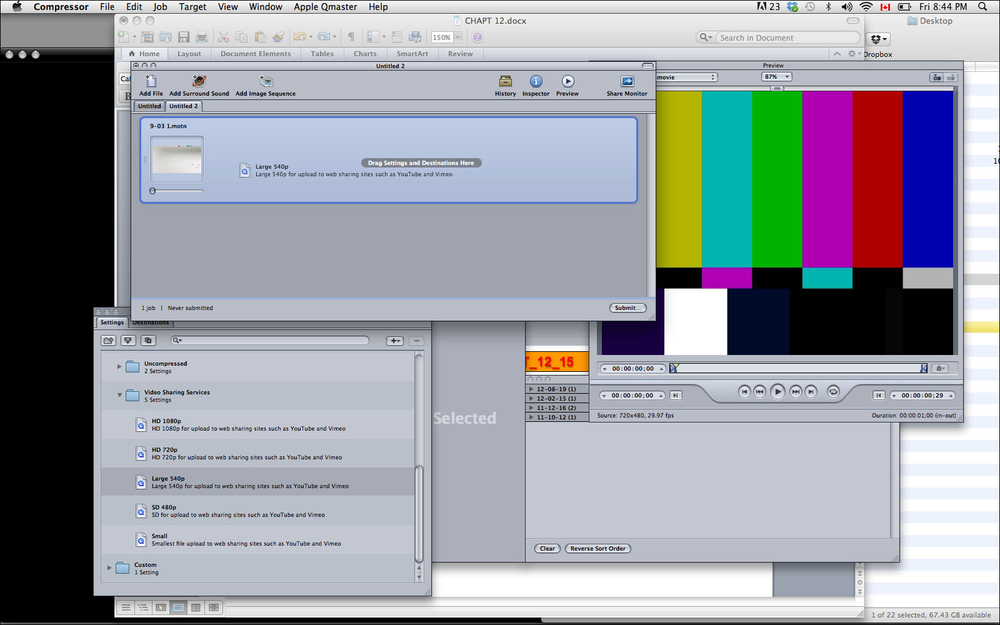
- Go to the Destinations tab and under the Apple category, drag the word Desktop over the word Source on the 540p setting you just added as shown in the following screenshot. The destinations may seem limited but we can create our own custom destinations as well as settings.

- We could go back to the Settings tab and add another setting and destination if we wanted. For now, click on the Submit button at the bottom of the Project window.
- Choose a name for this job and leave the other settings at their default. Click on Submit.
- If you want to, you can see the process revealed in the History tab (Window | History). When the job is finished, it will read as successful.
Compressor is a standalone application and there's a lot to it, so don't get overwhelmed if it was your first time here. Use the Help menu to read the documentation to see all the possibilities with Compressor, such as setting up a mini-rendering farm or creating droplets you can use to compress video on your desktop. Also, as long as you have Compressor on your system, you can export directly from Motion using Compressor settings. Go to the Share menu and choose Export with Compressor settings. Choose from one of the available presets.