CONCEPT 38
More Water Makes Chewier Bread
Bread. It’s ironic that something so simple seems so complicated to modern cooks. In many cases, the ingredient list for bread recipes consists of just flour, water, salt, and yeast. And the method and required equipment should not be daunting. After all, they were baking bread in ancient Egypt.
HOW THE SCIENCE WORKS
Let’s start with the ingredients.
Yeast is a living organism. Its function in bread dough is to consume sugars and starches present in the flour and then convert them into carbon dioxide and alcohol, which gives the finished loaf its lift and flavor. This process is known as fermentation.
The two most common forms of yeast in the grocery store are active dry and instant. They are similar in appearance and origins but are processed differently: Active dry yeast is dried at higher temperatures, which kills more of the exterior yeast cells (this is why it requires an initial activation in warm water), whereas instant, or rapid-rise, yeast is dried at more gentle temperatures (so it can be added directly to the dry ingredients). As a result, substituting equal amounts of one for the other will not provide the same results. (See “Substituting Active Dry Yeast for Instant.”)
Yeast is important, but bread would be nothing without the combination of flour and water. Though it may look like nothing more than white powder, flour is a complex substance made mostly of starch and lesser amounts of proteins (see “Flour 101”). With the proper treatment, it provides the structure and texture of breads of all kinds.
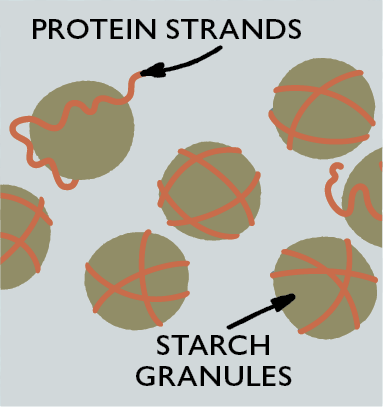
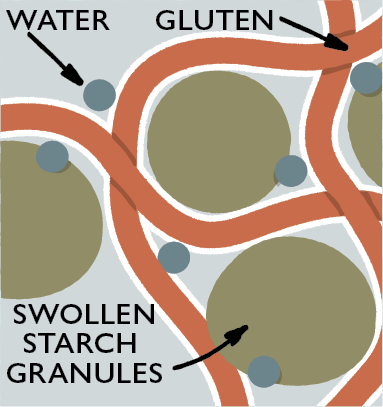
The role of flour in bread begins when it is combined with water and yeast—the first step of bread making. The wheat proteins in flour are unmoving and lifeless when dry but begin to change shape when they come in contact with water, a process called hydration. During hydration, the individual protein molecules, which consist of the loosely coiled glutenin and the more tightly wound gliadin (see concept 39), begin to link up with one another to form long, elastic chains called gluten. These strands of gluten combine to form a membranelike network. The network engulfs swollen starch granules and gas bubbles, stretching as the dough rises and then bakes, giving the finished loaf its structure and chew.
The amount of water added to your flour and yeast is important: The more water in a dough, the stronger and more extensible the gluten strands. If the gluten strands are strong and extensible, they can support the starch granules and gas bubbles that hydrate and swell as the dough rises and bakes, giving you an airier bread with good chew. During baking, the water within the dough turns to steam, creating hollow pockets as moisture rushes to escape. Extra water also creates a looser dough, which allows the steam bubbles to expand more easily. In a drier dough, gas bubbles have a harder time forming and are more likely to collapse. Getting those gas bubbles to hold their shape until the dough has risen and set in the oven is the key to creating an open, airy crumb.
We wanted to see and taste the differences in bread made with varying quantities of water so we designed a simple experiment. We started with our recipe for a rustic Italian bread, which has a hydration level of about 68 percent (for more on percent hydration, see “Calculating Baker’s Percentage”), and tried both increasing and decreasing the amount of water in the recipe. For simplicity’s sake, and to eliminate unwanted variables, we skipped using a biga (see concept 40) and made the doughs using a straight mixing method. Along with the original recipe, we tested the following hydration levels: 50 percent, 60 percent, 75 percent, and 80 percent.
THE RESULTS
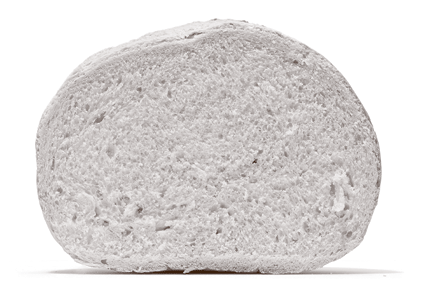
While even the 60 and 75 percent hydrated doughs showed significant differences, the extremes were most illustrative. The 50 percent hydrated loaf featured a tight, fine crumb with small air pockets—and showed little spread and expansion. On the other hand, the dough with 80 percent water had a loose, open crumb with large, irregular holes, and the bread baked up very flat and wide. In the middle of these outer limits, the original recipe featured moderate-size holes and good volume and height. Because the levels of flour, yeast, and salt were the same for all of our breads, ignoring the texture, tasters found the flavor of each loaf to be identical.
THE TAKEAWAY
The ratio of water to flour is important when making bread dough. When flour hits water, the individual wheat proteins begin to change shape, connecting to form strands of gluten. Gluten is responsible for creating the network within a dough that gives bread its structure. Too little water, and a strong gluten network cannot form. Without a strong gluten network, the gas bubbles created within the dough cannot hold and rise, making the finished product a dense loaf with too tight a crumb, as we saw in our bread with 50 percent hydration. Too much water, on the other hand, can dilute and weaken the gluten, likewise hindering a bread’s ability to rise, as in the loaf with 80 percent hydration.
We vary the hydration of our doughs depending on our desired end product, however. Our Pizza Bianca, which does not need a high rise, is a bread that we want to be extraordinarily chewy. Therefore, we hydrate it at 90 percent. Olive-Rosemary Bread, on the other hand, is best with a moderate chew, medium-sized holes, and a nice rise. We hydrate this loaf at 63 percent. No matter what kind of crumb and rise you desire, it always pays to measure your ingredients well. Too much water or flour can drastically alter the texture of your bread.
BAKER’S PERCENTAGE AT WORK
BREAD
The ratio of water to flour plays a large role in the finished texture and chew of any loaf of bread or pizza. More water helps the gluten network within the dough to become stretchy and elastic, allowing it to hold more gas bubbles as the bread bakes. We use an extremely high percentage of water in our Pizza Bianca and a lower but still high percentage of water in our Almost No-Knead Bread to create the chewy, bubbly textures that we desire. Our Pizza Bianca is so hydrated, in fact, that it is impossible to roll out. Instead, we simply pour it into a pan and press to fit.
PIZZA BIANCA
SERVES 6 TO 8
If you don’t have a stand mixer, you can mix the dough by hand. To do this, stir the wet and dry ingredients together with a stiff rubber spatula until the dough comes together and looks shaggy. Transfer the dough to a clean counter and knead by hand to form a smooth, round ball, 15 to 25 minutes, adding additional flour, if necessary, to prevent the dough from sticking to the counter. Proceed with the recipe as directed. If you don’t have a baking stone, bake the pizza on an overturned and preheated rimmed baking sheet set on the lowest oven rack. This recipe was developed using an 18 by 13-inch baking sheet. Smaller baking sheets can be used, but because the pizza will be thicker, baking times will be longer. Place a damp kitchen towel under the mixer and watch it at all times during kneading to prevent it from wobbling off the counter. Handle the dough with lightly oiled hands to prevent sticking. Resist flouring your fingers or the dough might stick further. Serve the pizza by itself as a snack, or with soup or salad as a light entrée.
|
3 |
cups (15 ounces) all-purpose flour |
|
12⁄3 |
cups water, room temperature |
|
1¼ |
teaspoons table salt |
|
1½ |
teaspoons instant or rapid-rise yeast |
|
1¼ |
teaspoons sugar |
|
5 |
tablespoons extra-virgin olive oil |
|
1 |
teaspoon kosher salt |
|
2 |
tablespoons fresh rosemary leaves |
1. Using stand mixer fitted with dough hook, mix flour, water, and table salt together on low speed until no areas of dry flour remain, 3 to 4 minutes, scraping down bowl as needed. Turn off mixer and let dough rest for 20 minutes.
2. Sprinkle yeast and sugar over dough. Knead on low speed until fully combined, 1 to 2 minutes. Increase mixer speed to high and knead until dough is glossy and smooth and pulls away from sides of bowl, 6 to 10 minutes. (Dough will pull away from sides only while mixer is on. When mixer is off, dough will fall back to sides.)
3. Using fingers, coat large bowl with 1 tablespoon oil, rubbing excess oil from fingers onto blade of rubber spatula. Using oiled spatula, transfer dough to prepared bowl and pour 1 tablespoon oil over top. Flip dough over once so that it is well coated with oil; cover bowl tightly with plastic wrap and let dough rise at room temperature until nearly tripled in volume and large bubbles have formed, 2 to 2½ hours. (Dough can be refrigerated for up to 24 hours. Bring dough to room temperature, 2 to 2½ hours, before proceeding with step 4.)
4. One hour before baking, adjust oven rack to middle position, place baking stone on rack, and heat oven to 450 degrees. Coat rimmed baking sheet with 2 tablespoons oil. Using rubber spatula, turn dough out onto prepared baking sheet along with any oil in bowl. Using fingertips, press dough out toward edges of baking sheet, taking care not to tear it. (Dough will not fit snugly into corners. If dough resists stretching, let it relax for 5 to 10 minutes before trying to stretch it again.) Let dough rest until slightly bubbly, 5 to 10 minutes. Using dinner fork, poke surface of dough 30 to 40 times and sprinkle with kosher salt.
5. Bake until golden brown, 20 to 30 minutes, sprinkling rosemary over top and rotating baking sheet halfway through baking. Using metal spatula, transfer pizza to cutting board. Brush dough lightly with remaining 1 tablespoon oil. Slice and serve immediately.
WHY THIS RECIPE WORKS
With no cheese or sauce—just a gloss of olive oil and flakes of salt—Pizza Bianca looks more like focaccia than pizza. But its crisp exterior and chewy, bubbly middle make us forget all about nomenclature. In some ways, this is the simplest bread imaginable because it does not involve shaping it into a loaf… just stretching the dough into a pan. Therefore, the dough can be very, very wet.
ADD WATER To achieve its chewy, bubbly texture, our recipe for Pizza Bianca calls for 9 parts water to 10 parts flour—an almost 30 percent higher level of hydration than in most other pizza dough. Water aids the development of gluten, the network of cross-linked proteins that gives bread its internal structure and chew. Up to a point, the more water in the dough, the stronger and more elastic the gluten strands and the chewier the bread. These strands, in turn, help to support the gas bubbles formed as the dough bakes, preventing them from bursting and creating an open, airy crust.
MIX, REST, AND KNEAD We let the dough rest for 20 minutes before kneading. This rest time, called autolyse, allows gluten to develop and therefore cuts down drastically on the kneading time. (See concept 39 for more on autolyse.) Instead of a half-hour of kneading in the mixer, now we need less than 10 minutes.
PRESS THE DOUGH Because this recipe is traditionally baked in a pan, it is easy to avoid handling the wet dough; simply pour it onto a well-oiled baking sheet. Shaping is easy: Press the dough from its middle toward the edges of the pan. It’s important, however, to stop pressing the dough if it is resisting. Give it a little rest: Resting allows the large gluten molecules to relax (like straightening curly hair) and stretch more easily.
USE A BAKING STONE Most pizza kitchens are equipped with stone- or tile-lined ovens that supply the steady, dry, intense heat necessary to make pizzas with crisp, crackerlike crusts. Baking stones (also called pizza stones) were created to simulate these conditions in the home oven.
Home ovens, whether electric or gas, are furnished with thermostats that switch on and off to maintain the oven’s internal temperature. This, along with the opening and closing of the oven door, causes the temperature to fluctuate, which can be damaging to baked goods that require extremely high heat. Our Pizza Bianca requires such an environment, so we turn to the baking stone. Preheating the oven with a baking stone for an hour evens out the heat in the oven, and the stone’s ability to absorb, retain, and radiate heat insulates the pizza from temperature swings that may occur during baking.
Baking stones intended for home use are usually made from clay or terra cotta. When purchasing, be sure to look for the thickest possible stone. Thickness is indicative of a stone’s ability to retain heat.
ALMOST NO-KNEAD BREAD
MAKES 1 LARGE ROUND LOAF
You will need at least a 6-quart Dutch oven for this recipe. An enameled cast-iron Dutch oven with a tight-fitting lid yields the best results, but the recipe also works in a regular cast-iron Dutch oven or heavy stockpot. Check the knob on your Dutch oven lid, as not all are ovensafe to 500 degrees; look for inexpensive replacement knobs from the manufacturer of your Dutch oven (or try using a metal drawer handle from a hardware store). This dough rises best in a warm kitchen that is at least 68 degrees.
|
3 |
cups (15 ounces) all-purpose flour |
|
1½ |
teaspoons salt |
|
¼ |
teaspoon instant or rapid-rise yeast |
|
¾ |
cup plus 2 tablespoons water, room temperature |
|
6 |
tablespoons mild-flavored lager, room temperature |
|
1 |
tablespoon white vinegar |
1. Whisk flour, salt, and yeast together in large bowl. Add water, beer, and vinegar. Using rubber spatula, fold mixture, scraping up dry flour from bottom of bowl, until shaggy ball forms. Cover bowl with plastic wrap and let sit at room temperature for at least 8 hours or up to 18 hours.
2. Lay 18 by 12-inch sheet of parchment paper inside 10-inch skillet and spray with vegetable oil spray. Transfer dough to lightly floured counter and knead by hand 10 to 15 times. Shape dough into ball by pulling edges into middle. Transfer loaf, seam side down, to prepared skillet and spray surface of dough with oil spray. Cover loosely with plastic wrap and let rise at room temperature until doubled in size, about 2 hours. (Dough should barely spring back when poked with knuckle.)
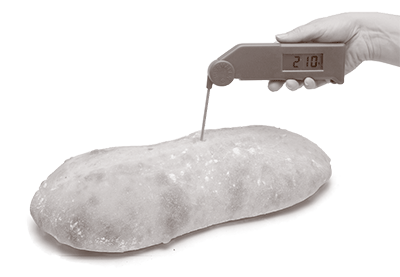
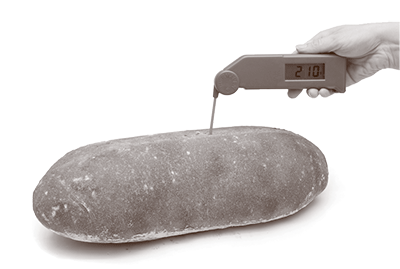
3. Thirty minutes before baking, adjust oven rack to lowest position, place Dutch oven (with lid) on rack, and heat oven to 500 degrees. Lightly flour top of dough and, using sharp serrated knife or single-edge razor blade, make one 6-inch-long, ½-inch-deep slash along top of dough. Carefully remove pot from oven and remove lid. Pick up loaf by lifting parchment overhang and lower into pot (let any excess parchment hang over pot edge). Cover pot and place in oven. Reduce oven temperature to 425 degrees and bake, covered, for 30 minutes. Remove lid and continue to bake until crust is deep golden brown and loaf registers 210 degrees, 20 to 30 minutes longer. Carefully remove loaf from pot; transfer to wire rack, discard parchment, and let cool to room temperature, about 2 hours, before slicing and serving. (Bread is best eaten on day it is baked but will keep wrapped in double layer of plastic wrap and stored at room temperature for up to 2 days. To recrisp crust, place unwrapped bread in 450-degree oven for 6 to 8 minutes.)
In 2006, New York Times writer Mark Bittman published a recipe developed by Jim Lahey of the Sullivan Street Bakery in Manhattan that promised to shake up the world of home baking: It allowed the average cook to bake bread that looked like it had been produced in a professional bakery and involved no kneading at all. However, as we baked loaf after loaf, we found two big problems: The dough deflated when carried to the pot, causing misshapen loaves, and it lacked flavor. To give the dough more strength, we lower the hydration and add the bare minimum of kneading time to compensate.
DON’T KNEAD—MUCH The original no-knead bread has a hydration level of 85 percent (see “Calculating Baker’s Percentage”), while most rustic breads max out at around 80 percent hydration, and standard sandwich breads hover between 60 percent and 75 percent hydration. This high level of water, along with the long rest, helps to form the gluten strands and, in effect, takes the place of kneading (see concept 39). Here, we cut back on the water in order to make the dough easier to handle. But with a lower level of hydration the gluten strands are not rearranged to the same degree as they are in the original recipe and need some help. This is why we knead our “no-knead” dough. Fifteen seconds is all it takes.
ADD VINEGAR AND BEER Two ingredients proved key to help boost the loaf’s flavor: vinegar and beer. Bottled vinegars are generally 5 percent solutions of acetic acid—the same acid produced by bacteria during dough fermentation. The addition of 1 tablespoon of distilled white vinegar adds tang. Bread’s unique flavor comes during fermentation, when yeast produces alcohol, carbon dioxide, and sulfur compounds. These three elements are present together in another location—a bottle of beer. We choose lager over other types of beer because most nonlager beers undergo a process called “top fermentation,” whereby yeast floats on top of the wort (grain mashed in hot water), which is exposed to oxygen and kept warm. Oxygen and warmth persuade yeast to produce spicy, astringent flavor compounds called phenols and fruity, floral compounds called esters that are desirable in beer but not in bread. Lagers, on the other hand, undergo “bottom fermentation,” where the yeast is kept submerged in the low-oxygen environment at the bottom of the wort at colder temperatures, which causes the yeast to produce fewer phenols and esters, but more sulfur compounds, so that the breadier yeast and sulfur flavors come forward.
BAKE IN TWO HOT OVENS We bake this bread in a preheated Dutch oven. Be careful of the knobs. The manufacturers of our favorite Dutch ovens (the 7¼-Quart Round French Oven by Le Creuset) and our Best Buy Dutch oven (the 6.5-Quart Cast Iron Dutch Oven by Tramontina) recommend against heating the pots to this temperature due to the phenolic (black) knobs used on the lids. But there is a simple solution. The knobs on both lids are secured with a single screw that is easily removed. Once the knob is removed, you can replace it with an inexpensive all-metal drawer handle purchased from a hardware store.
