EQUIPPING YOUR KITCHEN
What equipment do you really need to set up a decent home kitchen? The answer depends on what you want to accomplish. Your grandmother probably had a minimum of kitchen gear, yet she was a great cook. In contrast, you probably have friends who own a top-of-the-line kitchen and every gadget imaginable, yet they can’t turn out a creditable meal. A well-equipped kitchen won’t make you a good cook, but the right tools can help.
The list that follows highlights the gear we find most useful in our test kitchen and the brands that have earned our top ratings. We have not listed specialty items that can be essential for certain recipes (like a springform pan, without which a cheesecake can’t be made), nor have we listed “nice-to-have” items like a cleaver for cutting up chicken parts for stock. Start with the items on the following pages and then add more gear depending on the recipes you want to make.
Since cookware and knives are so important, we have included special sections on Cookware Materials, the safety of Nonstick Pans, and Knife Basics.
KNIVES AND MORE
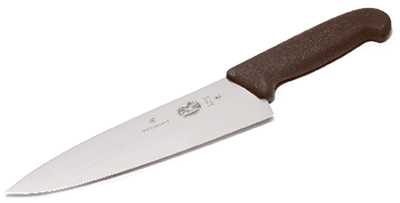
Chef’s Knife
WHAT TO LOOK FOR
- High-carbon stainless steel knife
- Thin, curved 8-inch blade
- Lightweight
- Comfortable grip and nonslip handle
TEST KITCHEN FAVORITES
Victorinox Fibrox 8-Inch Chef’s Knife (formerly Victorinox Forschner)
$29.99
Paring Knife

WHAT TO LOOK FOR
- 3- to 3½-inch blade
- Thin, slightly curved blade with pointed tip
- Comfortable grip
TEST KITCHEN FAVORITES
Wüsthof Classic with PEtec 3½-Inch Paring Knife (model #4066)
$39.95
BEST BUY: Victorinox Fibrox 3¼-inch Paring Knife
$8.95
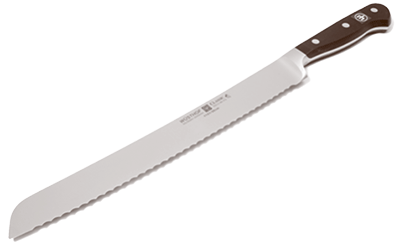
Serrated Knife
WHAT TO LOOK FOR
- 10- to 12-inch blade
- Long, somewhat flexible, slightly curved blade
- Pointed serrations that are uniformly spaced and moderately sized
TEST KITCHEN FAVORITES
Wüsthof Classic 10-Inch Bread Knife
$109.95
BEST BUY: Victorinox Fibrox 10¼-Inch Bread Knife
$24.95
Slicing Knife
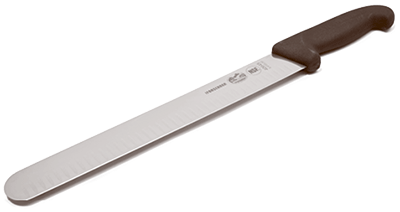
WHAT TO LOOK FOR
- Tapered 12-inch blade for slicing large cuts of meat
- Oval scallops (called a granton edge) carved into blade
- Fairly rigid blade with rounded tip
TEST KITCHEN FAVORITES
Victorinox Fibrox 12-Inch Granton Edge Slicing Knife
$39.95
Cutting Board
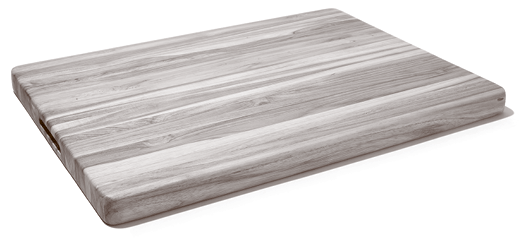
WHAT TO LOOK FOR
- Roomy work surface at least 15 by 20 inches
- Teak board for minimal maintenance
- Durable edge-grain construction (wood grain runs parallel to surface of board)
TEST KITCHEN FAVORITES
Proteak Edge Grain Teak Cutting Board
$84.99
BEST BUY: OXO Good Grips Carving and Cutting Board
$24.99

WHAT TO LOOK FOR
- Diamond sharpening material for electric sharpeners
- Easy to use and comfortable
- Clear instructions
TEST KITCHEN FAVORITES
ELECTRIC: Chef’sChoice Model 130 Professional Sharpening Station $149.95
MANUAL: AccuSharp Knife and Tool Sharpener
$10.95
Traditional Skillets
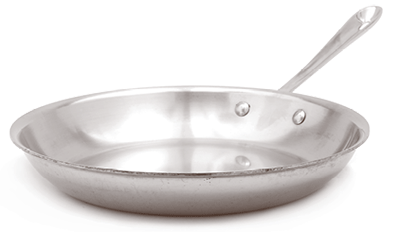
WHAT TO LOOK FOR
- Stainless steel interior, fully clad for even heat distribution
- 12-inch diameter and flared sides
- Comfortable, ovensafe handle
- Cooking surface of at least 9 inches
- Good to have smaller (8- or 10-inch) skillets too
TEST KITCHEN FAVORITES
All-Clad Stainless 12-Inch Frypan $154.99
Nonstick Skillets
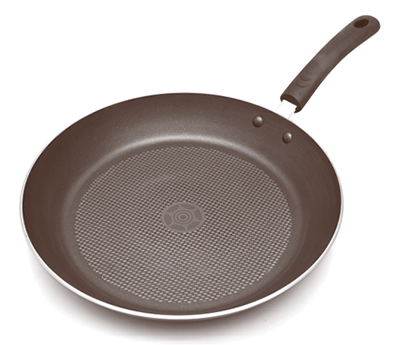
WHAT TO LOOK FOR
- Dark, nonstick surface
- 12- or 12½-inch diameter, thick bottom
- Comfortable, ovensafe handle
- Cooking surface of at least 9 inches
- Good to have smaller (8- or 10-inch) skillets too
TEST KITCHEN FAVORITES
T-Fal Professional Total Non-Stick 12½-Inch Fry Pan
$34.99
Dutch Oven

WHAT TO LOOK FOR
- Enameled cast iron or stainless steel
- Capacity of at least 6 quarts
- Diameter of at least 9 inches
- Tight-fitting lid
- Wide, sturdy handles
TEST KITCHEN FAVORITES
Le Creuset 7¼-Quart Round French Oven
$279
All-Clad Stainless 8-Quart Stockpot
$294.95
BEST BUY: Tramontina 6.5-Quart Cast Iron Dutch Oven
$49
Saucepans

WHAT TO LOOK FOR
- Large saucepan with 3- to 4-quart capacity and small nonstick saucepan with 2- to 2½-quart capacity
- Tight-fitting lids
- Pans with rounded corners that a whisk can reach into
- Long, comfortable handles that are angled for even weight distribution
TEST KITCHEN FAVORITES
LARGE: All-Clad Stainless 4-Quart Saucepan
$179.95
BEST BUY: Cuisinart MultiClad Unlimited 4-Quart Saucepan
$69.99
SMALL: Calphalon Contemporary Nonstick 2½-Quart Shallow Saucepan
$39.95
Rimmed Baking Sheets
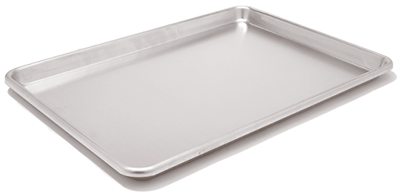
WHAT TO LOOK FOR
- Light-colored surface (heats and browns evenly)
- Thick, sturdy pan
- Dimensions of 18 by 13 inches
- Good to have at least two
TEST KITCHEN FAVORITES
Wear-Ever 13-Gauge Half Size Heavy Duty Sheet Pan by Vollrath (formerly Lincoln Foodservice)
$13
Roasting Pan

WHAT TO LOOK FOR
- At least 15 by 11 inches
- Stainless steel interior with aluminum core for even heat distribution
- Upright handles for easy gripping
- Light interior for better food monitoring
- Fixed V-rack with tall handles
TEST KITCHEN FAVORITES
Calphalon Contemporary Stainless Roasting Pan with V-Rack
$129.99
HANDY TOOLS
Tongs
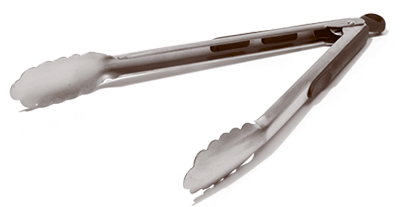
WHAT TO LOOK FOR
- Scalloped edges
- Slightly concave pincers
- 12 inches in length (to keep your hand far from heat)
- Open and close easily
TEST KITCHEN FAVORITES
OXO Good Grips 12-Inch Locking Tongs
$12.95
Wooden Spoon
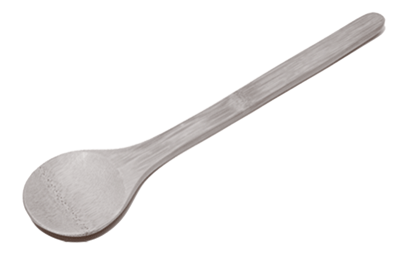
WHAT TO LOOK FOR
- Slim yet broad bowl
- Stain-resistant bamboo
- Comfortable handle
TEST KITCHEN FAVORITES
SCI Bamboo Wood Cooking Spoon
$2.40
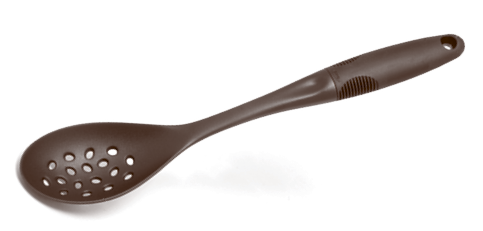
WHAT TO LOOK FOR
- Deep bowl
- Long handle
- Enough holes for quick draining
TEST KITCHEN FAVORITES
OXO Good Grips Nylon Slotted Spoon
$6.99
All-Around Spatulas

WHAT TO LOOK FOR
- Head about 3 inches wide and 5½ inches long
- 11 inches in length (tip to handle)
- Long, vertical slots
- Useful to have a metal spatula to use with traditional cookware and a plastic spatula for nonstick cookware
TEST KITCHEN FAVORITES
METAL: Wüsthof Gourmet Fish Spatula
$34.95
PLASTIC: Matfer Bourgeat Pelton Spatula
$11.95
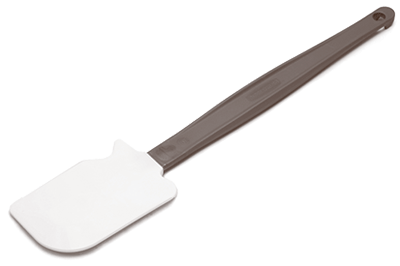
Rubber Spatula
WHAT TO LOOK FOR
- Wide, stiff blade with thin edge that’s flexible enough to conform to curve of a mixing bowl
- Heatproof
TEST KITCHEN FAVORITES
Rubbermaid Professional 13½-Inch High Heat Scraper
$18.99
All-Purpose Whisk

WHAT TO LOOK FOR
- At least 10 wires
- Wires of moderate thickness
- Comfortable handle
- Balanced, lightweight feel
TEST KITCHEN FAVORITES
OXO Good Grips 11-Inch Whisk
$9.99
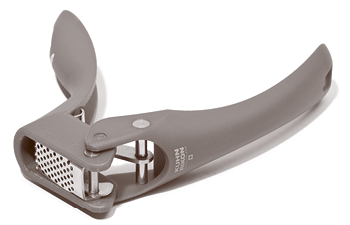
Garlic Press
WHAT TO LOOK FOR
- Large capacity that holds multiple garlic cloves
- Curved plastic handles
- Long handle and short distance between pivot point and plunger
TEST KITCHEN FAVORITES
Kuhn Rikon Easy-Squeeze Garlic Press
$20
BEST BUY: Trudeau Garlic Press
$11.99
Pepper Mill

WHAT TO LOOK FOR
- At least ½-cup capacity
- Wide, unobstructed filler doors
- Easy-to-adjust grind settings
TEST KITCHEN FAVORITES
Unicorn Magnum Plus Pepper Mill
$45
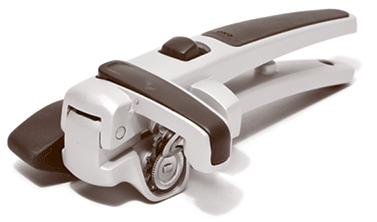
Can Opener
WHAT TO LOOK FOR
- Intuitive and easy to attach
- Smooth turning motions
- Magnet for no-touch lid disposal
- Comfortable handle
TEST KITCHEN FAVORITES
OXO Good Grips Magnetic Locking Can Opener
$21.99
Vegetable Peeler

WHAT TO LOOK FOR
- Sharp, carbon steel blade
- 1-inch space between blade and peeler to prevent jamming
- Lightweight and comfortable
TEST KITCHEN FAVORITES
Kuhn Rikon Original 4-Inch Swiss Peeler
$3.50
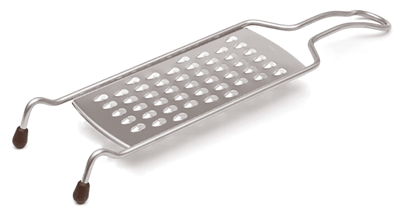
Grater
WHAT TO LOOK FOR
- Paddle-style grater
- Sharp, extra-large holes and generous grating plane
- Rubber-lined feet for stability
- Comfortable handle
TEST KITCHEN FAVORITES
Rösle Coarse Grater
$35
Rasp Grater
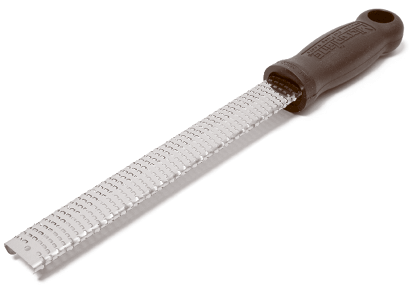
WHAT TO LOOK FOR
- Sharp teeth (require little effort or pressure when grating)
- Maneuverable over round or irregular shapes
- Comfortable handle
TEST KITCHEN FAVORITES
Microplane Classic 40020 Zester/Grater
$14.95
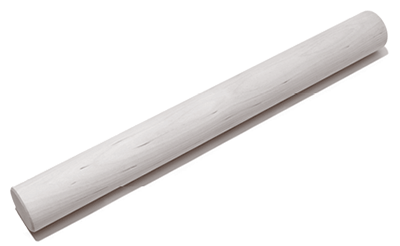
WHAT TO LOOK FOR
- Moderate weight (1 to 1½ pounds)
- 19-inch straight barrel
- Slightly textured wooden surface to grip dough for easy rolling
TEST KITCHEN FAVORITES
J. K. Adams Plain Maple Rolling Dowel
$13.95
Oven Mitt
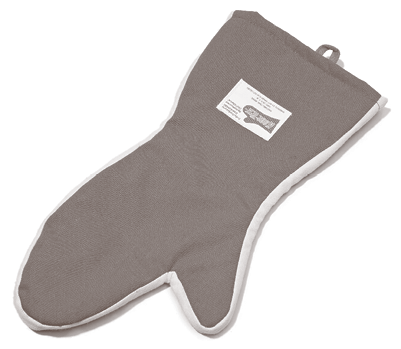
WHAT TO LOOK FOR
- Form-fitting and not overly bulky for easy maneuvering
- Machine washable
- Flexible, heat-resistant material
TEST KITCHEN FAVORITES
Kool-Tek 15-Inch Oven Mitt by KatchAll
$44.95
BEST BUY: OrkaPlus Silicone Oven Mitt with Cotton Lining
$14.95
Ladle
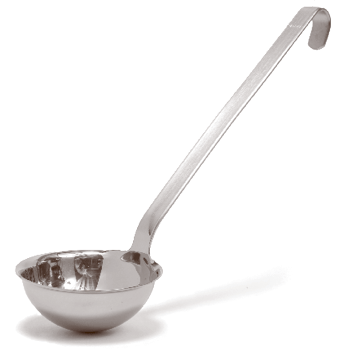
WHAT TO LOOK FOR
- Stainless steel
- Handle 9 to 10 inches in length
- Hooked handle end for hanging on pot
- Pouring rim to prevent dripping
TEST KITCHEN FAVORITES
Rösle Ladle with Pouring Rim
$29.95
Colander

WHAT TO LOOK FOR
- 4- to 7-quart capacity
- Metal ring attached to bottom for stability
- Many holes for quick draining
- Small holes so pasta doesn’t slip through
TEST KITCHEN FAVORITES
RSVP International Endurance Precision Pierced 5-Quart Colander
$32.95
Fine-Mesh Strainer

WHAT TO LOOK FOR
- At least 6 inches in diameter (measured from inside edge to inside edge)
- Sturdy construction
TEST KITCHEN FAVORITES
CIA Masters Collection 6¾-Inch Fine Mesh Strainer
$27.50
Potato Masher
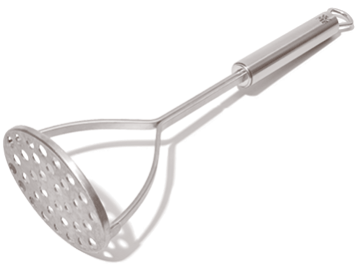
WHAT TO LOOK FOR
- Solid mashing disk with small holes
- Comfortable grip
TEST KITCHEN FAVORITES
WMF Profi Plus Stainless Steel Potato Masher
$19
Salad Spinner
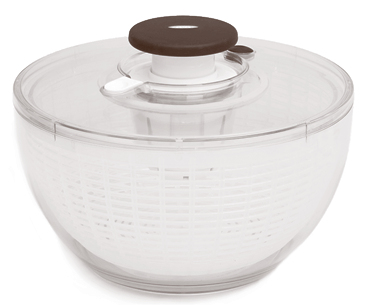
WHAT TO LOOK FOR
- Solid bottom for washing greens in bowl
- Ergonomic and easy-to-operate hand pump
TEST KITCHEN FAVORITES
OXO Good Grips Salad Spinner
$29.99
Dry Measuring Cups

WHAT TO LOOK FOR
- Stainless steel cups (hefty and durable)
- Measurement markings that are visible even when cup is full
- Evenly weighted and stable
- Long handles that are level with rim of cup
TEST KITCHEN FAVORITES
Amco Basic Ingredient 4-Piece Measuring Cup Set
$11.50
Liquid Measuring Cups
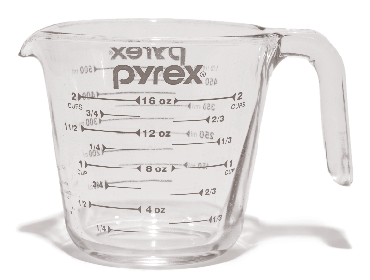
WHAT TO LOOK FOR
- Crisp, unambiguous markings that include¼-and 1⁄3-cup measurements
- Heatproof, sturdy cup with handle
- Good to have in a variety of sizes(1, 2, and 4 cups)
TEST KITCHEN FAVORITES
Pyrex 2-Cup Measuring Cup
$5.99
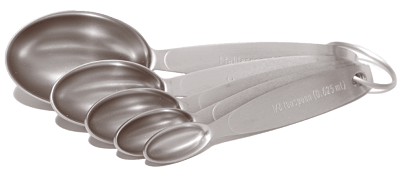
WHAT TO LOOK FOR
- Long, comfortable handles
- Rim of bowl flush with handle for easy “sweeping” off of excess ingredients
- Slim design
TEST KITCHEN FAVORITES
Cuisipro Stainless Steel Measuring Spoon Set
$9.95
Digital Scale
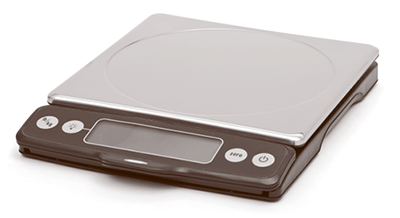
WHAT TO LOOK FOR
- Easy-to-read display not blocked by weighing platform
- At least 7-pound capacity
- Accessible buttons
- Gram-to-ounce conversion feature
- Roomy platform
TEST KITCHEN FAVORITES
OXO Food Scale
$49.99
BEST BUY: Soehnle 65055 Digital Scale
$34.95
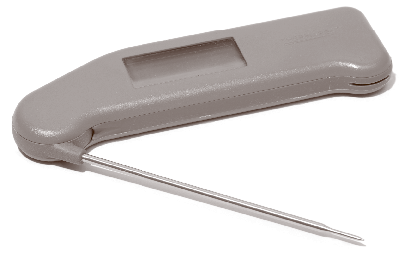
WHAT TO LOOK FOR
- Digital model with automatic shut-off
- Quick-response readings in 10 seconds or less
- Wide temperature range (-40 to 450 degrees)
- Long stem that can reach interior of large cuts of meat
- Water-resistant
TEST KITCHEN FAVORITES
ThermoWorks Splash-Proof Super-Fast Thermapen
$89
BEST BUYS: ThermoWorks Super-Fast Pocket Thermometer
$19
CDN ProAccurate Quick-Read Thermometer
$19.99
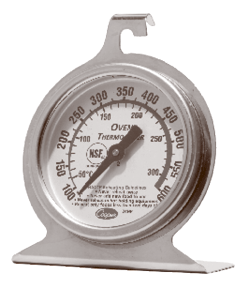
WHAT TO LOOK FOR
- Clearly marked numbers for easy readability
- Hook for hanging or stable base
- Large temperature range (up to 600 degrees)
TEST KITCHEN FAVORITES
Cooper-Atkins Oven Thermometer (model #24HP)
$6
Kitchen Timer
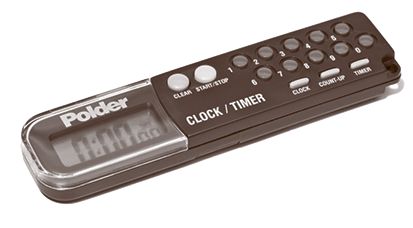
WHAT TO LOOK FOR
- Lengthy time range (1 second to at least 10 hours)
- Ability to count up after alarm goes off
- Easy to use and read
TEST KITCHEN FAVORITES
Polder 3-in-1 Clock, Timer, and Stopwatch
(model #898–95)
$12
ESSENTIAL BAKEWARE
Glass Baking Dish
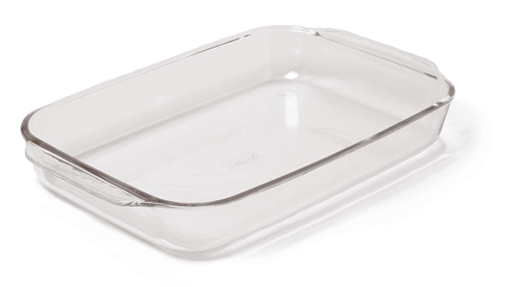
WHAT TO LOOK FOR
- Dimensions of 13 by 9 inches
- Large enough to hold casseroles and large crisps and cobblers
- Handles
TEST KITCHEN FAVORITES
Pyrex Bakeware 9 x 13-Inch Baking Dish
$12.99
Metal Baking Pan
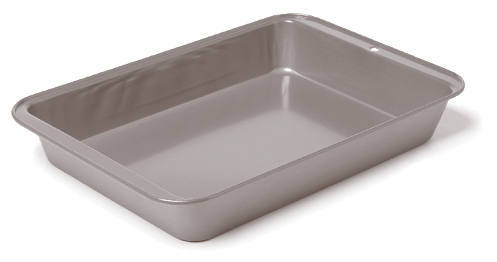
WHAT TO LOOK FOR
- Dimensions of 13 by 9 inches
- Straight sides
- Nonstick coating for even browning and easy release of cakes and bar cookies
- Handles
TEST KITCHEN FAVORITES
Baker’s Secret 9 x 13-Inch Nonstick Cake Pan
$7.49
Square Baking Pans
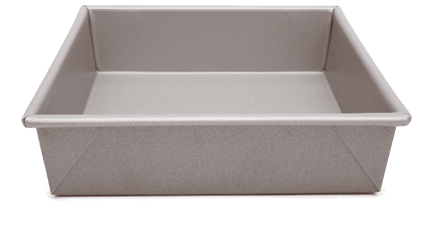
WHAT TO LOOK FOR
- Straight sides
- Light gold or dark nonstick surface for even browning and easy release of cakes
- Good to have both 9-inch and 8-inch square pans
TEST KITCHEN FAVORITES
Williams-Sonoma Nonstick Goldtouch Square Cake Pan
$26, 8-inch; $27, 9-inch
BEST BUY: Chicago Metallic Gourmetware 8-Inch Nonstick Square Cake Pan
$6.99
Round Cake Pans
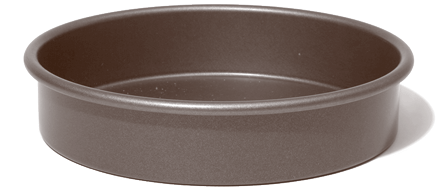
WHAT TO LOOK FOR
- Straight sides
- Nonstick coating for even browning and easy release of cakes
- Recommend a set of 9-inch and 8-inch pans
TEST KITCHEN FAVORITES
Chicago Metallic Professional Lifetime 9-Inch Nonstick Round Cake Pan
$12.99
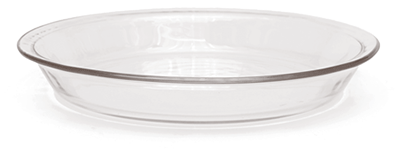
WHAT TO LOOK FOR
- Glass for even browning and easier monitoring
- ½-inch rim (makes it easy to shape decorative crusts)
- Shallow angled sides prevent crusts from slumping
- Good to have two
TEST KITCHEN FAVORITES
Pyrex Bakeware 9-Inch Pie Plate
$2.99
Loaf Pans

WHAT TO LOOK FOR
- Light gold or dark nonstick surface for even browning and easy release
- Good to have both 8½ by 4½-inch and 9 by 5-inch pans
TEST KITCHEN FAVORITES
Williams-Sonoma 8½ x 4½-Inch Nonstick Goldtouch Loaf Pan
$21
BEST BUY: Baker’s Secret 9 x 5-Inch Nonstick Loaf Pan
$5
Muffin Tin
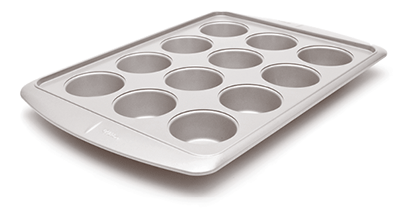
WHAT TO LOOK FOR
- Nonstick surface for even browning and easy release
- Wide, extended rims and raised lip for easy handling
- Cup capacity of ½ cup
TEST KITCHEN FAVORITES
Wilton Avanti Everglide Metal-Safe Nonstick 12-Cup Muffin Pan
$13.99
Cooling Rack

WHAT TO LOOK FOR
- Grid-style rack with tightly woven, heavy-gauge bars
- Should fit inside standard 18 by 13-inch rimmed baking sheet
- Dishwasher-safe
TEST KITCHEN FAVORITES
CIA Bakeware 12 x 17-Inch Cooling Rack
$15.95
BEST BUY: Libertyware Half-Size Sheet Pan Grate
$5.25
SMALL APPLIANCES
Food Processor

WHAT TO LOOK FOR
- 14-cup capacity
- Sharp and sturdy blades
- Wide feed tube
- Should come with basic blades and disks: steel blade, dough blade, shredding/slicing disk
TEST KITCHEN FAVORITES
Cuisinart Custom 14-Cup Food Processor
$199
Hand-Held Mixer

WHAT TO LOOK FOR
- Lightweight model
- Slim wire beaters without central post
- Digital display
- Separate ejector buttons (not part of speed dial)
- Variety of speeds
TEST KITCHEN FAVORITES
Cuisinart Power Advantage 7-Speed Hand Mixer
$49.95
NOTE: If you do a lot of baking or want to make bread, you should invest in a stand mixer instead of a hand-held mixer. We recommend the Cuisinart 5.5 Quart Stand Mixer ($299).
Blender
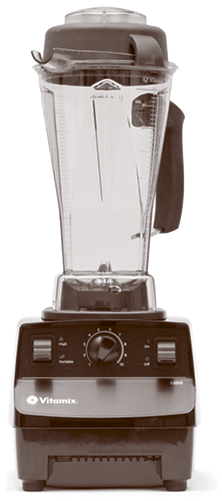
WHAT TO LOOK FOR
- Large blades that reach close to the edge and bottom of the jar
- Powerful motor (at least 700 watts)
- Automatic shut-off to keep motor from overheating
- Clear jar to monitor progress
TEST KITCHEN FAVORITES
Vitamix 5200
$449
BEST BUY: Breville BBL605XL Hemisphere Control Blender
$200
Parchment Paper

WHAT TO LOOK FOR
- Sturdy paper for heavy doughs
- Easy release of baked goods
- At least 14 inches wide
TEST KITCHEN FAVORITES
Reynolds Parchment Paper
$3.69
Plastic Wrap

WHAT TO LOOK FOR
- Clings tightly and resticks well
- Packaging with sharp teeth that aren’t exposed (to avoid snags on clothing and skin)
- Adhesive pad to hold cut end of wrap
TEST KITCHEN FAVORITES
Glad Cling Wrap Clear Plastic
$2.59
GRILLING EQUIPMENT
Gas Grill
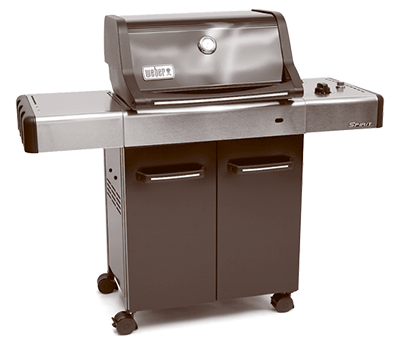
WHAT TO LOOK FOR
- Large grilling area (at least 350 square inches)
- Built-in thermometer
- Two burners for varying heat levels (three are even better)
- Attached table
- Fat drainage system
TEST KITCHEN FAVORITES
Weber Spirit E-210
$399
NOTE: Unless you live in an apartment with no access to outdoor space, you should own either a gas or a charcoal grill. If you choose charcoal, you will want a chimney starter.
Charcoal Grill

WHAT TO LOOK FOR
- Large grilling area
- Deep grill cover to fit large food items (such as a turkey)
- Hinged grill grate to tend fire
- Ash catcher for easier cleanup
TEST KITCHEN FAVORITES
Weber One-Touch Gold 22½-Inch Charcoal Grill
$149
Chimney Starter
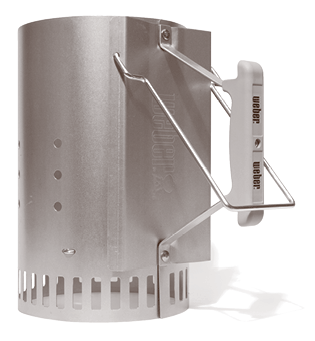
WHAT TO LOOK FOR
- 6-quart capacity
- Holes in canister so air can circulate around coals
- Sturdy construction
- Heat-resistant handle
- Dual handle for easy control
TEST KITCHEN FAVORITES
Weber Rapidfire Chimney Starter
$14.99
Grill Tongs
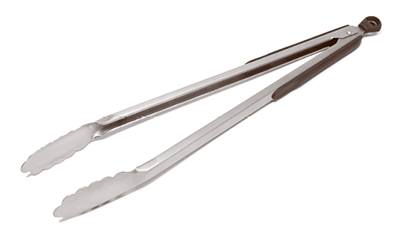
WHAT TO LOOK FOR
- 16 inches in length
- Scalloped, not sharp and serrated, edges
- Open and close easily
- Lightweight
- Moderate amount of springy tension
TEST KITCHEN FAVORITES
OXO Good Grips 16-Inch Locking Tongs
$14.99
Grill Brush
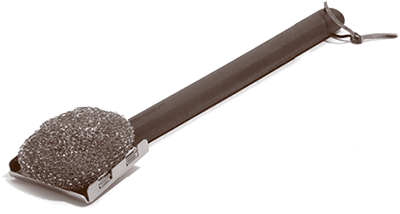
WHAT TO LOOK FOR
- Long handle (about 14 inches)
- Large woven-mesh detachable stainless steel scrubbing pad
TEST KITCHEN FAVORITES
Tool Wizard BBQ Brush
$9.99
Cookware is made from a variety of metals, each with its own pros and cons. The ability of the metal to withstand and conduct heat will determine how well you can brown food, how easily food will burn, and how evenly the heat is distributed. Weight matters too. Buy a lightweight stainless steel pan and your stew meat will stick to the pot. Ease of cleaning can enhance (or detract from) a pan’s desirability. Here’s what you need to know:
COPPER conducts heat extremely well, but it is expensive, heavy, and tarnishes easily. Copper is also is reactive, leaching into many foods to produce off-colors and flavors. For this reason, copper cookware is usually lined with tin or stainless steel.

THE BOTTOM LINE: Copper looks great but it’s not worth the expense.
ALUMINUM is second to copper in conductivity among the metals used for cookware. It is also light and inexpensive and retains heat well, provided it is of sufficient thickness, although the soft metal dents and scratches easily and it can react with acidic ingredients. Anodized aluminum cookware has a harder and less reactive outer surface. But its dark color can make it tricky to monitor the development of fond.
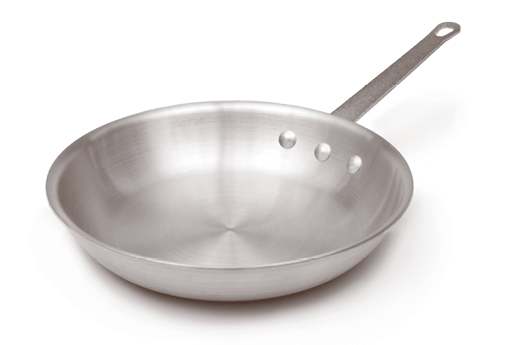
THE BOTTOM LINE: Unless anodized, aluminum is best used in combination with other metals.
CAST IRON heats up slowly but retains heat well. Cast-iron cookware is also inexpensive and lasts a lifetime, but it is heavy, reactive, and must be seasoned before use (unless you buy preseasoned cast-iron cookware, which we recommend). Cast iron is often coated with brightly colored enamel, which is not only attractive but makes the pot nonreactive. Because heavy cast-iron pots retain heat so well, they are perfect for recipes like frying and stewing that require precise temperature control.

THE BOTTOM LINE: Cast iron is great for skillets, and we like enameled cast iron for Dutch ovens.
STAINLESS STEEL is a poor heat conductor. Inexpensive cookware made entirely of thin-gauge stainless steel is prone to hot spots and warping. Stainless steel is, however, nonreactive, durable, and attractive, making it an excellent choice for coating, or “cladding,” cookware made from aluminum or copper.
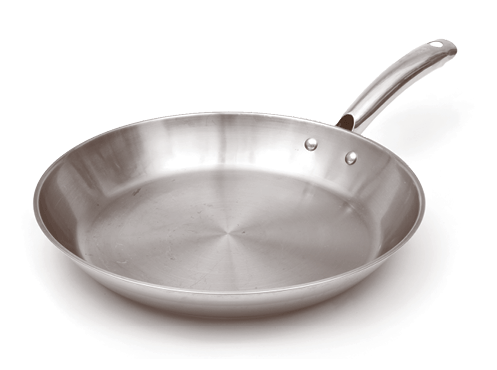
THE BOTTOM LINE: Buy cookware made with stainless steel that is combined with other metals.
CLAD cookware is what we recommend most of the time. The “cladding” label means that it is made from layers of metal that have been bonded under intense pressure and heat. For most clad cookware, these layers form a sandwich with the “filling” made of aluminum and the outer layers made of stainless steel.

THE BOTTOM LINE: Clad cookware heats evenly and quickly, and is easy to care for.
You may be wondering about nonstick coatings, which can be applied to cookware made from any of these materials. In general, we reserve nonstick pans for delicate foods, such as fish and eggs, which are prone to sticking. We find that nonstick pans don’t brown food as well as conventional pans. Also, there often are no browned bits left in the pan once something like a steak or chicken cutlet has been cooked, and thus nothing for the cook to use in building a pan sauce. (For more on this, see “Don't Use Nonstick Pans for Sauces.”)
There’s been a fair amount of news and concern about the safety of nonstick cookware, which now accounts for more than half of all cookware sales in the United States. What are the issues?
First, the production of nonstick surfaces can pollute the local ground water. This issue directly impacts anyone living near a manufacturing facility where nonstick surfaces are made.
Second, the ingestion of nonstick surfaces (once the coating starts to peel and flake) probably isn’t good for you. Maybe the coating just passes through your system, maybe not. In any case, the coating is no longer working if it has started to flake off; you need to throw out the pan and buy another one.
Third, nonstick pans can emit fumes if the surface reaches temperatures in excess of 600 degrees. Manufacturers admit that these fumes can kill small birds and advise against keeping pet birds in the kitchen. These fumes can cause a flulike illness in humans.
So how much of a concern is this? We conducted several kitchen tests in which we exposed both cheap and good-quality nonstick pans to high heat on the stovetop and under the broiler. We wanted to see how hot the cookware would get when used in recipes that call for high heat, like cooking a stir-fry. Using an infrared thermometer gun, we tracked temperatures and found only one way to get the temperature in the pan to 600 degrees: Heat an empty pan over a hot burner and forget about it.
Our recommendation: Never heat any pan, nonstick or otherwise, without first putting some oil in the pan. The oil will smoke at 400 degrees—well before the surface of a nonstick pan will emit dangerous fumes. You will notice the smoking oil and can pull the pan off the heat. This is a good idea when using conventional pans, too.
We continue to use nonstick cookware in the test kitchen, but for anyone who is looking for an alternative, we’ve found cast iron to be the most effective. Over time, cast-iron pans develop nonstick properties as the oils and fats used in cooking polymerize (the molecules change shape and link up) and essentially fuse with the surface of the pan. How much time? Clearly, the older and more seasoned the pan, the more “nonstick” it will become—as anyone who has been lucky enough to inherit their grandparents’ cast-iron skillet will tell you. For the rest of us, it’s never too late to start.
Specific knives are designed to perform a variety of tasks, which is why you need several knives. For instance, the serrations on a bread knife “grab” on to craggy surfaces (such as those on crusty bread) much better than the smooth edge of a chef’s knife. Likewise, a small paring knife is a much better choice than a large chef’s knife when trying to hull strawberries or devein shrimp. For a complete list of the knives we recommend that you own, see “Equipping Your Kitchen.”
Whichever knife you’re using, it should be sharp. Let’s say that again. Your knives must be sharp! There are three main reasons to keep your knives sharp.
- Sharp knives are actually less dangerous than dull knives, which are much more likely to slip and end up cutting your hand.
- Sharp knives cut through food more quickly than dull knives. Would you rather take two minutes or five minutes to chop an onion? It may not seem like a big difference, but in a recipe with a lot of vegetable or protein prep those extra minutes can really add up.
- Sharp knives produce food that is more evenly cut than dull knives. A dull blade will yield roughly minced garlic with large hunks, which can burn and impart a harsh flavor to your food. With a sharp knife, you can mince the garlic finer and more evenly, thus producing better-tasting food.
Right from the manufacturer, the blade should be very sharp. Most knife blades are actually shaped like a wedge. The spine (the top of the blade) is thick and helps the cook push the blade through food. The cutting edge is angled to a point. The blades on most European-style knives are angled at about 20 degrees.
So what turns a knife edge dull and what’s the best way to remedy the problem? After just a few minutes of use, the edge can roll over, making the blade feel slightly dull. The wedge becomes less effective and the cook needs to supply more energy to push the blade through food. Running the knife blade up and down the steel that came with your knife set can remove the folded edge and return the knife to its original sharpness.
However, most knives used by home cooks are much duller than this. The cook hasn’t stopped every few minutes to retool the blade with a steel. As a result, the factory-sharp angles on the edge have become rounded and very dull. At this point, it will take much more effort to use the knife and the edge will bruise food as it cuts. (The blade is also more likely to slip.) The knife needs an entirely new edge. A steel can’t do this; you need to regrind the blade and remove some metal. An electric knife sharpener is your best bet for doing this at home.
EMERGENCY INGREDIENT SUBSTITUTIONS
Everybody does it (even though they shouldn’t). Here are some tips for doing it well. No one wants to run out to the market for just one ingredient. Perhaps something you’ve got on hand will do the trick. We tested scores of widely published ingredient substitutions to figure out which ones work under what circumstances and which ones simply don’t work. Below is a list of ingredients commonly called for in recipes and the items you are likely to have on hand that will work as substitutions.
To replace: Whole Milk
Amount: 1 cup
Substitute:
5⁄8 cup skim milk + 3⁄8 cup half-and-half
2⁄3 cup 1% milk + 1⁄3 cup half-and-half
¾ cup 2% milk + ¼ cup half-and-half
7⁄8 cup skim milk + 1⁄8 cup heavy cream
To replace: Half-and-Half
Amount: 1 cup
Substitute:
¾ cup whole milk + ¼ cup heavy cream
2⁄3 cup skim or low-fat milk + 1⁄3 cup heavy cream
To replace: Heavy Cream
Amount: 1 cup
Substitute: 1 cup evaporated milk
Not suitable for whipping or baking, but fine for soups and sauces.
To replace: Eggs
Amount and Substitute:
1 LARGE = 1 JUMBO = 1 EXTRA-LARGE = 1 MEDIUM
2 LARGE = 1½ JUMBO = 2 EXTRA-LARGE = 2 MEDIUM
3 LARGE = 2½ JUMBO = 2½ EXTRA-LARGE = 3½ MEDIUM
4 LARGE = 3 JUMBO = 3½ EXTRA-LARGE = 4½ MEDIUM
5 LARGE = 4 JUMBO = 4 EXTRA-LARGE = 6 MEDIUM
6 LARGE = 5 JUMBO = 5 EXTRA-LARGE = 7 MEDIUM
To replace: Buttermilk
Amount: 1 cup
Substitute:
1 cup milk + 1 tablespoon lemon juice or distilled white vinegar
Not suitable for raw applications, such as a buttermilk dressing.
To replace: Sour Cream
Amount: 1 cup
Substitute: 1 cup plain whole-milk yogurt
Nonfat and low-fat yogurts are too lean to replace sour cream.
To replace: Plain Yogurt
Amount: 1 cup
Substitute: 1 cup sour cream
To replace: Cake Flour
Amount: 1 cup
Substitute: 7⁄8 cup all-purpose flour + 2 tablespoons cornstarch
To replace: Bread Flour
Amount: 1 cup
Substitute: 1 cup all-purpose flour
Bread and pizza crusts may bake up with slightly less chew.
To replace: Baking Powder
Amount: 1 teaspoon
Substitute: ¼ teaspoon baking soda + ½ teaspoon cream of tartar (use right away)
To replace: Light Brown Sugar
Amount: 1 cup
Substitute: 1 cup granulated sugar + 1 tablespoon molasses
Pulse the molasses in a food processor along with the sugar or simply add it along with the other wet ingredients.
To replace: Dark Brown Sugar
Amount: 1 cup
Substitute: 1 cup granulated sugar + 2 tablespoons molasses
Pulse the molasses in a food processor along with the sugar or simply add it along with the other wet ingredients.
To replace: Confectioners’ Sugar
Amount: 1 cup
Substitute: 1 cup granulated sugar + 1 teaspoon cornstarch, ground in a blender (not a food processor)
Works well for dusting over cakes, less so in frostings and glazes.
To replace: Table Salt
Amount: 1 tablespoon
Substitute:
1½ tablespoons Morton Kosher Salt or fleur de sel
OR 2 tablespoons Diamond Crystal Kosher Salt or Maldon Sea Salt
Not recommended for use in baking recipes.
To replace: Fresh Herbs
Amount: 1 tablespoon
Substitute: 1 teaspoon dried herbs
To replace: Wine
Amount: ½ cup
Substitute:
½ cup broth + 1 teaspoon wine vinegar (added just before serving)
OR ½ cup broth + 1 teaspoon lemon juice (added just before serving)
Vermouth makes an acceptable substitute for white wine.
To replace: Unsweetened Chocolate
Amount: 1 ounce
Substitute:
3 tablespoons cocoa powder + 1 tablespoon vegetable oil
1½ ounces bittersweet or semisweet chocolate (remove 1 tablespoon sugar from the recipe)
To replace: Bittersweet or Semisweet Chocolate
Amount: 1 ounce
Substitute: 2⁄3 ounce unsweetened chocolate + 2 teaspoons sugar
Works well with fudgy brownies. Do not use in a custard or cake.
FOOD SAFETY
THE BASICS
Food safety sounds scary and in some respects it is. If you don’t follow basic sanitation practices, you can make yourself and your family sick. That said, taking a few basic steps will dramatically reduce the risk of food-borne illnesses.
SEPARATE RAW AND COOKED One of the most important rules of food safety is to keep raw and cooked foods separate. Never place cooked food on a plate or cutting board that has come into contact with raw food, or vice versa, and wash any utensil (including a thermometer) that comes in contact with raw food before reusing it. These additional steps will help you avoid cross-contamination.
PUT UP A BARRIER Items that come in contact with both raw and cooked food, like scales and platters, should be covered with aluminum foil or plastic wrap to create a protective barrier. Once the item has been used, the foil—and any bacteria—can be discarded. Similarly, wrapping your cutting board with plastic wrap before pounding meat and poultry will limit the spread of bacteria.
DON’T RINSE RAW MEAT AND POULTRY Avoid rinsing raw meat and poultry, as doing so is likely to spread contaminants around your sink.
SAFER SEASONINGS Though bacteria can’t live for more than a few minutes in direct contact with salt (which quickly dehydrates bacteria, leading to death), they can live on the edges of a box or shaker. To avoid contamination, we grind pepper into a small bowl and then mix it with salt (using a ratio of 1 part pepper to 4 parts kosher salt or 2 parts table salt). This way, we can reach into the bowl for seasoning without having to wash our hands every time we touch the meat. Afterward, the bowl goes right into the dishwasher.
DON’T RECYCLE USED MARINADES Used marinade is contaminated with raw meat juices and is therefore unsafe to consume. If you want a sauce to serve with cooked meat, make a little extra marinade and set it aside before adding the rest to the raw meat.
AVOIDING THE DANGER ZONE
Most bacteria thrive between 40 and 140 degrees. Within this “danger zone,” bacteria double about every 20 minutes, quickly reaching harmful levels. As a general rule, food shouldn’t stay in this zone for more than two hours (one hour if the room temperature is over 90 degrees). Here are some specific steps you should take to avoid letting food spend too much time in the danger zone.
DEFROST IN FRIDGE Defrosting should always be done in the refrigerator, not on the counter, where the temperatures are higher and bacteria can multiply readily. Always place food on a plate or in a bowl while defrosting to prevent any liquid it releases from coming in contact with other foods. Most food will take 24 hours to thaw fully. (Larger items, like whole turkeys, can take far longer. Count on about five hours per pound.)
COUNTERINTUITIVE COOLING Though it may go against your instincts, don’t put hot foods in the fridge immediately after cooking. This will cause the temperature of the refrigerator to rise, potentially making it hospitable to the spread of bacteria. The FDA recommends cooling foods to 70 degrees within the first two hours after cooking and 40 degrees within four hours after that. We stay within these recommendations by cooling food on the countertop for about an hour, until it reaches 80 to 90 degrees (food should be just warm to the touch) before transferring it to the fridge. (Click here for details.)
REHEAT RAPIDLY When food is reheated, it should be brought through the danger zone as rapidly as possible—don’t let it come slowly to a simmer. Bring leftover sauces, soups, and gravies to a boil and make sure casseroles reach at least 165 degrees, using an instant-read thermometer to determine whether they’re at the proper temperature.
Thermometers are proven assets in limiting the spread of food-borne illness. A refrigerator thermometer will tell you if your fridge and freezer are working properly. Check the temperature of your refrigerator regularly to ensure that it is between 35 and 40 degrees; your freezer should be below 0 degrees.
Here are the recommended storage temperatures for specific foods. Keep in mind that the back of a refrigerator is the coldest. Make sure that raw meat is stored well wrapped and never on shelves that are above other food.
Food: Fish and Shellfish
Temperature: 30 to 34 degrees
Food: Meat and Poultry
Temperature: 32 to 36 degrees
Food: Dairy Products
Temperature: 36 to 40 degrees
Food: Eggs
Temperature: 38 to 40 degrees
Food: Produce
Temperature: 40 to 45 degrees
GET IT HOT
The doneness temperatures used throughout this book represent the test kitchen’s best assessment of palatability weighed against safety. In most cases, those concerns align. Rare chicken isn’t very tasty, or very safe. There are a few notable exceptions, especially as regards ground meat. If safety is your primary concern, you don’t want to eat rare burgers.
The USDA has issued a complex set of rules regarding the cooking of meat and poultry.Here are the basics:
- Cook whole cuts of meat, including pork, to an internal temperature of at least 145 degrees and let rest for at least three minutes.
- Cook all ground meats to an internal temperature of at least 160 degrees.
- Cook all poultry, including ground poultry, to an internal temperature of at least 165 degrees.
If you want more information on food safety, visit www.fsis.usda.gov/factsheets.
CONVERSIONS AND EQUIVALENTS
The recipes in this book were developed using standard U.S. measures. The charts below offer equivalents for U.S. and metric measures. All conversions are approximate and have been rounded up or down to the nearest whole number. For example:
1 teaspoon = 4.929 milliliters, rounded up to 5 milliliters
1 ounce = 28.349 grams, rounded down to 28 grams
U.S. TO METRIC
1 teaspoon = 5 milliliters
2 teaspoons = 10 milliliters
1 tablespoon = 15 milliliters
2 tablespoons = 30 milliliters
¼ cup = 59 milliliters
1⁄3 cup = 79 milliliters
½ cup = 118 milliliters
¾ cup = 177 milliliters
1 cup = 237 milliliters
1 ¼ cup = 296 milliliters
1 ½ cup = 355 milliliters
2 cups = 473 milliliters
2 ½ cups = 591 milliliters
3 cups = 710 milliliters
4 cups (I quart) = 0.946 liter
1.06 quart = 1 liter
4 quarts (1 gallon) = 3.8 liters
OVEN TEMPERATURES
Farenheit, Celsius, and Gas Mark (Imperial)
225 Fahrenheit = 105 Celsius = ¼ Gas Mark (Imperial)
250 Fahrenheit = 120 Celsius = ½ Gas Mark (Imperial)
275 Fahrenheit = 135 Celsius = 1 Gas Mark (Imperial)
300 Fahrenheit = 150 Celsius = 2 Gas Mark (Imperial)
325 Fahrenheit = 165 Celsius = 3 Gas Mark (Imperial)
350 Fahrenheit = 180 Celsius = 4 Gas Mark (Imperial)
375 Fahrenheit = 190 Celsius = 5 Gas Mark (Imperial)
400 Fahrenheit = 200 Celsius = 6 Gas Mark (Imperial)
425 Fahrenheit = 220 Celsius = 7 Gas Mark (Imperial)
450 Fahrenheit = 230 Celsius = 8 Gas Mark (Imperial)
475 Fahrenheit = 245 Celsius = 9 Gas Mark (Imperial)
WEIGHT CONVERSIONS
Ounces to Grams
½ ounce = 14 grams
¾ ounce = 21 grams
1 ounce = 28 grams
1 ½ ounces = 43 grams
2 ounces = 57 grams
2 ½ ounces = 71 grams
3 ounces = 85 grams
3 ½ ounces = 99 grams
4 ounces = 113 grams
4 ½ ounces = 128 grams
5 ounces = 142 grams
6 ounces = 170 grams
7 ounces = 198 grams
8 ounces = 227 grams
9 ounces = 255 grams
10 ounces = 283 grams
12 ounces = 340 grams
16 ounces (1 pound) = 454 grams
METRIC TEMPERATURES
If you use an oven set to metric or Imperial measures, you will want to refer to the chart on the left when using our recipes. For other temperatures not represented in the chart, use this simple formula:
Subtract 32 degrees from the Fahrenheit reading, then divide the result by 1.8 to find the Celsius reading.
For example, if a recipe says “roast until chicken thighs register 175 degrees,” you would convert this Fahrenheit temperature as follows:
175˚F – 32 = 143˚
143˚ ÷ 1.8 = 79.44˚C, rounded down to 79˚C
