Erin Pender, of Hampton, New Hampshire, wrote me about these special mittens in response to my request for information about fleece mittens in an article in Down East magazine. “I know what fleece mittens are,” she wrote. “These mittens were in Lowell, Mass., the winter of ’54 or ’55. I had borrowed them from a playmate for the afternoon. They were the warmest mittens I’ve ever worn, before or since. They were multicolored, as if the knitter had snippets of various colors of worsted weight yarn such as are used for markers, and had knitted them in with the mitten so that the tails were inside to create a warm ‘fleece.’”
Erin checked back with her now grown-up playmate and her friend’s mother, but the mother didn’t remember the mittens, and the friend didn’t know where the mittens had come from, whether from a local person or from someone of recent European extraction, only that her mother had given them to her. Mittens matching this description, but with loops rather than ends inside, are knitted in Sweden (100 Landskapsvottar, 1982) and in the Baltic countries, perhaps Latvia (Leszner, Vottar från När och Fjärran, 1982).
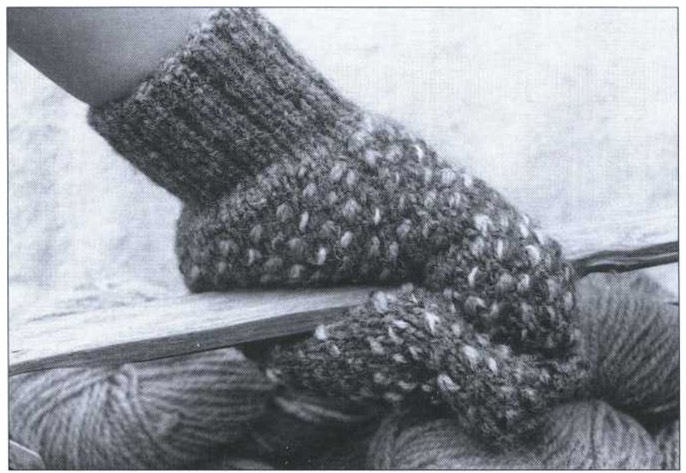
I made a mitten based on Erin’s description, but like the European women, I didn’t dare cut the loops to make an inside shag. And surprisingly, it didn’t matter, because the loops don’t catch fingers after all. Just don’t try to pull on the mittens over a ring with a fancy setting.
I took my inside-shag mitten to Erin Pender, whom I arranged to meet at the Portsmouth Circle Howard Johnson’s. Over coffee, I proudly whipped out my mitten. She shook her head. “Mm, no,” she said. “It didn’t look like that at all.” There were no bumps on the outside of the mitten she remembered, and the shag on the inside hadn’t shown through to the outside at all. The mitten itself was multicolored, perhaps of ombre yarn, with cut snippets rather than loops. She also thought the snippets might have been knotted in.
So there you have it. With a firm basis in European tradition but little more than a rumor to support it in this country, this pair of mittens is at best marginally a New England folk mitten. But—it’s warm and squashy and funny looking, and it uses up scraps. Maybe it will become a folk mitten.
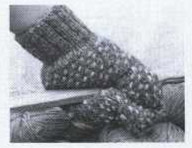
A mitten shagged on the inside, based on a description by Erin Pender and comparison with similar European mittens.
Yarn 3–6 ounces (85.5–171g) mediumweight wool yarn. About 2 ounces (57g) varicolored wool scraps, each at least 4 inches long. For the mitten shown, size Adult Medium, I used Bartlettyarns 2-ply Fisherman Yarn and scraps of Persian wool crewel embroidery yarn that had been sitting around for years waiting for my interest in embroidery to revive. Of course, I ran out of real scraps and had to go buy more. You needn’t be so lavish unless you want to be. This pattern was probably designed to use up scraps thriftily.
Equipment 1 set Size 4 (3.5mm, Can. Size 9) double-pointed knitting needles, or size you need to knit at the correct tension • Blunt-pointed yarn needle
Tension 4½ sts = 1" (2.5cm), measured in the round with shag
ABBREVIATIONS beg: beginning • CC: contrast color • dec(s): decrease (s) • inc(s): increase (s) • k: knit • k2tog: knit 2 together • MI: make I stitch • MIL: make I stitch left • MIR: make I stitch right • MC: main color • p: purl • rep: repeat • rnd(s): round (s) • SSK2tog: slip, slip, knit 2 sts together • st(s): stitch (es) • twisted MI: twisted make I cast-on
Measurements—inches and centimeters
| Child Sizes | Adult Sizes | |||||||
| 2–4 | 6–8 | S | M | L | ||||
| Length of hand | 4½ | 6 | 6½ | 7 | 7½ | |||
| 11.5 | 15.25 | 16.5 | 18 | 19 | ||||
| Hand circumference, incl. tip of thumb | 6 | 7¼ | 7½ | 9 | 9½ | |||
| 15.25 | 18.5 | 19 | 23 | 24.25 | ||||
| Length of mitten hand | 4¾ | 6½ | 7 | 7½ | 8 | |||
| 12 | 16.5 | 18 | 19 | 20.25 | ||||
| Mitten thumb (⅓ hand length) | 1⅝ | 2⅛ | 2⅜ | 2½ | 2⅜ | |||
| 4.25 | 5.5 | 6 | 6.5 | 6 | ||||
| Mitten width* a little more than | 3 | 3⅝ | 4 | 4½ | 4¾ | |||
| 7.5 | 9.25 | 10.25 | 11.5 | 12 | ||||
*These sizes allow extra room inside to accommodate the yarn loops.
A multiple of 2 sts and 2 rnds. The scraps are knit in every second st of every second rnd. Because I had no access to the person who made the original mittens (or even to the mittens themselves), I experimented and came up with this.
I. Knit I rnd in stockinette, working the thumb gore sts according to the directions.
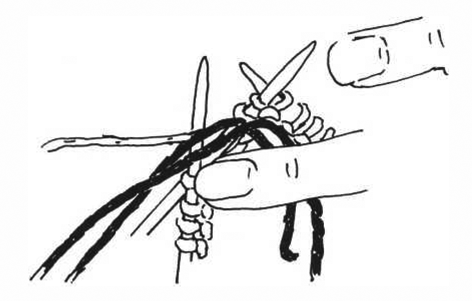
In the second rnd, k I st, then join the scrap yarn (2 strands of medium weight yarn or 4 of finer yarns). Insert the right needle into the next st. Hold the end of the scrap yarn against the back of the knit with the third finger of the left hand, leaving a 1 - to 2-inch tail pointing down.
Do this each time you start a new scrap.
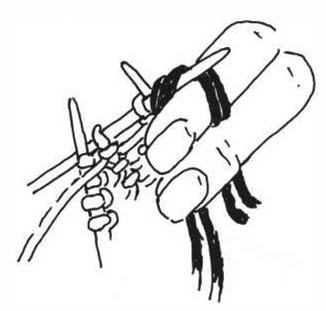
2.To work a shag stitch, wrap the long end of the scrap yarn around the left index finger and over the needle as if to knit. Hold the long end out of the way behind the knit with the left index finger. This will form the loop.
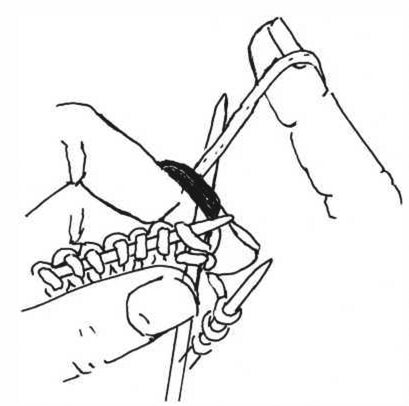
3.Wrap the knitting yarn around the right needle only (not around your finger).
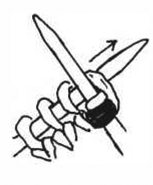
4. Knit both together. Remove the left index finger from its loop and work one more plain knit stitch.
Note: Do not work a shag st in the line of p marking sts. Instead, when entering the thumb gore, catch up the strand of scrap yarn by knitting under it the st before the first p st, then purling over it. Leaving the thumb gore, p over the scrap yarn strand, then k the next st under it, unless the next st is a shag st. If it is, don’t worry about catching it up near the p st.
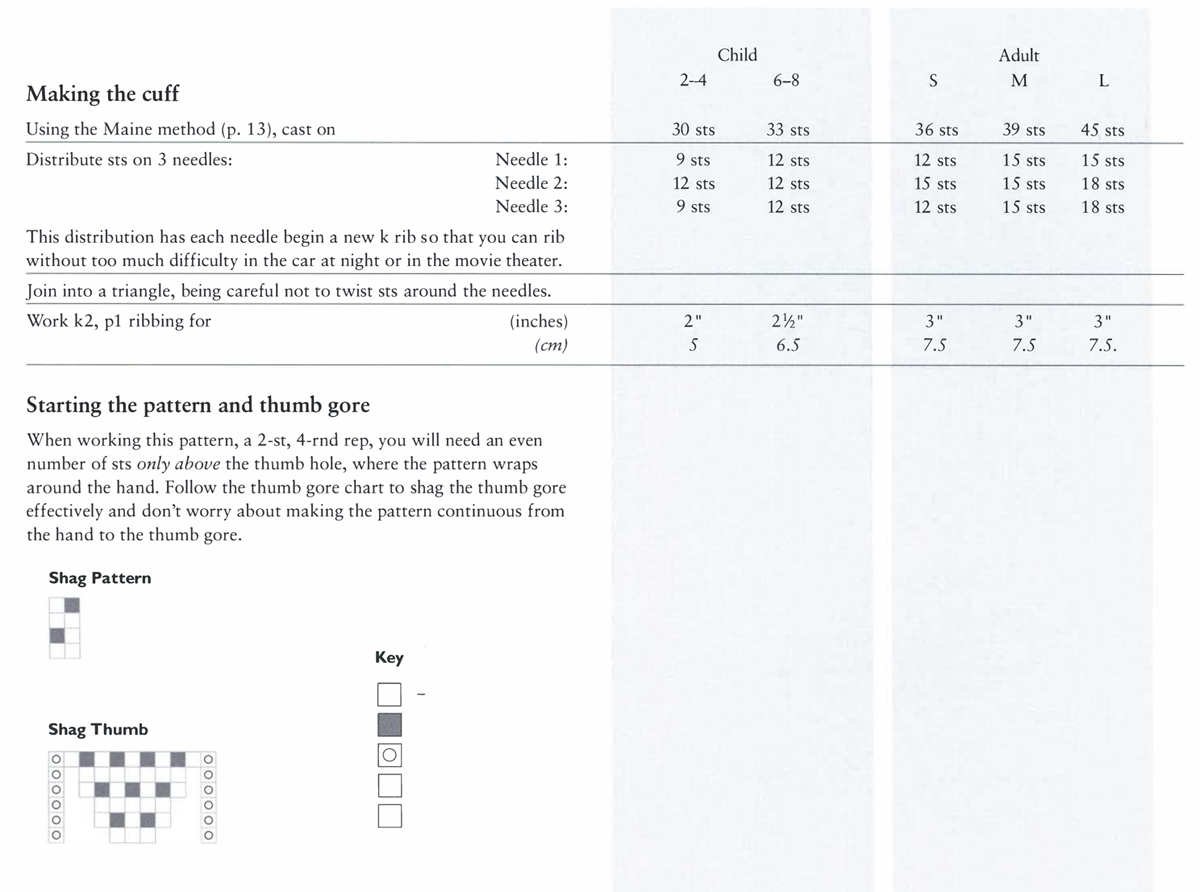
The cuffs are k2, p1 ribbing. You may wish to add stripes if your yarn scraps blend with the mitten color, but otherwise, stripes may make the mitten look too busy.