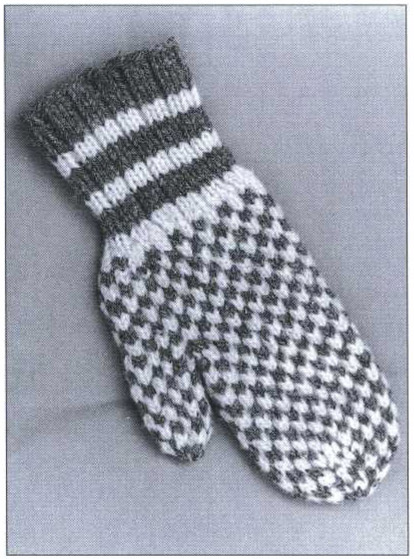
For those who tire of Salt and Pepper knitting, a one-one alternation of two colors that makes a smooth, thick mitten fabric, there’s Checkerboard, also called Block or Two-Two, but having nothing to do with trains.
Checkerboard is an alternation of colors in a two-two sequence—two rounds of 2 MC, 2 CC followed by two rnds of the opposite. It shouldn’t be very different from Salt and Pepper, but it is. For a reason known only to yarn engineers, this particular alternation pulls the fabric up into ridges like cornrows, thickening the mitten fabric greatly. It looks like a fancy stitch, but it isn’t. It’s plain old stockinette.
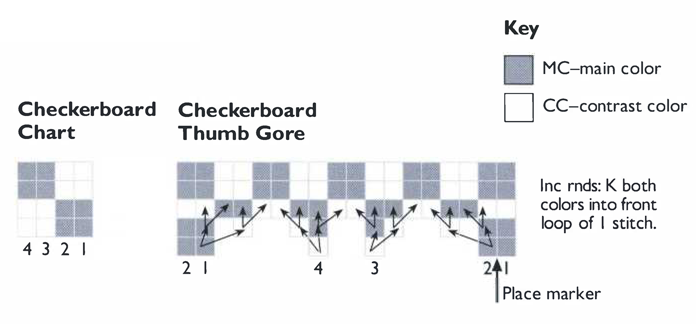
Checkerboard can be knit with 3 sts and 3 rnds per check, or even with 3 sts and rnds, but the most common pattern has 2 of each.
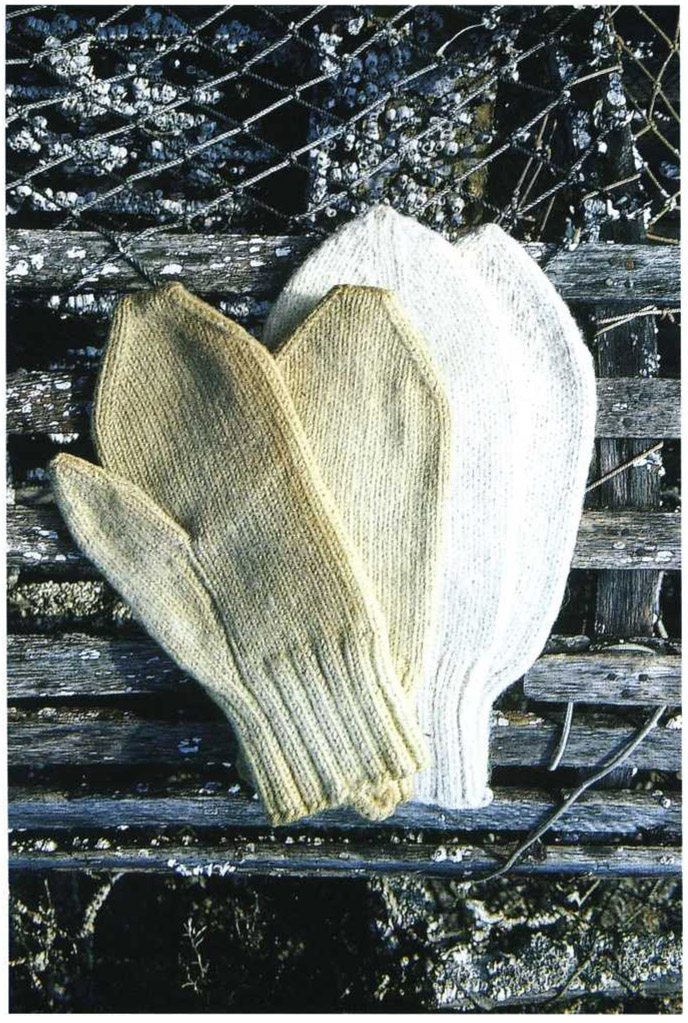
Checkerboard is knit in central (Farmington) and northern (Aroostook County) Maine, as well as New Brunswick and Nova Scotia. I’ve never seen a Checkerboard Mitten from southern Maine, but that doesn’t mean there aren’t any. The entire mitten pattern must have come from Scandinavia—I discovered one identical to it in a collection of Norwegian mittens in Annie Blatt, a German women’s magazine—same rounded tips, same pull-up effect, even the same unusual increase all at the bottom of the thumb gore
Two versions are presented in this book, one taken intact from a mitten in New Sweden, Maine, and a very light version in sport weight yarn for babies and young children (p. 189).
The heavy weight mittens are super—super thick, super warm, super solid, super flexible. They were originally knitted for woodsmen, who wore them as liners under leather mittens.
The woman who gave me the pattern, Beda Spooner, of New Sweden, told me she is Swedish. Both her mother and father were Swedish, she said. Mrs. Spooner is the only woman I interviewed who still sends fleeces to Bartlett Mills to exchange for yarn. Her son keeps and shears the sheep and takes the fleeces to Harmony, Maine, where he gets her gray and white natural yarn.
She washes the heavy 3-ply yarn in hot water in the skein, and then winds it for her winter knitting. Mrs. Spooner has a local reputation for her mittens and was afraid that publishing her instructions might damage her business. I hope it didn’t.
I tried knitting these mittens without shrinking the yarn ahead and found that they turned out wishy-washy—flaccid and easy to stretch out of shape. The next time, I simmered the yarn, in the skein, for 20 to 30 minutes with water and a little Orvus animal shampoo (from the feed store, but any fine soap would work), and then rinsed it thoroughly in cold water. The yarn became thicker, ropier, softer, and quite interesting to work with—but harder to knit at 6 sts per inch. The mittens neither stretched nor shrank afterward. I wore them to Reid State Park one sunny spring day, dropped them, and never found them again.
In spite of the simple and curious manner of putting on the thumb gore (all at once at the bottom), this is not an easy mitten to knit because of the thickness of the yarn and the tightness of the knit. Nonetheless, it’s well worth the effort to knit a pair, though only in Bartlettyarns 3-ply Homespun Yarn, prewashed in boiling water! They are warm, soft, flexible, and—unless you lose them—will last for years.
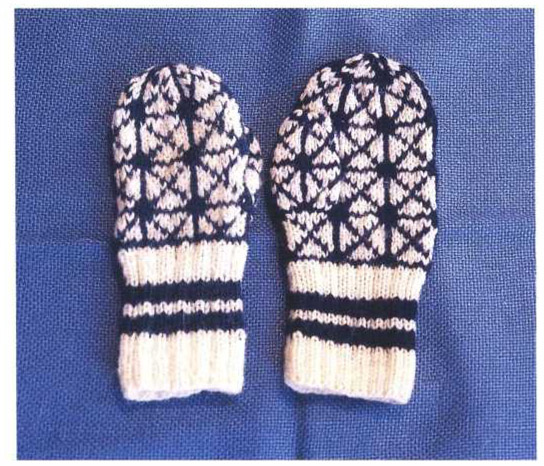
Checkerboard Mitten by Beda Spooner of New Sweden, Maine. Note the sudden increase at the thumb just above the cuff.
Yarn MC: 3 oz (85g) dark color 3-ply Homespun from Bartlettyarns • CC: 3 oz (85g) light color 3-ply Homespun from Bartlettyarns.
This yarn is about twice as heavy as ordinary medium weight yarn. Remember that, for best results, this yarn should be boiled as described in the introduction. After the yarn has cooled, put it in the washing machine on the spin cycle (only!), then hang or lay to dry thoroughly before you start to knit. Do not use synthetics or Superwash™-treated wool yarns as they will not respond to boiling.
Equipment 1 set Size 8 (5mm, Can. Size 6) double-pointed needles, or size you need to knit in pattern at correct tension • 1 set Size 5 (3.75mm, Can. Size 9) double-pointed needles for ribbing • 12" (30cm) length of contrasting waste yarn • Blunt-tipped yarn needle
Tension 6 sts and 5½ rnds = 1" (2.5cm) in pattern
ABBREVIATIONS beg: beginning • CC: contrast color • dec(s): decrease(s) • inc(s): increase(s) • k: knit • k2tog: knit 2 together • MI: make I stitch • MIL: make I stitch left • MIR: make I stitch right • MC: main color • p: purl • rep: repeat • rnd(s): round(s) • SSK2tog: slip, slip, knit 2 sts together • st(s): stitch(es) • twisted MI: twisted make I cast-on
Measurements—inches and centimeters)
| WM | WL | MM | ML | |
| Hand length | 7 | 7½ | 7 | 7½ |
| 18 | 19 | 18 | 19 | |
| Hand circumference, incl. tip of thumb | 9 | 9 | 9½ | 9½ |
| 23 | 23 | 24.25 | 24.25 | |
| Mitten hand length | 7½ | 8 | 7½ | 8 |
| 19 | 20.25 | 19 | 20.25 | |
| Mitten thumb length (⅓ hand) | 2½ | 25/8 | 2½ | 25/8 |
| 6.5 | 6.75 | 6.5 | 6.75 | |
| Mitten width* | 4 | 4 | 4½ | 4½ |
| 10.25 | 10.25 | 11.5 | 11.5 | |
*Checkerboard Mittens are quite flexible, and although this measurement seems scant for the measurement around the hand, it is comfortable and adequate. The mitten tends to stretch somewhat widthwise over time, and it is easy to make it too wide.
The pattern is a 4-st, 4-rnd rep. Its tendency to pull up sharply in wide ridges is a desirable feature of the pattern and should not be discouraged.
Left: Fleece-Stuffed Mittens (p. 54) and cap (p. 113).
Chebeague Island Fishermen’s Wet Mittens (p. 28), one pair knitted by Minnie Doughty and treasured as keepsakes by her daughters, the other pair, shrunk and well used, knitted by Chebeague Island Methodist Church Ladies’ Aid
Sawtooth Mittens (p. 100) and Sawtooth-patterned watch cap (p. 113)
Shag on the Inside Mitten (p. 62), Flying Geese Glove (p. 120)
Fox and Geese Mittens and toque (pps. 77 and 149)
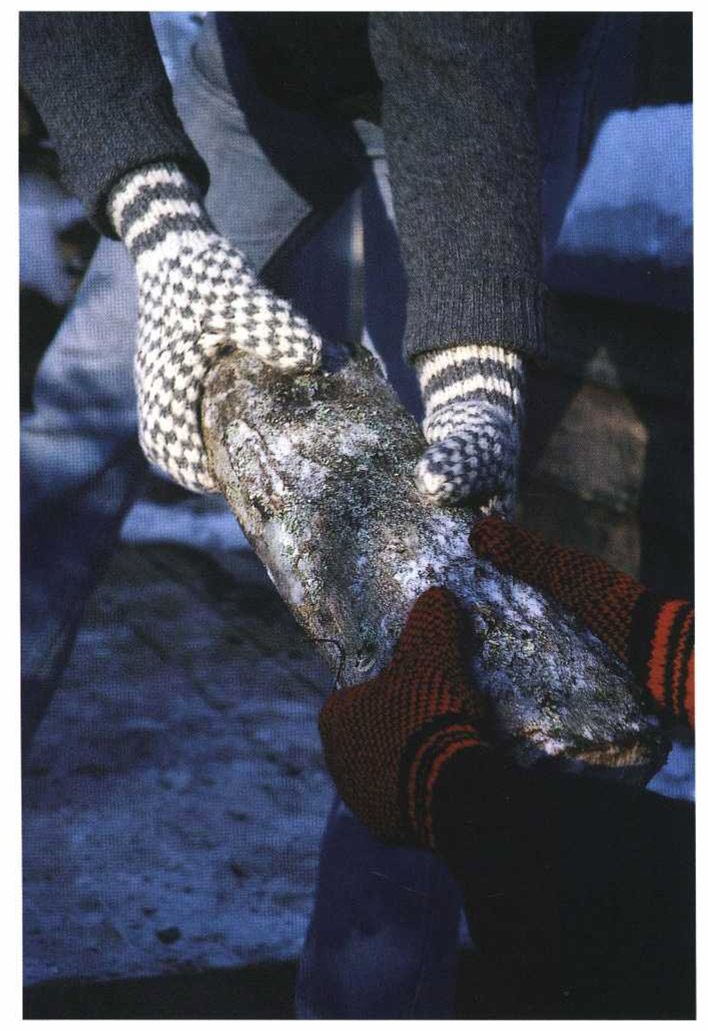
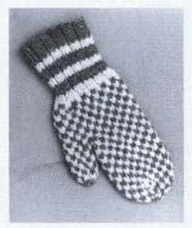
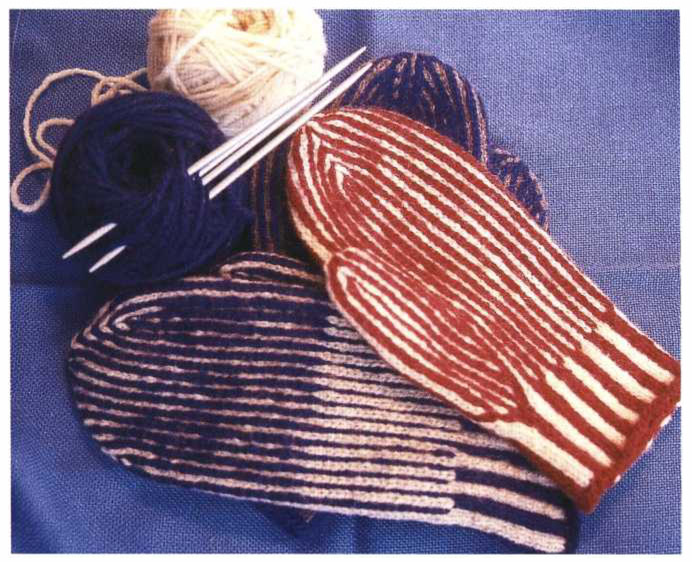
Incredible Checkerboard Mittens (p. 107) in gray and white, Salt and Pepper Mittens (p. 94) in red and blac)
Striped Mittens (p. 87). On bottom mitten, white was carried ahead halfway up the hand, then blue was carried ahead. On middle mitten, red was carried ahead. Mitten in background was knitted by Nora Johnson.
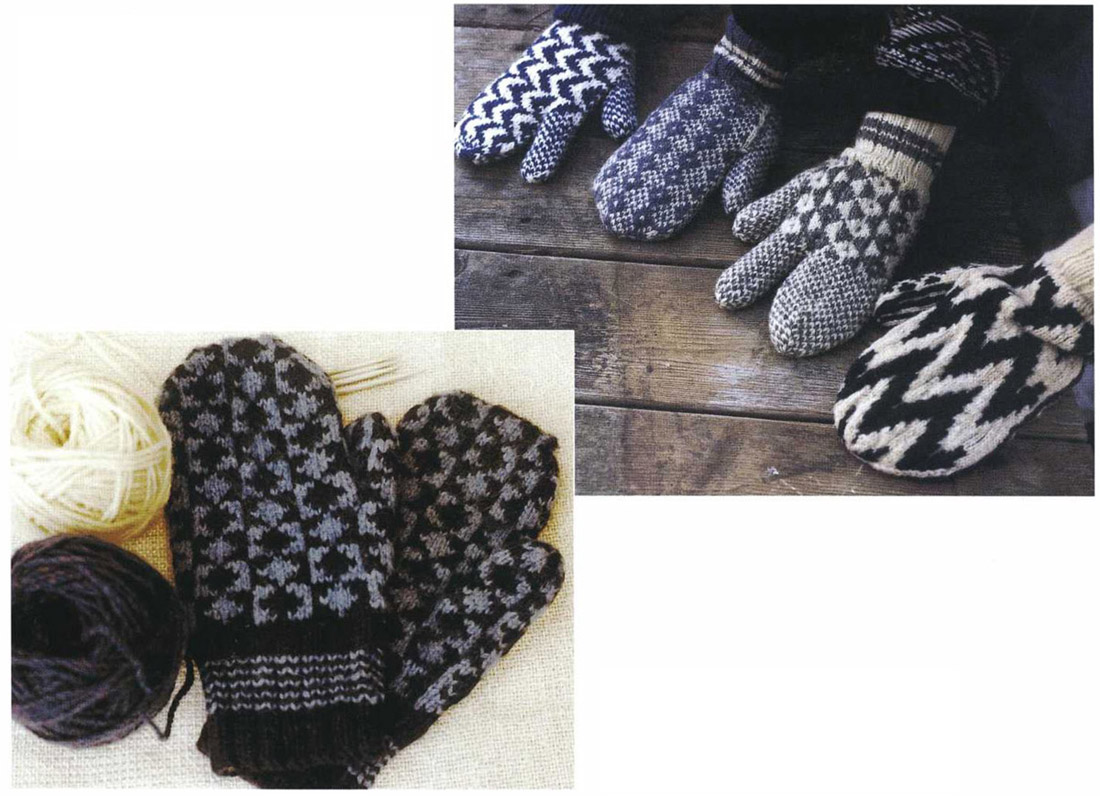
Left to right: Mrs. Martin’s Finger Mitt (p. 164) with Waves pattern, Labrador Diamonds Mitten (p. 156), Mrs. Martin’s Finger Mitt (p. 164) with Diamond Stripes pattern, Big Waves Mitten (p. 174)
Maplewood Mittens (p. 126). This pattern shows up best in close colors rather than high-contrast color combinations.
Outside: Two sizes of Chipman’s Check Wristers (p. 142). Two sizes of Salt and Pepper Mittens (p. 94).
Two versions of Mittens Hooked on a Dowel (p. 47): green mittens hooked in acrylic yarn by Albert Miller, blue and white mitten hooked by the author in wool yarn
Left to right: Wee Checkerboard Mitten (p. 189), child’s Sawtooth Mitten (p. 100), Baby Foxes and Goslings Mitten (p. 184)
Left to right: Spruce Mittens (p. 134) and Spruce-patterned watch cap (p. 113), Baby Foxes and Goslings Mittens (p. 184), baby helmet (p. 207) with Fox and Geese patter)
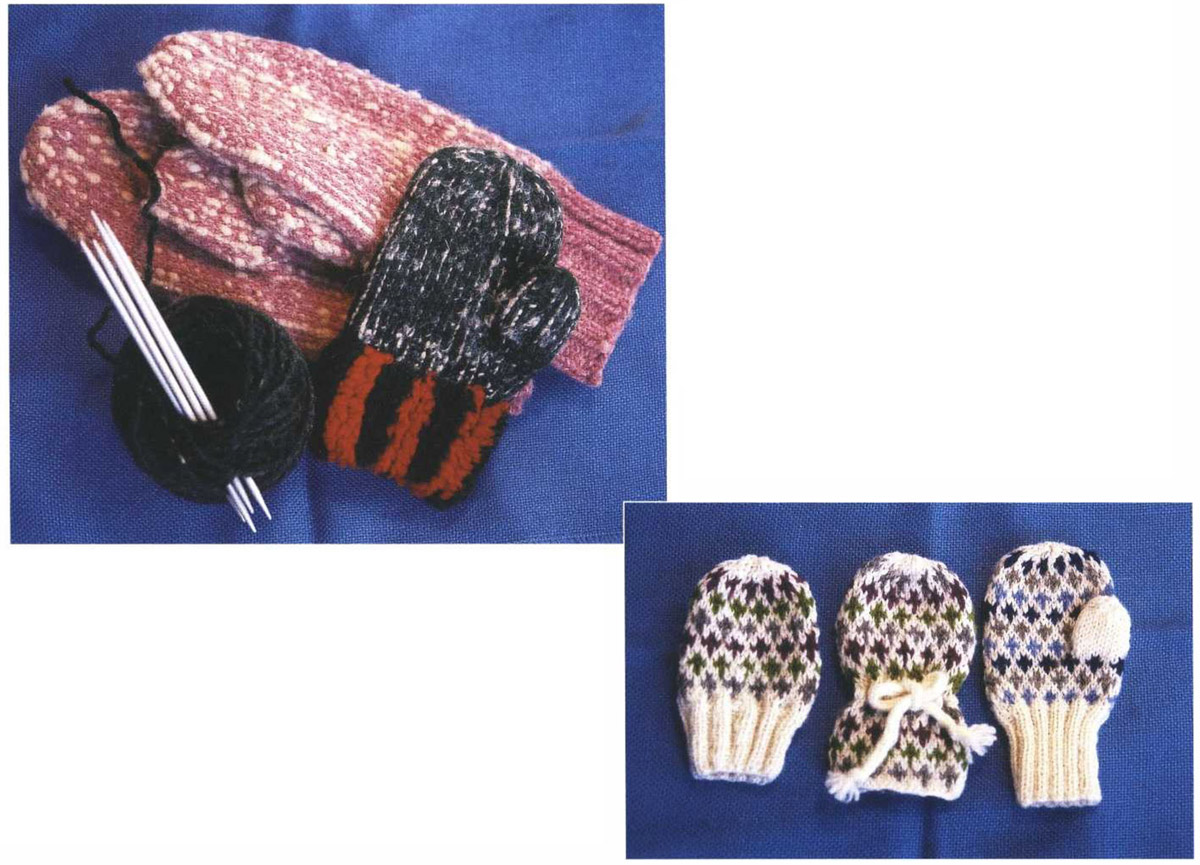
Double-Rolled Mittens (p. 36). Edna Mower made the larger pair with ribbed cuffs. Smaller mitten with shagged (and ribbed) cuff was copied from a mitten at the Maine State Museum made by Hattie Stover Brown.
Petites Mitaines en Fleur-de-lis (p. 200): Size 0–6 months with no thumb and a ribbed cuff, Size 0–6 months with no thumb and a wide patterned cuff and tie, Size 6–12 months with ribbed cuff
Compass Mittens for Small Mariners (p. 194) in two sizes
Left: Mitten with Double Irish Chain pattern (p. 180) made from Labrador Diamonds Mittens directions (p. 157). A narrow strip of Newfoundland Palm Stitch is visible on left edge of mitten. Right: Newfoundland palm stitch (p. 181) on a small mitten
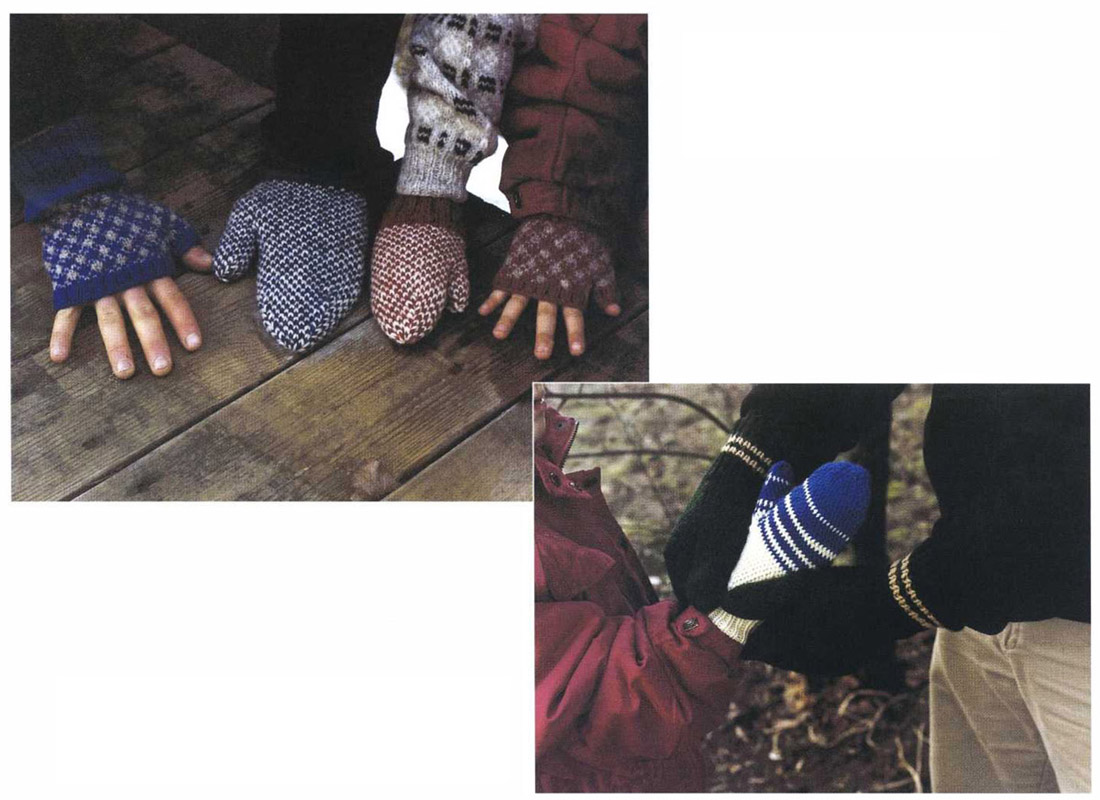
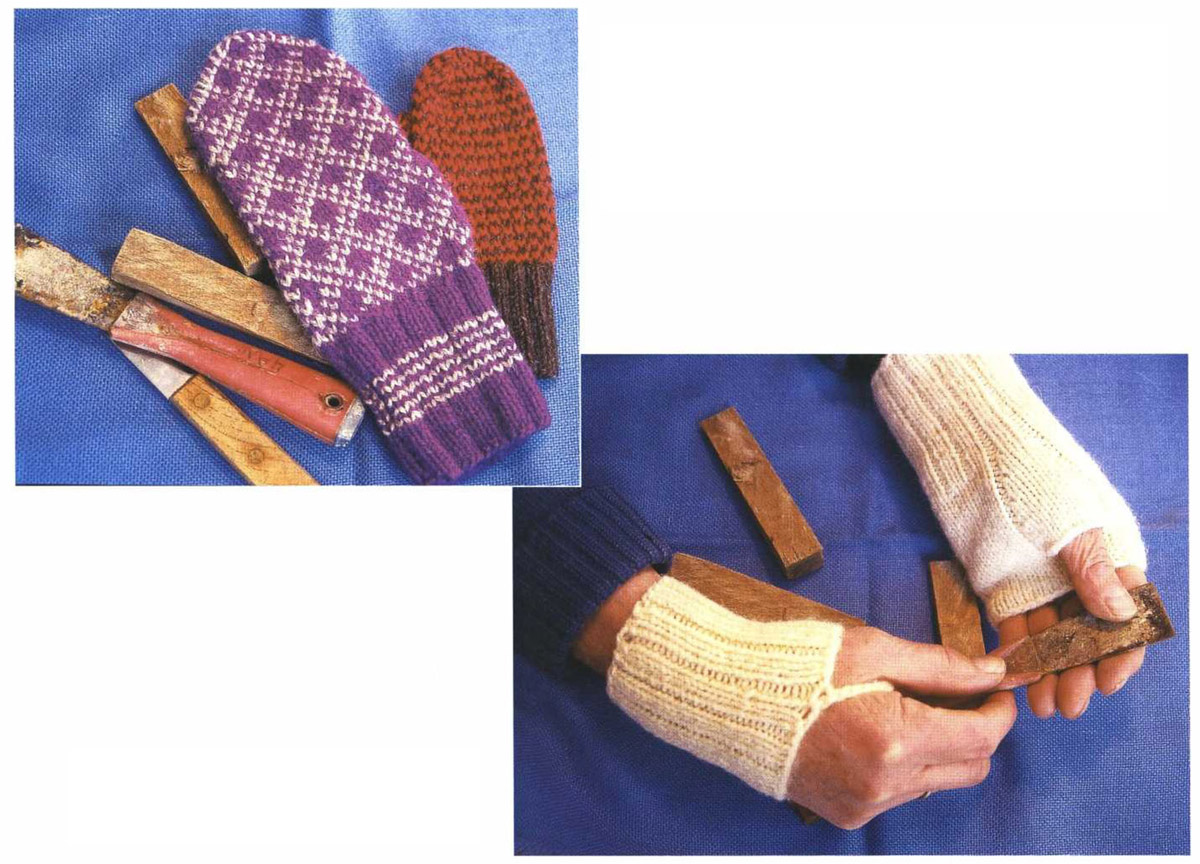
Left to right: Laura Ridgewell’s Wrister (p. 70) and Phyllis Wharton’s Wrister (p. 72)