Chapter 1: Introduction to Circular Knitting
Whether you call it circular knitting or knitting in the round, it means the same thing: knitting items as tubes (or, more correctly, spirals) instead of knitting flat pieces back-and-forth. The information in this book will help you discover new ways to use your knitting tools to increase efficiency in the construction and finishing of your projects. I hope that you will learn to love working in the round and will bring these techniques into all aspects of your knitting life.

About Circular Knitting
Circular knitting differs from flat knitting in several ways. In flat knitting, you typically use single-pointed needles and work back and forth in rows. When you reach the end of a row, you turn your project over and work back. However, in circular knitting, you use different kinds of needles that allow you to keep knitting in one direction around the outside of your project (see the “Needles for Circular Knitting” section later in this chapter). The knitting develops in a spiral, and you normally do not turn the work unless you are performing special shaping techniques. Circular knitting is therefore counted in rounds instead of rows.
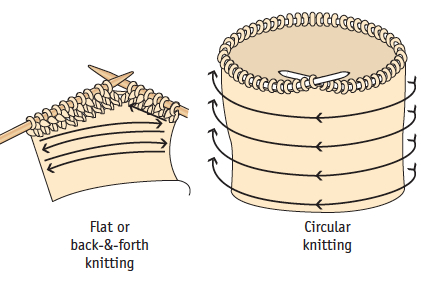
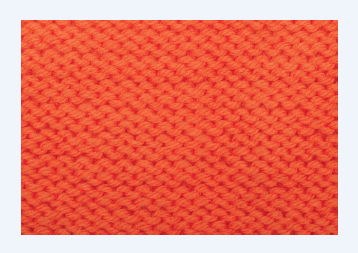
Because the right side of your work is always facing you, you work most stitch patterns differently in the round than when working flat. For instance, when working flat, you create the stockinette stitch by knitting each right-side row and purling each wrong-side row, as shown here. However, in circular knitting all rounds are right-side rounds, so you must knit every round to create a stockinette fabric. You create garter stitch in flat knitting by knitting a right-side row and then knitting a wrong-side row. However, when working garter stitch in the round, you must knit one round and then purl the next. This may sound complicated now, but once you try circular knitting, you will quickly get the idea.
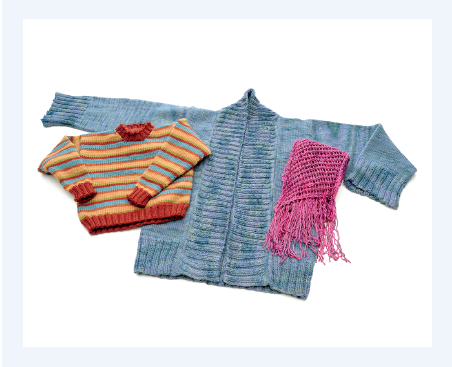
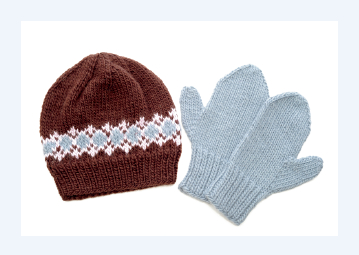
A lot of things can be knit in the round; in fact, most things can be. Any item that is made up of a tube of some sort lends itself well to being worked in the round. This includes garments such as hats, socks, mittens, and skirts as well as household items and accessories such as purses, tote bags, pillow covers, wine bottle covers, yoga mat bags, and a variety of cozies for digital devices.

With more complicated projects that consist of many connected tubes, such as pullovers or gloves, you can work in the round with additional shaping. You can even work projects such as cardigans, scarves, and shawls in the round and later cut them apart (a process called steeking; see Chapter 9 for details).
The Pros and Cons of Knitting in the Round
There are many advantages to circular knitting, which is why I choose to knit my projects in the round whenever I can. However, as with everything in life, there are certain aspects of circular knitting that some people see as drawbacks. I strongly believe that the benefits of circular knitting outweigh any small challenges, especially since those challenges are so easy to overcome. I think you will agree with me.
Advantages of Knitting in the Round
Less Purling
Some knitters dislike purling. Depending on your style of knitting, which is a topic that could fill a whole other book, purling can be a little slower than knitting. If you often work in stockinette and dislike purling, then you will love circular knitting. Since you work in a spiral around the outside of the piece, when working in stockinette you can just knit, knit, and knit some more. It can be quite relaxing to knit in the round on a stockinette project!
Less Seaming
Another benefit of working in the round is that you don’t have to do as much seaming, and in some instances no seaming at all. Take socks or mittens, for example: if you work them as tubes with some shaping here and there for a thumb or a heel, then your seaming will be nonexistent. Many types of garments are really much more comfortable when constructed without seams, such as socks, mittens, hats, and, in my opinion, sweaters. Seams can be stiff and bulky, making garments uncomfortable in places where there is a lot of friction, like underarms or cuffs.
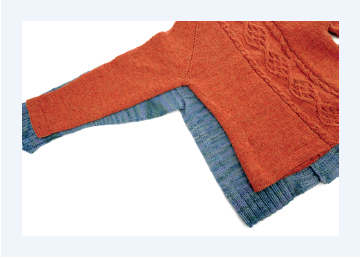
In circular knitting, if you knit the sleeves of a sweater in the round, you don’t need to seam them up when you are done. If you knit the body of the sweater in the round, you can easily attach the sleeves while you are knitting the sweater, instead of having to sew them in afterward. You will see examples of attaching sleeves to a garment in progress in Chapter 8, but the idea is that by knitting pieces as tubes, you can eliminate or lessen the need for seaming, saving yourself a lot of time and creating a garment that is more comfortable to wear.
Right Side Always Facing You
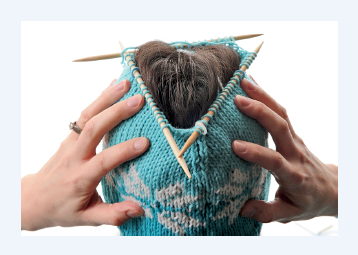
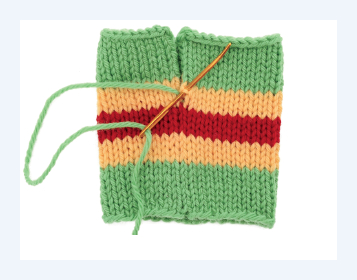
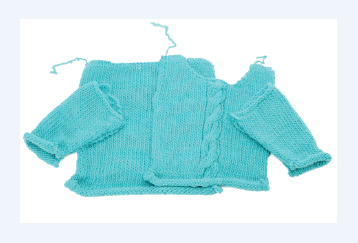
In most cases, circular knitting means that the “right” or public side of the work is facing you. When working with stranded colorwork, circular knitting can make it easier to track your pattern. Working with the design facing you, such as with a cable panel like the one shown here, helps you keep the different colors where they are supposed to be. The same is true of any patterned project, such as lace, cables, or knit-and-purl patterns. With the right side always facing you, the path of a charted pattern is simpler to follow, which means fewer mistakes.

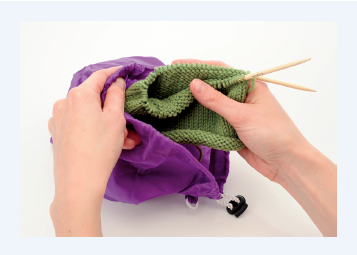
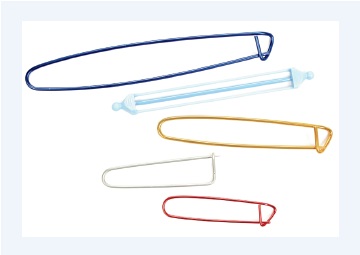
Portability
Many knitters find projects worked in the round, especially those knit on circular needles, to be more portable than those knit on straight needles. The flexible cable helps a project fit readily into your knitting bag. When working with circular needles, you can slide the stitches to the center of the cable, where they are less likely to slide off the needle tips. For added protection, you can use a simple rubber band to hold the two needle ends together, although in most cases this extra step isn’t needed.
Ease in Checking Fit
One of the nicest benefits of knitting in the round is that you can try on garments as you go, making adjustments as needed. For instance, when knitting a sleeve in the round, it’s easy to slip it on and check the length. However, if you worked flat, you would have to pin or temporarily seam the sleeve together before trying it on. Working a hat in the round allows you to try it on to check the fit: both the circumference of the brim and the depth of the hat. Instead of measuring and wondering when to stop, trying on the item ensures that you get a better fit.
More Consistent Gauge
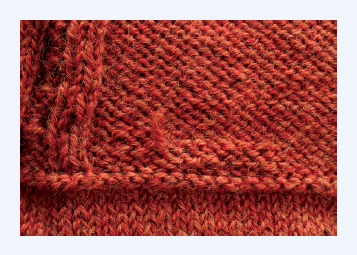
Some people knit and purl at different tensions or use a bit more yarn when they purl. As a result, their gauge can be inconsistent when working an item in flat, back-and-forth knitting. This is sometimes referred to as rowing out. When working in stockinette stitch, this appears as a slightly shorter row of knit stitches alternating with a slightly elongated row of stitches. Knitting in the round corrects this problem by allowing you to always be working on the outside of the piece.
Comfort and Ergonomics
Knitting a heavy project on single-pointed needles can place a lot of strain on your hands, wrists, and elbows as the weight of the project hangs from the distant ends of your straight needles. However, this is less of a problem with circular knitting because the project hangs from the cable, so the weight is more centralized. The same holds true for objects knit on double-pointed needles. As you knit, the weight of the project falls from the needles straight down into your lap.
Knitting Two-at-a-Time
Working with the technique commonly called “magic loop” (see Chapter 2), you can knit more than one item at a time. My books 2-at-a-Time Socks and Toe-Up 2-at-a-Time Socks both explain this technique in detail. You can expand the concept from socks to anything that you knit as a tube and that you need two of—sleeves, mittens, baby booties, and so on. When finished, items that you construct in this way are exactly the same size. Knitting things at the same time also eliminates the need to go back and repeat the work you’ve just done.
Less Row Counting
When working a sweater flat, you must count the rows on the front and back or carefully measure and match their lengths to ensure that the pieces will match up when you seam them. However, with circular knitting, you can knit the body of a sweater in one piece, so there’s no need to worry about working the same number of rows for the front and back.
Disadvantages of Knitting in the Round
Even though “no seams” is one of the best parts of circular knitting, it can also cause a few difficulties. Fortunately, you can easily overcome these challenges.
No Seams in Which to Hide Ends
In flat knitting, seams give you a place to hide the ends of yarn when changing colors or attaching a new ball of yarn. Since there are no seams in circular knitting, there is also “no place to hide.” This means you must be a little tidier when weaving in your ends or use an alternative method such as spit-splicing or a Russian join to eliminate ends altogether (see Chapter 3 for details about joining new yarn in circular knitting). However, I see this as a good thing; the seams in flat knitting can quickly become overloaded with yarn ends, which can create bulk.
No Side Seams On Sweaters
Some people object to knitting sweaters in the round because they actually want seams. They feel that side seams add definition and stability to a sweater, or they just prefer the look of a sweater with a side seam. It is true that seams can prevent sagging in some very stretchy stitch patterns. However, if you want to make the appearance of a seam or desire added stability in a particular project, there are ways to do that while still knitting in the round. You can create a false seam in the location where a seam would naturally fall in a garment knit back and forth (see Chapter 3). A false seam gives both the appearance and the stability of a seam.
Jogs on Horizontal Stripes
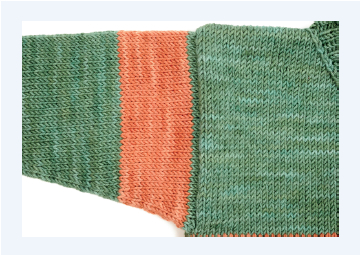
In flat knitting, you work horizontal stripes and colorwork patterns back and forth in rows. When you seam the piece later, you can match up these stripes nearly exactly on each side to make each stripe appear to be a perfect circle. It’s a fussy business, but you can do it.
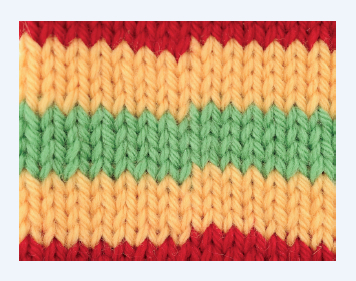
When you work horizontal stripes or colorwork patterns in the round, you are really working them as spirals. This means that the last stitch you knit at the end of a round will appear raised above the first stitch of that round. This creates a little stairstep called a “color jog” whenever you change colors. Fortunately, there are techniques to compensate for this (see Chapter 3). A jogless jog eliminates both the visible color change and the need for fussy post-knitting color matching in seams.
Large Projects Can Become Unwieldy
Knitting a large project, such as a pullover, in the round can get heavy. Some people therefore prefer to knit large items like this in pieces, which lessens the weight and increases the portability. However, remember that if you knit a sweater in the round, there is no, or nearly no, seaming when you are done. And this extra bulk falls into your lap rather than putting additional strain on your hands, wrists, and elbows. I’m very happy to work with a few extra ounces of yarn in my lap in exchange for all the benefits that circular knitting brings.
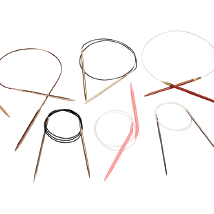
Needles for Circular Knitting
You use two types of needles in circular knitting: double-pointed and circular. Although some types of projects are more easily worked using certain needles, the needle you choose is largely a matter of personal preference. The information below can help you make informed decisions when buying needles for circular knitting.
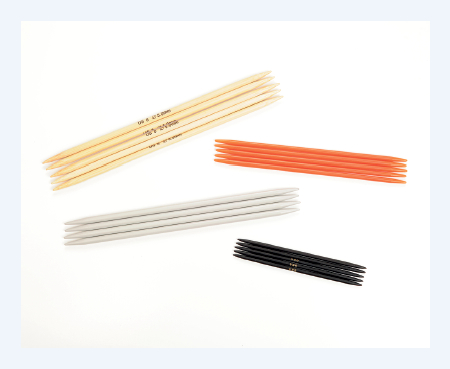
Double-Pointed Needles
Double-pointed needles, commonly called dpns, are straight needles that are pointed on both ends. They are good for working on projects with a small circumference, such as mittens, socks, or the fingers of gloves. You divide your stitches among the needles (sold in sets of four or five) and work in a continuous spiral from one needle to the next, forming a tube of knitted fabric.
NOTE: I prefer sets of five because I am notorious for losing needles. The fifth needle is like an insurance plan—if I lose one, I still have the other four to work with.

Sizes
Double-pointed needles are available in all standard needle sizes ranging from tiny 8/0 (pronounced “eight-ought”) to very large US 36 (20mm).
Sold in lengths ranging from 4 to 16 inches, dpns are most commonly found in 5- to 8-inch lengths. The shortest needles can be uncomfortable to hold and are best suited to working the fingers of gloves and other items with a small circumference. You can use long dpns for working sweaters or other large projects, but they can be unwieldy.
Materials
Like straight needles, double-pointed needles are available in a wide range of materials to suit individual tastes and needs. You can find them made of plastic, aluminum, steel, bamboo, and various types of wood. The very smallest sizes are available only in steel; in other materials they would likely break.
For beginners, I highly recommend bamboo or unpolished wooden needles. The slight texture on the surface of these needles helps keep the stitches from accidentally slipping off the ends. Plastic dpns also have some surface friction for holding your stitches and are lightweight. If you’re looking for speed, then metal needles are the way to go. Their slick, polished surface lets the stitches move quickly on the needles. However, metal dpns can be relatively heavy, causing them to occasionally slip from your work, especially if you are a loose knitter.
Double-Pointed Needle Recommendations
For beginning circular knitters who are working on mittens, socks, hats, and similar items, I recommend a five-needle set of wooden or bamboo needles. Good choices include Clover bamboo needles and Brittany birch needles. To treat yourself, try a set of DyakCraft’s Darn Pretty needles, which are made from a laminated composite wood product and are available in a wide range of colors, or Blue Sky Alpacas’ reclaimed Dalbergia Rosewood needles. As you gain skill and confidence with knitting in the round, consider experimenting with other needles.

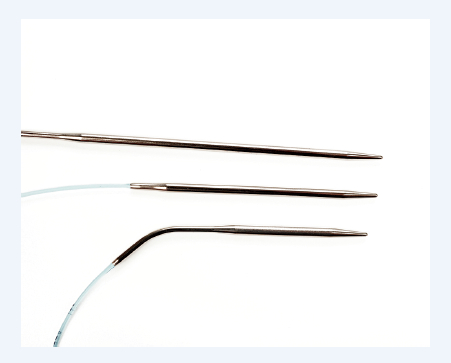
Circular Needles
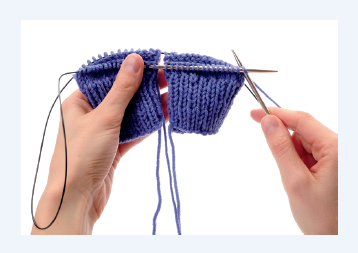
A circular needle consists of two needle tips connected by a thin cable. You typically use circulars to knit projects that have a circumference of 18 or more inches. However, you can use them in creative ways to knit smaller circumferences. The length of the circular you need will depend on which method of circular knitting you are using, as well as the circumference of your intended project. I will explain this further in Chapter 2.

Sizes
As with double-pointed needles, circular needles are available in all standard sizes. However, they are not easy to find in sizes smaller than US 0 or larger than US 19. Circular needles come in many lengths, ranging from 9 to 60 inches. This measurement includes the length of the needles, not just the length of the cable.
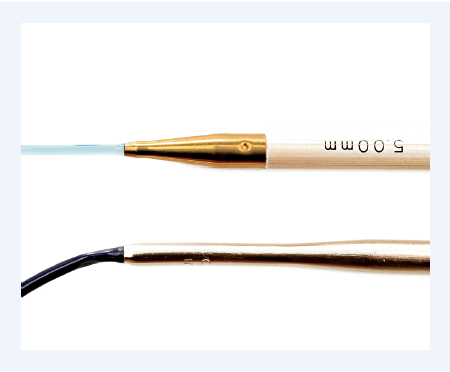
The length of the needle tip varies with the length of the entire circular needle: a 16-inch circular typically has a tip of about 31⁄2 inches, while a 40-inch circular typically has a tip of about 5 inches. Some people prefer to work with long circular needles because there is more needle tip to hold.
Materials
The tips of circular needles can be made from a variety of materials, including wood, bamboo, metal, plastic, and even glass. The cable connecting the tips is commonly made of plastic, nylon, or silicone. Some cables are very flexible, while others maintain some stiffness, making them inappropriate for some methods of circular knitting.
The point where the needle and cable meet is referred to as the join. A smooth join is important in a circular needle, because it means your stitches won’t snag as you slide them from the cable onto the needles, making for a more pleasant knitting experience.
Metal and polished wood needles are slick and smooth, which means that stitches slide faster along the needle. This is especially true of needles with a nickel plating, such as Addi Turbos. Bamboo, plastic, and unpolished wood needles have more texture and drag to help your stitches stay in place. These can be a better choice for beginning knitters or when working complex lace projects. Once you have built up your confidence with a slightly textured needle, you can build your speed with super-slick ones.
|
TIP The shortest circular needles (9 inches) have a needle tip that is only 2 inches long. Most people find these needles uncomfortable since there is very little to hold onto. They require you to grasp the needle with just a few fingers, which can lead to hand cramping. I find it much easier to use double-pointed needles or other methods to work such small circumferences (see Chapter 2). The only way to know what works best for you is to experiment with many needle types. |
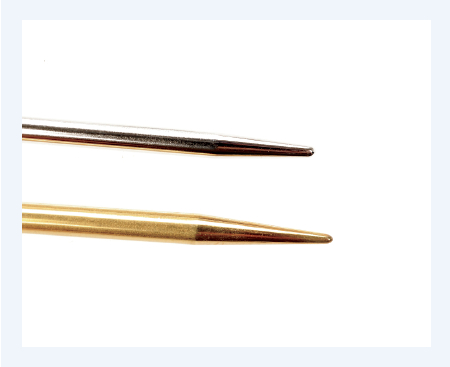
The tips of circular needles range from blunt to pointy. Pointy tips are great for working cables and lace, as they more easily penetrate tight stitch configurations. However, they are more likely to split and snag your yarn. For that reason, some people prefer blunter tips, especially when working plain stockinette or simple stitch patterns.
Versatility
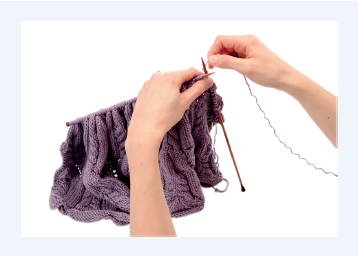
Circular needles are very versatile, making them great multipurpose tools. You can use them to work items in the round or flat. To use them for flat knitting, you cast on the stitches required for the intended project and, instead of joining the work (as shown in Chapter 2), you simply turn the work around as if you were using straight needles and work back across the same row. This ability to work with circular needles for back-and-forth projects makes them particularly useful for large, flat items such as afghans or shawls.
|
TIP Extra circulars in short lengths are handy as makeshift stitch holders. You can use spare long circulars to spread out the stitches of a work in progress, making it easier to assess your work. |
Circular Needle Recommendations
Skacel Addi circulars are my favorite needles. Although they cost more, their quality is well worth the investment. The join on Addi circular needles is barely noticeable, and they have a pliable cable. They come in three types: Addi Natura, Addi Turbo, and Addi Lace. Addi Natura needles are made of bamboo with a moderately blunt needle tip and are excellent beginner needles. Addi Turbos are made of nickel-plated brass and are very smooth and fast. They are a great choice for knitters who have experience with circular knitting and are looking to increase their speed. Addi Lace needles are made of polished brass and have a pointy tip that is perfect for working lace or cable projects.
Inox makes two types of circular needles: Inox and Inox Express. Both are affordable and available in yarn shops and through online retailers. The former have gray-coated aluminum needle tips with a clear plastic cable. The coating on the needle creates some friction, making it a great option if you are learning to work in the round. However, the cable is not very flexible. Inox Express circulars have nickel-plated needle tips with a flexible black cable and a smooth join. These needles are among my favorites for their speed and affordability.

Clover Takumi bamboo circular needles are affordably priced and are available in many retail locations. Because they are made of bamboo, they are excellent needles for a beginning circular knitter. However, the join on these circulars can sometimes catch your work.
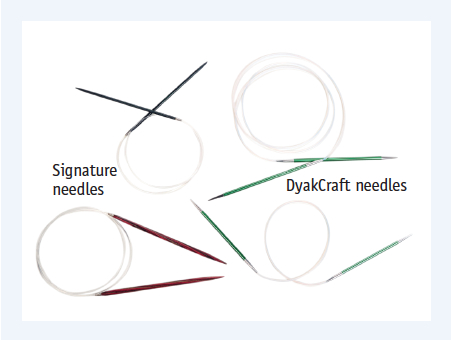
Many other needles are on the market—so many that I could probably devote an entire chapter to the topic. Of note, Signature Needle Arts’ precision-made metal needles and DyakCraft’s colorful, hand-crafted wooden needles qualify as luxury tools; they are a delight to hold in your hands and a joy to knit with. These needles make a wonderful gift that you can give to yourself.
Crystal Palace and KA both produce high-quality bamboo circulars with pliable cables.
HiyaHiya makes affordable metal circulars that are great if you are on a budget.
Kollage makes circulars with square needle tips, which some people find to be more comfortable to hold than traditional needle tips, especially in the larger sizes.
|
TIP Experimenting with different types of needles is the best way to determine what works best for you. This doesn’t need to be a huge up-front investment. Buy one set at a time and try them for a while before adding another set in a different size and length. Over time, you will accumulate a variety of needles that are suitable for different situations; you will also discover which are your favorites and learn what’s best for any given project. |
Interchangeable Circular Needle Sets
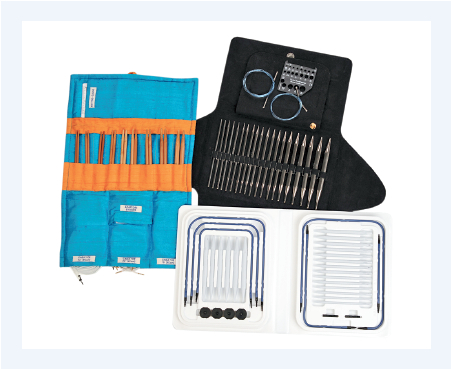
Circular needles also come in interchangeable sets that enable you to “build your own needle” out of the included needle tips and cables. These sets are available in a variety of materials and feature different methods of connecting the cables to the needles: some turn and click, some push and click, and some screw on and are tightened with a tool.
Most sets contain multiple cables of various lengths with pairs of needle tips in sizes from US 4 to 11. Interchangeable needle set manufacturers usually offer additional needle tips and cables for separate purchase. However, design limitations prevent interchangeable sets from including needles smaller than a US 4; below that size, the needles are too fine to be connected with an interlocking mechanism.
Other details vary between sets. Some allow the knitter to join multiple cables together to increase the length of the needles (great for knitting very large circumferences or for trying on a sweater knit in the round). Most come in a case that’s useful for transporting your tools. All sets have caps that you can place on the ends of a cable to create a long stitch holder or use to convert the circular needles to very long “straight” needles (a cable with a needle tip on one end and an end cap on the other).
|
FYI Interchangeable needle sets are available at a range of price points from the very affordable Denise plastic set to the luxurious Lantern Moon Ebony set. My favorites are WEBS Interchangeable Bamboo Needles and Addi Turbo Clicks. An interchangeable needle set can be a great value. For an initial investment of about $50 to $200, you are buying the equivalent of about 27 circular needles. Also, buying one of these sets means that you always have the right needle on hand for the job. |
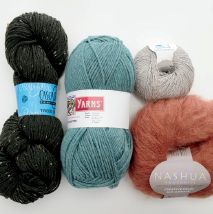
Basic Yarn Information
With so many yarns to choose from, it’s easy to be overwhelmed. Here is some basic information about yarn to get you started.
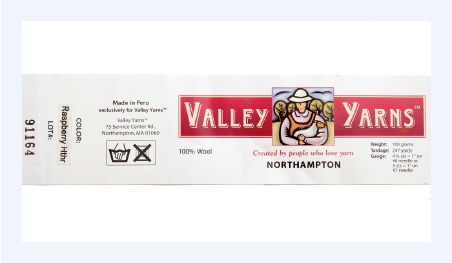
Ball Band Information
The ball band is the label that comes on a ball or skein of yarn. This label gives information such as the manufacturer, name of the yarn, fiber content, yardage, weight, washing instructions, and suggested gauge and needle size. It may also include the color and dye lot. When buying more than one ball of the same color, be sure to purchase yarn from the same dye lot.
Yarn Weight
Yarn is available in a variety of weights. Knitters interchangeably express yarn weight in terms of stitches per inch and its weight name. Some common yarns for knitting are:
1 lace (8.25–10 stitches/inch)
2 fingering (6.75–8 stitches/inch)
3 sport (5.75–6.5 stitches/inch)
4 DK (5.25–6 stitches/inch)
5 worsted (4–5 stitches/inch)
6 chunky (3–3.75 stitches/inch)
7 bulky (1.5–2.75 stitches/inch)
Shawls and other lacy items are often worked in lace- or fingering-weight yarn. Socks and baby garments are best knit in fingering-weight yarn. Fingering-weight yarn is also an excellent choice for detailed colorwork items. Sweaters are most often knit out of DK, worsted-weight, or chunky yarn. Bulky yarns are best for very warm outerwear. You can knit accessories such as hats, mittens, scarves, and bags in any weight of yarn to good effect.

Fiber
Yarn is also available in a variety of fiber types:
Wool and wool blends are the most common and are a good all-around choice. They are elastic, durable, and warm.
Mohair and alpaca are other commonly available animal fibers. They lack the elasticity of wool but have excellent heat-retaining properties.
Cotton yarns are strong and durable but lack the elasticity of some other fibers. They are good for warm-weather garments.
Acrylic, sometimes manufactured to replicate the qualities of wool, is a good alternative if you are allergic to animal fibers. It is strong and somewhat elastic, but lacks the warmth of wool.
Ply
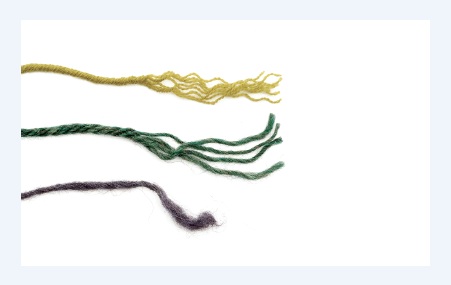
Yarns are made up of spun strands of fibers. Each strand of spun fiber is called a ply. Plied yarns are made up of multiple strands of these spun fibers, while single-ply yarns are made of only one strand. If you cannot find information about the number of plies on the yarn label, you can pull out an inch from one end of the ball, untwist the plies, and count them.
The Best Yarn to Use While Learning
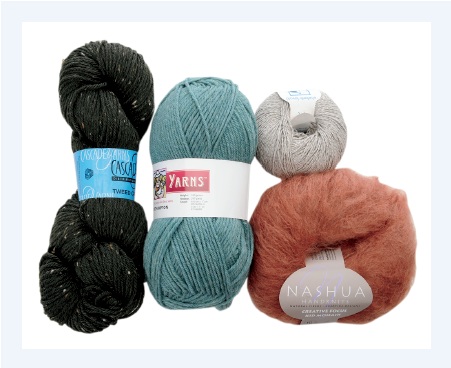
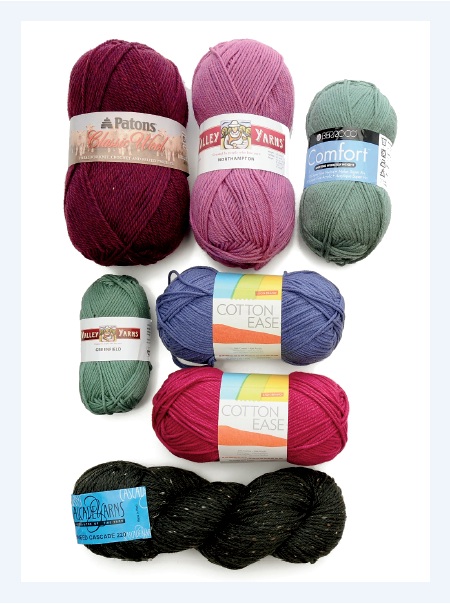
You can use any type of yarn for circular knitting, but some types are better than others for learning purposes. To learn circular (or any) knitting techniques, I recommend the following:
• Work with a worsted-weight yarn. Its size makes it perfect for learning new techniques. Thinner yarns can be fiddly and difficult to manipulate; thicker yarns can obscure stitches.
• Work with a smooth yarn. For learning, it’s best to avoid textured, nubby, or furry yarns. It is very important when learning a new technique to be able to see your stitches clearly. Any yarn that obscures your stitches is not a good choice.
• Work with a three- or four-ply yarn. This type of yarn has the kind of stability you need when learning. Single-ply yarns tend to untwist as you knit with them. This can cause the yarn strand to separate and sometimes even break. Yarns with more than four plies usually have very fine strands that can separate and snag on your needles as you knit.
• Work with wool yarn. Wool is elastic, which makes it forgiving of a beginner’s uneven tension. Also, wool’s durability allows you to rip it out and reknit it multiple times. Avoid cotton yarns when learning because they are inelastic and can be slippery. If you are allergic to wool, choose a good-quality acrylic.
• Work with a light-colored yarn. Darker colors absorb the light around them and can make it difficult to see the details of your stitches. Lighter colors reflect light back to your eye. White can be too bright, but a light neutral color, such as natural or tan, is excellent, as are pastels.
Some yarns to consider include Cascade 220, Valley Yarns Northampton, Lion Wool, and Patons Classic Wool. If you have a wool allergy, then consider a good-quality acrylic or acrylic blend, such as Berroco Comfort, Lion Cotton-Ease, or Patons Canadiana.
Other Tools You Will Need
There are some basic knitting tools that every knitter should have on hand. Having the right tools helps you to be prepared for any knitting situation. Try to keep your tools separate from similar household items—you don’t want your knitting scissors or tape measure disappearing into the family junk drawer. With all your tools assembled, you’re ready to begin!
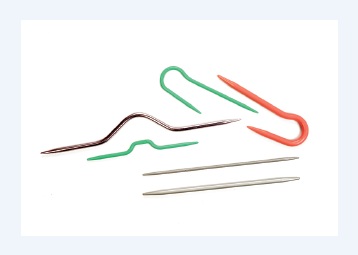
Scissors and Seaming Needles
A sharp pair of small scissors, sometimes called snips, or some other form of yarn cutter is very important. Snips are my preferred cutting tool; however, Clover’s round pendant yarn cutter is particularly handy for travel or for use around small children.
Seaming, or darning, needles are essential for both seaming and reserving stitches.

Stitch Holders
Stitch holders are great for reserving stitches that are not currently being worked. For instance, when knitting a mitten, you might put the thumb stitches on a holder while you complete the hand portion of the mitten. Later, you would move the thumb stitches back to the needles to complete the thumb. I like to use scrap yarn instead of stitch holders; not only is the yarn more flexible, but I also usually have some lying around. A smooth yarn in a contrasting color works best.
Stitch Markers
Stitch markers come in a variety of shapes, sizes, and materials. You can use them for marking off stitch repeats, for designating where increases or decreases occur, or even for reminding you when you have reached the end of a round (especially important in circular knitting). I prefer to use locking stitch markers, as you can also use them for holding pieces in place during seaming. Clover’s are my favorite. There are also a number of cute novelty markers available, which do their job while making you smile, and are therefore worth a look.

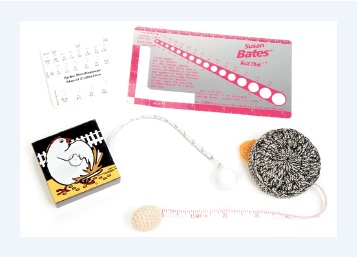
Measuring Tools
A retractable tape measure is my favorite tool for meas-uring the length of knitted items. They are inexpensive, flexible, and readily available. They come in a variety of shapes from simple, round tape measures to novelty shapes.
A needle and stitch gauge is handy both as a measuring device for determining gauge and to ensure that you’re using needles of the correct size. These range from the simple Susan Bates Knit Chek to Goose Pond’s brass sheep-shaped gauge, among others. Choose a gauge that has at least a 2-inch measuring window.
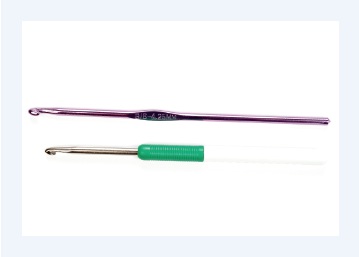
Crochet Hook
You should have at least one crochet hook, even if you can’t crochet. A size E hook is a good all-purpose tool. You can use it for fixing mistakes, such as dropped stitches, or for picking up stitches along the edges of your work.
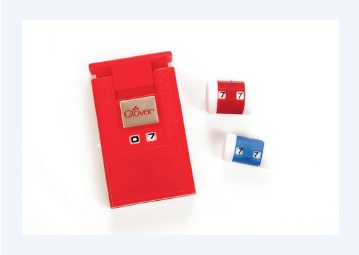
Row Counters
It’s important to have on hand a pen and paper or a row counter to keep track of your work. Row counters are available in a variety of types. The simplest is a rotating counter that sits directly on your knitting needle. After each round, you turn a small dial to change the current round count in a small window. Clover makes a counter called a Kacha-Kacha that is quite a bit larger, and you click it each time you work a round. There are even a few row-counting applications available for smart phones!
Cable Needles
A cable needle is a short needle that you use to temporarily hold a small set of stitches out of the way while you work the next set of stitches. You work the stitches on the cable needle next, creating a twisted portion of knitting called a cable. Cable needles come in different sizes, shapes, and materials. The size of the cable needle should be the same as or smaller than your working needles. If you don’t have a cable needle, a double-pointed needle of the same or smaller size can easily serve as a substitute.
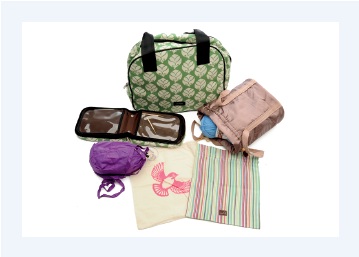
Knitting Storage
You can keep everything in one easily accessible location by using a knitting bag, bin, or toolbox. Storage for your tools and projects does not need to be expensive; simple, economical plastic bins make excellent storage. A tote bag for carrying your knitting with you is handy, but it does not need to cost a great deal. For example, you can reclaim a discarded purse or diaper bag and turn it into a knitting tote.
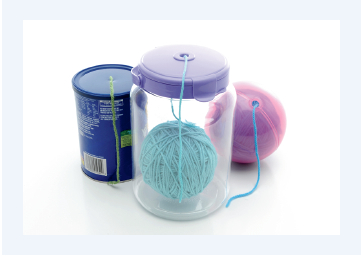
Yarn Containers
It is important to manage your yarn while working on a project. Again, although there are containers created with the sole purpose of managing your yarn and keeping it clean and safe, you can recycle or repurpose many household items to hold yarn. The container should allow the yarn to move freely off of the ball while protecting it from dirt and dust and curious hands or paws.
Materials for Taking Notes
A few basic office supplies are handy for taking notes, planning projects, and tracking changes that you have made to an existing pattern. Self-stick note pads make referencing different pages of books or magazines much simpler. Colored pencils and graph paper help with planning stripes or colorwork projects. It is important to take notes as you work so that you can re-create any changes you’ve made as well as make note of any tricky areas you come across when working with a pattern.

|
TIP There are so many options available for knitting bags and containers that it is easy to feel overwhelmed. Take your time, talk to other knitters, and make a good investment. I have had my favorite bag, a Lexie Barnes Lady B, for five years and I still love it. |