FROM NOTES ON THE PERFECT INGREDIENTS AND INDISPENSABLE EQUIPMENT to the secrets I’ve learned from years of baking, here’s everything you need to know to make madeleines your special signature treat.

WHAT, EXACTLY, IS A MADELEINE? Traditionally madeleines are described as“small, shell-shaped cakes made of flour, eggs, sugar, and butter and baked in molds.” Stories vary about how and when these adorable French tea cakes were born, but most experts agree that they’re named after Madeleine Paulmier, a pastry chef from Commercy, a town in the Lorraine region of France. Some claim that Paulmier created the sweet treat in the nineteenth century, but legend has it that she baked them as early as the eighteenth century for Stanislaw Lezczynski, the Duke of Lorraine, and his son-in-law Louis XV. According to that story, the French king liked the sponge cakes so much that he named them after her.
Regardless of when they first came out of an oven or how they got their name, the recipe quickly spread. These tasty tea cakes became a part of French culture and even literature. The madeleine’s place in literary history was assured thanks to Marcel Proust, the writer, essayist, and critic best known for his autobiographical novel, À la recherche du temps perdu, published in seven parts from 1913 to 1927. (The book was translated into English as In Search of Lost Time, also known as Remembrance of Things Past.) Proust used examples to contrast voluntary memories—those retrieved by “intelligence” and produced by making a conscious effort to remember people or places—with involuntary memories, which, according to Proust’s narrator, come naturally when the moment one remembers is magical.
To explain the latter, Proust describes biting into a childhood snack. In the now famous “episode of the madeleine,” he writes:
No sooner had the warm liquid mixed with the crumbs touched my palate than a shudder ran through me and I stopped, intent upon the extraordinary thing that was happening to me. An exquisite pleasure had invaded my senses, something isolated, detached, with no suggestion of its origin. And at once the vicissitudes of life had become indifferent to me, its disasters innocuous, its brevity illusory—this new sensation having had on me the effect which love has of filling me with a precious essence; or rather this essence was not in me it was me. … Whence did it come? What did it mean? How could I seize and apprehend it? … And suddenly the memory revealed itself. The taste was that of the little piece of madeleine which on Sunday mornings at Combray (because on those mornings I did not go out before mass), when I went to say good morning to her in her bedroom, my aunt Léonie used to give me, dipping it first in her own cup of tea or tisane. The sight of the little madeleine had recalled nothing to my mind before I tasted it. And all from my cup of tea.
We’ll never know the exact recipe for the madeleine so magical that it prompted involuntary memories for dear Monsieur Proust. But one thing I am sure of is that the recipes in this book are so scrumptious, they will prompt you to make your own sweet memories for years to come.
I’VE HAD PLENTY OF YEARS OF TRIAL AND ERROR, which is why I want to share all the tips and tricks I’ve learned along the way. Follow this advice and your madeleines will be perfect, starting with the very first batch.
GET YOUR MISE EN PLACE IN PLACE
Mise en place (pronounced meez-ahn-plabss) is a French term that translates literally as “set in place.” Chefs around the world use this phrase to describe the process of organizing what you need for a recipe before you start to cook or bake.
For madeleines, you’ll need to collect the pans, bowls, whisks, ingredients, and other utensils or equipment called for in the recipe. Next, prepare any ingredients according to the descriptions in the list—for example, toast nuts, chop and weigh chocolate, grate a lemon, and so on. Getting your mise en place in order before you delve into any recipe is the best way to avoid forgetting an ingredient or a part of the process. The result is a smoother, more enjoyable baking experience.
WHEN IT COMES TO THE STUFF THAT GREAT MADELEINES ARE MADE OF, fresh is always best. Extracts and seasonings lose their potency over time; juicing a lemon on the spot will mean a bolder citrus flavor than would be had from bottled lemon juice. In my opinion, it is much better to hold off on baking until you can replace a not-so-fresh ingredient with one of better quality.
The good news is that all the recipes in this book can be made with readily available ingredients, most of which you probably already have in your kitchen. Here’s what to keep on hand, as well as “add-in” items that will allow you to create endless variations.
There is no substitute for the flavor and texture of real butter in baked goods. You’ll need unsalted butter for the sweet madeleines and either salted or unsalted for the savory varieties. In a pinch, however, you can use either in all the recipes. Just be sure to remove butter from the refrigerator 30 to 60 minutes before baking if the recipe calls for whipping it with the sugar. You won’t get that “light and fluffy” consistency if you trying to whip butter that’s chilled.
Coating your pans with cooking spray—either regular spray or baking spray with flour—will help ensure that your madeleines fall out of their molds. The spray with flour seems to create a slightly more golden brown madeleine, so that is what I use. If you don’t have spray, coat the molds with melted butter.
SUGARS
Most of the recipes in this book call for white granulated sugar. A few require dark brown sugar, but substituting light brown sugar is fine. (You get a more pronounced flavor from the molasses in the dark variety.) Confectioners’ sugar lightly sifted over cooled madeleines creates a pretty finish. Glittery and colored sanding sugars and crystals can dress up plain madeleines easily and quickly, if that’s what you desire. I sprinkle decorating sugars onto the batter before baking.
You’ll want to use either white or brown large eggs, the most common size available in the United States. The U.S. Department of Agriculture calculates egg size by weight per dozen. Large eggs, which are called for in all the recipes here, weigh in at more than 2 ounces each.
Unbleached all-purpose flour is what I used to develop the recipes in this book. Commercial gluten-free flour mixes can be substituted cup for cup in place of all-purpose flour and will lead to an equally delectable, though slightly grittier, madeleine.
Double-acting baking powder is a leavening agent that helps madeleines rise to a medium bump or higher, depending on the amount the recipe calls for. Replace your baking powder every six months, which is when it loses its efficacy. Traditional madeleines do not call for baking powder; whisking for several minutes aerates the batter so that the heat of the oven helps the cakes rise.
There is no substitute for pure extract, so be sure that the ones you buy don’t say “imitation” or “flavoring.” The most common extract you’ll use in these recipes is vanilla. Vanilla bean paste may be substituted teaspoon for teaspoon for pure vanilla extract; it supplies those wonderful specks that look so pretty in baked goods. See “Resources” for good sources of vanilla.
Two other extracts to consider whisking into your madeleine batter are orange blossom water and rosewater. Either substitute them for the vanilla or use half orange blossom or rosewater and half vanilla.
The recipes in this book call for a range of chocolates, from unsweetened and extra-bittersweet to semisweet, milk chocolate, and white chocolate varieties. You’ll likely find an array of chocolates at your grocery store amid an ever-expanding selection of chips, chunks, and slabs. My advice is to purchase the best-quality chocolate you can afford.
Some of the recipes in this book also call for cocoa powder. You’ll find two types at the grocery store, both of which are unsweetened. Dutch-processed cocoa powder is darker and treated with an alkali to neutralize its acidity. Familiar brands include Droste, Valrhona, Whole Foods Bulk cocoa, and Hershey’s Special Dark. It’s fine to substitute natural cocoa powder for Dutch-processed in most cases, but not the other way around. I like to use Dutch-processed cocoa powder when I want a deep, rich color and flavor. I also use it for sifting over chocolate madeleines as a simple finish before serving. Natural, unsweetened cocoa powder, such as Hershey’s Cocoa, is used when baking soda (an alkali) is called for. The baking soda causes the leavening to occur when the batter is placed in the hot oven because the acidity hasn’t been tempered, as in Dutch-processed cocoa.
The crunchy texture and varied flavors of nuts are fantastic additions to madeleines. Toasting is the first step to achieving superior taste—it intensifies a nut’s flavor and transforms the texture from buttery to crunchy. To toast nuts, place them in a single layer on a baking sheet and bake at 300˚F for 15 to 20 minutes. Every 5 minutes or so, stir with a spatula to ensure even browning.
The right tools will ensure perfect madeleines every time. Here’s a list of the necessary baking equipment, plus a few luxuries that will make you feel like a professional baker.
To bake true madeleines, you need proper molds. The beauty of these special pans is that they come in all different shapes, sizes, and materials. From mini-madeleine pans with nonstick coating to round shell molds in heavy-gauge tinned steel, a range is available at home goods and kitchen supply stores, in baking shops and catalogues, and through many online retailers.
I prefer nonstick pans, which I recommend for both seasoned and novice bakers alike. The nontoxic, nonstick coating allows the madeleines to slip out easily after they’re baked, and washing will be easy and fast. Just remember that nonstick pans still need to be buttered or sprayed with baking spray. Careful pan preparation is key to ensuring successful madeleines.

A fast and reliable method for preparing pans of all kinds—including nonstick types—is to coat the surface lightly with a canned cooking spray. I do this over the sink so it’s easier to clean the excess spray. You can also prep pans with butter. Melt 3 to 4 tablespoons of butter in a small bowl; then use a pastry brush to coat all the nooks and flutes of the shell molds. However you decide to prep your pans, an even coat is crucial for the quick and easy release of the madeleines. Both methods are simple and effective.
Any medium-size microwave-safe bowl will work just fine when making all the recipes in this book. For my quick and easy madeleine method, I recommend using a 2-quart glass bowl or measuring cup (such as Pyrex brand). In addition to being microwave safe, the bowl should have a wide bottom, which prevents tipping when you’re whisking and stirring. A handle is also useful, allowing you to pour batter directly into the molds. You can also use a 1-quart (4-cup) bowl, but the 2-quart (8-cup) size gives you a little more room to whisk. I also love a 2-quart clear glass bowl with a cover; the cover comes in handy when you want to make the batter ahead and chill it overnight.
French-style whisks are my favorite for making madeleines. They are stainless steel and measure about 8 inches long and only 1½ inches at the widest point. The stiffness and narrower width allow thorough mixing at the bottom of the bowl.
I frequently mention using a small offset spatula. These are useful for many tasks: to glaze, blend melted chocolate, apply decorations, and gently nudge madeleines out of their shells. Rubber spatulas are available in many sizes and shapes (and even pretty colors). I use them for folding, mixing, blending, and scraping every last bit of batter out of a bowl. I prefer silicone spatulas, which are able to take the heat when stirring ingredients in a double boiler.
I use a spring-action scoop to transfer batter into molds. I find the scoop is neater and faster than a spoon, and it helps create madeleines of uniform size. Most often I use a 1½-inch scoop, plus a smaller size for mini madeleines.
You’ll need to set hot pans on racks and then place the madeleines on those same racks to cool. I prefer large heavyweight racks. They make it easy to move an entire batch of madeleines from the kitchen counter to the table, where you’ve laid out your decorations.
One surefire way to ensure baking success is to accurately measure ingredients. Measure dry ingredients in good-quality metal measuring cups and spoons; you’ll need 1¼ cup, 1⅓ cup, ½ cup, and 1 cup. Measuring spoons are available in increments of 1¼ teaspoon, ½ teaspoon, 1 teaspoon, and 1 tablespoon.
Liquids should be measured in clear glass measuring cups that have measurements printed on the side. It’s best to fill them on a flat surface and then observe the measurement at eye level to be sure it’s correct.
I have owned several heavy-duty stand mixers. They are remarkably dependable, worth the investment (they last years!), and crucial when it comes to a few of the recipes in this book. If you don’t own one, a handheld mixer will work in its place, because the batter for the madeleines is relatively light and the quantities are small. Another bonus of the handheld mixer: it fits easily into the 2-quart microwavable bowl you’re already using for these recipes, which means one less thing to wash.
So, when should you use a stand or hand mixer versus whisking by hand? Using the mixer adds more air into the batter than hand-mixing does, resulting in a madeleine with a consistency that’s more like cake than a cookie. Therefore, you should use a stand or hand mixer when you want a finer-grain madeleine that has a texture similar to pound or sponge cake.
Using a Microplane for freshly grated citrus zest will change your life! They work so much better than box graters, and you’ll quickly discover that fresh zest is incomparable to dried when it comes to flavor. Microplanes also come in handy for serving. Freshly shaved chocolate, or even a sprinkle of grated lemon, orange, lime, or grapefruit rind, creates a gorgeous finish to a platter of fresh-from-the-oven madeleines.
A timer with a loud bell or buzzer will be the best reminder to check your madeleines. It’s easy to become distracted when baking, so a reliable timer is handy for success.
Batters and glazes can splash and drip, so I always wear an apron to protect my clothes and to set the stage for baking. Oven mitts are essential, and I am fussy about the ones I buy. I prefer smaller sizes that are flexible, allowing me to grab pans more easily. I set them out during my mise en place. There’s nothing more frustrating than searching for mitts at the precise moment the madeleines need to come out of the oven.
THERE’S MORE THAN ONE METHOD TO BAKE MADELEINES. The classic way calls for melting the butter separately, then folding it into a batter of egg, sugar, and flour. This method creates a pound-cake-like madeleine with the quintessential “hump” in the middle. My one-bowl method directs you to first melt the butter and sugar together. Then you whisk the eggs, flavoring, and flour into the same bowl for a quick batter that’s ready to scoop, bake, and serve. Both methods work well, so feel free to experiment and see which one you like best.
The classic batter for madeleines is a genoise mixture. Named after the Italian city of Genoa, genoise is a foamlike cake that’s often used for wedding cakes, sheet cakes, ladyfingers, and petits fours, as well as traditional madeleines. The leavening happens as a result of air being whipped into the egg–sugar mixture, combined with the heat of the oven, rather than through chemical agents such as baking powder or baking soda. The resulting madeleines tend to look like small, plump pound cakes.

1. Place the butter in a 2-quart microwavable bowl. Microwave on low power for 1 to 2 minutes. Whisk to blend and return to the microwave for 15-second intervals until the butter is fully melted. Let cool.

2. Combine the eggs and sugar and warm gently.

3. Beat the egg and sugar mixture until thick and foamy. I suggest using a handheld or stand mixer, which will save time.
4. Add the flour and flavorings, if using.

5. Fold in the melted butter.

6. Scoop the batter evenly into prepared pans.

7. Bake until madeleines puff up and no shiny spots remain in the centers. Remove the pans from the oven, let cool on a wire rack for 2 to 3 minutes, and then carefully remove the madeleines using a small offset spatula.
I’ve developed a nontraditional method that yields equally delicious and successful results. This shortcut was born from the need to speed things up when I was operating a baking business. I found it to be the fastest and simplest way to make hundreds of madeleines that turned out just as tender and lovely as the ones I made using the classic method. Here’s how to do it.
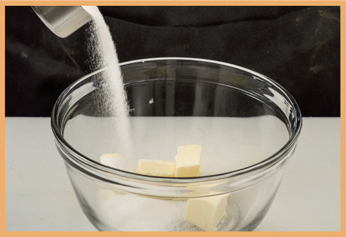
1. Place the room-temperature butter (cut into tablespoon-size pieces), sugar, and chopped chocolate (if using) in a 2-quart microwavable bowl.

2. Microwave on low power for 1 to 2 minutes. Whisk to blend and then return to the microwave for 15-second intervals until the butter is fully melted.
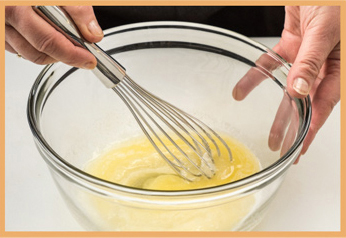
3. Whisk the mixture until it is smooth and the batter falls from the whisk in ribbons. You may also use a hand mixer, which will create a fluffier mixture more quickly.
4. Add the eggs (which should be room temperature) one at a time, whisking vigorously until evenly blended. Whisk for another minute or two to incorporate more air into the batter, which results in a finer crumb.

5. Add any flavorings, extracts, citrus peel, herbs, spices, or liqueurs to the batter. Whisk to blend completely.

6. Stir in the flour just until it disappears into the batter.

7. Scoop the batter evenly into the prepared pans.

8. Bake until the madeleines puff up and no shiny spots remain in the centers. Remove pans from the oven, let cool on a wire rack for 2 to 3 minutes, and then carefully remove the madeleines using a small offset spatula.
FIVE TIPS FOR CREATING PERFECT MADELEINES
I’VE BEEN BAKING FOR MORE THAN 30 YEARS, and I’ve had my fair share of flops even though I’m a professional baker. The most important advice I can offer as you embark on making madeleines is just to have fun. These recipes will help you learn to trust your senses, hit your stride, and relax. Here are five essential tips for creating perfect madeleines each and every time.
1. Use a timer as a guide. It will remind you to check on the madeleines and see how they look, but keep in mind that baking times vary. Those given in the recipes are a range and will depend on your oven and your location. If the batter seems unbaked, wait another minute or two, even if the recipe indicates doneness after a specific number of minutes.
2. Whisk the ingredients for 2 to 3 minutes. This step might not seem necessary, but it’s important to whip air into the batter to get the fine crumb that the madeleine is known for.
3. Let the batter cool before you add the eggs. I know how tempting it is to keep charging ahead when the mixture comes out of the microwave, but if it’s too hot, the eggs will scramble.
4. Use an ice cream scoop instead of a spoon to fill the shell molds. Scooping creates a more uniform size, which means that all the madeleines will finish baking at the same time. If some of the molds are filled more than others, the thin ones will bake more quickly than the plumper ones.
5. Place the pan on a wire cooling rack when it comes out of the oven. The madeleines need to sit for a minute or two before they’re removed from their molds because at this stage they are very tender and may crumble. What’s more, their super-soft spongelike quality means that whatever pattern is on your cooling racks will transfer onto the flat side of the still-warm madeleine.
FOR THE RARE OCCASION WHEN ALL OF YOUR MADELEINES DON’T DISAPPEAR IN A SINGLE SITTING, you’ll want to ensure they stay fresh for as long as possible. Madeleines will keep for 2 to 3 days if wrapped in an airtight container. Wrap them only after they’ve cooled completely, for steam will make them soggy. I also use zip-close baggies to store fresh madeleines or for freezing. Madeleines can be frozen for up to 2 months. Wrap them completely cooled in a freezer-safe container or zip-close bag, layering them between sheets of waxed paper. Defrost the madeleines at room temperature for 2 to 3 hours. You can even pop them briefly in the microwave before serving.