BUTTERFLY lighthouse


To make this house a little different, I decided to slightly taper the sides, front and back. You can, however, cut all the parts square, and the butterflies will be perfectly content.
Cutting the entrace slots is easily done: Simply drill a hole at the top and bottom of the slot locations and cut out the material between the holes. You also can attach a 2″ to 3″-long dowel at the bottom of each entrance opening. The butterflies will land on these and walk into the house. The perch rail inside the house gives the butterflies a place to cling and rest.
To attract the butterflies, paint the house with bright colors and place it in a flower bed or mount it on a post 2′ to 3′ off the ground.
Be sure to read “The Butterfly Environment” in “Attracting Birds, Butterflies and Bats to Your Backyard” for more information about butterflies and butterfly houses.
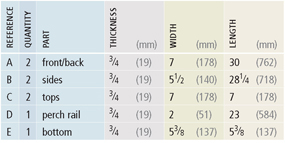

Cut the parts according to the cutting list. Lay out the holes on the front, then drill holes at the top and bottom of each hole location and connect them using a jigsaw or coping saw. The layout of the holes doesn't need to be exact. Just space them evenly on the front.
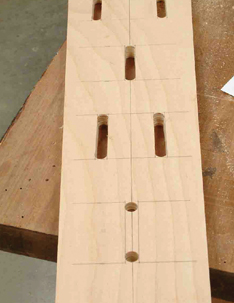
Using nails, attach the perch rail to one side, then attach the sides to the back. Flip the assembly over and attach the front to the sides. Then fit the bottom inside the box and attach it with nails.
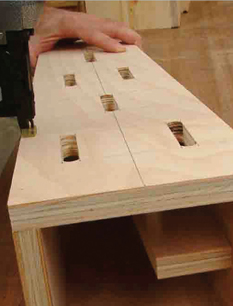
After cutting the miters on the roof parts, tape them together, add glue to the joint and fold it. Then nail this assembly to the top of the box.

Even though the sides have a slight angle, the roof will fit tightly to the box. Paint the outside of the box to seal and protect the plywood.