AMERICAN TREE SPARROW nesting platform
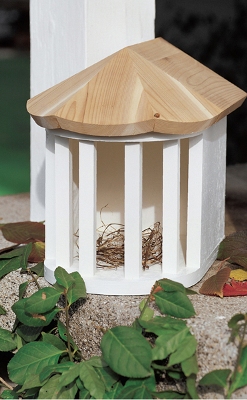
This nesting platform is a fun and challenging project to make. The angled roof parts require some patience to fit together, but that's what these projects are about — having fun and enjoying a challenge.
The columns limit the size of the birds that can use it. If you want to make this for a bird other than the American tree sparrow, simply make all the parts and space the columns accordingly.
Because American tree sparrows nest close to the ground, place the house approximately 2′ off the ground and conceal within vegetation for protection.
AMERICAN TREE SPARROW
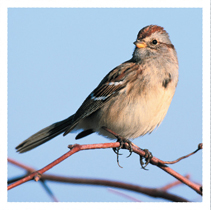
Despite the American tree sparrow's name, these birds actually forage and nest on the ground, and breed primarily above the tree line in the far north. However, they do prefer artificial nest boxes during the winter.
The American tree sparrow is a small songbird with a gray head, a rusty brown crown and eye stripe, two white wing bars, a dark spot in the center of the breast and a rather long tail. They eat seeds, berries and insects, and prefer to live in arctic willow and birch thickets and woodlands. These birds summer in northern Canada and Alaska and winter across the continental United States.
The American tree sparrow can tolerate subzero temperatures when its seed diet provides sufficient calories, thus they can winter where snow doesn't entirely cover the weeds and grasses. No one knows exactly how many American tree sparrows exist, but because they have about 247 million acres in which to breed in northern Canada and Alaska, then approximately 10 million to 20 million pairs should be breeding.
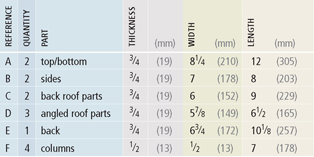

Cut out the side and back parts and nail them together as shown in the illustration.
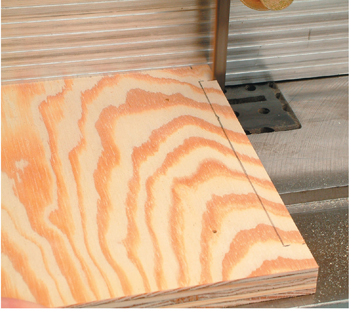
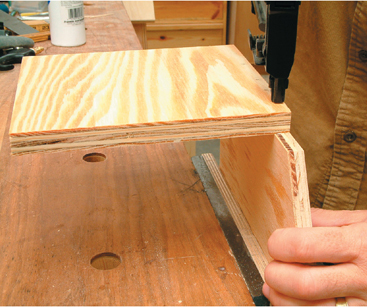
Cut a notch in the top to accept the back. This is easily done on the band saw by first making the two short cuts of the notch.
Make the long cut of the notch by setting the saw's fence to the depth of the notch. Make a skewed cut up to one of the short cuts. Flip the part over and make the second cut to the other short cut.
The waste will fall away from the saw blade with no problem of kickback from the blade.
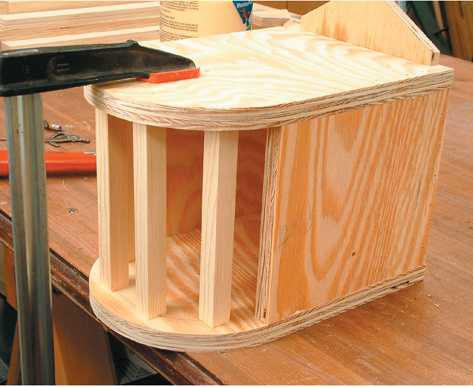
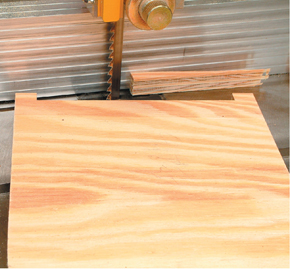
Make the two 30°-angle cuts on the back. Then cut the radius on the top and bottom parts and nail them to the side and back assembly. Then glue and nail the columns in place. Use a clamp to help hold the assembly until the glue sets.
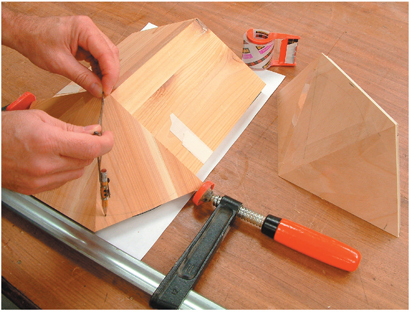
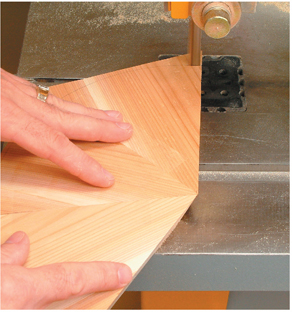
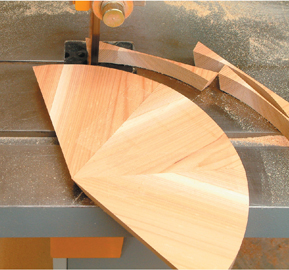
Cut out the two back roof parts. Then cut a 15° bevel on one long edge of each part. Tape and glue the miter joint. When the glue sets, cut out the angled roof parts. Start by cutting a 25½° × 17½°-compound bevel on scrap roof parts. Cut the sample parts until you have the compound angle just right, then cut the actual roof parts. Tape the miter joints and hold the assembly in place next to the back roof parts. Center a compass at the peak of the roof and draw a radius around the angled assembly.
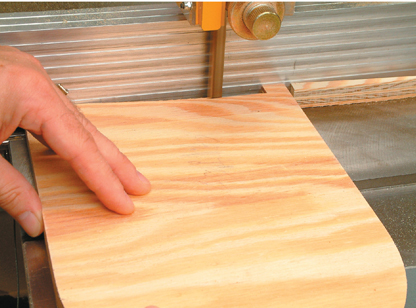
Lay the taped, angled roof assembly flat and cut the radius on the line you drew.
This is a quick and safe procedure.
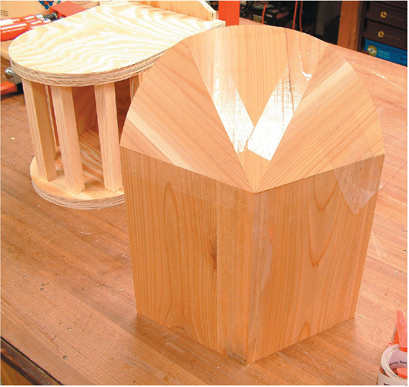
Apply glue to the miters on the angled roof assembly and to the front edges of the back roof assembly. Put the parts together and let the glue set. Then nail the roof assembly to the base assembly.