
3
Putting It All Together
The more you practice various leatherworking techniques, the better your final work will be. Of course, the most enjoyable way to test your skills is to actually make something. In this chapter, we’ll put all the basic techniques from the past chapter together to demonstrate the creation of a belt and a card case. A variety of useful accessories can be created using the same basic techniques, and a photo gallery of them is included at the end of the book.
DEMONSTRATION PROJECT 1: BELT

Tools and Supplies
 Smooth marble, polyester, or other hard surface for stamping design.
 Appropriate surface for punching holes and setting fasteners (Poundo board, linoleum square, or 10-ounce cowhide square).
8- to 9-ounce vegetable-tanned cowhide leather belt strap, 1½inches wide by waist size plus 8 inches. Refer to information on how to size a belt on the next page).
1½-inch heel bar buckle
Three conchos (optional)
Snaps and snap setter
8- to 9-ounce scrap leather for testing stamps
Scratch awl
¼-inch oblong hole punch
¾-inch or 1-inch oblong bag hole punch
Skiver
Size 2 edge beveler
Leather shears
Utility knife
Mallet
Veiner, seeder, and camouflage stamps or stamps of your choice (Craftool V 406, S 705, and C 834 were used here).
Leather conditioner
Gel antique stain
Edge wax and burnishing fabric
Edge Kote
Bone tool
Gum tragacanth
Small bowl of clean water and clean cellulose sponge
Measuring square
Measuring tape
Cotton swabs or wool daubers
Scrap rags
Ballpoint pen
Index card
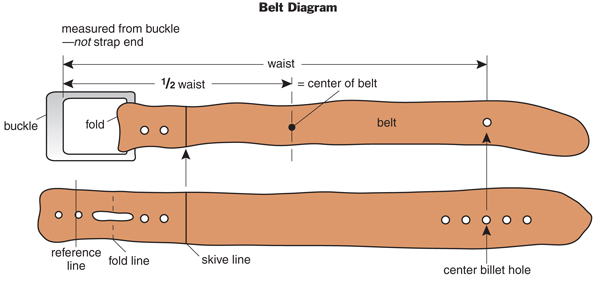
Sizing the Belt

1. Start with a belt strap and center bar buckle.
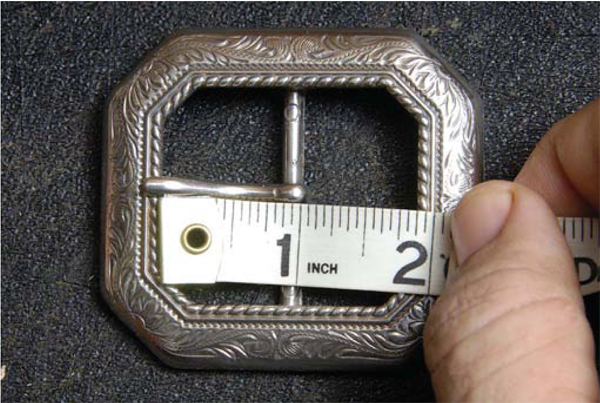
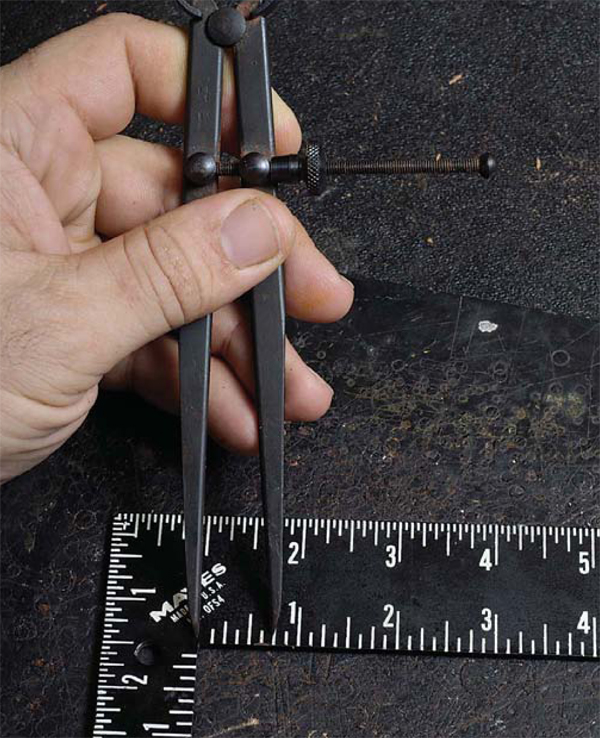
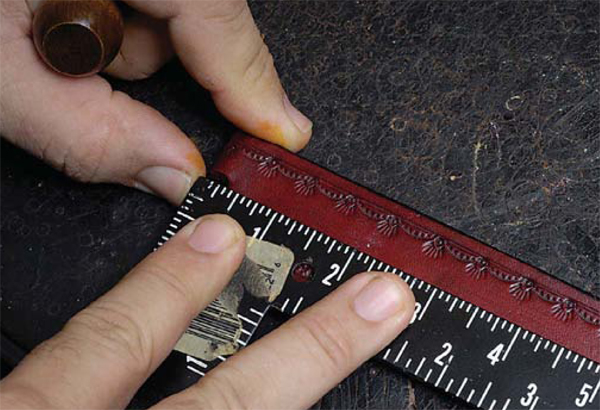
2. Measure the distance from the bar to the inside edge of the leading edge of the buckle.
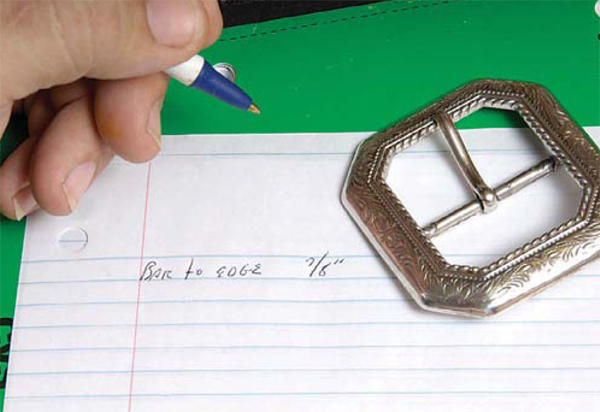
3. Make note of this distance (here, it’s 7/8 inch).
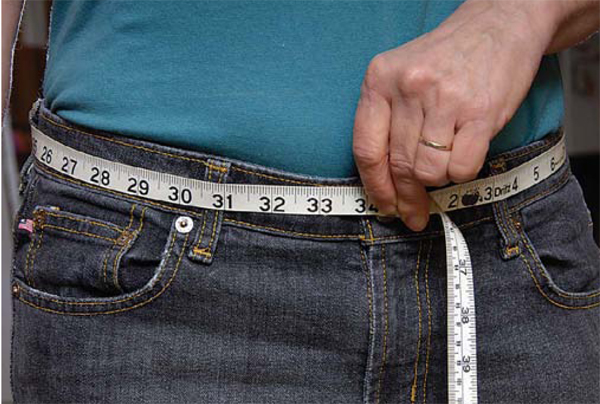
4. While wearing the type of pants the belt will go with, take a measurement around the waist where the belt will be worn.
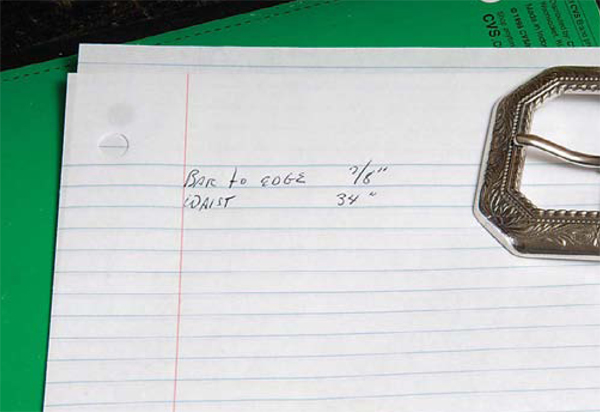
5. Make note of the measurement (in this case, it’s 34 inches).

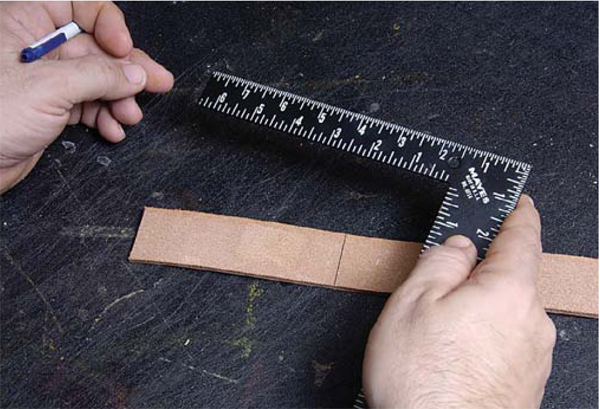
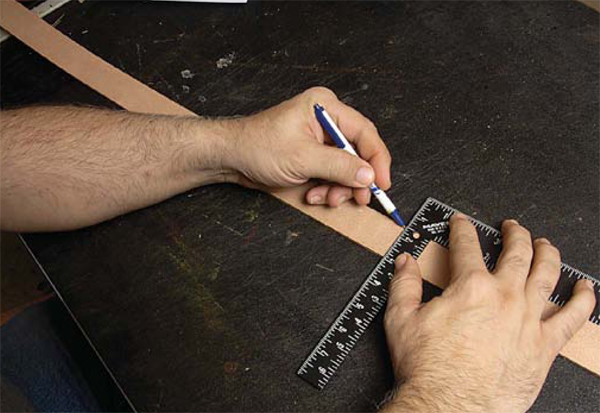
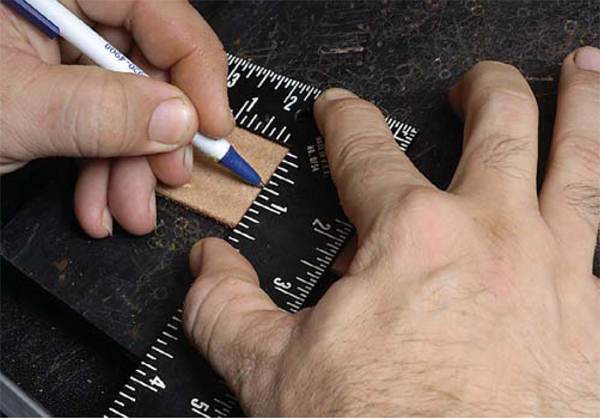
6. To begin with a perfectly square end on your belt strap, use your square to mark a perpendicular line about 1½ inches from the edge. (Here, we are also removing the hole that was used to hang the belt blank in the store.)
7. Use a ballpoint pen on the flesh side to mark the perpendicular line.

8. Use shears to carefully cut along the line.
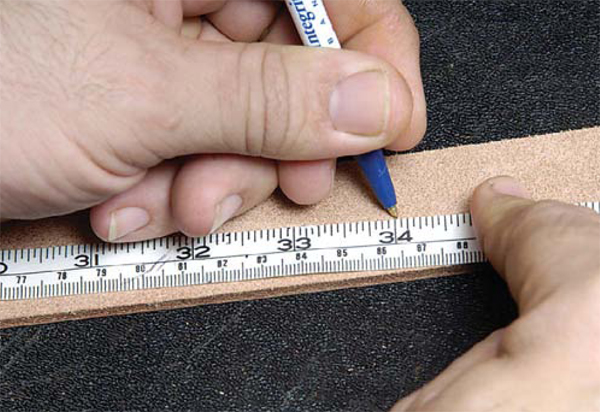
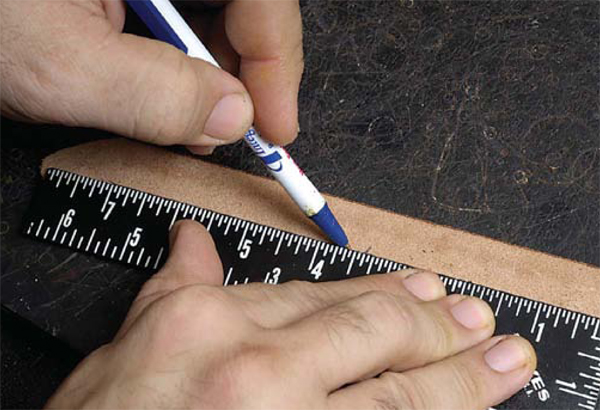
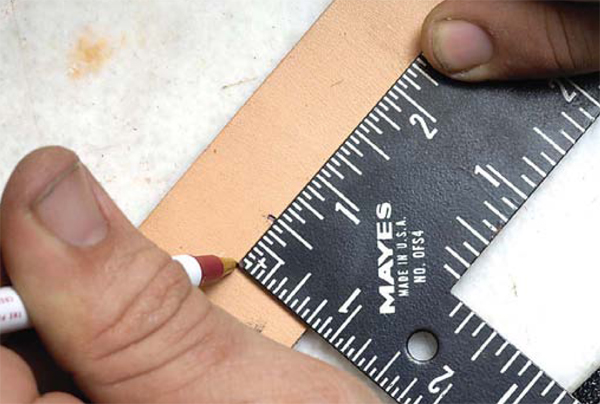
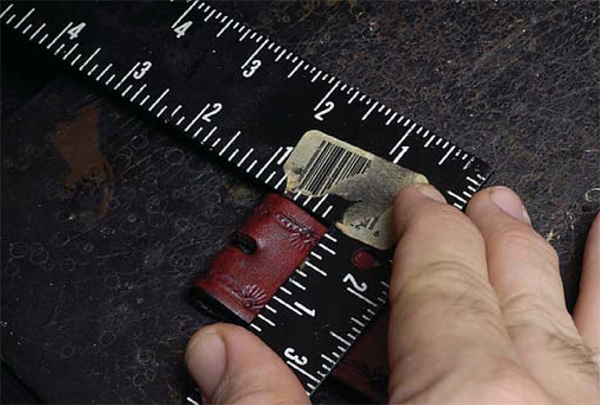
9. Measure 5 inches from the squared end and make a mark with the pen on the flesh side of the leather.
10. Make a perpendicular line at the mark using your square and pen. This line represents the skive line.

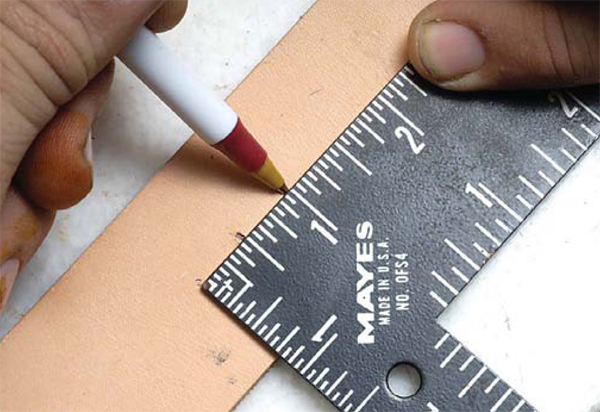
11. From the skive line, make a mark 21/2 inches toward the buckle end.

12. Draw a line at this point. This will be the fold line.
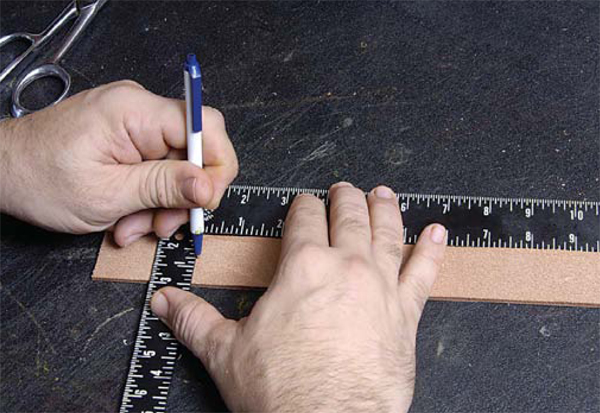
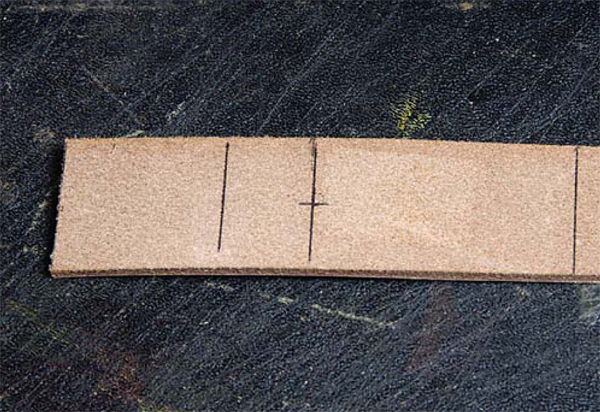
13. While the square is still positioned, mark the center of the line you just made at the center of the strip.

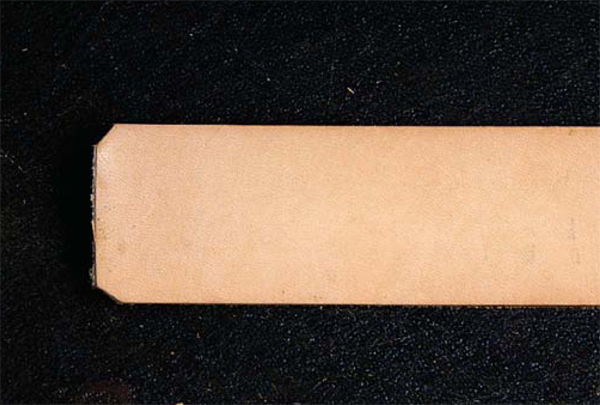
14. This is how your belt buckle end should look now.

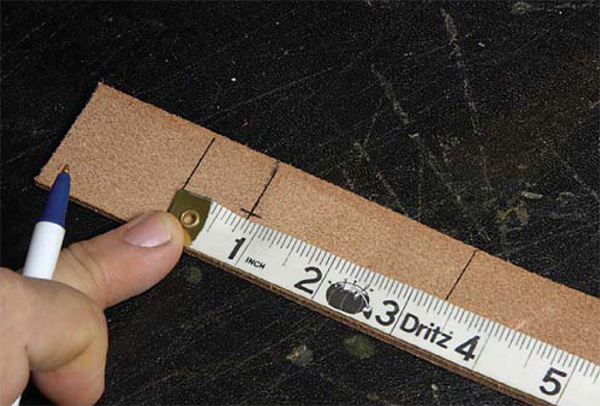
15. The next measurement is derived from the buckle measurement your recorded in step 3 (7⁄8 inch here). Use the measurement of the actual buckle you are using.

16. From the fold line you just made (which is 21/2 inches from the end of the belt strap) measure 7/8 inch (the buckle measurement) toward the end of the leather strap. This line represents where the inside edge of the buckle meets the leather of the finished belt.
17. As before, draw a line with your ballpoint pen on the flesh side of the belt. It is from this reference line that you will determine all other belt measurements.
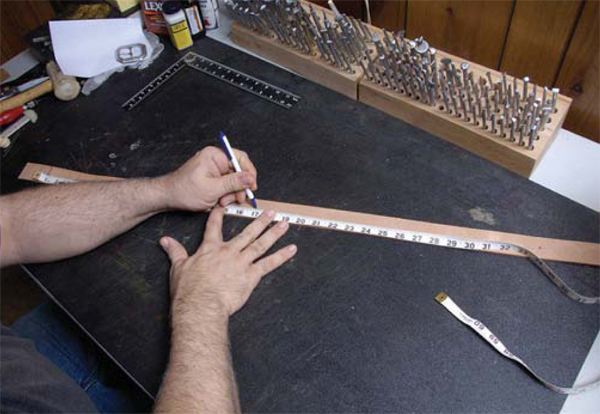
18. Place your measuring tape on the reference line as shown.
19. Measure from the reference line to the other end of the belt using the waist measurement you recorded in step 5 (34 inches here).
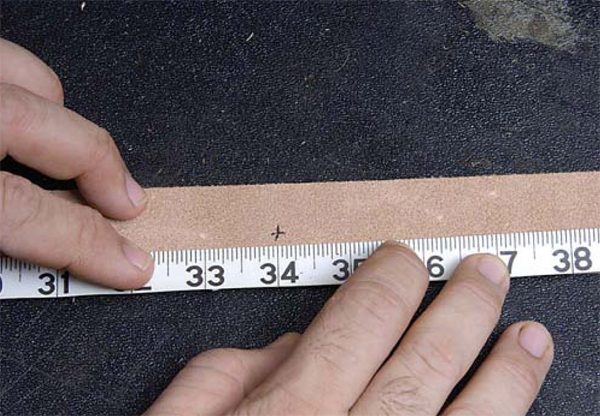
20. Make a plus sign in the center the belt at this point. This represents the center hole of five holes.
21. From this center hole mark, measure 4¾ inches to the billet end of the belt. This mark represents the end of the belt strap.
22. As before, use a ballpoint pen to make a perpendicular line at the mark on the flesh side, using the square.

23. Use the leather shears to cut the belt about ¼ inch beyond the billet end.
CONCHO PLACEMENT
At this point, you will want to decide if you will be adding decorative elements, such as conchos, to your belt.
1. If so, mark the center back of the belt now. The center is between the center hole line in the billet end (step 20) and the reference line (step 17).
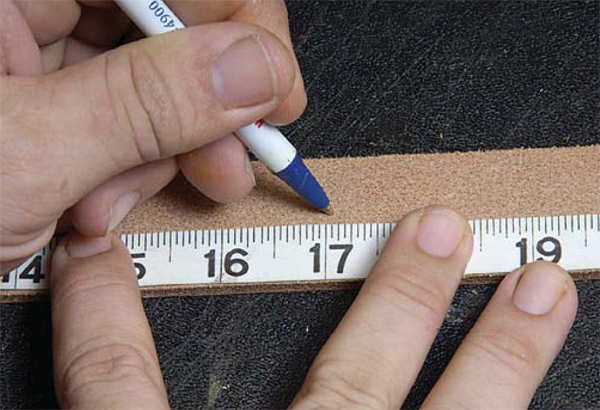
2. The center point is half the belt waist measurement. In this project, it is half of 34 inches: 17 inches. Make a pen mark that shows where the center concho will be placed.

3. Make a plus sign in the center of the strip at this point.
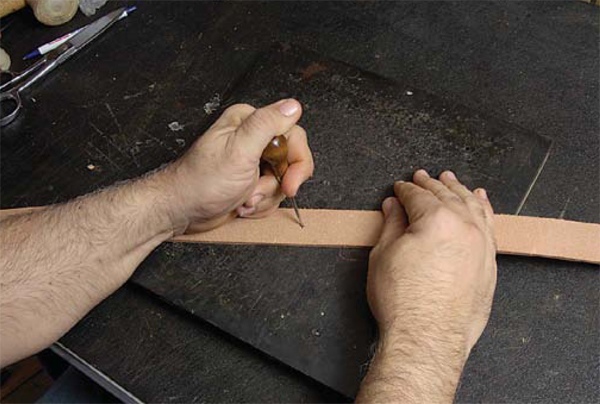
4. The center mark is used to place any belt back decorations and should be transferred to the grain side with your awl for future reference.
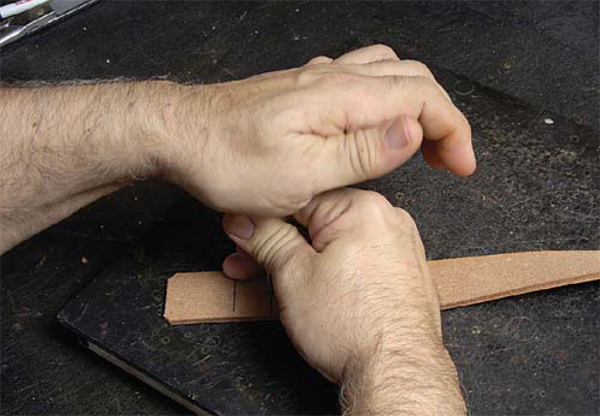
5. To keep the hole small and unobtrusive, do not punch your awl with a mallet. Push the awl by hand just far enough to make a small hole that shows through on the grain side.
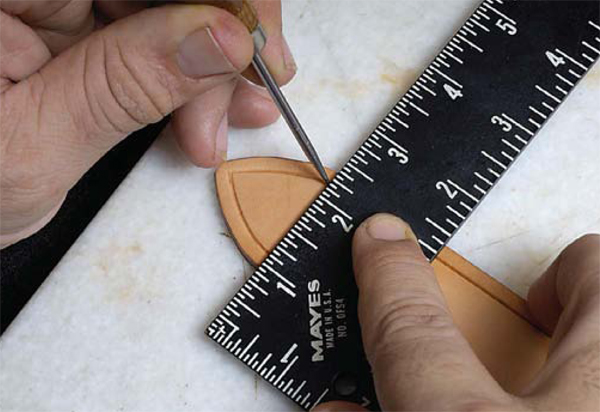
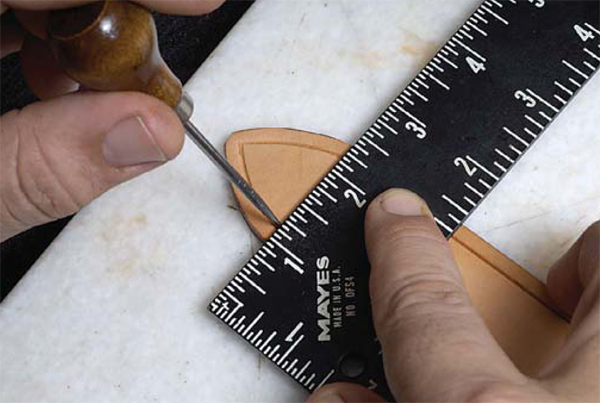
Cutting the Billet End
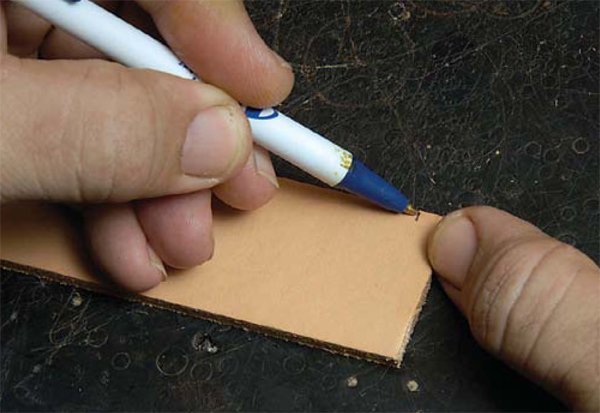
1. Transfer the line from the flesh side of the billet end of the belt to the grain side by marking along the edge of the belt. Make a mark on the grain side.
2. Use the square to draw a perpendicular line across the grain side of the belt. Make a mark at the center point along this line.
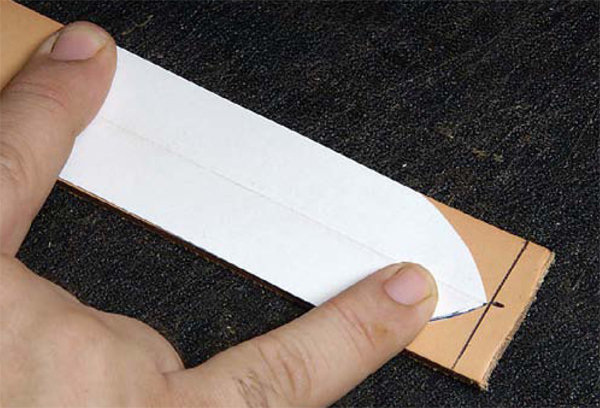
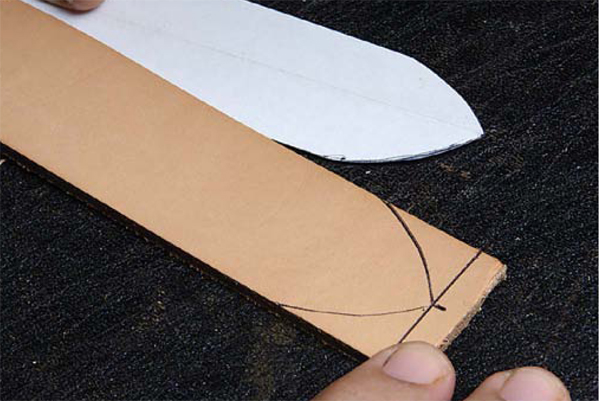
3. You can use a strap end cutter at this point to neatly cut the end of the belt to shape. Or, if you don’t want to purchase a strap end cutter, you can use a simple pattern made by tracing the end of a belt you already have or by drawing one freehand on a strip of paper folded in half. Place your belt tip pattern on the grain side of the belt as shown, with the edges even and the point at the center dot.
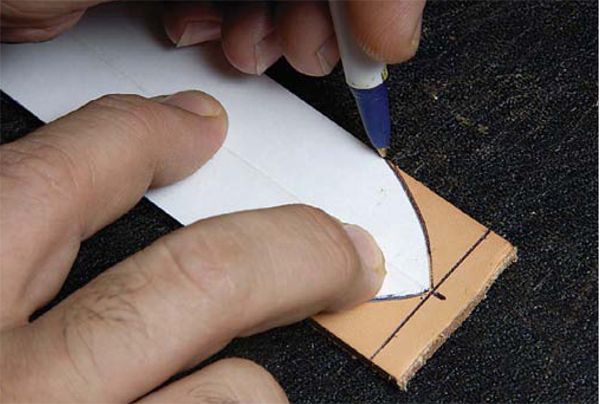
4. Using the ballpoint pen, trace the outline of the pattern onto the grain side of the belt.
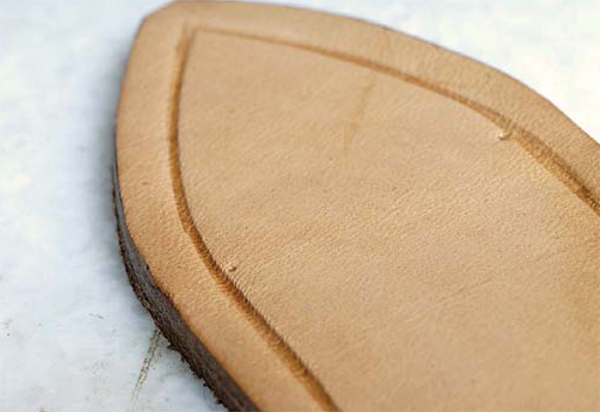
5. This is how your belt should look at this point.
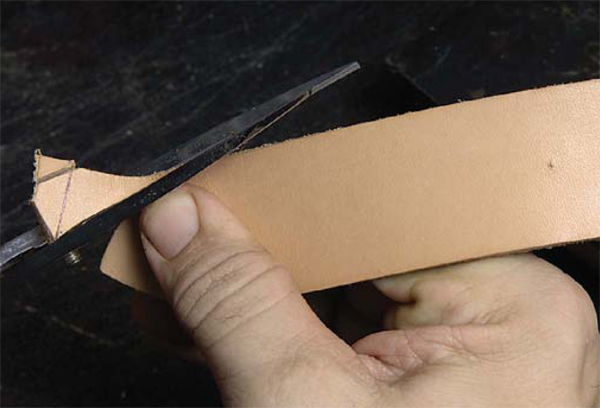
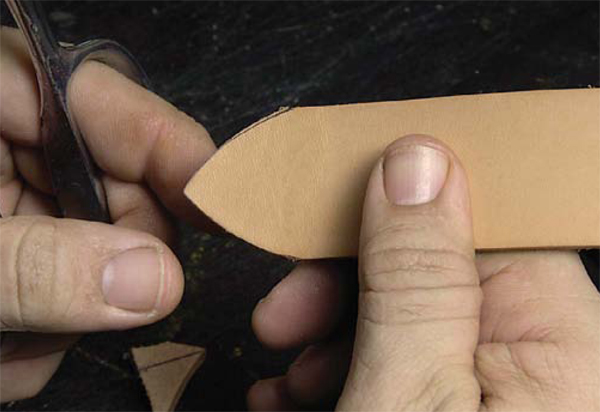
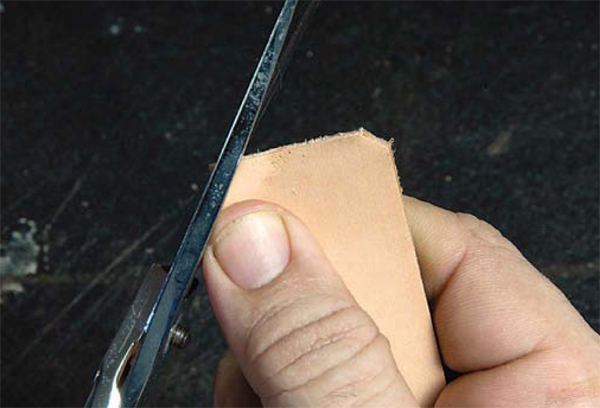
6. With shears, carefully cut on the inside of the lines from each side to the tip of the belt end.
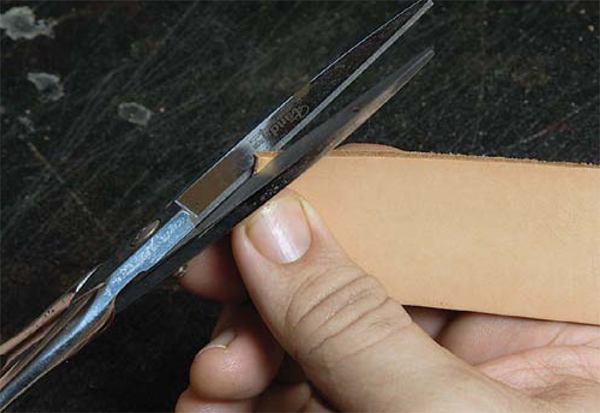
7. Turn your attention to the buckle end of the belt. To create a professional appearance, use shears to snip off a portion of each corner on an angle, as shown.
Preparing the Leather for Stamping
Wet the entire piece—both the flesh and grain sides— each and every time prior to stamping to prevent permanent water spots. Use a light touch. Pressing too hard or scrubbing could abrade the grain and ruin the finish.
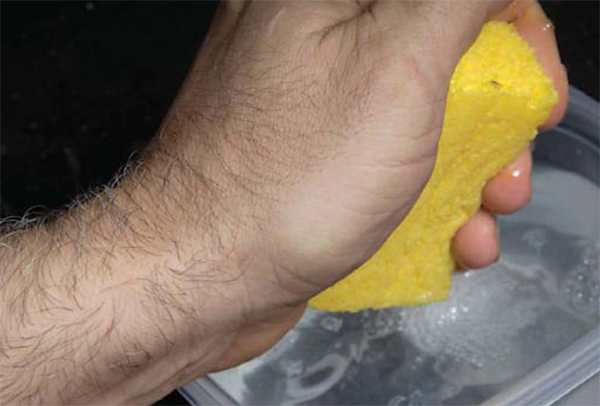
1. Dampen a new palm-sized piece of cellulose sponge and wring it out lightly so water isn’t dripping.

2. Starting from one end of the flesh side of the belt, generously wet the entire length of the leather evenly with the sponge.
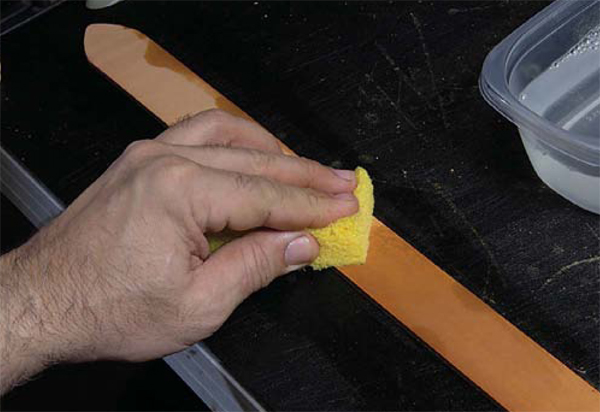
3. Flip the belt over and repeat the process on the grain side, using about half the amount of water you used on the flesh side.

4. Spots that are more porous will typically dry faster and give the piece a spotty appearance. This will disappear as the leather dries.

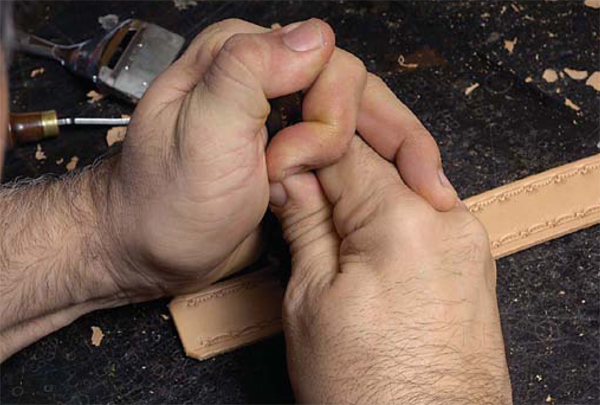
5. After wetting the leather, you should add a leather conditioner on the grain side right away.
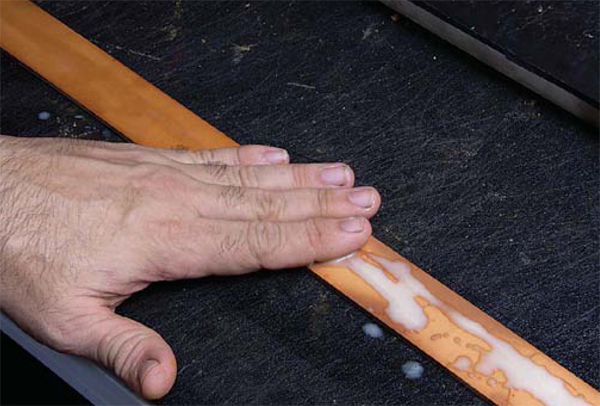
6. Use your fingers to massage the leather in a circular motion until the leather conditioner disappears and your fingers start to drag a bit. This indicates that the conditioner has soaked into the leather.

7. Some mottling is normal as the leather dries, due to normal inconsistencies in the hide. Wait until the leather dries to the proper point before stamping.
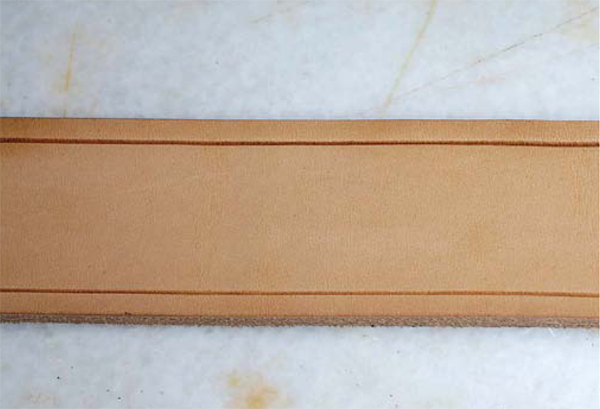
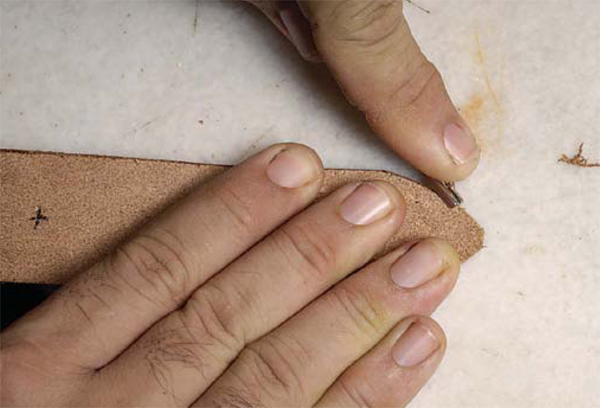
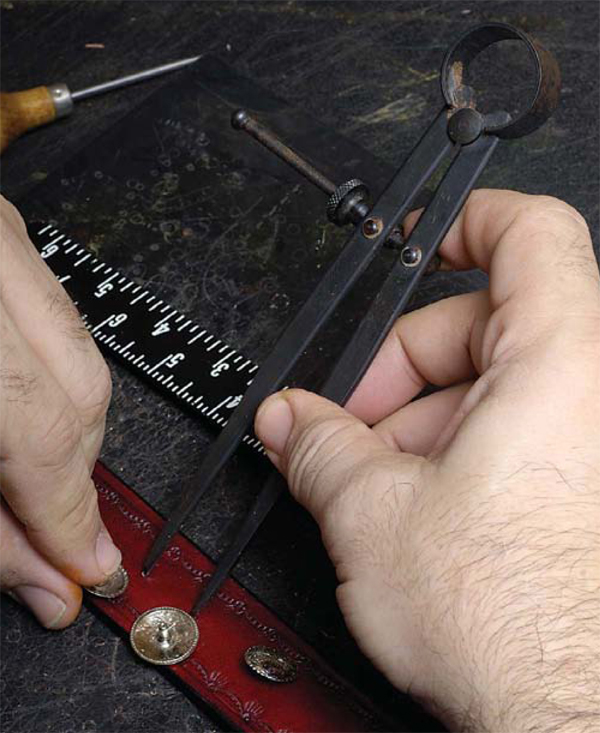
Making a Stamping Guideline
The next step is to make an impression in the leather to serve as a guideline for stamping. The easiest way for this belt project is to use the Craftool 3-in-1 tool, which has a 1/8-inch groove. If you do not have this tool or want to make a wider guideline, you may use dividers for this purpose. This procedure is shown on page 126.

1. The 3-in-1 tool has groovers for burnishing the edges of leather. It is used here to make a guideline.
2. Place your belt on the stamping surface. Place the tool against the straight portion of the belt edge as shown. The curved billet ends will be done last. Once the tool is in position, you may find it more comfortable to hold the handle closer to the tool.
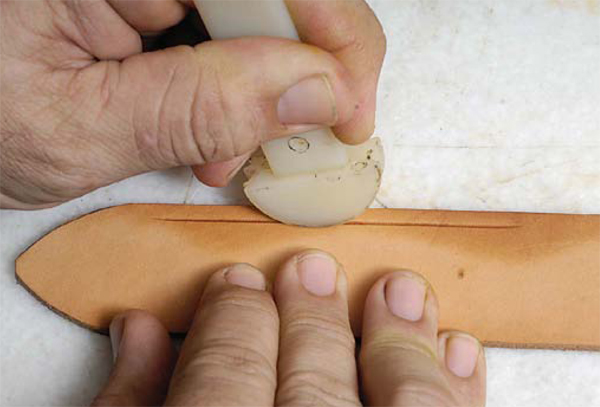

3. Using heavy downward pressure, move the tool forward and backward in about 3-inch segments along the entire length of the belt. As you go, the tool will make a dark line on the leather. You will notice that the tool will drag at first, but as the leather burnishes, it will become slicker. When that happens, the tool will slide more easily.

4. Take off the handle and finish the curved billet end by starting at the tip and proceeding to the existing guideline.
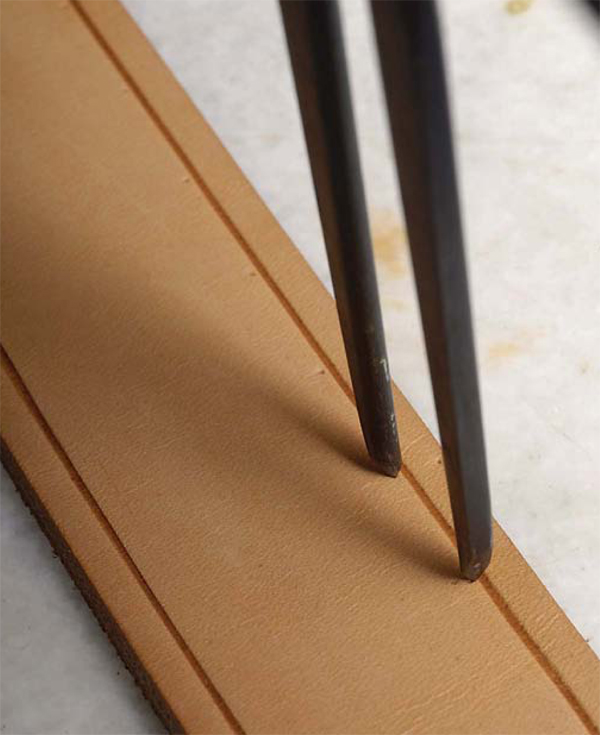
Using wing dividers to make guidelines
An alternate method of making tooling guide lines is to use a wing divider tool. Allow wet leather to dry to the proper wetness. Adjust the dividers to 1/8 inch or the setting you prefer. Run one arm of the tool along the belt edge, allowing the weight of the other arm to make the line. Don’t press or you risk permanently scoring the leather. Other tools you may use to make a guideline include an awl and a stylus.

5. Repeat the process on the other side.
6. Use the head of the 3-in-1 tool to go along the entire edge a second time, pushing down hard. Be sure to stay in the track you made the first time. You’ll notice that the groove will become slicker as you go.
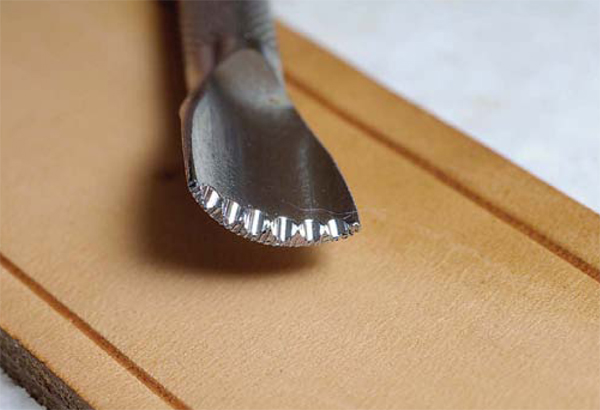
Stamping
If you find you don’t have the exact veiner, seeder, and camouflage tools shown here, substitute a similar tool.
Craftool Veiner V 406
Craftool Seeder S 705
Craftool Camouflage Tool C 834
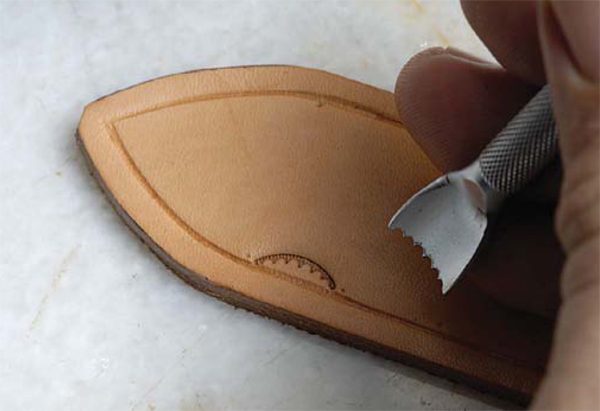
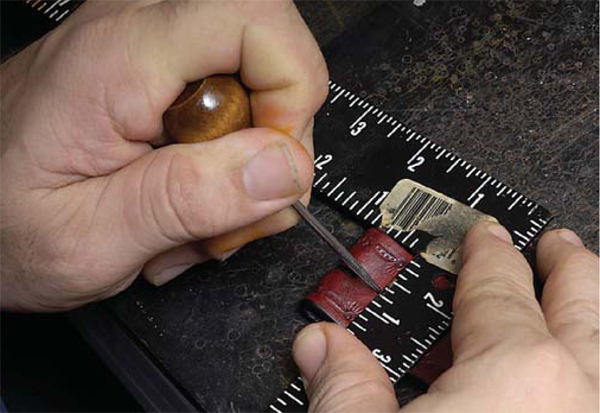
1. Use an awl to make very slight indentations on the guideline where the billet end curve straightens out.
2. These marks are where you will begin making your decorative stamped border.

3. Set your divider tool just slightly larger than the width of the stamp (here, it’s the veiner).

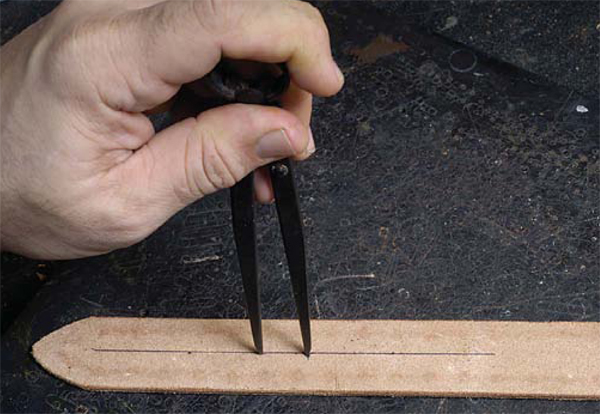
4. Place one arm of the divider on the awl mark and the other just inside the divider line toward the center of the belt. Press the tool on the leather lightly, using just enough pressure to make a light mark.

5. Place the one divider arm in the second mark you just made and “walk”the divider down the belt to make evenly spaced marks. Take your time with this process to ensure that you will have reliable marks to stamp your design. These marks will disappear as the belt is tooled.
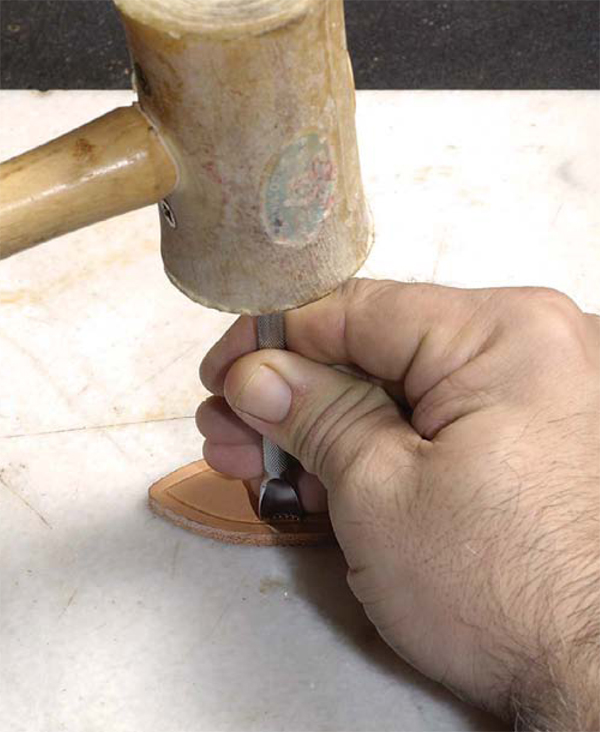
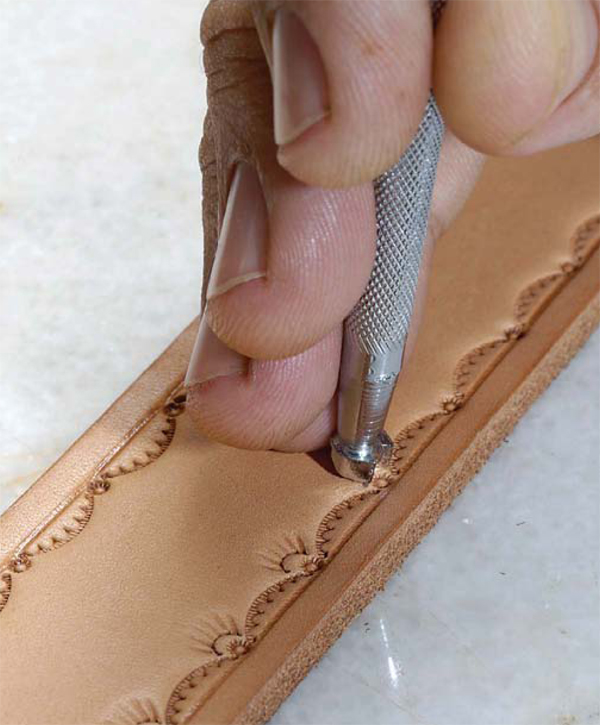
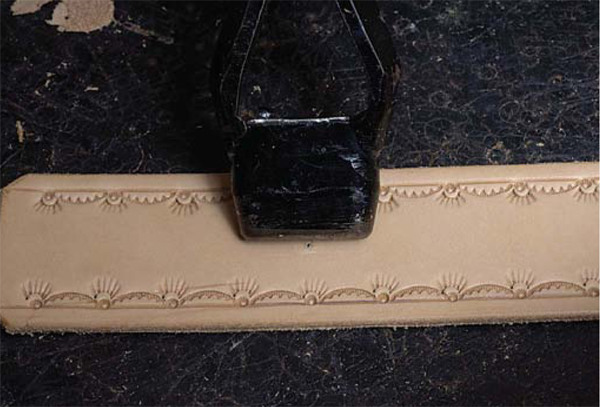
6. Center the veiner tool between the two marks. The tool should be on the line, but toward the center. With the tool perpendicular to the work surface, tap the tool firmly two or three times. As a rule, the larger the stamping tool, the harder you need to strike it with the mallet.
7. The tool impression should result in nice dark lines. If the leather is “mushing” out, you are pounding too hard or the leather is too wet. Try to stamp all impressions at the same depth.

8. Continue stamping between the marks for about 4 or 5 inches. Leave enough space between impressions for the seeder stamp, which you will add later.

9. To prevent the belt from deforming or stretching out of shape, turn it around and start stamping the opposite edge. Stop stamping at the same point on each side.

10. Continue stamping, rotating the belt every 4 or 5 inches as you go.

11. The TLAR (“that looks about right”) method is used for spacing the veiner stamp at the tip of the belt. Estimate the spacing and stamp the final two impressions on each side.
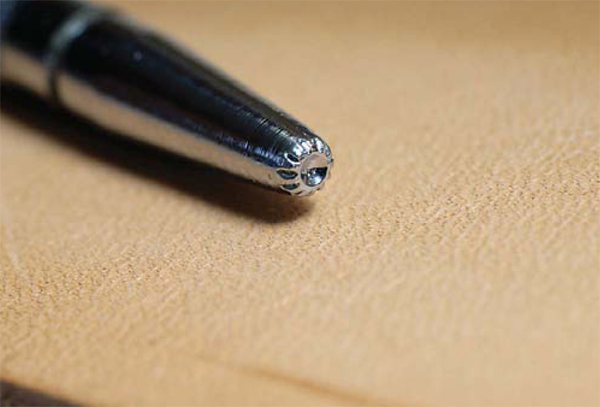
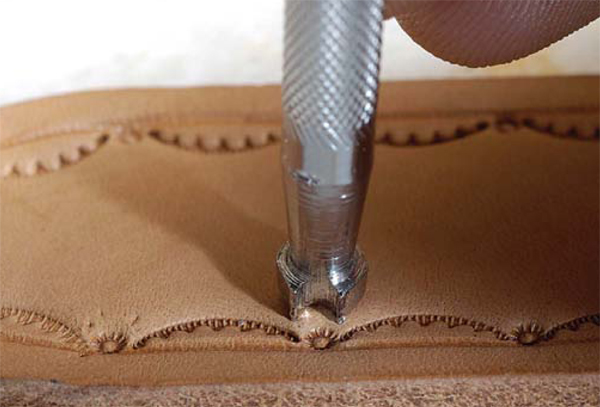
12. Now place the seeder tool just above and inside the guideline between the veiner stamps. With the tool perpendicular to the work surface, use the mallet to strike the tool once. Use a light touch. If you hit the seeder tool too hard, it may go right through the belt.
13. It is not necessary to periodically switch sides with the seeder tool, as it covers less area than the veiner tool and won’t deform the leather belt shape.

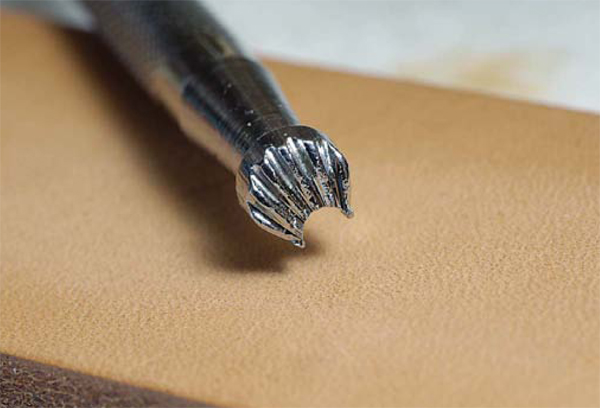
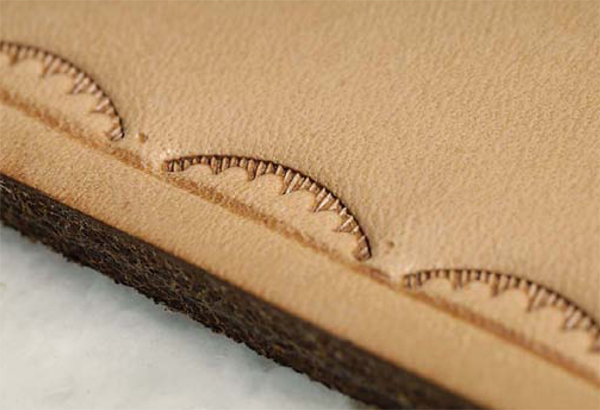
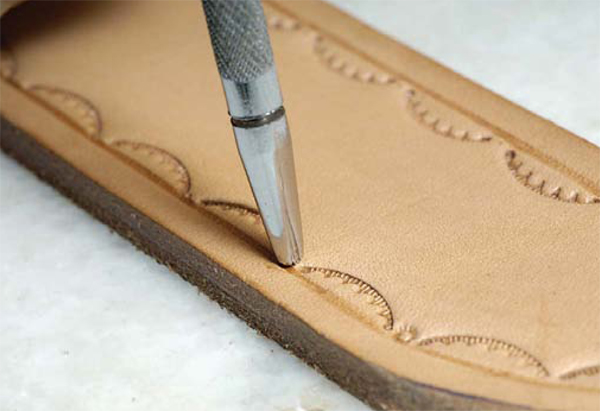
14. Place the camouflage tool so that the half-moon shape surrounds the seeder impression.
15. With the tool in a perpendicular position, strike the mallet one or two times.
16. Continue to make an impression over each seeder mark except for the one at the very tip of the billet end. Be sure to set your stamp at the same angle for each impression.

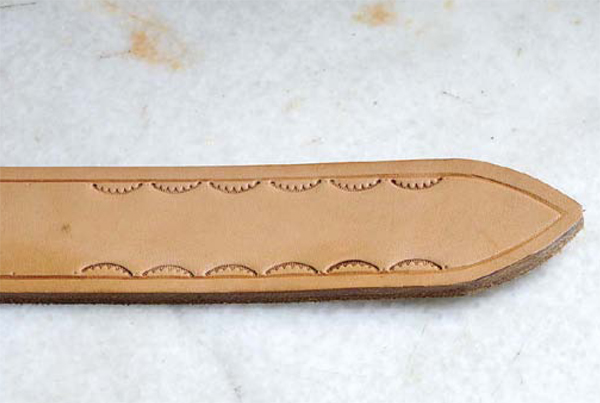
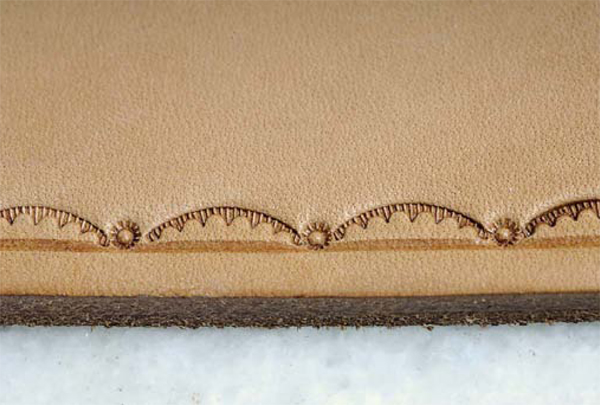
17. The finished design. Experiment on scrap leather with different tools to create your own one-of-a-kind belt design.
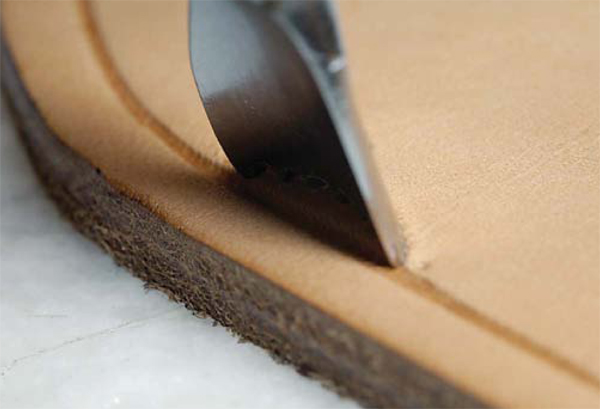
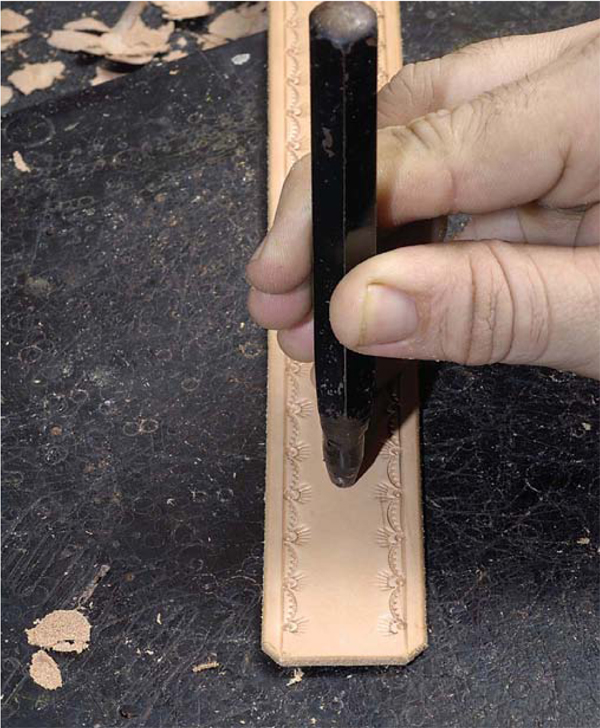
Beveling the Edges

1. Raw leather edges are unsightly and should be finished for a professional-looking job.
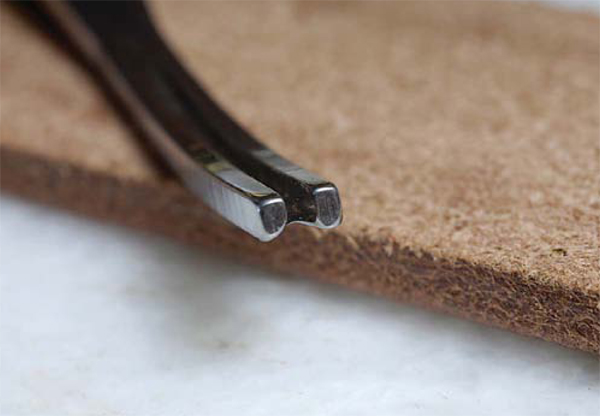
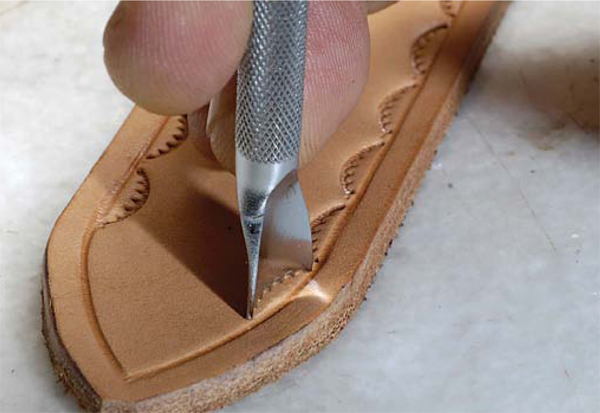
2. A size 2 edge beveler was used for this project.
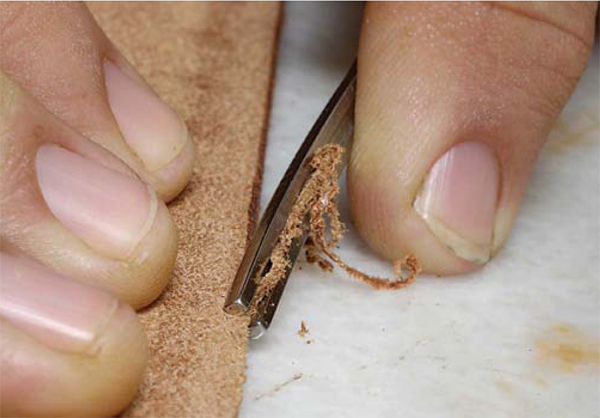
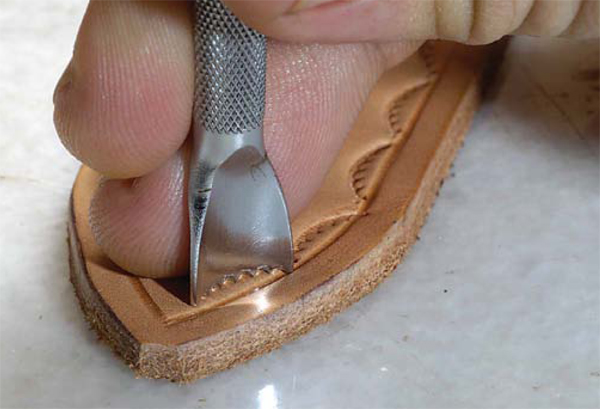
3. Keep the tool at a 30-degree angle during the entire process. Push the tool away from you using long strokes and a medium amount of pressure.
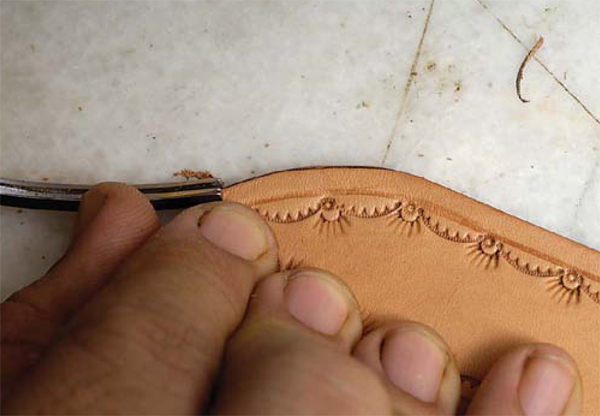
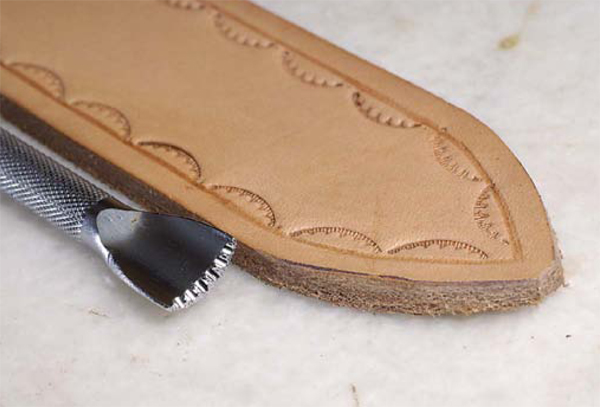
4. Go slowly and use shorter strokes when beveling the billet end. Bevel the grain and the flesh side of the entire belt.
5. The belt edge after beveling is smooth and has a wellcrafted appearance.
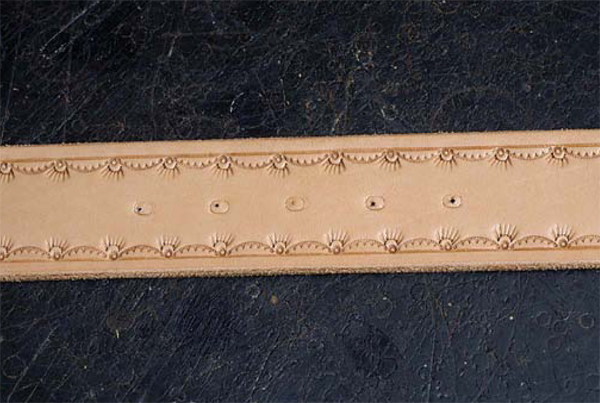
Punching Billet-End Holes
1. Place the belt flesh side up on a rubber mat or Poundo board. You will now make a centered line that extends about 4 inches from either side of the plus sign, which represents your center hole mark. Use a pencil—not a pen—to make several light marks in the center of the belt (¾ inch on this 1½-inch-wide belt.)
Note: A pen was used here to make the marks and line easy to see. The pencil marks and line will remain after the belt is finished. If you prefer not to have any marks on the finished belt, use wing dividers to make slight indentations.
2. Use a pencil to lightly draw the center line, which will be your guideline for punching your belt holes.
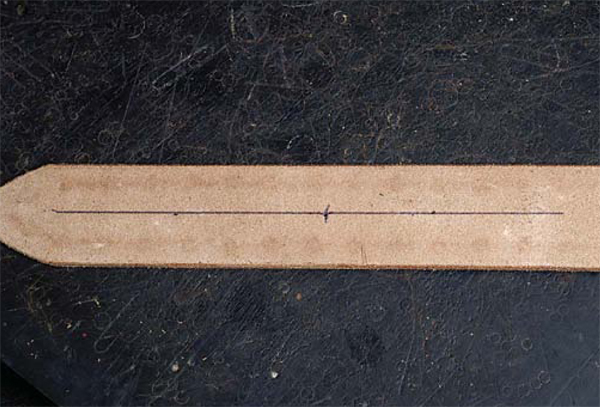
3. This is how your line should look.
4. Billet end holes are generally placed ¾ inch apart in standard belts. Set the wing divider at ¾ inch.

5. Place one arm of the divider on the plus sign and make a mark on either side of this point.

6. Place one arm on one of the marks you just made and make a mark on the far side of this point. Repeat the process using the other mark from step 6 to make the last mark. You should now have five marks that are ¾ inch apart, two on either side of the plus sign.
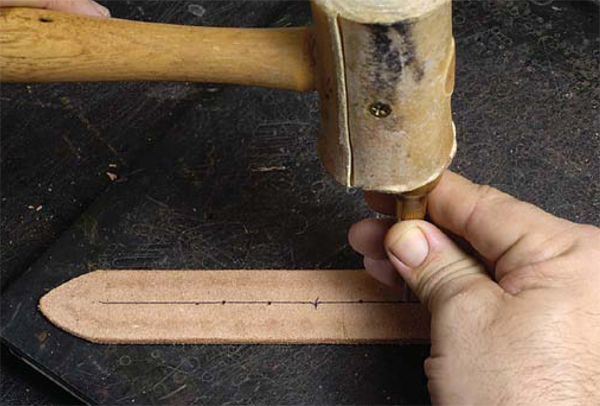
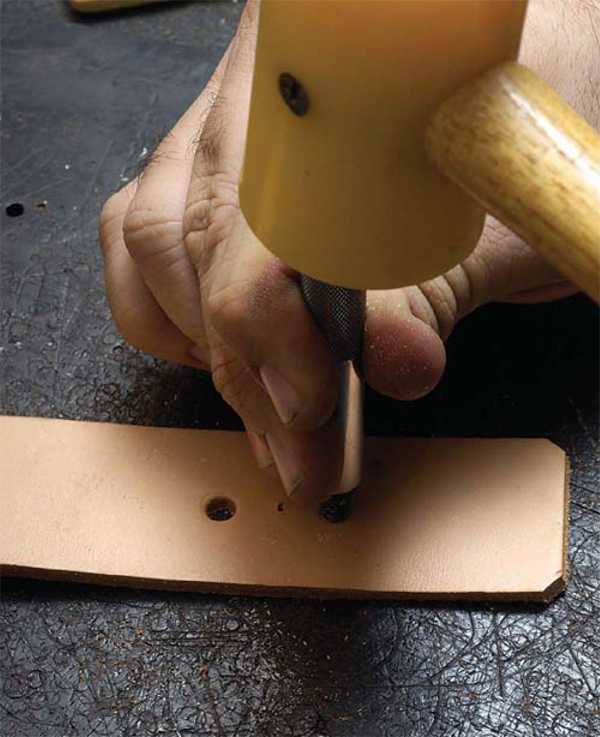
7. Use an awl and mallet to make holes all the way through the leather on all five marks.
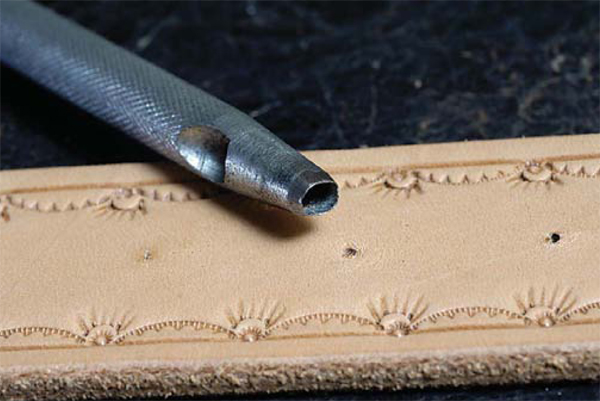
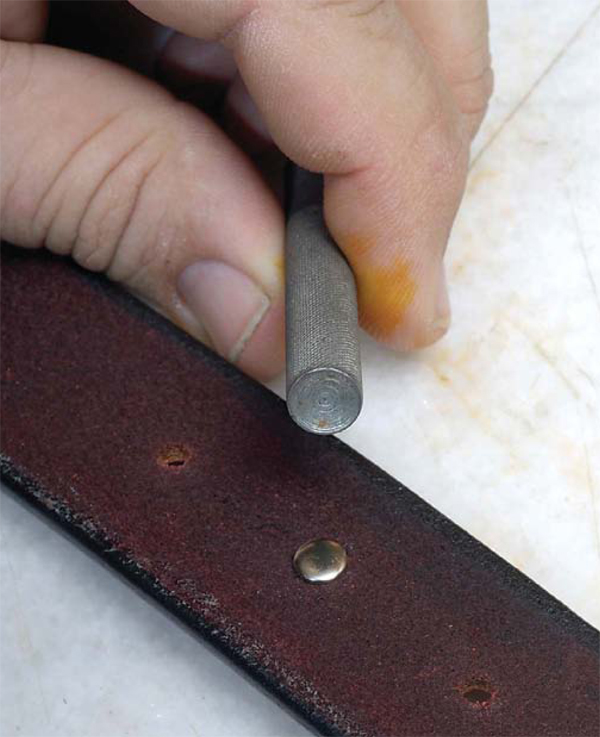
8. Flip your belt so that the grain side is facing upward. Here you may either use a ¼-inch round hole punch or a ¼-inch oblong hole punch. Oblong holes protect the leather from stretching a bit better than round holes.
9. Set your punch over each hole and carefully press the tool lightly into the leather at a 90-degree angle just to make a light impression.
10. If you are not satisfied with the placement, go back and reset the tool and make another light impression.
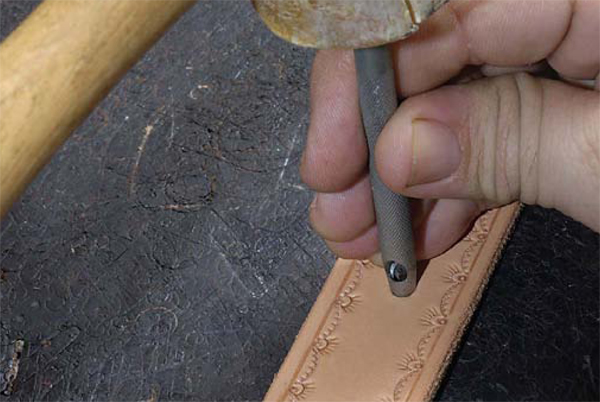
11. When you are satisfied with your punch placement marks, reregister the tool over the final mark. Hold the punch at a 90-degree angle to the belt. Strike the mallet hard as many times as necessary to go through the leather.
12. Note that all punch holes are done from the grain side of the leather. Continue punching until all five marks are punched through.
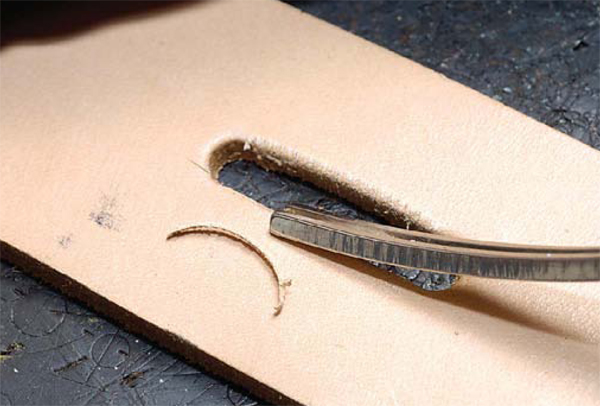
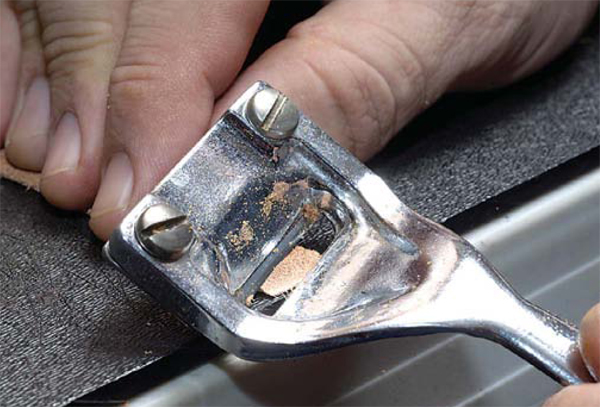
Skiving and Beveling the Buckle End
1. Skiving is done after tooling. But before skiving, let your belt thoroughly dry for at least 24 hours
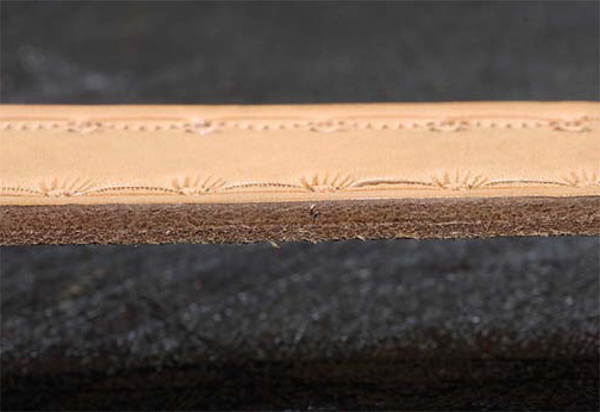
2. The purpose of skiving the buckle end is to reduce the thickness of the leather at the fold line area. This will make your fold lay flat and make room for the buckle between the two layers of leather.
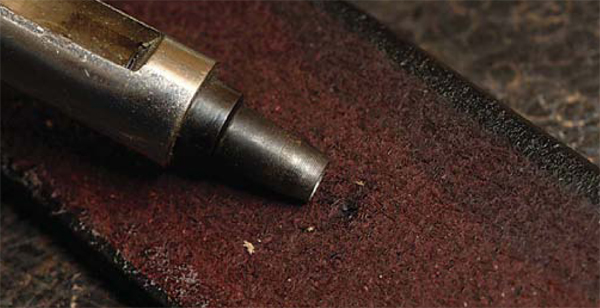
3. Skive from the skive line to the end of the belt. The goal is to remove about a third of the thickness of the leather.

4. Take your time with this step. Remove thin shavings in short, even strokes. Remember to keep turning the skiver in different directions as you proceed.

5. Skive to the end of the belt. Don’t make deep cuts that will take off a lot of material at a time; work in short, thin strokes.
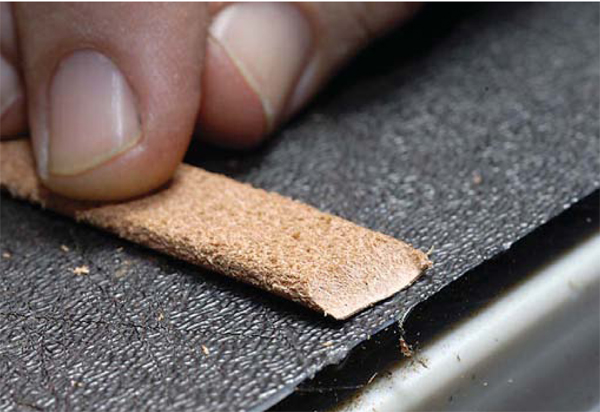
6. Skive the center, sides, and end of this area. Strive for a consistent thickness of leather over the entire skived area.

7. Use the edge beveler to rebevel all the edges that were skived.
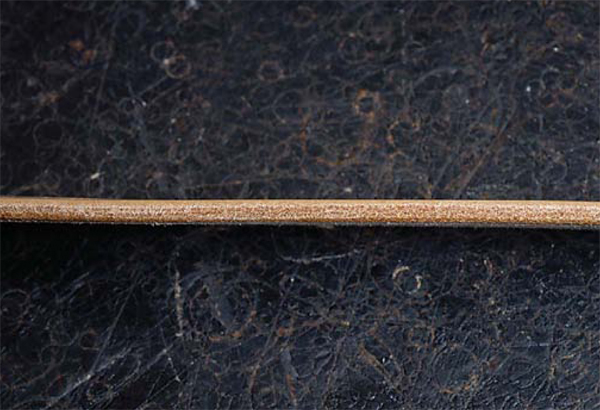
8. The belt buckle end before skiving.

9. There is a noticeable difference in thickness after the belt buckle end has been skived. The finished thickness should be about two thirds of the original thickness. You do not want to remove more than half the thickness, as this would make the belt less durable.
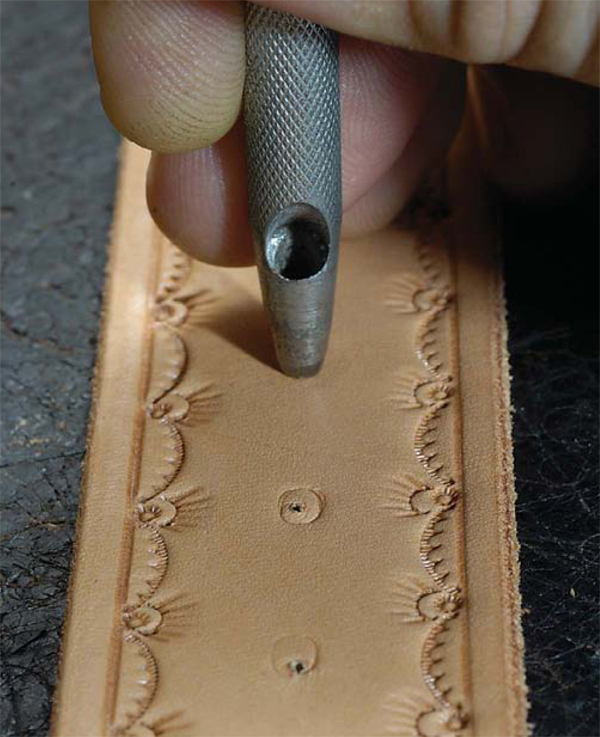
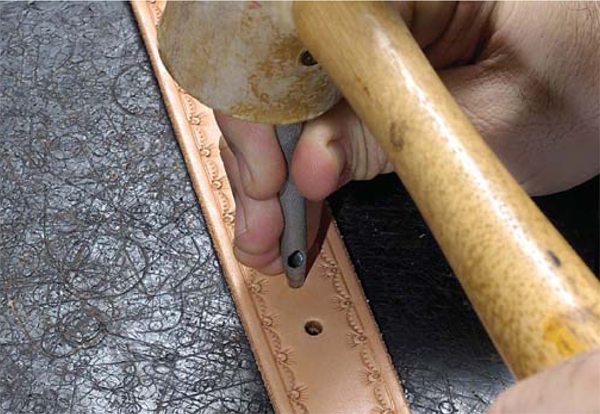
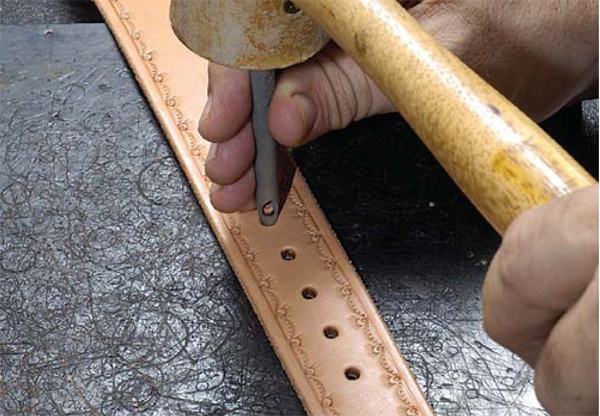
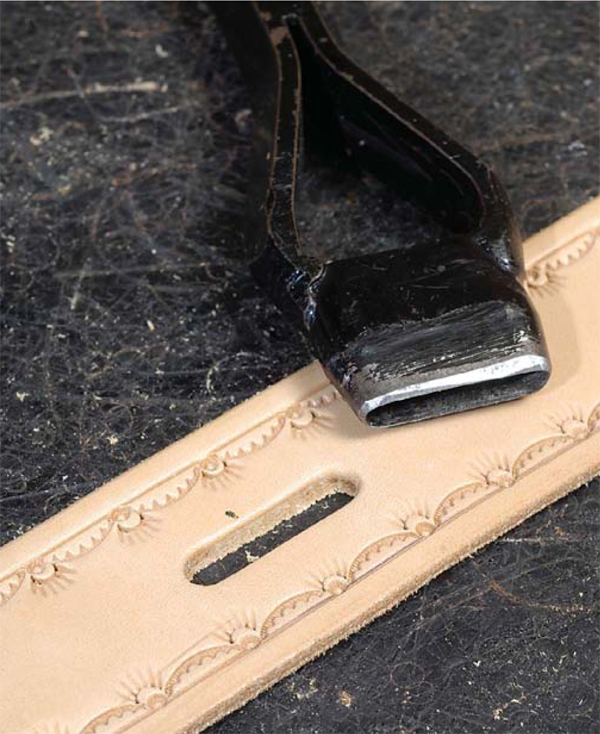
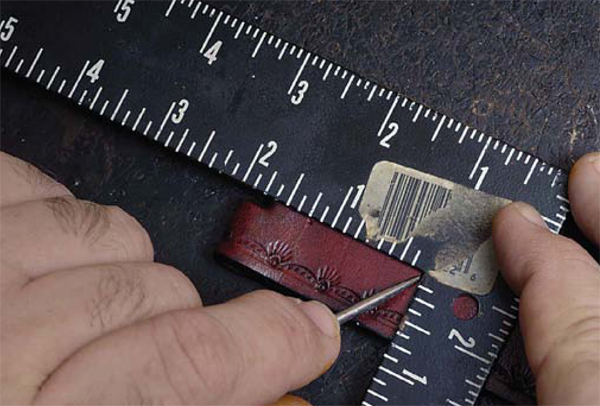
Punching the Oblong Tongue Hole
1. The awl hole you made at the buckle end early in the process represents the center of the tongue hole. The tongue is the metal rod that goes through the billet-end holes to hold the belt in the buckle. You may use a ¾-inch or 1-inch oblong bag punch.
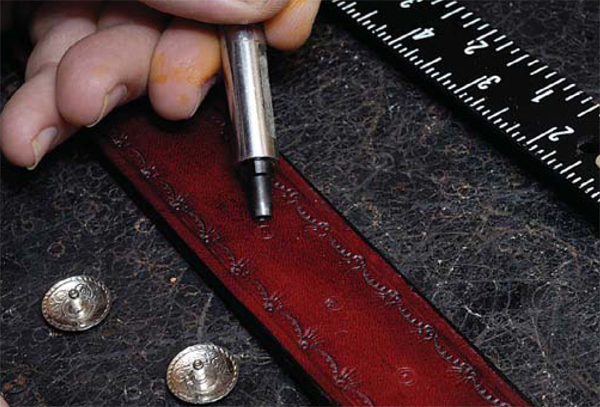
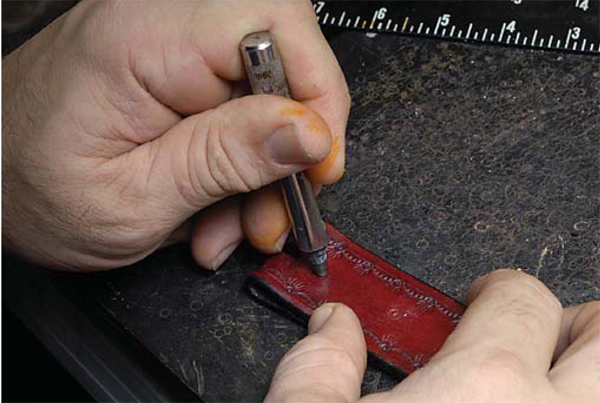
2. This punch is made from the grain side. Center the punch over the small awl hole by eye.

3. Place the punch at a 90-degree angle and push down with both hands to make an impression in the leather. Check the impression and relocate if necessary.
Note: An alternate method using a 1⁄4-inch round hole punch will also be shown.
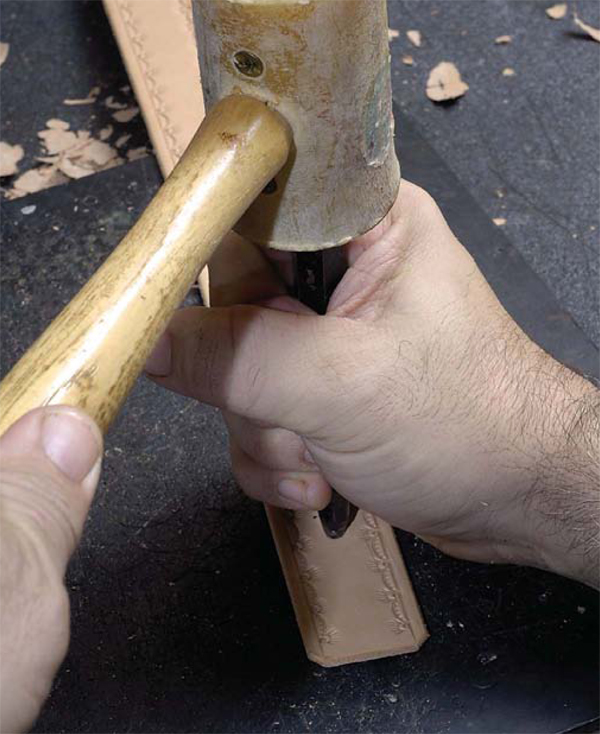
4. Once you’re satisfied with the placement, register the punch. Remember to make your punch on a rubber mat or Poundo board so as not to damage your tool or work surface. Hold the punch at a 90-degree angle and rap solidly with the mallet several times until the punch goes all the way through the leather.
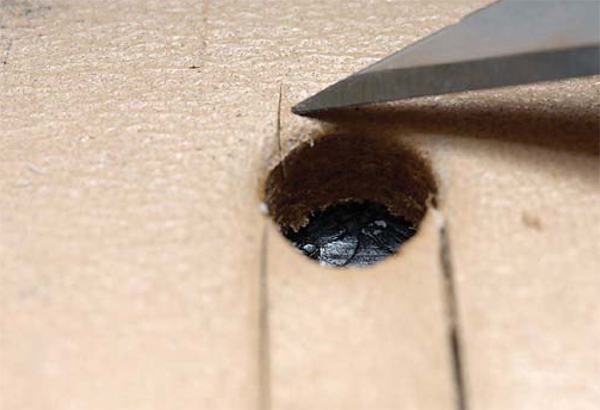
AN ALTERNATE METHOD: USING A 1/4-INCH ROUND HOLE PUNCH

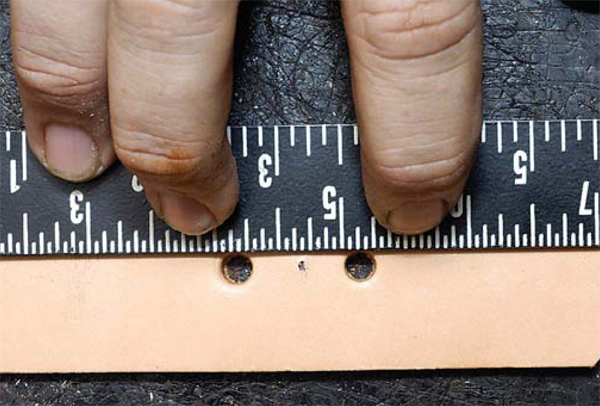
1. Find the awl hole you made earlier.
2. Make a mark 1/2 inch to the left of the center mark.
3. Make a mark ½ to the right of the center mark.

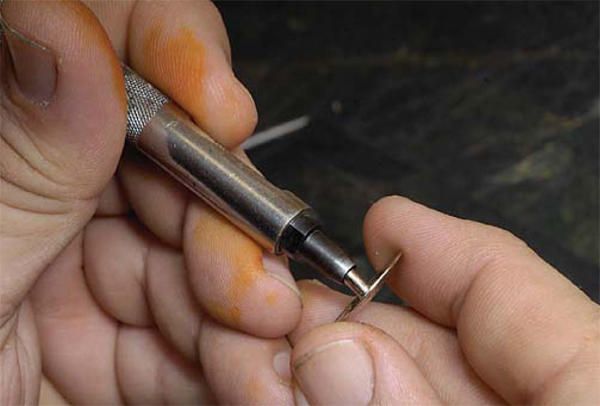
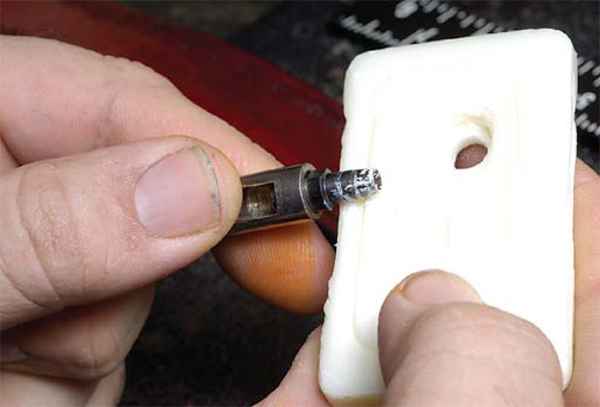
4. Prepare a ¼-inch round hole punch by rubbing the edges and inside with soap.
5. Make light registration marks with your hole punch to ensure that your placement is correct. Then punch both holes by tapping several times with your mallet using firm pressure.
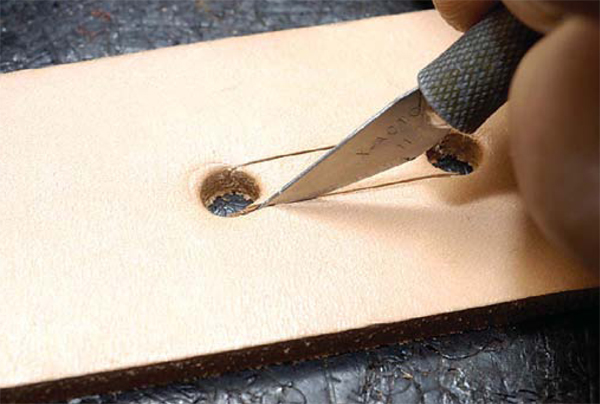
6. Line up your straight edge along the outer edges of both holes.
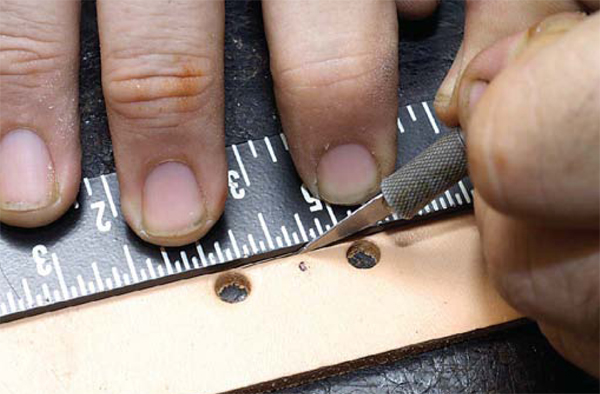
7. Use a craft knife to score the surface of the leather from the center of the first hole to the center of the second hole.
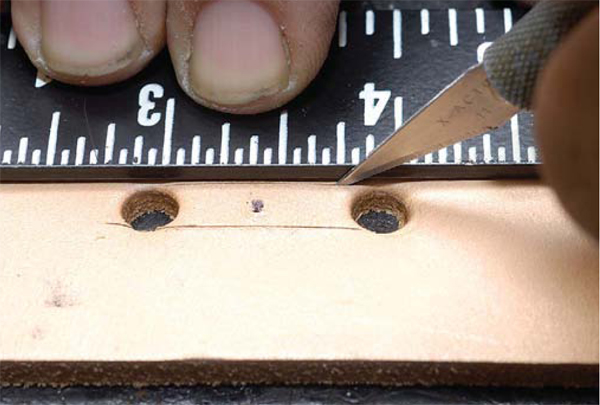
8. Repeat the process between the two holes on the other side.
9. Be careful not to score beyond the center of the hole, as was done here. (This small goof will be removed in the beveling process.)
10. Use your craft knife to cut all the way through the leather on both scored lines.
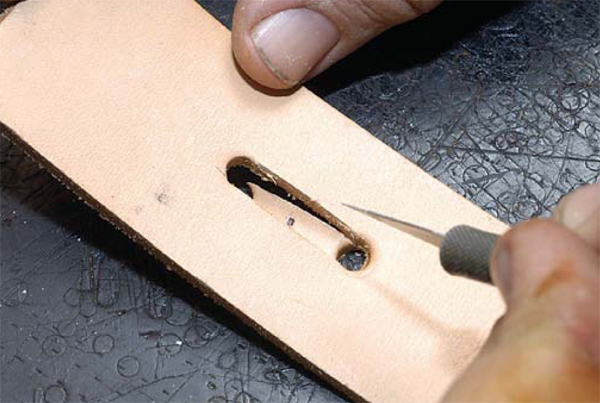
11. Press out the oblong leather piece with your craft knife.
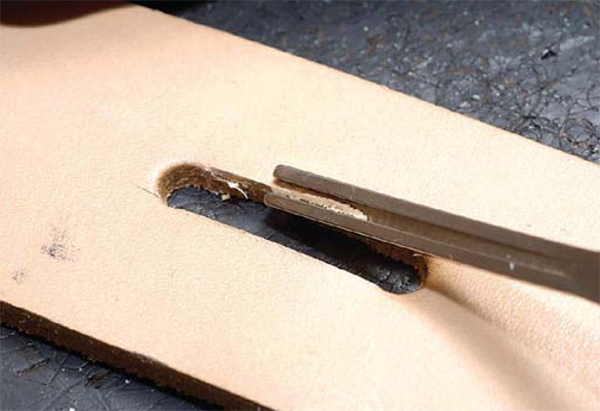

12. Use your edge beveler to dress up the edges of the oblong hole.
Coloring, Finishing, and Folding the Belt
Choosing a color finish is an art in itself and a matter of personal preference. For this project, Eco-Flo Gel Antique Mahogany was used. This product is also available in black, tan, saddle tan, and medium and dark brown. Don’t forget to dye your belt keeper the same time you dye your belt.
1. Start by squirting a moderate amount of gel onto a medium wool dauber. Apply the gel generously to the entire grain side, making sure the dye penetrates the recesses of the stamp impressions.
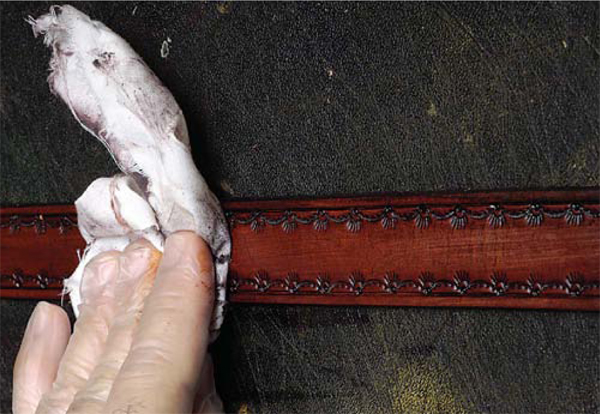
2. Use a clean, lint-free rag or old t-shirt to rub the gel into the leather and wipe off excess. Apply more gel if needed in recesses that may have been missed. Apply more gel to the dauber and repeat the process on the flesh side of the belt. Check the belt edges to make sure they are dyed, as well.
Rub the gel into the leather and wipe off excess gel. When you are satisfied, let the belt dry for 24 hours.

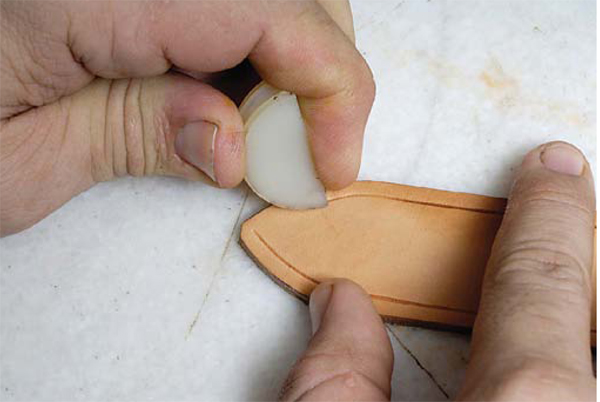
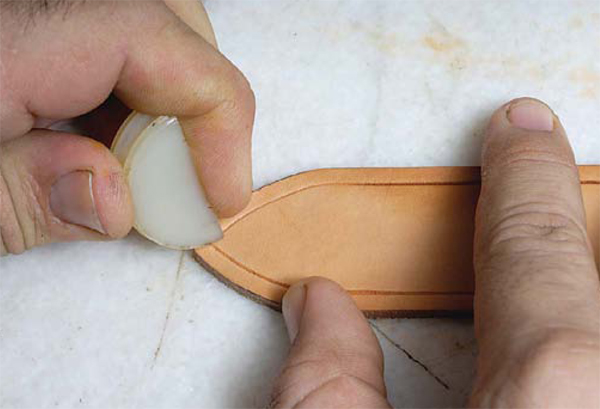
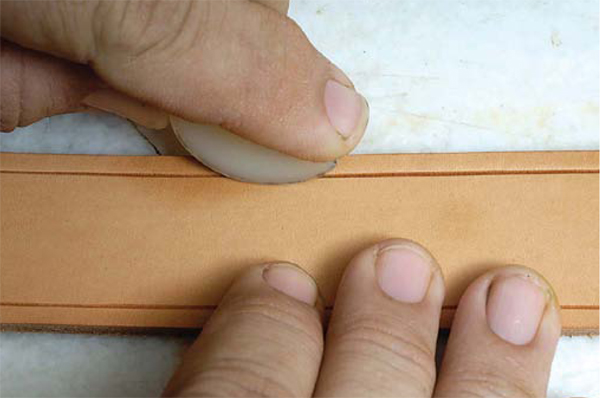
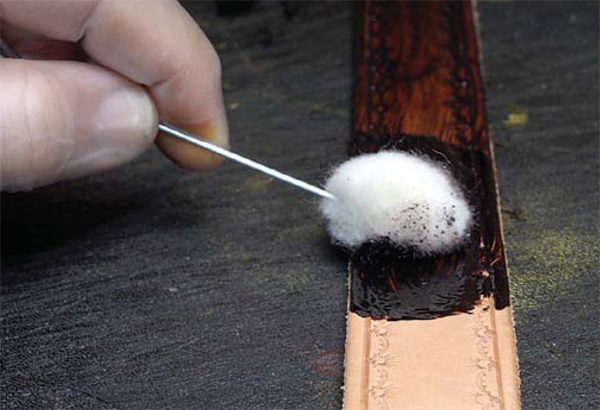
3. Use a wool dauber or good-quality cotton swab to apply a liberal amount of Edge Kote along the entire edge of your belt. Be extremely careful to not get the dye on the top finished side of the belt or other project. Should this happen, wipe it off immediately. Let the Edge Kote dry for about 2 hours before proceeding. Once it is dry, use a small chunk of the edge wax to rub an even coat along the entire edge.

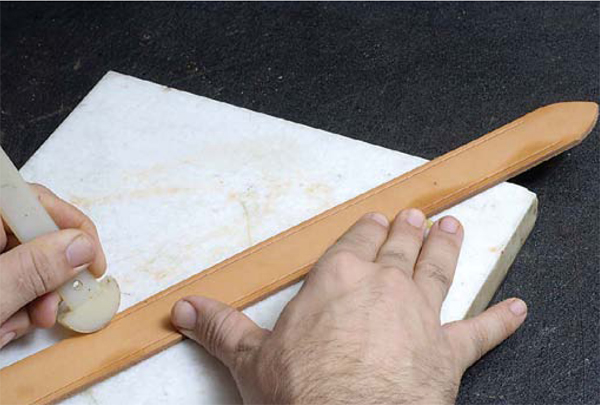
4. Burnish the edge by rubbing a wad of ballistic or sports nylon swiftly over the edge in 2- to 3-inch sections.
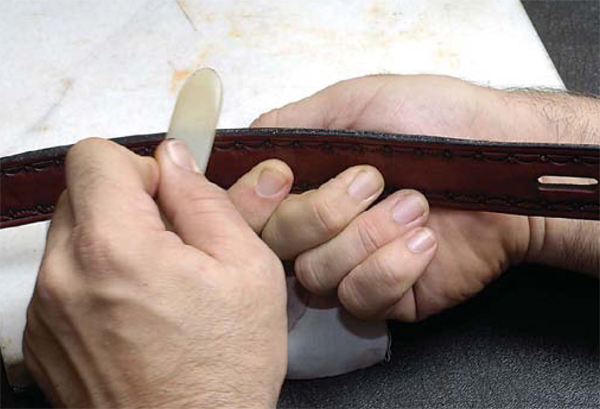
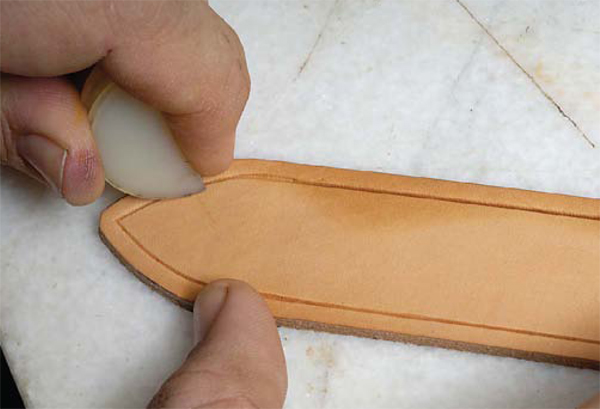
5. Use the flat side of a bone tool or the Craftool 3-in-1 tool to burnish the edges to make them round and smooth.
Next, use a wool dauber to apply a generous amount of gum tragacanth to the flesh side. Use the flat side of the Craftool 3-in-1 tool or bone folder to burnish in a circular motion. Keep burnishing until the liquid is pushed into the pores of the leather and the flesh side has a smooth, shiny finish. The flesh side of this belt will now resist moisture. Let the belt dry overnight before proceeding.

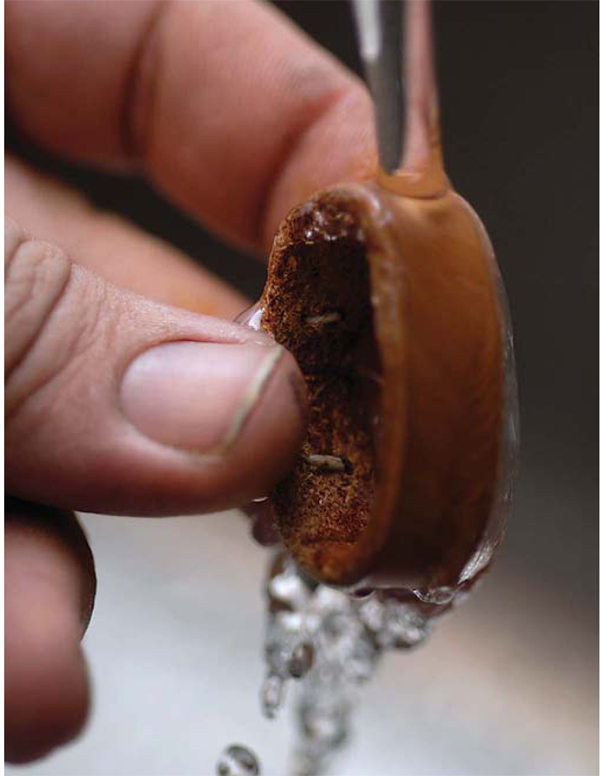
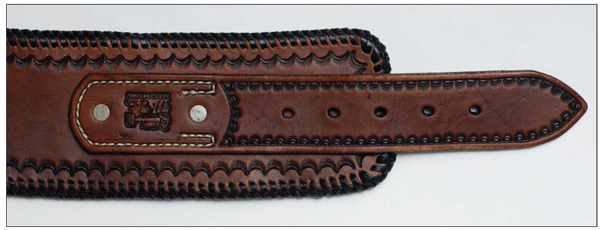
6. Although this step runs counter to previous warnings about leather and water, it’s a must. You cannot fold dry leather without cracking it. So you must wet the entire belt (to prevent water stains) so the buckle end can be folded to hold the buckle. Run the belt under hot water for about three to four minutes to give the fibers a chance to absorb the moisture. The leather must be wet all the way through at the point of the fold.

7. Fold the grain side of the belt end to the back in the center of the oblong hole
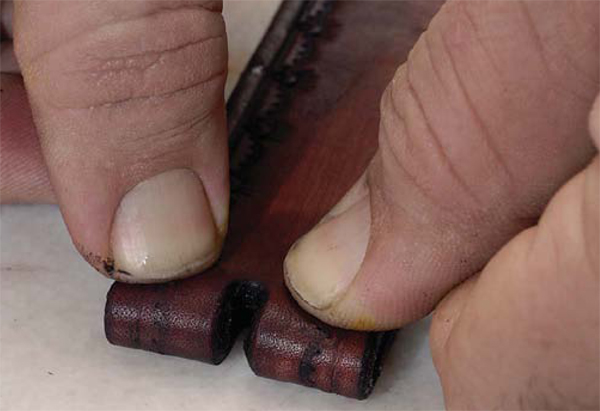
8. Squeeze both sides firmly together. Place waxed paper over the belt to protect it and weigh it down with any flat, heavy object, such as the stone slab, and let it dry overnight.
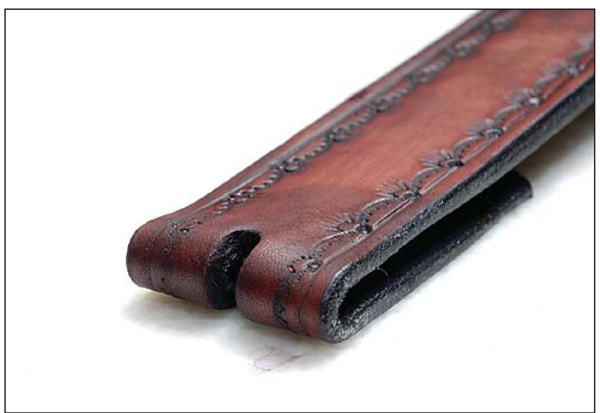
9. The belt end is now ready for the snaps and buckle.
Adding Conchos
1. Find the awl hole you made in the center back of the belt. Use your awl to make the hole visible on the other side.
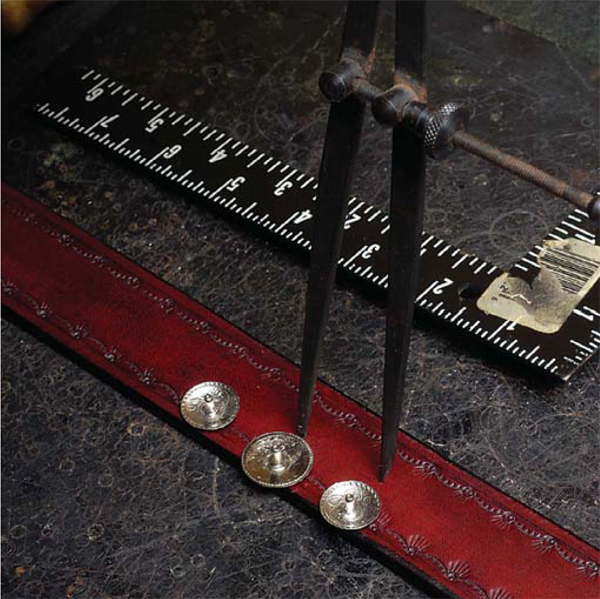

2. Use your wing dividers to determine the placement of the concho to the right of the center. There’s no rule for spacing conchos—place them where they look best to you. Use the awl to mark the placement, in the center of the width of the belt.
3. With the wing dividers set to the same spacing, mark the spot for the left concho. Again, use your ruler to determine the center width point.
4. Select a round hole punch that is the right size for your concho shaft.
5. Place the hole punch over each mark and make a light impression by pushing the punch down. Check your impressions to be sure the placement is correct.
6. Coat the outside of the tool with ordinary bar soap to help the punch go through the leather smoothly.
7. Remember to punch only on your rubber mat or Poundo board. Place the punch on the grain side at a 90- degree angle and hit it hard with the mallet until the punch goes all the way through the leather. Punch the remaining two holes in the same manner, soaping the punch each time.
8. Switch to your stone slab or other hard surface. You’ll need a concave anvil for the next step. The anvil’s shape will protect the concho from becoming disfigured.


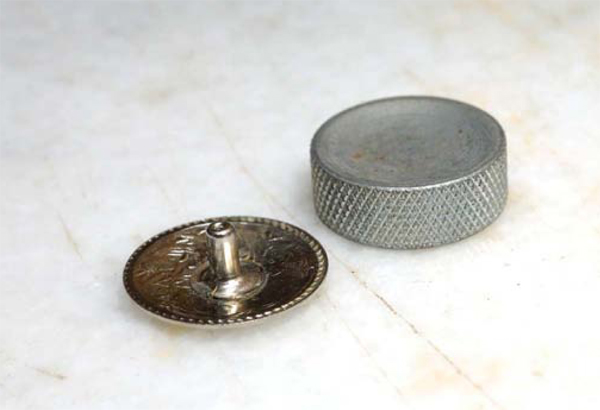
9. Place the decorative side of the concho down onto the anvil. Line up the center hole of the belt with the concho so that the concho shaft pops through the grain side of the belt.
10. Place the concho back onto the shaft.
11. Use the snap and rivet setter to tap the back onto the front the concho.
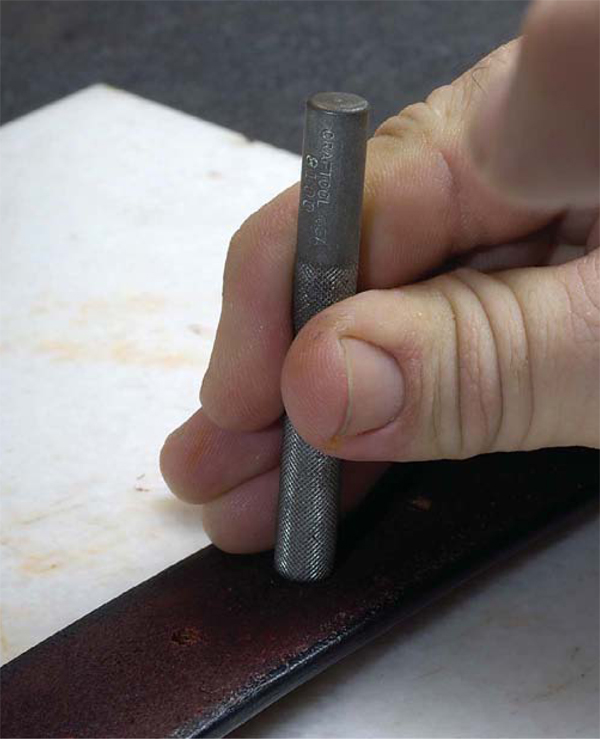
12. Place the tool over the concho back at a 90-degree angle.

13. Tap gently but firmly in a circular motion to set the entire circumference of the concho. Be careful not to hit the tool too hard, so you don’t smash the metal.
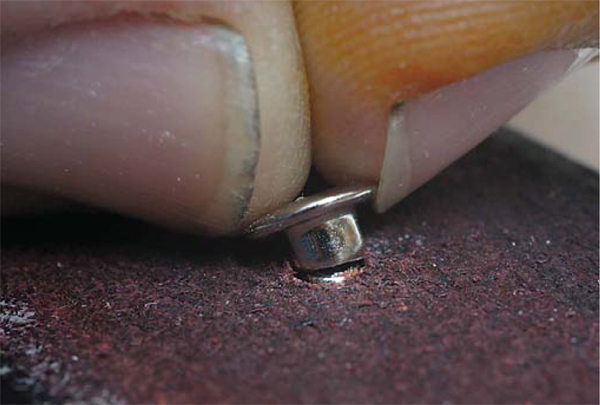
14. Here’s how the front and back of your concho should look. Repeat the process to attach the other two conchos.
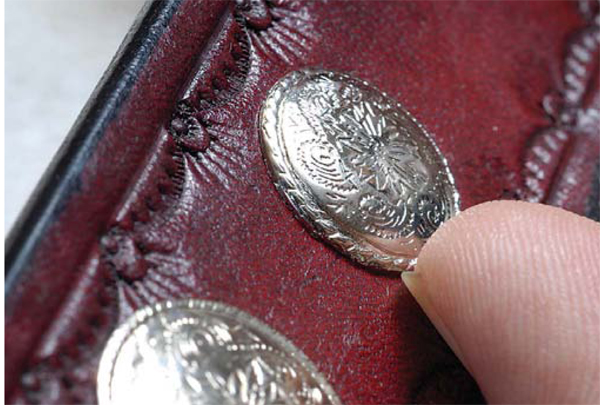
15. Check to see if the conchos are attached properly by trying to slide your fingernail under the edge. If it goes under, the concho is too loose and should be tapped some more.
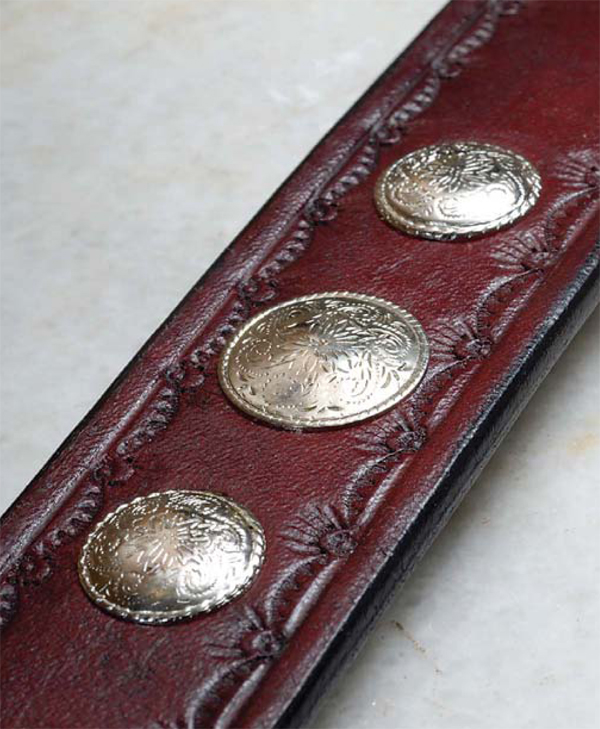
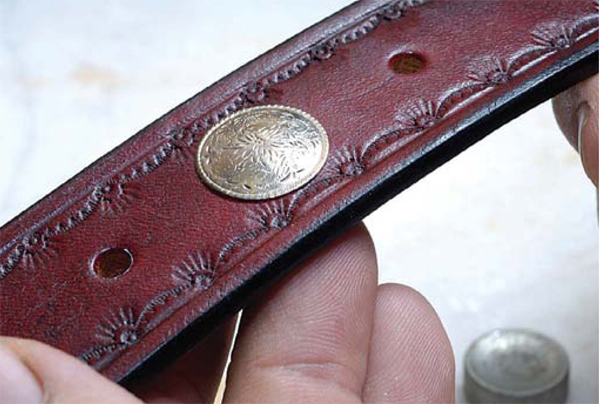
16. These silver metal conchos contrast nicely with the dark belt color. Once you locate the center of the belt, you can use your wing dividers to place multiple decorative elements wherever it pleases you.
Making Snap or Rivet Holes
1. Measure 7/8 inch from the fold line of the belt to place the first snap or rivet hole.
2. Find the center of the width.
3. Make a mark at this point with your awl.

4. Measure 1¼ inches from that mark to position the second snap hole.
5. Find the center of the width and make a mark with your awl.
6. Center a ¼-inch hole punch over your marks and push down to make a light impression.

7. Use soap to coat the tool to make it easier to punch.

8. Before punching, check that the strap sides are even and parallel. With the tool at a 90-degree angle, punch through both layers of the belt at the same time. Repeat for the second hole.
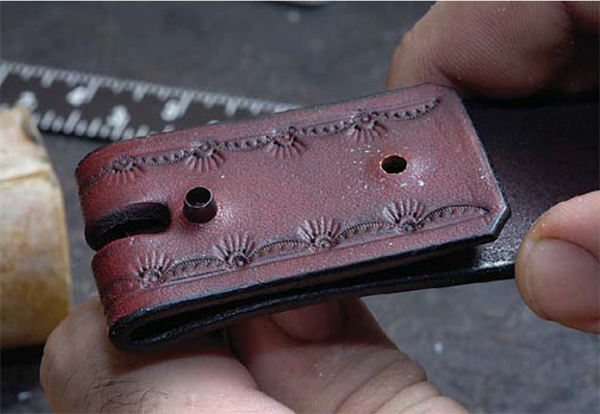
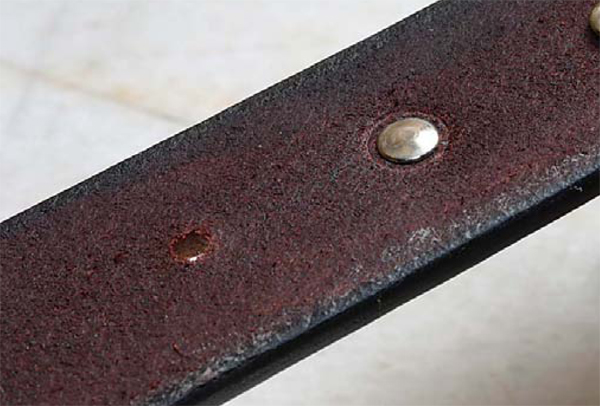
9. The belt is ready for the addition of snaps or rivets.
Snaps were used for this project to allow the buckle to be easily switched. Rivets are permanent fasteners—once they are installed, the buckle can’t be changed.
If you are using snaps, add them now. If you are using rivets you’ll need to add them as you put the buckle and keeper on.
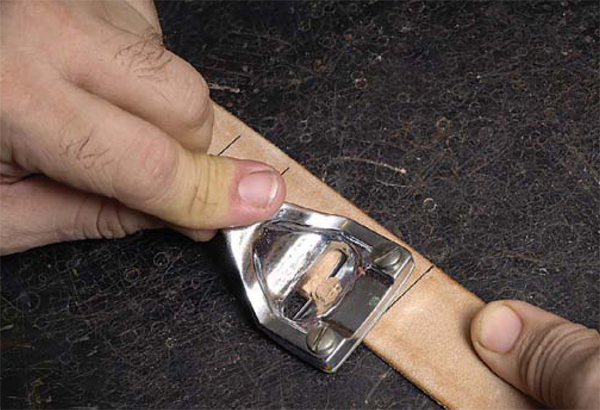
Attaching the Buckle
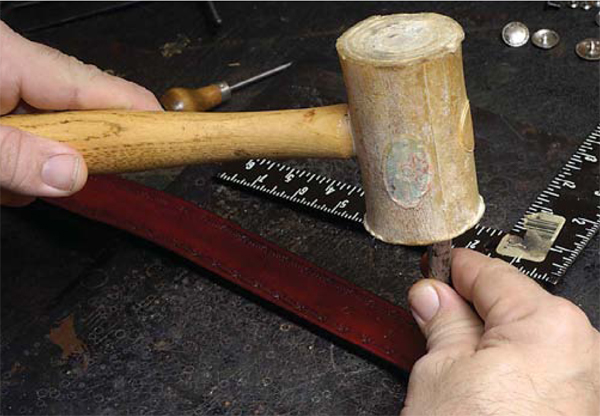
We are using snaps here, but the process is very similar for rivets. Simply follow these steps and add a rivet everywhere we press a snap together.
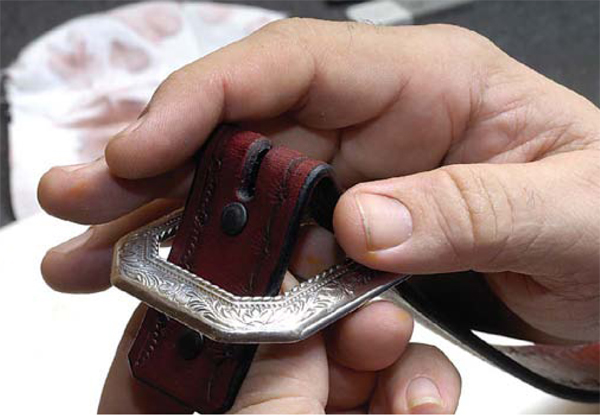
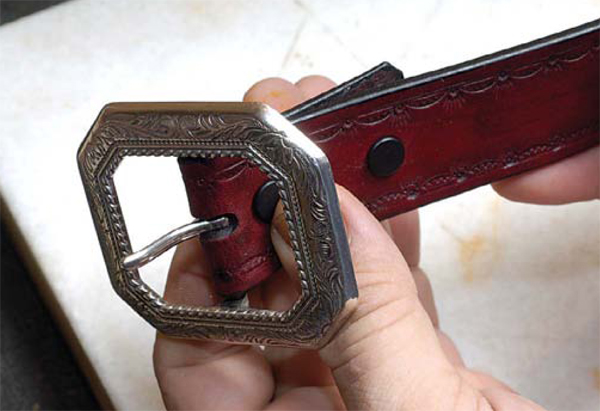
1. With the finished sides of the buckle and belt facing upward, feed the buckle end of the belt around the bar on the buckle.

2. Push the buckle tongue through the oblong hole.
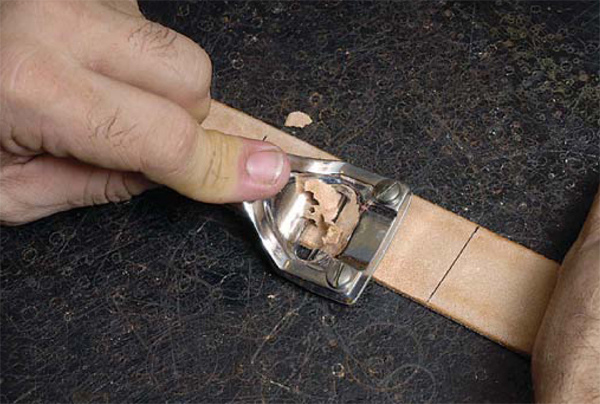
3. Press the snaps closest to the buckle together.
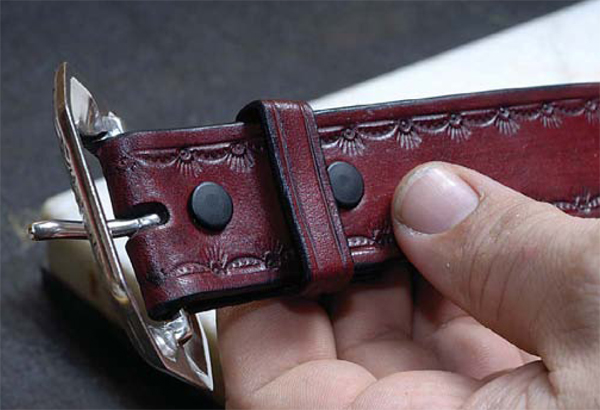
4. Thread the keeper up to the first snap.
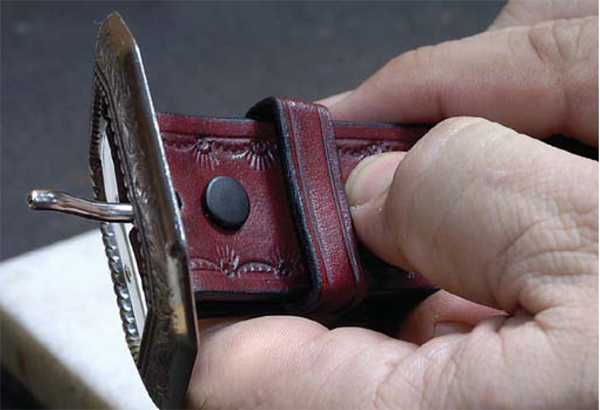
5. Press the second snap together.
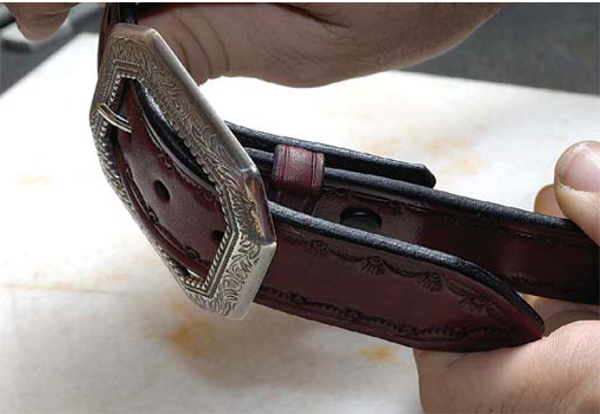
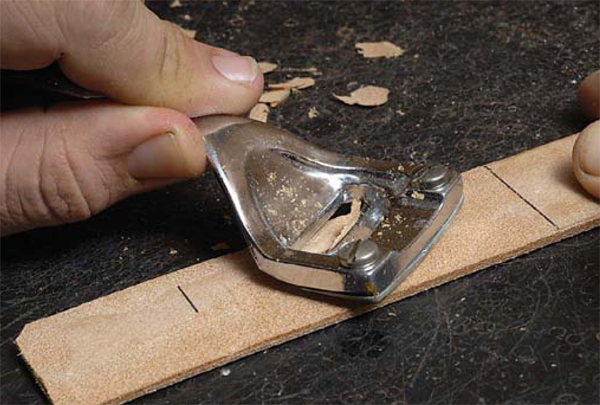
6. The belt is finished and ready to wear.
Making a Belt Keeper
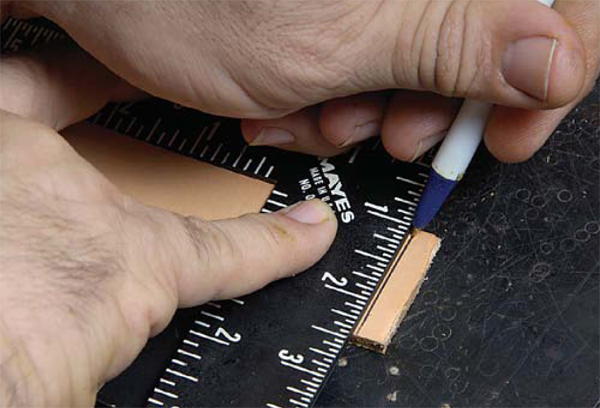
Belt keepers sold by leathercraft vendors don’t cost much, but they are typically stapled rather than sewn. Using a belt keeper block is optional, but it will come in handy if you plan to make many belts and keepers. This measured drawing will accommodate 1-inch to 1¼-inch keepers. The dimensions can be adjusted for other size keepers.
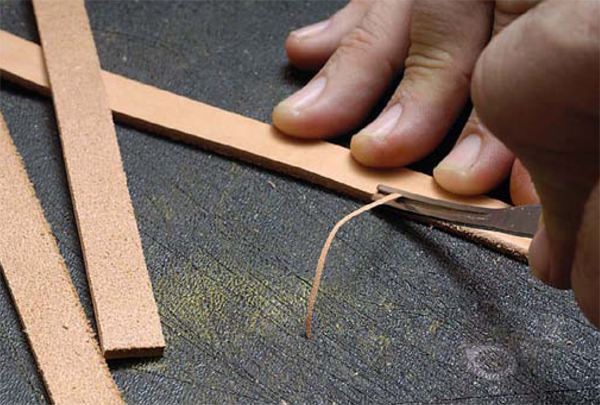
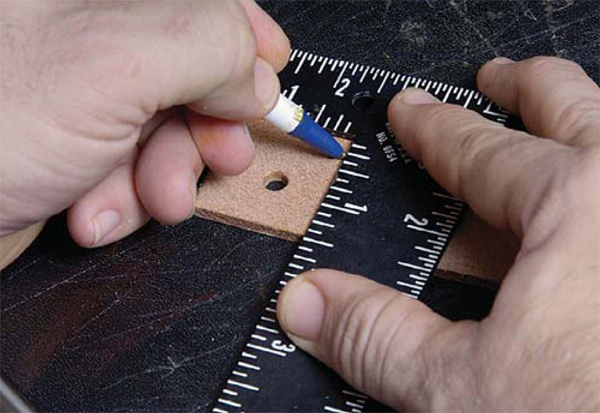
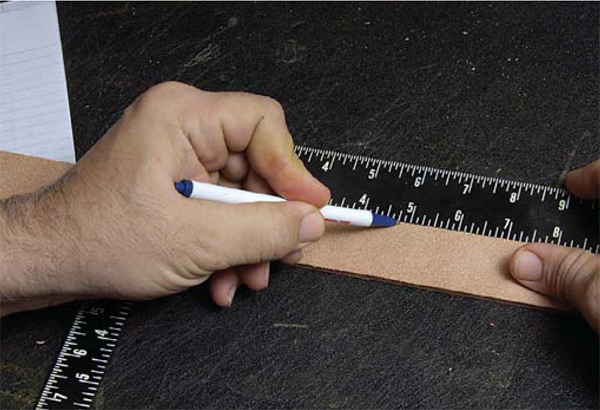
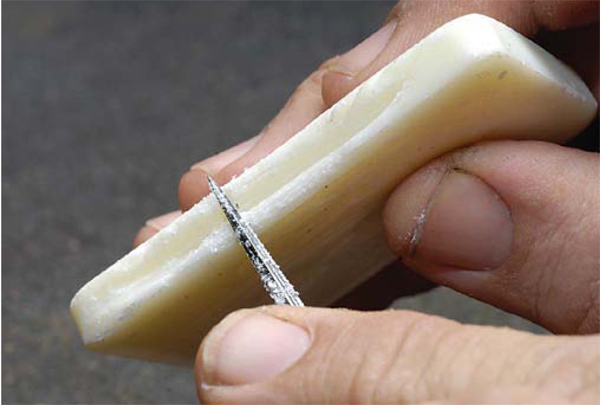
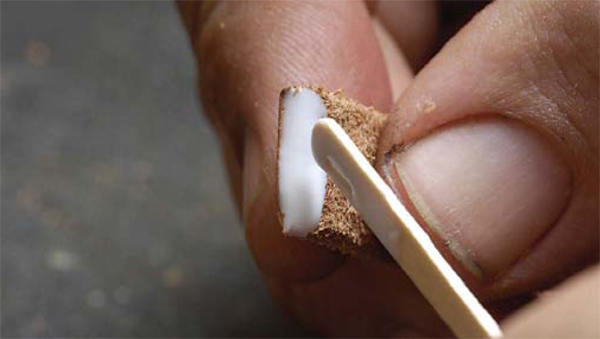
1. Start with a leather strip ½ inch wide by about 6 inches. Use a 2 edge beveler to bevel the top and bottom edges of the strip.
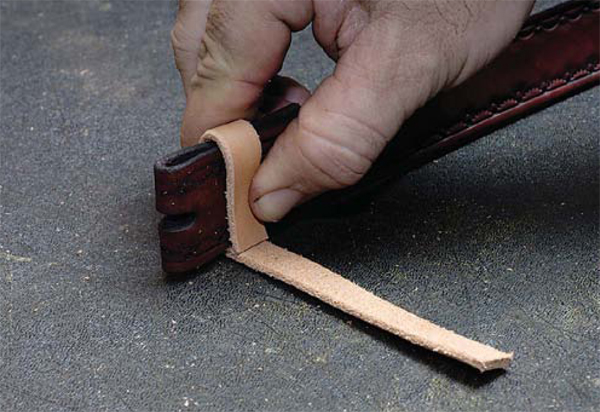

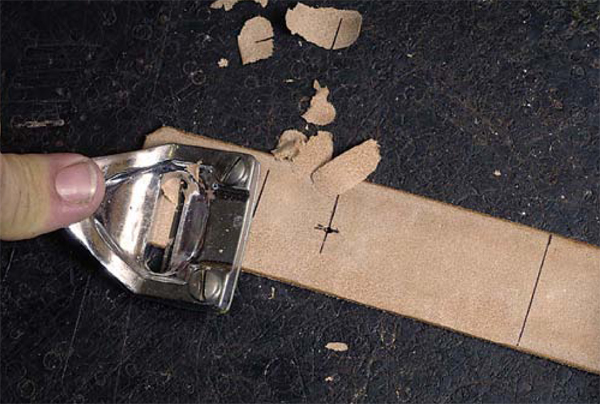
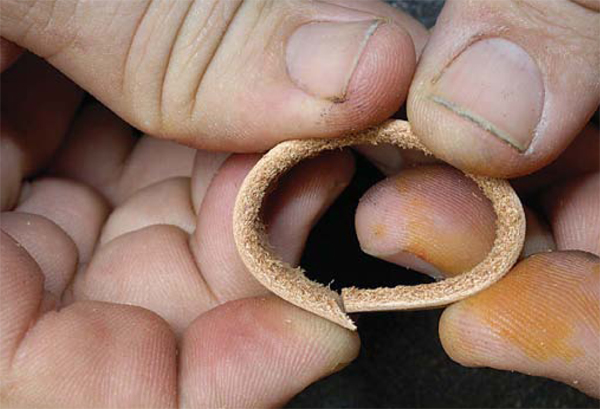
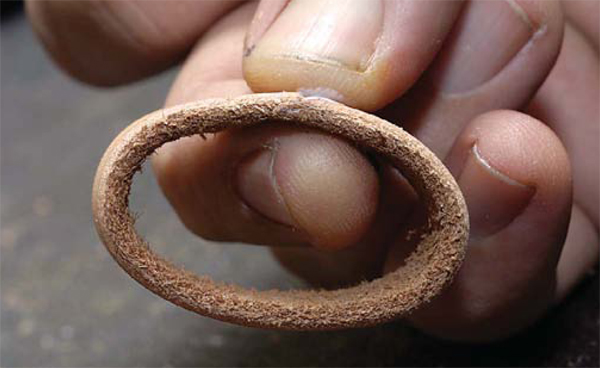
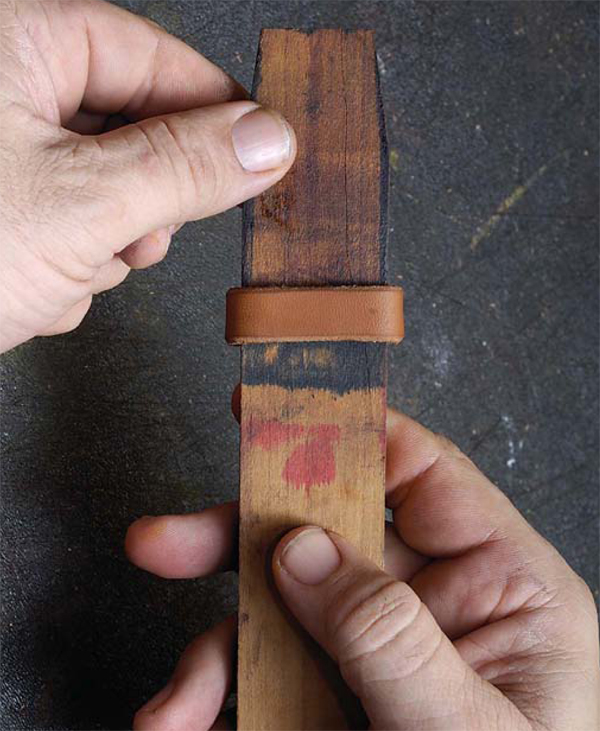
2. Size the keeper by wrapping it tightly around a folded buckle end, as shown.

3. Use a ballpoint pen, awl, or other implement to make a mark where the leather meets.

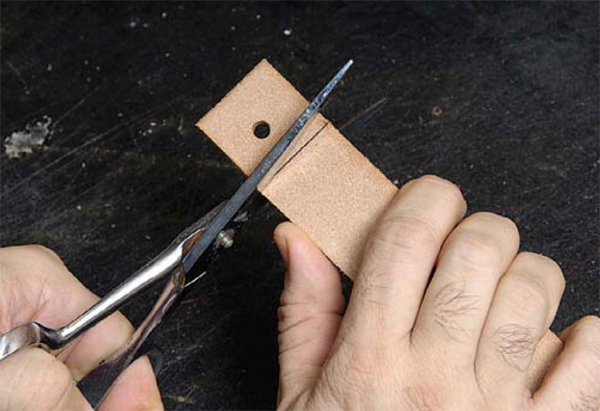
4. Use scissors to cut at the mark.
Tools and Supplies
1/2- by 6-inch, 4-ounce cowhide strip
Size 2 edge beveler
Leather shears
Skiver
Punch awl
Soap bar
Leather Weld
Stitching needle
10-inch length waxed linen thread
Two segments of belt leather or belt keeper block
5. The two ends will be joined end-to-end as shown.
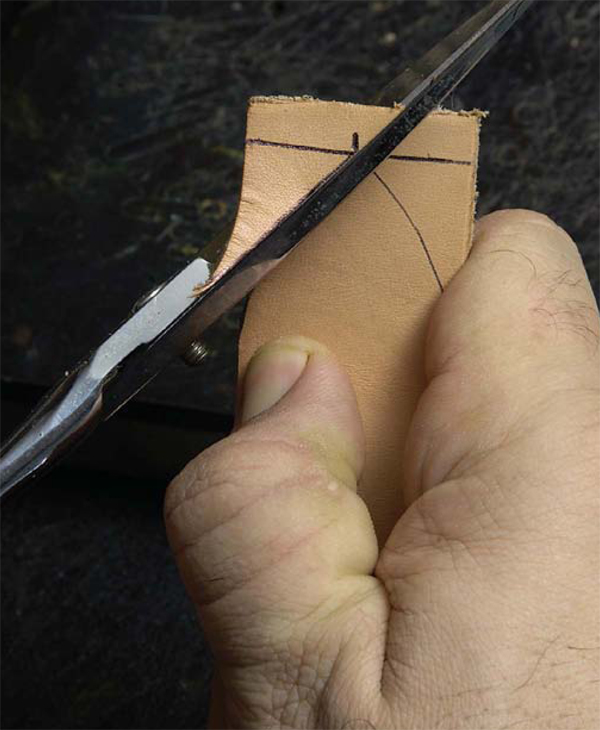
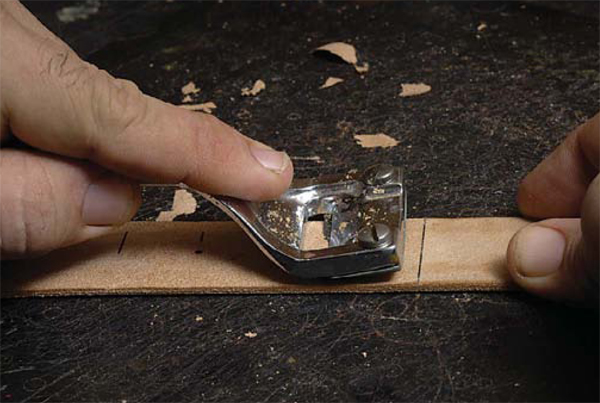
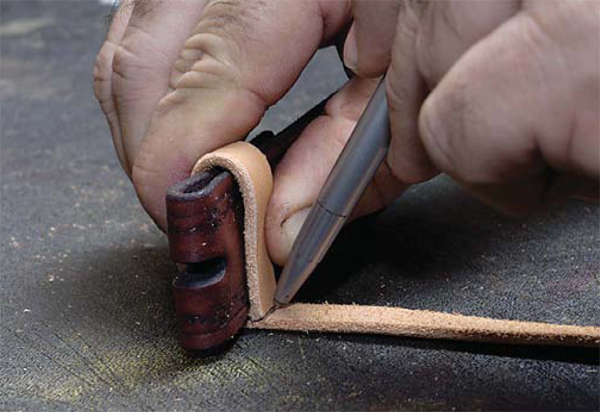
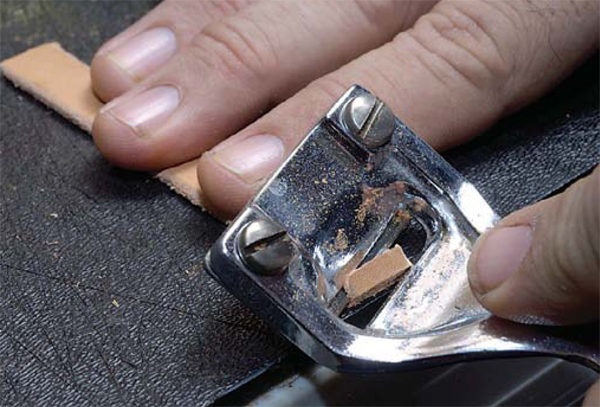
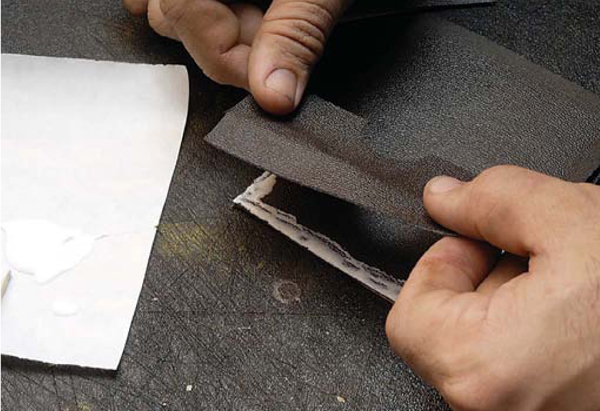
6. With the flesh side facing up, skive one end at about a 30-degree angle. This is most easily accomplished with the leather supported at the edge of the work surface, as shown.
7. Your belt keeper now has one skived end and one straight end.
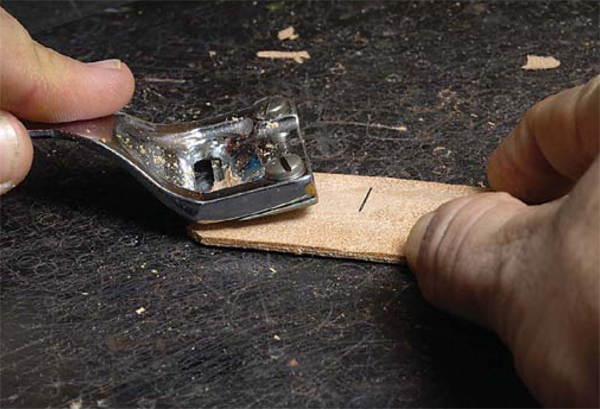
8. With the grain side up, skive the opposite end at about a 30-degree angle.

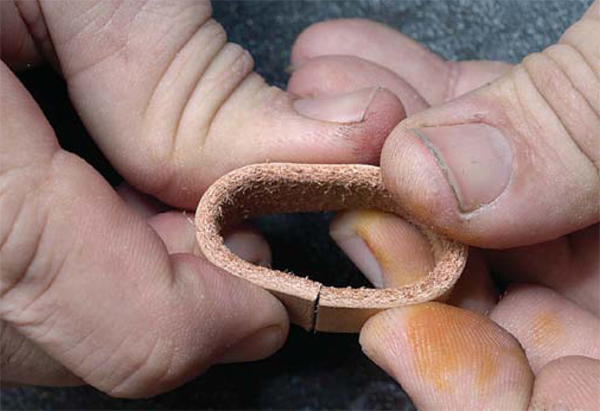
9. The two ends will now join together perfectly.

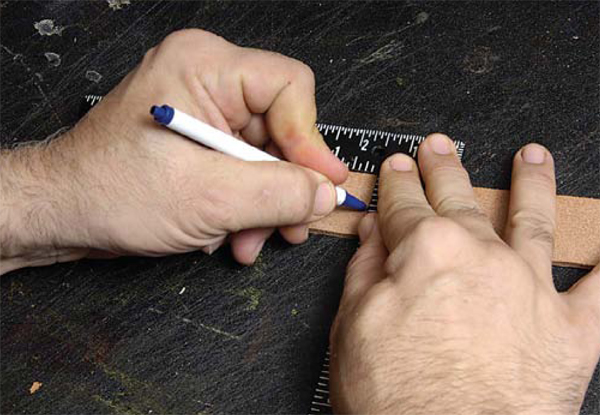
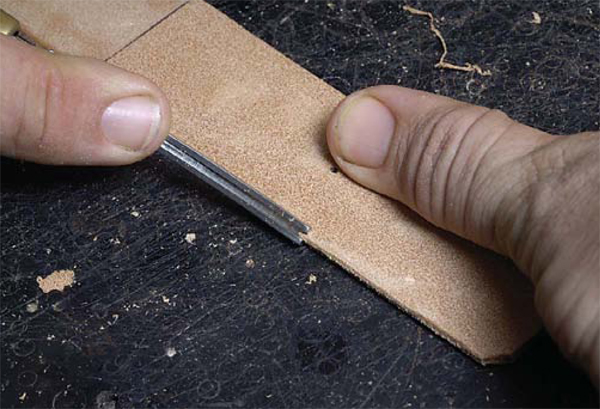
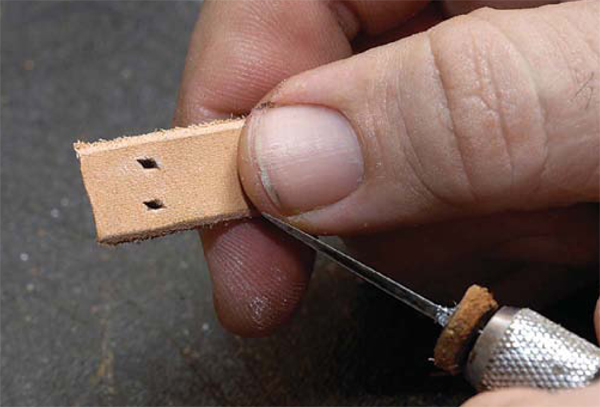
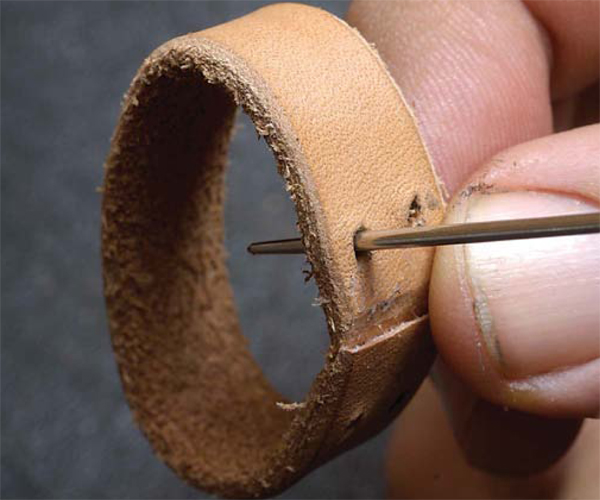
10. Use a stylus, awl tip, or pen to make four marks ¼ inch from each end and slightly in from each edge to serve as stitching placement marks.
11. Apply ordinary bar soap to the end of a stitching awl.
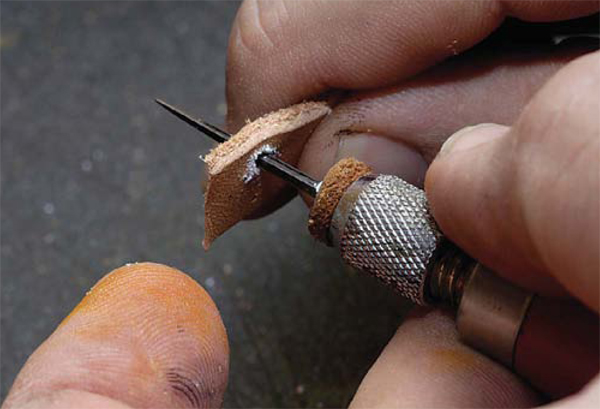
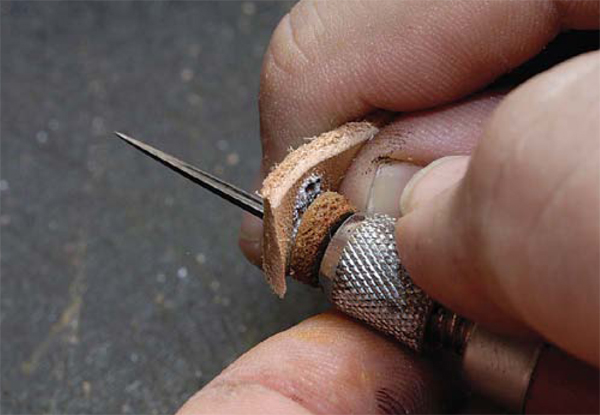
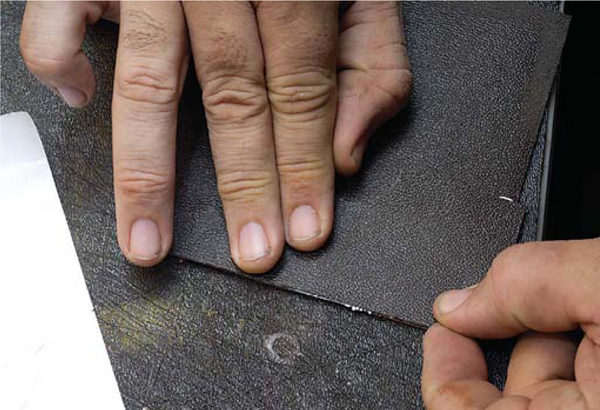
12. Hold the awl so that the top edge of the awl blade is parallel to the edge of the leather as shown and punch through the leather on all four marks.


13. Apply Leather Weld or other similar leather glue to one skived end and press together. Hold the joint together until the glue sets well enough to hold the pieces together. For best results, allow to dry overnight before proceeding.

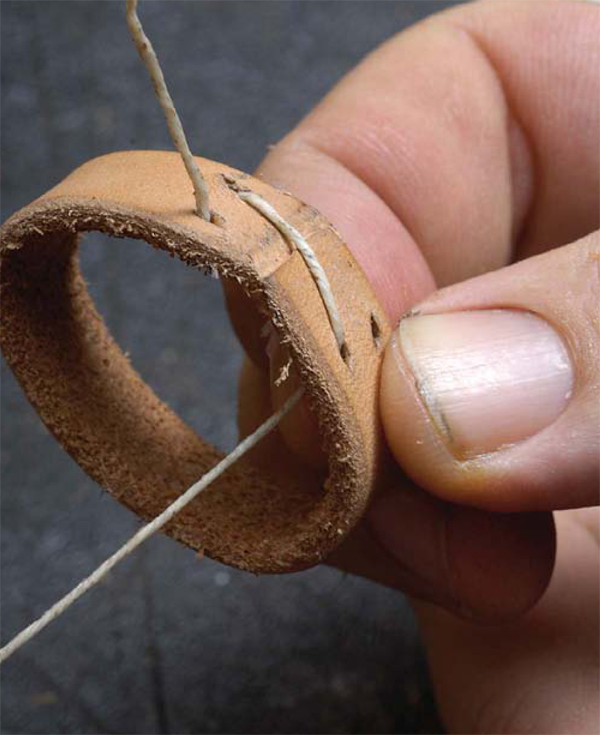
14. Thread the needle with a 10-inch length of waxed linen thread.
15. Insert the needle in the upper left hole and pull it through, leaving a 2-inch tail in the front.
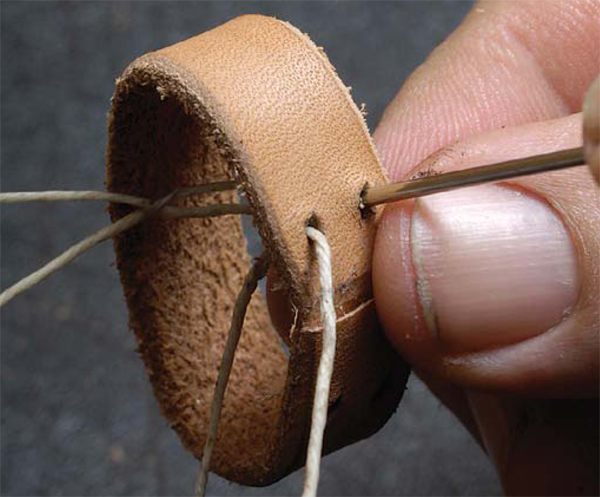
16. Bring the needle out the upper right hole and draw the thread tight.
17. Insert the needle in the lower left hole and draw the thread tight.

18. Bring the needle out the lower right hole and draw the thread tight.

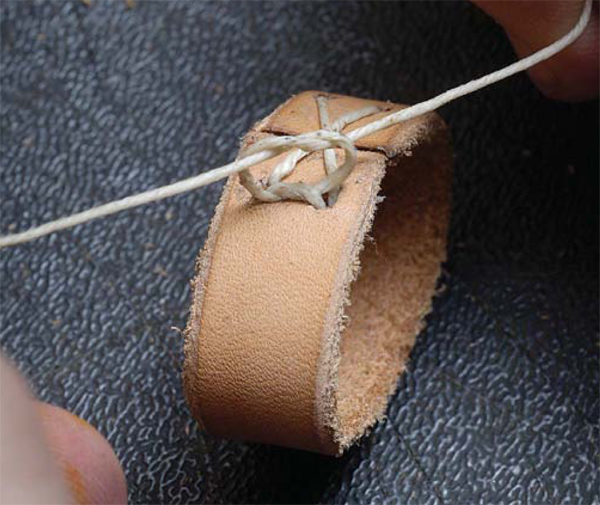
19. Insert the needle in the upper left hole and draw the thread tight.

20. Bring the needle out the upper right hole a second time and draw the thread tight.

21. Remove the thread from the needle.
22. Tie a square knot close to the leather.
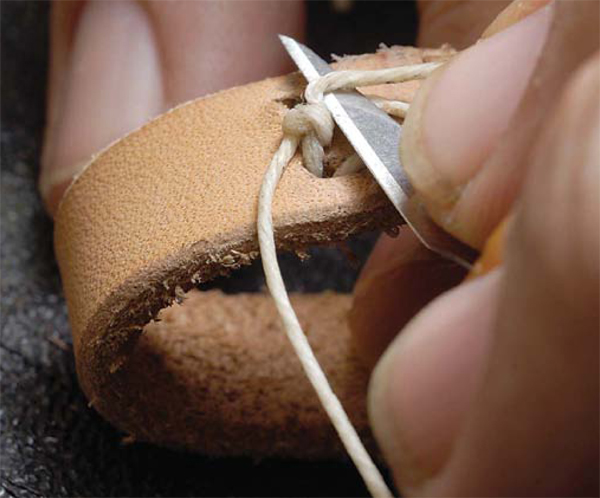
23. Cut the thread ends close to the knot.
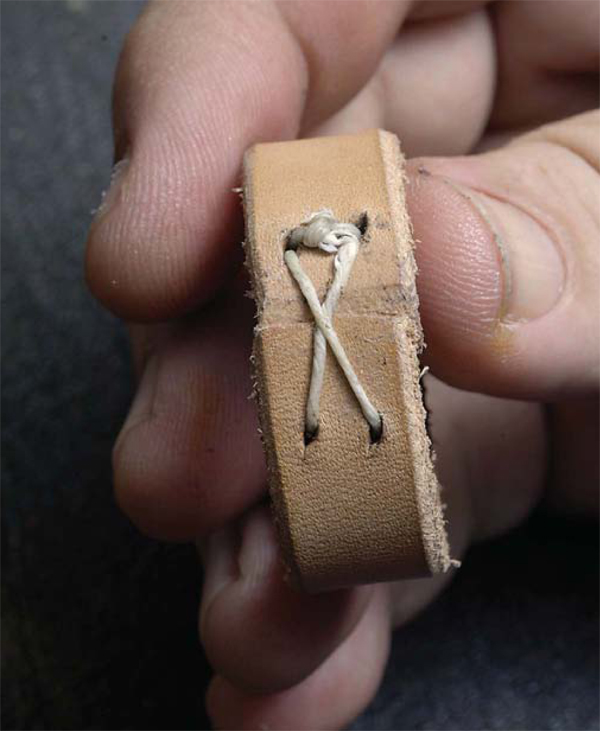
24. The finished keeper is ready to dye to match your belt. Let the keeper dry for 24 hours after dyeing.
25. Thoroughly wet the keeper in hot water.
26. Push the keeper onto a block until it fits snugly and let dry overnight. An alternative to using a block is to place the keeper on two pieces of leather that are the same thickness as your belt. The results won’t be quite as good but will suffice.
GALLERY OF BELT DESIGNS
Once you learn the basic carving and stamping techniques, you can create an infinite number of one-of-akind belt designs similar to these done by leathercrafter Bill Hollis. Here is just a small sampling of what can be done with a fresh belt blank and a few leathercraft tools.
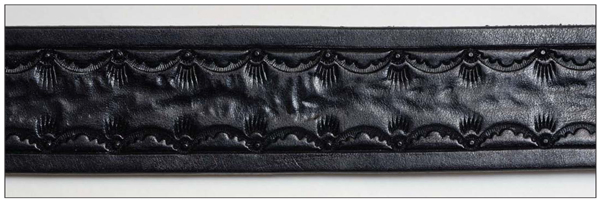
A design is similar to the demo project, made with Craftools V-407, C-834, S-724, and P-703. The design was embellished with random peaks and valleys made by the pear shader.
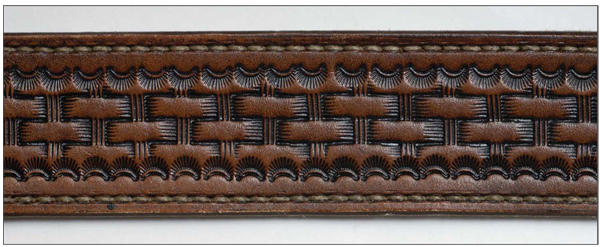
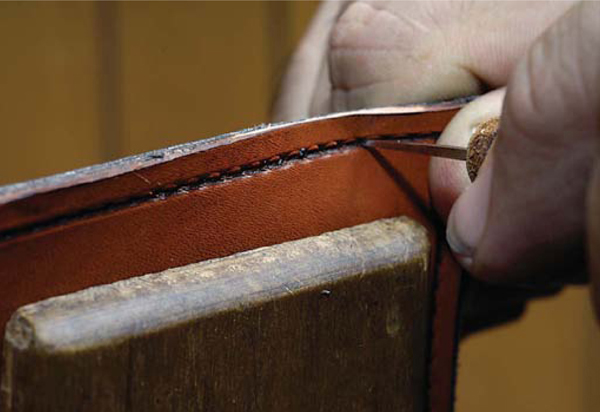
Only two Craftools were used to make this basketweave design: D-436 and X-534. The edge stitching dresses up the belt.
This western-style gun belt is a bit more advanced, but the stamping is straightforward. Experiment with your favorite camouflage and border tools to produce your own unique design. The stamping on this belt was made with Craftools D-438 and D-435.

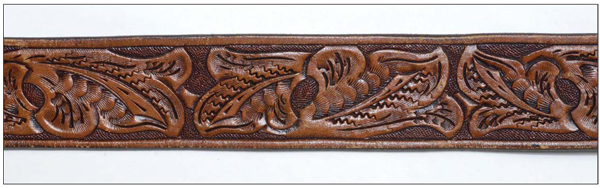
These belts feature western floral-style carving. To get good at this type of design, you need to practice, practice, practice. The flowers, leaves, and stems are beveled, providing dimension by raising them off the leather surface. Pear shaders give the leaves and petals curvature and more depth. The veiner tool makes leaves appear curved, while the camouflage tool adds interest. The seeders add realism to the flower centers. And finally, the background stamping draws attention to the main figures.
DEMONSTRATION PROJECT 2: CARD CASE
Tools and Supplies
Smooth marble, polyester, or other hard surface for stamping.
4-ounce cowhide leather rectangle 4¼ inches wide by 5¼ inches long
Moroccan or other lining leather 5 inches long by 6½ inches wide
Card case pattern (from page 162)
4-ounce scrap leather for testing stamps
Skiver
Size 2 edge beveler
Leather shears
Utility knife or head knife
Swivel knife
Beveler tools and a border tool or stamps of your choice (Craftool B203, B701, and D436 were used here).
Modeling tool with medium ball end
Three-dimensional stamp of your choice (the Marine Corps logo was used here)
Stitching groover
Scratch awl or stylus
Wing dividers
Single-edge razor blade
Leather conditioner (such as Lexol)
Gel Antique (saddle tan was used here)
Small jar or tube of acrylic paint (metallic gold was used here)
60-grit sandpaper
Edge wax and burnishing cloth
Edge Kote
Bone tool
Small bowl of clean water and cellulose sponge
Measuring square
Cotton swabs
Ballpoint pen
Stitching needles
Waxed nylon thread
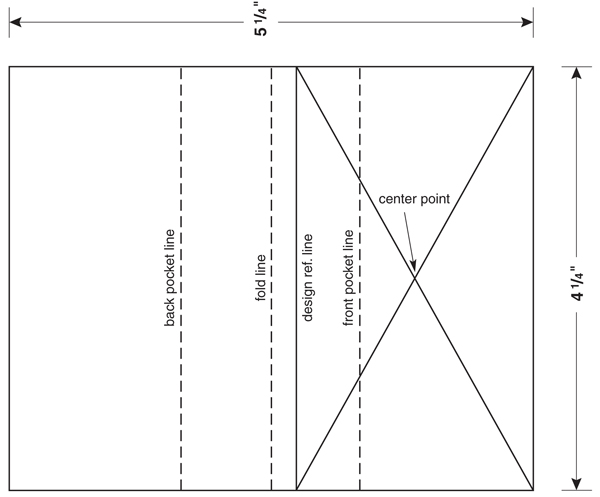
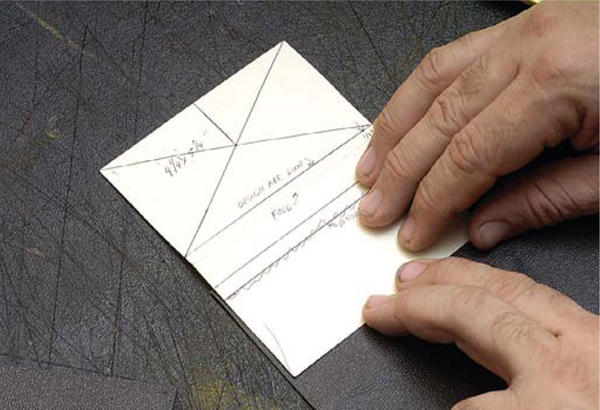
Card Case Pattern
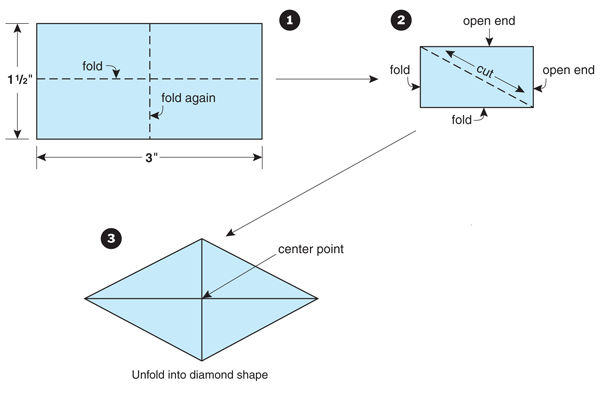
Diamond Pattern use cardstock
1. Prepare the leather for stamping as instructed previously. Wet the leather with clean water and sponge. When the entire piece is evenly wet, spray on a generous amount of leather conditioner. Gently rub in the leather conditioner in a circular motion, using your fingers, until it is all absorbed.

2. Use a stitching groover and stitching wheel to prepare the piece to be stitched.
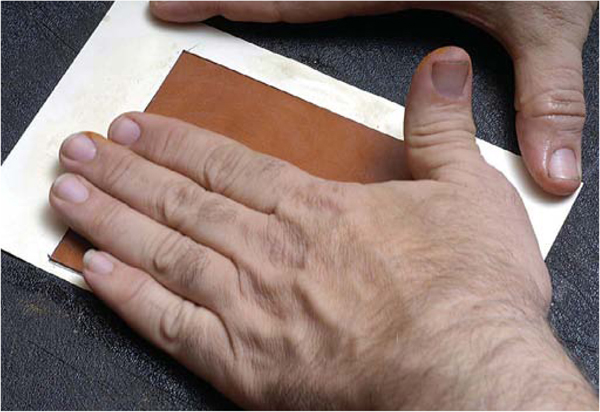
3. Place the card case pattern over the leather, matching up the edges.

4. Use the awl to lightly mark the center point of the card case front by punching through the pattern onto the leather.
5. Find the center of the diamond pattern piece
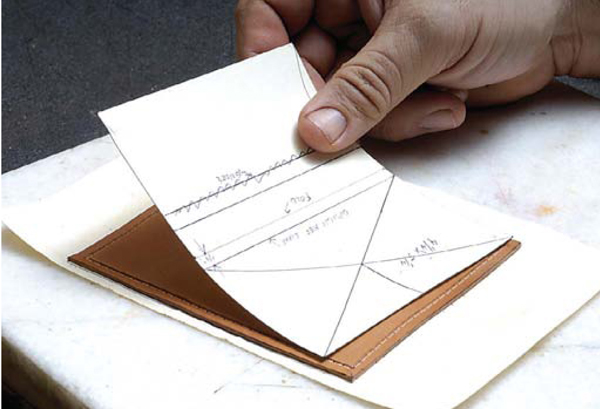
6. Use the awl or stylus to hold down the pattern at the center mark. Arrange the diamond so it is centered properly within the three grooves. Use a divider arm or stylus to mark one of the diamond points. Without moving the pattern, use the awl or stylus to mark the other three points of the diamond.

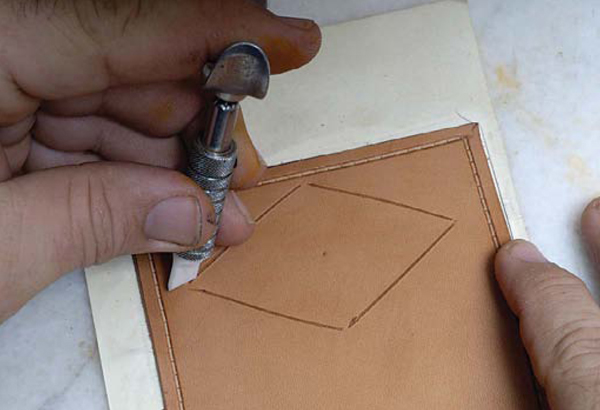
7. While holding the pattern down firmly so it doesn’t move, use your awl or stylus to very lightly trace the pattern. Don’t cut into the leather or press too deeply.
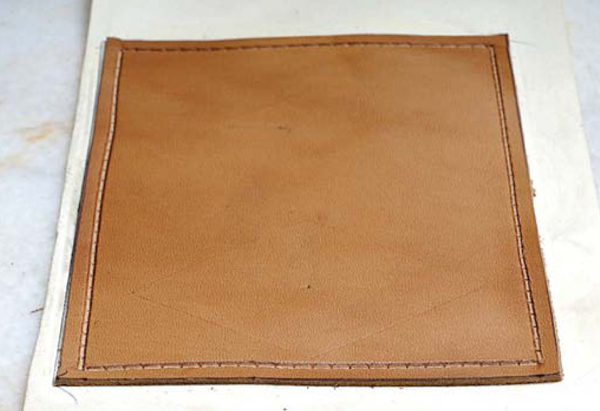
8. This is how your project should look at this stage.
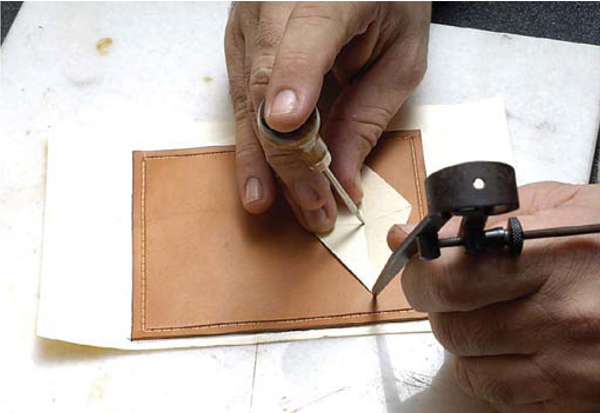
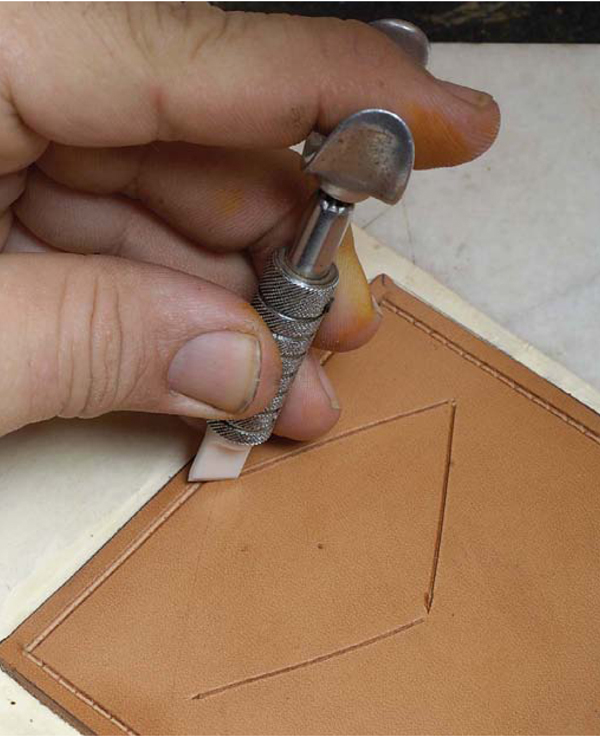
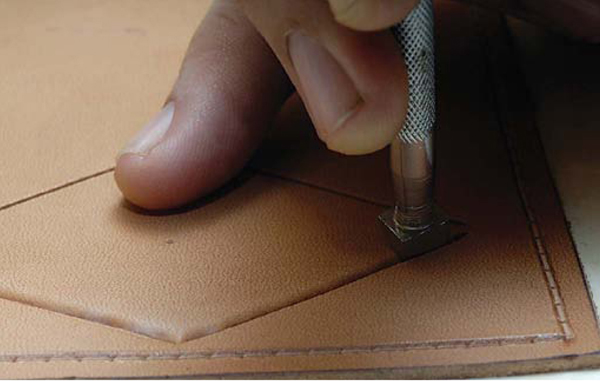
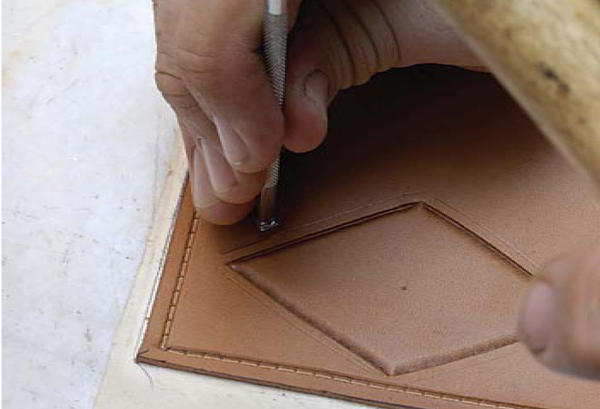
Cutting the Design

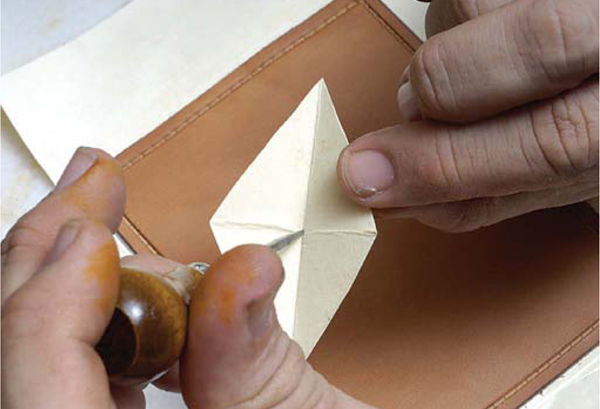
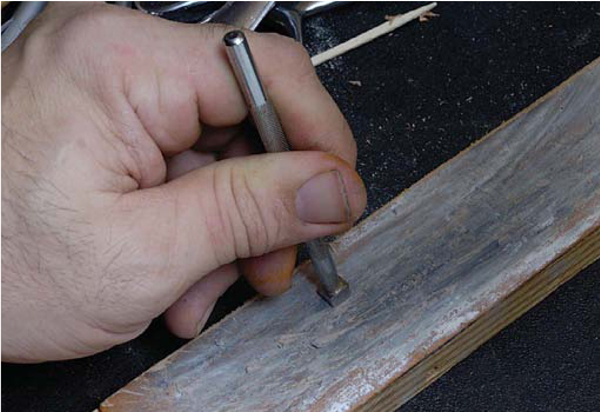
1. Strop the swivel knife. This will help your knife blade cut smoothly through the leather.

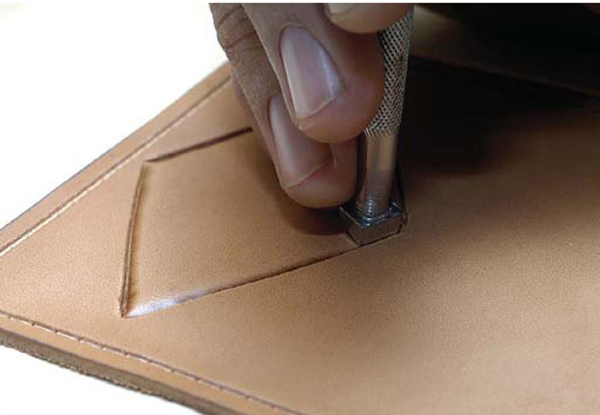
2. Starting in one corner, follow your guideline and cut a clear, clean line. Each side of the diamond should be made in one smooth cut.
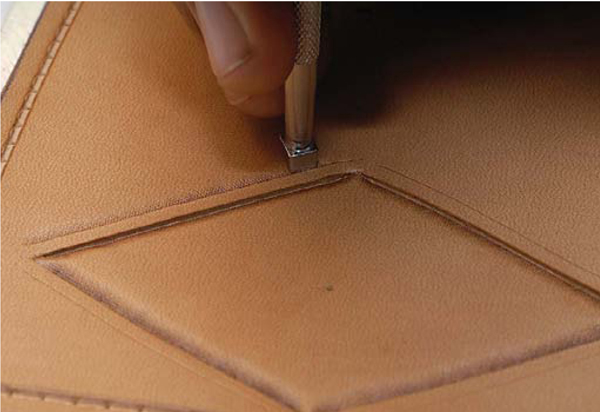
3. Stop at the next corner and lift your knife up.
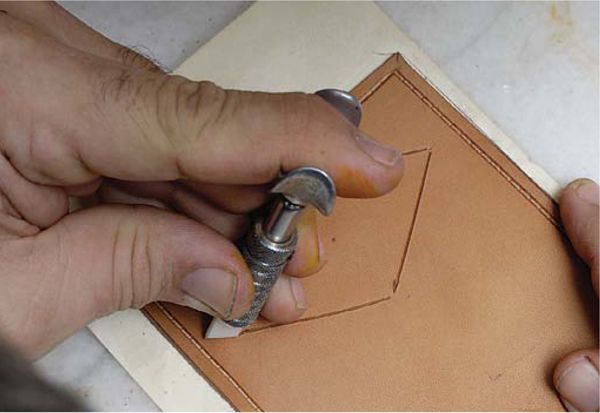
4. Replace the corner edge of the knife at this corner mark but make sure to leave a space so that the lines do not touch.
5. Repeat the process on the other sides of the triangle.
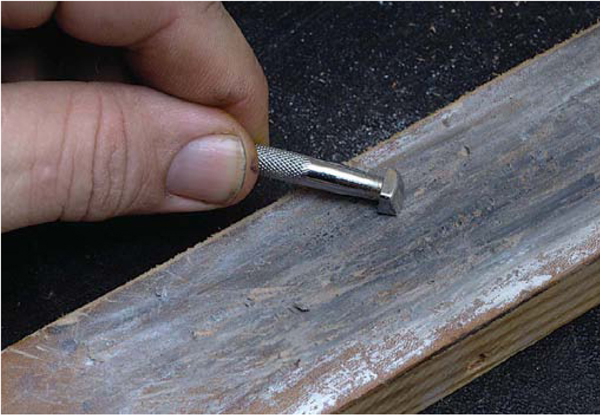
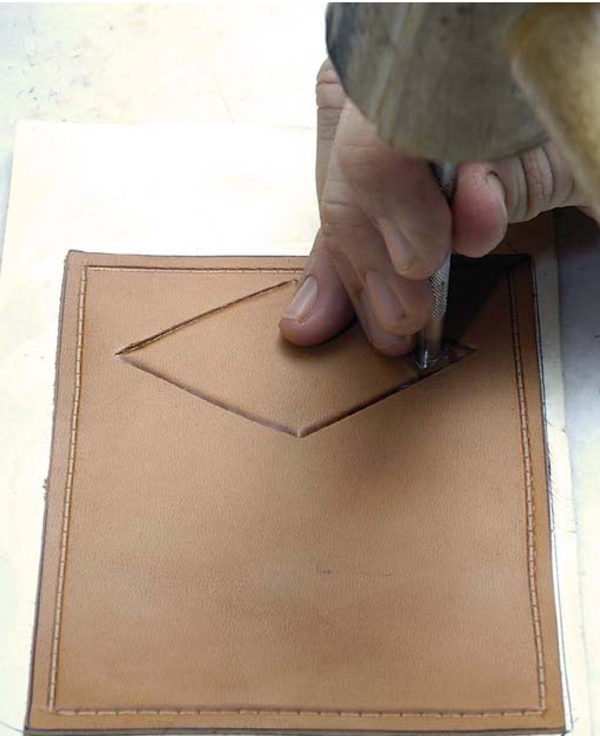
6. Prepare your Craftool beveler tool B 201. Strop the bottom and side edges of the tool. Note that the beveler tool is the only stamping tool you will strop.
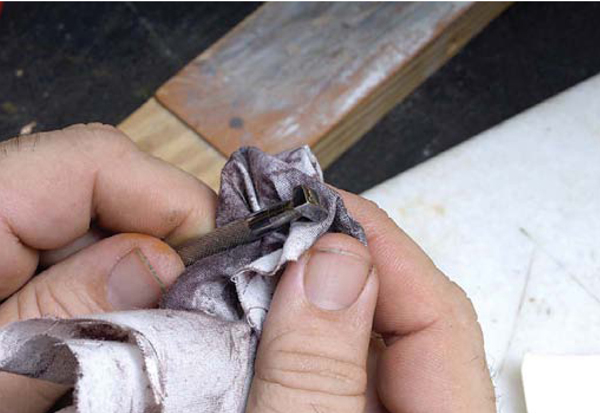
7. Wipe off excess jeweler’s rogue.
8. Place your beveler at a 90-degree angle with the edge placed along the inside of your triangle. Start at a corner and move the beveler smoothly along the line as you make short, light taps. Stop when you reach the end of the cut.

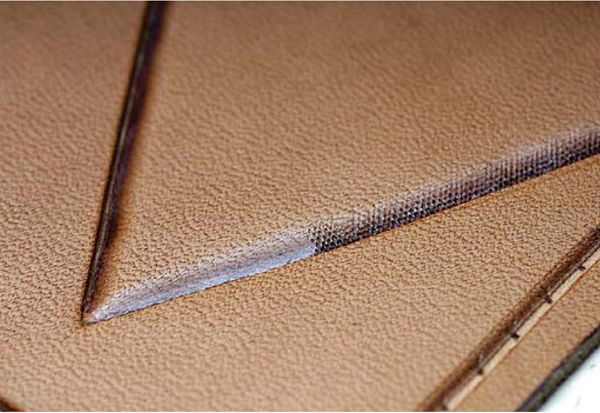
9. This is how your beveled line should look.
10. Place your tool at the beginning of the second side of the triangle and bevel to the end. Be sure to stop at the end of the cut, leaving a small space between the diamond sides.

11. The beveled edges should appear straight and of equal depth.
12. Continue beveling the remaining two sides of the diamond.
13. To add interest, switch to the texture beveling tool, Craftool B701. Re-bevel all edges using the same technique you used with the smooth beveler.
14. Notice the difference between a straight beveled edge on the left portion of the cut and after using a texture beveler, shown on the right portion of the cut.
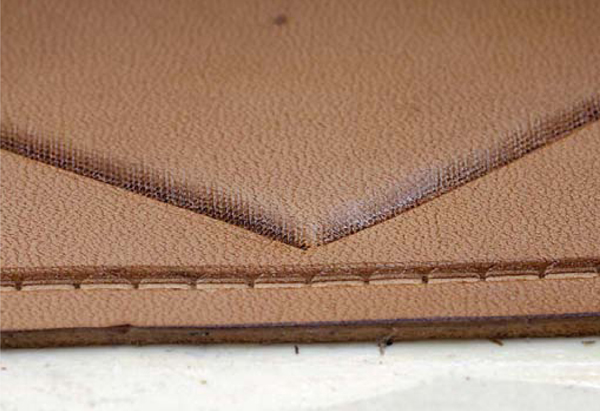
15. By leaving a space between the cuts, you should get a nice crisp corner on your diamond.

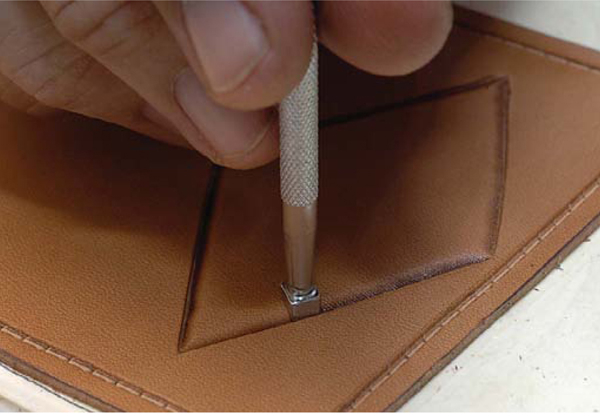
16. To add interest to the design, create a second diamond on the outside of the first diamond. This also shows that you don't always have to bevel against a cut line.


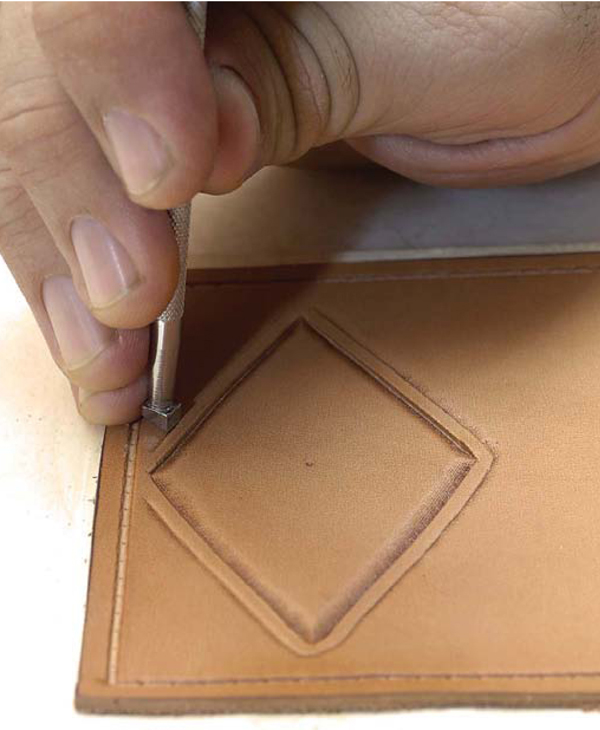
17. Set the divider arms about 3/16 inch apart. Place one arm in the cut and pull toward you, letting the weight of the other arm make a slight impression in the leather. Repeat this process on all sides.
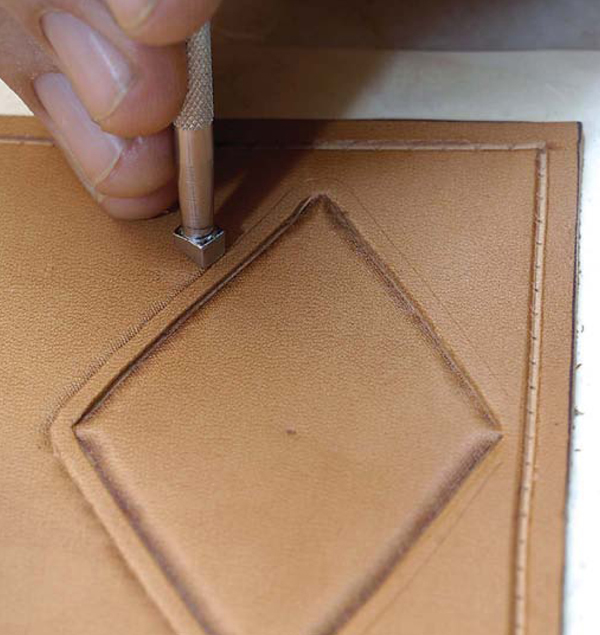
18. Use the Craftool texture beveler B701 to gently bevel against the line. Go slowly, carefully obliterating the line as you go. When you reach a corner, lift the tool and set it down at the correct angle on the line. Because there is not a cut line, it is not necessary to leave a gap between where one line ends and the other begins.
19. Allow the bevel to taper off as you reach the stitching guideline.
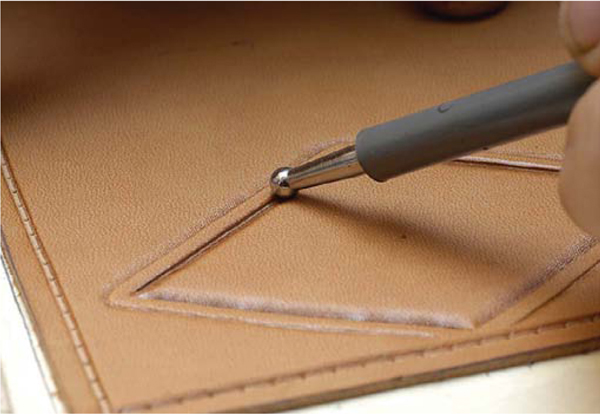
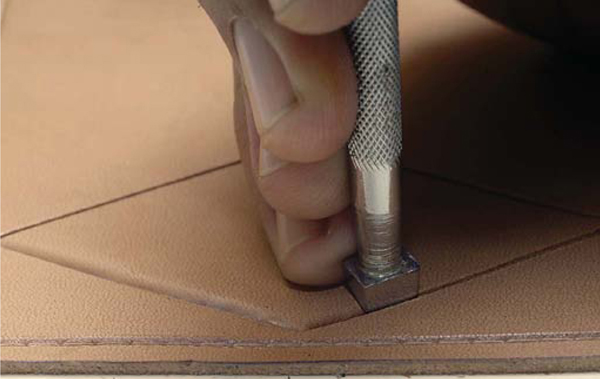
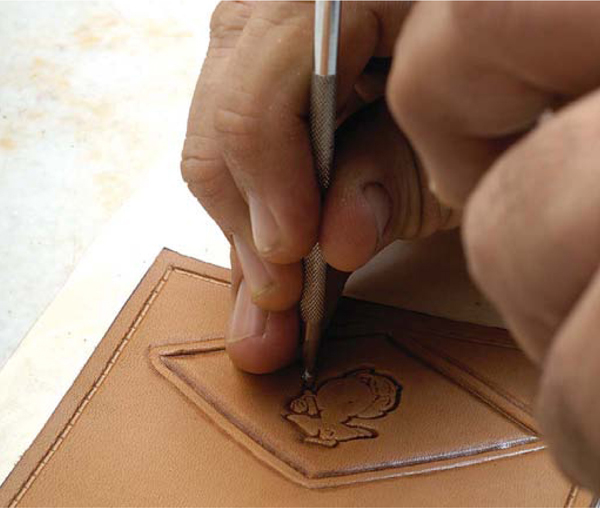
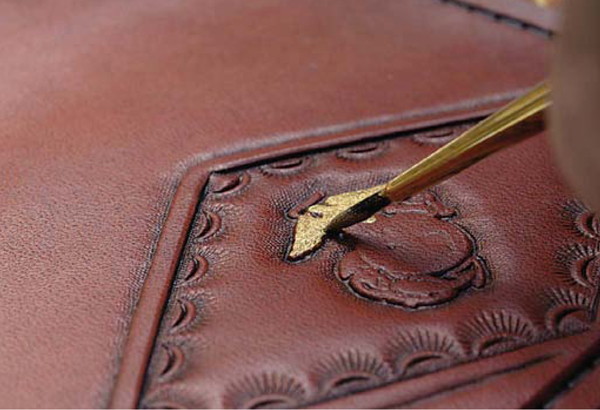
20. Use the modeling tool with the medium ball end to enhance and smooth the inside cut line, which has already been beveled.

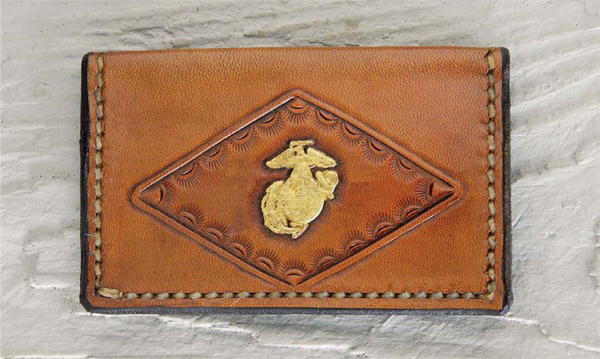
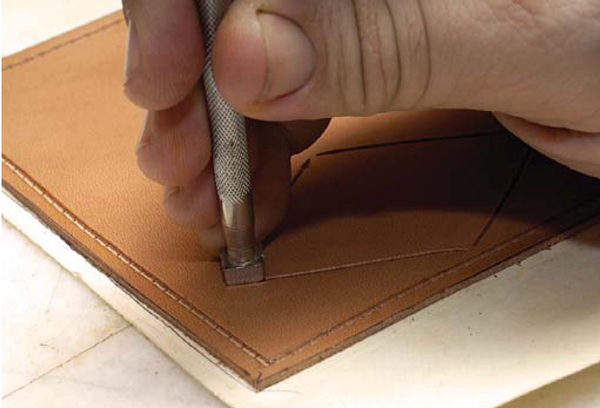
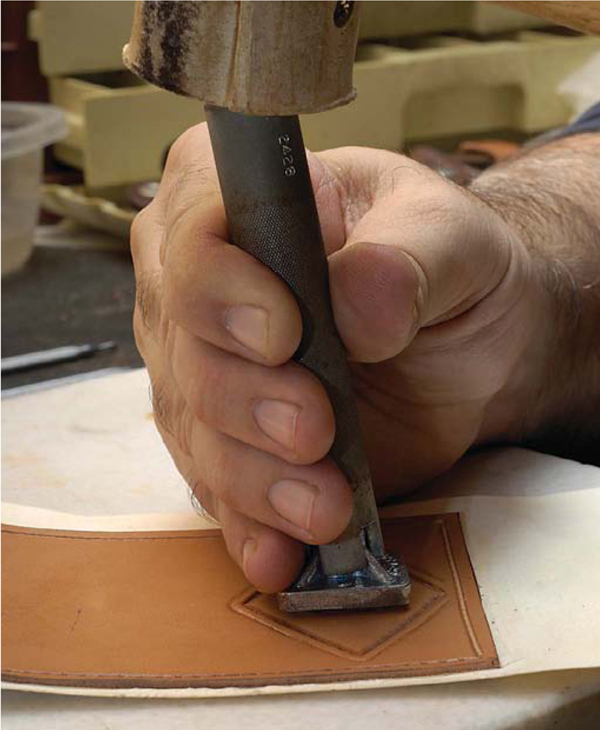
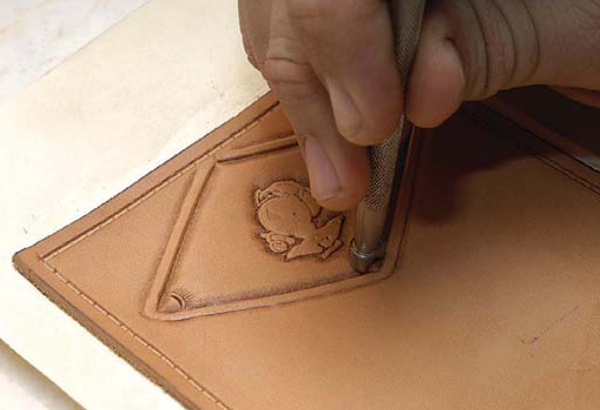
21. Select the three-dimensional stamp of your choice. Center the stamp by eye within the triangle. If the numbers and writing are right side up with the project facing you, the stamp is in the proper orientation. Without moving the stamp, insert the handle. If the stamp moves, read-just it.

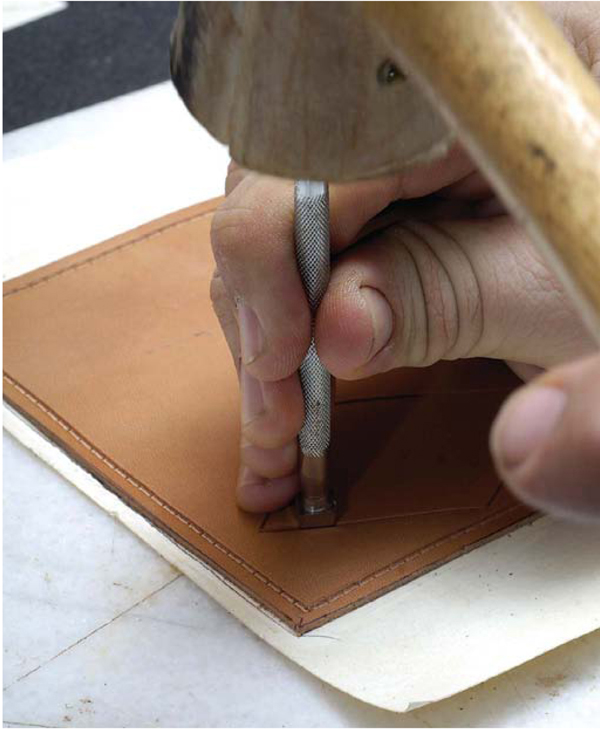
22. With the handle at a 90-degree angle, hold down tight and hit the handle hard with the mallet three times.
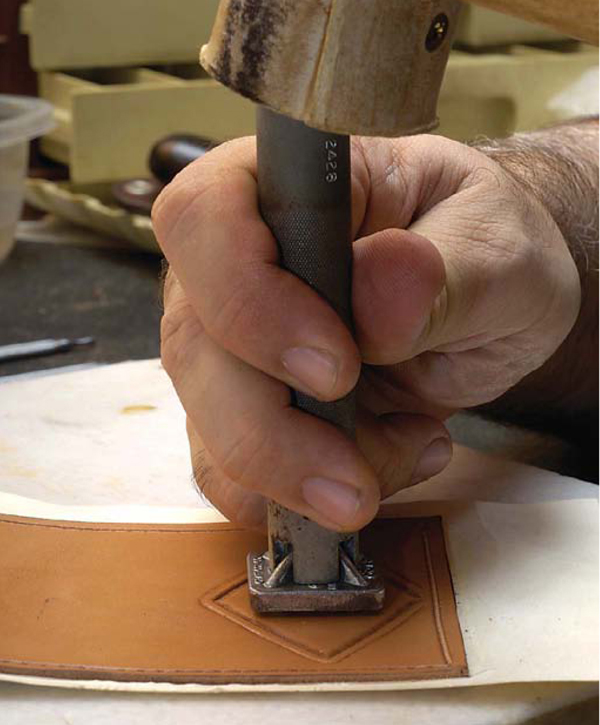
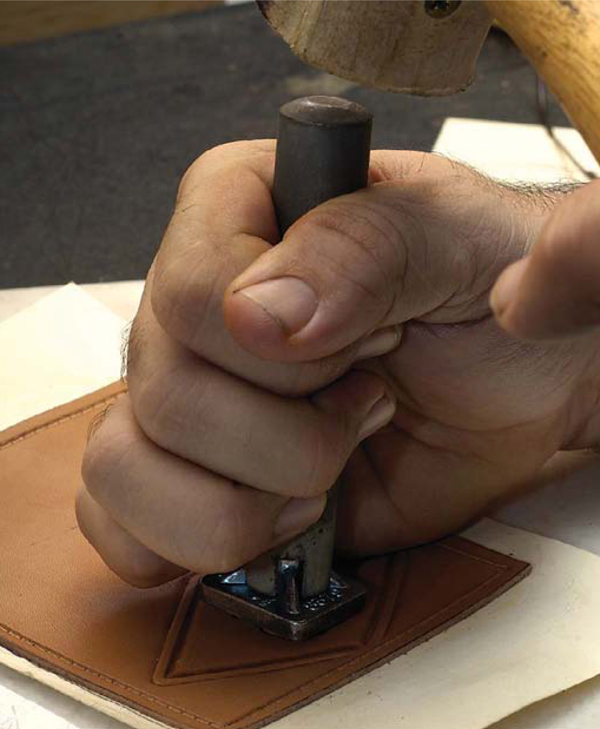

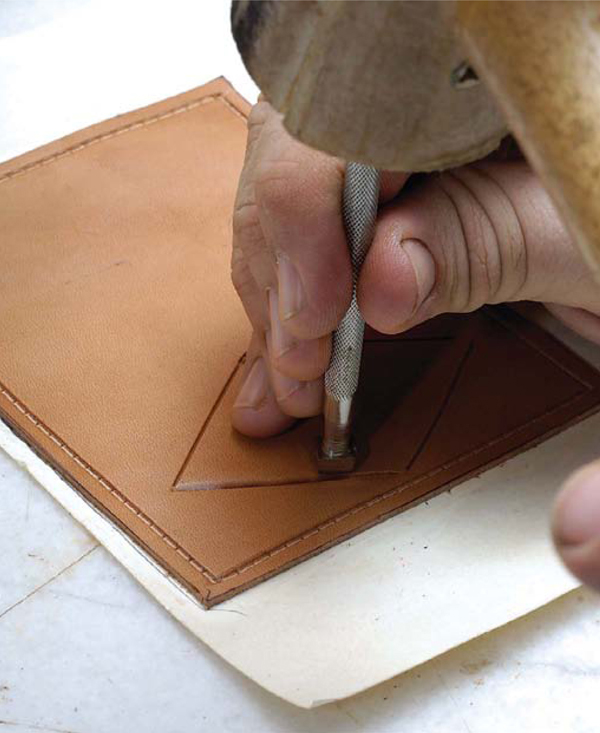
23. Without lifting or moving the stamp, hit the stamp hard a couple of times at each clock position in this order: 12 o'clock, 6 o'clock, 9 o'clock, and 3 o'clock.
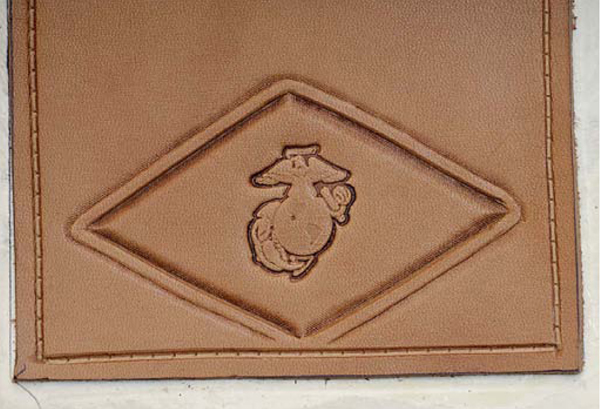
24. Remove the stamp and check the results. If any portion of the stamp is too light, carefully register the stamp and rap again with the mallet. The stamp must be positioned exactly or you will make a double impression, which will be difficult, if not impossible, to fix.

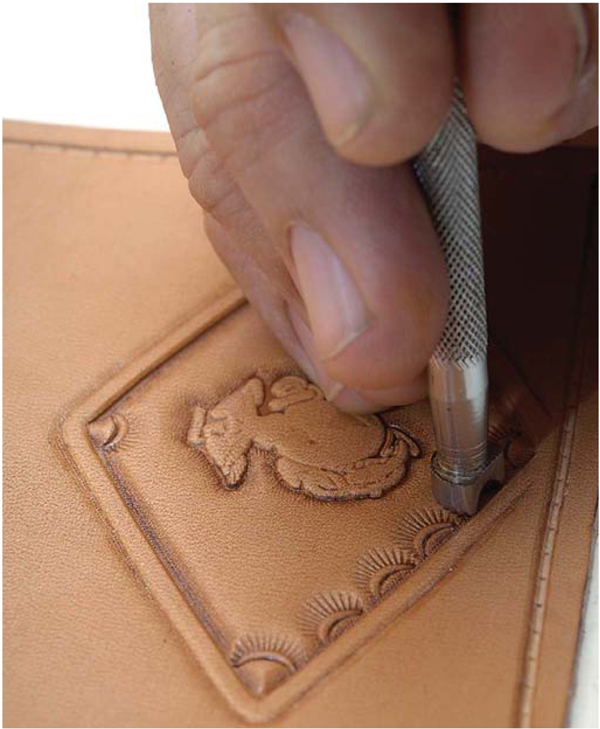
25. Use the texture beveler Craftool B 701 to bevel around the edge of the 3-D stamp. Move the tool along carefully, using the corner of the tool to get into any tight areas of the design.

26. The border tool D436 will add more interest to the design. Stamp the design in all four corners.
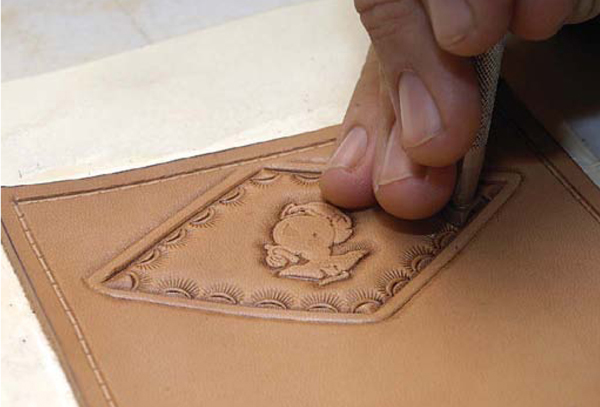
27. Continue stamping the design along the cut line, using your eye to judge the spacing. With this tool, four impressions may be made between the corner stamps. When you are experimenting with your own tools and designs, the way to achieve success is by preparing a sample test piece and through practice.
Coloring the Case
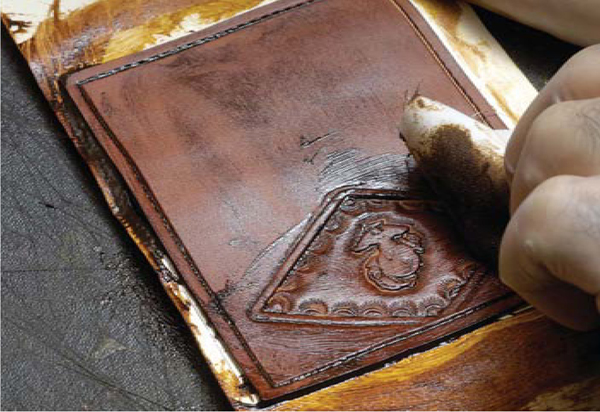
1. Let your project dry for several hours or overnight before dying. Apply gel antique evenly over the entire card case. Be sure to work the gel into the recessed areas of the stamp. Inspect the stamped areas and if any spots were missed, apply more gel where needed, rub in, and rub off.

2. A metallic gold accent color will be added to the stamped emblem after the antique gel is dry. Place a small amount of metallic gold acrylic paint on a card or paper plate. If it's too thick, add a drop or two of water.
3. A small liner brush is used to paint the stamped area. If you accidentally paint outside of the stamped area, wipe the paint off right away with a slightly damp cloth or paper towel.

4. Acrylic paint dries quickly. When it is dry to the touch, remove the cardstock backing by pulling up on one of the short ends until you can grasp the case. Pull the cardstock off slowly while holding the case in your other hand.
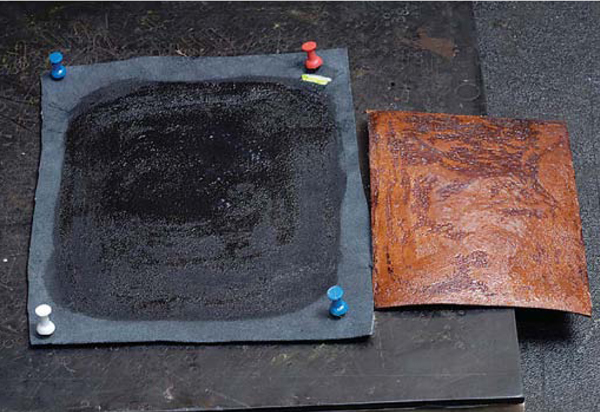
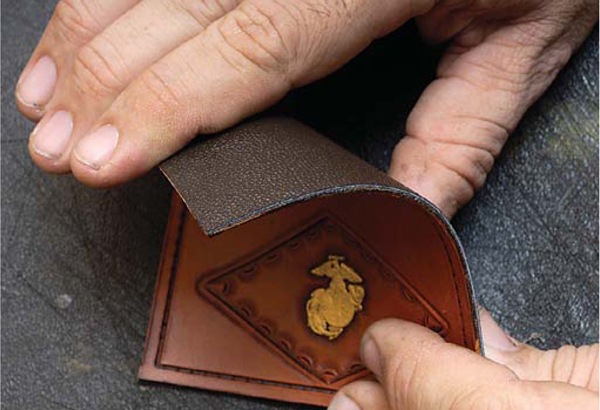
Preparing and Attaching the Lining
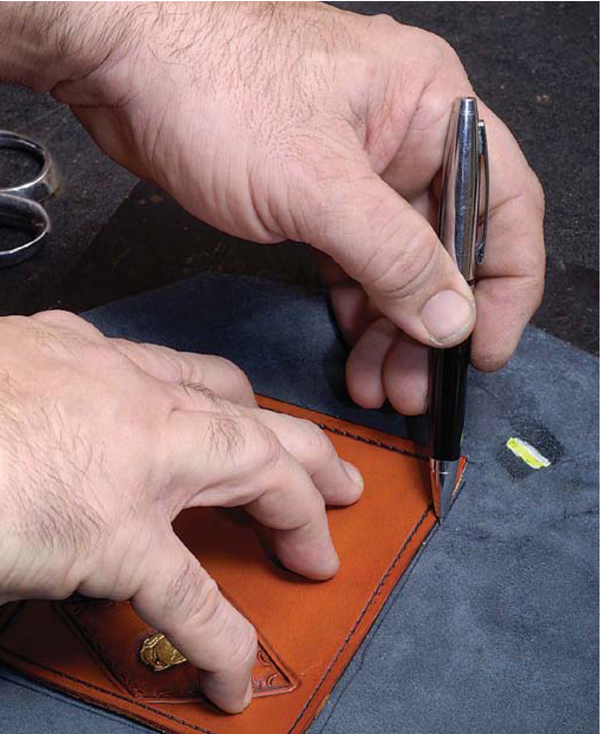
1. Black Moroccan leather is used to line this project. Use a ballpoint pen to trace the outline of the card case on the flesh side of the lining leather.
2. Cut about 1 inch away from the lines on all sides.


3. Use pushpins to pin the lining, flesh side up, to your rubber mat. Use as many pins as needed to hold the lining taut—there must be no wrinkles.
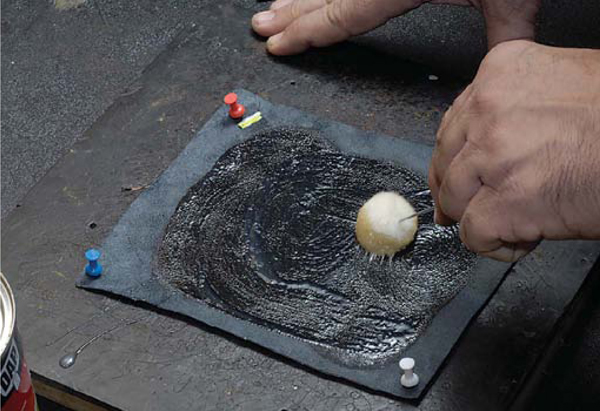
4. Use a wool dauber to apply two coats of solvent-based cement on the flesh sides of the liner and card case. Follow the directions on the product's packaging for this procedure. Be sure to cover the entire lining and card case with the cement.
5. Let the pieces dry to the touch after the second coat of cement has been applied.
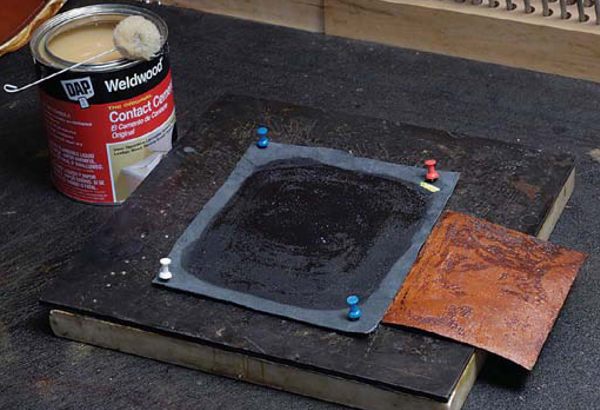
6. You can tell if the cement is ready by touching the surface. It should be tacky but none should come off on your finger.
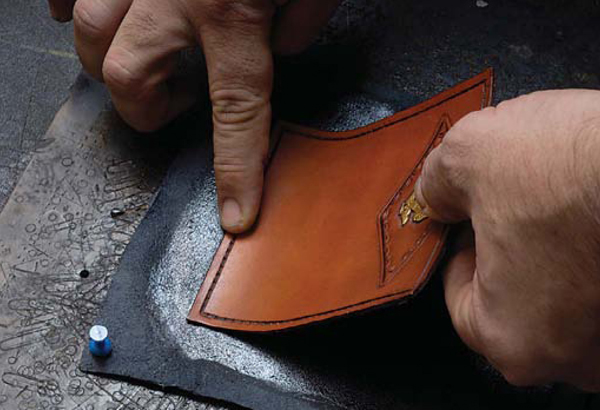
7. Once you place the tooled leather piece on the lining, it cannot be adjusted. Start by placing just the edge of the tooled leather piece onto the liner. Getting it to lie precisely on the line is not essential.
8. Begin pressing the piece down with your finger from one end to the other while holding the loose end away from the cemented portion of the liner.
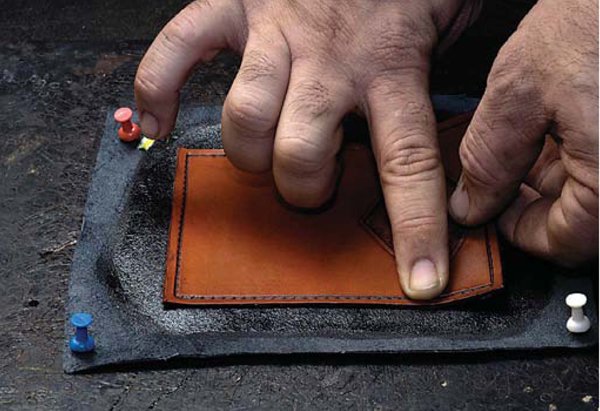
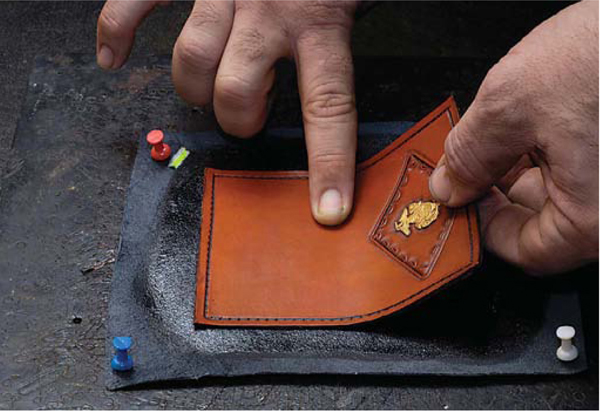
9. Push down edges all the way around the case using your finger.
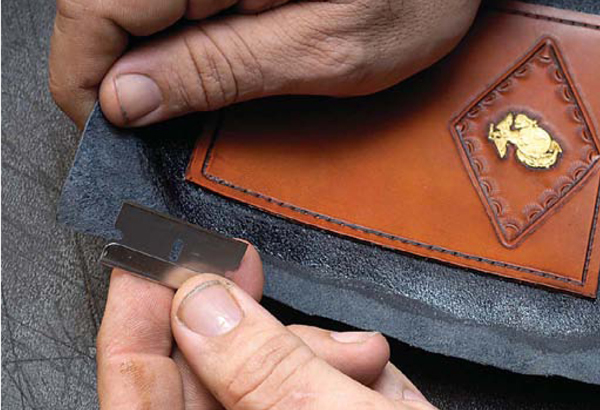
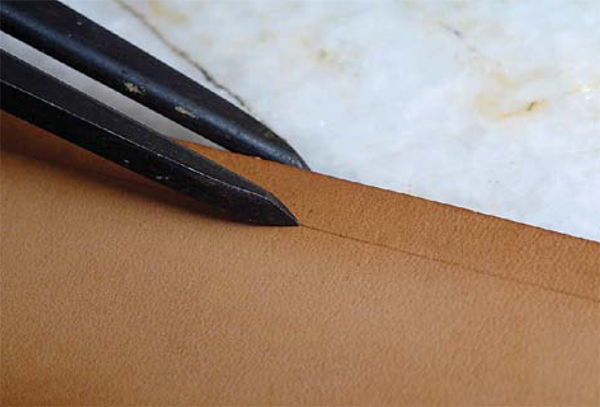
10. Remove the pushpins and check your lining. Because the cement extended past the edge of your tooled leather piece, the liner should be firmly adhered to the edges. To remove the excess liner, use a sharp razor blade.
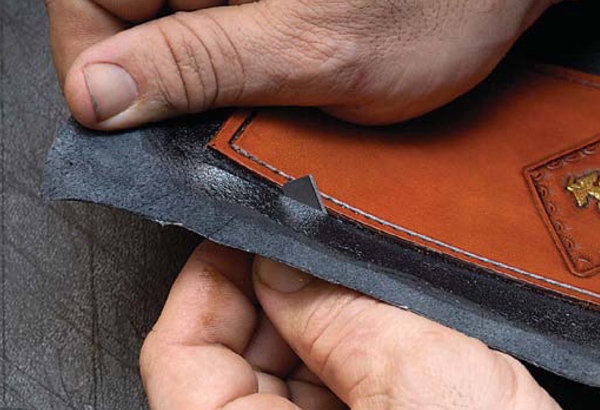
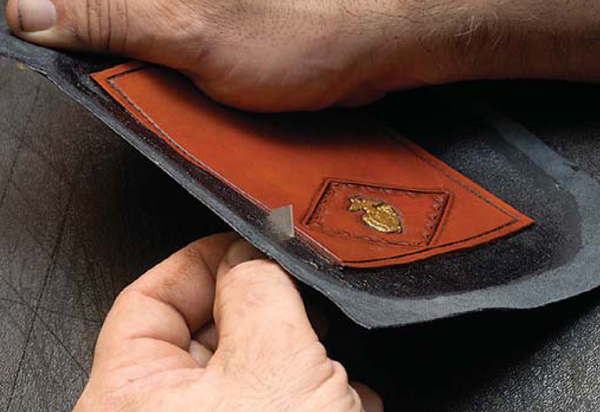
11. Punch the tip of the blade up through the liner along the edge of the stamped piece. Begin slicing it off by pulling the blade toward you, keeping the blade against the heavier leather. Continue in this manner until the liner is removed from all four sides.
12. If your blade is sharp, the edges of the liner and the heavy leather should be exactly even.
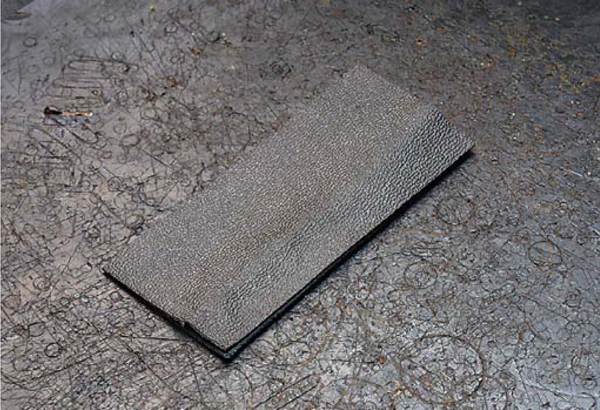
13. Now you will make the pockets from the same leather as the lining. To make them easier to attach, you will want to cut the pockets ¼ to ½ inch larger than the pattern on the two sides.
Start with a piece of lining leather about 5 inches wide that aready has one straight edge.

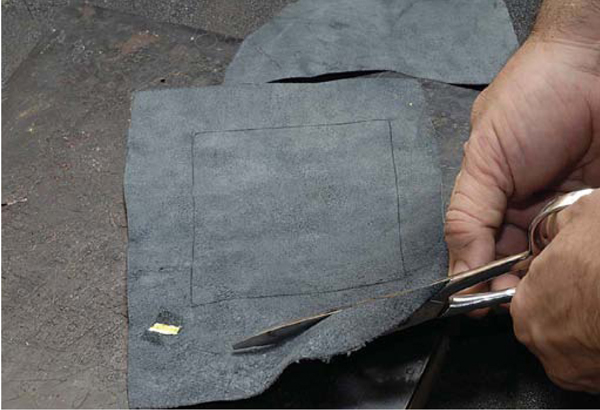
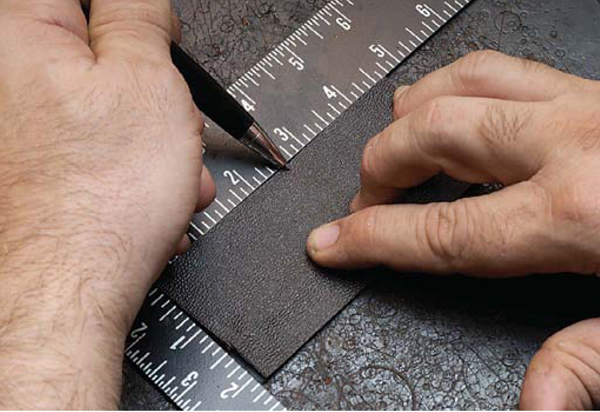
14. Place your pattern on the leather, lining up the straight edge with the top of the pocket. Place your ruler right against the edge of the pattern.
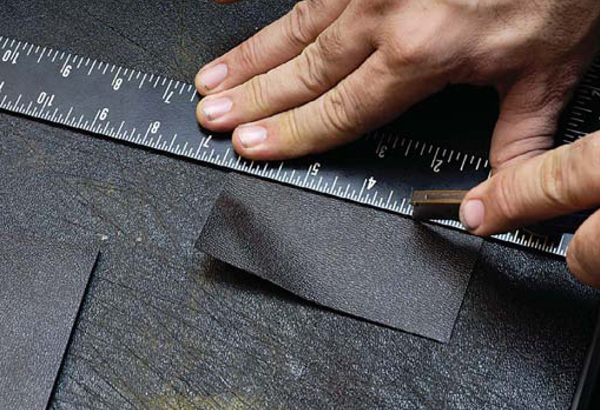
15. Remove the pattern without moving the ruler and cut out the rectangle using a razor blade or rotary cutter. Repeat the process for the second pocket.
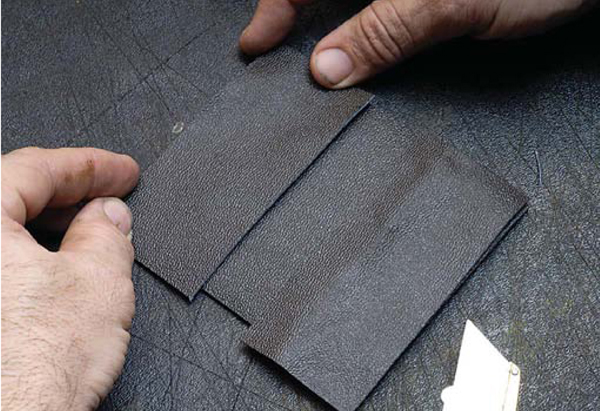
16. You should now have two pockets that are the same size.
17. Stack the pockets on top of one another with the edges even.
CUTTING THUMB HOLES
1. Mark the center of one of the long edges on the flesh side with a pen.

2. To make the arc of the thumbhole, center a quarter over the mark.
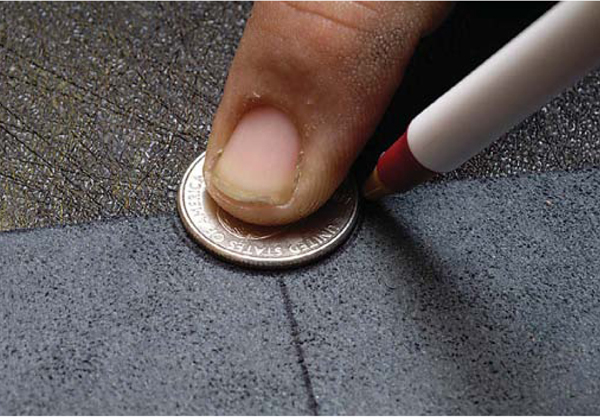
3. Trace the outline onto the leather.
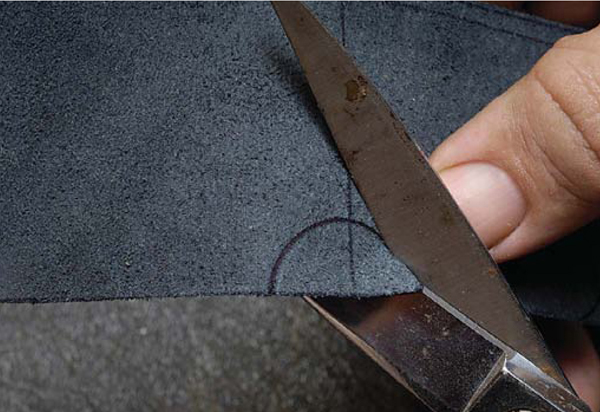
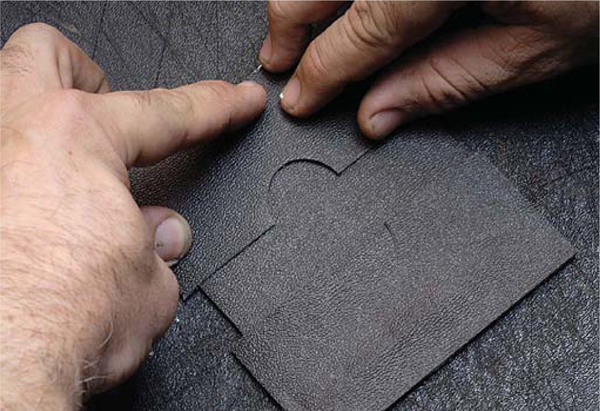
4. Cut out carefully along the line using leather shears.
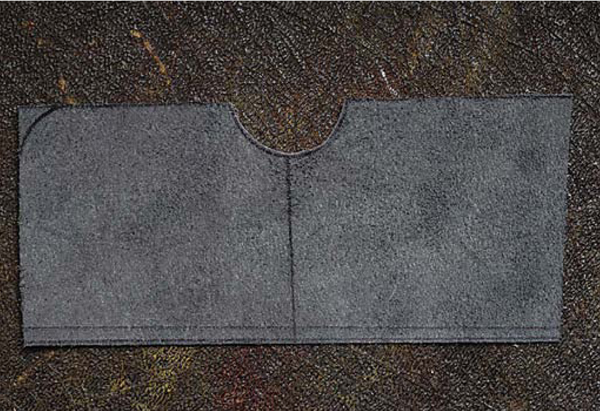
5. The finished card case pockets with thumbhole.
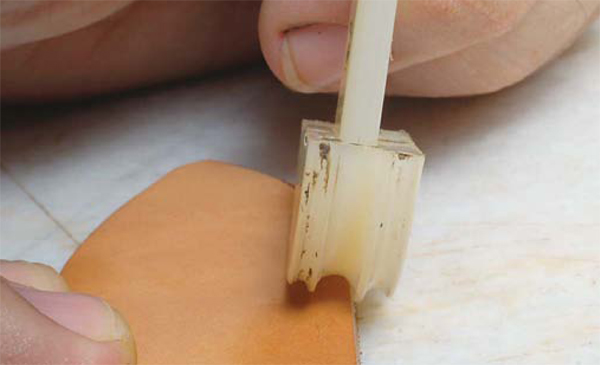
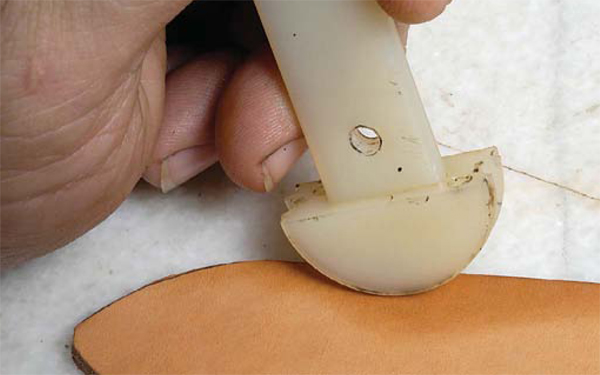
Cutting Thumb Holes with a Punch
An alternate method is to use a half round strap end punch. You may not want to buy one just for this purpose, but if you have one on hand, it is a quick, professional way to cut thumb holes.
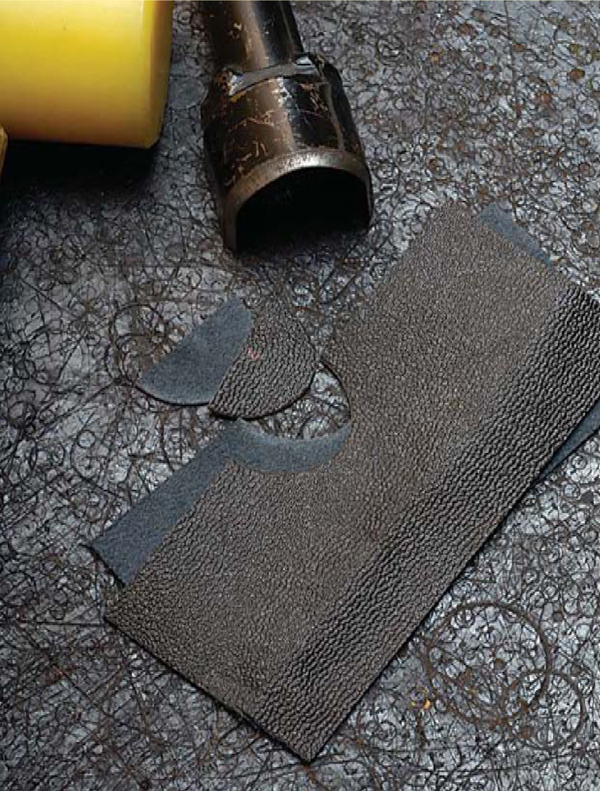
Mark the center of a long edge of one of the pocket pieces on the flesh side. Place both pocket pieces together, matching the top, bottom, and sides. Center the punch over the center mark and tap with the mallet, using moderate pressure. Both thumbholes are complete.
Gluing

1. To prepare the piece for gluing, first identify the space on the card case between the two pockets. To do this, place them on the lined side of the card case, with the bottom edges even.
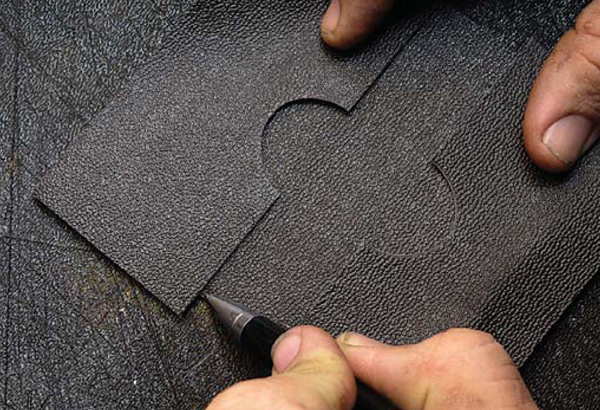
2. Use a pen to make a mark on the card case liner to show where the top edge will be on each side. Repeat this step for the second pocket.
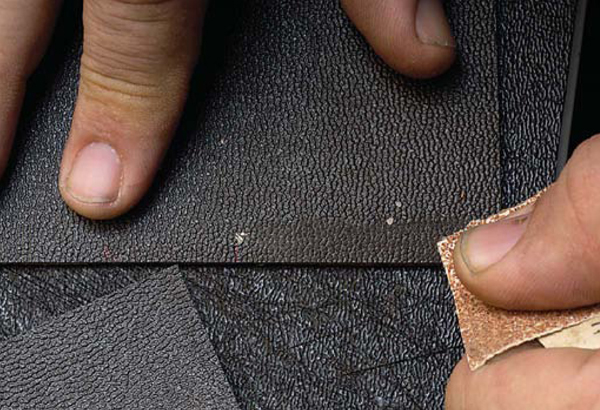
3. Use coarse 60- to 80-grit sandpaper to roughen up about 1/8 inch along the edge of the card case liner.
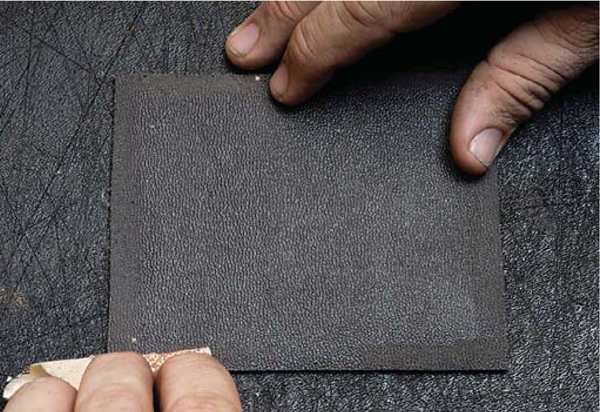
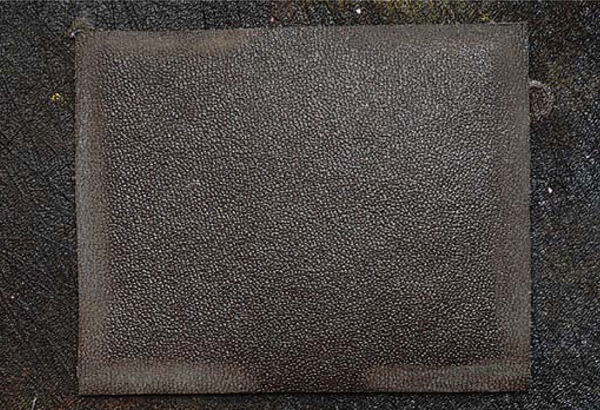
4. Do not sand between the marks you made that designated where the pockets end, as it will show once the pockets are added.
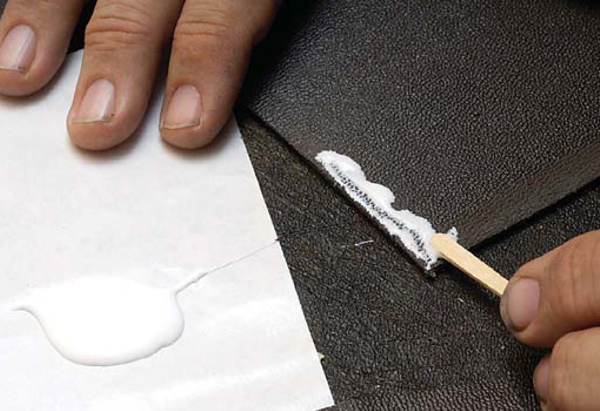
5. The next step is to glue the pockets to the card case using white leather glue. Spread a small puddle of glue onto freezer paper, paper plate, or other disposable item. With a craft stick or something similar, spread a line of glue along the sanded portions of the edges.
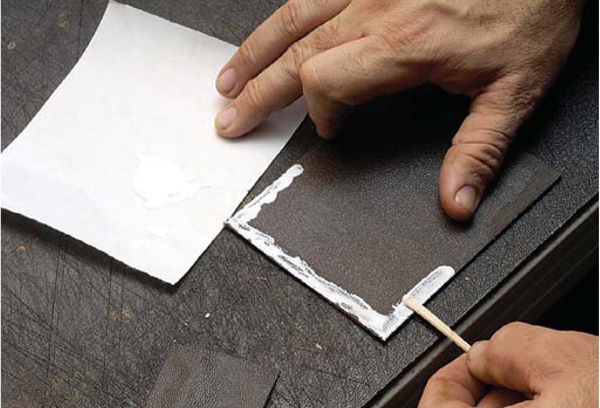
6. Stop the glue line at your marks.
7. Position the pocket so that the thumbhole is in the center of the case, leaving the extra leather sticking out on the outer edges. Make sure the top edge of the pocket lines up with the pocket liner indication marks on the lining. Press down firmly.

8. Some of the glue should squeeze out around the edges.

9. Use a toothpick to wipe off the excess glue.
10. Complete the second pocket in the same way. Make sure all the glue has been cleaned off the edges, then let dry overnight.
Finishing the Case
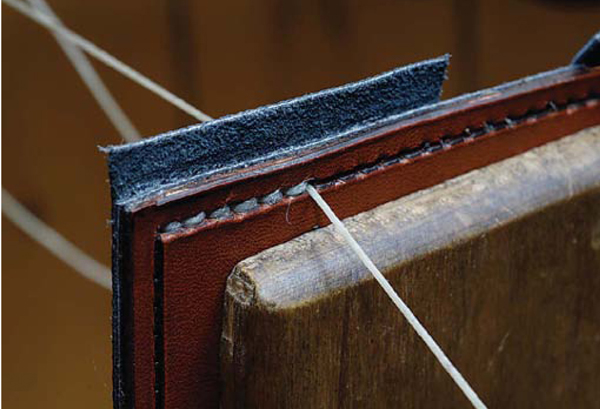
1. Now that the lining is cemented and the pockets are secured with glue, the project is ready to be stitched. Stitch all four sides of the card case.

2. Trim off the excess pocket material. Place the case with the tooled side up on your cutting board. Hold the case down firmly with one hand. Place a utility knife along the edge of the tooled leather piece and cut off the entire pocket excess.
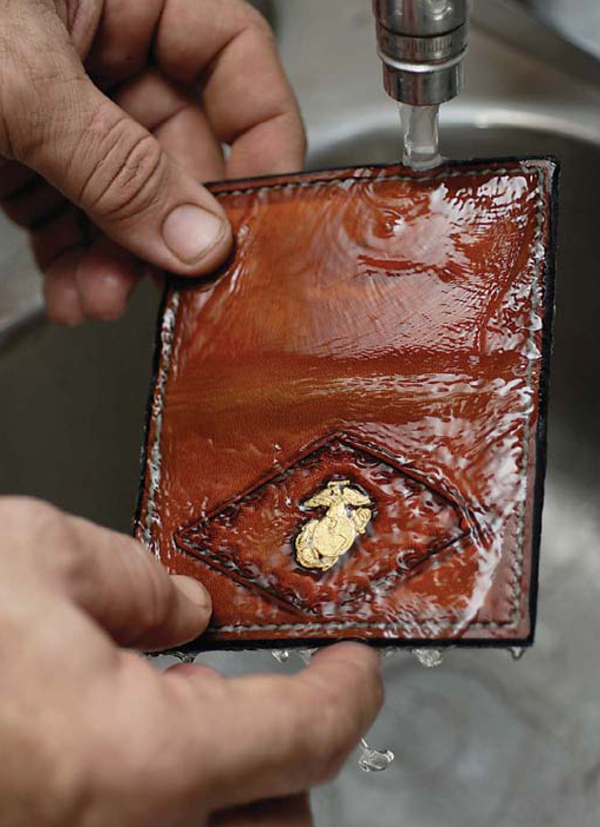
3. To set the fold, wet the entire tooled side of the card case under running water.

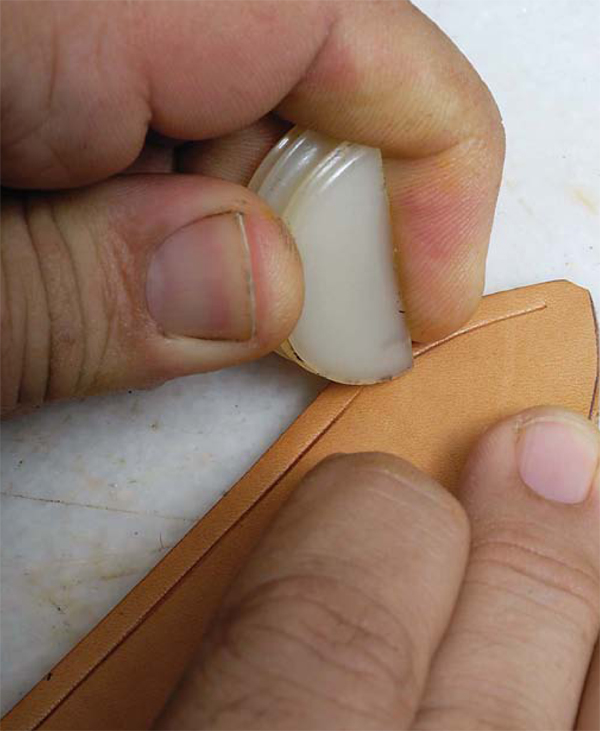
4. Even up the edges of the case.
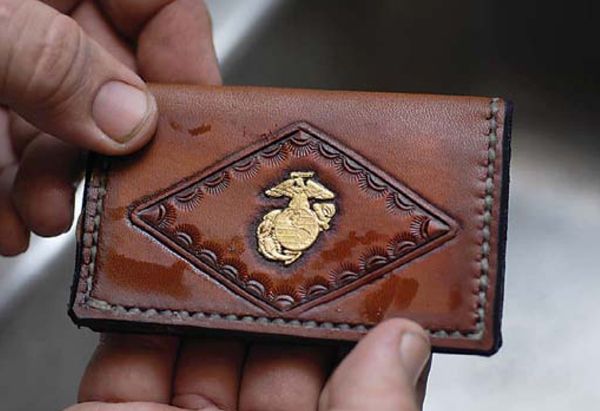
5. Firmly press the folded edge with your fingers to set the fold. Towel off excess water if necessary. Place waxed paper over the case and weigh it down with any flat, heavy object, such as the stone slab, and let it dry overnight. Apply a finishing product such as Leather Balm with Atom Wax.
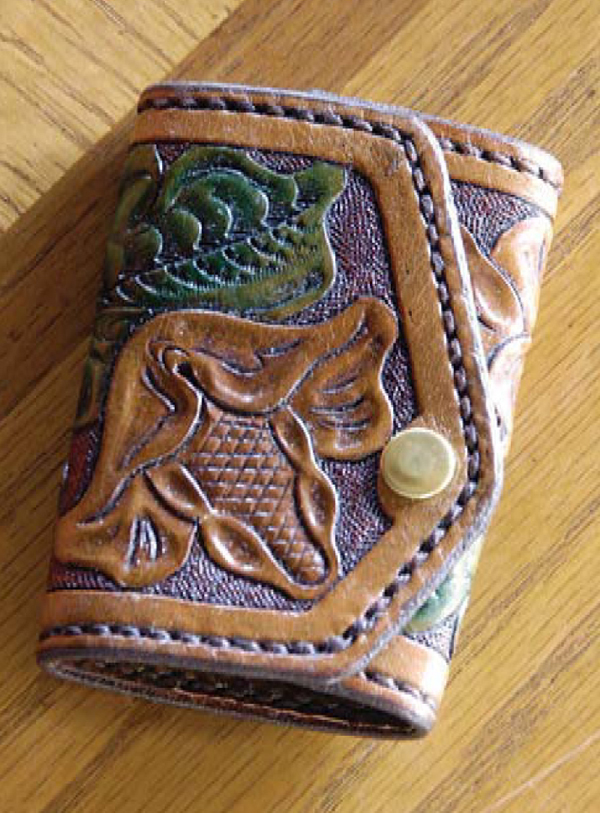
LEATHER PROJECT GALLERY
Once you've learned the basics of leathercrafting, you don't have to stop with the belt and card case projects demonstrated here. Combine all of the techniques to make many other leather accessories. Here are just a few to provide you with some inspiration.

Checkbook Cover
Key Case
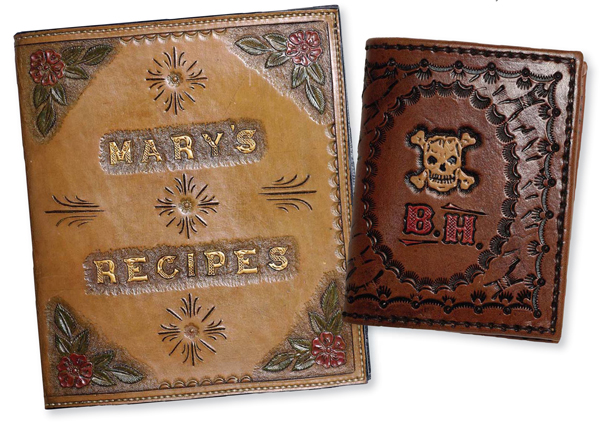
Three-ring Binder Cover and Wallet

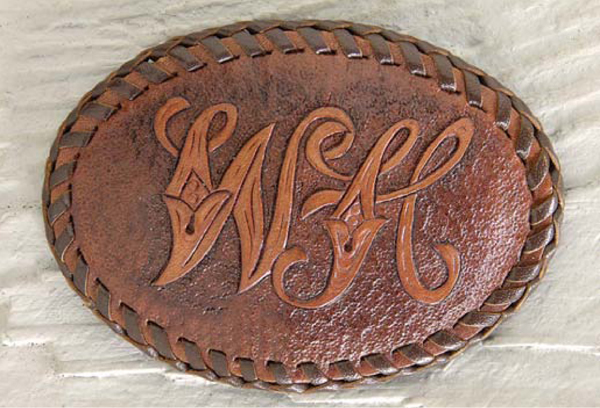
Center-bar Belt Buckles
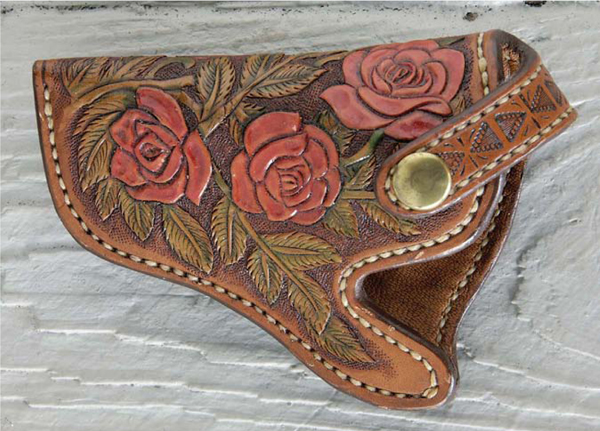
Holster
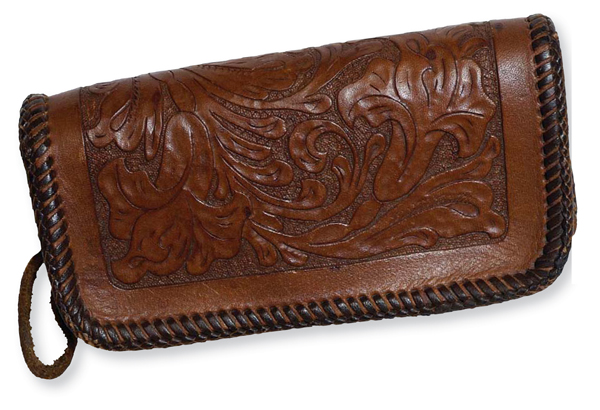
Clutch purse

Kinfe Sheath Clutch purse