Chapter 7

Cake & Cupcake Factory

Baking is a piece of cake with the easy and delicious recipes in this chapter!

After-School Apple Cake

Cocoa Cake-in-a-Mug

Makes 1 serving

This easy cake-in-a-mug is a quick fix for a chocolate craving. It makes enough for just one person — and because you microwave it, it’s ready to eat in 5 minutes!

Here’s What You Need

Here's What You Do

  1. 1. Microwave the butter in a mug for 10 to 20 seconds, until melted. Crack the egg into a separate bowl and whisk it slightly. Pour it over the butter, and whisk away.
  2. 2. Beat in the sugar and cocoa powder.
  3. 3. Cook in the microwave on high for 1 minute, or until a toothpick inserted in the center comes out clean. Sift a little confectioners’ sugar on top for a garnish. Dig in with a spoon.

Sprinkle on Sugar Decorations

Use stencils to create fancy patterns on your cupcakes and cookies with confectioners’ sugar (see Bonus Features). First, put 12 to 1 cup of confectioners’ sugar in a sifter or small fine-mesh strainer. Lay a stencil lightly on the surface of the baked good and gently shake or tap the container over it, making sure to cover the whole design. Very carefully lift the stencil straight up and away from the surface.

On vanilla cookies or cupcakes, use granulated sugar tinted with a few drops of food coloring. Brush the surface lightly with juice first so the sugar sticks.

Stenciling with confectioners’ sugar is messy — put the cupcakes or cookies on a baking sheet or plate!

Don’t use the handle of the sifter because too much sugar might come out at once.

Very Vanilla Birthday Cake

Makes 8–10 servings

This classic yellow cake is sweet and buttery. Follow the basic batter recipe, and then bake it in any of the pans listed below.

Here’s What You Need

Preheat the oven to 350°F (180°C).

Baking Times

Here's What You Do

  1. 1. Butter and lightly flour the cake pan(s) of your choice. We used two 8-inch rounds.
  2. 2. Beat the butter and sugar in a large bowl using an electric mixer until light and fluffy, about 5 minutes.
  3. 3. Beat in the eggs, one at a time, until combined. Beat in the vanilla.
  4. 4. In a separate bowl, whisk the flour, baking powder, and salt. With the mixer on low, add half of the flour mixture to the butter mixture, and beat until just combined.
  5. 5. Beat in half of the buttermilk. Add the remaining flour mixture and buttermilk separately, beating after each addition until just combined. Scrape down the bowl as needed.
  6. 6. Pour the batter into the prepared pan(s). Bake according to the times listed at left, or until a toothpick inserted in the center comes out clean.

Buttercream Frosting

Makes 3 cups

This sweet, smooth frosting goes with all kinds of cakes and cupcakes. Tint the whole batch a favorite color, or color just a portion of it to pipe on decorative swirls and designs.

Here’s What You Need

Here's What You Do

  1. 1. Beat the butter in a large bowl with an electric mixer until it’s nice and creamy.
  2. 2. Slowly add the confectioners’ sugar, mixing at low speed.
  3. 3. Add the vanilla and 2 tablespoons of the milk, and mix at low speed.
  4. 4. Mix until the frosting is smooth and creamy. If it’s too thick, you can add more milk a bit at a time to make it more spreadable.
Kitchen Creativity

Flavored Frostings

Chocolate Icing. Substitute 1 cup of unsweetened cocoa powder for an equal amount of confectioners’ sugar.

Cream Cheese Frosting. Substitute 4 to 6 ounces of softened cream cheese for the same amount of butter.

Bake Up a Birthday Party!

Looking for a fun theme for your next birthday party? Host a baking party! Send out invitations on recipe cards. Serve make-your-own pizzas from scratch (see It’s a Party! Pizza Dough). Check out the decorating tips in Mix & Match Cupcake Decorating Party and put out lots of fun materials so your guests can decorate their own cupcakes. For favors, send guests home with wooden spoons and aprons, decorated at the party. Happy birthday!
Frosting for Beginners

Use a straight-edged metal spatula like this one for a smoothly frosted cake.
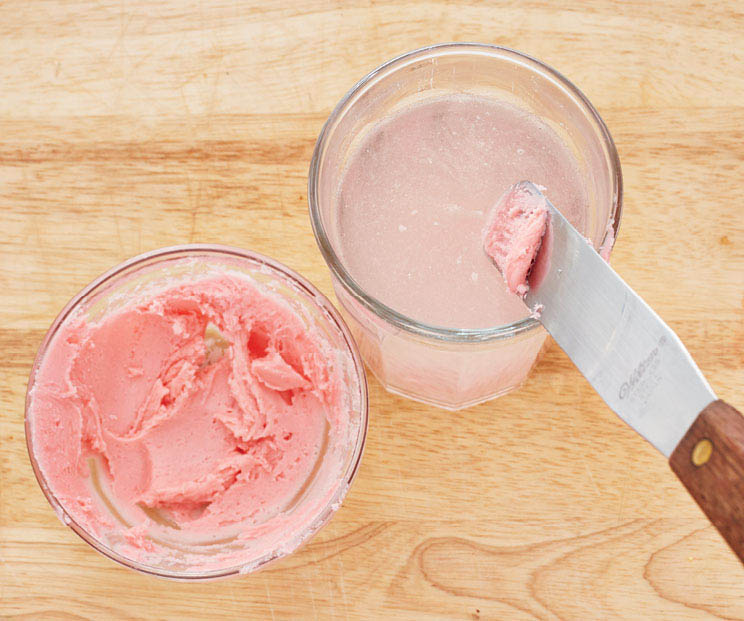
  1. 1. Start with a completely cooled cake. If you frost the cake while it’s still warm, the butter in your icing will melt! You can freeze the cake before you frost it to make it super easy to spread the frosting.
  2. 2. If the cake is too crumbly, make a crumb coat first. To do this, spread a thin layer of frosting on the cake to seal in the crumbs. Then refrigerate or freeze the cake for 15 minutes. Now you can frost the whole cake without making a big mess!
  3. 3. Frost the top of the cake first, beginning with a pile of frosting in the center and spreading it out to the sides. Next, frost the sides of the cake, working from the top to the bottom.
  4. 4. If the spreader becomes too gooey, dip it in a glass of warm water to clean it off for easier spreading.

How to Color Frosting

  1. 1. Divide the frosting into small bowls, one for each color. Squirt a few drops of food coloring into each bowl. Mix it all up.
  2. 2. For vibrant colored frosting, use paste food colors. Add dabs of the paste to your frosting with a toothpick — a little paste goes a long way!
  3. 3. For all-natural colored frosting, make dye out of fresh raspberries. Push the berries through a strainer so the juice runs into the icing. Stir it up. Add more juice until the color is just right.

Cake Decorating Basics

With a pastry bag, a few decorating tips, and buttercream frosting, you can create all kinds of playful designs on your cakes and cupcakes. Start with a pastry kit that has decorator tips (we use a Wilton set). You can tell the decorator tips apart by their names and numbers.

Pastry Bag Tips

Read your pastry kit directions to assemble the pastry bag.

Star Tip Use this tip to make a festive border around your cake. Or make mini flowers or a swirled design on a cupcake.

Leaf Tip Create basic or ruffled leaves with this tip. Hold the bag at a 45-degree angle so that the tip opening is horizontal, squeeze out frosting, and slowly pull up the tip when you have the desired leaf length.

Round Tip You can make polka dot borders with this tip, draw thick letters and numbers, or create a swirl on top of a cupcake.

Ribbon Tip This narrow tip makes flat ribbon lines on cupcake (the mummy in Mix & Match Cupcake Decorating Party was made with this tip!).

Writing Tip Use this tiny round tip for writing messages, drawing or outlining shapes, and making dots.