
Row 2: Ribbons
You will master the following techniques with this row:
• Using the 45° angle on a ruler
• Stitching a diagonal seam
• Understanding the “dog-ear” and keeping points intact
Materials
See Fabrics for a complete list of suggested fabrics for this quilt.
Cutting
RED PRINT
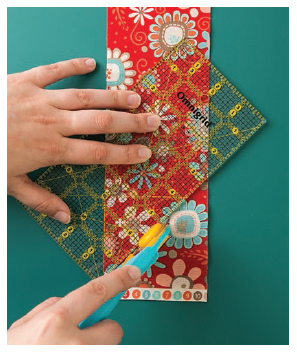
• Cut 1 strip 3⅜˝ × WOF. Locate the 45° line on a ruler, and lay it on the long raw edge of the fabric near the end. Make a true cut at 45° across the width of the strip. Lay the ruler on the raw edge of the true cut.
• Cut 8 diamonds 3⅜˝ wide.
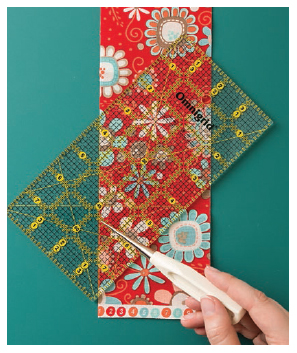
Line up the ruler’s 45° angle with the long raw edge of fabric.
Make a true cut at 45°.

Cut 8 diamonds 3⅜˝ wide.
 It is easier to cut all of these in a single layer; it will help to prevent any mistakes.
RED SOLID
• Cut 7 squares 2⅝˝ × 2⅝˝.
OFF-WHITE SOLID
• Cut 7 squares 2⅞˝ × 2⅞˝; then cut them in half diagonally, creating 14 triangles.
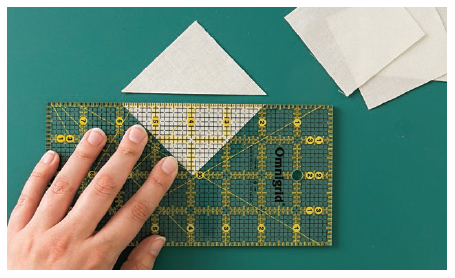
Cut squares in half diagonally.
Stitching It All Together
1. Pin an off-white triangle to one side of a red square at both corners. Note the triangle’s orientation as shown in the photo. You will see that the triangle end is slightly longer than the side of the square at one end; this is called a “dog-ear.” Match up the 90° corners, and begin stitching at this end.
2. Stitch. Press the seam allowance toward the red square. Make 7.
3. Repeat Steps 1 and 2 with a second upside down triangle on the opposite side of each square. Make 7.
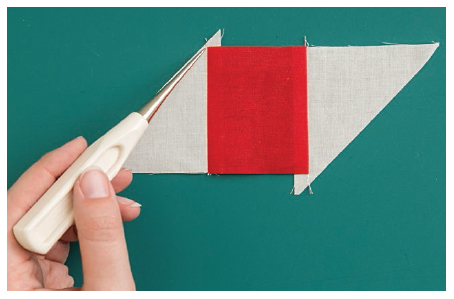
Dog-ear
4. Place a red-and-cream unit on a red print diagonal strip, right sides together, aligning the corners as shown. Pin and stitch. Press the seam allowance toward the red print. Make 7.

Align the pieces as shown.

Stitch and press.
5. Pin the units into pairs, right sides together. Align the raw edges. Stitch.
6. Stitch the pairs together into a row. Stitch the remaining red print diagonal strip to the end of the row, so there is a red print diagonal strip at the start and finish of the row. Press.
One of the main objectives for this row is stitching perfect diagonal seams. The trick is keeping the dog-ear intact so you create a ¼˝ seam allowance for the next seam. This is the secret to keeping the points perfect. Aim for the points to hit right at the seamline.
7. Once you know the width the row should be (see Oops! Adjusting the Row Measurement), trim each end of the row at 90° using your masking tape markers for the correct width measurement. Make sure the ribbon units are centered in the row.