FIGURE 30.1 In Calendar, the Folder Pane displays the Date Navigator and the My Calendars group.
IN THIS CHAPTER
Learning about the Outlook Calendar
Working with Calendar views
Creating one-time and recurring appointments
Forwarding appointments
Searching your calendar
Using Calendar options
Learning about tasks
Introducing the Task view
Defining a new task
Assigning a task to someone
Working with assigned tasks
Understanding task options
A calendar is something you usually hang on the wall. It has a page for each month and a picture of a puppy, lighthouse, or famous painting. If that’s what you think, then you haven’t used the Outlook Calendar! Outlook provides a sophisticated calendar that helps you manage your time efficiently. In today’s busy world, few of us have any shortage of things to do. A list of tasks always seems to be waiting for our attention, particularly in a high-pressure business or professional environment. This chapter covers the Outlook Calendar and Task (To-Do list) features, which can help you stay on time and on track with whatever you do.
At its heart, the Outlook Calendar stores and displays appointments. An appointment is just what it sounds like — a scheduled event with a title and a time and date specified for the beginning and end of the event. Outlook distinguishes between two types of appointments:
Scheduling appointments may not sound so special, and in fact it’s not. But it’s the way that Outlook lets you organize, use, and share your appointments that makes the Calendar so useful.
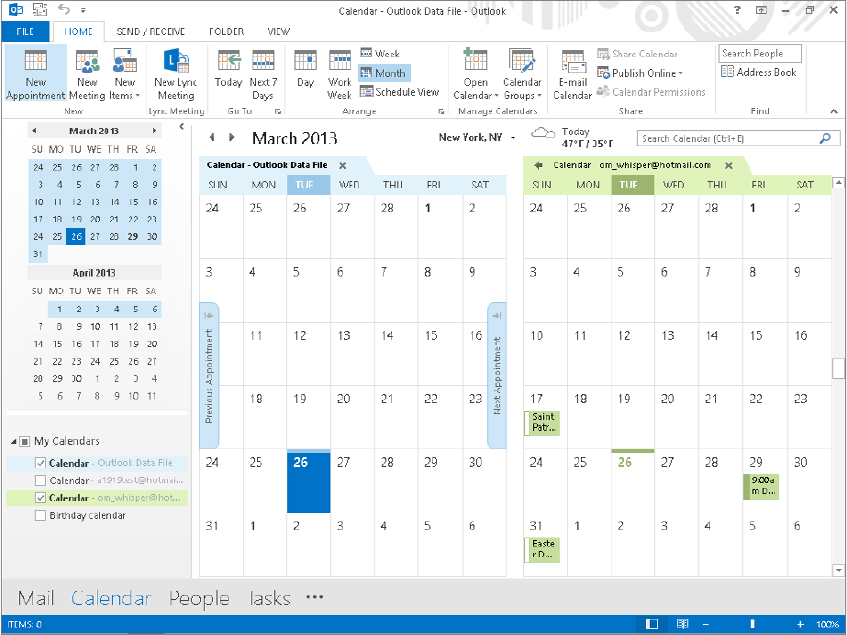
To show the Calendar, click Calendar in the Navigation bar at the bottom of Outlook. The Calendar appears in Month view, by default, and you’ll explore more views momentarily. The top section of the Folder Pane shows a small calendar of the current month and next month, called the Date Navigator, which has several useful features, as shown in Figure 30.1 and described in the following list:
FIGURE 30.1 In Calendar, the Folder Pane displays the Date Navigator and the My Calendars group.
The Folder Pane includes the My Calendars Calendar group. It has a calendar for the Outlook Data file, plus a calendar for each additional e-mail account you set up. You can use the check boxes beside the listed calendars to determine which ones appear so that you can work with them. Make sure that you have selected the desired calendar in the Folder Pane when you start adding appointments. Also, by default, you will see multiple calendars side by side in the main Calendar window, as shown in Figure 30.1. The tab above each calendar identifies which account the calendar goes with; click the tab for the desired calendar to select that calendar.
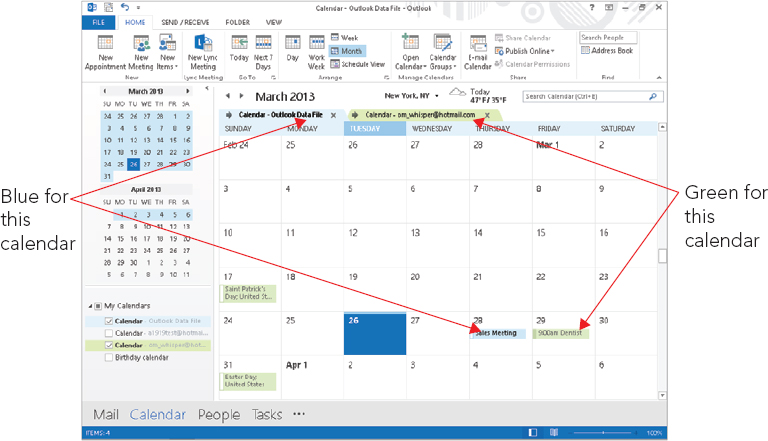
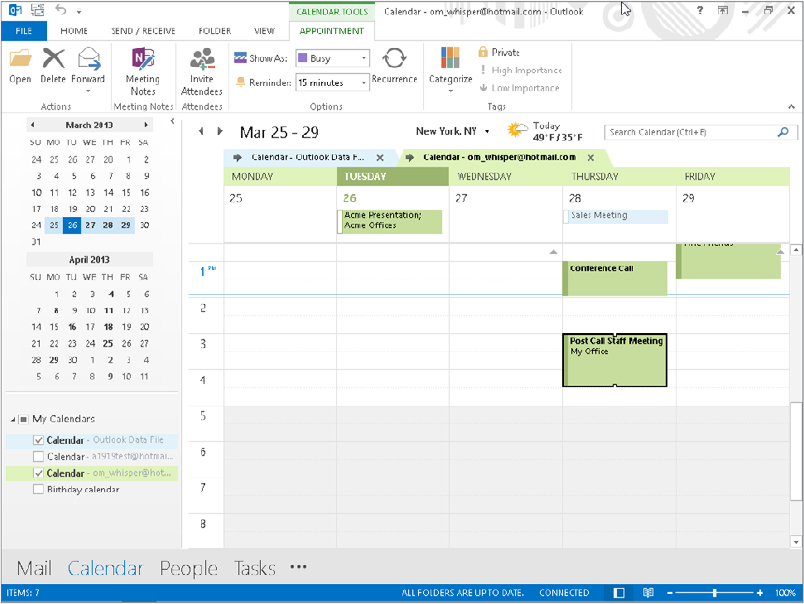
If you prefer, you can open multiple calendars and overlay them for easier viewing. To turn overlay on or off (it’s a toggle), choose View ⇒ Arrangement ⇒ Overlay. When you do this, the appointments from all the open calendars appear together in the main calendar pane, as shown in Figure 30.2. The information on each date is color coded to match its calendar tab, so that you can tell which calendar an appointment goes with. To select which calendar to work with, click its tab at the top of the overlaid schedule. The rest of the figures in this chapter will show the calendar with Overlay toggled on.
FIGURE 30.2 Toggle Overlay on to see the information from multiple calendars together on a single schedule.
When the Calendar is displayed, you can choose between viewing a single day (the default), a workweek, a week, or an entire month. Choose Week view to view the entire week or just the workweek (Monday–Friday). In Month view you can set the level of detail display to low, medium, or high. Plus you can use Schedule view to make it easier to find free time between two calendars to avoid scheduling conflicts. You select your view using either the View tab or the choices in the Arrange group on the Home tab. Outlook displays the date or date range displayed as well as buttons that move the calendar forward or backward by one of whatever unit (day, week, or month) is displayed above the calendar (see Figure 30.3).
FIGURE 30.3 The Outlook Calendar displaying a single day’s appointments
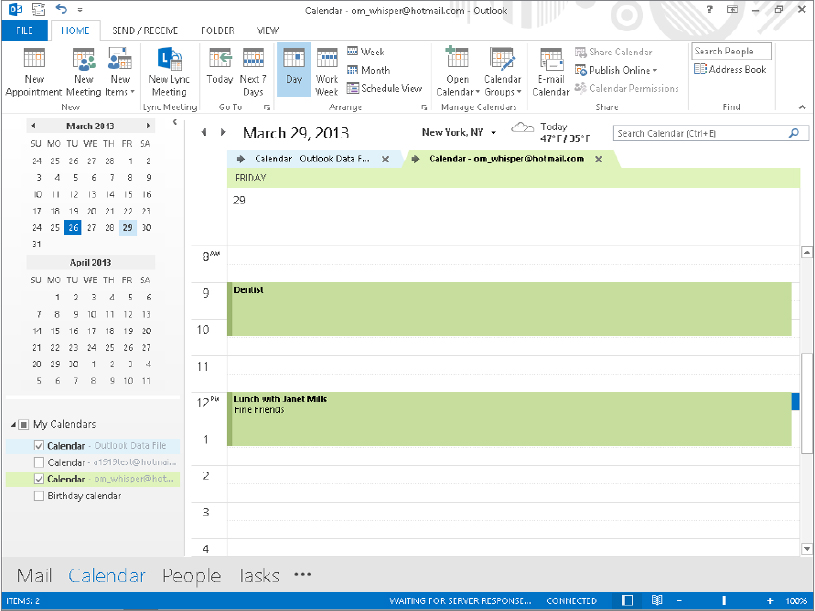
When the Calendar is displaying a single day, it looks as shown in Figure 30.3. Times of the day are listed at the left edge of the schedule, and each appointment is displayed in its assigned time slot. Use the scroll bar to bring different times into view. Any all-day events for the day are displayed at the top of the schedule.
Click on an appointment to select it; it displays with a black border and small handles (boxes) on the top and bottom borders. You can:
If you double-click on an appointment, it opens for editing, as explained later in this chapter.
The Work Week view is shown in Figure 30.4. You can display the full seven-day week by selecting the Week view, instead.
FIGURE 30.4 The Outlook Calendar displaying an entire workweek’s appointments
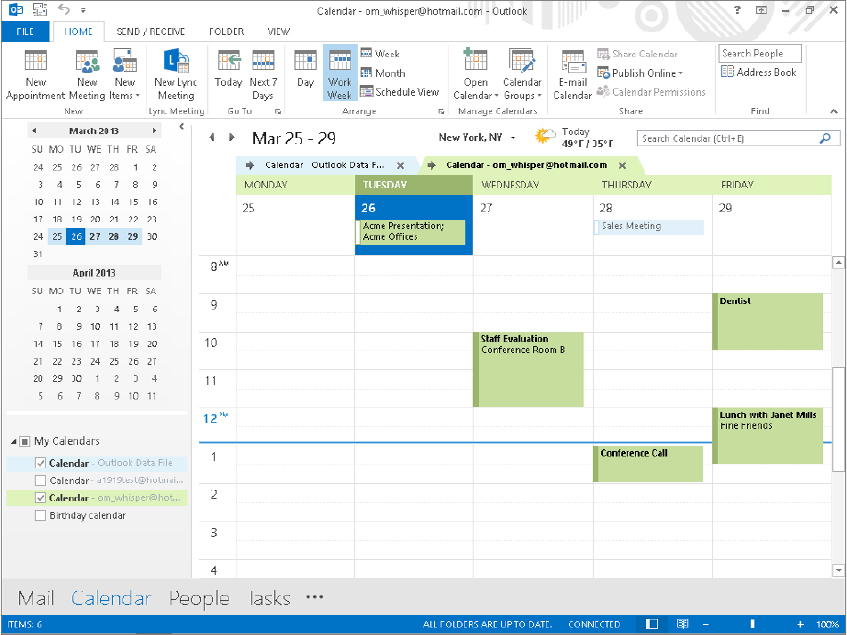
In essence, the Week view consists of five or seven single-day views side-by-side, and you can perform the same actions as described for the Day view. You can also drag an appointment to a different day.
You can display the Reading pane with a view if you want to see details about a selected appointment, as shown at the right in Figure 30.4. This feature can be useful when the Calendar itself is too crowded to show these details for each appointment. To toggle the Reading pane on or off, click the View tab, click Reading Pane in the Layout group, and click the desired position. Clicking Off hides the Reading pane, which is the default setting.
The Month view shows an entire month of appointments, as shown in Figure 30.5. Appointments for each day are displayed in order but without time details. If an all-day event exists for the day, it is displayed with a white bar along the left — for example, the “Vacation Day” appointment on the 22nd, shown in Figure 30.5. If a day has more appointments than can be shown, a small down-arrow is displayed. Click on the arrow to open the single-day display, where you can view all appointments for that date.
FIGURE 30.5 The Outlook Calendar displaying a month’s appointments
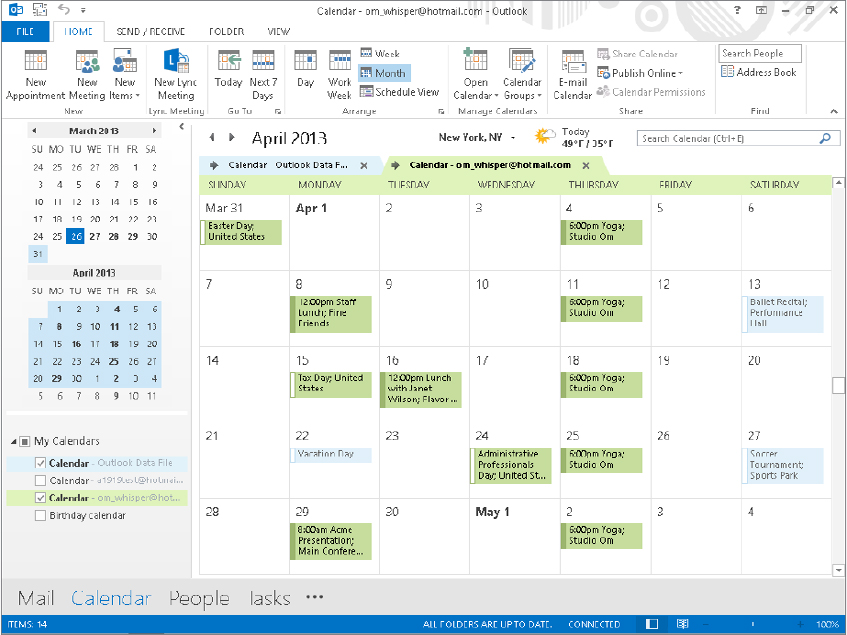
Figure 30.5 shows the Month display with the High option selected for details, which is the default setting. You can also select Low or Medium details, as follows:
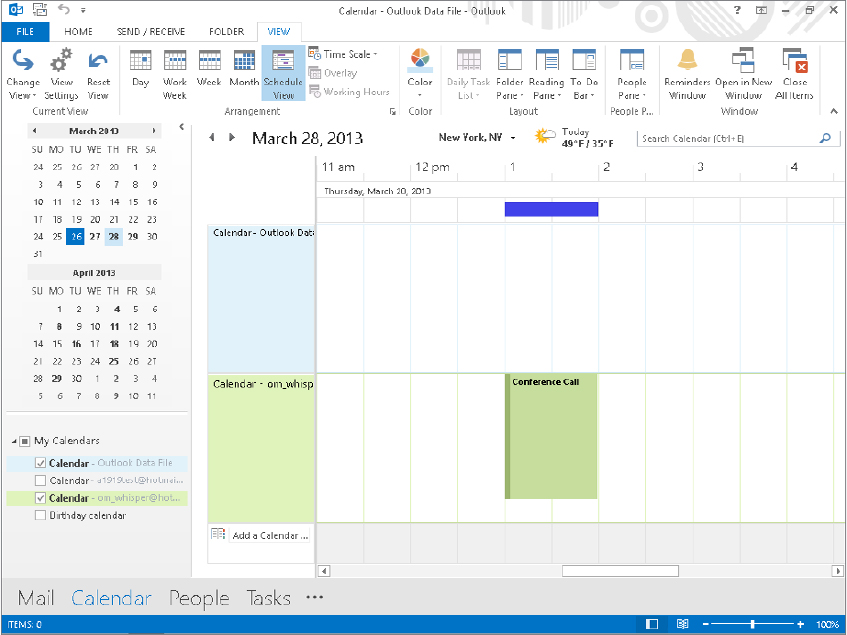
Schedule view, shown in Figure 30.6, lays out the currently open calendars along a horizontal timeline, giving you a way to compare timeframes and find open time slots available in all the calendars. In the example shown in Figure 30.6, the 1 to 2 P.M. timeframe is not open; the blue bar above that slot means the upper calendar has an all-day event, and the bottom calendar shows a conference call occurring at that time.
FIGURE 30.6 The Schedule view enables you to compare availability.
Outlook’s To-Do bar can be useful for working with Calendar items. To display the To-Do bar, click To-Do Bar in the Layout group of the View tab, then choose Normal. The To-Do bar is shown in Figure 30.7.
FIGURE 30.7 The To-Do bar can display the upcoming appointments, and more.
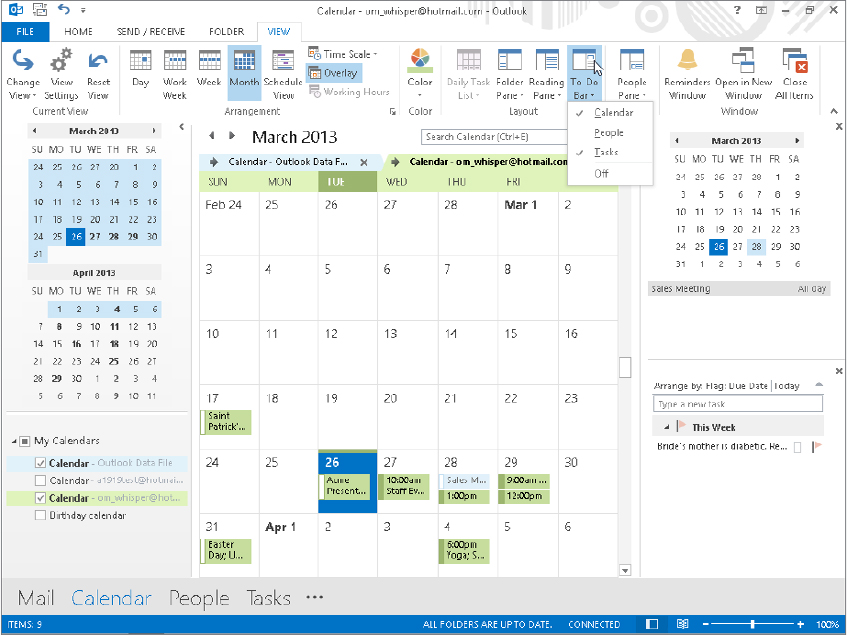
The To-Do bar can display three items:
You can control what is displayed on the To-Do bar. You can display one, two, or all of the items in the preceding list. To change the To-Do bar display, choose View ⇒ Layout ⇒ To-Do bar, and then select or deselect the individual items — Calendar, People, and Tasks — on the shortcut menu as shown in Figure 30.7.
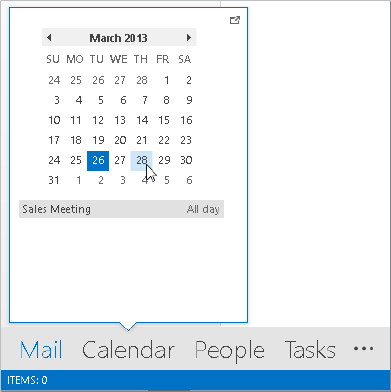
You don’t have to be in Calendar in Outlook 2013 to see your appointments for an upcoming date. You can use a new feature, sometimes called sneak peek, that enables you to display a pop-up calendar from the Navigation Bar and click a date to preview. To use this feature from outside of Calendar, move the mouse pointer over Calendar in the Navigation Bar, then click the desired date in the pop-up calendar that appears. As shown in Figure 30.8, any appointments for the day are listed below the calendar. Move the mouse pointer off of the pop-up to close it.
FIGURE 30.8 Point to Calendar on the Navigation Bar and then click a date to see appointments.
You may have noticed in some of the earlier screen shots, such as Figure 30.6, that a little weather report appears above the calendar in some of the views. This Weather Bar automatically displays and hides itself depending on the current view settings. For example, there’s no room for it to appear when you open the To-Do Bar. To change the location of the weather report provided, click the down arrow beside the displayed city, and then click Add Location. In the text box that appears, type a city and state or ZIP code, and then click the Search button.
An Outlook appointment can be very simple, or you can use Outlook’s tools to add various features and options to an appointment. The following sections start with the basics of creating a simple appointment and then look at the various options.
To create a simple appointment, make sure that Outlook is displaying the Calendar, and that if multiple calendars are displayed, you have selected the one to which you want to add the appointment. Then do one of the following:
The Appointment window is shown in Figure 30.9 before any information has been entered. Then, follow these steps:
FIGURE 30.9 An Outlook Appointment window
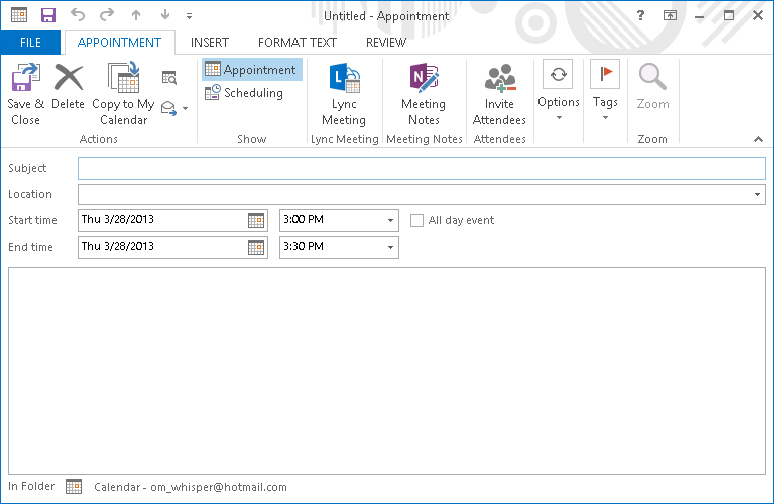
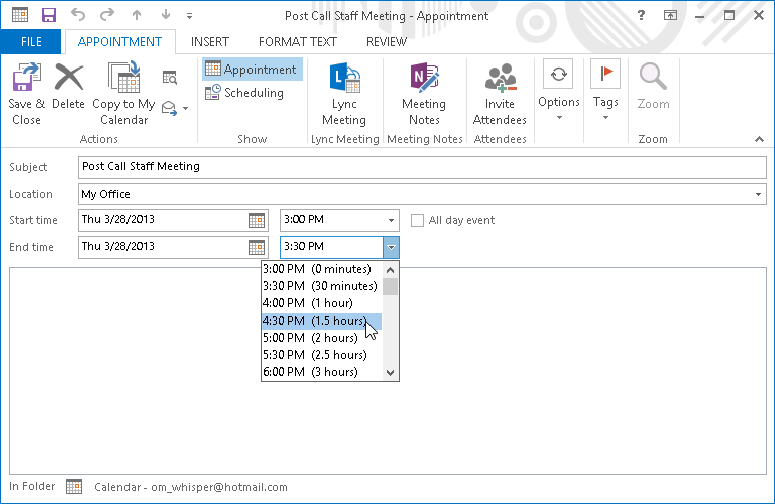
FIGURE 30.10 Selecting the stop time for an appointment
To edit an appointment, double-click on it in the current Calendar view to open the Appointment window. Make any needed changes, and click the Save & Close button in the Actions group of the Event or Appointment tab of the Ribbon.
To delete an appointment, click it in Calendar view to select it; then, press Delete.
If you simply want to change the duration of an appointment, you can do so without opening the appointment form. When you select the appointment in the Calendar by clicking on it, it displays small, square handles on its border, as shown in Figure 30.11. For a regular appointment, the handles will be at the top and bottom, as shown in the figure. Drag the top or bottom handle to change the appointment’s start or stop time, respectively. For an all-day event, the handles are on the left and right edges and can be dragged to change the start or stop time.
FIGURE 30.11 Drag a selected appointment’s handles to change its duration.
You can also change an appointment’s time, date, or both without changing its duration; do so by pointing at the appointment and dragging it to the new position on the Calendar.
When you create an appointment, there are several optional features you may want to use. They are described in the following sections.
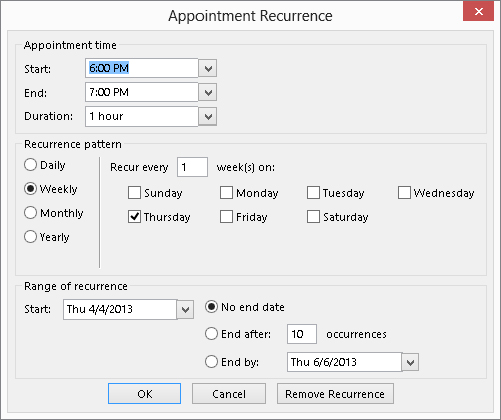
Some events occur on a regular basis. Perhaps you have a chiropractor appointment at 10:00 a.m. every Monday, or a company strategy meeting on the first Tuesday of each month. You can enter such appointments only once and have Outlook create all the recurrences automatically. Here’s how:
FIGURE 30.12 Defining a recurring appointment
When you double-click an existing recurring appointment for editing, you can click Open This Occurrence or Open the Series and then click OK to indicate whether to edit one or all of the appointments. You can then click the Recurrence button to open the Appointment Recurrence dialog box to modify the recurrence pattern. You can also remove the recurrence by clicking the Remove Recurrent button in this dialog box. Outlook removes all instances of the appointment from the Calendar except the next one. Note that changing the schedule for a single occurrence unlinks it from the overall recurring appointment.
If you try to delete a recurring appointment, Outlook gives you the option of deleting all occurrences of the appointment or just the current one.
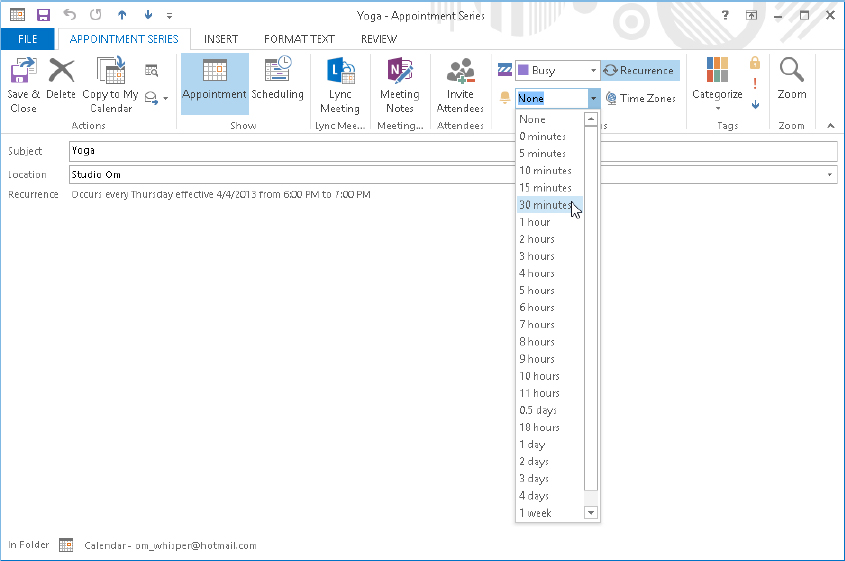
Outlook can remind you of an appointment by displaying a dialog box and playing a sound. You can specify how much advance notice you get and change the sound that is played. You can also turn reminders off. To set a reminder, follow these steps:
FIGURE 30.13 Specifying the reminder interval for an appointment
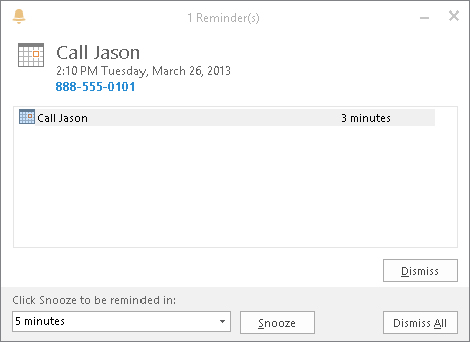
When a reminder comes due, Outlook plays the sound (if one was specified for the appointment) and displays the dialog box shown in Figure 30.14. If more than one reminder is due, they will all be listed. The actions you can take are the following:
FIGURE 30.14 The Appointment Reminder dialog box
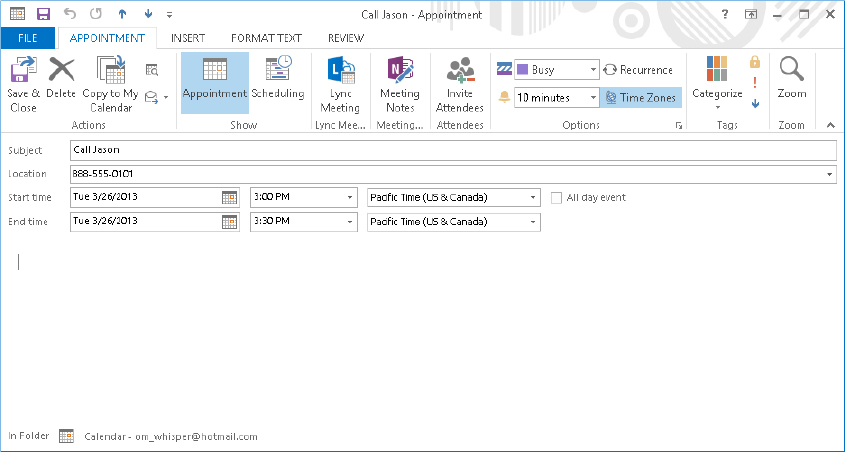
By default, Outlook appointments use the time zone that your system is set up to use. At times, you may want to use another time zone — for example, if you are in New York and your client says, “Call me at 8:00 A.M. my time.” You may not know the number of hours difference, but as long as you know her time zone you are all set.
When you have the Appointment window open, click the Time Zones button in the Options group of the Event or Appointment tab of the Ribbon to display time zone selectors next to the start and end time fields (Figure 30.15); you may need to click an Options button first to display the group’s options. Change either the start or end time zone to the desired setting; the other will change to the same thing. Now the start and stop times you enter will be interpreted as being in the selected time zone, and the appointment will be displayed in the correct local time slot. For example, if you are in the Eastern time zone and enter an appointment from 8:00 a.m. to 9:00 a.m. in the Pacific time zone, the appointment will display between 11:00 and 12:00 a.m. on your Calendar because the Pacific zone is three hours behind the Eastern zone.
FIGURE 30.15 Basing an appointment on a different time zone from the one you are in
Outlook lets you forward an appointment to an e-mail recipient. Forwarding is different from inviting an attendee to a meeting (covered in the previous chapter). You have two ways to forward an Outlook appointment:
In either case, Outlook creates a new e-mail message with the appointment attached as an Outlook item and the title of the appointment inserted in the Subject field. You then address and complete the e-mail message as usual. If you are using Outlook with an Exchange Server account, the appointment itself is forwarded without being attached to an e-mail message.
When the recipients receive a forwarded appointment, they can double-click on the attachment to open it. It opens in an Appointment window, and users can save it to their calendars or discard it as desired. Of course, recipients must be using Outlook or another program that supports the Outlook appointment format.
Another forwarding option for appointments is the iCalendar format. This is a widely supported format for calendar information and is supported by Outlook as well as many other scheduling programs. If you are not sure that all your recipients are using Outlook, using this format may be needed when forwarding an appointment. To do so, follow these steps:
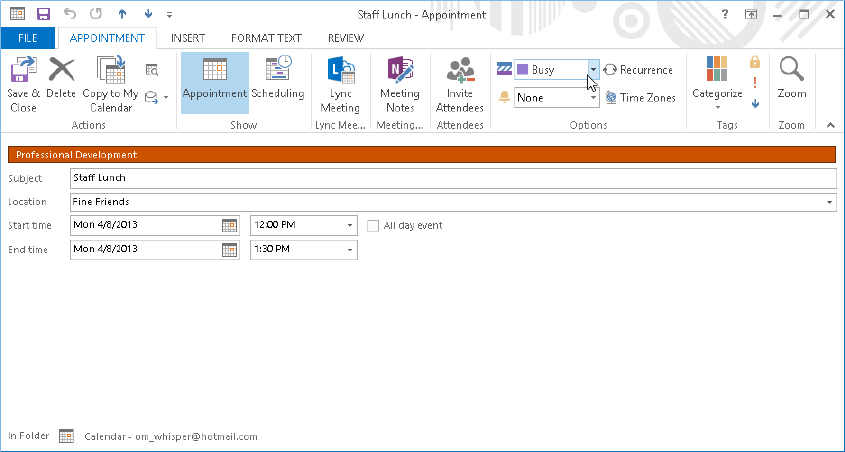
As with most Outlook items, an appointment can be assigned to a category. Outlook comes with six predefined and color-coded categories. Initially they are named according to their color, but you can change these to more meaningful names such as “Professional Development,” as in the example shown in Figure 30.16. The first time you apply a category color, you are prompted to enter a name for the category.
FIGURE 30.16 The color-coded categories appear in the Appointment window.
You have two ways to assign an appointment to a category:
An appointment, as is true of other Outlook items, can be assigned to more than one category. In the Calendar, a categorized appointment is displayed in the color of the assigned category.
By default, all appointments that you create are assigned normal importance. You can assign either low or high importance to an open appointment by clicking on the corresponding button in the Tags group of the Event or Appointment tab of the Ribbon. (You may need to click the Tags button first to display the group’s choices.) Then you can use this importance level as a criterion when using the Search feature in your Calendar, as discussed elsewhere in this chapter.
Outlook gives you the ability to publish your calendar so that other people can view your schedule. You may at times want to mark an appointment as Private so that other people viewing your calendar cannot see the details. They can still see that you are busy during the period of the appointment but will not have access to details about the appointment.
To mark an open appointment as Private, click the Private (padlock) button in the Tags group of the Event or Appointment tab of the Ribbon. Depending on the size of the Appointment window, you may need to click the Tags button to display the group’s choices.
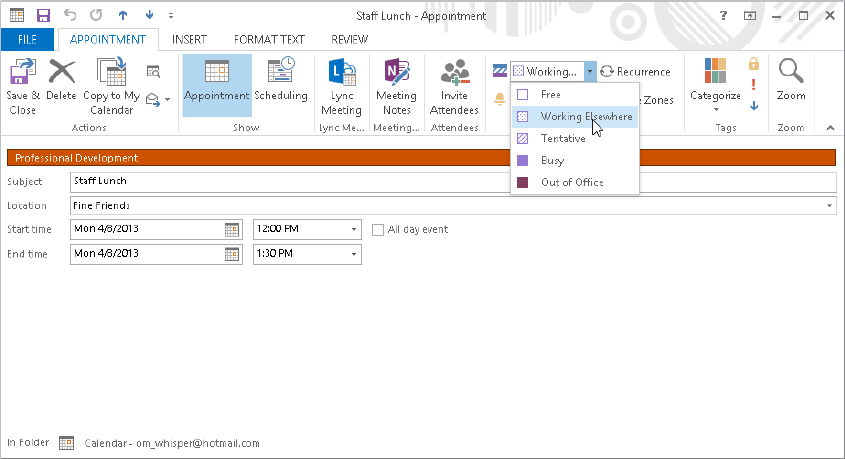
An appointment in your calendar can display in one of several ways in the various views: Free, Working Elsewhere, Tentative, Busy, or Out of Office. This display affects your own calendar as well as that of other people with whom you are sharing your calendar. When you create an appointment, you can specify how it will display. (The default is Busy except for all-day events, as mentioned earlier in this chapter.) To do so, click the Show As list on the Options group of the Event or Appointment tab on the Ribbon (click the Options button first if needed), and select from the list (Figure 30.17).
FIGURE 30.17 Specifying how an appointment displays on the schedule
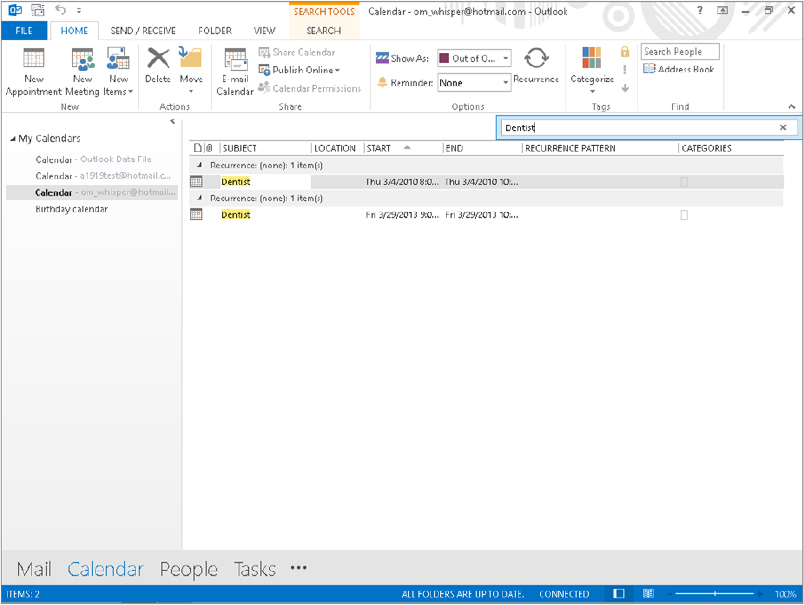
As your Calendar becomes filled with appointments past and future, it will become difficult if not impossible to find information by simply scrolling through the Calendar. You can use the Search feature to filter the Calendar to show just the information you want. For example, you can filter to show only appointments within a certain month assigned to a specific category.
For a basic search, enter your search term in the Search Calendar box at the top right of the Calendar display (Figure 30.18). You can also click on the down arrow to select from previously used search terms. Outlook automatically searches as you enter the term and displays only matching appointments (or a message, if it finds no matching entries). Click the X at the right end of the Search box to cancel the search and return to displaying all Calendar items.
FIGURE 30.18 Performing a basic search of the Calendar
If you need more control over the search, click on the magnifying glass at the right end of the Search box without typing anything. Outlook displays the Search Tools ⇒ Search contextual tab, as shown in Figure 30.19. You can use one of the choices in the Refine group to narrow the search results. Or, you can click Search Tools in the Options group, and then click Advanced Find to open the Advanced Find dialog box. It works just like the one for Contacts described in Chapter 29. Click the Close Search button in the Close group at the right end of the tab to finish working with the search features.
FIGURE 30.19 Tools for performing an advanced search of the Calendar

The Outlook Calendar comes with default settings for many aspects of its operation. As you become familiar with the Calendar, you may want to make changes to these settings to customize the Calendar for the way you work. You access Calendar Options by choosing File on the Ribbon and clicking Options. In the Options dialog box, click Calendar in the list at the left. The Calendar tab of options is shown in Figure 30.20. The various options available here are divided into several sections.
FIGURE 30.20 The Calendar tab in the Options dialog box

The first section of Calendar options has to do with how Outlook defines the workweek, as follows:
The next section of the Calendar Options dialog box includes options for a variety of features:
Finally, this dialog box has a few advanced options, as follows:
A task is similar to an appointment in that it is something you must do. It is different in that it does not have a specific date or time associated with it, although it may well have a due date by which it is supposed to be completed. In this sense, Outlook tasks are pretty much like a paper to-do list that you stick on the fridge. When you look a little deeper, however, you’ll find that tasks can do so much more:
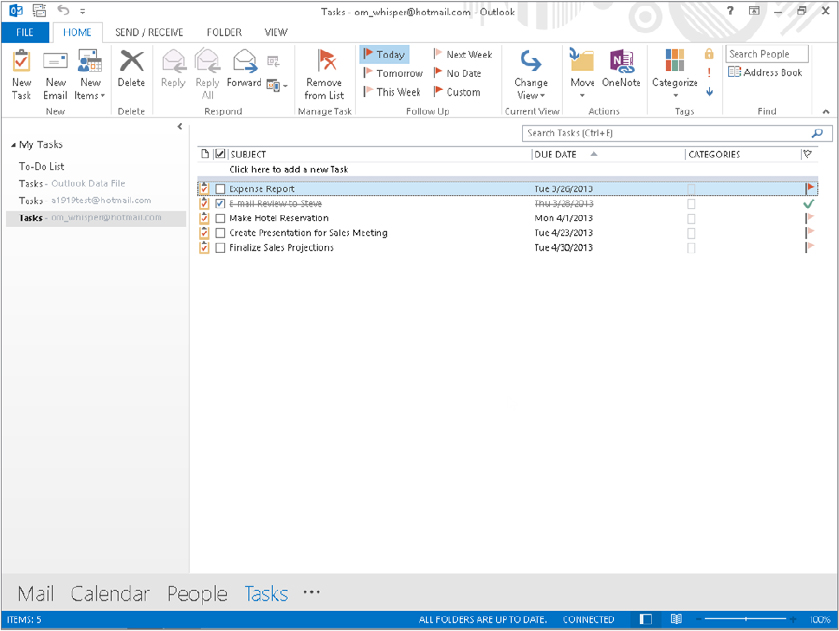
To switch to working with Tasks in Outlook, click the Tasks button on the Navigation bar. The list of tasks appears, using one of a variety of available views. The Simple List view, shown in Figure 30.21, displays active tasks — those not yet completed — as well as tasks checked off as complete. They are arranged by due date initially, although you can change the sort order by clicking the column headings (Subject, Due Date, and so on) at the top of the list.
FIGURE 30.21 The Simple List view displays a list of all your tasks.
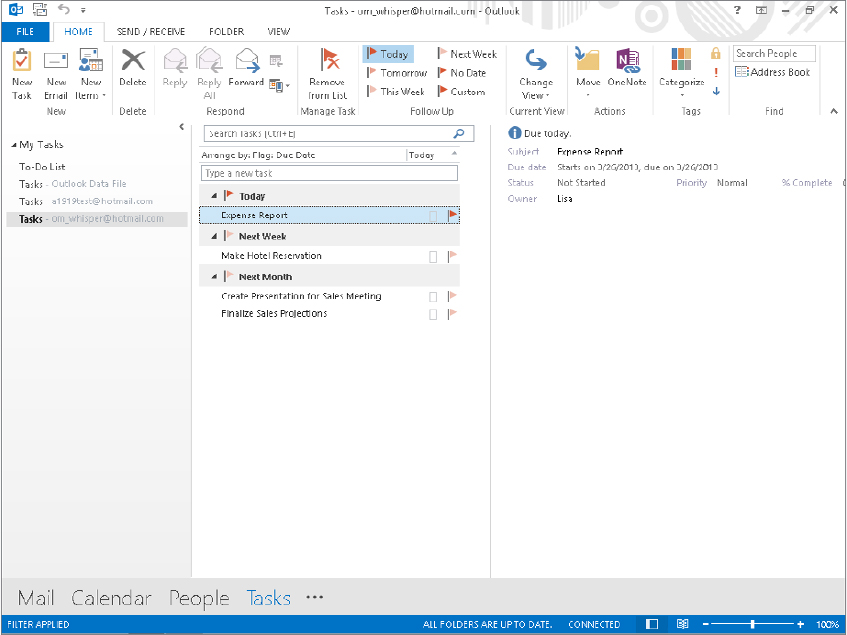
If you want to view tasks differently, click the Change View button in the Current View group of the Home tab or the View tab, and click another view. Figure 30.22 shows the To-Do List view, which includes a pane at the right that provides more details about the selected task in the task list.
FIGURE 30.22 Task List view includes a pane with more details.
While you are viewing tasks, you can open a single task by double-clicking on it. You can also perform certain actions with the task by right-clicking on it in the task list and selecting from the shortcut menu. These actions are the following:
You learn more about these actions later in this chapter when you learn how to create a new task.
The full list of available views is:
To create a new task, click the New Task button in the New group on the Home tab of the Ribbon. (You can also press Ctrl+Shift+K.) Outlook creates a new task and displays it as shown in Figure 30.23.
FIGURE 30.23 Creating a new task
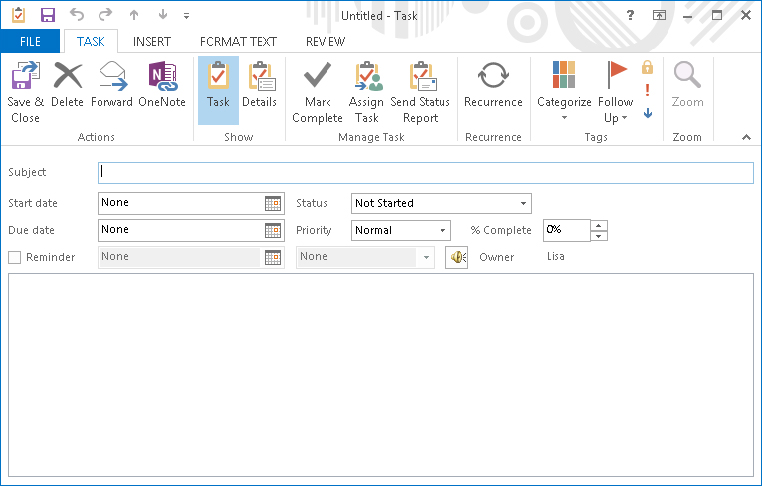
The only required entry in this window is the Subject, which will be the title of the task that is displayed in Task view. The other task information in the window is explained here and in the following sections:
Other aspects of creating a new task are explained in the following sections.
If you click the Details button in the Show group of the Task tab of the Ribbon, Outlook displays the Details window for the task. This window is shown in Figure 30.24.
FIGURE 30.24 Entering details for a new task
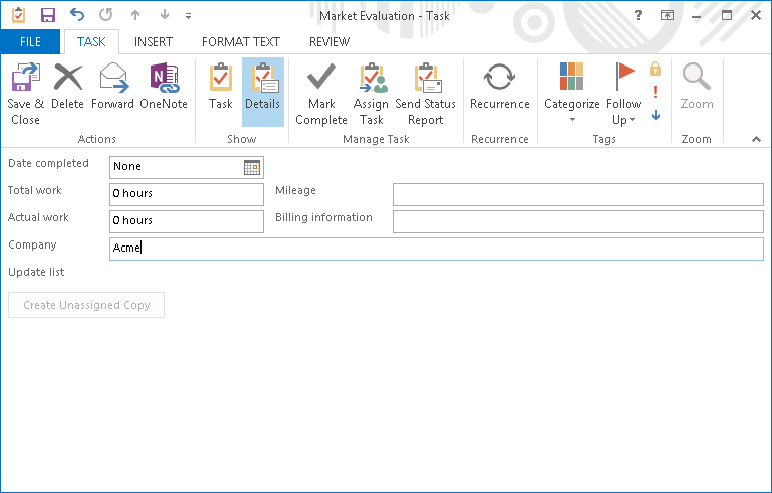
The fields available in the Details window let you keep track of additional information related to a task. You can specify the completion date, enter information about the time spent on the task, identify a company associated with the task, track mileage, and enter billing information. Outlook does not track this information for you but just provides these detail fields for you to enter it in.
The lower section of the Details window is relevant only if the task has been assigned to someone as described shortly under “Assigning a task”.
When you have finished entering details for the task, click the Task button in the Show group of the Task tab on the Ribbon to return to the regular Task window. You can also click Save & Close in the Actions group if you have finished defining the task.
To mark a task as complete, click the check mark beside it in the current view. Or, double-click it to open it, and in the Manage Task group of the Task tab, click the Mark Complete button. You can then close the task window.
Outlook lets you assign a task to someone else. Doing so can be useful in a variety of situations, such as when you are heading a committee and need to delegate various jobs to the committee members. By using Outlook’s Assign Task command, you can track progress and be notified when each task has been completed.
To assign a task, create the task as described earlier in this chapter. You can also open an existing task and, as long as you are the owner of the task, assign it to someone else. Here’s how:
FIGURE 30.25 Assigning a task to someone else
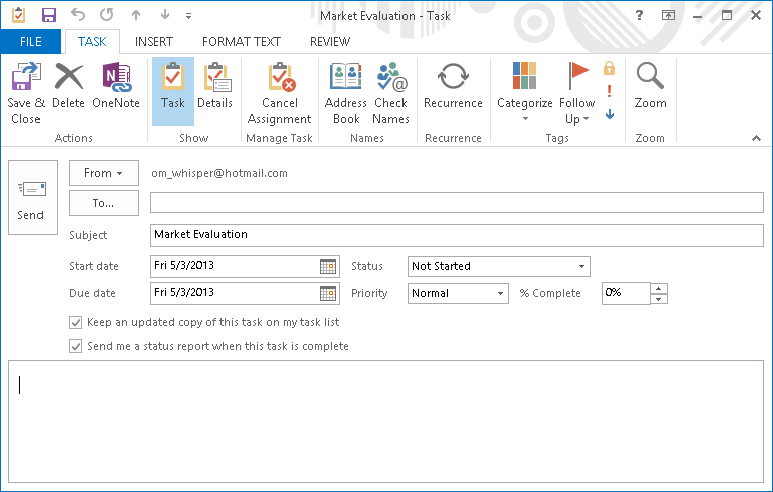
Two options are available when you assign a task to someone else, as follows:
When you send a task assignment, the recipient receives an e-mail message containing information about the assignment and permitting the recipient to either accept or decline the assignment. You learn more about this and other aspects of task assignments later in this chapter, in the section, “Working with Assigned Tasks.”
Like appointments, tasks can have a defined recurrence. For example, you may have to review each month’s sales figures by the end of the next month. Rather than enter a new task each month, you can define a task that recurs each month.
To define a recurring task, create the task as usual, and before saving and closing it, click the Recurrence button in the Recurrence group of the Task tab of the Ribbon. Outlook opens the Task Recurrence dialog box, as shown in Figure 30.26.
FIGURE 30.26 Defining a recurring task
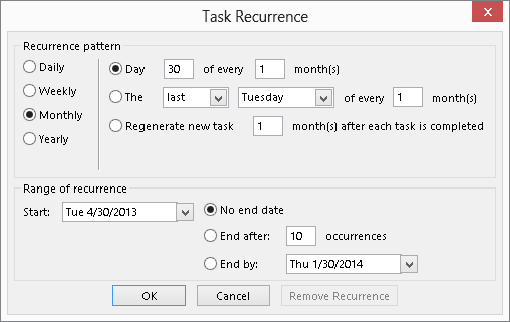
The four basic patterns of recurrence are Daily, Weekly, Monthly, and Yearly. When you choose the basic pattern in the top left of the dialog box, the remainder of the options change to reflect what’s available:
In all cases, you also specify a start date and when the recurring task ends.
Working with assigned tasks, whether you are the person doing the assigning or the person accepting the assignment, can be a bit confusing. After you understand it, however, the tool can be very useful.
When someone sends you a task assignment, you receive an e-mail message asking you to respond to the assignment request. Select the message in the message list, and two choices appear above the task in the Reading Pane:
You also can open the task from your Task list, and use the Accept or Respond choice in the Respond group of the Task tab.
No matter which method you use, in the dialog box that appears, you can choose either Edit response before sending or Send response now and then click OK to proceed with the message in the desired fashion.
When you send a task assignment to someone, one of three things will happen:
When you have accepted a task assignment, you own that task and no one but you can change the task even though it may be on someone else’s Task list. You can then, as you work on the task, open it and update the status and percentage completed of the task; you can also mark it as Completed. When you do so and save the modified task, an update is sent to the person who assigned you the task (assuming that the Keep an updated copy of this task on my task list option was selected when you were sent the assignment). By default, this update does not appear in the task assigner’s Inbox but is processed automatically, and the updated information is available the next time the task assigner views the task.
Likewise, if the Send me a status report when this task is complete option was selected when you were sent the assignment, the person who assigned the task receives an automatic update when you mark the task as Completed. Although Task Complete updates are processed automatically, they appear in the person’s Inbox.
A task can have more than one prior owner. Suppose, for example, that person A created the task and sent a task request to person B. Then, person B sent a task request to person C, who accepted the task. C is the owner of the task, and both A and B are prior owners and will receive status updates.
Sometimes you may want to send a status report or comments about a task manually. Here are two situations in which doing so might be desirable:
To send a status report manually, open and save the task and click the Send Status Report button in the Manage Task group of the Task tab of the Ribbon. Outlook creates an e-mail message with information about the task status in the body of the message. You can add text as needed. If the task was assigned to you, the To field already contains the addresses of the task’s prior owners. You can add additional recipients if desired.
The most flexible way to view your tasks is by using the Task view, as explained earlier in this chapter. You can also have Outlook display tasks on the To-Do bar and in Calendar view.
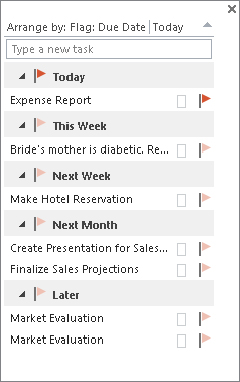
You can display active tasks on the To-Do bar along with the Date Navigator and upcoming appointments. They are displayed at the bottom, as shown in Figure 30.27. Use View ⇒ Layout ⇒ To-Do Bar ⇒ Tasks to toggle the task list on and off in the To-Do bar. When you’re working with Tasks in Outlook and toggle on the task display in the To-Do Bar, it shows the tasks for all the folders (accounts) in the My Tasks group, unless you’ve changed to another default data file as described in an earlier note.
FIGURE 30.27 Viewing the daily Task List on the To-Do bar
The Outlook Calendar can display the daily Task list along with your appointments in some views such as Day view. The Daily Task List is displayed below the Appointment section of the Calendar, as shown in Figure 30.28. You have three options as to how the daily Task List is displayed:
FIGURE 30.28 Viewing the Daily Task List on the Outlook Calendar

To switch between daily Task List views, display the Outlook Calendar, click the View tab, and then choose Daily Task List in the Layout group. Then, select the desired view from the next menu. The Arrange By choices on this menu also let you specify whether to display tasks by due date (the default) or start date, and whether to show completed tasks.
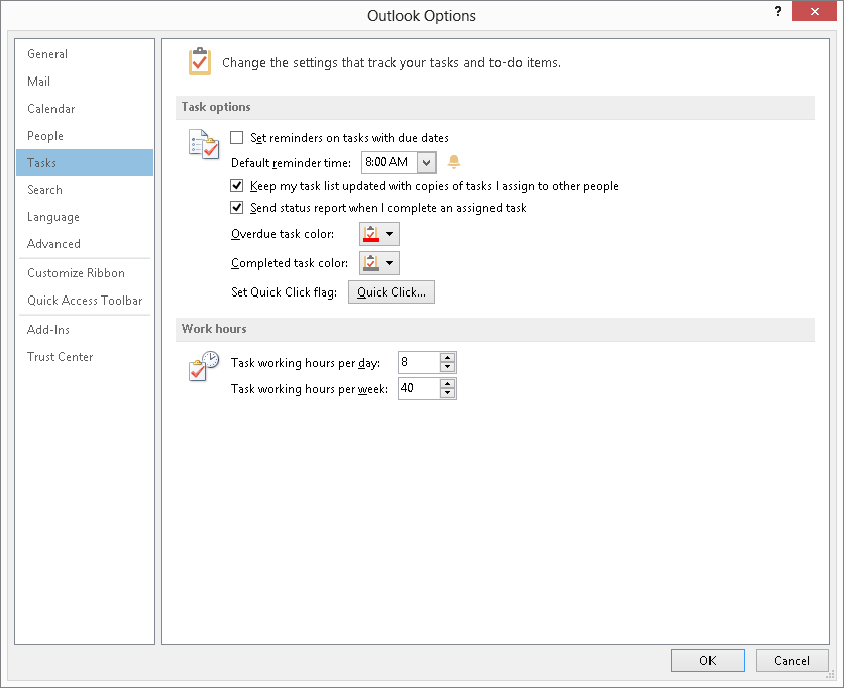
Outlook offers several options that relate to the way tasks and task assignments work. To view and change these options, select Options from the File to display the Outlook Options dialog box, then click Tasks at the left. The Tasks tab choices are shown in Figure 30.29. The first two options determine the colors used to display overdue tasks and completed tasks; the default colors are red and dark gray, respectively. The other options are as follows:
FIGURE 30.29 The Tasks settings in Outlook Options
Outlook’s Calendar is a powerful and flexible tool for keeping track of your appointments and other time commitments. Much more than a simple date book, the Outlook Calendar can do things such as remind you of an upcoming appointment. Outlook also provides some powerful tools for keeping track of your tasks. By listing your tasks and optionally reminding you of when they are due, Outlook can greatly reduce the chance that you’ll forget to do something important. You should now be able to use Outlook to: