
GRILLING BASICS
Ten Tips for Grilling Greatness
STARTING A
CHARCOAL GRILL
Got a match? You and your charcoal grill, right? All jokes aside, plan on carving out 15 to 20 minutes to get your fire going.

1. LIFE’S EASIER WITH A CHIMNEY STARTER. This metal cylinder with a wire rack and handles provides a snug spot for getting a fire going quickly. Simply fill the space under the wire rack with some wadded-up newspaper or paraffin cubes, then fill the cylinder with charcoal briquettes.

2. LIGHT, CHIMNEY, ACTION. Once you light the newspaper or paraffin cubes, the briquettes will fire up with little risk of a flameout. You’ll see the chimney smoking at first, but don’t make a move until the top coals are covered in white ash.

3. GLOVES ON. Wearing insulated barbecue mitts or gloves, grab both of the chimney handles and carefully pour the hot coals onto the charcoal grate. That swinging handle is designed to make it safer and easier to aim the coals.
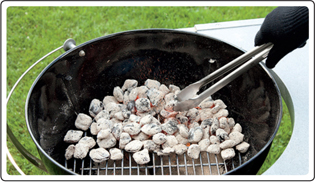
4. COAL PLAY. We like the flexibility of a two-zone fire, where all the coals are pushed to one side of the charcoal grate, providing you with both direct and indirect cooking options. An area of indirect heat will also give you a “safety zone”—a place to temporarily move food if it begins to flare up over direct heat.
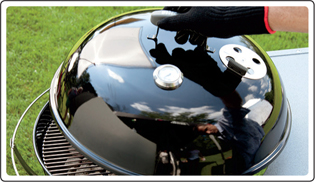
5. JUST ABOUT GO TIME. Put the cooking grate back in place, and cover the grill with the lid. In 10 to 15 minutes, the temperature of the grill should be close to 500°F. This is when you want to brush the grate clean.

6. MAKE SURE THE TOP AND BOTTOM VENTS ARE OPEN. While grilling, the vent on the bottom half of the grill should be wide open and clear of ashes, to provide enough air for the fire. Keep the vent on the top open as well, unless you want to lower the temperature a bit by closing the top vent about halfway.
STARTING A
GAS GRILL
Skills required: lid lifting and knob turning. The huge advantage of gas grilling is its ease, but there are a few important tips to follow:

1. FIRST THINGS FIRST.
Check the propane tank; replace it if it’s empty or near empty.

2. LIFT THE GRILL LID AND LIGHT THE GRILL.
Follow your Owner’s Guide for lighting instructions.
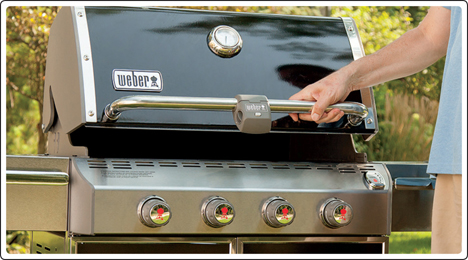
3. GRILL ON, LID GOES DOWN.
Close the lid and wait 10 to 15 minutes for the grill to preheat. This creates the oven-like environment needed for efficient cooking and gets the cooking grates good and hot for the perfect sear. It also makes the grates much easier to clean.
DIRECT AND INDIRECT
COOKING
It’s time for us to be direct—and indirect—regarding heat.
There are two basic ways of grilling your food: directly over hot coals or fired-up burners, or indirectly, off to the side of the heat source. Direct cooking doles out a hefty blast of heat, which gives food that satisfying, crunchy sear, while indirect heat is gentler, transforming the grill into an oven that cooks your meal more gradually.
Direct heat is best used when grilling thinner, tender items that don’t need a lot of time to cook all the way through—your basic hot dogs and beef burger patties would fall under this category.
Indirect heat is the way to go when you want to cook foods more gently from all directions. It’s great for roasting fresh sausages and toasting buns, for example.
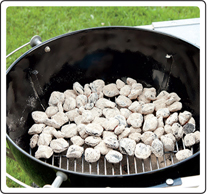
CHARCOAL: DIRECT COOKING
With direct heat, the fire is right below the food. The heat radiates off the charcoal and conducts through the metal cooking grate to create those dark, handsome grill marks.

CHARCOAL: INDIRECT COOKING
With indirect heat, the charcoal is arranged to one side of the food, or it is on both sides of the food.
In many cases, we like to dabble in both types of heat to achieve a good external crust with the preferred internal doneness level to match. This approach leads to more dependable outcomes and not as many awkward “surprise—it’s raw!” moments at the dinner table. To ensure tasty success, start your item over direct heat to sear on both sides, and then move it to the indirect zone to finish up without getting torched. You’ll need to build a simple two-zone fire for this, where the hot coals are pushed to one side in a charcoal grill, or where some of the burners are turned off on a gas grill.
In order for all this direct-indirect stuff to work, however, you need know that the lid is your friend. Keeping it closed as much as possible is what retains the swirling radiant heat you need for indirect cooking, as well as staving off flare-ups in direct use. You’ll still need to turn your food, but when the heat can cook the food from the top and bottom simultaneously, grilling tends to go much faster, which, of course, means the eating part arrives more quickly, and that’s the whole point of this delicious exercise, isn’t it?
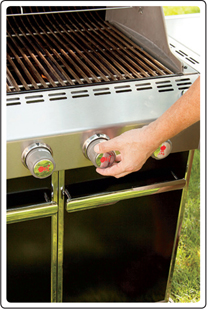
GAS: DIRECT AND INDIRECT COOKING
Using direct heat on a gas grill is simply a matter of grilling the food right over lit burners. To use indirect heat, light the burners on the far left and far right of the grill, and grill the food over the unlit burner(s) between them. If your grill has just two burners, light one of them and grill over the unlit one for indirect cooking.
GRILL
MAINTENANCE
Outdoorsy types tend to be pretty low maintenance—grills included. That said, embracing a couple of simple upkeep rituals can keep your grill going, and going strong, for a very long time.
To achieve the coveted grill marks, keep food from sticking, and eliminate the chances of old burned barnacles on your burger, the cooking grates need to be cleaned before every use. Close the lid and preheat your grill to about 500°F for 10 minutes. Slip your hand into an insulated barbecue mitt or glove and use a long-handled grill brush to do a quick once-over of the grates, dislodging any charred bits left behind from past meals. That quick treatment does the trick.
Keep your grill in tip-top, efficient shape by giving it a more thorough cleaning every month or so. Check the instructions in your Owner’s Guide, but start by wiping down the outside of your grill with warm, soapy water. Scrape any accumulated debris from the inside of the lid. Gas grillers should remove the cooking grates, brush the burners, and clean out the bottom of the cook box and drip pan. Charcoal grillers should regularly remove all ash sitting at the bottom of the kettle.
Check your Owner’s Guide to get the full report on the ultimate deep clean, upkeep, and maintenance for your grill.
GRILL SAFETY
Please read your Owner’s Guide and familiarize yourself with and follow all “dangers,” “warnings,” and “cautions.” Also follow the grilling procedures and maintenance requirements listed in your Owner’s Guide.
If you cannot locate the Owner’s Guide for your grill model, please contact the manufacturer prior to use. If you have any questions concerning the “dangers,” “warnings,” and “cautions” contained in your Weber® gas, charcoal, or electric grill Owner’s Guide, or if you do not have an Owner’s Guide for your specific grill model, please visit www.weber.com to access your Owner’s Guide or for the toll-free number for Weber-Stephen Products LLC Customer Service before using your grill.
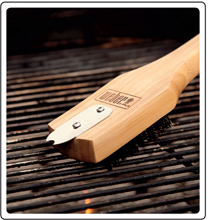
A sturdy grill brush with stainless-steel bristles is essential for cleaning your cooking grate. A notched scraper on the grill head is especially good at loosening hardened bits.
TOOLS OF
THE TRADE
These are our must-have tools for creating perfectly cooked, easily flipped, deftly served masterpieces.
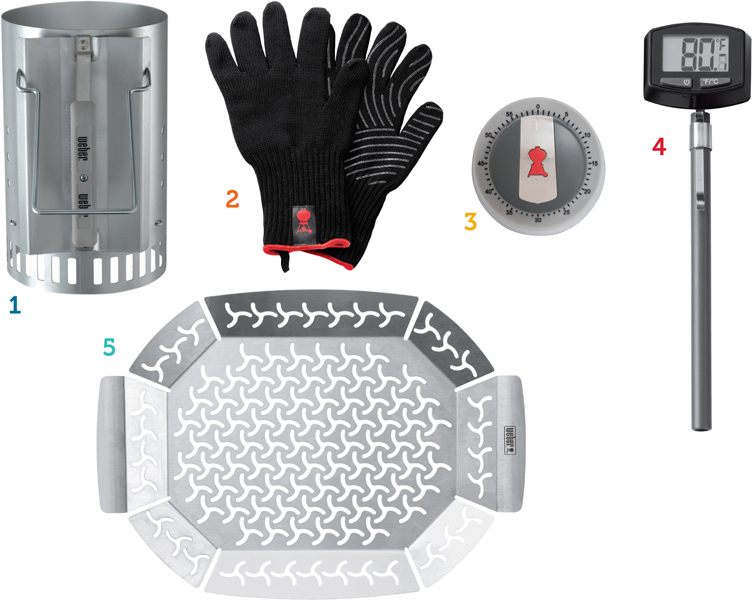
1 CHIMNEY STARTER
This is the secret to charcoal grilling success. Pile in briquettes; fill the space underneath with paraffin cubes or wadded-up newspaper; strike a match; and a safe, quickly lit fire is at the ready—lighter fluid need not apply. See “Starting a Charcoal Grill” for more details.
2 BARBECUE GLOVES
Choose gloves that are insulated and that cover both hand and wrist.
3 TIMER
Ensure that nothing gets overdone or underdone by setting a timer. Simple is best, so select something easy to use that emits a sound you can hear.
4 INSTANT-READ THERMOMETER
Get a quick and accurate read on internal temperatures. Easy to find and relatively inexpensive, this all but guarantees grilling success.
5 PERFORATED GRILL PAN
Use this when cooking foods that are either too small or too delicate for the grates, and say good-bye to saying good-bye to food dropped in the fire.

6 BURGER PRESS
Become a patty-forming machine with this. Your burgers will be the same size and thickness, which means they will cook at the same rate.
7 GRILL BRUSH
Keep your cooking grates clean with one of these. Your burgers and sausages won’t stick or be speckled with old, burned bits.
8 SPATULA
Long-handled spatulas with offset (bent) necks are what we flip for. These are the easiest for lifting burgers off the grates.
9 GRILL-PROOF GRIDDLE
A griddle brings another kitchen convenience to your grill top for cooking fish and vegetable patties too delicate to put right on an open grate.
10 TONGS
Turn hot dogs, brats, and sausages in seconds without piercing them and losing those precious juices. Look for a pair with low tension, a good grip, and a lock for storage.
TEN TIPS
FOR GRILLING GREATNESS
1 THOSE WHO PREHEAT WELL, EAT WELL.
Cold grills are no place for burgers and sausages. Without that ample surge of heat to kick off the cooking, food will stick to the grates and you’ll miss out on those coveted grill marks. Even if a recipe calls for medium or low heat, the grill should be preheated first. Lift the lid, fire up the coals or burners, close the lid, and let the grill do its intensely hot thing for 10 to 15 minutes—the internal temperature should reach about 500°F.
2 CLEANLINESS IS GRILL-LINESS.
Unless you prefer your burgers speckled with burned, crusty old bits of food, a swift sweep of a grill brush over the grates is your second order of business. There’s usually “stuff” left behind after grilling, and, if not removed, it will bind itself to your food, and your food to the grates. So, after a good preheat, grab a sturdy, long-handled, stainless steel–bristled grill brush and give your grates a good cleaning.
3 GET IT TOGETHER, MAN!
Once your grill is preheated and the cooking grates are brushed clean, gather everything you will need and bring it to your grill. That includes tools, oiled and seasoned food, and any additional sauces or sides you’re using. Don’t forget a clean platter or plates to use as a landing pad for your grilled burgers, sausages, and sides. Running back and forth to the kitchen could lead to something great getting overcooked or burned.
4 PLAY (HEAT) ZONE DEFENSE.
Thinner beef burgers tend to cook pretty quickly over direct heat, as do hot dogs, but sometimes you’ll use ingredients that benefit from indirect cooking—think big, raw sausages, or super thick burger patties. In those instances, and many others, a two-zone fire is the way to go. Also, you can brown your items directly above the heat source to get good grill marks, and then slide them onto the indirect, cooler side to finish in gentler, roasting confines.
5 THEY JUST NEED SOME SPACE.
Burgers and sausages were designed to feed a crowd, but they don’t necessarily want to be part of one. All food cooks a little better on a grill with a little space around it. This allows heat to move freely up and around, as well as giving you some elbow room to wedge tongs or a spatula in between items. Also, leave about a quarter of the grate space clear in case you have to move something quickly to a warmer or cooler spot.
6 GIVE A LID-DLE.
Yes, it’s more than just a heavy-duty rain shield. The grill’s lid is actually an integral part of the cooking. Leaving the lid on while grilling keeps the interior at a consistent temperature, which makes for better and more predictable results. Also, dripping fat plus too much air whooshing in can trigger flare-ups. Not good. Charcoal grillers, remember to keep the lid vents at least halfway open. All fires need at least some air to keep on burning.
7 HANDS OFF THE MERCHANDISE.
When you put a cold, raw patty on a hot cooking grate, it sticks. As the meat begins to cook, it attaches itself to the cooking grate for the first couple of minutes. If you try to turn a patty during this time, you are bound to tear it and leave some meat sticking to the grate. However, if you can manage to wait four minutes or so, that’s enough time for the meat to develop a caramelized crust that releases naturally from the grate.
8 KEEP THE GRILL FIRES BURNING.
Charcoal fires, if left to their own devices, reach their hottest temperatures first and then start to lose heat—that rate is determined by the type and amount of fuel used, and your interference. Refuel your fire every 45 minutes or so to keep the temperature up, and move coals around to get your heat zones in order. Keep the bottom vent free of ash, and the top vent adjusted to your preferred airflow.
9 KNOW WHEN TO PULL THE RIP CORD.
This means getting your burgers and sausages off the grill at just the right moment. The surest approach involves a thermometer slipped into the center of the meat, but forget about that old, dial thermometer bouncing around your kitchen drawer. For much more reliable readings, trust a digital instant-read thermometer.
10 NOW, WAIT JUST A MINUTE.
As burgers cook, the heat pushes meat juices out to the surface. If you let hot burgers “rest” for just a minute or two off the grill before diving in, the juices have a chance to be reabsorbed into the meat, and that makes a better burger. On decadent days, drop a thin slice of butter on top of each burger while resting and let the lusciousness seep inside.