Dry Bag
On Thursday, August 14, 2003, just before 4:10 p.m. EST, a software problem in Ohio caused the Northeast blackout of 2003. This power outage affected areas of the northeastern and midwestern United States and the Canadian province of Ontario. Nearly 55 million people lost power, and many were without power for days. We don’t expect this to happen, especially in America. It has been quite some time since something like this has occurred, but there are power surges that happen daily. The summer months can cause a huge strain and drain on power. Will you be prepared when the power goes out the next time?
Imagine yourself in one of the major metropolitan areas affected by this blackout in 2003. What would you have done? Would you have been one of the people walking across the Brooklyn Bridge? Would you have extra food, water, and a means to communicate? Without a communication device, how would you link up with your family and loved ones? These are things to think about. How would you accomplish these things?
The ability to communicate and stay informed during emergency situations is key. A shortwave radio with a hand crank could allow you to follow information and updates. The kit in this chapter includes other items that will help keep you up and running or hunkered down until things return to normal. You also need to have a link-up plan in place that you’ve practiced with friends and family members. Sit down with the people you care about and come up with ideas on where you can meet, a timeline, and contingency plans if your initial and secondary meeting points are unreachable. When you practice and rehearse your plans, make sure you do it with the gear that will be on your back—the urban bug out kit.
The bag should not be so heavy that you are not mobile and not effective. This kit keeps your bag lightweight and will allow you to move swiftly, silently, and stealthily.
Many of these items have been covered in the previous chapters, but the focus here is on how they can be used in an urban environment. Remember, the gear you are the most familiar with and most comfortable with is the gear that is going to work the best for you in a survival situation. You don’t want to learn how to use things when you are in an already bad or grim situation.
Make sure your pack is hydration capable, has lots of storage, and is comfortable. You want to be able to access your gear quickly and efficiently, and that calls for easy-to-access pockets on the outside of the pack. You also want easy access into your pack by means of a zipper, drawstring, and fastek clips.
A military- or field-tested pack is best here. Reputable blogs, websites, and experienced friends or colleagues can help you get started. Always try out the pack for fit, user friendliness, features, and comfort. This is a bag you are going to pack with your urban gear and should not weigh more than 20 pounds (9 kilograms). You want to be quick and mobile, and ready to react in any situation. A heavy load on your back will make this tough to do.
Look for the following when choosing a survival pack:

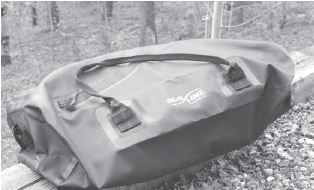
Dry Bag
For the urban bug out kit you want a knife with a full tang blade. A full tang blade means that the blade and handle are one solid piece of steel. This makes the knife much stronger, which means it can be used to skin an animal, protect yourself, chop down trees, pry open doors, and break into and open up places. Look for a good quality knife that can accomplish these things to include in your urban bug out kit.
A pocket-sized survival mask will help you breathe clean air so you can safely escape a burning building or chemical explosion. See chapter five for more on survival masks.
No one knows what the elements are going to throw at you, so waterproof your kit. A strong waterproof bag made of soft rubber will not only keep your gear dry but also provide a protective barrier against things that could poke or tear your pack. When moving in an urban environment you could encounter debris such as rebar, exposed sharp metals, beams, light posts, or ripped-up cars. Any of these could snag you or your pack and tear things open. A rubber waterproof bag will give you added protection to keep your gear safe and dry.
You can also use trash bags to waterproof your gear. Use at least two and secure the top of each one with a rubber band. Simply pack your gear in the inner trash bag, seal it by twisting the top and forming a gooseneck (just fold the wound part over on itself like a gooseneck, then secure it with a rubber band). Make sure you press all of the air out of the bag. Repeat this two to three times with more trash bags. The extra bags will provide extra protection and an extra barrier to the internal bag that holds your kit. Continue to gooseneck each subsequent bag and secure the top with a rubber band for easy access. If you tape the bags shut, you will ruin the bag each time you have to go in and get your gear. Therefore, use rubber bands and practice getting in and out of the bags to retrieve gear. You should be able to access your gear with and without light. Be sure to practice with whichever waterproofing method you use to ensure you are prepared.

Breath of Life Mask
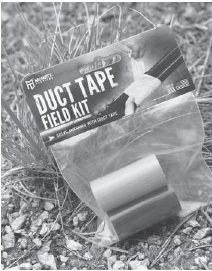
Duct tape is an essential piece of gear for any kit or situation. Use duct tape for first aid, including covering and compressing wounds, repairing things like clothing, latching down items, making an improvised weapon, sealing a leaky water bladder. A must for your urban kit, you can pick up a roll of duct tape just about anywhere.
Make sure you have a way to start a fire, make sure you have more than one option for starting a fire, and make sure you have some type of cube or paste to act as kindling once you get a spark or flame going.
The Sparkie does exactly what the name says: It sends out sparks to ignite tinder and get a fire going. You can even do this using one hand, which can be useful in windy conditions: One hand can hold down the tinder and the other can operate the Sparkie to ignite it. The Sparkie is lightweight and slightly larger than a house key.

Duct Tape
WetFire Tinder Cubes come in a pack of eight and will help get a fire going. It is hard to get tinder going when it is wet or damp, but you won’t have that problem with WetFire cubes. They burn very hot and long and burn even longer when they are wet. The WetFire Tinder Cube looks like a very dense marshmallow and can easily fit in your kit.
Refer to chapter five for the use of a whistle and its importance. A survival whistle is still very useful in an urban environment and can be used to signal, mark your position, provide early warning, and signal a coordinated movement such as an attack or retreat.
A compass is key for finding direction. If the city you are in is your hometown, navigation should not be a problem, but if you are traveling in an unfamiliar urban environment, a compass will be very useful. If you move underground or plan on moving at night, you will need a compass. A compass will be able to easily give you cardinal directions (north, south, east, and west), but be aware that the high concentration of metal in urban settings could cause a compass to not read exactly as it should.
Make sure you have a good headlamp in your urban kit. Chapter five offers more detail on the necessity and benefits of a tactical headlamp. Look for a headlamp that is lightweight, easy to use, and can last a long time. Make sure you have a flashlight or penlight as a backup. A large office building in the middle of the day will be completely dark inside. You will need something that can provide adequate light to move in the urban environment. A headlamp, flashlight, or penlight light will allow you to navigate through buildings, homes, and subways.

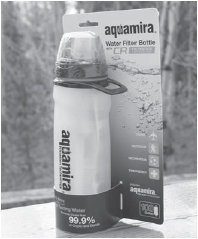
Water Bottle with Filtere
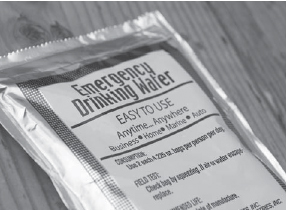
We can go without food for weeks, but we can only go without water for three days. Having a water bottle, and drinking from it, ensures you stay hydrated. Make sure you have the supplies to get you through six days. If you find yourself in a bad scenario, a bottle with a built-in filter will make water safe to drink and you won’t have to carry around multiple water bottles or bladders of water. Water can get very heavy very quickly if you decide to carry too much.
This is a totally waterproof piece of gear that can be worn, made into a lean-to, or used as a ground mat. The poncho itself is waterproof, but anywhere there is a hole or opening water can get through. This is your full-body raincoat that you can use during inclement weather and use to construct a hasty shelter. Ponchos are very inexpensive and should definitely be a part of your kit.
Another great piece of gear to keep you warm at night is the bivy sack. The bivy sack can be as useful and invaluable in an urban environment as in any rural area. Use it to sleep in and get warm quickly when the weather gets bad. It will keep you warm, dry, and help reflect your body heat inward for a comfortable, toasty night. See chapter five for more on bivy sacks.
There are bugs in the city, so it’s better to have some bug spray than not. Make sure you have a repellant that offers long-lasting protection against black flies, ticks, chiggers, mosquitoes, deer flies, and other biting insects. Put your repellant in a large ziplock bag so it does not leak into the rest of your gear.
Keeping yourself clean will help prevent problems with infections and will keep you at your best in a survival situation. See chapter five for more details on bathing wipes.
The personal hygiene kit should be appropriate to your gender. You don’t need both unless you are packing an urban kit for a man and a woman. Also, think about including some type of medicated powder or antifungal cream. Medicated powder can also be used as foot powder and a cooling powder in the armpits and on genitalia.
Another inexpensive lightweight piece of gear is the bug head net. This is useful when you will be sleeping outdoors to keep mosquitoes, bugs, and pests away from your head and face when you are trying to rest.
You’ll want at least a six-day supply of food. Select the best food and water options for you. Be cognizant of the weight of these items. This is for your urban kit and you want to be fast and light on your feet. You want to be able to move quickly, efficiently, and with minimal effort. Don’t pack tons of food. Energy bars are small, compact, and nutrient dense and will give you the calories you need without taking up too much space in your pack. You could also pack a mix of bars, dehydrated food (this is fairly lightweight), and an MRE (meals ready to eat) or two, but remember, a heavy pack will just slow you down.

Emergency Water
Look for a bear or pepper spray that can get the ingredients out quickly and with high volume. The spray can be used on a bear, person, or an unruly mob that is after you. Make sure you are upwind when you disperse the spray so you don’t incapacitate yourself when you are trying to ward off an attack.
One recommended book for every large survival kit is the SAS Survival Handbook, which will provide useful information on a variety of survival topics. See chapter five for more on this valuable resource.
Don’t rely on Google Maps and your phone. Make sure you have maps of the surrounding areas and maps of potential locations you might need to travel to and from. Many good outdoor stores have maps of the local areas. Gas stations also have inexpensive roadmaps.
You need to have a first aid kit that can help you treat cuts, scrapes, larger wounds, sprains, headaches, and allergic reactions. A prepackaged kit will have all the supplies you need.
If you have the proper training and necessary permits, a pistol can save your life, ward off would-be attackers, kill game, and protect others in your party. It is essential that you refer to local regulations for carry laws and firearm possession.
A cache site is a concealed location where can you store your gear for resupply and replenishment. Concealment is key. You don’t want someone to be able to find your stash of goodies. It needs to be well hidden but very easy for you to find and recognize. Even your backyard can be a good cache site. Other possibilities include parks, abandoned buildings, and waterways such as rivers, lakes, ponds, or streams. Make sure your kit is waterproofed and includes a drying agent if you are storing your kit in a damp environment.
If you are using your cache to store weapons, metals, batteries, and ammunition, be sure your cache is waterproof. Weaponry should be lubricated and bagged before it is stored. You can purchase waterproof storage containers in various sizes and shapes. You can also make your own. You can make your own with trash bags, large PVC tubing, a box, or wooden crate. Make sure you waterproof your items with trash bags, ziplock bags, and tape or rubber bands and include a drying agent inside the storage vessel to get rid of moisture. An old saltshaker filled with rice can help capture moisture from within your self-made cache system.
Once you determine where you are going to place your cache and if you are going to have one or multiple cache sites, create a map—whether it’s a mental map, paper map, or some type of code that only you know—to locate your gear. Navigate to each of your caches to restore your supplies. This will cut down on the load you have to carry when you are en route to your bug out location.
Find and adopt the gear that works best for you, the gear you can afford, the gear you are well-trained to use and can operate from muscle memory and with your eyes closed. Always consider the environment you will be in and think about what you can feasibly carry on your back for a long period of time.