Northbrook Farm is a seven-acre certified organic farm that is part of a larger piece of land co-owned by my husband Lamont and me, and my Aunt Jane and Uncle Brian. But Northbrook Farm is more than that. It is my living, my food source, my identity in the community, my sons’ playground, my joy, my frustration, my business.

Most people would assume that someone who starts an organic farm had a pre-existing passion for growing. In my case, that came later. My uncle offered me land to farm several years ago, and until that moment, I had never considered farming. From the moment he mentioned it, though, it seemed like a perfect fit for me. I had finished university, where I had completed an English degree, and then I had spent some time travelling and working at various jobs. All the while I had pondered what I would do for the long term.
I knew that I loved working outdoors, and that I liked physical work. I sure didn’t relish the idea of sitting behind a desk all day and then having to go to a gym to stay healthy. I wanted work that would involve both my body and my brain. I was also becoming increasingly aware of the basic connection between what I put into my body and how I felt. I wanted to find work that could include a family, so that my “work life” and “family life” wouldn’t be separate categories. Coupled with all this was a desire to find work that would leave a small environmental footprint. I wanted work that would benefit my own health, as well as that of my community and my planet. This seemed like a very tall order until I considered organic farming!
I accepted my uncle’s offer, but deferred the move for a couple years while I took care of some other goals. In the meantime, I met Lamont, the man who was to become my husband. The poor guy fell in love with a woman who already had a plan. He decided he could go along with my plan, and moved across the continent from North Carolina to pursue my dream with me. I had land and I had my new little family of two; all I needed now was to learn how to grow vegetables, or so I thought. As time went on, I realized that I also needed to learn how to plan a farm, how to decide what to grow, how to nurture the soil, how to keep records, how to become certified organic, how to sell, and how to run a business!
The first thing many would-be farmers have to figure out is where they will farm. In my case, I was able to skip this step. I had the great good fortune to have free land to farm for my first three years. After that time, Lamont and I decided to buy my grandmother’s portion of the land that we now share with my aunt and uncle. Fortunately, she gave us a great deal, because otherwise we probably wouldn’t have been able to afford to buy land in this area. Robin and Rachel will tell you about other land-use arrangements. When looking for land to farm, you should consider the climate, size, slope, sun exposure, water availability, drainage, proximity to markets, and fertility. Of course, in a perfect world you would find a piece of land that was perfect in all these ways, and you would be able to afford it. The unfortunate reality is that in the Victoria area, where the climate is great for year-round growing and there is a huge market for local organic vegetables, property prices are sky high.
Because of these prices, most new farmers end up in a leasing or land-sharing situation. All such arrangements should be entered into with caution and communication! We are very lucky to own our land, but we do not own it alone. We have had to work with Brian and Jane through misunderstandings and differing expectations regarding such things as the appearance of the land, landscaping budgets for shared areas, et cetera. If you are going to be sharing land in any way, it is very important to think carefully about what issues may come up, and get plans down on paper for how all parties will deal with them. All parties must be very clear about their expectations, and communicate those expectations well. If at all possible, find someone near you who has been in a similar situation and ask for their advice. Did they ever come to blows about water use? Did the person they were leasing from object to tiller noise on Sunday mornings? Did anyone expect the property to look like Butchart Gardens? Did “just give me some veggies when you have them” turn into “feed my entire extended family twelve months a year”? Did “long term” turn out to be only two years?
Don’t get me wrong—many land-sharing or leasing situations work wonderfully well for many, many years. They can allow agricultural land to stay in agriculture while providing an opportunity for new farmers to make a living. These arrangements can reduce landowners’ taxes while improving the quality of their water and soil, transforming fallow lands into beautiful, biologically diverse spaces, and creating or growing healthy communities. The odds of all these good things happening are greater if everyone enters the arrangement with their eyes, minds, hearts, and ears open, and with pens in hand to write down all agreements.

We felt rather overwhelmed as the time to move to the farm approached and we realized we needed a plan. Naturally, this English major turned to books. Let me tell you, it’s not as easy as the books say (not even this one). However, the reading was very valuable. Books gave me ideas about how to begin. Much of what I read didn’t really make sense until I was in the dirt, but once I was there, a lot of information came back to me, and I could make sense of what I was seeing.
My most valuable learning resource has been the farming community. Remember, everything you’re doing has probably been done before by someone else. Every contact I made led to another. As I sit down to write this I’m going on a trip down memory lane, thinking of all the people who helped and taught me, many of whom have become good friends. There were really just two starting points.
The first was Mary Alice Johnson. I heard that she taught a course, Organic Farming as a Business, at a local college. This course was exactly what I needed. She co-taught the class with Tina Baynes. I signed up, and learned a lot from the actual course material, but perhaps more importantly, I met Tina, who farmed in my neighbourhood and owned a box-delivery business with Rebecca Jehn. They became not only friends but also our very first customers, as they bought our vegetables to put in their boxes. That first summer, Lamont apprenticed with Tina. It was only one day a week (because we were up to our eyeballs in work on our own farm), but he learned a tremendous amount from her. Tina also told us about other groups and resources in the community. Through those contacts, we met other growers who invited us to their farms to learn from what they did.
The second one was that shortly after we moved here, I got talking to my new next-door neighbour. He mentioned that the regional government was funding a drip irrigation workshop to encourage water conservation. I hadn’t even thought about irrigation! Here was something else to learn. So off I went to the workshop. The content was great, but the people I met there turned out to be an even greater source of information. My neighbour introduced me to a certified organic grower in the area who told me about the upcoming Islands Organic Producers Association (IOPA) annual general meeting. IOPA is our local organic certifying body. I went to find out how to get certified. Not only did I get my application and meet lots of other people in the community, I even ended up volunteering for a committee! This was a wonderful learning experience, and it provided more opportunities to meet more farmers who invited me to their farms to learn, and who shared their knowledge with me.
One of the things my new friends told me was where they got their feed, soil amendments (such as lime, kelp meal, rock phosphate, et cetera), and equipment. From them I learned that a good supplier is more than a source of materials. A knowledgeable supplier can save you a lot of money and time in the long run, even if their prices aren’t the absolute lowest. For example, we checked out an irrigation store in Victoria that had great prices but staff who didn’t know a thing! When we compared them with our nearby irrigation shop in Saanichton, we realized that although our local store was a bit more expensive on individual items, we’d probably save money (and grey hairs) overall, because they were knowledgeable and helpful. They could help us design an efficient system that would actually work, and we wouldn’t have to keep making expensive changes year after year.
It’s a tough balance, because for the first couple of years you won’t be bringing in much income, so it’s very difficult to find the money to pay for the things that you need. When you start shopping around, make sure you introduce yourself as a new farmer in the area, and set up accounts everywhere you shop. Most suppliers charge much less to their regular account customers than they do to walk-in customers.
From my experience, I would say that the most important things to keep in mind in getting started are to be open, to admit ignorance, to ask questions, and to volunteer. There might be an amazing community around you that could be an invaluable resource. Maybe all you need to do to tap into this resource is start introducing yourself and asking questions. There are opportunities out there for formal apprenticeships, through soil across Canada, CRAFT in Ontario, and ACORN in Atlantic Canada. In the USA, there is the National Sustainable Agriculture Information Service (formerly known as ATTRA). If you search “Organic Farming Apprenticeships,” you’ll find several programs. For short-term placements, try WWOOF (World Wide Opportunities on Organic Farms), Global Lifestyles, or HelpX. Or you can always call organic farmers around you and offer to come by and work with them for a day, a week, or a season. Tell them you want to learn and you want to help, and who knows what kinds of responses you will get? While you’re doing all this, a bit of book-learning will come in handy too. See our suggested reading list for some of our favourites.
A word of caution: you will never know it all, and you may never feel “ready.” After reading, apprenticing, and being involved in your community, at some point you’ll have to make the leap. Don’t wait until you think you know it all, or you will never start your farm. We sure didn’t. When people asked about our farming background, my balding husband Lamont declared, “Crops? I don’t even know how to grow hair!” We were blissfully ignorant of the challenges we would face.
When we arrived on the property, one of our earliest challenges was staring us in the face in the form of a big fat bunny rabbit. I don’t mean a wily little brown rabbit that looked like it belonged outdoors (although we had our share of those too). The ones that were really causing problems were the feral rabbits that had overrun the place. You know, the offspring of someone’s cute Easter gift that they later released into “the wild” when the rabbit started eating, pooping, or procreating too much.
Those creatures were everywhere. They’d sun themselves on our driveway and would only move when a wheelbarrow tire came too close or when I’d pick up a tool to throw at them. Our first attempt to save the crops was exclusion. We put up a short fence around an area of the garden. The fence was black nylon netting, and we buried it six inches deep to keep the rabbits from digging underneath. So, instead, they chewed through it. Plan B was a little more gruesome. One day Lamont snapped. We approached a bed of lettuce to see a bunny snacking. Lamont instructed me to circle around and herd it toward him while he selected a grapefruit-sized rock. By the time Lamont lobbed it, the rabbit was dashing at full speed, zipping this way and that. Somehow, the rock found its mark and came down squarely on the rabbit’s head. We ate rabbit stew that night, and that meal was the beginning of the end of my decade of vegetarianism. Lamont did manage to kill one more rabbit that way, but we knew it wasn’t a permanent solution to our large problem.

The next step was to adopt Fleece, our golden retriever. That first year Fleece was in heaven. She’d eat entire nests of baby bunnies and carry around the heads of full-grown ones the way other dogs carry old tennis balls. It wasn’t pretty, but eventually a kind of balance was established. We still see rabbits, but they’re no longer a major threat to our livelihood.
The deer have been another story. In the first couple of years, we put up with a bit of deer damage because it wasn’t enough to justify the cost of fencing our whole twenty acres. However, as more and more of our region gets developed (reducing deer habitat), as our dog gets older and slower, and as we grow more food closer and closer to the woods beside us, the deer problem has increased greatly. So, the fencing had to begin. Eight thousand dollars and many hours of work later, the problem is not yet solved. They’ve jumped over, dug under, burst through weak corners and gone around the unfinished end of fences, so the work continues. In retrospect, we would have been much better off fencing before the deer got a taste, because now that they know what’s here, they are persistent. Live and learn.
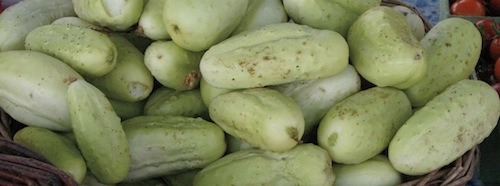 Our heirloom Lillie Mae’s Little White Cucumbers have a cult following among our market customers and chefs.
After finding your dream piece of land, and while learning all you can from books and other farmers, you’ll have to decide how much land to put into production. Farmers on small parcels simply farm all the land they possibly can. We had the wonderful and unusual situation of having more land than we could use for our first few years. We read, thought, asked others, and then ended up ploughing way too much! We had a great plan. We’d plant a quarter-acre in each of four crops: beans, beets, squash, and Swiss chard. In addition to that, we’d have an “experimental garden” in which we would plant small amounts of lots of different crops for our own consumption. We then planned to have another acre and a half in green manure (crops such as buckwheat or clover that are later tilled in to improve soil fertility). The following year we would put veggies where the green manure had been, and vice versa. Then, on top of all that, we had another two acres that we planned as a future orchard. We had a terrific plan to rotate several green manures on that piece over a period of two years, and then plant our orchard.
Our plan was solid. Our execution was not. Actually, the first problem was that the plan was overly ambitious. We hadn’t taken into account the number of rocks in the soil, and therefore the amount of time that would have to go into picking them out. We didn’t really plan any time for the green manures, and let me tell you, with only a walk-behind rototiller, prepping and planting large areas in green manure takes some time. We didn’t get nearly the area planted in our four major crops that we thought we would. In retrospect, this was fortunate.
You see, we also had no idea just how much produce would grow in a small area. What we had intended as our experimental garden ended up providing lots of saleable crops. There is no way that the two of us (and all our family, friends, and acquaintances) could possibly have eaten all of those “small amounts.” On the other hand, we would have gone insane with the tedium and backache of picking a quarter-acre each of beans and squash. We also learned that at the farmers’ market, variety sells.
One problem with our ambitious plan was that in the first year, we opened up a lot more land than we could manage. We hired a neighbour with a tractor to plough and rototill what had been hay fields, so we wasted money by turning too much. Worse yet, once the land was ploughed, the weeds moved in. I think there was also a negative psychological effect. We started our farming career feeling as though we were out of control, and it took about five years for that feeling to abate. I contrast this with Rachel’s experience. She started small and has gradually grown more and more each year. Sure, she feels too busy in the summer (there really is more work than you can possibly do at the height of the season), but she has always seemed to me to be so much calmer and more grounded than I am. And I know for sure her weeds have never been as out-of-control as mine. When I read her chapter, I don’t get the sense of panic that I recall from the first couple of years that I farmed.
As a general guideline, I’d say that it’s reasonable to start off with a quarter- to a half-acre per full-time person on the farm. When I wrote the first draft of this paragraph, I wrote, “With our degree of mechanization, I think that one acre per person works, once you have a bit of experience.” Since then, I’ve seen Robin and Andrew grow more food on one acre with three full-time people than I was growing on two acres with two full-time people. We’re gradually learning that production is tied much more to labour than it is to area.
As you gain experience, you’ll learn what suits your personality. Maybe you’ll be an Andrew, able to coax stunning yields out of small areas with your attention to detail and your patience. Or maybe you’ll be more like me—preferring to have more area under production so when you’re a bit sloppy with the seeding or the watering, you can shrug and plant another bed.

We’ve all found that the labour crunch comes on harvest days. One person cannot harvest one acre of mixed vegetables that are producing well, and still have time to maintain them, so you get into hiring others to help. This may be a great way to go, but I’d suggest doing it on your own for a while first. In the meantime, if you’re open to it, you’ll probably have friends, family members, and even interested strangers offering occasional help, often just in exchange for vegetables. Since we live in the beautiful tourist mecca of southern Vancouver Island, we often hear from friends who want to visit. We love having guests, but we always tell them that only the first night is free; after that, they have to pitch in on the farm.
I can’t tell you what you should grow, but here are some things to keep in mind while you’re deciding. Grow what you like to eat. Not only will meal times recharge and inspire you, but crops are actually easier to tend and to pick if you’re excited about how they’ll taste. You will also be a much better salesperson if there is genuine enthusiasm behind your recommendation of the veggies. Talk to other growers and to buyers such as box-program owners, chefs, and produce managers. You can ask for general ideas of what they need, or you can seek contracts to grow specific crops. If you can find other growers in your area, it is great to run your ideas past them. Maybe the local produce manager is telling everyone that she wants more green beans and all the organic farms in the region have decided to plant more this year. In that case you might choose to grow something else or seek a new market. Also, during all these conversations, remember to talk about price. Maybe the reason no one is growing zucchini for the local restaurant is that they don’t want to pay more than $0.60 a pound.
In choosing how many crops to grow, there are two things to balance. On one hand, you could grow only a few crops. This will keep your day-to-day operations and your recordkeeping simple while you’re learning. You might be able to learn a whole lot about growing a few things. However, you won’t have the satisfaction of a bountiful market table or farm stand full of appealing variety. You also will miss out on the thrill of eating meals that are all yours. Perhaps more seriously, if one or two of those crops fail, you will have lost a significant portion of your income. On the other hand, you could grow small amounts of many crops. In this case, you’ll learn a little bit about growing a lot of crops. You’ll probably love the variety but curse the complexity. It is difficult to find the time to attend to the needs of many different crops at different stages of growth. I write lots more about recordkeeping later, but it is very important to keep thorough records, or you won’t remember all the invaluable knowledge that you gain each year.
The first several years will be an experiment. You’ll gradually learn what grows well for you, what you enjoy growing, and what makes money for you. Careful recordkeeping will tell you at a glance at the end of the season how much money each crop brought in. I aim for an average of $1.50 per square foot outdoors (that’s $600 per bed, since my beds are four feet wide and a hundred feet long). Some labour-intensive crops, like salad greens and strawberries, do much better than that, and that offsets the lower-maintenance crops like winter squash and melons. If you have the space, these low-maintenance crops are great to cover ground. For me, winter squash and melons make around $0.50 per square foot. If your space is tight, you can focus on higher value crops. Also, in our climate you can plant in succession, so many of your beds can produce two crops each season. My average is fairly conservative, and accounts for some less-than-perfectly-tended beds. Robin pays much greater attention to detail and can expect $2.00 per square foot. Whatever your average, it’s an important piece of information when you’re deciding which crops to grow, and which to pass up each spring.
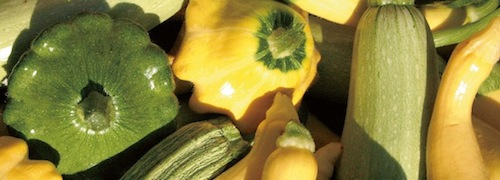 The colours and shine of our summer squash mix attract attention on our market tables.
One more word of caution: beware niche markets. I know this runs contrary to conventional farming wisdom. It may be that you have a truly original idea, and that you’ll be able to make a million and live out your farming dreams growing a niche crop. However, I think it’s more likely that the niche market won’t be a truly original idea. When we were still in the planning stages of our farm, Lamont and I went to an agriculture conference in Chilliwack, BC. There we met a man who told us, “I lost my shirt in cranberries, then ginseng, then kiwi. Now I’m a consultant.” (Perhaps I should add another word of caution: beware of consultants!)
Around the time we moved to the Saanich Peninsula, many of our neighbours were digging up and burning kiwi vines. Several years before, word had gone out that our climate was perfect for kiwi-growing (it is), and that the price was right (it was); anyone could make a decent living growing kiwi. Well, not too long after, the bottom fell out of the kiwi market. Now many of the people who ripped out their kiwi vines are planting grapes. I’m scared of putting all my eggs in one basket. I think it’s more sensible to plant a variety of crops. Fads come and go, but people have been eating lettuce, carrots, beans, et cetera, for a long time. Of course you want your produce to stand out, but to do that you can focus on growing unusual varieties, and on making sure that they are clean, sold immediately after picking, and of top quality.
We had made lots of contacts, and some friends, in our new farming community. We had decided what to grow, and how much of it. Now we had to figure out how we’d grow it! The first thing to decide was how the field should be laid out. We were lucky enough to have a field on a beautiful, gentle, south-facing slope. The field is approximately four hundred by three hundred and fifty feet. We read that it was best for soil conservation to till across the hill, rather than up and down, so our first decision was made.
We then decided that we would plant in beds of several tightly spaced rows. This seemed to make sense on a farm that wasn’t very mechanized. Tractors often plant in individual rows, but beds were better for us. Beds are a more efficient use of space than rows, because so much less area is lost to paths. It also means that less area gets compacted by feet, wheelbarrow tires, et cetera, and thus soil structure (tilth) and soil life are encouraged. If the beds are in the same places year after year, you can concentrate on amending the fertility just in the beds, not in the walking paths, so the money and time you spend building your soil is used to the greatest advantage.
We decided to make our beds four feet wide. This is slightly too wide to be convenient, because reaching all the way to the middle to harvest is a bit awkward. However, the wider the beds, the more efficient the use of space, and four-foot beds work perfectly for the tractor we ended up buying. The tractor tires straddle the beds and only compact the paths. Our paths are twenty-six inches wide, which is adequate for kneeling to weed and harvest, and leaves room for a bin for gathering crops.
We then had to decide how long to make the beds. At first, it seemed logical to run them from one edge of the field to the other. Up one side of the field is a gravel driveway, and the main water line, so we thought the beds (and irrigation lines) would start there and run all the way to the other edge. Somewhere along the way, Lamont realized that looking down a three-hundred-and-fifty-foot-long bed that needed weeding would be daunting indeed. Also, we learned that the type of irrigation we wanted to use would not emit evenly over such a long distance. The plants at the beginning of the bed would get more water than those at the end. So we decided to break up the field.
We made everything square (as much as possible): one hundred by one hundred-foot blocks divided into sixteen beds in each block. The field looked like a tic-tac-toe board with nine equal blocks (plus two smaller areas at the top where the field narrowed). Having a consistent bed size makes planning easy. A bed is a standard unit, so when we’re comparing yields, for instance, we know that a bed in one part of the field is the same area as a bed in another part of the field. With all the beds and blocks being the same size, irrigation is interchangeable. This system also leaves main pathways (seeded in grasses and white clover) between the blocks that are wide enough to allow for driving in the field when it is dry. We’ve been very pleased with this layout. We now have a tractor that is a bit big for our needs, so the hundred-foot beds seem too small, but for all the hand work, and for the irrigation system, hundred-foot beds are ideal.
In our first years, we relied almost exclusively on emitter line or drip tape, a thin-walled hose is perforated to release water evenly along its length. This minimizes water use, and also helps with weed control, as the drip tape leaves the surface dry and thus does not encourage weeds to germinate. We chose line with emitters that drip water every twelve inches. In our clay soil, water easily spreads out horizontally, so having emitters only every foot worked well enough in the early years. After five years, our drip tape began to wear out, and as we gradually replace it, we are changing to drip tape with emitters every six or eight inches. We’ve noticed that as our soil structure improves with more organic matter, the water does not spread out horizontally as well as it used to, so the emitters spaced at twelve inches no longer water the whole bed as effectively. If you have sandy soil, you’ll need your emitters closer together. Initially each of our beds had two lines of drip tape, and this remained the same whether we were planting four rows along a bed (as with lettuce), or two (as with summer squash). We now find that we’re sometimes adding a third line to even out the moisture across the width of the bed.
Our system worked quite well on crops established early in the spring, but newly transplanted crops struggled in the heat of summer, with only drip irrigation to sustain them. We also discovered that in the dry season, nothing would germinate without moisture right on the surface. We later devised a better system. When first planting a bed, we lay a half-inch line right down the middle, into which we have inserted micro-spray emitters. Each one sprays out a two-foot radius, so the little spray just covers the bed without wasting too much water on the paths. Once the seeds have germinated, or the transplants have become well established, we replace the spray line with the two or three lines of drip tape. This is the system we use on carrots, beets, lettuce, beans, parsley, basil, chard, et cetera. On salad greens, which like overhead water, we leave the spray emitters on for the duration of their production.
For some more widely spaced crops we have a different system. For melons and winter squash, which we plant two and a half feet apart, we custom-make irrigation lines. We use half-inch line into which we insert emitters that drip at a rate of one gallon per hour. We put one emitter every two and a half feet. Then, when a bed is all ready for transplanting, we lay out the irrigation, turn it on for a minute, then simply transplant into the wet spots and tuck the irrigation line right in beside the plant. This way, we’re watering just the plants, not the weeds. Tomatoes only get drip irrigation (they don’t start with the micro sprayers), because they don’t like to have wet leaves.
Irrigation systems are surprisingly individual. What works for your neighbour might not be quite right for you. Some of our friends prefer overhead irrigation. One of our friends, who farms just fifty kilometres away, finds that seeds germinate just fine under her drip tape, but she prefers a different brand from what we use. She finds that the brand we use moves around on the bed too much as the tapes expand and contract with the differences in day and night temperature.
Another consideration when you’re laying out your field for the first time is your long-term crop rotation. Check our recommended reading list for sources that are good for crop rotation and fertility information. I especially like Eliot Coleman’s New Organic Grower for clear crop-rotation plans. The ideal rotation plans I had in my first couple of years have changed a bit as I have learned what does and does not grow well for me. A rotation plan works best if you want to grow exactly the same amounts of many different families of plants, and if all areas of your land grow all those things equally well. The reality for me is that some crops grow very well (all cucurbits, the cucumber, squash, and melon family) and some crops grow poorly (most brassicas, the broccoli and cabbage family). Furthermore, not all areas of the field grow all crops equally well. For instance, every year I’d love to have the high, drier areas of the field in early spring crops followed by the overwintering crops that I plant in late summer. I don’t do this, however, because the soil would never get properly rested under a cover crop, and because too many of the spring and winter crops are brassicas. There wouldn’t be enough variety for an adequate rotation.
 Recently transplanted tomato plants in Heather’s Tomato Tunnel.
As a general guideline, I try to balance these many factors by making sure that each year I set some areas aside to be in green manures. A green manure is a crop grown to improve soil structure and fertility; it is turned in rather than harvested. I’ll explain this in more detail in my section on soil fertility. I have also now incorporated chickens in a movable pen (more on that later), so there is always some part of the field that is getting a rest from annual vegetable crops. During its rest, the fertility is being restored, either with green manure or chicken manure, and cycles of disease and pests are disrupted. In addition, I keep careful track of where each crop was planted each year, then I just move things around, being especially careful not to plant the same families in the same locations two years in a row. Sometimes this means that a crop is not in its optimum growing location, but I feel the benefit to the soil of a thorough rotation outweighs the inconvenience of not being able to put everything exactly where I’d like to.
When I started out, I was very intimidated by the reading I did about soil health and fertility. All this talk of N-P-K (the macro-nutrients Nitrogen, Phosphorous, and Potassium)—how would I know what I needed and how much? Sure, I understood that my compost should have a good carbon-to-nitrogen ratio, but how would I know if I achieved it, and then how would I know how much compost to apply? Then I came to the sad realization that compost doesn’t grow on trees. To apply it at the rates recommended by some books (especially the organic home-gardening books), I would have to spend all my money having materials trucked in (manure, hay, seaweed) and all my time turning and hauling the stuff. Then of course there were all the micronutrients to consider! I thought a soil test would be a good idea, but then I heard that these could be inaccurate, or that the results could vary with the time of year, the temperature of the soil, the point in the growing cycle when the tests were taken, et cetera. I heard of an old, experienced farmer who said he took a soil sample, divided it in half, sent it to two labs, and got two different results, and I have heard a soil scientist say that testing for nitrogen is imperfect at best.
Although I had reservations about soil testing, I had to start somewhere, so I sent a sample off to a lab. Perhaps the most valuable piece of information from the test was my soil pH. We live in an area of naturally acidic soils, and most vegetable crops like relatively neutral soil, so the application of lime is an ongoing necessity here. Beyond that, I learned that my organic matter was low. Now, with a bit of experience, I could have determined that just by looking and feeling the soil. I also got recommendations for the amount of nitrogen, potassium, and phosphorus to add per acre. I divided this out to tell me how much should be added to each bed, then started buying amendments. That first year I used a lot of alfalfa meal for nitrogen, because I hadn’t been on the land long enough to make compost or grow cover crops, also known as green manures. In addition, I added rock phosphate and sulphate of potash to each bed, along with a handful of kelp meal for micronutrients. Since that first year, I test only occasionally, when I see poor crop performance that I cannot figure out on my own.
I have come to believe that in general, soil life is more important than specific N-P-K numbers. Soil life depends on organic matter, on cultural practices (mulching, tilling, crop rotation, watering, et cetera), and of course on nutrient levels. I highly recommend the book The Soul of Soil for a good background in basic soil science, and then I think it’s most important to watch your crops to find out what they need. Deficiencies show themselves in the plants. Good quality compost not only adds nutrients, but, perhaps more importantly, adds beneficial microbes to the soil. But compost is not the be all and the end all of healthy soil.
Building compost piles can be useful, and indeed some farmers manage their compost very carefully. However, a lot of “composting” can happen right in the soil when you incorporate organic matter. This could be crop residues, green manures, animal manures, or other plant material brought in from off-farm. This saves time and energy compared to moving material into and then out of piles, and can save nutrients that might be lost through leaching or dissipating in the air when compost piles get too wet or too dry, or are turned. Keep your eyes and ears open for sources of organic matter in your community. For example, in Victoria we have an organic tofu plant, and the owner donates the okara (what is left of the soybeans after they make the tofu) to local organic farmers. This is a great source of organic matter, and is fairly rich in nitrogen. Naturally, it’s also in very high demand and there is never enough to go around. There may be restaurant owners near you who are more than happy to save their kitchen scraps if you pick them up on a regular schedule. These can make great additions to a compost pile. Beaches can be a source of seaweed. Neighbours with animals might give you manure. If you’re planning to be certified organic, however, remember to check the status of everything you plan to bring onto the farm, to make sure you can use it, then document it when you bring it onto the farm.
Several years ago we added chickens to our farm. This idea intimidated me at first, and we probably wouldn’t have done it if it weren’t for a friend who was getting out of the business and offered us her slightly used laying hens. I didn’t feel like much of a farmer at the beginning of my foray into animal husbandry. When the appointed day arrived for me to pick up the chickens, my friend wasn’t going to be there, but she said she would leave them in their coop so they would be easy to catch. Well, it turns out that there’s no such thing as an “easy-to-catch” chicken for a gal who had never owned an animal bigger than a newt. Not only was I hopeless at catching them, but much to my embarrassment I discovered that I was afraid of them. Yup, I was intimidated by your basic domestic chicken. Fortunately, a friend had volunteered to help me. He ended up catching all the hens.
The flock I acquired was all female, and since our regional organic standards require a rooster for normal socialization of poultry, I mentioned to my friends that I was on the lookout for a rooster. Very soon, I got a call from a friend who worked in a nearby industrial area. She had heard of “C.D.” (short for Cock-A-Doodle), the stray rooster. It seems he showed up outside the door of a cafeteria one day and never left. The poor creature was harassed by dogs, had no other chickens to keep him company, and subsisted on what he could scrounge, along with leftovers provided by the concerned cooks. These cooks were delighted to hear that C.D. could live out the rest of his days on my organic farm. Again, it sounded easy enough: “Just c’mon by and get him.” This time the friend who offered to assist had no more experience than I did. Fortunately, I had handled my hens enough to be getting over my fear, and C.D. was a bantam (a small breed) so he did not look intimidating at all. However, what he lacked in size he made up for in speed and agility! My hens would come running when they heard the feed hit the pan, so I assumed I would be able to lure C.D. with food. No such luck. After half an hour of running and diving after a flapping rooster, we felt both incompetent and foolish. How the heck were we going to get that bird into our cage? Just as we were about to give up, the nearest door opened.
A tall, dark, handsome stranger emerged. “You ladies need some help?” he asked.
“Are you any good at catching chickens?” I laughed.
With a shrug and a barely perceptible nod, he calmly strode up to C.D. and grabbed him on his first attempt. Off he sauntered into the sunset, and we never even learned the name of our rooster-rustling knight.
When we first brought our flock home, we tried “chicken tractors”—small, movable pens that I could pull by hand onto fresh ground every day. This might work beautifully in some situations, but I didn’t like it. I wanted to leave the chickens in one place long enough for them to clean it out, and then wanted to plant a cover crop before another food crop (to adhere to the organic standard, which prohibits growing a food crop after the application of raw manure). I found it awkward to have such small patches at different stages of growing and grazing, so we quickly changed our plan.
Here’s what we do now: we house the chickens in a coop that can be dragged around behind the tractor, and enclose this in a fence that gives them a run of approximately a hundred by sixteen feet. In about two or three months, our thirty chickens can totally clear the vegetation out of an area this size, and then it’s time to move them. The old chicken run gets planted in a green manure crop; then, when it is turned in, we have a lovely, fertile, rested area ready for a heavy-feeding vegetable crop. I find that the areas where the chickens have grazed grow great vegetables. The soil is fertile and diseases are much reduced. I think this is due to the increased biological health of the soil. Weed pressure, however, is not reduced. The chickens don’t seem to dig out weed seeds, and their food sometimes contains viable seed that gets spilled as they scratch around. Oh well, if the chickens took care of everything, it would be too easy!
I hate infrastructure in general, fencing in particular, and I have a natural tendency to take the easiest (or laziest) route. One year, at the end of a bad blueberry season, I had a brilliant idea for curing my mummy berry problem. Mummy berry is a devastating fungal disease that prevents the berries from ripening properly. The fungus spreads from fallen, infected berries. I put my chickens, their coop, and their feed in the middle of my two-acre blueberry field, hypothesizing that they wouldn’t venture far. I didn’t bother putting up a fence. I had visions of them eating every fallen, diseased berry, thus curing my mummy berry problem. At the same time, they’d eat all the weeds springing up through the sawdust mulch, and deposit their rich manure around the plants. Well, I discovered how far the chickens will venture when unfenced: as far as the nearest compost pile. Every morning they’d beeline from the coop, all the way through the field to the pile, where they’d scratch, dust bathe, and feast on my lovely red wiggler worms. The few who tended to linger around the coop began to get picked off by birds of prey, so, it was back to the fenced area, complete with netting over the top of their run.
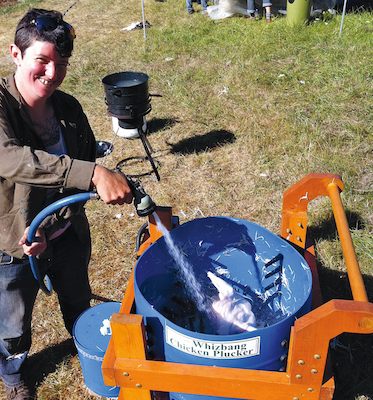 Melanie demonstrates the Whizbang Chicken Plucker, built by our friend Cam from a design he found on the Internet. It saves us so much time by plucking chickens in about 15 seconds when it used to take us about 10 minutes by hand.
When the hens’ egg production drops to the point that I cannot sell enough eggs to pay for their feed (after roughly two and a half years), I slaughter them. They are skinny and tough compared to chickens grown for meat, but they provide our family and friends with wonderful, flavourful stews and soups. In recent years I have begun raising a flock of meat birds each summer. These are the quick-growing varieties of chickens selected for their meat. They live only ten weeks or so, and during that time I keep them in a chicken tractor. I then slaughter them on the farm, and pluck them in the Whizbang Chicken Plucker that our dear friend Cam built.
My sons are aware of the practical role of animals on the farm, and they help out in little ways on slaughter days. I didn’t realize how pragmatic they had become until I mentioned, within five-year-old Jackson’s hearing, that I thought we should get a new dog.
“Why?” he asked.
“Fleece is getting too old to chase away racoons and deer,” I replied.
“Will we slaughter her?” was his innocent question.
I learned a bit myself about the seemingly arbitrary lines we draw between species when I explained to him the difference between farm animals and pets.
Green Manures (or Cover Crops)
I’m a huge fan of green manures. By planting these crops, you are using the miracle of photosynthesis to harvest energy from the sun and store it in your soil. Green manures give you many of the benefits of composting in a very efficient way. Instead of having to haul compost around by tractor or wheelbarrow, it can grow right where you want it.
Typical green manures include buckwheat, grain and legume blends, and clovers. All are beneficial in different circumstances. Buckwheat is a great choice for spring planting, since it grows quickly and tolerates drought. It is easy to turn in and decomposes quickly, so food crops can be planted shortly after a buckwheat crop. Although buckwheat doesn’t fix nitrogen from the air, it preserves the nitrogen in the soil by preventing its loss though leaching or dissipating in the air. The nutrients that the buckwheat holds then become available when it is turned into the soil. Buckwheat also prevents weeds from taking over fallow areas. It adds a lot of biomass to the soil as it decomposes, and until then, its lovely flowers provide great forage for bees.

Over the winter, a fall-planted mixture of 80 per cent rye or winter wheat and 20 per cent peas and/or vetch makes a great cover crop. The grain adds organic matter and a good root system to prevent erosion, while the peas fix nitrogen from the air into nodules on their roots, which is then released when the crop is turned in. When I was first learning about the wonders of legumes for adding nitrogen to soil, I wondered why we shouldn’t plant just peas and get even more nitrogen! For one thing, the grain acts as a pole for the legume to climb, but more importantly, legumes fix nitrogen only if it is not readily available in the soil. This is where the grain comes in: the sprouting grain takes up the available soil nitrogen, forcing the legume to fix it from the air. Eventually, the nitrogen that the grain took up is also returned to the soil when it is turned in.
With green manure crops, you should turn them in just as they are beginning to flower, or just about to set seed in the case of grains. This is when the biomass is at its peak. If you let a green manure go to seed, it will become a weed problem. The crops turn in best, and decompose fastest, if you mow them first. Clovers work well as nitrogen fixers too, but they are harder to kill, and can become persistent weeds if you are not careful. However, we do like one type of clover for one situation.
In our first few years we were surprised at how much work growing green manures can be. We often had large areas that we wanted to improve with green manures for a whole twelve- to eighteen-month cycle. This meant a lot of energy went into planting, then turning in, a winter crop, followed by one or two summer buckwheat crops, then another winter crop before returning to vegetables the next spring. We then learned about yellow sweet clover, which is a biennial (that is, if you plant it in the spring, it doesn’t flower until the following spring). So this is a green manure that can be planted in the early spring, and left undisturbed for a whole year. Unfortunately, when we tried it, the clover was slow to establish, so weeds had a chance to get ahead. We had to mow several times to prevent the weeds from going to seed, but it was great not having to turn it in and replant with the changing seasons, especially since the less the soil is disturbed, the healthier it is. The clover was difficult to kill, and took quite a while to decompose, but the subsequent vegetables grew well.
All soil-building techniques require inputs: energy, equipment, and time—or some combination of these factors. For instance, large-scale green manuring can be difficult without a tractor. Rachel’s section describes some pros and cons of mulching. Livestock requires infrastructure and care three hundred and sixty-five days a year. Whatever plans you have for building soil health and fertility will probably evolve (and perhaps change radically) as the years go by.
One of the most difficult and intimidating things for me to wrap my head (and my cheque book) around in the beginning was equipment needs. In our first year we bought lots of hand tools (used), wheelbarrows, a good walk-behind tiller, a utility trailer, a sickle-bar mower, and a lot of irrigation equipment. There was a lot more equipment that we thought we could use, but we just couldn’t spend too much money before we had any income from the farm. The next year we added a good Weed Eater (with a shoulder harness—essential!), a ride-on mower, and a tractor, but more on that later.
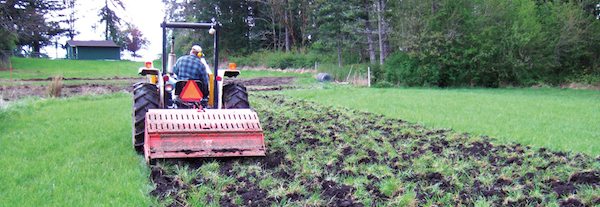
In our first year we hired a neighbour with a tractor to plough and rototill for us. For the next couple of years we still had that neighbour come back to till large areas. We certainly used our little tiller all the time, but for turning in green manures, or in the spring and fall when time is short and there are large areas that need tilling, the walk-behind tiller doesn’t quite do it. That being said, we were not very pleased with the results of tractor-powered tilling. The big tillers turn the soil so fast and so thoroughly that they can create several problems. They damage the tilth or structure of the soil, and kill earthworms and other soil creatures, and they break up the soil so finely that it then becomes subject to compaction. Basically, they dramatically alter the soil ecosystem. In clay soil like ours, big tillers can also create hardpan at the depth where the tines reach. Hardpan is the layer of compacted soil below the loosened upper layer. It can be impermeable to water, plant roots, and critters. This can also happen with walk-behind tillers if you either till too much or till when the ground is too wet, but hardpan develops much sooner with tractor-powered tillers. For all these reasons, we gradually moved away from tractor tilling.
Instead, in our second year we bought a tractor ourselves. We got a used cultivator (imagine a heavy, steel set of curved fingers that drag through the soil), and the next year added a set of discs (picture a set of twelve angled pizza cutters that slice and toss the top four inches of soil as they roll behind the tractor). The cultivator is great for loosening the soil down to twelve inches deep and preventing hardpan. We used the discs for turning in green manure crops and residue from vegetable crops. After the discs and the cultivator, the soil was ready for our walk-behind tiller to do the final bed preparation. Unfortunately, we found we were going over the field many times to prepare for planting, thus causing significant soil compaction and still requiring the walk-behind tiller.
There is no easy answer to what implements you might need, and there are ways you can get creative. One year, out of desperation to save time planting green manures, I discovered that several passes with the cultivator, followed by one pass dragging a rolled-up chain-link fence to break up clods, prepared the ground enough to broadcast cover crop seeds. Another pass dragging the fence covered the seed. It certainly didn’t do as pretty a job as a tiller followed by a precision seeder, but it was good enough for me, and the cultivator is much easier on the soil than the tiller.
In our sixth year we made a big investment and bought a spader for our tractor. . Instead of the curved, rotating tines of a tiller, spaders have flat paddles that dig into the ground and push the soil backwards. This serves the same purpose as a tractor-powered tiller, but better, deeper, and in a more gentle way that does not destroy the tilth of the soil. Furthermore, the “spades” are placed so that they reach to differing depths in the soil. This means that no hardpan is created below the spaded area, a great advantage over tilling. The spader does not leave the fine powder that a tiller does, so we had to get used to seeding in coarser soil. We were a bit skeptical at first, but so far it is working very well. The spader is amazingly good at turning in crop residues. I can spade in huge squash plants, wait a week, spade again, and the ground is ready for the next crop.
However, sometimes one solution can lead to another challenge. Our spader was not a perfect match for our tractor. The tractor had barely enough horsepower to drive the spader in our heavy soil, and it couldn’t go forward slowly enough for the spader to work at its best. So, two years later we bought a new tractor. The preceding season had been our most productive yet, but we reinvested all our profits. We saw a big difference in our soil when we started using the spader, and now we’re seeing more improvement with the new tractor. This improvement is contributing to higher production, but the benefit is slow and more long term compared to the big financial investment in the equipment.
The decision to buy a tractor is a big one, and you may choose never to buy one. Tractors are so expensive that for that amount of money, you could hire others to do custom tractor work for many years. Repairs on tractors are costly too. However, if you have such a large area that smaller equipment is inefficient, you might have to go for it. If you can find a good used tractor with a front-end loader, you’ll always find little jobs for it. The front-end loader is invaluable for turning and moving large quantities of compost, and this capability will help reduce dependence on expensive purchased compost and other soil amendments. Another big advantage of owning a tractor over hiring one is flexibility. You can turn in little bits of your field throughout the season rather than waiting until the whole field is ready to be tilled. This helps you stay on top of your green manures and your crop succession.
In general and when possible, delay buying equipment until you’re pretty settled into what you’re doing. That way you might avoid some costly buying and selling if you change your mind about how your field should be laid out, or even which crops you will grow. Try renting, borrowing, or sharing for a little while until you know exactly what you need; then you’ll be more confident when you buy. One way or another, you’ll need tools of some kind to help you mow, turn in cover crops, prepare seedbeds, plant seeds (or seedlings), weed, and water. Of course, these tools can be anything from scythes, spades, forks, hoes, trowels, and watering cans, to massive tractors with every implement you can dream of. The low-tech options have the obvious advantage of costing less, and you’ll stay in good shape! Over your first couple of years farming, however, keep your eyes and mind open for slightly-higher-tech options that might save you time and backaches.
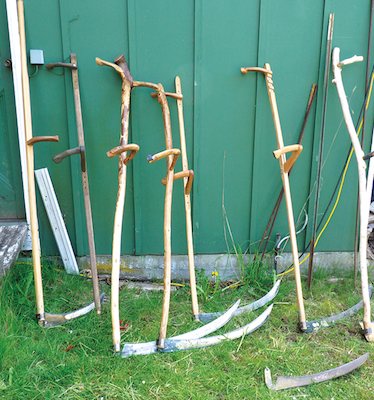
 Top row from left: spade, square shovel, digging fork, pitchfork, slim draw hoe, half-moon hoe, scythe with sharpening stone. Bottom row: two-bladed harvesting knife, two types of hand-held weeding tools, and a Ho-Mi.
Once you have worked like a dog all winter, planning, then all spring, preparing soil, planting, watering, and weeding, the day will come when something grows. At this point I remember thinking, “Holy crap! Now I have to figure out how to harvest and sell this!” Harvesting is an area where you can learn a tonne by helping others, and by asking questions. I don’t know many farmers who would turn down an offer of help on a harvest day, and the more farmers you can see in action, the more ideas for efficiency you will pick up.
Our general system is something like this: At the start of a harvest day, I make sure I have lots of plastic bins rinsed out and ready. Sometimes I even spread them around the field so they’re ready at the end of each bed I will be harvesting from that day. Then the picking begins. I have elastic bands in my pockets, because I find it fastest to bunch chard, parsley, kale, beets, and carrots right there in the field. I have a little pen-style Newton scale I use in the field to recalibrate myself occasionally and to make sure my bunches are a consistent size. I carry the produce down to my packing shed, wash and box it, and at the end of the day, drive it all up to the garage in my truck.
During every step of the harvesting and packing process, I keep my eyes open for imperfections—any insect-damaged or wilted produce is culled. Sometimes this is hard to do. If you’ve put hours and hours into a bed of carrots that looked perfect until you sprayed off the dirt, it can be tempting to think, “Well, gee, that wireworm damage really isn’t too bad,” and sell them anyway. This is especially the case if you have already promised the crop to a buyer. In the long run, though, it’s better for your business to eat those carrots yourself, or give them to family, friends, soup kitchens, dogs, or chickens, and only sell the really great produce. Sometimes this will necessitate awkward phone calls to chefs, to apologize that they won’t be getting all of their order, but it helps to build up a reputation for top-quality produce that will allow you to charge the prices you need to make a living.
Our first harvest day was incredibly discouraging. It took Lamont and me all morning and half the afternoon to pick $47.60 worth of Swiss chard. We figured we had each made about $4.00 per hour for the harvest, and that meant $0.00 per hour for all the work that went into it before the harvest! Looking back, we had made several mistakes. We were picking the crop too soon. The leaves weren’t big enough to make for efficient picking, and we had overestimated how much was in the bed so we were really scrounging to meet the order. We were washing in small batches in tubs on the ground, which was slow and hurt our backs. We just didn’t have a system.
Now the situation is much improved. We have made all kinds of changes, including moving the packing shed to the bottom of the field, so we can walk downhill with the heavy, full bins, and uphill with the light, empty ones. It is essential to have a good stock of markers and masking tape for labelling bins, and a well-organized harvest list, now that our harvest is substantial. Disorganization eats up so much time!
When you are developing your harvesting system, remember to observe others and to experiment. There is no single right way to do it, but every tiny little thing you can do to improve efficiency and to reduce disorganization will really pay off over the length of a season. Although it’s a good idea to try different methods, make sure they never compromise the quality of the end product. One key to our harvesting that has not changed from our first year is that we sell our crops before we pick them. We tell our customers what we have available, they tell us what they want, and then we pick exactly what they have ordered and get it to them as soon as possible. This way, they get produce that is truly fresh, and we don’t have any waste.

Now that you’ve figured out how to harvest your crops, you’ve got to learn how to sell them. Actually, this is a bit backwards, because if you don’t start thinking about marketing long before your crops are ready to pick, at mid-season you’ll be full of panic and your compost pile will be full of wonderful vegetables. Marketing can be very satisfying, but it certainly involves planning and work.
In our first year we developed some markets before we even planted anything. We met with the owners of two produce-box-delivery programs. Each of them told us which crops they did not have in sufficient local supply, and we made a verbal agreement about how much they would buy and at what price. As we met other farmers, we always asked for marketing suggestions, as well as suggestions about what crops to grow. That first year (and even the second and third), we ended up growing more and different crops than we had pre-arranged to sell, and this left us scrambling a bit in mid-season to look for more markets. I’ve never been very comfortable making sales calls, but it helped to remember that I wasn’t asking anyone to do me any favours. I had a great product, and I knew that lots of people out there wanted to eat good quality, fresh, organic, locally grown vegetables. The sales calls always go better when I have some kind of inside track.

For example, if I am already selling to one restaurant and find I have an excess of salad, I’ll start by asking the chef I know if he or she knows any other chefs who might be interested. Then, when I call, I can start the conversation by saying, “So-and-so from such-and-such restaurant mentioned that you might be looking for local, organic greens.” Another way to get this kind of lead is to ask other farmers where they sell, and if they would mind you calling that restaurant or store. This requires a bit of consideration, of course. We all benefit when we work within co-operative rather than competitive communities, so please don’t try to horn in on other farmers’ outlets. Make sure you’re not going to be offering the same products (especially not at a lower price). I always start conversations with chefs and produce managers by asking, “Do you have a local, organic source of beets [or whatever crop I want to sell]?” If they say yes, I drop it and move on to another crop or another market.
In our first year, Lamont and I started selling at the Moss Street Community Market in Victoria. On our first Saturday selling at the market we felt an amazing mix of emotions. We were nervous and intimidated, and we felt like frauds standing behind the table, as if we were pretending to be farmers! At the same time, we were very proud of our produce. We had just one folding table-full, but it seemed like a bounty to us. Much to our delight and amazement, we sold out in the first two hours. Better yet, the customers were great! They were warm and friendly, and they were grateful for the food. The other vendors were welcoming and helpful. That day really solidified for me that the path we had chosen was good, important work.
Ten years later, I still love the farmers’ market. I have regular customers whom I have seen week in and week out for every one of those years. We have seen each other’s families grow, and a few laugh-lines appear on our faces. Our market community has seen many births, and mourned a few deaths. The word “community” in the Moss Street Community Market really means something. That being said, selling at the market is draining. After a big Friday harvest, the market on Saturday is a long day. Being “on” all day, answering questions, calculating prices, trying desperately to recall names, takes its toll. In May or June, when a customer asks for cooking advice about an unusual vegetable, I have boundless patience and interest, and often other customers will join the conversation and swap ideas too. I must admit that by October, when yet another customer asks what to do with a kohlrabi, the enthusiasm I had earlier in the season has worn a bit thin.
 The occasional casual, outdoor potluck dinner during the farming season provides a chance to build community while enjoying the fruits of our labour.
There are lots of different marketing options out there, including farmers’ markets, farm stands, restaurants, grocery stores, Community Supported Agriculture (or other box-delivery businesses), wholesalers, and probably others I’ve never thought of. When we started out, we sold mostly to box programs and the farmers’ market, with a bit to restaurants and one small grocery store. Now all our sales are to Saanich Organics, the distribution company we own. We describe how it works in Chapter Five.
While you’re establishing your markets, try to balance efficiency, price, and personal satisfaction. For example, it may be very rewarding to know each customer personally and it may be your dream to deliver custom-ordered boxes of perfect produce to families, but it is unlikely that you will have time to grow and sell enough to make a living that way. At the other extreme, for maximum efficiency, you could grow all one crop on a large scale and sell it through a distributor. But if you go that route, not only would you be unable to maintain the biodiversity and crop rotation necessary for a healthy ecosystem, but you might not be able to get the price you need. You’d be competing with the economies of scale (and subsidies) of huge farms all over the world. This model also may not be as personally satisfying for you.
Think about why you’re farming, and that will give you clues as to how you should approach marketing. Is it a passion for growing? For food? For business? For people? This might help you decide if you want to maximize your time alone in the field or if you want more interaction with the public through a farmers’ market or a farm stand. Weigh all these factors and make a plan, but be open to the idea that it may have to change year to year.
Wherever you sell, you will have to decide on a price for each crop. In the Victoria area, many consumers recognize that it costs more to grow organic produce here than it does in other parts of the world, so they are willing to pay more for local produce than they do for imported. This willingness has come about through the work of many farmers who have decided to keep their prices high enough to make a living, and then have put in the time to educate their customers about why they charge what they do. Because the farmers in this area try to be co-operative rather than competitive, we don’t undercut each other’s prices. This is extremely important. Wherever you are growing, try your best to develop this kind of community among farmers in your area. As long as people are eating imported organic vegetables, we should not be competing with other local growers for market share. Instead, we should be co-operating, so that we can all grow more food and enable more people to eat locally. No farmer benefits if we’re all busting our butts just to sell vegetables cheaper and cheaper as we compete with each other.
Although every farmer I met as I was starting up told me to write down information right away, I still sometimes think, “Oh, I’m busy right now. I’ll record this later.” Well, believe me, no matter how memorable a detail seems at the time, if you don’t record it, you will forget it. This becomes more true the longer I farm, as the years start to run together in my memory.
Why is it so important to be able to refer back to everything you do? So you can learn. Every seed you put in the ground is an experiment, and each of these experiments has countless variables (variety, location, date, weather, soil temperature, moisture, weed pressure, preceding crops, et cetera). The more of these variables you can keep track of, the sooner trends of successes and failures will reveal themselves, and the more you will learn from both. There are countless ways to keep records, and an unlimited number of details you could record, so you will have to draw the line somewhere. What follows is an outline of the elements of my recordkeeping system.
I used to maintain a daily journal in a three-ring binder with a page for every day of the year. This was an informal place where I could write down anything that happened on the farm that day. I used a binder so I could add more sheets. I usually wrote only a few lines each day, and then would move on to the next page the next day. Then, the following year, I would go back and write on the page again. So, for example, July 1st was on the same page every year, and when that page finally filled up, I simply added a new page. Keeping the information from same date of different years all together made it easy to compare farm activities that were happening at any given time of the year.
Now the farm journal has simplified: we use one page for a whole week, rather than for a single day. Each week at the farm meeting with our apprentices, we begin by looking back at the to-do list from the previous week. We check off what we accomplished, and write the date when each task was completed. We add any relevant details or notes, such as how we amended the bed we planted, or what variety of seed we used. We then move to a new page and write our to-do list and our individual goals for the coming week.
Appendix B contains more detailed explanations and examples of my spreadsheets. I use Excel for my planting spreadsheet. It includes columns for planting code (shorthand for the location and year of each crop), crop, variety, seed source, date of purchase, planting date, method of planting (direct-seeded or started in pots or trays, et cetera), quantity, bed length, germination date, germination comments, transplant date, spacing, depth of seeding, description at time of transplanting, first harvest date, last harvest date, yield, cultural practices, amendments added, and a final one for comments. I’m sure this list looks a bit overwhelming. Don’t worry: I don’t fill in every column for every planting. For example, I often miss recording germination dates and descriptions. For all direct-seeded crops, the columns for transplanting information are left blank, and for transplanted crops, the seeding depth is not applicable.
Generally, the more information you can get down, the better. You may look back and learn that parsley always takes a long time to germinate, and never has a very high germination rate for you, so you may decide to seed it earlier and thicker. You may see that you got a higher yield out of a bed of chard that was more widely spaced than another, more closely spaced bed. You may learn that your carefully tended, early-transplanted squash actually only produced fruit a couple of days earlier than another planting that required less attention.
On this sheet I record each sale by date, code (this corresponds to the planting spreadsheet), crop, variety, quantity, price per unit, total price, market, and invoice number.
Your invoice books are the first, most basic, and legally required part of your recordkeeping system. If you’re ever audited for tax purposes, this is your record of income.
The expense spreadsheet is where I record all farm expenses. I usually don’t get around to doing this until field work slows down in the late fall. Then I sit down with my mountain of receipts and start entering data. You will need this information for tax purposes anyway, and arranging it on a spreadsheet that categorizes your expenses enables you to learn from it. Perhaps you will see that you’re spending more on chicken feed than you are making in egg sales. Maybe you’ll even get some pleasant surprises and see your irrigation expenses dropping year after year. Maybe you will learn that you’re spending so much on gas for deliveries that you should consider raising your delivery charges.
And, speaking of vehicle expenses, you should keep a logbook in any vehicle that you use for farm purposes. Read the odometer at the beginning and the end of the year, and write down the mileage of every farm-related trip. This way, you can accurately calculate the percentage of vehicle use that was farm-related. You can then write off that percentage, not only of all your gas for the year, but also of all vehicle maintenance and insurance costs.
This is where I record what has been in every bed in the field every year since we began farming. Each winter, when I’m planning what to plant, I also plan where it is going to go. Thus I make sure that I’m not putting plants of the same family in a place where they were recently planted, and I can keep track of what areas need to have a rest from cash crops with a rotation of chickens and/or green manures. I find it easiest to record this on bed maps.
This is required for organic certification, and is a list of everything that comes onto the farm that will be added either directly to the soil or to the compost pile.
Compost records are also required for organic certification. These show the location of each pile and when it was started, turned, and used. I also record compost temperatures to make sure each pile has heated up sufficiently.
There is another obvious reason for keeping good records, which I have only mentioned in passing: detailed records are required for organic certification. Keeping good records throughout the year will prevent months of dread and a week of hell when it comes time to put together your application for certification (or re-certification) each year. In fact, for some farmers who use organic practices, the strict recordkeeping requirements are a deterrent to certification.
Whether or not to certify is indeed a big decision. The process is somewhat onerous, and involves some expense. For me, however, the benefits far outweigh the inconveniences. By certifying, you become part of a community that can offer you support and guidance, and the standards can be an important educational resource for good growing practices. Of course, there are also marketing benefits to certification. Many buyers want organic produce, and most grocery stores and box programs will not buy organic produce unless it is certified. You can charge more realistic (higher) prices if you are certified organic, as opposed to using other terms like “naturally grown” or “unsprayed.”

Above and beyond all this, I personally believe in the philosophies of my certifying organization, and in the concept of organic certification. Sure, if all consumers knew the farmers who grew their food, certification might not be necessary, but this simply is not the case. Even if a farmer sells directly to the public, she may not have the time to discuss her growing practices in detail with every individual consumer. Also, if every customer drove out to a farm or two every week to buy their food, much of the environmental benefit of eating locally grown food would be lost due to the fossil fuel use of their cars. So, we have markets, grocery stores, delivery programs, and other ways to increase the efficiency of getting food to consumers.
Certification then takes the place of first-hand knowledge of a farmer’s growing practices. Certification assures consumers that farmers, at a minimum, meet the written standards—and in fact, many farmers exceed those standards. Without certification, there can be confusion about what exactly “organic” practices are. I have heard farmers say, “Oh yeah, I’m mostly organic,” and then I come to realize that they use certain agricultural chemicals that they personally do not think are harmful, but which are prohibited under certified organic standards. Last but not least, by being part of the certification process (whether as a consumer or a farmer), you are supporting a movement that researches and strives to improve sustainable agriculture.
Never forget that, whatever your reasons for wanting to start an organic farm, it is a business, and you will not be able to farm for long if you neglect the business side. You are not betraying any lofty principles by wanting to make a living at this. In the current North American economic climate, it is taken for granted that small, family farms are marginally financially sustainable at best. Nearly all farms (conventional as well as organic) are supported either by a spouse working off the farm or by government subsidies. To a large extent, our society has chosen to “outsource” the growing of its food to regions with cheaper labour and land, questionable environmental and labour standards, and further agricultural subsidies. By importing our food, we undermine our own rural economies and we participate in a system of global environmental degradation. When we support a global, commodity-food system, we sacrifice diversity, flavour, and nutrition to the supremacy of varieties that are selected for their durability in transport, and then picked unripe. Perhaps most seriously, as we lose local farmers, we compromise our food sovereignty because we lose the very basic ability to feed ourselves. This need not be the case. We can choose to take control of our own food systems, but this will require a cultural change away from thinking that price is the most important factor in making food-purchasing decisions. In this time and place, it is a revolutionary act to run a farm that is both environmentally and economically sustainable.
When starting your farm, set up good business practices at the same time as you set up your plans for growing. Hire a bookkeeper if you need one. Before you even begin farming, get a GST number (if you live in Canada). Because produce is GST-exempt, you do not have to charge it when you sell your vegetables, but once you have your number, you can get back all the GST you pay on farm purchases. This really adds up, and it only takes a few minutes to apply. Just as important as getting a GST number is getting a farm tax number and using it to avoid paying provincial sales tax (PST). In British Columbia, you get this farm tax number from the land assessment office, where they determine that the land is indeed being used for farm purposes. As well as avoiding paying PST on farm purchases, the owner of farmed land pays a reduced property tax rate.
Keep your ear to the ground for grants that might help you, and, of course, keep careful track of all your expenses, in order to write them off on your income tax. If you decide to hire people to work on your farm, you will have to do payroll, withhold taxes, and register with workers’ compensation (WorkSafe BC in British Columbia). This may be the time when it pays to hire a bookkeeper. Remember that any government programs, such as tax exemptions or grants, have been put in place because governments want to encourage farming. They are not “loopholes,” but legitimate ways to help farms succeed.
I was living in Edmonton when Brian and Jane called to ask me if I wanted to farm on the piece of land that I now co-own with them. Not only did I know nothing about farming, but where I grew up, the word “farm” means something entirely different from the kind of enterprise I now run. When you say “farm” to Albertans, they picture grain, livestock, or both. Market gardening isn’t really on the radar. And if you say “farmer” to an Albertan, or at least the Albertan who lived next door to my parents, he pictures a man. My parents’ neighbour had heard that I was planning to move to BC.
“What are you going to do there?” he asked.
“I’m going to be a farmer,” I replied.
“Oh, you’re going to be a farmer’s wife?”
“No,” I replied. “I’m going to be a farmer.”
Then, once again with nearly the same words, “You’re going to marry a farmer?”
And once again, this time with voice hardening slightly, “Um, no, I’m not marrying anyone. I’m going to be a farmer.”
I can’t blame him. It takes a moment to integrate into your thinking an idea that has never occurred to you before, and for him, the notion of a single woman farming was just such an idea. Looking back, I am somewhat stunned that I had the—what’s the word?—not courage or even confidence, but more like naïveté, foolishness, or even gall, to jump into something I knew less than nothing about. I think my aunt and uncle’s call came at exactly the right time. I was still young enough to think I could do anything if I just set my mind to it. Just as important, I had a safety net: wonderful, loving parents who had taught me to be independent and to take chances, but who, I knew, would bail me out if I really needed it.
There was also the distant memory of the pride I had felt when, as a young girl camping with my family, my father would comment on what heavy pails of water I could carry: “Almost as much as her big brother.” Ever since then I’ve enjoyed situations that physically challenged me, and throughout my youth I stubbornly refused to acknowledge any advantage men claimed over women, physical or otherwise.

I am glad that I can now truly say I think very little about what it’s like to be a woman in a male-dominated field. I’m always a bit surprised when I’m asked about my experience “as a woman.” This is probably largely because many, if not most, of the small-scale farmers in this region are women. The separate but related question, about what it’s like to farm as a mother, certainly looms large in my mind, and I write more about that later in this book, but “as a woman”? It’s not a burning question for me. I am a woman. I am a farmer. That’s pretty much it. Or, so I thought, until I had to confront some of my own hang-ups when I hired a man for the first time.
The original apprentices and employees I worked with were women. Ilya was the first man to join the farm, but in his first season he was only apprenticing part-time. His partner, Chrystal, was my main apprentice, and Ilya was away doing other work much of the season. A couple of years later, Jeremy applied to work for me. He fit the bill perfectly; he had experience, his references told me he was a hard worker, he was committed to sustainable agriculture, and he was easy-going and fun to have around. So why was I hesitating to hire him? I had to admit to myself that I had a certain reluctance to hire a man as my full-time, main farmhand. I knew this was unethical. If the situation were reversed, and a man passed over the most qualified applicant solely because she was a woman, it would clearly be discrimination.
I hired him, and had a wonderful two years working with him. He was everything I could want in an employee, so I had to do some soul-searching about where my initial reluctance had come from. I’m still not entirely certain about how to put it into words, but I think I feared some sort of power struggle. Would he take me seriously and respect my decisions? Would he respect the scale of my farm, or would he push toward a “bigger, better, faster” mode of production that did not appeal to me? Would we have good communication and develop the warm camaraderie I had with the women I had worked with? I think some of this came from my internalized sexism, which led me to assume that a man would not take me as seriously, or respect me as much as a woman would.
I’m happy to report that I’m gradually conquering that internalized sexism. I now work with men and women, both straight and gay, as well transgendered people who define their genders outside the narrow “he” and “she” that I was used to. My life and the community of the farm are enriched by the gender diversity around here.
This is especially important to me because of my children. One of the great gifts of farming is that my kids are growing up around so many cool adults. They live on this shared land and some of the adults in their lives are permanent, while others come and go with the seasons. I explain to everyone I hire that my kids are free-range. I do not expect my employees to babysit, but the kids will probably come down and visit or work with them in the field. Each adult develops her or his own relationship with my children. The people on the farm are very diverse, so my kids learn that there are many different ways to be.
This really hit home one day in July. My children love a parade, and were keen to march in the Victoria Pride Parade when they heard the farm hands talking about it. A couple of days before the parade, Jackson asked me what it was all about. I explained that it was a day for queer people and their friends to celebrate who they are. He didn’t understand what I was talking about. He already understood what gay and transgendered meant, but it had never occurred to him that these people were “different” in any way that mattered. I had mixed emotions explaining homophobia (because, after all, if there had never been homophobia, there would not be pride parades as we know them). I was sad to have to tell him about hatred and fear, but I was very happy to see his absolute openness and acceptance of good people without regard for the boxes adults put them in.
When we began farming, Lamont and I did not yet have any children. When our first son, Jackson, was born, things sure changed! Next came Walker, and then Levi, and we realized that farming with one son had been relatively easy. If you already have a child or children, and are thinking about farming, there are some things that you should consider.
Farming with children can be wonderful, both for the children and for the adults, but it does add certain challenges and risks. It is not possible to work in the field and give full attention to your child at the same time. A young child may be interested in weeding or picking rocks for a few minutes, but probably not for several hours at a stretch. Therefore, in order for you to get any work done, your child will have to be very independent. He or she will need to entertain himself or herself outside for long periods of time. For children spending time alone (within eye- and earshot, but not right beside you) in a farm environment, there are physical risks involved. Farm kids are likely to have bumps, scrapes, and insect stings. Then there are the more serious hazards like picking up a harvest knife, ingesting toxic weeds, and even getting injured by farm equipment. You will have to assess for yourself the risks on your farm, and your comfort level with those risks. You will have to balance the small chance of serious injury against the potential everyday benefits of growing up on a farm.

You need a high degree of organization to farm with children. In the morning, you will have to be prepared with snacks, drinks, clothing, sunscreen, toys or tools, and plans for diaper changes and naps, depending on the child’s age. Regardless of your best intentions, organization, and energy level, it is impossible to do as much farm work with a child as it is without. I have been incredibly fortunate to have apprentices and farm workers who love my children and who understand that part of working on this farm is working with three inquisitive, energetic boys. Best of all, I have terrific, supportive parents who come for long visits each summer and help with the farm and the kids.
Occasionally though, the stress of the work and raising the kids, added onto the hormonal rollercoaster of child-bearing, has boiled over. I still cringe when I remember one scene I subjected my friends to. It was September, and time to get the tomato plants out of the L.J. greenhouse so we could plant salad greens. Robin, Rachel, a couple of employees, and I met one afternoon to get the big job done. Jackson was two. It was hot, and I was exhausted. Not only had the farming season taken its toll, but I was nine months pregnant. I had planned to leave my toddler up at the house with Lamont, but Jackson insisted on coming down to the greenhouse. Once there, however, he wanted more attention than I had in me to give. I felt I had to get the work done. After all, there was Rachel, also exhausted and working away with baby Elias on her back. And I worried that Robin always had to tackle more than her share of the load since she was the only one without kids. I dug in my heels, and so did Jackson. Our fight escalated to the point where he was hitting and throwing things at me, and I was yelling at him. Then I burst into tears and Robin ended up carrying Jackson away. By this time, all the others in the greenhouse were crying sympathy tears.
What a scene for Lamont to walk into when, moments later, he showed up to see how the job was going, and ask if I needed help with Jackson. He led me up to the house and tucked me into bed. Much to my amazement, my tears just wouldn’t stop, until I fell asleep. I slept for several hours that afternoon, and then at 11:00 that night, I went into labour. I think the intensity of my emotional outburst was a sign of my body’s wisdom: it was changing, getting ready for the birth, and demanded that I rest up for it.
Although there are significant challenges to farming with children, there are huge benefits too. Farming is work that very young children can really be involved in. At three years old, Jackson could weed, harvest, wash and pack vegetables, pick rocks, hoe, seed, transplant, and help fix irrigation. My kids are part of a family that is working together toward a common goal. This can give them a terrific sense of accomplishment, self-confidence, and security. Children who grow up participating in a farm learn not only to grow food, but also to grasp the deeper connections of organisms in ecosystems. They understand the cycles of life and death of which all of us are a part, and they see close up the wonder and beauty of nature.
Each winter our family leaves the farm for six to eight weeks to visit relatives. One January we returned in a spell of beautiful, sunny weather, and I’ll never forget the joy I felt meandering the field with Jackson. We were mostly just enjoying the smell of the air and the rich green hues of the plants. We’d stop here and there and select the food that was to make our dinner that night. Jackson snacked as we walked, and at one point he called out to me, “Mom, you should try this kale—it’s delicious!” Rachel and I both farm with kids and love it (most of the time). Robin has observed our families at close range and has decided not to have children.
At the beginning of our fourth farming season, several things happened all at once. Our new house was completed, leaving the small cottage we had been living in empty. My friends also started asking me why we didn’t have apprentices. Around the same time, I started thinking that I might actually know enough about farming to provide a good learning experience for someone interested in apprenticing. Lamont was offered a great contract that we knew would take him away for most of the summer (he is a geologist), and with our first son just over a year old, we realized that there was no way I could do all the work alone.
 Jackson and Walker transplanting winter squash. When they’re motivated, they can get a lot done!
Early that spring, one of our box customers left a note saying that she was interested in learning how to farm. She lived in Victoria and wanted to apprentice part-time. I thought this might be perfect. I was nervous about teaching an apprentice, but having someone on the farm just part-time was not too overwhelming. Since she would not be living on the farm, it didn’t seem like too much of a commitment, and if it didn’t work out, it wouldn’t be too devastating for either of us. So I met Wendy. We hit it off so well, and I enjoyed her energy, enthusiasm, and desire to learn so much, that I joined SOIL (Stewards of Irreplaceable Land), an organization that links farmers with people who want to apprentice. Through SOIL, I met Cyra, and she soon moved out to the farm. Nearly overnight, our quiet, two-person farm was becoming a little community.
I had been somewhat reluctant to bring others onto the farm for several reasons. We had so much to learn about growing crops in those first years that I didn’t think I could also learn how to teach others. I also didn’t know enough to feel ready to teach. I lacked confidence and organization, and enjoyed working alone. The farm was my home, and I didn’t know if I wanted strangers in my home.
Now I love having apprentices for even more reasons. When someone is working beside me, I have to question what I’m doing and why I’m doing it. I have to keep thinking and learning as I teach. I also have to be a lot more organized and efficient than I used to be. Robin once told me, “Working with someone else is great. The helper may only be able to do half of what I can do, but I can get twice the work done that I otherwise would, because I’m so much more organized!” Ideally, an apprentice is someone who is committed to sustainable agriculture, probably even planning a farming career. This commitment often gives them a level of energy that can re-inspire me, as the day-to-day work sometimes starts to wear me down. Of course, the other huge benefit to including apprentices on our farm is the labour they provide. Also very important to me is that by mentoring apprentices, I may be able to increase the number of organic farmers out there, and thus multiply the benefits of organic-food production. If we are ever going to be more than a drop in the bucket of our food-production system, we need a lot more farmers.
Since my first mentoring year with Wendy and Cyra, Northbrook Farm has continued to evolve. By 2005 (our fifth season), Cyra had moved on. Wendy’s role on the farm had grown, as she worked for us half-time (for pay) and grew crops of her own in several beds in our field. That spring, Chrystal and Ilya joined us as apprentices. They moved into the cottage and settled right into life on the farm. During their first year, they worked for room and board, education, and a small stipend. They were amazing apprentices: smart, hard-working, full of questions and energy, dedicated, and serious about learning how to farm. In September of that year their apprenticeship ended and their employment began. This happened when I gave birth to our second son, and Chrystal and Ilya suddenly took on much more responsibility on the farm.
In 2006, the pattern that had begun with Wendy continued with Chrystal and Ilya: they worked for us half-time and grew their own crops in our field half-time. Since I knew I was going to be very busy with two kids and much of the Saanich Organics sales, I didn’t feel able to mentor a new full-time apprentice so that year, almost all our labour was paid hourly (with the exception of a bit of help from two occasional volunteer apprentices). This took some of the pressure off me. Although we all enjoy our work more, and learn more, when we are together, I was not obliged to work alongside anyone. When I had to be in the house with the children, or on the phone with chefs, the employees would just look at the to-do list and get to work. Again in 2007 and 2008, all the farm labour was paid, with the notable exception of my dear parents who come out for a couple of months each summer. My mother takes care of meals and children, and my father helps in the field and takes on maintenance projects.
My big challenge of the last couple of years has been to become a better boss. This is a whole new skill for me. When I first started paying employees, I thought it was pretty simple: you tell them what to do and they do it. I had the idea that apprentices had a right to expect time and attention, but that paid employees would just do what they were told. With the help of a seminar on becoming a better employer, I’ve come to see that being a better employer gives me better employees. One of the main challenges has been to learn what motivates each employee. Does he work better independently or with others? Does she prefer to figure things out on her own or follow clear instructions? Larkin and Jeremy, my two main employees for two years, were both passionate about learning. They enjoyed taking responsibility for crops and having input in decision-making. Both could work alone, but preferred the social element of working with others. I tried to respond to those qualities in them, as well as being thoughtful and understanding about things like occasional days off. Now and then, a homemade popsicle on a hot day or coffee on a cold morning helps too. We also developed the tradition of homemade cake to celebrate any birthdays on the farm.
I am far from the perfect boss, but I think the people who work for me are generally happy with their jobs, and I have had truly amazing employees. The backbone of my communication with employees is our weekly farm meeting, when we develop the all-important to-do list. We find this meeting indispensable for exchanging information, keeping lines of communication open, and making sure we all have a similar vision of what’s happening on the farm. Our agenda is much the same each week. We start by reviewing the past week’s to-do list to see what we’ve accomplished. We then develop and prioritize the new week’s list. Then, each of us shares our favourite thing from the previous week, and our goals for the coming week. The favourites and goals need not be farm related. They usually do pertain to the farm, but when they don’t, we can sometimes get to know each other better, and have conversations about our bigger picture. This is important, because the kind of work we’re doing, and the kind of place we’re trying to create, works better when we bring our whole selves to it, not just our hands and backs.
I have now returned to including apprentices on my farm. I’m happy to get back into teaching and encouraging more potential farmers. From a financial point of view, I make as much net profit in years when I hire paid employees as I do in years when I work with apprentices. The most important thing seems to be staying on top of the timing of seeding, watering, weeding, and thinning, and this requires an enormous amount of labour.
Starting up an organic farm is exciting. There is much to learn, and it is rewarding to see those first seeds sprout into life. No matter how much energy and enthusiasm you have when you begin, there will be times when you get tired, and when the length of the to-do list becomes overwhelming. I remember well standing in my field at the height of summer in 2004. Two thoughts kept running through my head. The first was, “Holy crap, I’m so tired. Why am I doing this? There are so many easier ways to make a living. I’ve got to quit.” The second was, “Oh no, I’m screwed, because I can’t think of any other job in the world that I want to do.” I realized then that I was completely hooked on farming, and that I had to find ways to do it that wouldn’t burn me out.
Since then, I have become a bit better at managing my stress. There are still times when it feels like way too much, and every season, Robin, Rachel, and I each have at least one tearful breakdown on a Monday night during box-packing. This happens when the work has us worn down and what would otherwise be a manageable problem (wilted pac choi, flea beetle infestation) seems like an insurmountable crisis. But those days are becoming fewer and farther between, and we are gradually learning to see them for what they are: bad days in a usually great life.

So, how do you keep the bad days to a minimum? Pay attention to your own rhythms. I’m not a morning person, so I usually ignore farmer stereotypes about being out in the field at the crack of dawn. Let’s face it, at Victoria’s latitude, there are too many hours of daylight in the summer for us to be working in the field from dawn to dark, so we choose to take breaks. The first couple of years, you will probably have to work fourteen hours a day, seven days a week for six months at a time. Fortunately, there’s a good chance that for a couple of years you will want to work like this. Starting any business is incredibly challenging and exciting, and as you start farming, you will be rewarded by seeing nature respond to your actions. There’s nothing like looking at trays full of glowing, germinating seedlings to make you want to skip lunch and keep planting! However, this pace is not sustainable permanently.
We all have different strategies to help us stay physically and mentally healthy. I try to take one day off each week, and now that I have children, I usually don’t work outside after dinner. One farmer friend takes two hours off in the afternoon three or four days a week. During that time she rests, swims, walks, or catches up on recordkeeping. Other farmers make sure they take one “getaway” each summer, even if it is just two days. Whatever you decide, the key is to make sure it happens. You will never feel like you are able to take a day off, so you have to decide in advance and simply stop working on that day. It is especially important if you live on your farm to physically get away sometimes, even if it is just for a two-hour hike on Sunday.
One evening a couple of summers ago we met with the owner of another box program in Victoria. She had brought farmers together to talk about expanding the growing and selling capacity on the island, possibly through forming a new distribution company to facilitate produce marketing. The catch seemed to be that there was just no more produce out there; most farmers were selling all they could grow. Late that night Rachel sent Robin and me an e-mail. She was fired up. “We’ve got to finish that book! We have to get more young people farming, and show them that it’s something they can do!”
Exactly one month later I was standing in my field, having just discovered widespread mummy berry (a fungal disease) in my blueberries. On my way down the field I had seen the first raven-pecked, still-unripe melons. Then, before I could return to the house, Melanie, the manager of the Saanich Organics crops, waved me over. “Did Rachel tell you? We have early blight in the greenhouse.” The idea struck me that writing this book was almost unethical. I was so discouraged that I thought I shouldn’t encourage anyone else to do what I was doing. It’s just too hard, pays too little, and can be too discouraging, I thought.
The next Saturday our market table sold over $2,000 worth of vegetables for the first time, and customers thanked us for the work we were doing. The next Monday morning I was out harvesting to the sound of birdsong when the light was still golden and every leaf I touched was sparkling with dew. I was filled with a deep sense of peace and I knew that for me, there is no better job in the world than farming. Tuesday I did some research and came up with a mummy berry-containment plan. The foil pie plates I tied onto rebar stakes to deter the ravens from the melon patch even proved quite effective. Melanie reported that the diseased tomato plant tissue had been removed, and the blight did not appear to be spreading.
Now, as I write this, I am in North Carolina, enjoying a good long winter break with my husband’s family and our friends. I love the winter freedom that farming gives us, but even as I enjoy the rest, I’m excited about returning to eat food that we’ve grown with our own hands. I eagerly look forward to planting those first seeds in the spring, because I know that each year, not only does my knowledge increase, but more importantly, my soil improves. Each year’s hard work in building the soil pays off in increased soil life and health. Every year is different: different weather, different vegetable varieties, different challenges and different successes. I will never stop learning, and, as long as I am able, I will never stop nurturing myself, my family, and my land by organic farming.