
LEGO bricks are amazing in their versatility. With so many different types of bricks available, it’s possible to construct all kinds of contraptions with moving parts. Build a rubber band car that zooms forward under its own power. Create a marble track that can be set up different ways, construct a candy dispenser that actually dispenses a handful of candy and more!
Fill this candy machine with your favorite candy. Pull the lever on the side of the machine and a handful of candy drops down. Open the door to release the candy into your hand. Simple, fun and YUM! But keep in mind that everyone in the family is going to want to try some of your candy! You might want to stock up! The parts list for this project is flexible, meaning that there are several combinations of bricks that will work.
RED BRICKS
2—2 × 4 bricks
6—2 × 6 bricks
7—1 × 6 bricks
2—1 × 8 bricks
4—1 × 4 bricks
6—1 × 2 bricks
1—2 × 10 plate
DARK GRAY BRICKS
2—4 × 4 plates
2—2 × 10 plates
1—2 × 4 plate
2—1 × 6 Technic bricks
2—2 × 2 tiles
1—1 × 2 plate
1—6 × 10 plate
LIGHT GRAY BRICKS
1—2 × 4 tile
1—2 × 4 plate with axles
2—panels 1 × 4 × 1
ASSORTED BRICKS
1—6 × 12 green plate
7—2 × 4 medium blue bricks
4—2 × 2 yellow round bricks
10—1 × 6 yellow bricks or equivalent
4—windows, 4 studs wide and 5 bricks high
1—rocker plate with rocker bearing
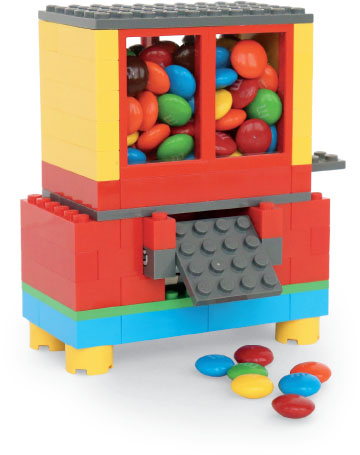
STEP 1: Start by gathering these bricks for the base of the candy dispenser.

STEP 2: Place the medium blue bricks around the edge of the underside of the green plate. Add four 2 × 2 round yellow bricks to make little feet on the machine.
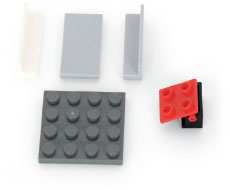
STEP 3: Gather these bricks to make the ramp that the candy will slide down. Place the 2 × 4 tile in the center of the 4 × 4 plate and add the panels on the sides. Attach this to the rocker bearing with rocker plate (hinge).
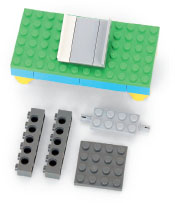
STEP 4: Attach the ramp to the green plate so that one row of studs is visible in front of the ramp.

STEP 5: Add a 2 × 4 red brick on each side of the ramp. Build the door for the candy as shown.

STEP 6: Build up two layers of red bricks around the ramp and door.

STEP 7: Add a third layer of red bricks. Place a 1 × 6 red brick over each of the Technic bricks that hold the door.
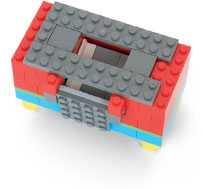
STEP 8: Place two 2 × 10 dark gray plates, two 2 × 2 dark gray tiles and a 1 × 2 plate on the top. The tiles will allow the arm to slide in and out, which will release the candy.

STEP 9: Build the sliding arm with a 2 × 10 red plate and a 2 × 4 gray plate.
STEP 10: Using bricks that are one stud wide, build one layer around the candy chamber. Be sure to leave an opening for the sliding arm.
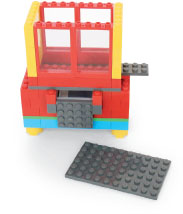
STEP 11: Add windows and fill in the sides with yellow bricks.
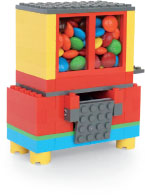
STEP 12: Fill the candy chamber with candy and place a 6 × 10 dark gray plate on the top as the lid. Your candy machine is ready to go!

The secret to this zippy marble run is the use of tile bricks on the ramps to create a smooth surface. The structures shown can be arranged in different configurations to create multiple different paths for your marble to zoom down. Experiment with the design until you get it exactly the way you want it. Then make it bigger! How many marble ramps can you build? How high can your design go?
At least 10 to 12—1 × 2 Technic bricks with one hole
At least 13—2 × 4 tiles
Technic connector pins
Gray plates
Various bricks to support the ramps
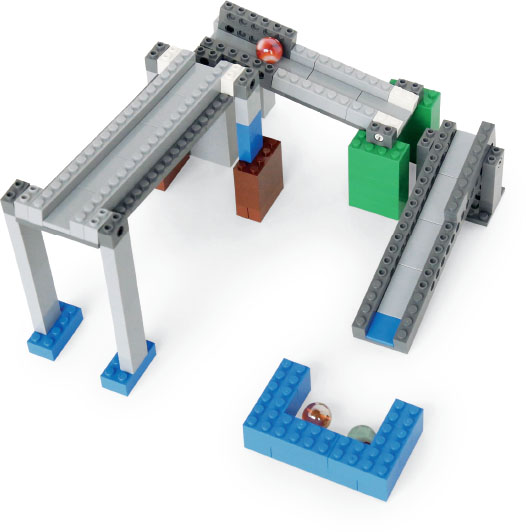
Start the marble at the top and it will roll back and forth down the ramps!

This is the basic design of each ramp. Use Technic connector pins to attach 1 × 2 Technic bricks to the ramp. This allows the ramp to pivot to the angle that you want while the 1 × 2 bricks stay level.

The sections of the ramp are connected with gray plates on the underside. Build the ramps as long as you want them to be!
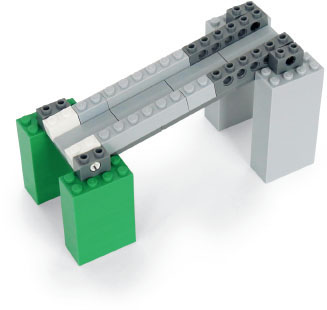
This is a middle height ramp, designed to sit with both ends on the floor.
This ramp will have one end on the floor, with the lower end attached to the middle height ramp.

Create one low ramp like this that will take the marble all the way down to the bottom.
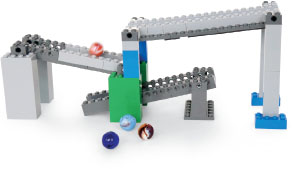
You may have to play with the arrangement of your ramps and the angles of the ramps until you get them in just the right position so that your marble won’t fall off.
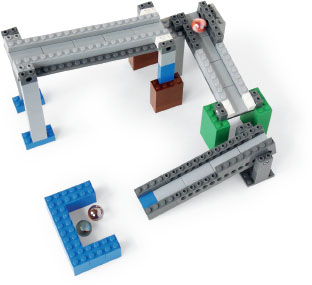
Here is another way to arrange the ramps. For this configuration, add 1 × 2 bricks to the sides of the ramps in any places where the marble falls off the track. If you get tired of chasing the marbles, you can easily build a box to catch them at the bottom. Two layers of bricks are enough to stop the marbles, even when they are rolling quickly.
Take this project to the next level by adding a task that the marble can perform. For example, you could add a bell at the bottom of the ramp that the marble would ring when it hits it. Or have the marble knock down the first domino in a row of dominoes when it gets to the bottom.
Wind it up and let it go! This simple car will travel across your floor with the power of a single rubber band. To make it go, hook the rubber band around both Technic connector pins. Then turn the back wheels to wind up the rubber band. Set the car down and watch it zoom!
1—6 × 10 light gray plate
1—2 × 6 light gray plate
2—1 × 10 light gray bricks
1—2 × 6 light gray brick
2—1 × 8 dark gray bricks
1—2 × 6 Technic plate, with holes
2—1 × 14 Technic bricks (13 holes)
1—Technic axle and pin connector
4—Technic axle pins with friction, length wise
2—Technic axles, 3 studs long
2—1 × 2 lime green slopes
2—1 × 3 blue slopes
2—large back wheels with x-shaped opening
2—front wheels with x-shaped opening
Rubber band

STEP 1: Gather these bricks for the base of the car.

STEP 2: Build the back wheel assembly. The back axle consists of two Technic axles (3 studs long) and one Technic axle and pin connector. Slide on the two 1 × 14 Technic bricks before adding the rear wheels.

STEP 3: Attach the front wheels to the front hole in each Technic brick. Another option is to use wheels that accept an axle pin instead of an x opening. Then use gray axle pins instead of the pins with the x on one end.
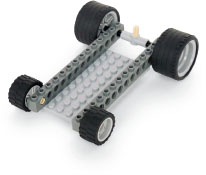
This design allows the axles in the back wheels to turn freely. In other words, the pin that is sticking out turns all the way around as the wheels turn.

STEP 4: Place a 2 × 6 Technic plate with holes two studs away from the front of the car and place a Technic pin in the center hole. This is an important functional element and the rest of the bricks are simply decoration.
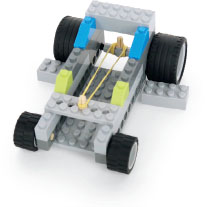
To operate the car, loop a rubber band around the front pin and then around the back pin. The rubber band should be long enough to be quite loose around both pins. Then turn the back wheels backwards to wind up the rubber band. In this photo, the 2 × 4 bricks in front of the wheels are holding the car in place. Once the car is wound, it will go zooming off when you let go!
This treasure box has a real working drawer, but there’s a twist! Anyone who happens upon your treasure box will assume that the handle in front opens the drawer, but that is actually just a decoy. The real drawer is a hidden drawer which opens on the side of the box. Your valuables are safe in this LEGO treasure box!
4—6 × 10 light gray plates
1—1 × 2 light gray plate with one stud on top
1—light gray bracket 1 × 2—2 × 2
1—1 × 2 × 1 light gray panel
Various brown bricks
Brown plates for the bottom of the drawer
Brown tiles—to make the drawer slide easily
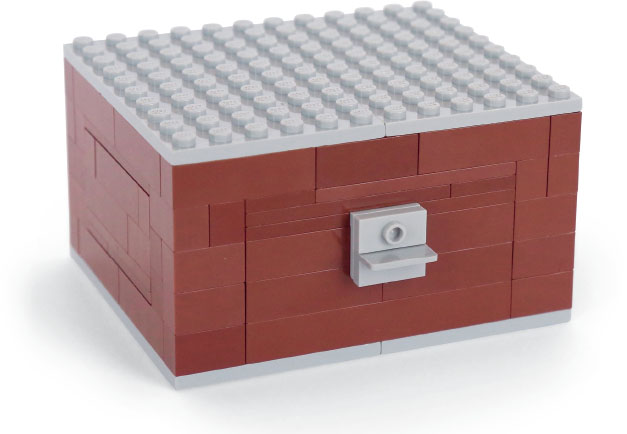
Anyone who sees this box will think that the drawer opens from the front. But that’s a trick!
The real drawer actually slides out from the side. Note that the front of the treasure box is constructed to give the appearance of a drawer. In addition to the false handle, the bricks are lined up rather than overlapped to look like the edges of a drawer.

Each side of the box has an opening the exact size of the drawer and the drawer is the same width as the box (12 studs). Open the drawer by pushing on it from either side.
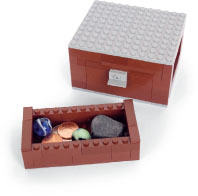
The drawer is 6 studs by 12 studs.
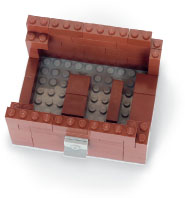
Build supports for the drawer in the bottom of the box. Use brown bricks and cover each brick with a brown tile so that the drawer will slide easily.

Now it’s time to assemble the box. Gather your base, your drawer, two light gray plates and extra brown bricks.

Place the drawer in its opening. Then add a layer of bricks on each side of the box between the top of the drawer and the lid. These bricks will just be resting on top of the drawer and then will attach to the lid (gray plates).
Now, what valuable treasures will you keep safe in your secret box?
This exciting zip line is the perfect addition to any LEGO fort! Make it simple or use a really long string to make the zip line travel all the way across the room. A wheel on the zip line car helps it to travel smoothly down the string.
2—1 × 4 dark gray plates
1—1 × 2 dark gray plate with one stud on top
2—1 × 2 dark gray plates with arm up
2—1 × 1 blue bricks
1—1 × 1 light gray brick
1—1 × 2 Technic brick
1—light gray Technic connector pin
2—2 × 2 tiles with lifting ring
1—wheel
String

Build your zip line by tying string to any brick that has a hole in it. The bricks shown are 2 × 2 tiles with a lifting ring.
Use ladders and gray plates to create a fort for your minifigures. Add trees and plants for camouflage!

Build a little car with handles for your minifigures to hang on to as they glide down the zip line. A wheel makes the zip line quite fast! Gather these bricks to build it.
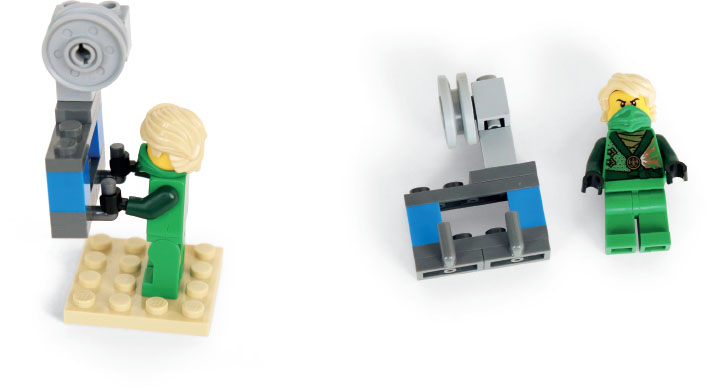
Another option is to build a small square car for the minifigure to stand inside. Attach the wheel to the top of the car. Either way, LEGO zip lines are a lot of fun to play with!