Give traditional games new life by building them out of LEGO bricks! Or invent your own board game with your own rules—and it doesn’t have to be flat, either. Create a board game that travels through a fort and over a mountain. Build your own chess set with custom game pieces. Build a puzzle for someone else to solve. Game night is more fun with LEGO!
Foosball, also known as table soccer, is a fun and fast-paced game! Players compete to kick a ball into the goal. This miniature version built out of LEGO bricks can be played on a table top with a marble as the ball. Start the game by dropping the marble in the center of the playing field. The game continues until one player has scored 10 goals.
• The game is built on two 32 × 32 stud base plates.
• The overall dimensions of the game are 47 studs by 26 studs.
• Each goal is 4 studs by 8 studs and sticks out past the 47 stud length.
• Each team has three rods.
• The goalie rod has two players and the other two rods have three players each.
Red and blue bricks for the walls of the game (color is not important)
Dark gray plates for the top layer
Red bricks (one stud wide) for the goals
8—red Technic liftarms, 2 × 4 L-shaped thick
15—red Technic axle connectors, smooth, x-shaped hole + orientation
3—light gray Technic axle connectors, smooth, x-shaped hole + orientation
8—light gray Technic liftarms, 2 × 4 L-shaped thick
115—2 × 4 light gray tiles
2—1 × 2 light gray tiles
3—1 × 6 light gray tiles
1—1 × 4 light gray tile
6—2 × 2 white tiles
12—1 × 2 dark gray Technic bricks
10—Technic axles, 12 studs long
8—Technic axles, 10 studs long

Each team will have two rods made up of two 10 stud Technic axles, one 12 stud Technic axle, three connectors and three L-shaped liftarms. Each team will also have a goalie rod made up of three 12 stud Technic axles, three connectors and two L-shaped liftarms.

The L-shaped liftarms have an x-shaped opening that slides onto the Technic axles. They fit snugly and do not spin when you spin the rod, which makes them sturdy enough to hit the ball.
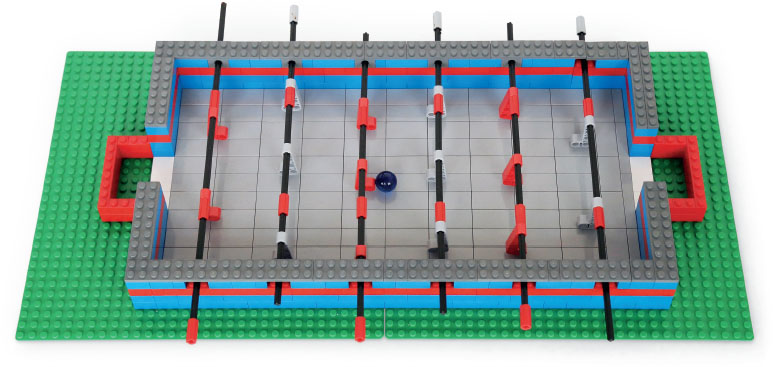
After building each rod, slide each end through a 1 × 2 Technic brick. These Technic bricks will attach to the game table. The goalie rods are placed 3 studs from the end of the field. Then there are 5 studs between each of the 1 × 2 Technic bricks. The spacing was determined by the best possible reach of each player on the field so that the ball will not get stuck during game play.
Build your own checkers game! This classic game is fun to play with a friend. A standard LEGO baseplate (32 studs by 32 studs) works perfectly for a checker board. Use 4 × 4 plates to create the squares on the board. Create your game with the colors shown or choose your own colors!
CHECKER BOARD
1—tan base plate
32—4 × 4 tan plates
32—4 × 4 red plates
GAME PIECES
12—2 × 2 blue bricks
6—1 × 1 blue bricks (optional)
12—2 × 2 yellow bricks
6—1 × 1 yellow bricks (optional)

This checkers board is made with a tan baseplate. If you use 4 × 4 plates for the squares, it works out perfectly with the number of squares needed for checkers.

Line up 12 bricks on each side and play according the the rules for checkers. There are a couple of options for marking pieces that have become kings. Either stack two 2 × 2 bricks using pieces that have been captured in game play or add a 1 × 1 brick to the kings.
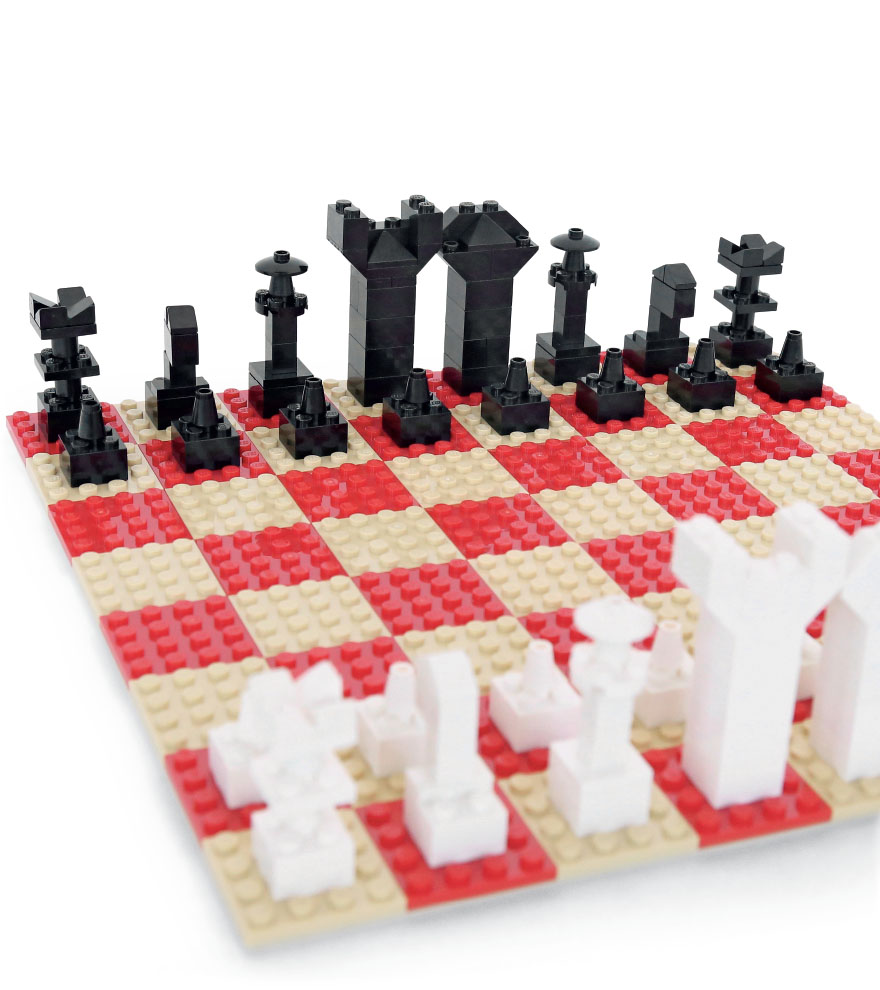
Use LEGO bricks to create your own chess set! In addition to being a great game of strategy, chess is interesting because of the great variety of unique chess sets. This LEGO chess set will be a fun addition to your game collection! Refer to the checkers game on here for details on how to build the game board.
Checkers game board (see here)
PAWNS (8 PER SIDE)
8—2 × 2 black bricks
8—1 × 1 black cones
8—2 × 2 white bricks
8—1 × 1 white cones
KNIGHTS (2 PER SIDE)
2—2 × 2 black bricks
2—1 × 1 black bricks
2—1 × 2 black bricks
2—1 × 2 black plates with one stud on top
4—1 × 1 black slopes, 30 degree
2—2 × 2 white bricks
2—1 × 1 white bricks
2—1 × 2 white bricks
2—1 × 2 white plates with one stud on top
4—1 × 1 white slopes, 30 degree
ROOKS (2 PER SIDE)
2—black 2 × 2 bricks
4—1 × 1 black round bricks
4—2 × 2 black plates
8—1 × 1 black slopes, 30 degree
2—2 × 2 white bricks
4—1 × 1 white round bricks
4—2 × 2 white plates
8—1 × 1 white slopes, 30 degree
BISHOPS (2 PER SIDE)
2—2 × 2 black bricks
4—1 × 1 black bricks
2—2 × 2 black plates with one stud on top
2—2 × 2 black round plates
2—1 × 1 black cones
2—2 × 2 black disks
2—2 × 2 white bricks
4—1 × 1 white bricks
2—2 × 2 white plates with one stud on top
2—2 × 2 white round plates
2—1 × 1 white cones
2—2 × 2 white disks
QUEEN (1 PER SIDE)
4—2 × 2 black bricks
2—2 × 2 black slopes, inverted
2—1 × 2 black slopes
1—1 × 2 black slope, 45 degree triple
4—2 × 2 white bricks
2—2 × 2 white slopes, inverted
2—1 × 2 white slopes
1—1 × 2 white slope, triple
KING (1 PER SIDE)
4—2 × 2 black bricks
3—1 × 2 black bricks
1—2 × 2 black plate
1—1 × 2 black slope, 45 degree triple
1—2 × 4 black slope, inverted double
4—2 × 2 white bricks
3—1 × 2 white bricks
1—2 × 2 white plate
1—1 × 2 white slope, 45 degree triple
1—2 × 4 white slope, inverted double
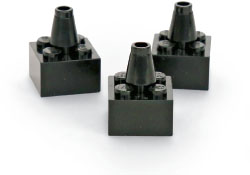
The pawns are simple to build with a 2 × 2 brick and a 1 × 1 cone each.
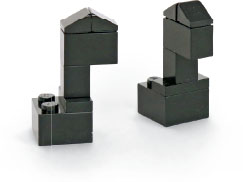
The knight is designed to look like a simple horse. For each knight, place a 1 × 2 plate with one stud on top of a 2 × 2 brick. Add a 1 × 1 brick, a 1 × 2 brick and two 1 × 1 slopes.
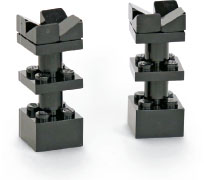
Each rook has a 2 × 2 brick, a 1 × 1 round brick, a 2 × 2 plate and another 1 × 1 round brick. The top is a 2 × 2 plate decorated with four 1 × 1 slopes.
1 × 2 triple slope bricks give the king and queen a distinct royal look. To build the king (shown on the left), stack four 2 × 2 bricks. Then add a 2 × 2 plate. The top of the king is a 2 × 4 double inverted slope, three 1 × 2 bricks and a 1 × 2 triple slope. To build the queen (shown on the right), stack four 2 × 2 bricks. Add two 2 × 2 inverted slopes on top of that. Then place two 1 × 2 slope bricks and a 1 × 2 triple slope on the top.

The bishop looks like a simple tower. Start with a 2 × 2 brick. Add a 2 × 2 plate with one stud on top, then two 1 × 1 bricks. The top is a 2 × 2 round plate, a 1 × 1 cone and a 2 × 2 disk.

This Ninja Quest game combines LEGO ninja minifigures with an adventure board game. The great thing about building a LEGO game is that you can determine what the game board will look like and you can decide on your own rules. Use our board game idea or create your own!
2—tan base plates
2 × 4 green, lime green, blue, dark red and orange plates
4—Ninja minifigures
1—die

RULES OF THE GAME
1. On their turn, each player rolls the die and moves that number of spaces.
2. The dark red spaces are battle squares. If a player lands on a battle square, he and one opponent on the game board each roll the die. The opponent is the closest player on the board, whether ahead or behind the player who landed on the battle square. The player who rolls the higher number either keeps the more advanced position on the board if he was ahead or moves to the more advanced position on the board if he was behind.
3. The blue spaces are ninja challenge squares. If a player lands on a blue space, he has to perform a ninja challenge. Get creative! Some ideas for the challenges are to do 10 sit-ups, perform an imaginary ninja duel or sneak down a hallway. Or make the challenges something that the minifigures will do.
4. The player who arrives at the Ninja Master Dojo first is the winner!

IDEAS FOR EXTENDING THE GAME
1. Create a challenge for entering the Ninja Master Dojo. For example, players have to roll a certain number before they can gain entrance to the dojo and win the game.
2. Add ninja fact cards. Create spaces on the game board that require players to draw a card and answer a question.
3. Add more dimensions to your game board. Make the players travel up over a mountain, for example.
Build some LEGO tops that spin well and spin fast! Once you try building these tops, you’ll want to keep creating more. It’s fun to modify the tops with different colors and designs. It’s also fun to try battling the tops against each other. Find some friends and a smooth playing surface. Spin your tops and see whose top can knock the other tops over!
2 × 2 round plates
1 × 1 round plates in all colors
1 × 1 cones
2 × 2 round bricks
Round plates with a hole in the middle
Technic axles
Technic connector pins, ½ length
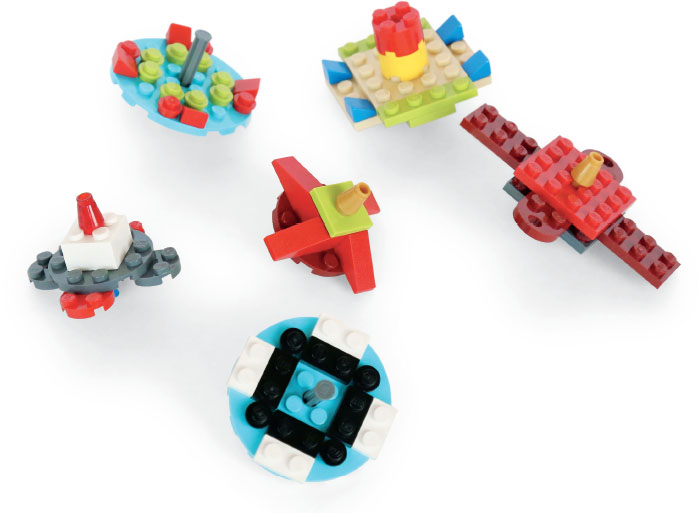
One thing that you will quickly discover when building tops is that the center of gravity needs to be close to the ground. In other words, your top will need to have only a small amount of axle sticking out on the bottom or it won’t spin properly.
The first way to build a top is to use a round plate with a hole in the center. Slide a Technic axle through the hole, but it won’t be secure. Add a 2 × 2 round plate to the bottom of the top as shown on the left. This will hold the axle in place.

Another way to build a top is to use a Technic connector pin—the short half-length version. Add one of these to the bottom of a 2 × 2 round plate.

To build the red and gray top, collect the bricks shown.
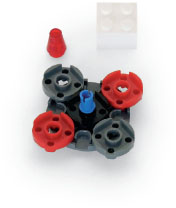
Attach all of the 2 × 2 round plates on the underside of the 4 × 4 round plate.
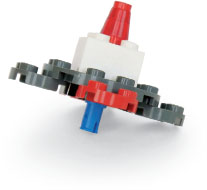
Build the top side as shown.

Try building a design with black and white.

The black and white design on this top creates a fun optical illusion when it’s spinning.
Build a LEGO puzzle and challenge a friend to solve it! These simple puzzles fit together to create a square that is 10 studs by 10 studs. It’s easy to build puzzle pieces that fit into a 10 × 10 square. But once the pieces are apart, can you get them back to a square again?
Bricks in various colors
Plates in various colors

Use plates to hold bricks together in the shape of the pieces that you want. Try to make the top of each puzzle piece one solid color because it makes the puzzle easier to solve, but if you have to mix colors it’s not a major problem.
PUZZLE DESIGN #1: These pieces all fit into a square. Build them and try to solve the puzzle. Don’t check the solution picture until you have given it a good try!
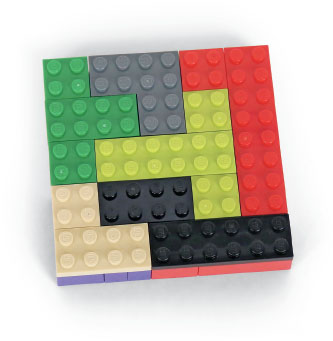
This photo shows the solution for Puzzle #1.
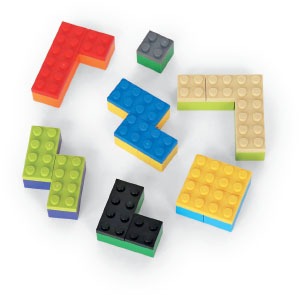
PUZZLE DESIGN #2. Here is another puzzle design with differently shaped pieces. The square makes it a challenge to solve!

This photo shows the solution for Puzzle #2.
Now try designing your own brain teaser puzzles!