Now that you know which tools to avoid, you’re ready to look at the tools you can use to get the job done right. In this section, I fill you in on text editors, program editors, integrated development environments, and browser debuggers.
Text editors
The hammer-and-saw equivalent for creating web applications is the standard text editor. You can build all the program code used in this book using the text editor that’s already installed on your computer. You don’t have to buy any fancy software packages or maintain any upgrades. This section explains how to use the standard text editors that are found on most computers, based on the operating system you’re running.
If you’re running Microsoft Windows
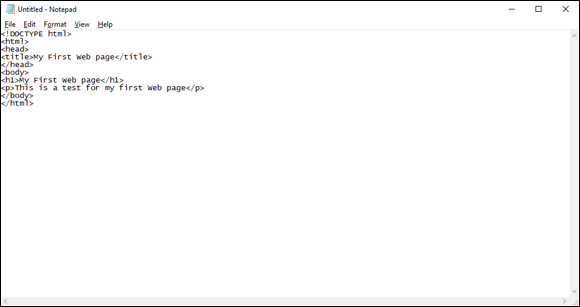
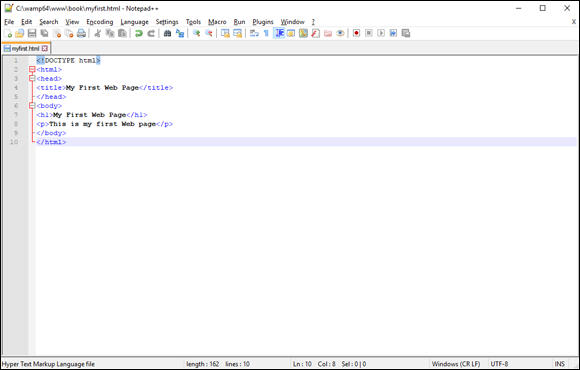
If you’re running Microsoft Windows, you have the trusty Notepad application for creating and viewing standard text files. Notepad provides a bare-bones interface for typing text and saving it. Figure 3-1 shows an example of writing HTML code in a Notepad window. Notepad is nothing fancy — just your code in black and white.
Notepad works fine as a programming tool, but you’ll want to tweak a few of the settings before you start coding in Notepad, just to make things easier.
DISABLING WORD WRAP
In Notepad, you can define the width of the document you want to create, and then Notepad automatically starts a new line when you’ve reached that limit. This feature is handy for typing memos, but it causes issues when coding.
Wrapping a line of code from one line to the next is generally not allowed in programming languages. All the code for a statement should be on the same line, unless you do some trickery to tell it otherwise.
Another issue with word wrap is that the GoTo option in the Edit menu becomes disabled when word wrap is turned on. Because Notepad doesn’t show line numbers, the GoTo feature is all you have to hunt for specific line numbers that error messages point out. GoTo is a crucial tool to have in the Notepad editor.
To disable word wrap in Notepad, click the Format entry in the menu bar; then click the Word Wrap entry to ensure there is no check mark next to it.
AVOIDING DEFAULT FILE EXTENSIONS
By default, Notepad assumes you’re saving a text document and automatically appends a .txt file extension to the file. That doesn't work with programming code, because most programs use a specific file extension to identify themselves (such as .html for HTML files or .php for PHP files).
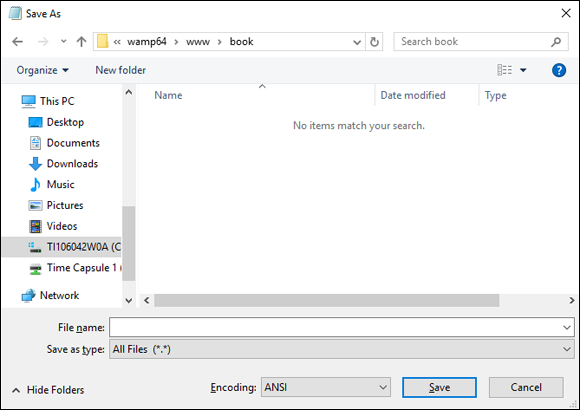
When you use the File ⇒ Save As menu option in Notepad, you'll need to be careful when saving your program file that the .txt file extension doesn’t get appended to the end of the filename. To save a program file using Notepad, follow these steps:
-
Choose File ⇒ Save As from the menu bar at the top of the editor.
The Save As dialog box, shown in Figure 3-2, appears.
- In the drop-down list at the top of the Save As dialog box, navigate to the folder where you want to save the program file.
-
From the Save As Type text box near the bottom of the Save As dialog box, select All Files (*.*).
This prevents Notepad from appending the .txt file extension to your filename.
- In the File Name field, enter the filename for your program file, including the file extension you want to use.
-
Click Save to save the program file.
Your program file is properly saved in the correct format, with the correct filename, in the correct location.
SEEING FILE EXTENSIONS
In Microsoft Windows you use File Explorer to navigate the storage devices on your system to open files. Unfortunately, the default setup in File Explorer is to hide the file extension part of the filename (the part after the period) so that it doesn't confuse novice computer users.
That can have the opposite effect for programmers, adding confusion when you’re trying to look for a specific file. You may use the same filename for multiple files with different extensions. Fortunately, you can easily change this default setting in Windows. Just follow these steps:
- In Windows 8 or 10, open Settings. In Windows 7, open the Control Panel.
- In Windows 8 or 10, type File Explorer Options in the search bar and press Enter.
- Click the icon for the File Explorer Options tool that appears in the search results.
-
In Windows 7, click the File Explorer Options icon in the Control Panel.
You may have to go to the Advanced view to see it.
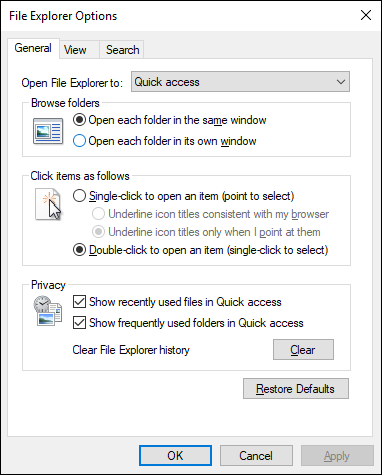
After you open File Explorer Options, the dialog box should look like Figure 3-3.
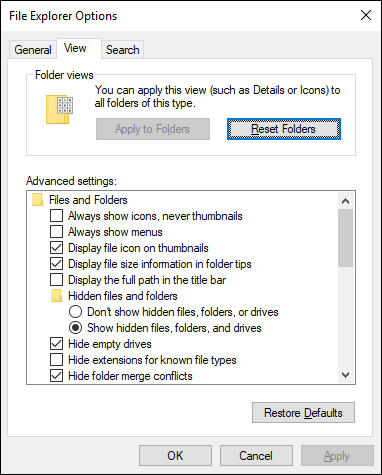
- Click the View tab.
- Remove the check mark from the Hide Extensions for Known File Types check box, as shown in Figure 3-4.
-
Click OK.
Now you’ll be able to see the full filename, including the extension, when you look for your programs using File Explorer.
SETTING THE DEFAULT APPLICATION
Now that you can see the full filename of your program files in File Explorer, there’s just one more hurdle to cross. If you want to open your program files using Notepad by default, you’ll need to tell File Explorer to do that. Follow these steps:
- Navigate to the program file, and right-click the filename.
-
In the menu that appears, select Open.
The Open dialog box appears.
-
Select Notepad from the list of programs, and then select the check box to always open files of this type using the program.
Now you’ll be able to double-click your program files in File Explorer to automatically open them in Notepad.
If you’re running macOS
If you’re running macOS (or one of the earlier Mac OS X versions), the text editor that comes standard is called TextEdit. The TextEdit application actually provides quite a lot of features for a standard text editor — it recognizes and allows you to edit a few different types of text files, including rich text files (.rtf) and HTML files.
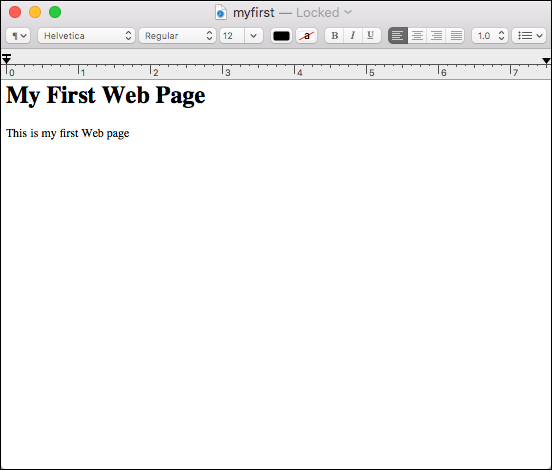
The drawback to TextEdit is that sometimes it can be too smart. Trying to save and edit an HTML file in TextEdit can be more complicated than it should be. By default, TextEdit will try to display the HTML tags as their graphical equivalents in the editor window, as shown in Figure 3-5.
As you can see in Figure 3-5, TextEdit actually shows the text as the HTML tags format it instead of the actual HTML code. This won’t work for editing an HTML file, because you need to see the code text instead of what the code generates. There’s an easy way to fix that — just follow these steps:
-
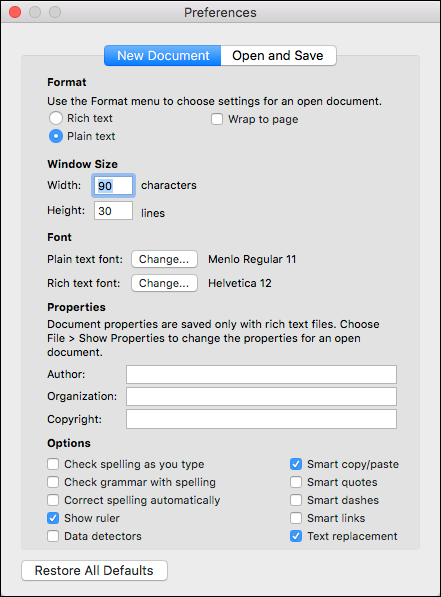
Choose TextEdit ⇒ Preferences.
The Preferences dialog box, shown in Figure 3-6, appears.
- On the New Document tab, in the Format section, select the Plain Text radio button.
- In the Options section, remove the check mark from the following check boxes:
- Correct Spelling Automatically
- Smart Quotes
- Smart Dashes
- Smart Links
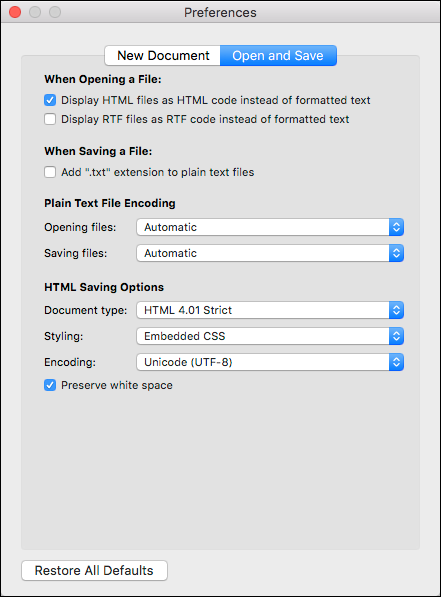
- Click the Open and Save tab (see Figure 3-7).
- In the When Opening a File section, check the Display HTML Files as HTML Code Instead of Formatted Text check box.
- In the When Saving a File section, remove the check mark from the Add “.txt” File Extension to Plain Text Files check box.
- Close the Preferences dialog box to save the settings.
Now you’re all set to start editing your program code using TextEdit!
If you’re running Linux
The Linux environment was made by programmers, for programmers. Because of that, even the simple text editors installed by default in Linux distributions provide some basic features that come in handy when coding.
Which text editor comes with your Linux distribution usually depends on the desktop environment. Linux supports many different graphical desktop environments, but the two most common are GNOME and KDE. This section walks through the default text editors found in each.
THE GNOME EDITOR
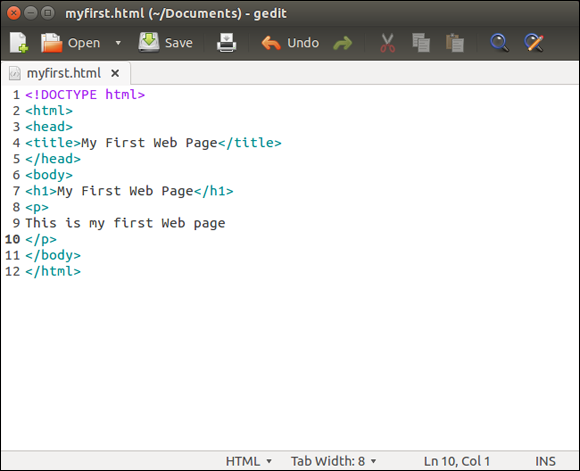
If you’re working in a GNOME desktop environment, the default text editor is gedit, shown in Figure 3-8.
The gedit editor automatically saves program files as plain text format and doesn’t try to add a .txt file extension to filenames. There's nothing special you need to do to dive into coding your programs using gedit. Plus, it has some advanced features specifically for programming that you would find in program editors (see the “Program editors” section later in this chapter).
THE KDE EDITOR
The default text editor used in the KDE graphical desktop environment is Kate, shown in Figure 3-9.
Just like gedit, the Kate editor contains lots of programmer-friendly features right out of the box. Again, no special configuration is required before you can start editing your program code in Kate.
Program editors
The next step up from standard text editors is a family of tools called program editors. A program editor works just like a text editor, but it has a few additional built-in features that come in handy for programming. Here are some of the features that you’ll find in program editors:
- Line numbering: Providing the line numbers off to the side of the window is a lifesaver when coding. When an error message tells you there’s a problem on line 1935, not having to count every line to get there helps!
- Syntax highlighting: With syntax highlighting, the editor uses different colors for different parts of the program. Program keywords are displayed using different colors to help make them stand out from data in the code file.
- Syntax error marking: Text that appears to be used as a keyword but that isn’t found in the code statement dictionary is marked as an error. This feature can be a time-saver by helping you catch simple typos in your program code.
There are lots of commercial program editors, but some of the best program editors are actually free. This section discusses some of the better free ones available for HTML, CSS, JavaScript, and PHP coding.
Notepad++
If you’re running Microsoft Windows, the Notepad++ tool is a great place to start. As its name suggests, it’s like Notepad, but better. You can download Notepad++ from www.notepad-plus-plus.org. The main editing window is shown in Figure 3-10.
The main interface for Notepad++ looks similar to Notepad, so there’s nothing different to get used to. By default, it shows line numbers along the left margin, as well as the type of file and the column location of the cursor at the bottom.
Notepad++ recognizes the syntax for many different types of programming languages, including HTML, CSS, JavaScript, and PHP. It highlights the keywords and will even match up opening and closing block statements. If you miss a closing block, Notepad++ will point that out.
Scintilla and SciTE
The Scintilla library (www.scintilla.org) is an open-source project to provide a programming text editor engine for use in any type of environment. Developers can embed the Scintilla editor into any type of application free of charge.
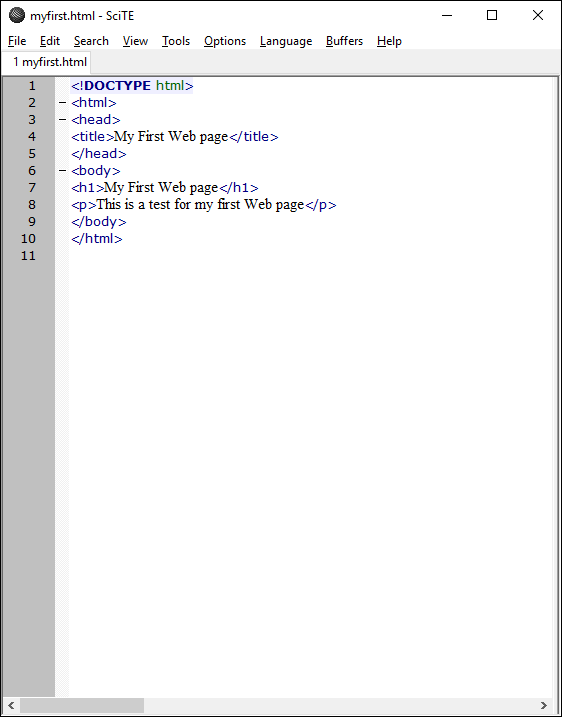
The SciTE package is a desktop text editor tool that implements the Scintilla library. The SciTE package is available for Windows, macOS, and Linux platforms. You can download it from the Scintilla website for the Windows and Linux platforms, and it’s available in the Apple Store for the macOS platform. Figure 3-11 shows the basic SciTE editor window in action.
SciTE provides all the program editing features mentioned earlier. It recognizes the syntax of many different programming languages and can help you organize your code by marking and collapsing code sections (this comes in handy if you write long if-then statement sections).
jEdit
The jEdit program editor (www.jedit.org) is a little bit different from the other packages. It’s written in Java code, so you can run it in any platform that supports Java. That means you can use the exact same editor interface in Windows, macOS, or Linux! jEdit supports all the common features you’d expect from a program editor. Figure 3-12 shows the basic jEdit editor window.
 Because jEdit is a Java application, your desktop platform must have either a Java Runtime Environment (JRE) or Java Development Kit (JDK) package installed in order for it to work. You can download and install one from Oracle at
 www.oracle.com/technetwork/java/javase/downloads. Also, because jEdit runs as a Java application, you may find it slower than some of the native desktop packages such as Notepad++ or SciTE.
Integrated development environments
Moving up the ladder of tools, the laser-guided miter tool for program development is the integrated development environment (IDE). IDE packages provide everything you could possibly need to develop any size of web application.
Here are some of the advanced features IDE packages provide:
- Code completion: Start typing a code statement, and the package will provide a pop-up list of statements that match what you’re typing. It also shows what parameters are required and optional for the statement.
- Code formatting: The IDE automatically indents code blocks to help make your code more readable.
- Program execution: You can run your code directly from the editor window without having to jump out to a web browser.
- Debugging: You can step through the program code line by line, watch how variables are set, and see whether any error messages are generated.
- Project and file management: Most IDE packages allow you to group your application files into projects. This allows you to open a project and see just the files associated with that application. Some will even upload the project files to your web-hosting site for you, similar to what the graphical desktop tools do.
Using an IDE tool is not for the faint of heart. Because of all the fancy features, learning how to use the IDE interface can be almost as complicated as learning the programming language!
There are both commercial and open-source IDE packages available for the PHP environment. To give you a general idea of how IDE packages operate, this section walks through two of the more popular ones: Netbeans and Eclipse.
Netbeans
The Netbeans IDE package was originally developed by Sun Microsystems and released as an open-source IDE for its Java programming language environment (thus the “beans” part of the name). When Oracle acquired Sun, it maintained support for Netbeans, and continued development of it with updated releases.
The Netbeans IDE now contains support for several different programming languages besides Java by using additional plug-in modules. As you can guess, the reason I’m mentioning it here is because there’s a plug-in module for PHP.
You can download the Netbeans editor with the PHP module already installed, making it easy to install. Just go to www.netbeans.org/downloads and click the Download button under the PHP category.
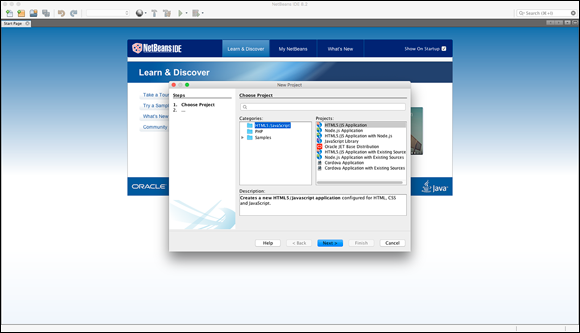
When you start Netbeans, it will prompt you to start a new project, as shown in Figure 3-13.
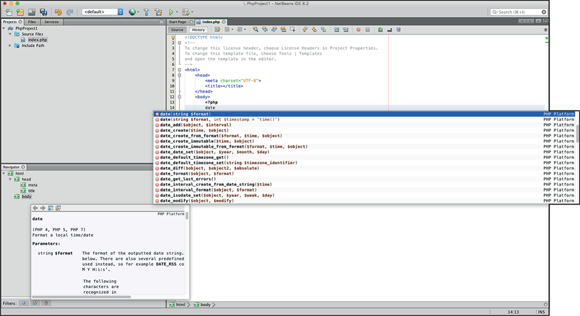
Netbeans contains project templates for HTML and JavaScript applications, as well as PHP applications. When you start a new PHP project, Netbeans automatically creates an index.php file as the main program file for the project. It even builds a rough template for your code. As you would expect from an IDE, when you start typing a PHP function name, Netbeans opens a pop-up box that shows all the PHP functions that match what you're typing, as shown in Figure 3-14.
Not only does it show the code completion list, as you can see in Figure 3-14, but it also shows you the PHP manual definition of the function! This is certainly a handy tool to have available if you plan on doing any large-scale PHP development.
Eclipse
The other big name in PHP IDE packages is the Eclipse PHP Development Tool (usually just called Eclipse PDT). Eclipse was also originally designed as a Java application IDE. Many open-source proponents didn’t trust Sun Microsystems maintaining the only IDE for Java, so they set out to develop their own. (The story goes that there was no intentional wordplay on the name Eclipse versus Sun Microsystems. If you can believe that, I may have a bridge to sell you.)
Just like the Netbeans IDE, Eclipse evolved from a Java-only IDE to support many different programming languages via the use of plug-in modules. You can download the Eclipse PDT as an all-in-one package at www.eclipse.org/pdt.
Just like the jEdit editor, Eclipse PDT is written as a Java application and requires that you have a JRE or JDK installed on your workstation (see “jEdit,” earlier in this chapter).
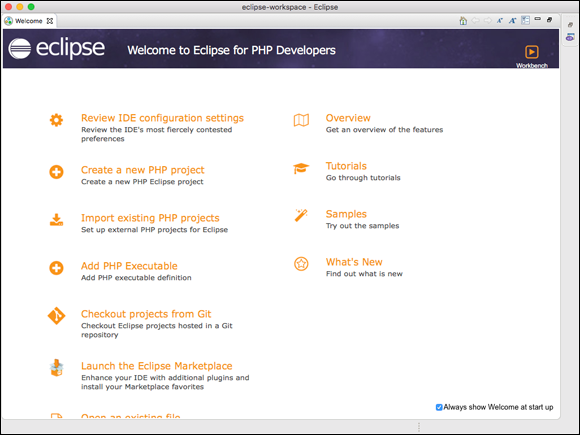
When you start Eclipse, a menu system appears, as shown in Figure 3-15.
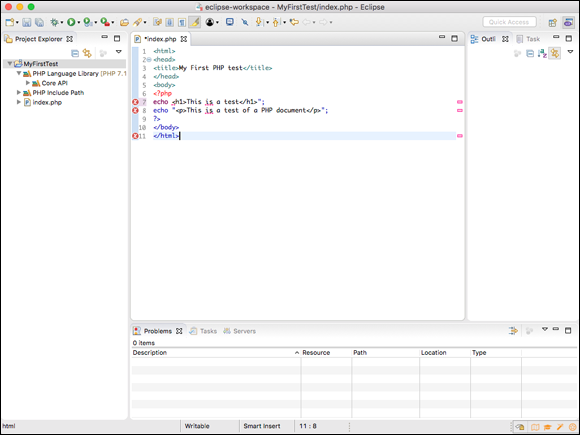
This allows you to easily change the IDE configuration, start a new project, or open an existing project. Eclipse has all the same features that Netbeans offers. Plus, it has one additional feature: Eclipse PDT contains the advanced PHP Debugger tool developed by Zend, the company that sponsors PHP. The Debugger tool can help point out errors in your PHP code immediately as you type, or it can debug your code as you run it in the Eclipse editor window. Figure 3-16 demonstrates Eclipse pointing out a PHP coding error I made in my code.
Having an advanced PHP debugger at your fingertips can be a great time-saver when you’re developing large applications!
Browser debuggers
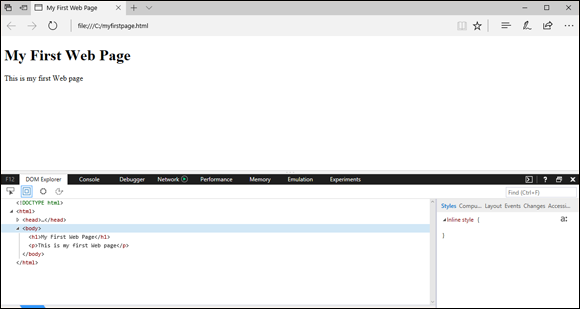
Before I finish this chapter, I want to mention one more tool that you have available when trying to troubleshoot web application issues. Most browsers today have a code-debugging feature either built in or easily installable. The browser debuggers can help you troubleshoot HTML, CSS, and JavaScript issues in the web page you send to the client. Figure 3-17 shows the debugging console in the Microsoft Edge web browser after you press F12 to activate it.
Browser debuggers can show you exactly where something has gone wrong in the HTML or CSS code. They’re also invaluable when working with JavaScript applications.
When you’re developing web applications, it’s crucial that you test, do some more testing, and then test again. Testing your application in every possible way your website visitors will use it is the only way to know just what to expect.
Things are getting better, but different browsers still may handle HTML, CSS, and even JavaScript code differently. Nowhere is this more evident than when errors occur.
When an error occurs in HTML or CSS code, the browser doesn’t display any type of error message. Instead, it tries to fix the problem on its own so it can display the web page. Unfortunately, not all browsers fix code the same way. If you run into a situation where your web page looks different on two different browsers, most likely you have some type of HTML or CSS code issue that the browsers are interpreting differently.
 Identifying which tools to avoid