Tools & Materials 
Pencil
Carpenter’s level
Screwdriver
Cardboard
Masking tape
Plumber’s putty
Tub & tile caulk
Stud finder
4-ft. level
Shims
3" drywall screws
Drill
Protective equipment
Most bathroom countertops installed today are integral (one-piece) sink/countertop units made from cultured marble or other solid materials, like solid surfacing. Integral sink/countertops are convenient, and many are inexpensive, but style and color options are limited.
Some remodelers and designers still prefer the distinctive look of a custom-built countertop with a self-rimming sink basin, which gives you a much greater selection of styles and colors. Installing a self-rimming sink is very simple.
Tools & Materials
Pencil
Carpenter’s level
Screwdriver
Cardboard
Masking tape
Plumber’s putty
Tub & tile caulk
Stud finder
4-ft. level
Shims
3" drywall screws
Drill
Protective equipment
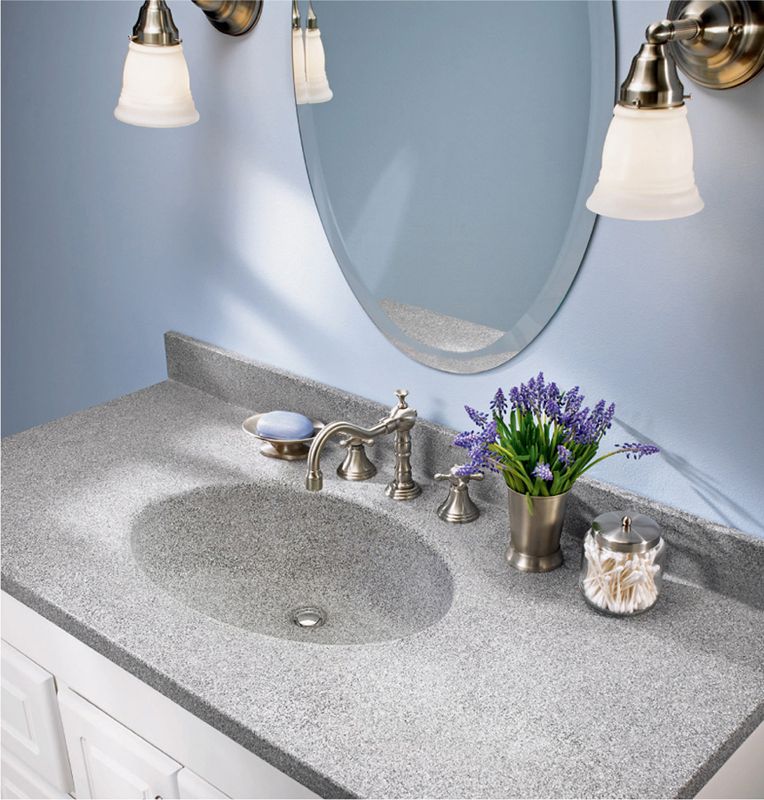
Integral sink/countertops are made in standard sizes to fit common vanity widths. Because the sink and countertop are cast from the same material, integral sink/countertops do not leak, and do not require extensive caulking and sealing.
 HOW TO INSTALL A VANITY CABINET
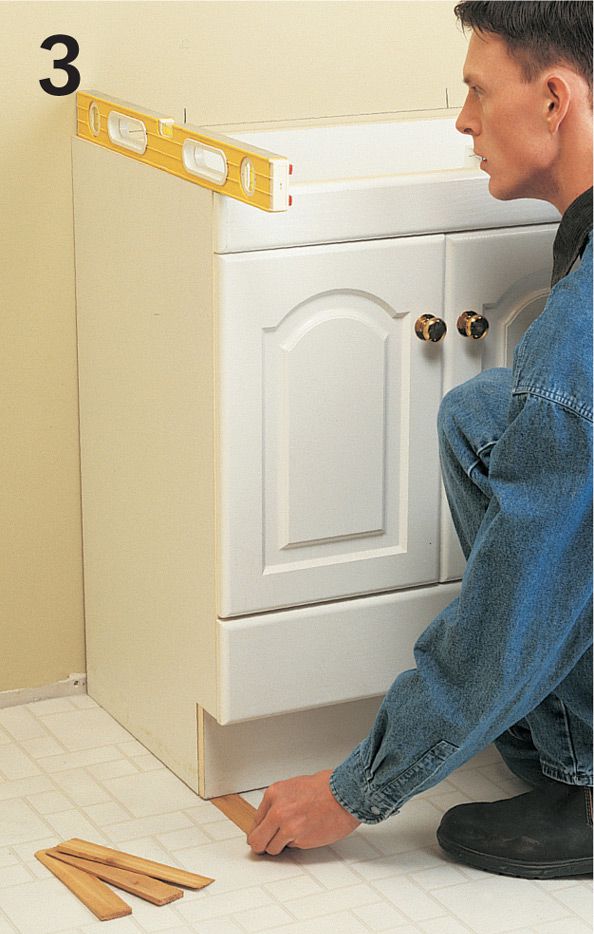
Measure and mark the top edge of the vanity cabinet on the wall, then use a 4-ft. level to mark a level line at the cabinet height mark. Use an electronic stud finder to locate the framing members, then mark the stud locations along the line.
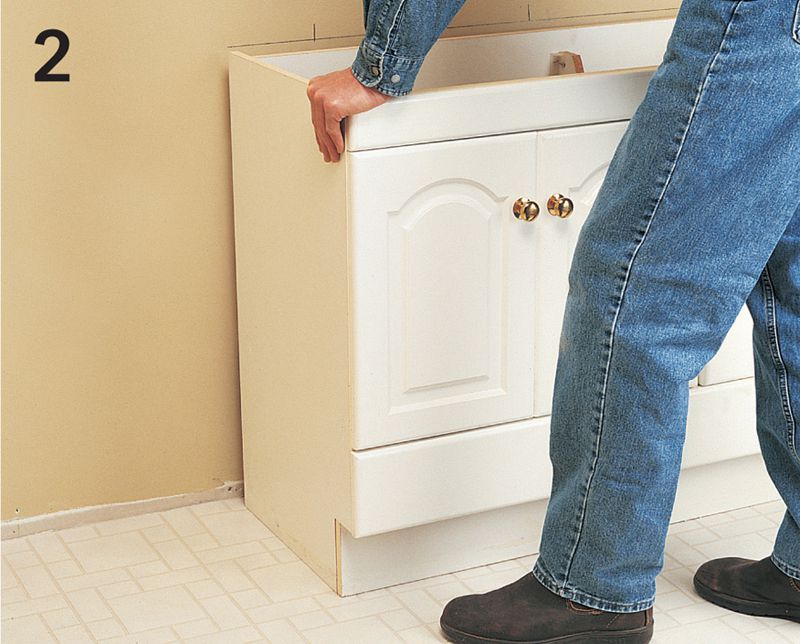
Slide the vanity into position so that the back rail of the cabinet can later be fastened to studs at both corners and in the center. The back of the cabinet should also be flush against the wall. (If the wall surface is uneven, position the vanity so it contacts the wall in at least one spot, and the back cabinet rail is parallel with the wall.)

Variation: To install two or more cabinets, set the cabinets in position against the wall, and align the cabinet fronts. If one cabinet is higher than the other, shim under the lower cabinet until the two are even. Clamp the cabinet faces together, then drill countersunk pilot holes spaced 12" apart through the face frames so they go at least halfway into the face frame of the second cabinet. Drive wood screws through the pilot holes to join the cabinets together.
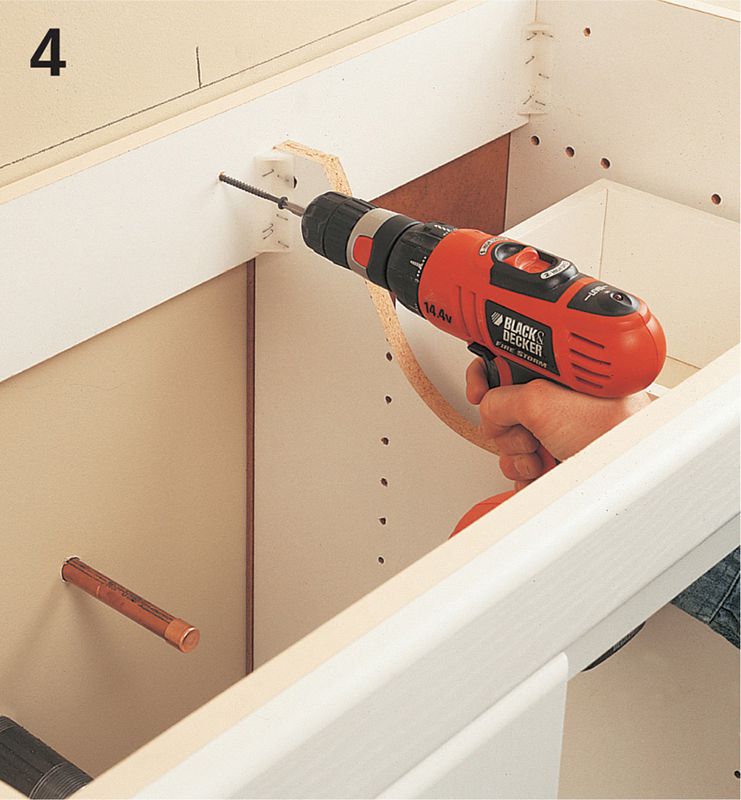
At the stud locations marked on the wall, drive 3" drywall screws through the rail on the cabinet back and into the framing members. The screws should be driven at both corners and in the center of the back rail.
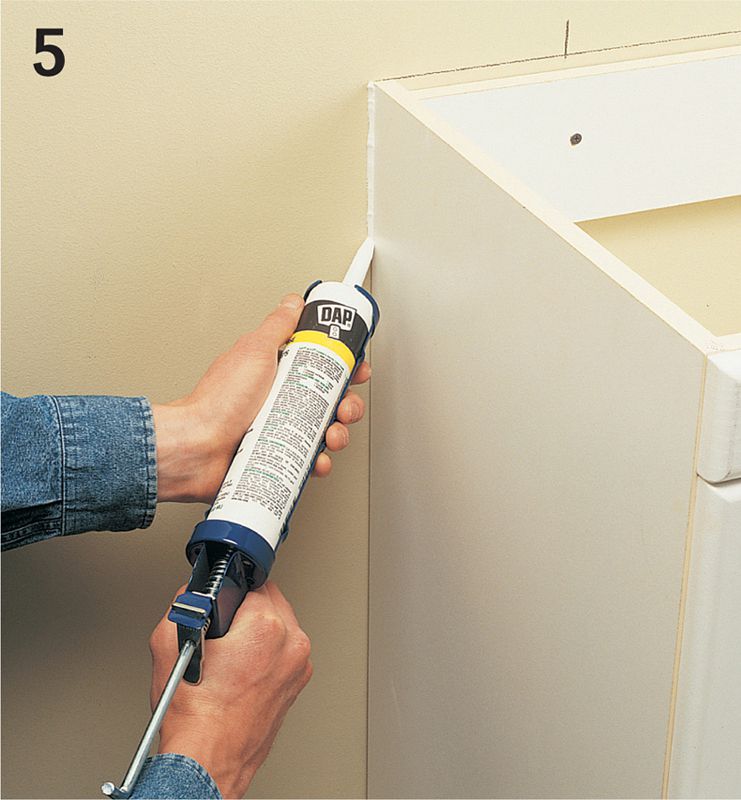
Run a bead of caulk along small gaps between the vanity and wall, and between the vanity and floor. For larger gaps, use quarter-round molding between the vanity and wall. Between the vanity and floor, install the same baseboard material used to cover the gap between the wall and floor.
HOW TO INSTALL AN INTEGRAL VANITY COUNTERTOP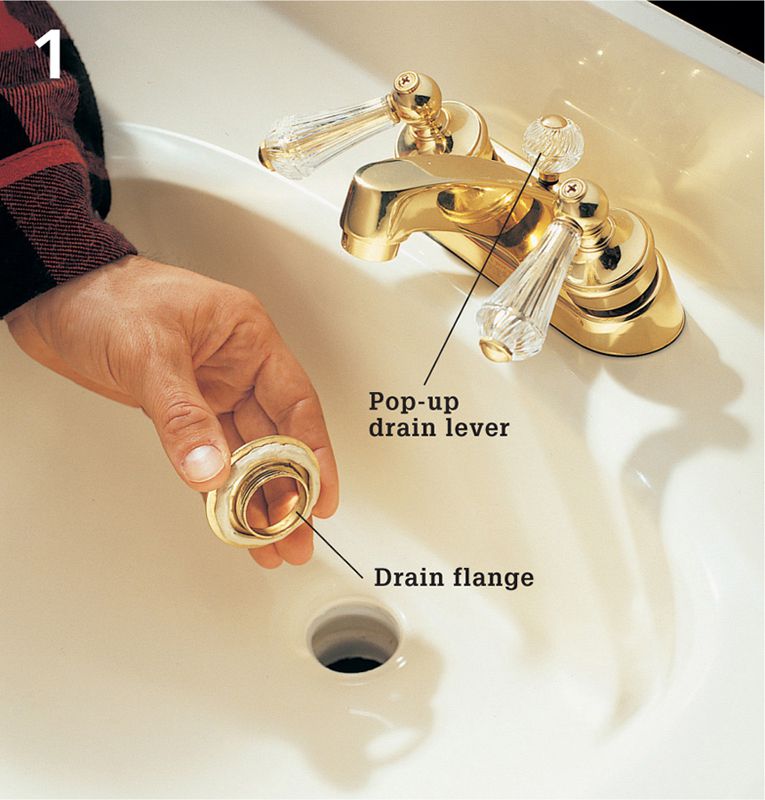
Set the sink/countertop unit onto sawhorses. Attach the faucet and slip the drain lever through the faucet body. Place a ring of plumber’s putty around the drain flange, then insert the flange in the drain opening.

Thread the locknut and sealing gasket onto the drain tailpiece, then insert the tailpiece into the drain opening and screw it onto the drain flange. Tighten the locknut securely. Attach the tailpiece extension. Insert the pop-up stopper linkage.
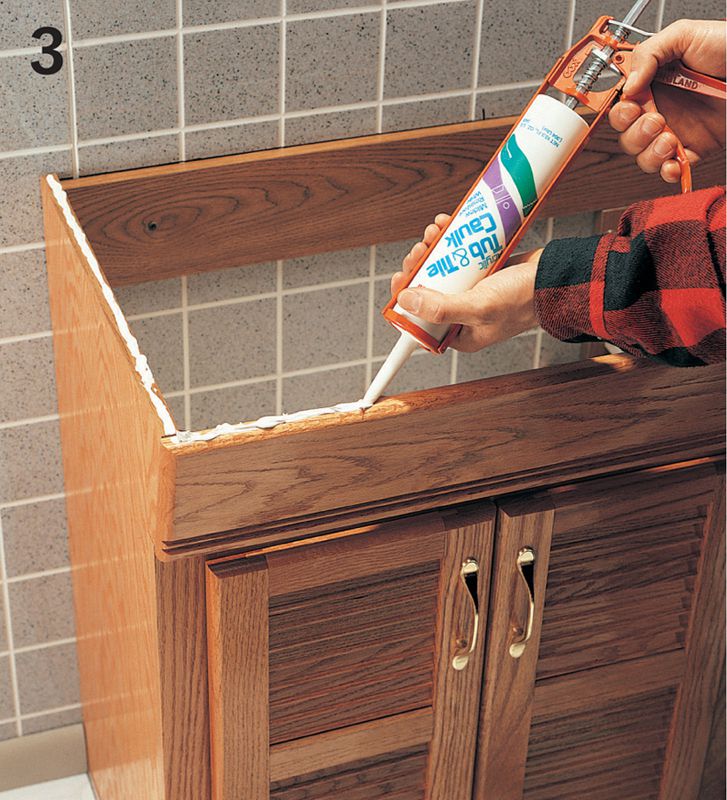
Apply a layer of tub & tile caulk (or adhesive, if specified by the countertop manufacturer) to the top edges of the cabinet vanity, and to any corner braces.
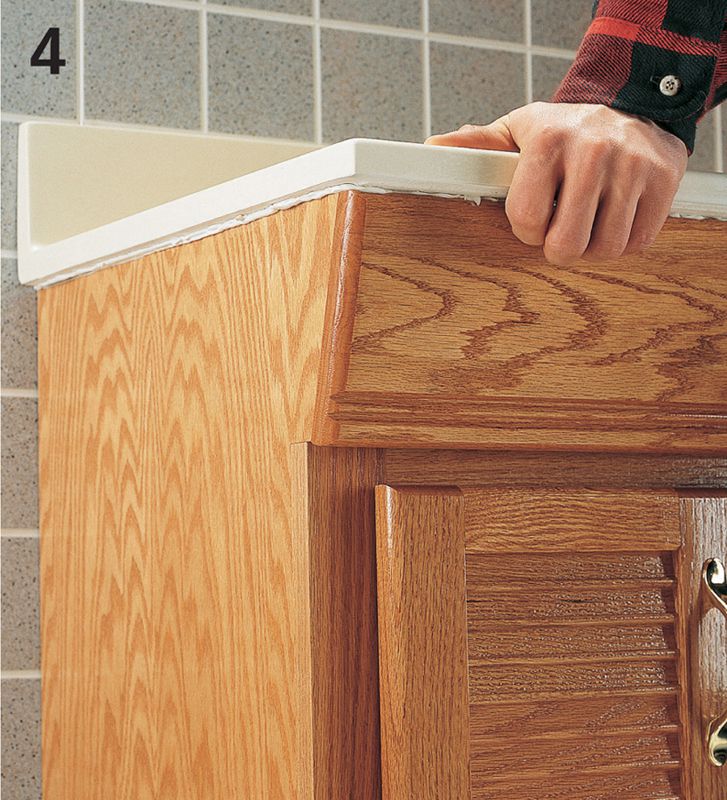
Center the sink/countertop unit over the vanity, so the overhang is equal on both sides and the backsplash of the countertop is flush with the wall. Press the countertop evenly into the caulk.
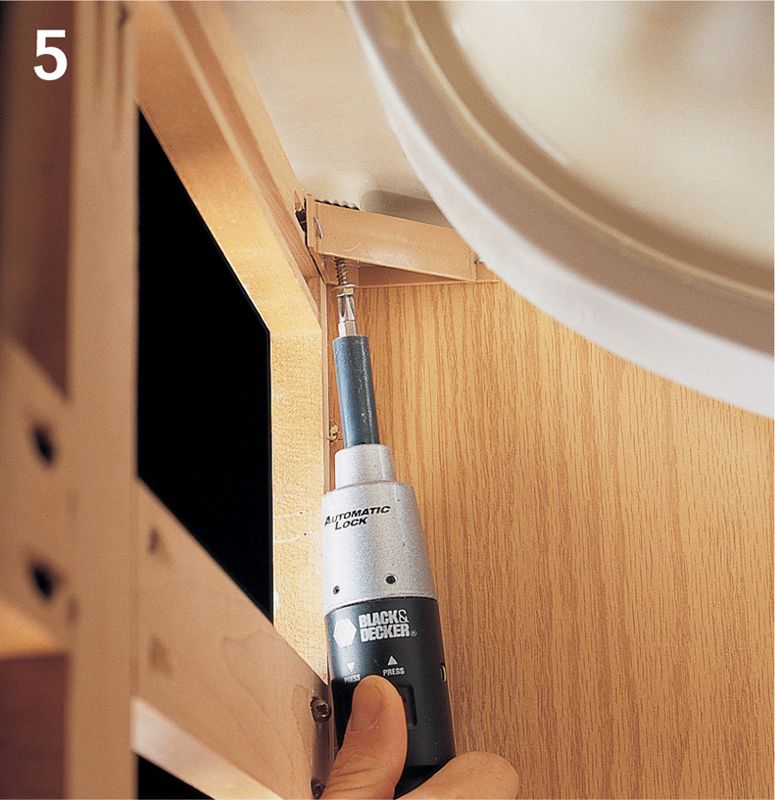
Cabinets with corner braces: Secure the countertop to the cabinet by driving a mounting screw through each corner brace and up into the countertop. Note: Cultured marble and other hard countertops require predrilling and a plastic screw sleeve.
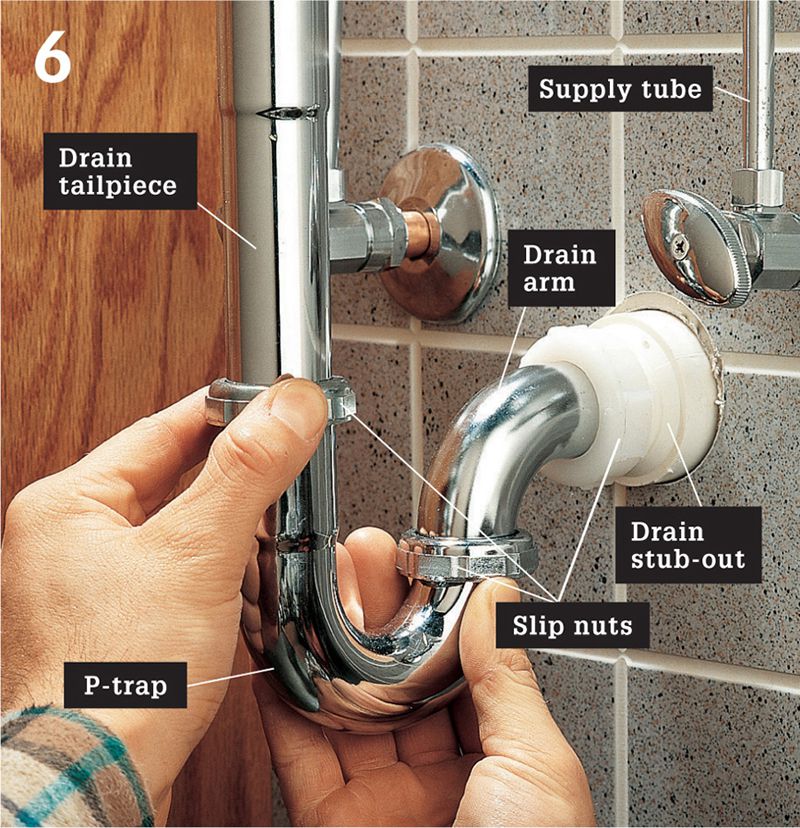
Attach the drain arm to the drain stub-out in the wall using a slip nut. Attach one end of the P-trap to the drain arm, and the other to the tailpiece of the sink drain, using slip nuts. Connect supply tubes to the faucet tailpieces. Seal the gap between the backsplash and the wall with tub and tile caulk.
VARIATION: DROP-IN SINKS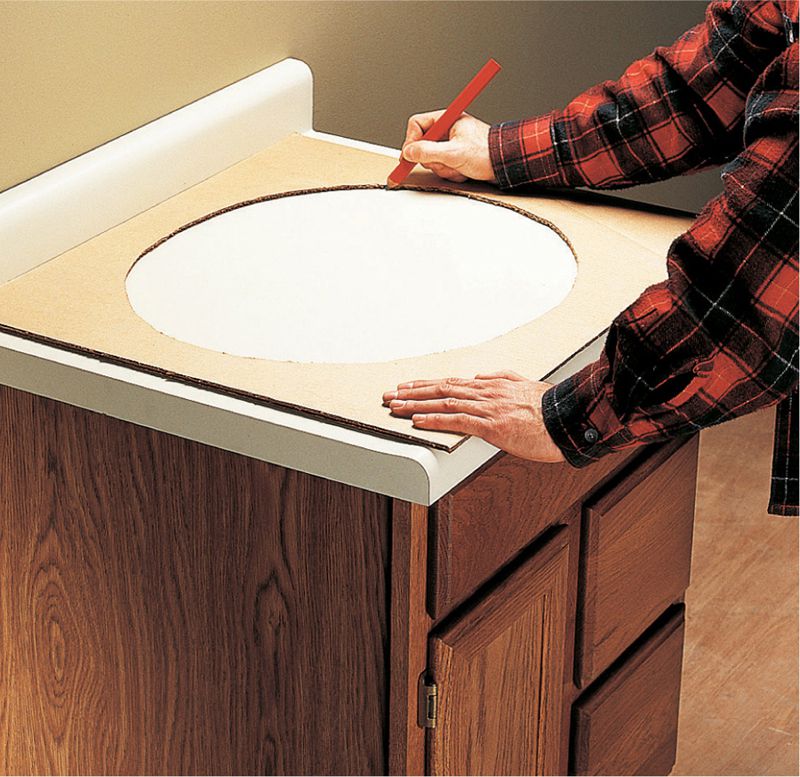
An inexpensive alternative to an integral vanity countertop is to build your own countertop from postform laminate or another kitchen-style countertop material. Be sure to add buildup strips and caps to the exposed ends. Position the countertop on your vanity cabinet and trace a cutout for the drop-in lavatory.
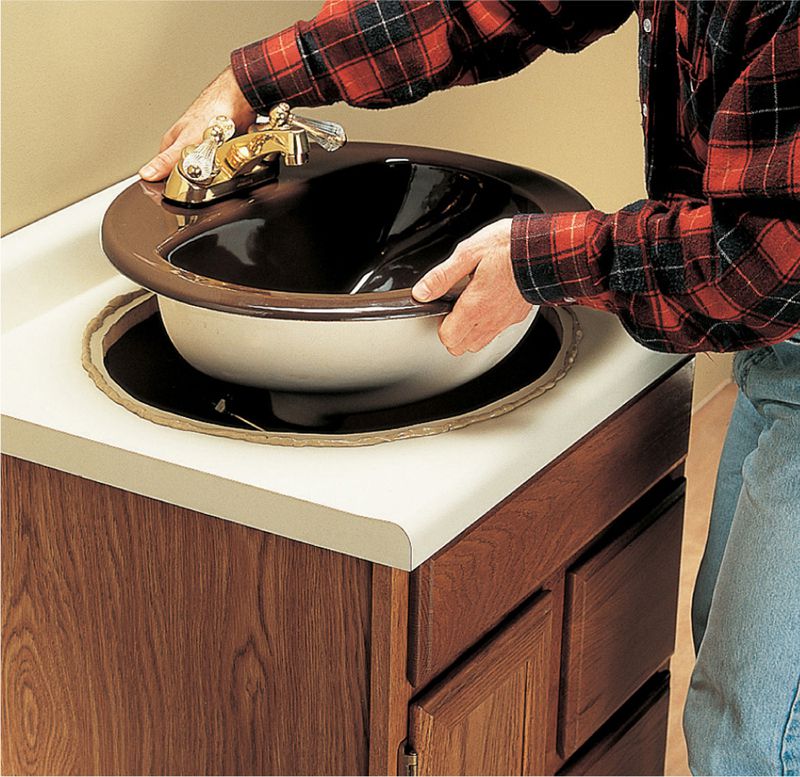
Install the drop-in sink. Some sinks rely mostly on their own weight to stay put, requiring only a bead of plumber’s putty for setting the sink flange. Lighter sinks are held in place with clips from below. It’s usually recommended that you attach your faucet to the sink before installing it, and then make your hookups.