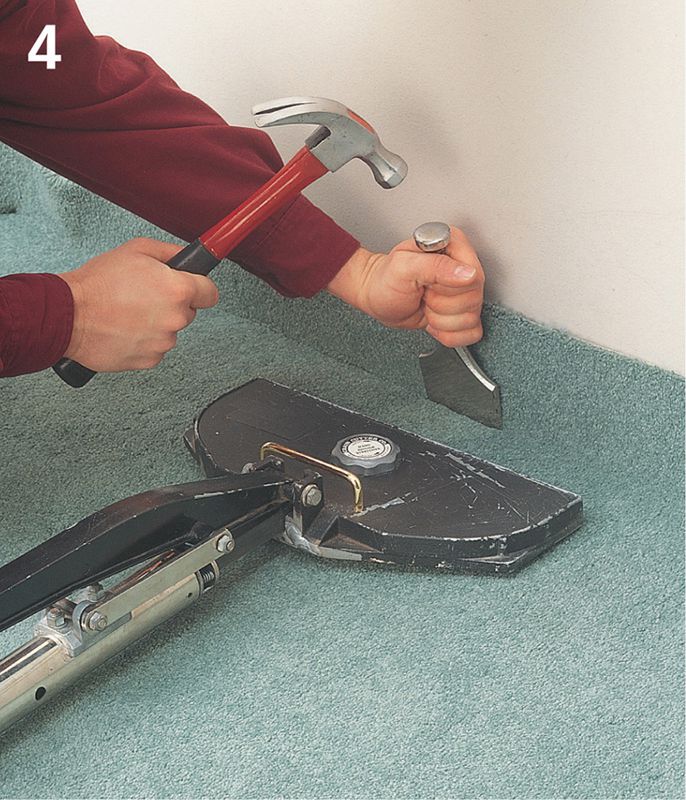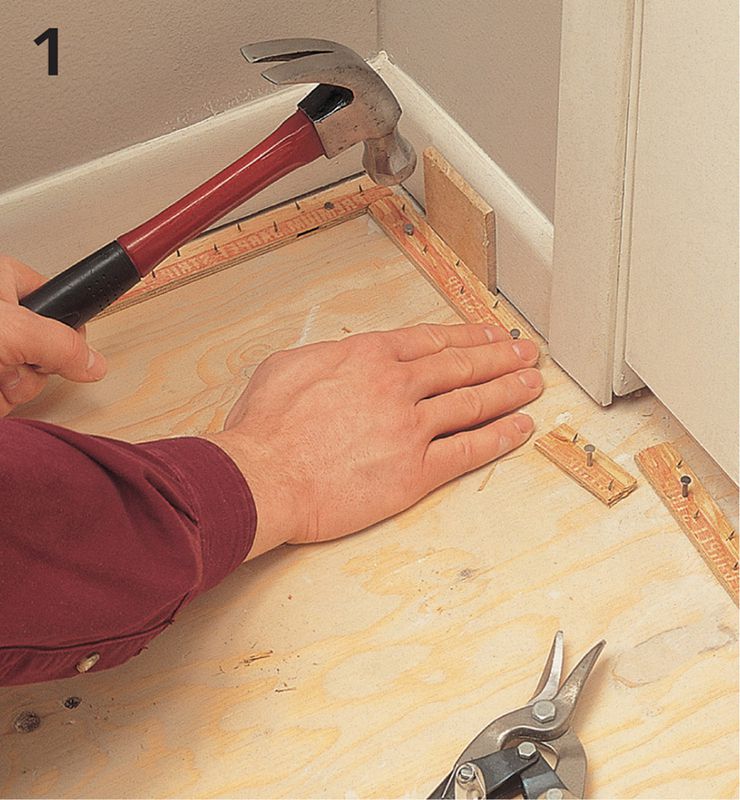
Starting in a corner, nail tackless strips to the floor, keeping a gap between the strips and the walls that’s about 2/3 the thickness of the carpet. Use plywood spacers to maintain the gap. Angled pins on the strip should point toward the wall.

Use aviation snips to cut tackless strips to fit around radiators, door moldings, and other obstacles.
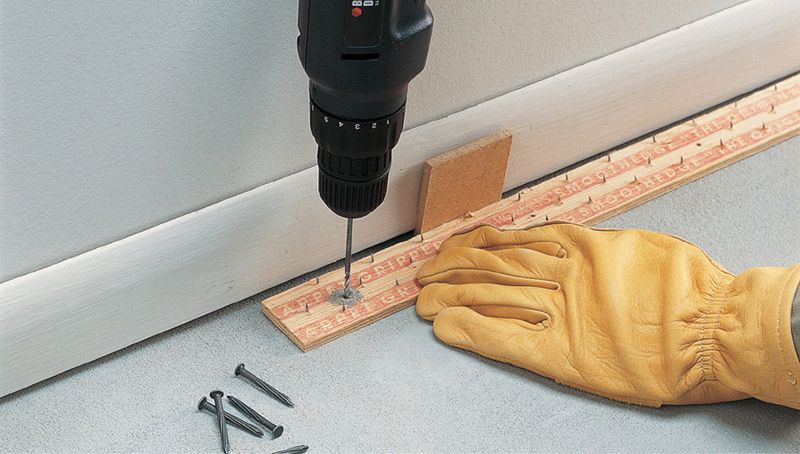
Variation: On concrete, use wider tackless strips. Using a masonry bit, drill pilot holes through the strips and into the floor. Then fasten the strips with 1/2" fluted masonry nails.
 HOW TO INSTALL CARPET PADDING
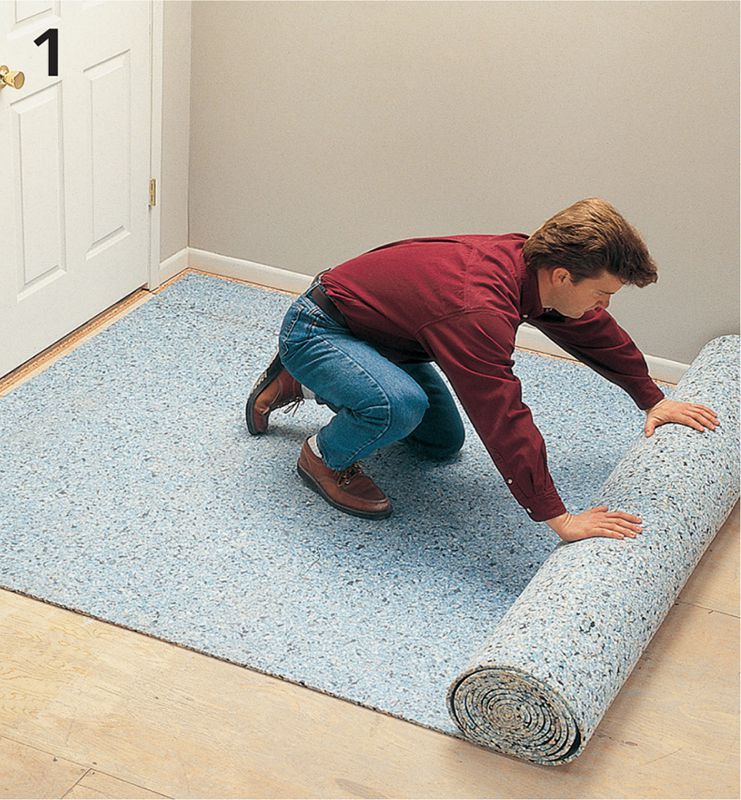
Roll out enough padding to cover the entire floor. Make sure the seams between the padding are tight. If one face of the padding has a slicker surface, keep the slick surface face up, making it easier to slide the carpet over the pad during installation.
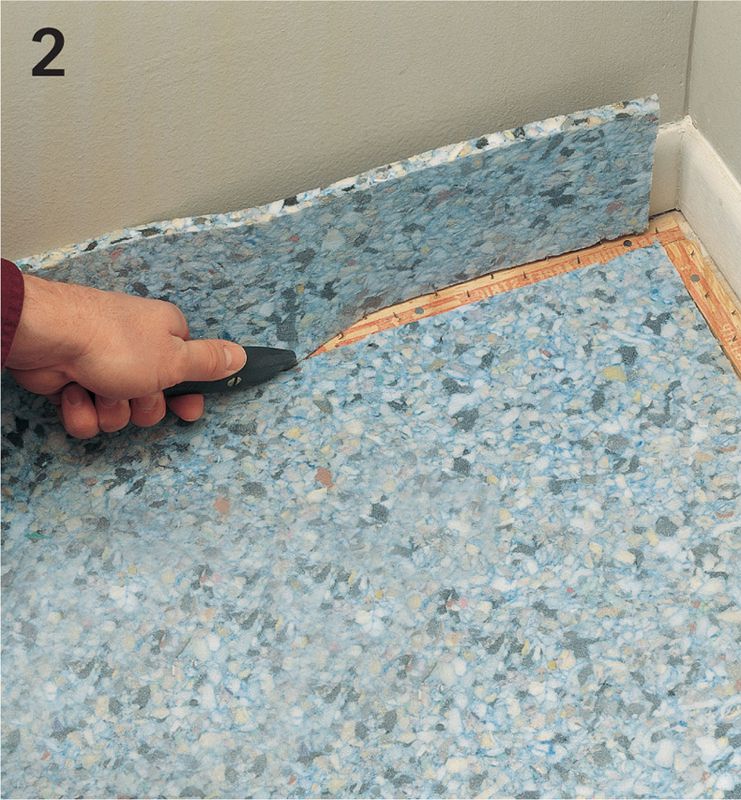
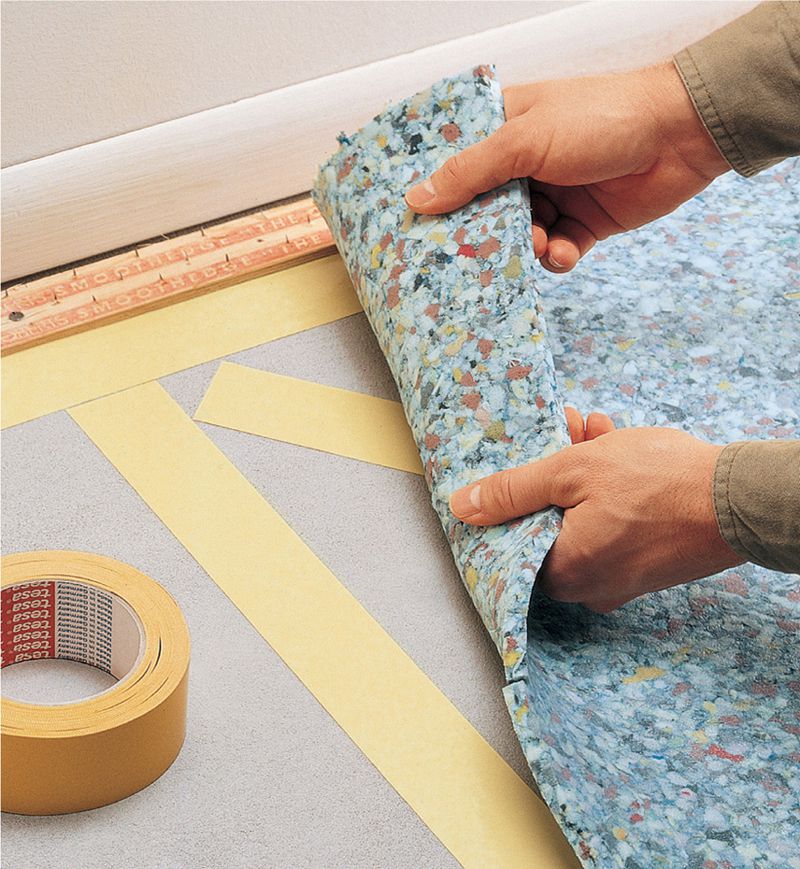
Use a utility knife to cut away excess padding along the edges. The padding should touch, but not overlap, the tackless strips.
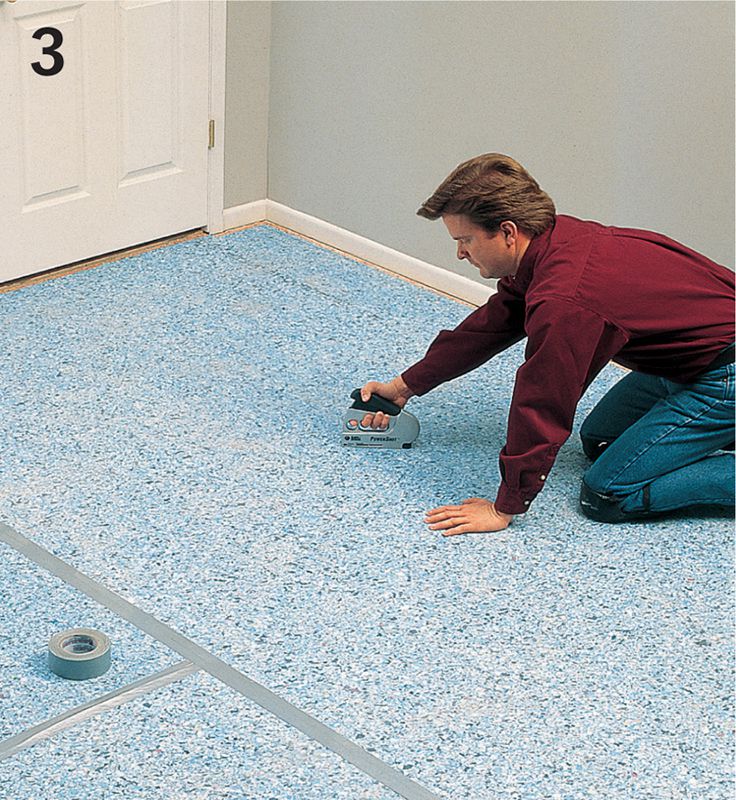
Tape the seams together with duct tape, then staple the padding to the floor every 12".
Variation: To fasten padding to a concrete floor, apply double-sided tape next to the tackless strips, along the seams, and in an “X” pattern across the floor.
HOW TO CUT & SEAM CARPET
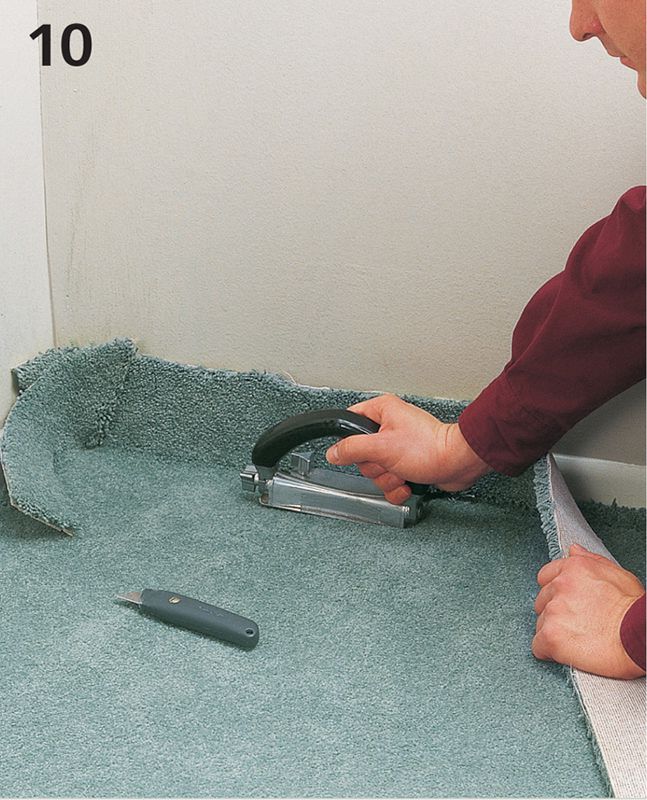
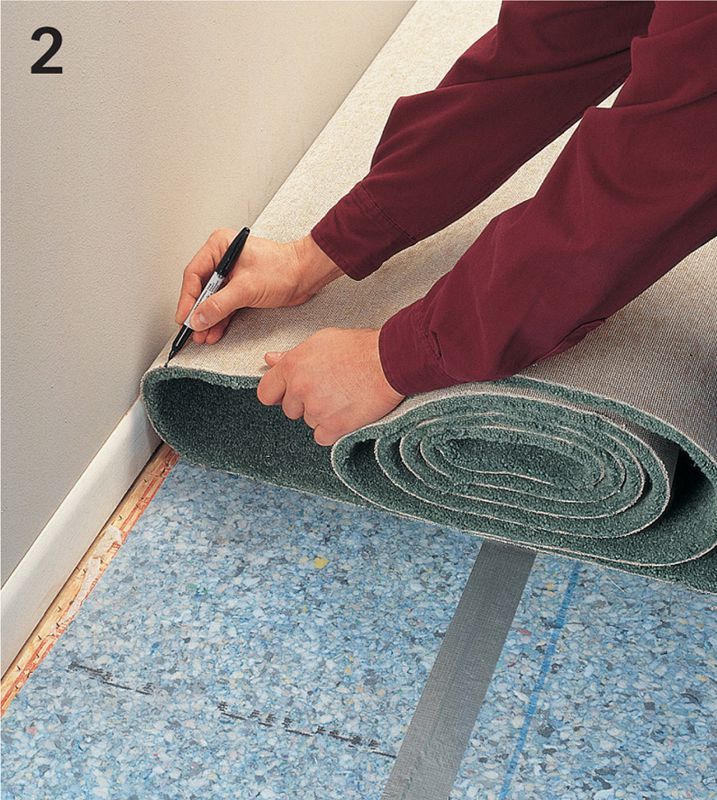
Position the carpet roll against one wall, with its loose end extending up the wall about 6", then roll out the carpet until it reaches the opposite wall.
At the opposite wall, mark the back of the carpet at each edge about 6" beyond the point where the carpet touches the wall. Pull the carpet back away from the wall so the marks are visible.
Variation: When cutting loop-pile carpet, avoid severing the loops by cutting it from the top side using a row-running knife. Fold the carpet back along the cut line to part the pile (left) and make a crease along the part line. Lay the carpet flat and cut along the part in the pile (right). Cut slowly to ensure a smooth, straight cut.
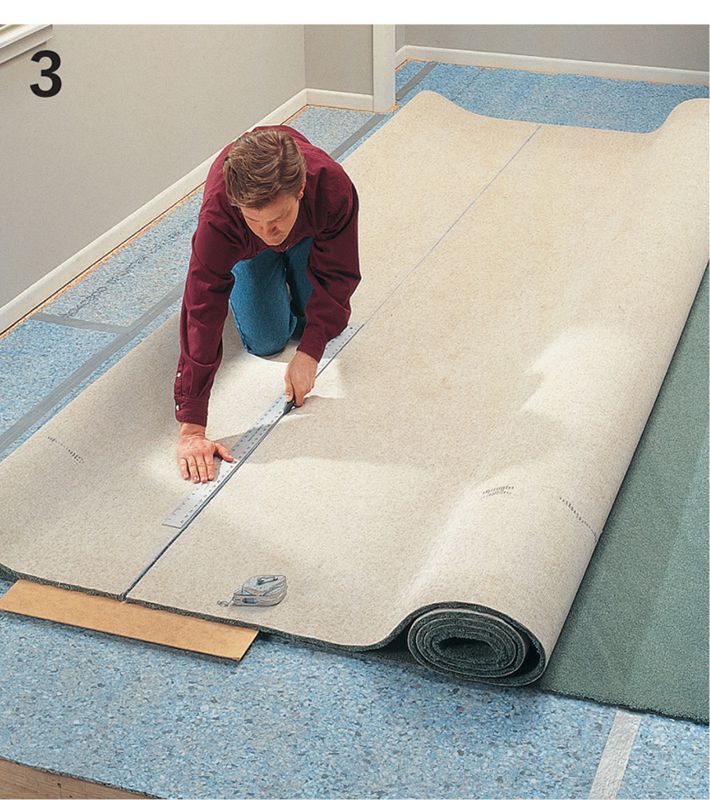
Snap a chalk line across the back of the carpet between the marks. Place a scrap piece of plywood under the cutting area to protect the carpet and padding from the knife blade. Cut along the line using a straightedge and utility knife.
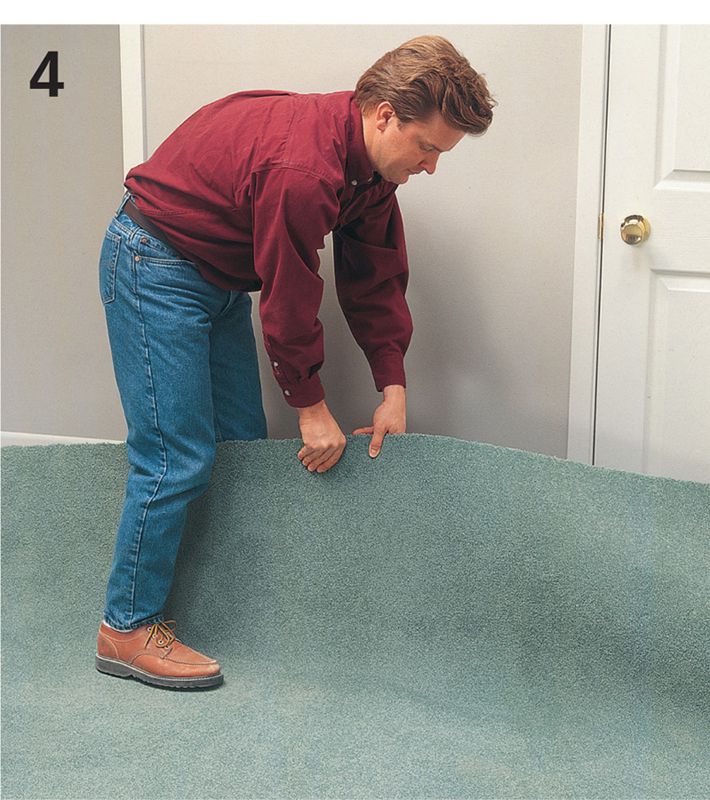
Next to walls, straddle the edge of the carpet and nudge it with your foot until it extends up the wall by about 6" and is parallel to the wall.
At the corners, relieve buckling by slitting the carpet with a utility knife, allowing the carpet to lie somewhat flat. Make sure that corner cuts do not cut into usable carpet.
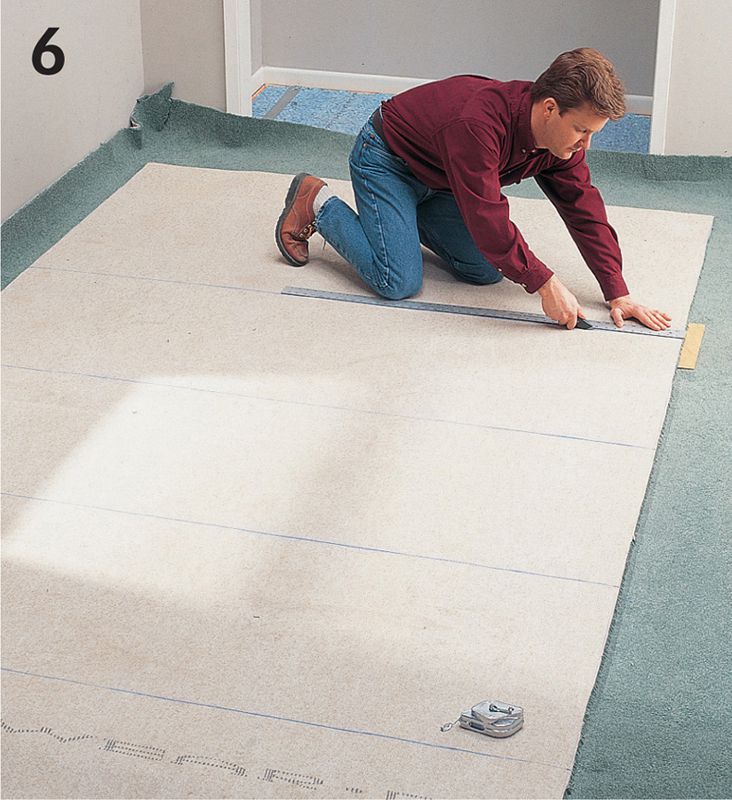
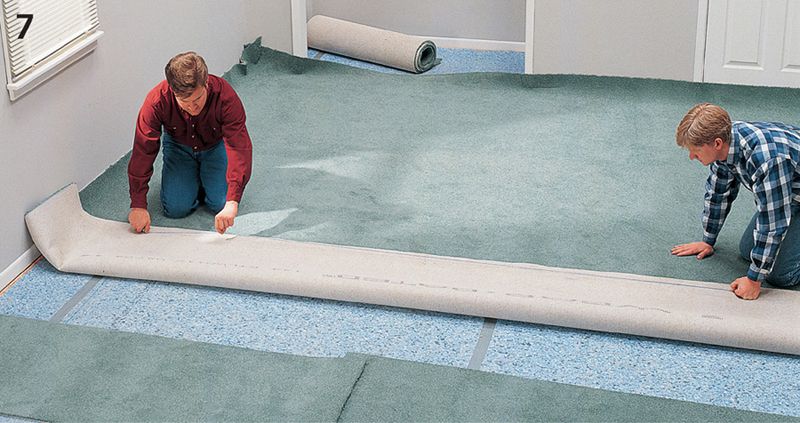
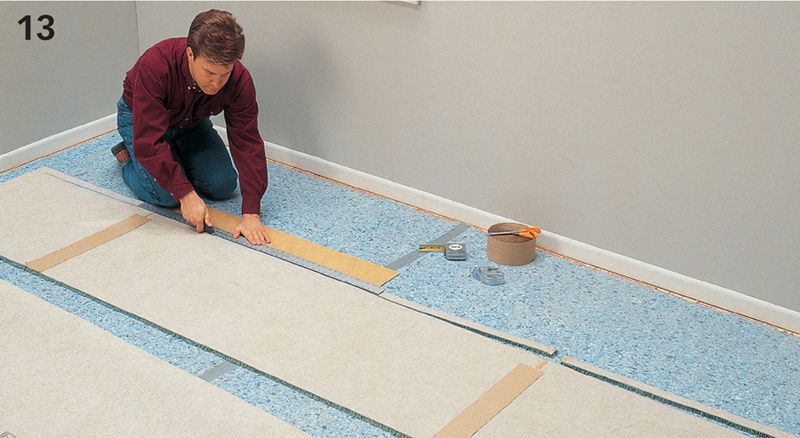
Using your seaming plan as a guide, measure and cut fill-in pieces of carpet to complete the installation. Be sure to include a 6" surplus at each wall and a 3" surplus on each edge that will be seamed to another piece of carpet. Set the cut pieces in place, making sure the pile faces in the same direction on all pieces.
Roll back the large piece of carpet on the side to be seamed, then use a chalk line to snap a straight seam edge about 2" from the factory edge. Keep the ends of the line about 18" from the sides of the carpet where the overlap onto the walls causes the carpet to buckle.
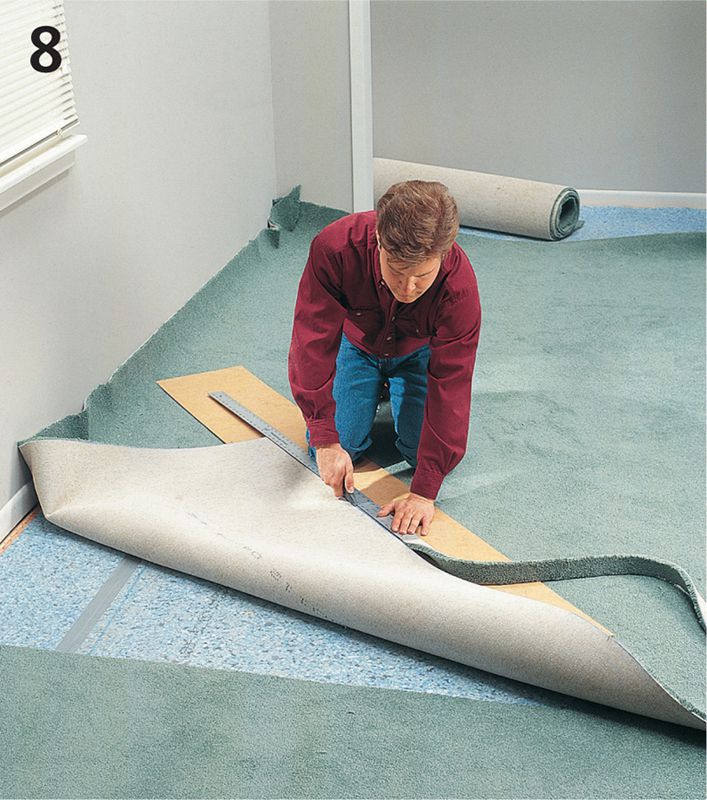
Using a straightedge and utility knife, carefully cut the carpet along the chalk line. To extend the cutting lines to the edges of the carpet, pull the corners back at an angle so they lie flat, then cut the line with the straightedge and utility knife. Place scrap wood under the cutting area to protect the carpet while cutting.
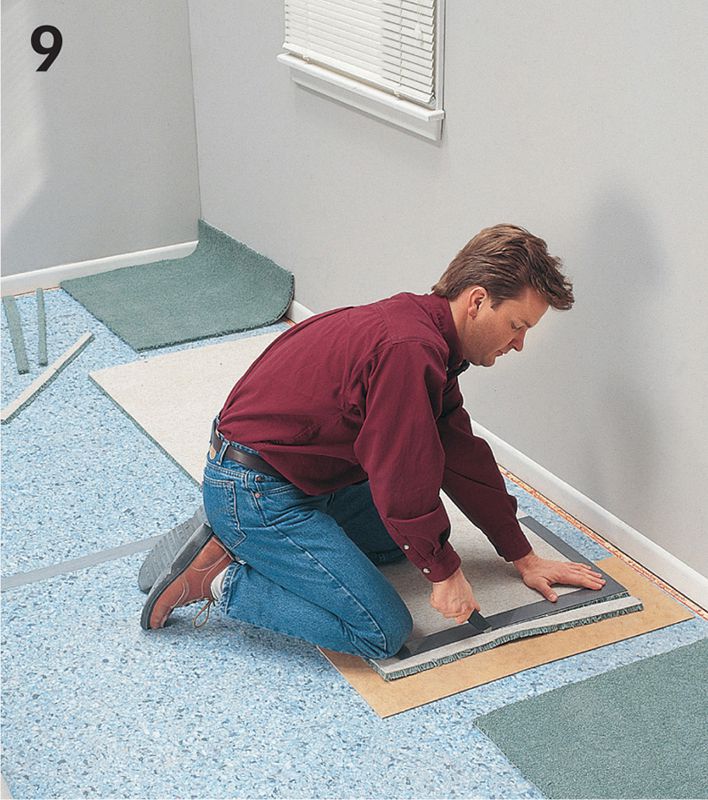
On smaller carpet pieces, cut straight seam edges where the small pieces will be joined to one another. Don’t cut the edges that will be seamed to the large carpet piece until after the small pieces are joined together.
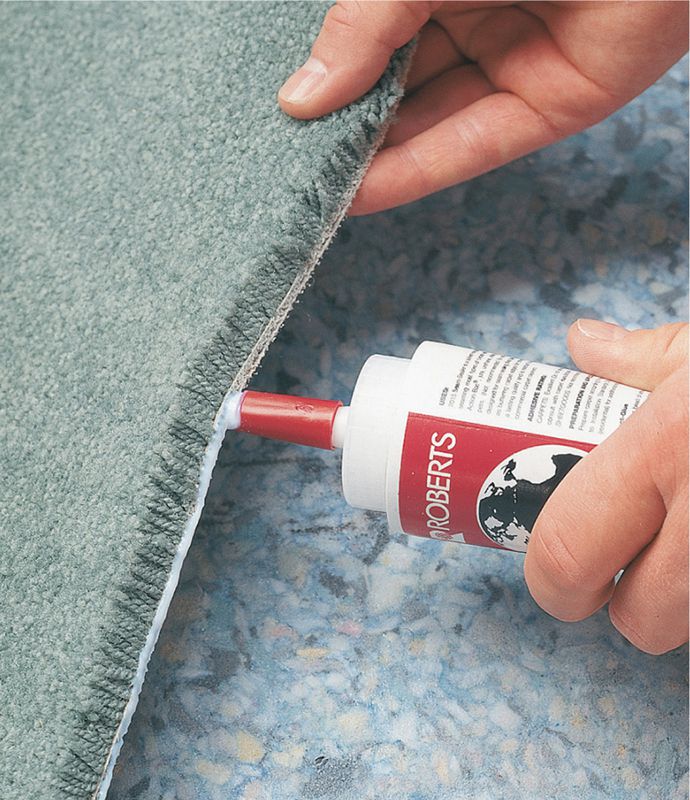
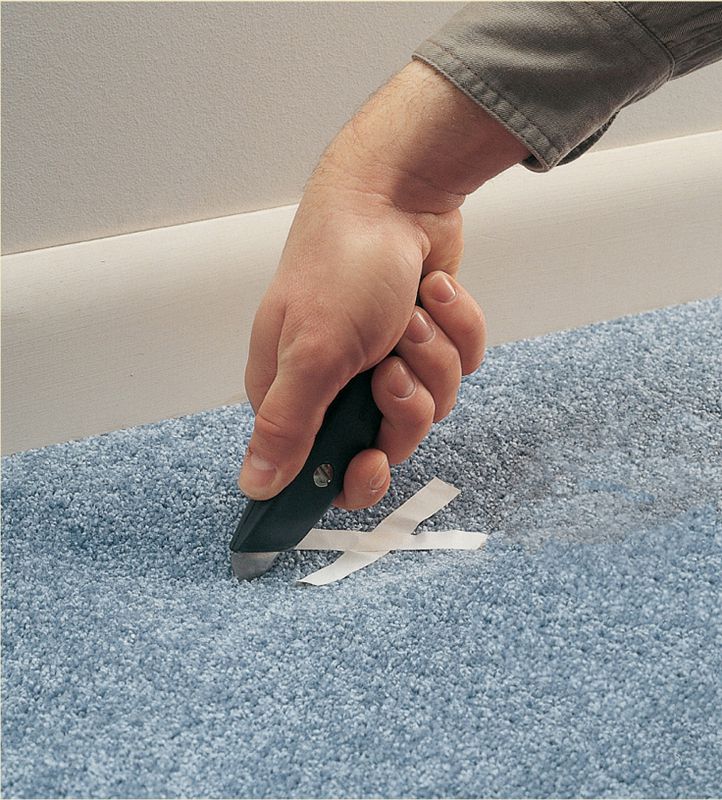
Option: Apply a continuous bead of seam glue along the cut edges of the backing at seams to ensure that the carpet will not fray.
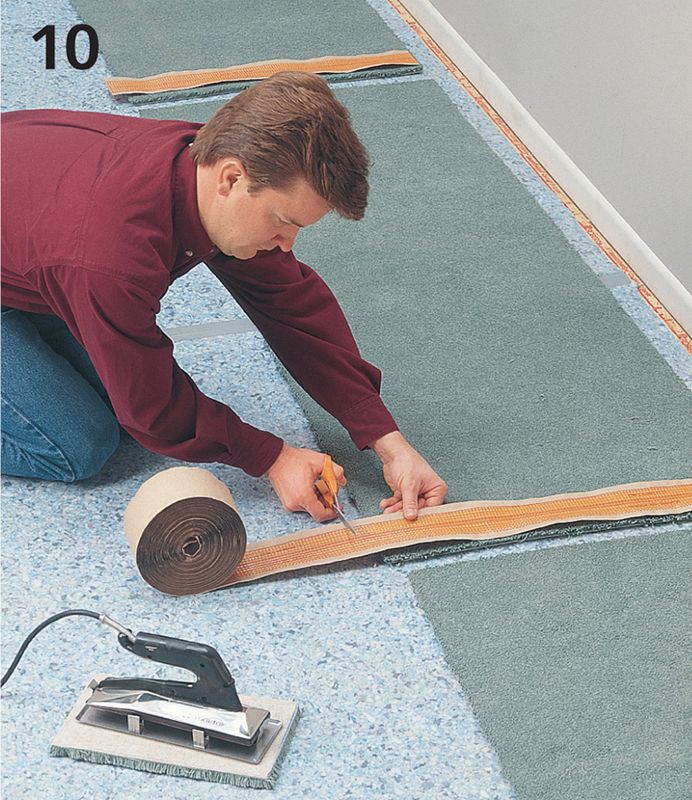
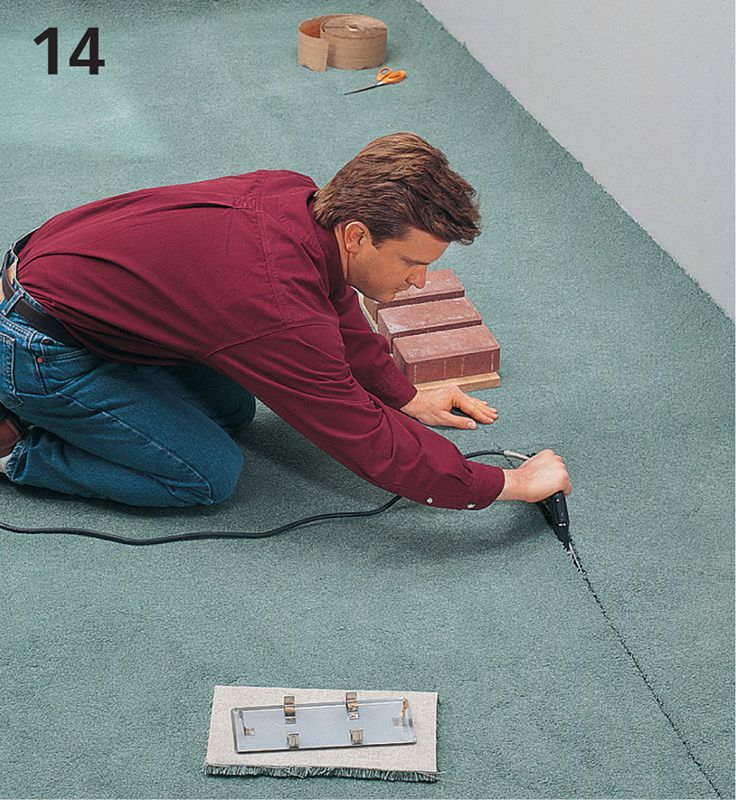
Plug in the seam iron and set it aside to heat up, then measure and cut hot-glue seam tape for all seams. Begin by joining the small fill-in pieces to form one large piece. Center the tape under the seam with the adhesive side facing up.
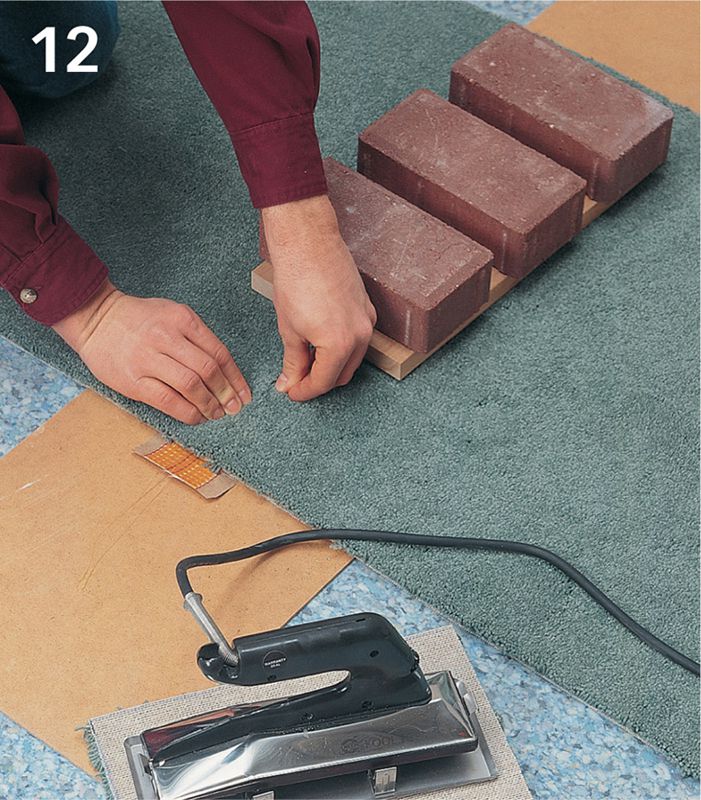
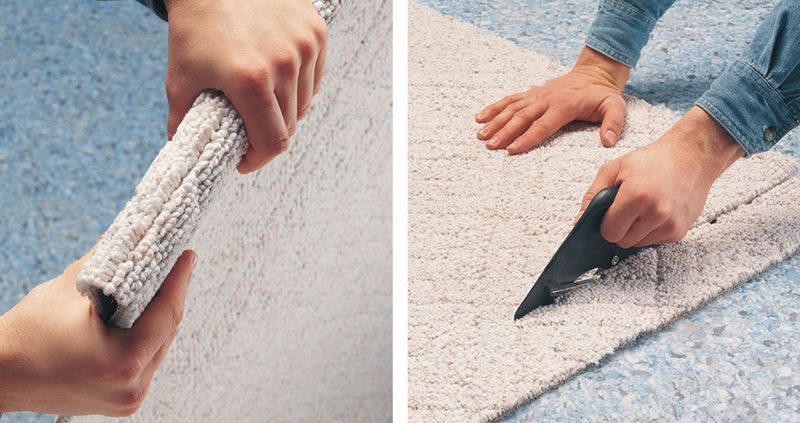
Set the iron under the carpet at one end of the tape until the adhesive liquifies, usually about 30 seconds. Working in 12" sections, slowly move the iron along the tape, letting the carpet fall onto the hot adhesive behind it. Set weights at the end of the seam to hold the pieces in place.
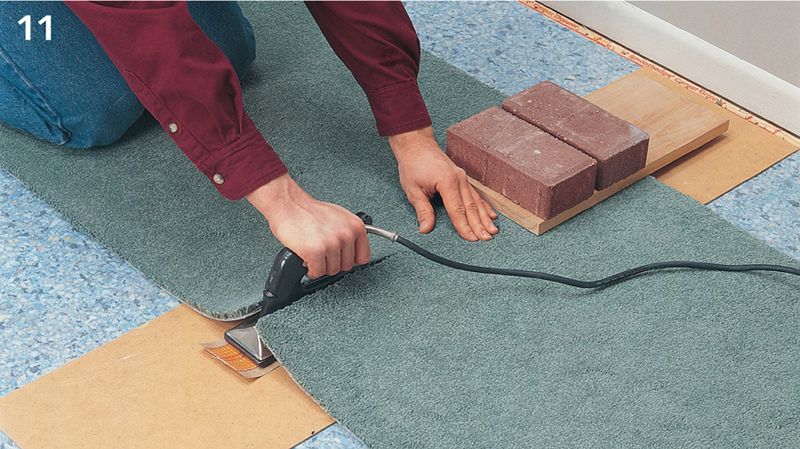
Press the edges of the carpet together into the melted adhesive behind the iron. Separate the pile with your fingers to make sure no fibers are stuck in the glue and the seam is tight, then place a weighted board over the seam to keep it flat while the glue sets.
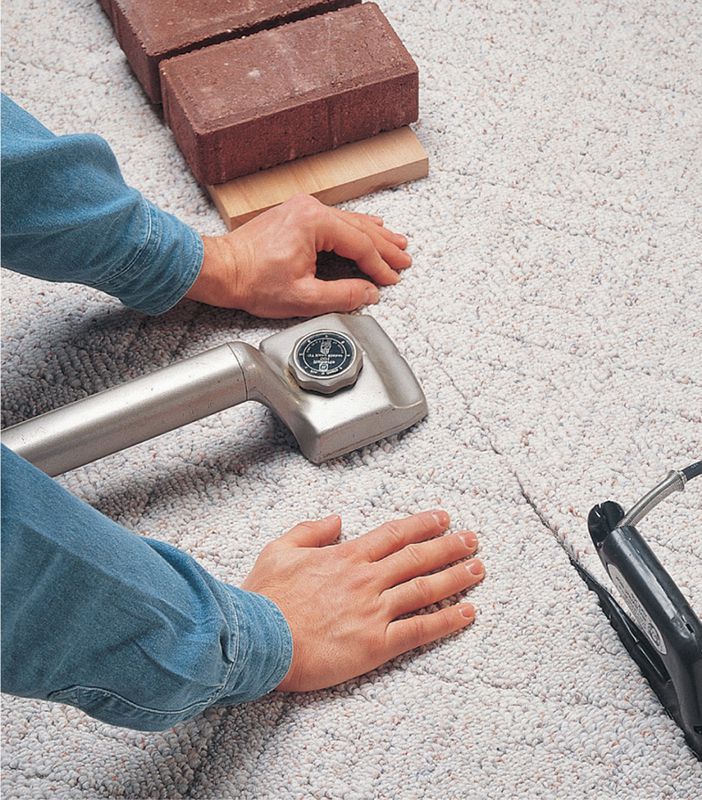
Variation: To close any gaps in loop-pile carpet seams, use a knee kicker to gently push the seam edges together while the adhesive is still hot.
Continue seaming the fill-in pieces together. When the tape’s adhesive has cooled, turn the seamed piece over and cut a fresh seam edge as done in steps 7 and 8. Reheat and remove about 1/2" of tape from the end of each seam to keep it from overlapping the tape on the large piece.
Use hot-glue seam tape to join the seamed pieces to the large piece of carpet, repeating steps 10 through 12.
If you’re laying carpet in a closet, cut a fill-in piece and join it to the main carpet with hot-glue seam tape.

At radiators, pipes, and other obstructions, cut slits in the carpet with a utility knife. Cut long slits from the edge of the carpet to the obstruction, then cut short cross-slits where the carpet will fit around the obstruction.
Partition Walls 
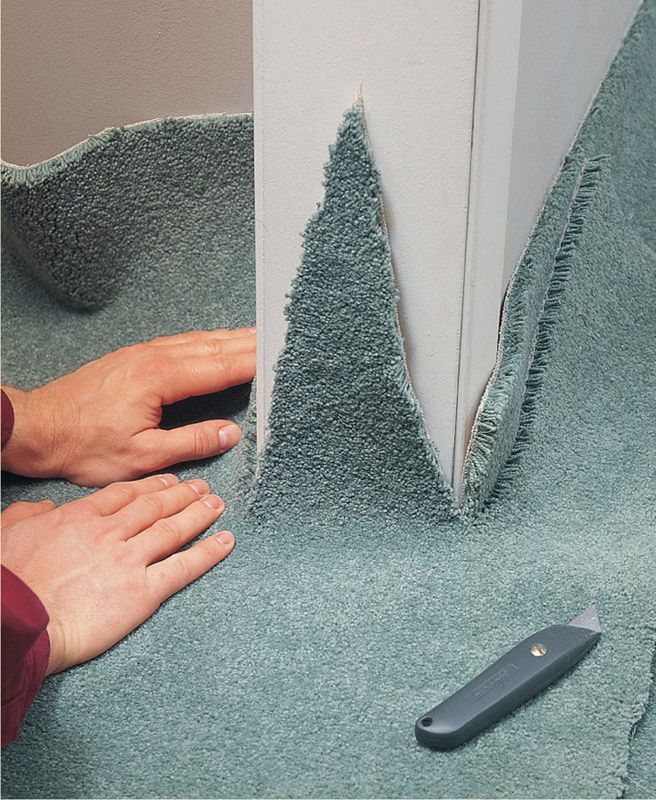
To fit carpet around partition walls where the edges of the wall or door jamb meet the floor, make diagonal cuts from the edge of the carpet at the center of the wall to the points where the edges of the wall meet the floor.
HOW TO STRETCH & SECURE CARPET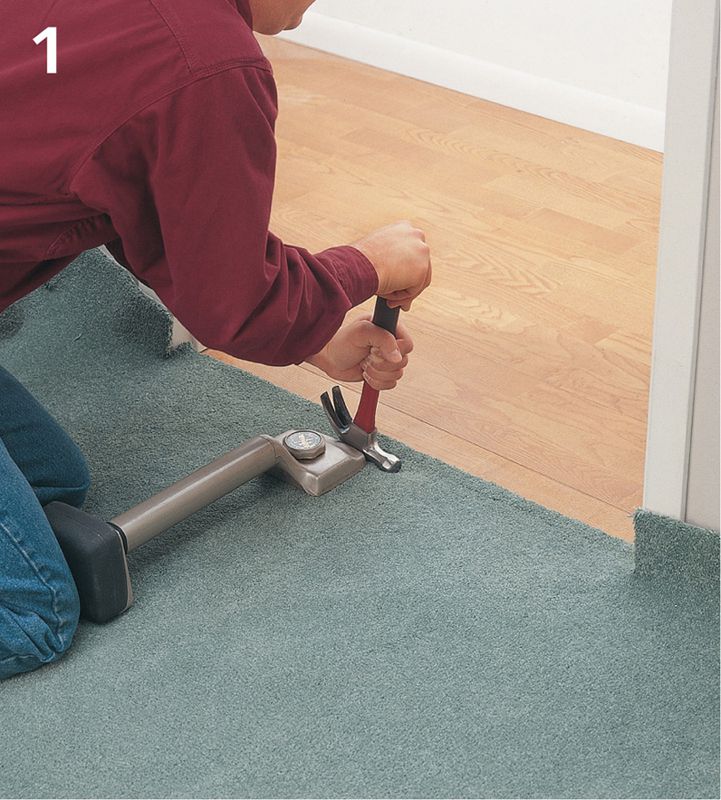
Before stretching the seamed carpet, read through this entire section and create a stretching sequence similar to the one shown here. Start by fastening the carpet at a doorway threshold using carpet transitions (see pages 50 to 51).
If the doorway is close to a corner, use the knee kicker to secure the carpet to the tackless strips between the door and the corner. Also secure a few feet of carpet along the adjacent wall, working toward the corner.
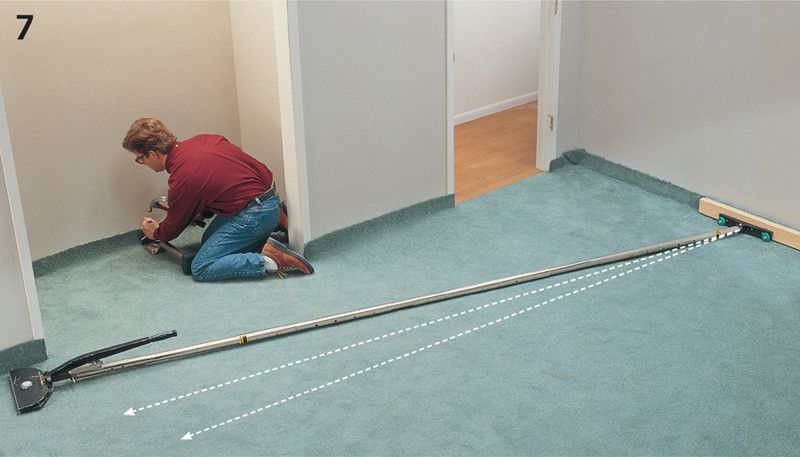
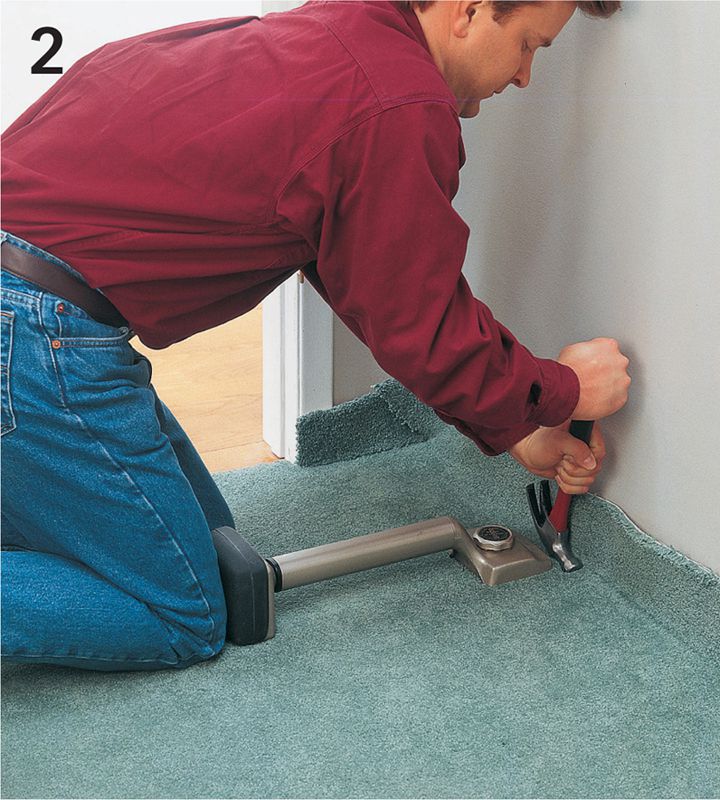
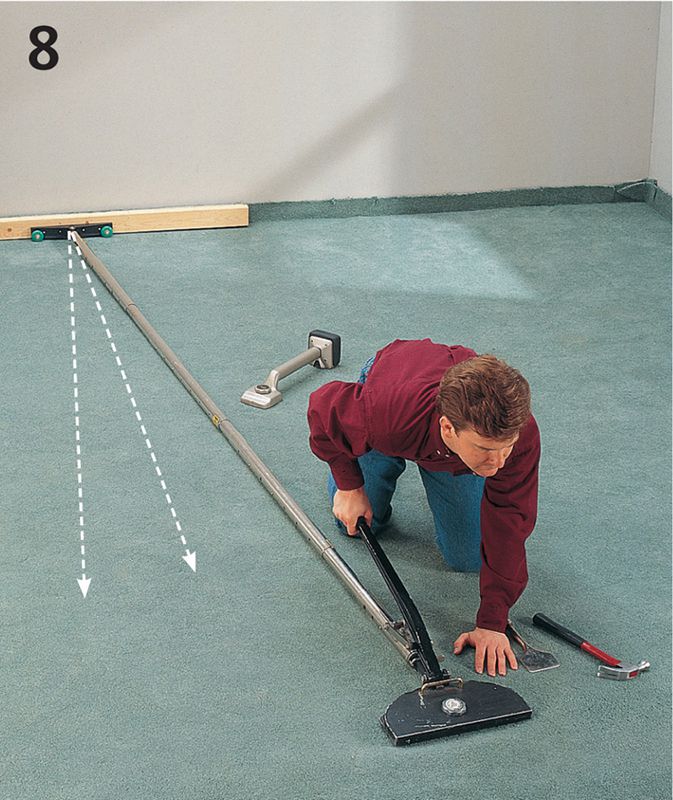
Use a power stretcher to stretch the carpet toward the wall opposite the door. Brace the tail with a length of 2 × 4 placed across the doorway. Leaving the tail in place and moving only the stretcher head, continue stretching and securing the carpet along the wall, working toward the nearest corner in 12 to 24" increments.
With the power stretcher still extended from the doorway to the opposite side of the room, knee-kick the carpet onto the tackless strips along the closest wall, starting near the corner closest to the stretcher tail. Disengage and move the stretcher only if it’s in the way.
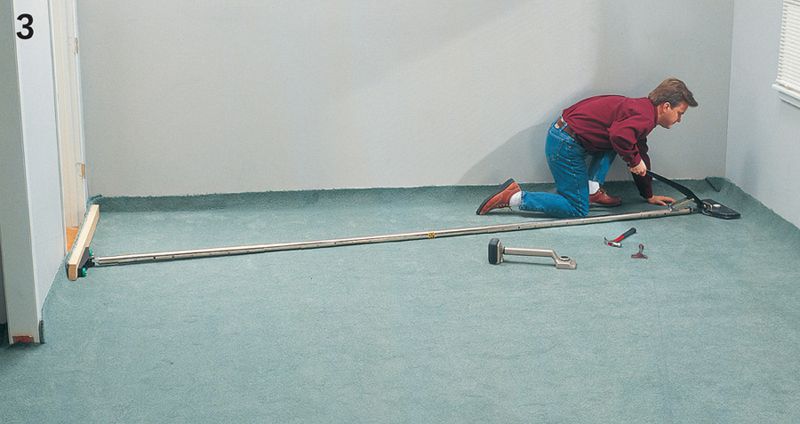
Reposition the stretcher so its tail is against the center of the wall you just secured. Stretch and secure the carpet along the opposite wall, working from the center toward a corner. If there’s a closet in an adjacent wall, work toward that wall, not the closet.
Use the knee kicker to stretch and secure the carpet inside the closet (if necessary). Stretch and fasten the carpet against the back wall first, then do the side walls. After the carpet in the closet is stretched and secured, use the knee kicker to secure the carpet along the walls next to the closet. Disengage the power stretcher only if it’s in the way.
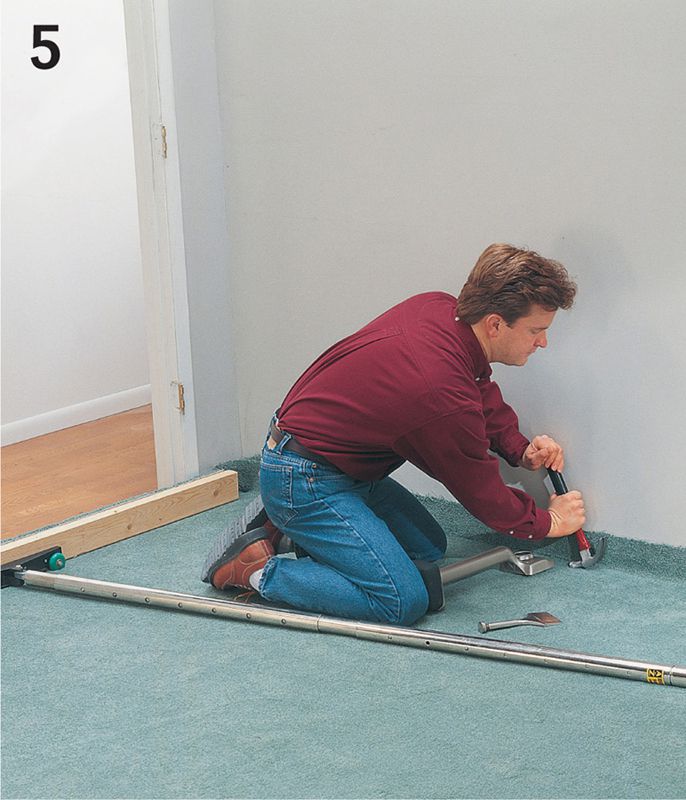
Return the head of the power stretcher to the center of the wall. Finish securing carpet along this wall, working toward the other corner of the room.
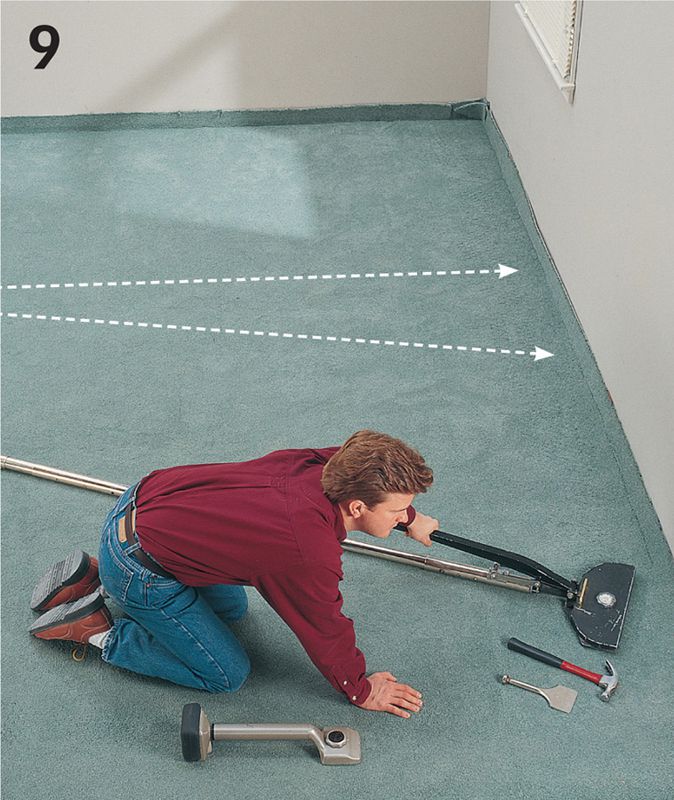
Reposition the stretcher to secure the carpet along the last wall of the room, working from the center toward the corners. The tail block should be braced against the opposite wall.
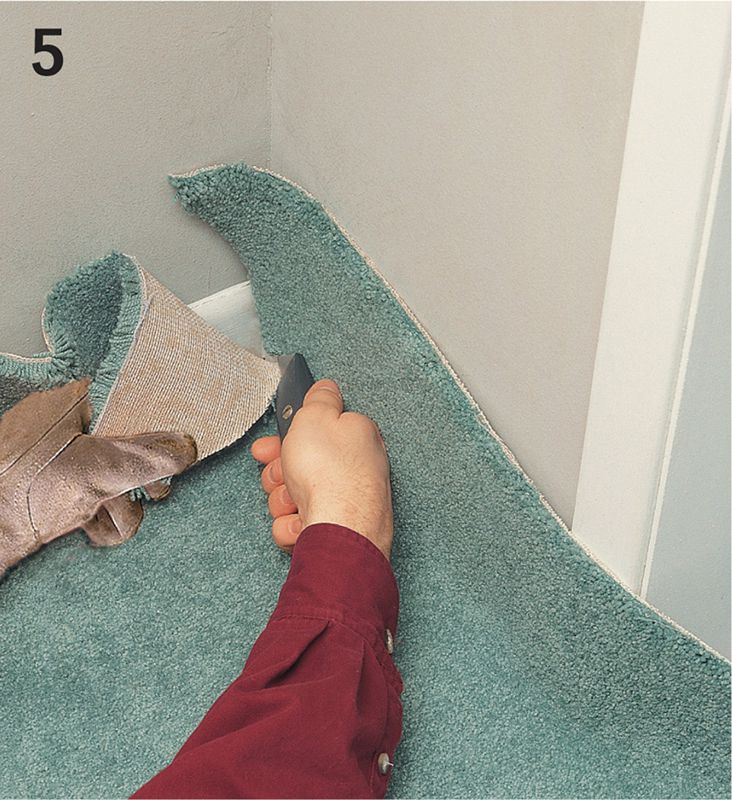
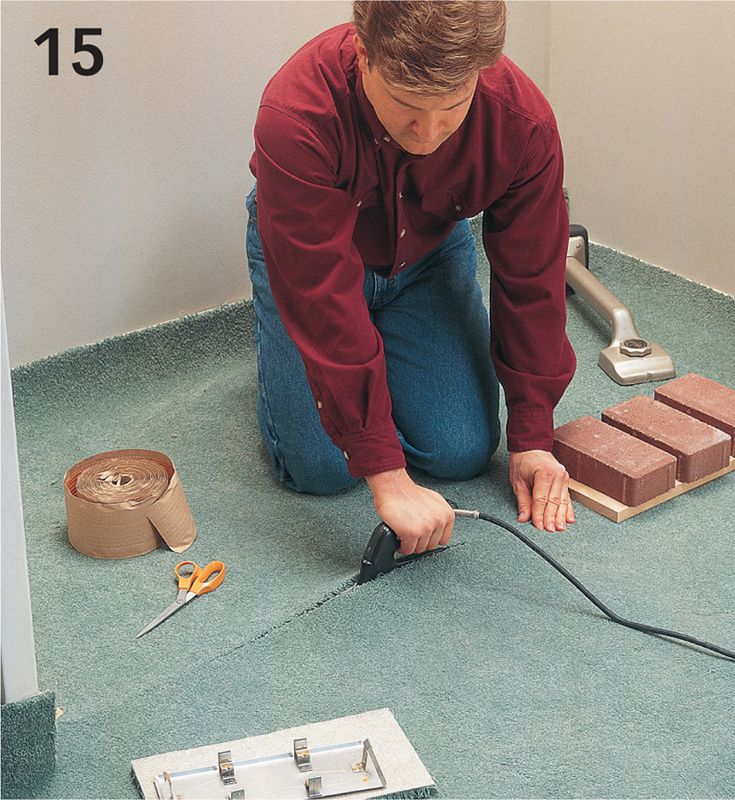
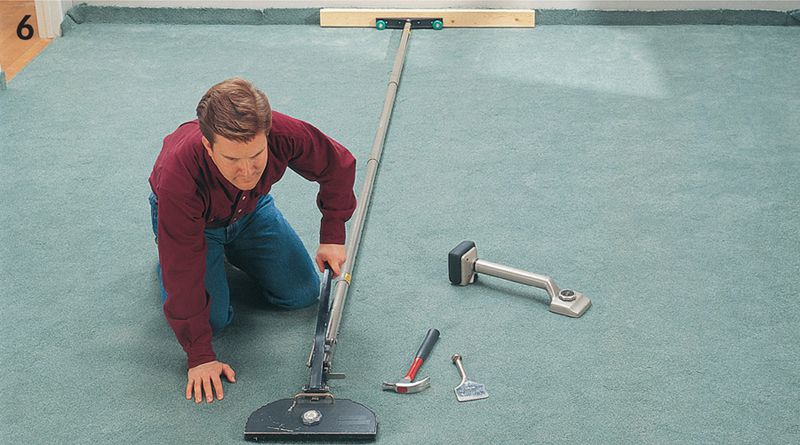
Use a carpet edge trimmer to trim surplus carpet away from the walls. At corners, use a utility knife to finish the cuts.
Making Cutouts
Locate any floor vents under the stretched carpet, then use a utility knife to cut away the carpet, starting at the center. It’s important that this be done only after the stretching is complete.
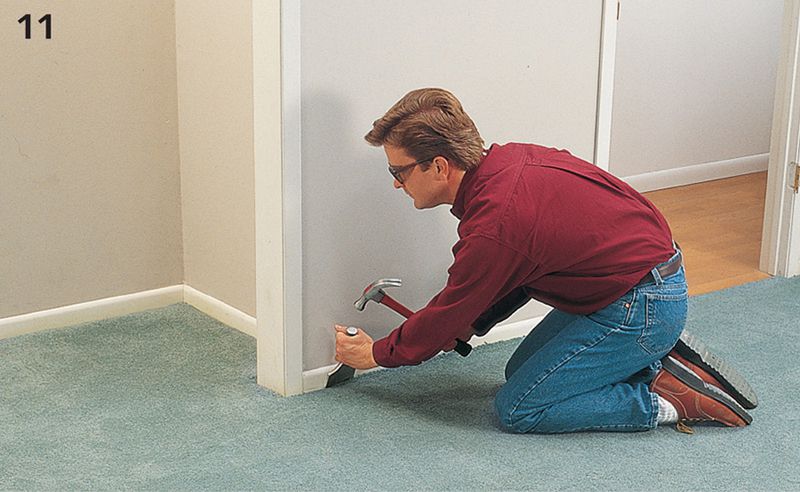
Tuck the trimmed edges of the carpet neatly into the gaps between the tackless strips and the walls using a stair tool and hammer.