WALLS & CEILINGS
CEILING TILE: ACOUSTIC
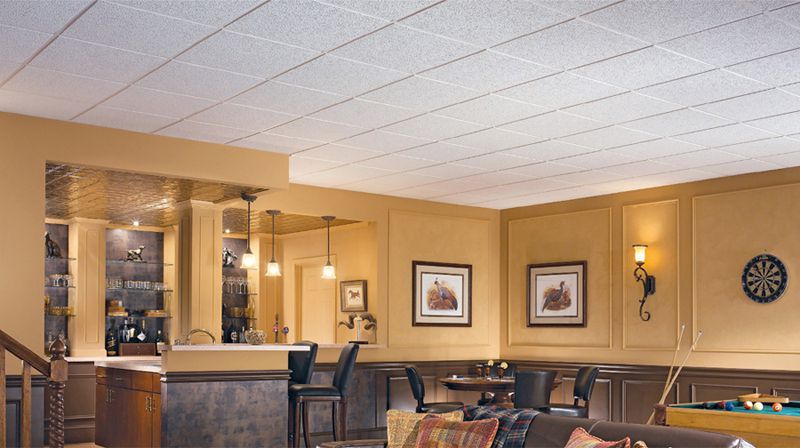
Easy-to-install ceiling tile can lend character to a plain ceiling or help turn an unfinished basement or attic into beautiful living space. Made of pressed mineral and fiberboard, ceiling tiles are available in a variety of styles. They also provide moderate noise reduction.
Ceiling tiles typically can be attached directly to a drywall or plaster ceiling with adhesive. If your ceiling is damaged or uneven, or if you have an unfinished joist ceiling, install 1 × 2 furring strips as a base for the tiles, as shown in this project. Some systems include metal tracks for clip-on installation.
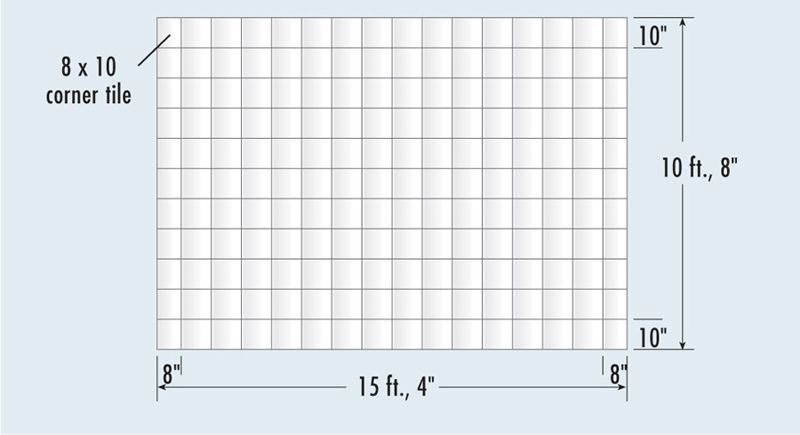
Unless your ceiling measures in even feet, you won’t be able to install the 12-inch tiles without some cutting. To prevent an unattractive installation with small, irregular tiles along two sides, include a course of border tiles along the perimeter of the installation. Plan so that tiles at opposite ends of the room are cut to the same width and are at least half the width of a full tile.
Most ceiling tile comes prefinished, but it can be painted to match any decor. For best results, apply two coats of paint using a roller with a 1/4-inch nap, and wait 24 hours between coats.
Measure the ceiling and devise a layout. If the length (or width) doesn’t measure in even feet, use this formula to determine the width of the border tiles: add 12 to the number of inches remaining and divide by 2. The result is the width of the border tile. (For example, if the room length is 15 ft., 4", add 12 to the 4, then divide 16 by 2, which results in an 8" border tile.)
Acoustic tiles are attached to wood strips on the ceiling rather than suspended. They do not lower the ceiling height as much as a suspended ceiling, but they are also harder to remove for joist cavity access.
 HOW TO INSTALL AN ACOUSTIC TILE CEILING
Install the first furring strip flush with the wall and perpendicular to the joists, fastening with two 8d nails or 2" screws at each joist. Measure out from the wall a distance equal to the border tile width minus 3/4" and snap a chalk line. Install the second furring strip with its wall-side edge on the chalk line.
Install the remaining strips 12" on-center from the second strip. Measure from the second strip and mark the joist nearest the wall every 12". Repeat along the joist on the opposite side of the room, then snap chalk lines between the marks. Install the furring strips along the lines. Install the last furring strip flush against the opposite side wall.
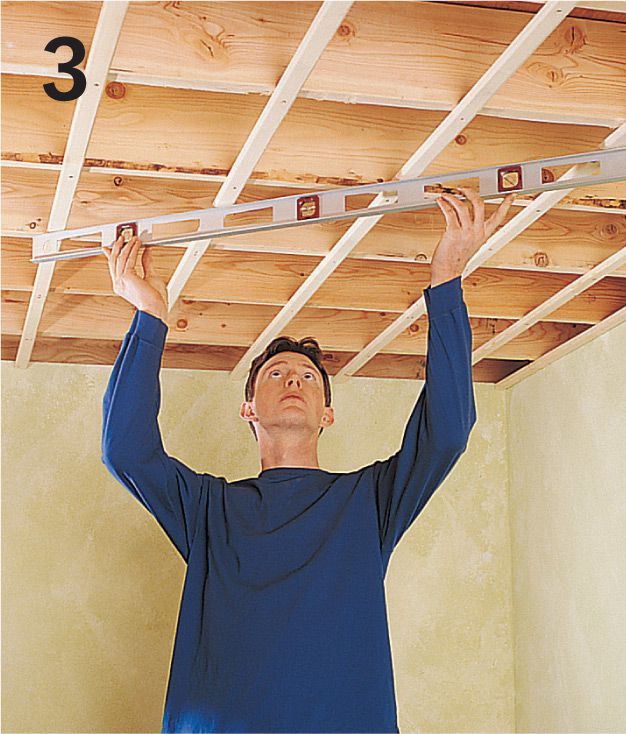
Check the strips with a 4-ft. level. Insert wood shims between the strips and joists as necessary to bring the strips into a level plane.
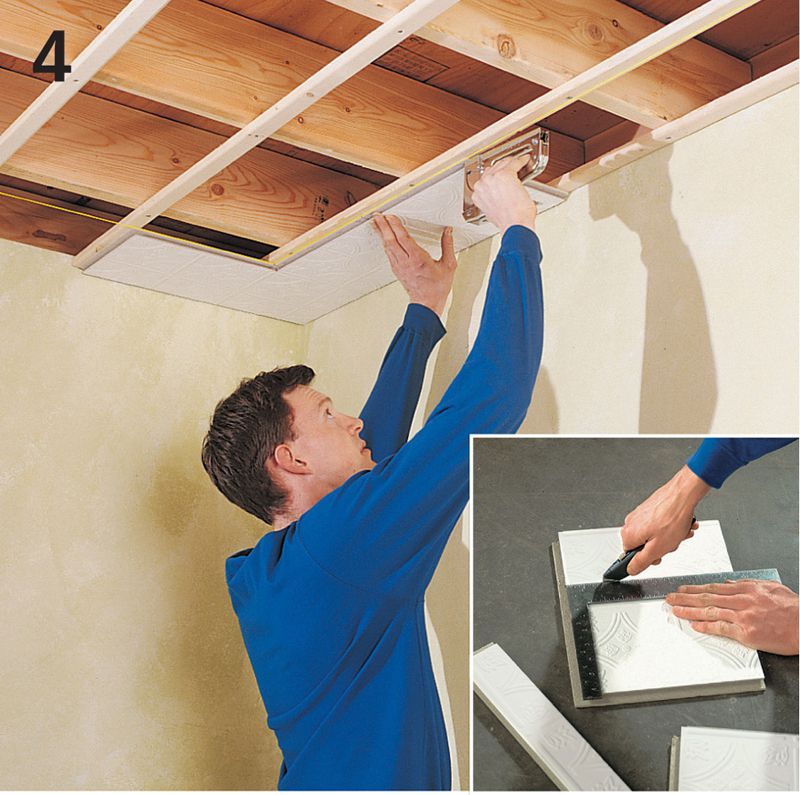
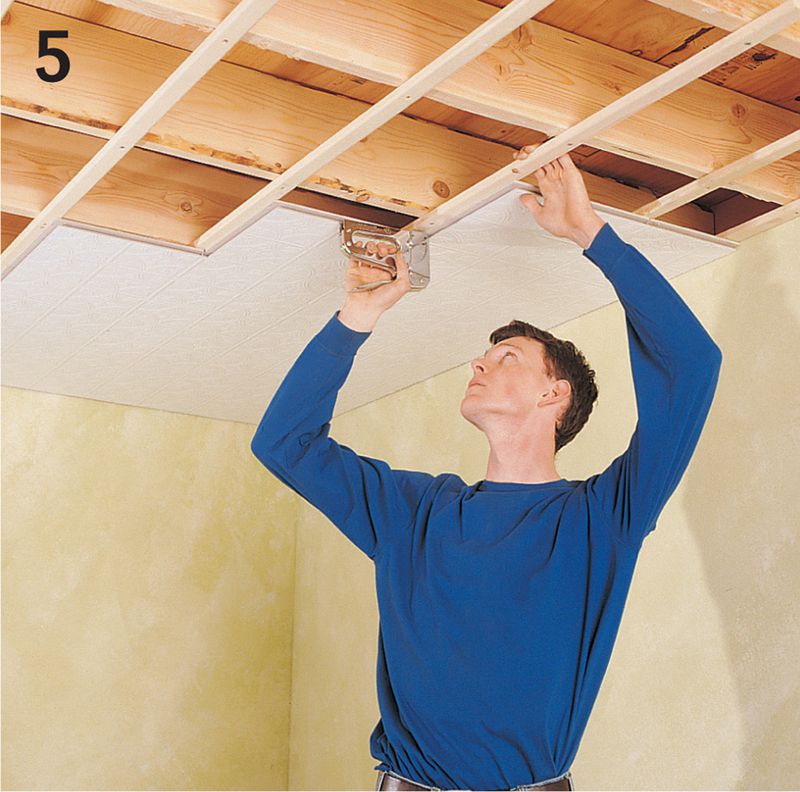
Cut border tiles with a utility knife to fit (inset). Position the corner tile with the flange edges aligned with the two string lines and fasten it to the furring strips with four 1/2" staples. Cut and install two border tiles along each wall, making sure the tiles fit snugly together.
Fill in between the border tiles with full-size tiles. Continue working diagonally in this manner toward the opposite corner. For the border tiles along the far wall, trim off the flange edges and staple through the faces of the tiles close to the wall.