Tools & Materials 
Handsaw
Hammer
Caulk gun
Prehung exterior door
Brickmold
Shims
Exterior-grade silicone caulk
Galvanized casing nails
Self-adhesive flashing tape
Protective equipment
Anew entry door will provide you with a fine opportunity to dress up the house. Your choice of exterior door design should be driven by the style of other exterior doors on the house. In addition to the number of panels or other design elements, you’ll need to determine whether you want an “inswing” or “outswing” door, and what “hand” it should be. This is a matter of space and precedent. Most exterior doors swing in, but if your space is small and cluttered, you may want to opt for an outswing door. The “hand” of the door is simply the location of the handle on the side the door swings toward. For example, a left handed inswing door will have the handle on the left side as you face it from inside the space. The hand of the door should be determined by practicality; if there is a perpendicular wall right next to the door, the door should open on the side away from the wall so that visitors don’t feel crowded upon entering.
If you are adding a door at the rear of the house, it may contain an entry door that is less of a design statement than simply a serviceable way to get in and out. The following service door installation includes a fairly plain steel door leading to a workshop addition. If you are installing a fancier front door, the techniques are fundamentally the same.
Tools & Materials
Handsaw
Hammer
Caulk gun
Prehung exterior door
Brickmold
Shims
Exterior-grade silicone caulk
Galvanized casing nails
Self-adhesive flashing tape
Protective equipment
 HOW TO INSTALL A PREHUNG ENTRY DOOR
Flash the bottom and sides. Apply two strips of self-adhesive flashing tape to cover the jack studs in the door’s rough opening. Cut a slit in the tape and extend the outer ear 4 to 6" past the bottom edge of the header. Fold the tape over the housewrap to create a 3" overlap. Peel off the backing and press the tape firmly in place.
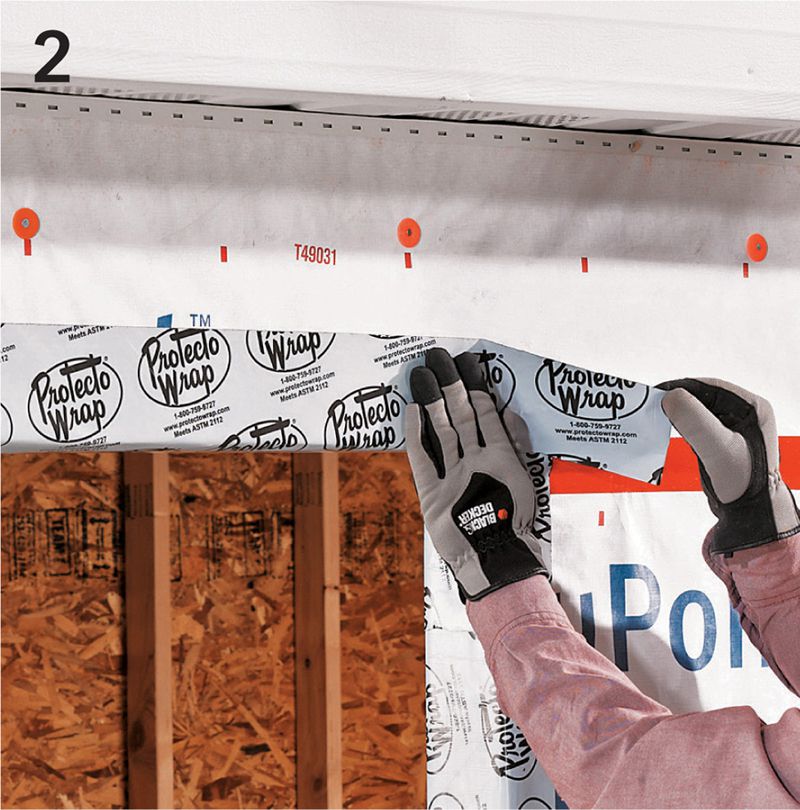
Flash the header. Cover the header with a third piece of self-adhesive flashing tape, extending the ends of the tape 6" beyond the side flashing. Fold the extra tape over the housewrap to form a 3" overlap.
Seal the opening. Apply a 1/2"-wide bead of caulk up the outside edges of the jack stud area and around the header to seal the brickmold casing.
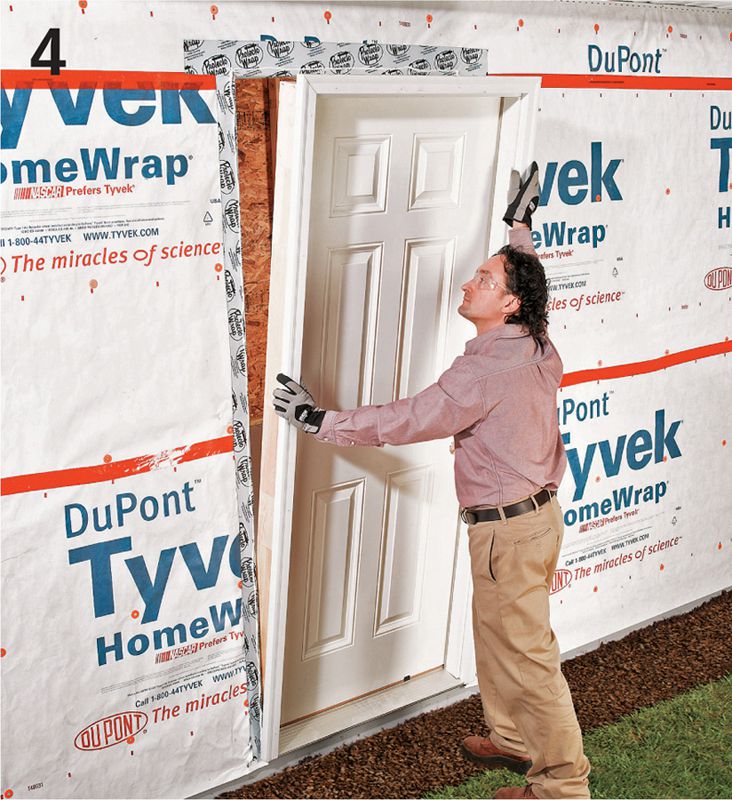
Position the door in the opening. Set the bottoms of the side jambs inside the rough opening, and tip the door into place. Adjust the door so it’s level, plumb, and centered in the opening.
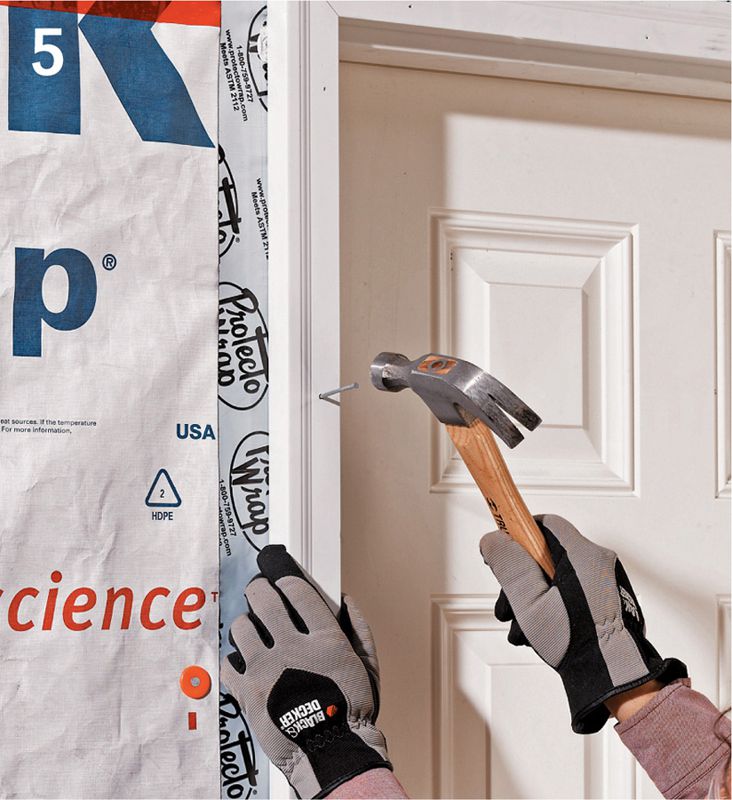
Attach the door. Drive 2 1/2" galvanized casing nails through the brickmold to fasten the door to the jack studs and header. Space the nails every 12".
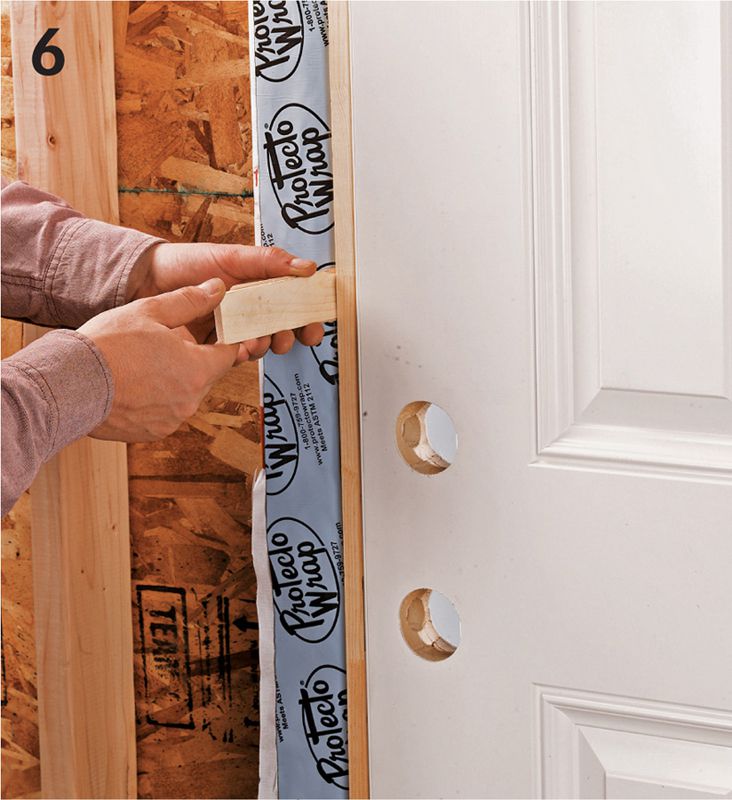
Shim at the dead bolt and behind the hinges. Insert pairs of shims with the door closed, adjusting the shims in or out until there’s a consistent 1/8" gap between the door and the jamb. If your door came with them, insert one long screw at each hinge into the framing. Then fill the gap with non-expanding foam.
