WINDOWS & DOORS
DOORS: POCKET
Pocket doors are a space-saving alternative to traditional hinged interior doors. Swinging doors can monopolize up to 16 square feet of floor space in a room, which is why pocket doors are a perfect choice for tight spaces, like small bathrooms. Installed in pairs, pocket doors can divide large rooms into more intimate spaces and can still be opened to use the entire area.
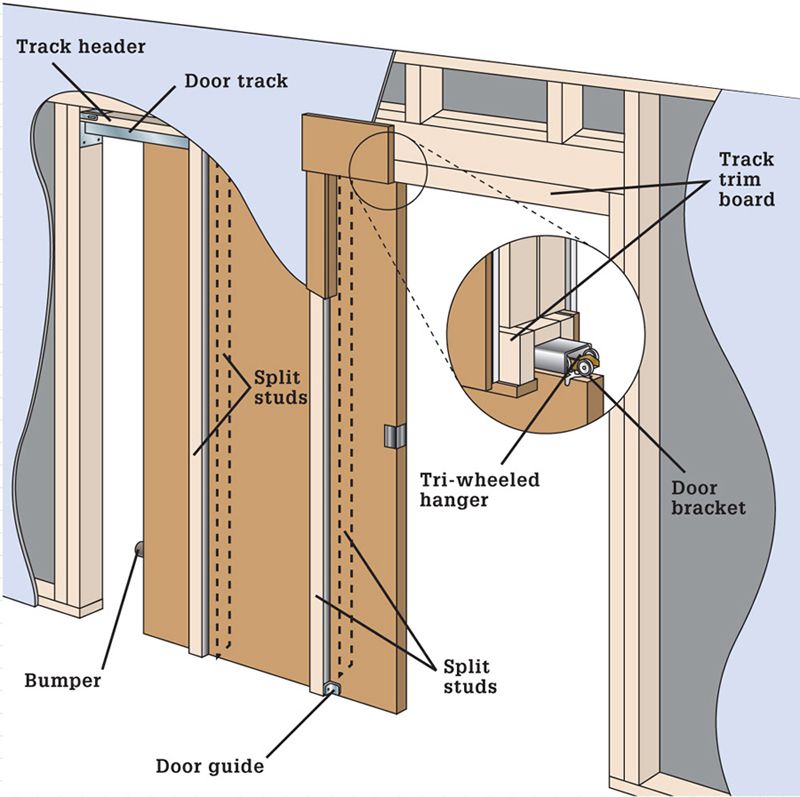
Pocket door hardware kits generally are universal and can be adapted for almost any interior door. In this project, the frame kit includes an adjustable track, steel-clad split studs, and all the required hanging hardware. The latch hardware, jambs, and the door itself are all sold separately. Pocket door frames can also be purchased as preassembled units that can be easily installed into a rough opening.
Framing and installing a pocket door is not difficult in new construction or a major remodel. But retrofitting a pocket door in place of a standard door or installing one in a wall without an existing door, is a major project that involves removing the wall material, framing the new opening, installing and hanging the door, and refinishing the wall. Hidden utilities, such as wiring, plumbing, and heating ducts, must be rerouted if encountered.
The rough opening for a pocket door is at least twice the width of a standard door opening. If the wall is load bearing, you will need to install an appropriately sized header.
Because pocket doors are easy to open and close and require no threshold, they offer increased accessibility for wheelchair or walker users, provided the handles are easy to use. If you are installing a pocket door for this purpose, be aware that standard latch hardware may be difficult to use for some individuals.
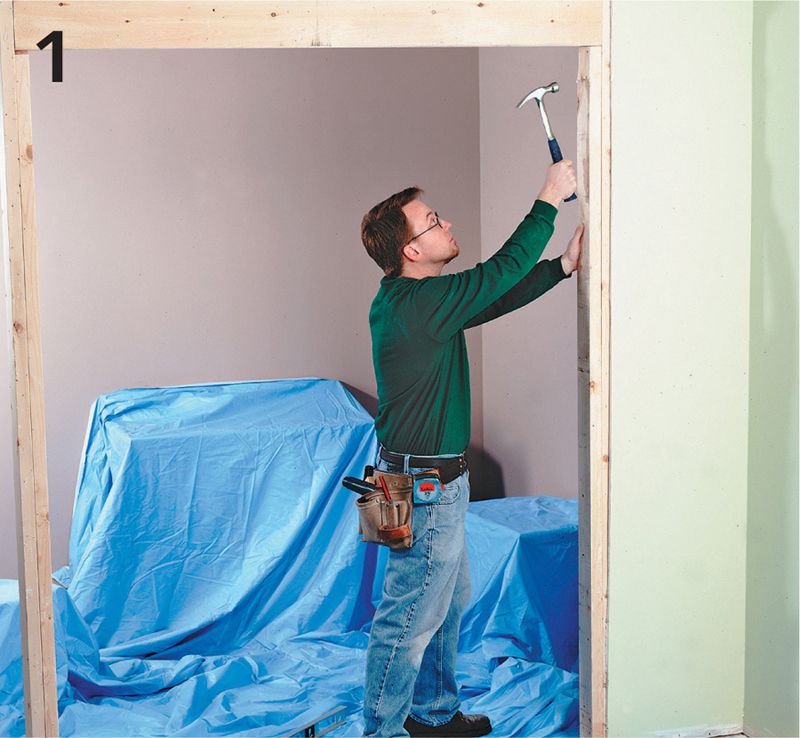
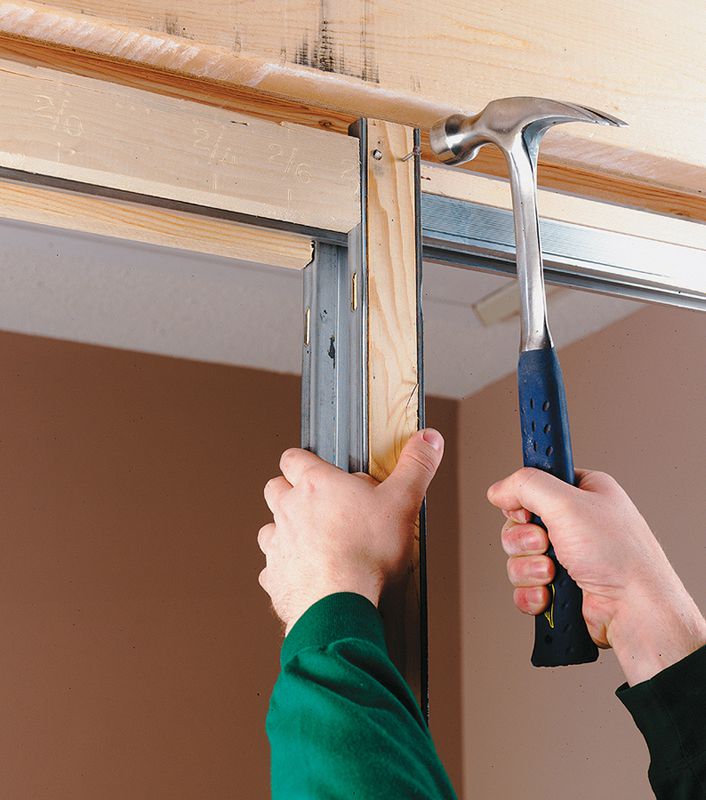
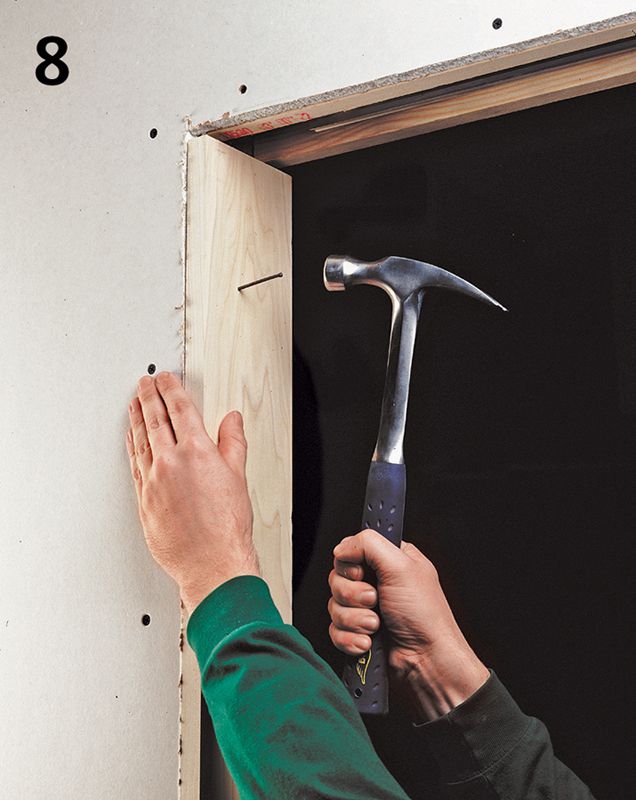
Frame the rough opening for the pocket door according to the manufacturer’s sizing instructions. Determine the proper height for the overhead track and drive a nail at each side of the door opening. Leave the nailheads protruding slightly so you can support the track on them temporarily.
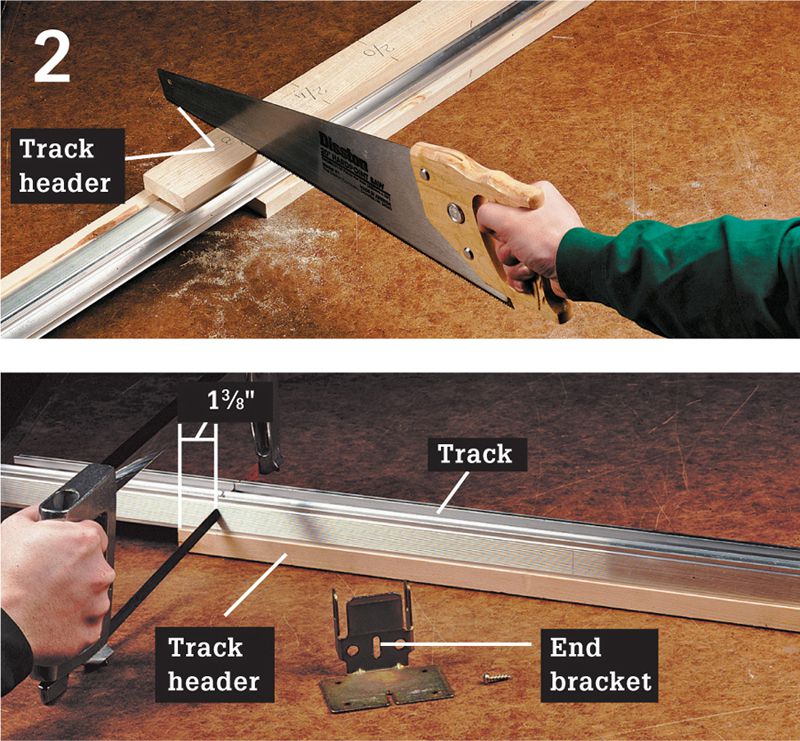
Cut the overhead track to length according to the width of the pocket door. The wooden portion of the track should be premarked with cutting lines for standard door sizes (top). The metal part of the track is cut shorter than the wood part (here, by 1 3/8"). Attach the end brackets to the track after the trim cuts are made.
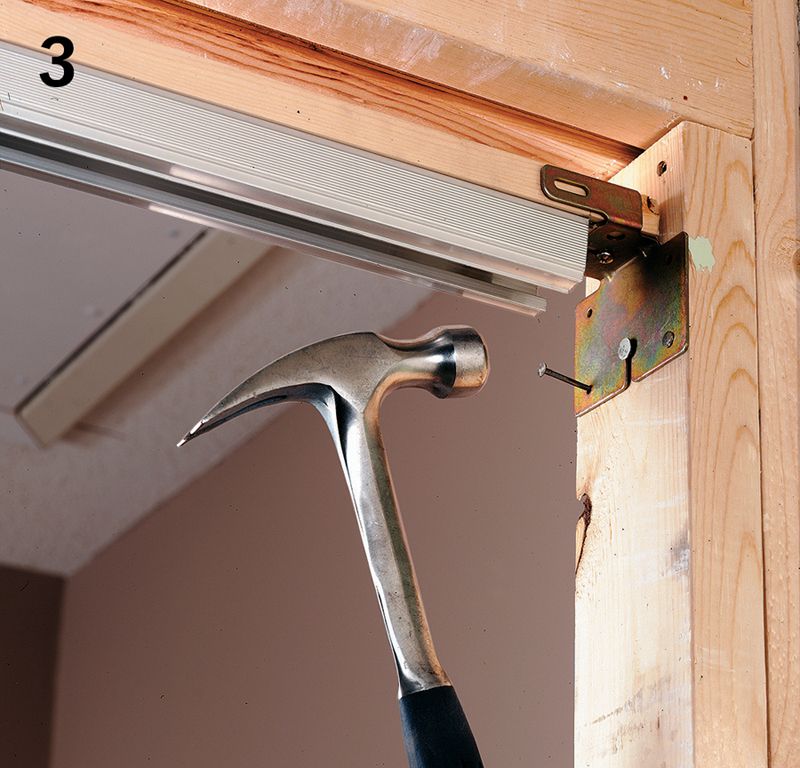
Position the overhead track in the framed opening, resting the end bracket on the nails driven in step 1 for temporary support. Center the assembly and secure it by driving 8d common nails through the nailing holes in the brackets.
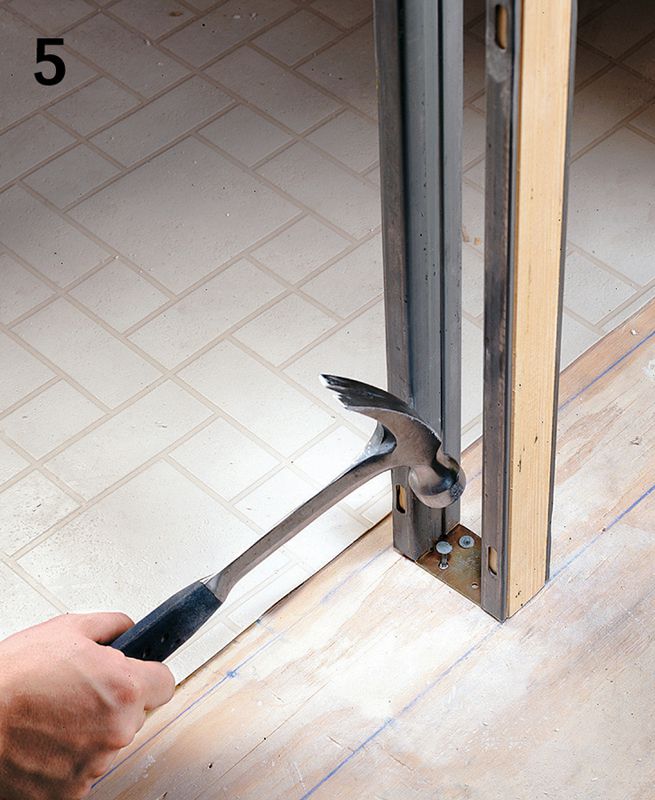
Attach the split studs in the framed opening. Split studs are the secret to pocket doors. They have an open center that allows the door to pass through. Because they are reinforced with steel they can perform structural bearing comparable to a solid wood stud. Nail the split studs to the wooden part of the overhead track.
Fasten split studs to the floor by nailing through the bottom plate into the subfloor. Snap chalk lines aligned with the front and back of the sole plate in the framed opening as guidance.
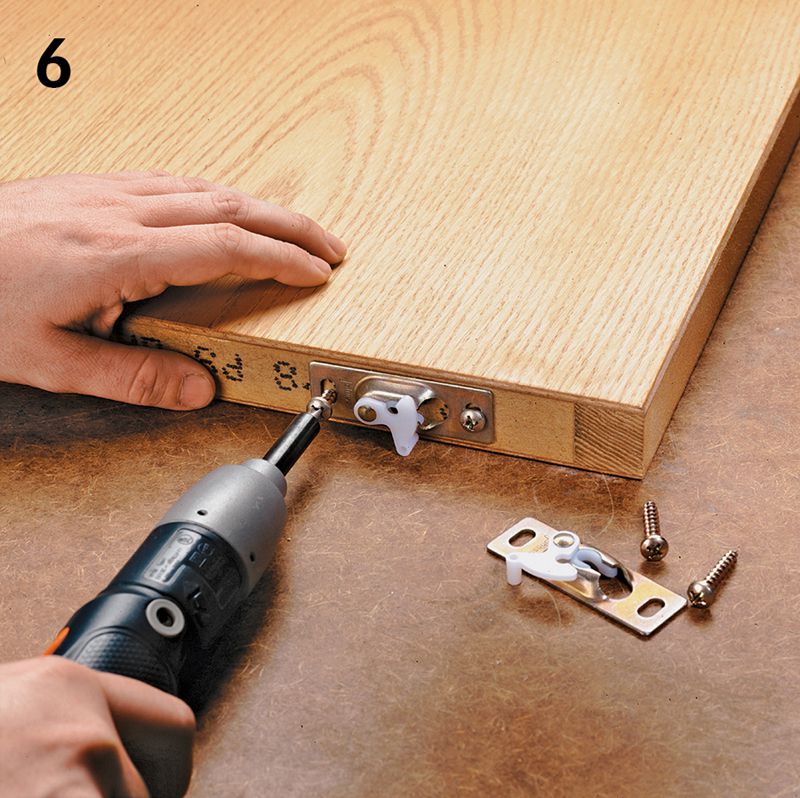
Fasten rolling brackets to the top of the door following the spacing recommended by the door manufacturer (usually a couple of inches in from each end). Attach wall coverings around the framed opening, making sure your fasteners are not long enough to protrude into the pocket. Tip: Paint or stain the door before hanging it.
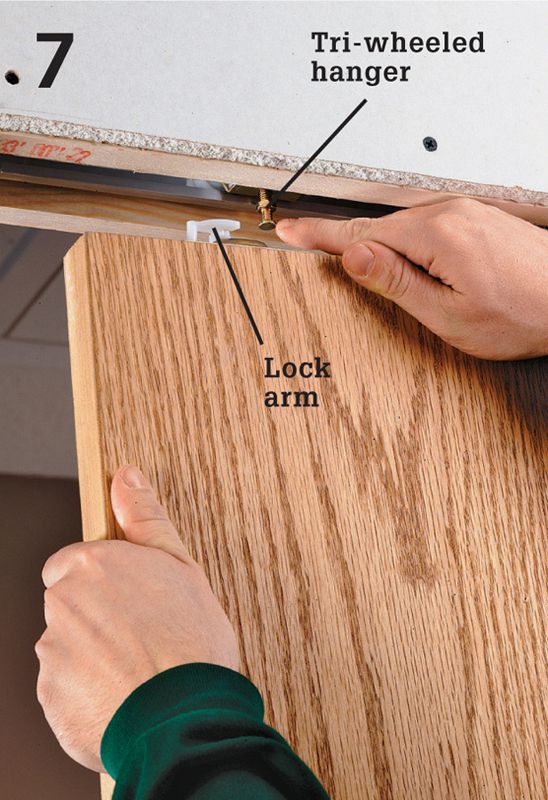
Hang the door by pressing the bracket up into the tri-wheeled hangers in the overhead track and then snapping the lock arm over the hanger. If you have not installed floor covering yet, do so before proceeding to the trim installation.
Attach a full-width door jamb for the door to close against. Nail the jamb to the framed opening stud with 8d casing nails.
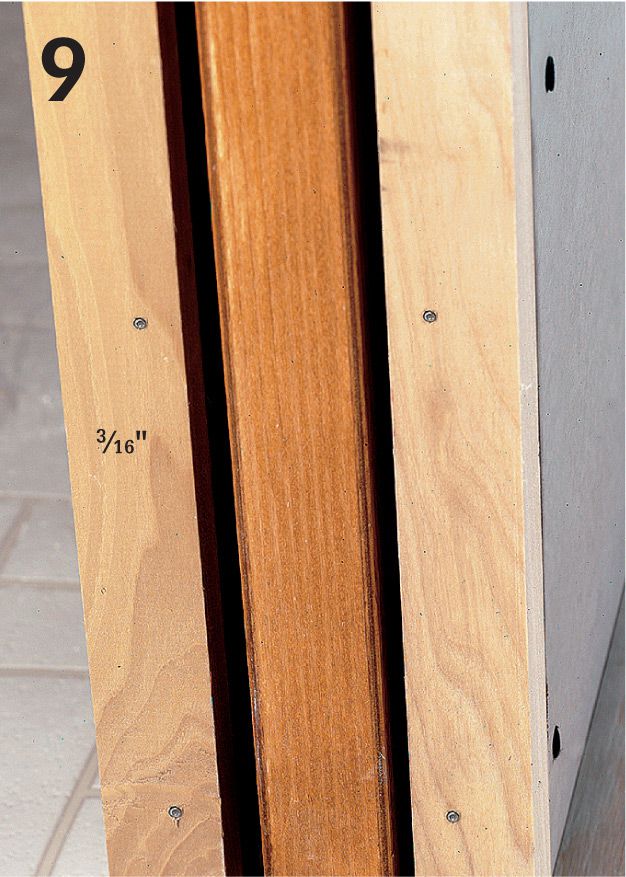
Attach split jambs to the side of the framed opening housing the door. Maintain a gap of 3/16" between the door and the inside edges of the split jambs.
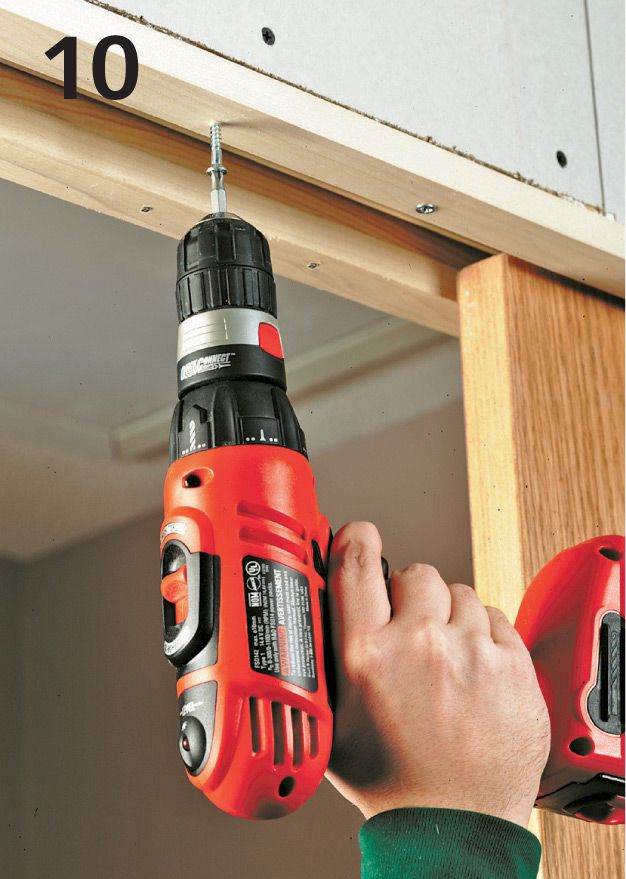
Install split head jambs with countersunk wood screws. This allows you to easily remove the head jamb if the door needs to be replaced or removed for repair.
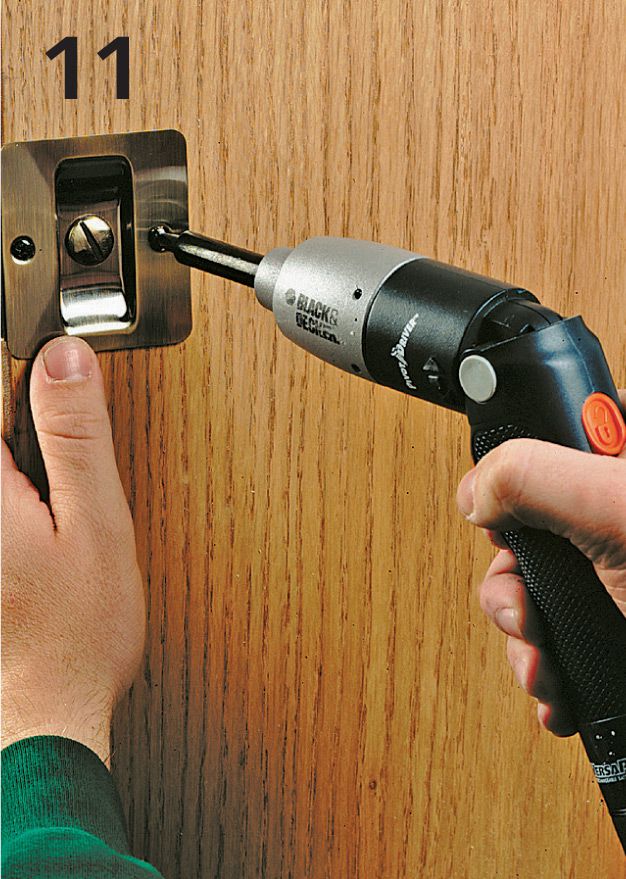
Attach the latch and pull hardware, which is usually supplied with the door. Also attach door guide hardware at the wall opening to help track the door. Fill nail holes and finish the jambs and walls.